Fuel Injector Replacement – BMW B46 Turbo 4 Cylinder Engine
Step 1 - Purchase Parts
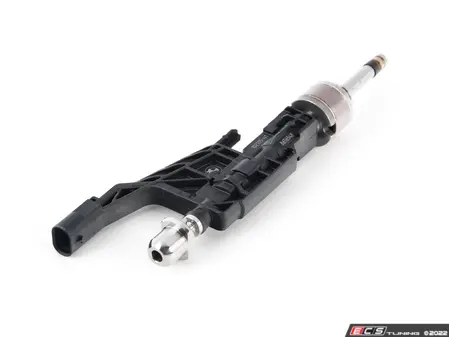
Fuel Injector
Direct injection fuel injectors are notoriously expensive. Many home mechanics try and save money by installing "imported" aftermarket injectors often found on sites like Amazon and Ebay. Big mistake. Please take our word on this...you get what you pay for with fuel injectors. Cheap aftermarket versions will fail and can even possibly cause major damage to your engine. Don't cut corners - even if you have to take out a loan, only install Genuine BMW fuel injectors like this one in your vehicle.

Fuel Injector Removal Tool for B38/B46/B48/B58 Engines
If you are replacing the fuel injectors in a direct injection BMW B38,B46,B48 or B58 4-cylinder engine...then you MUST have this tool. Why? Trying to pull or pry an injector out of one of these engines without the proper tool can damage the cylinder head. This tool is a must for all professional or seasoned home BMW mechanics.

Fuel Injector Distance Gauge
New fuel injectors for direct injection engines are expensive. the last thing you want to do is break one during installation! This measuring gauge made by BMW guarantees you have the exact offset between the top of the injector and the fuel rail during installation. Not having the correct offset can cause the welds in the fuel rail to crack causing catastrophic failure to the fuel system. This handy distance gauge is cheap insurance against this ever happening.
Step 2 - Repair Procedure

You must disconnect the negative battery cable before starting this repair. Not disconnecting the battery could cause catastrophic damage to the engine electronics.
You must remove the ignition coils before starting this repair.
Please see our article Ignition Coil Replacement - B46 Turbo 4-Cylinder Engine for instructions on removing the ignition coils.
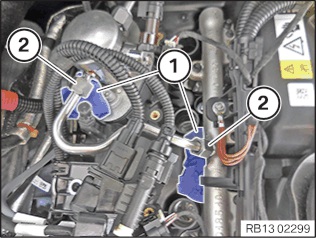
- Position rags (1) under high pressure fuel line union nuts (2) between fuel pump and fuel rail. This is good practice to catch any fuel that may leak out when removing the fuel line.
- Completely loosen the union nuts (1). Remove the high pressure fuel line from the engine.

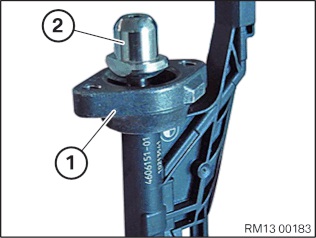
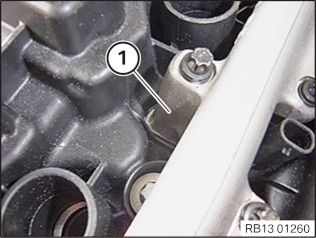
- Remove ground cable (2) by removing its mounting nut (1) and removing from the work area.
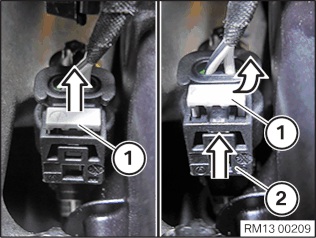
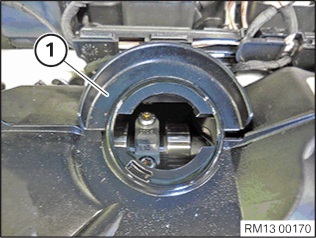
- The fuel injectors are unplugged by releasing the lock (1) as shown in the diagram.

- Unplug all 4 fuel injectors.
- Remove the oil fill cap. Remove the plastic drip shield then replace cap.
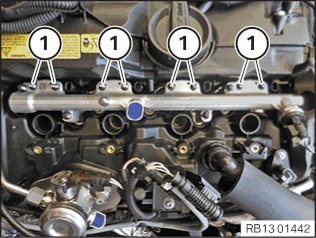
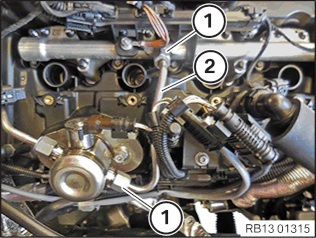
- Remove the smaller 30mm fuel rail mounting bolts 13538661716 (1).
- Remove the longer 70mm fuel rail mounting bolts 13538661715 (1).
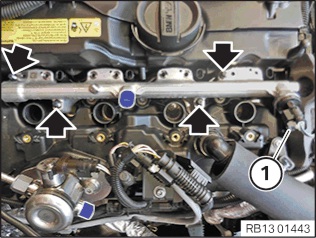
- Remove the fuel injector bracket gasket 13538642294 (1) from each injector .
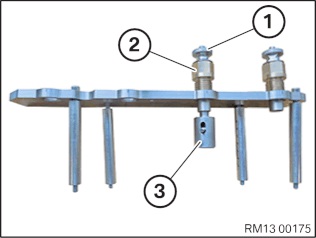
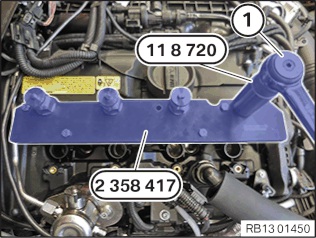
- You must use the special fuel injector removal tool 2358417 to remove the fuel injectors (see our parts list above to order).
- The fuel injector removal tool 2358417 consists of three important parts: the threaded sleeve (1), the pull-out thread (2) and the injector fixture (3).

- Unscrew and remove the injector fixtures from the fuel injector removal tool 2358417.
- Press the lock (1) and remove the threaded sleeve from the tool.

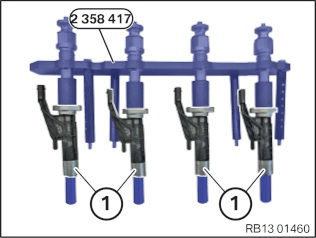
- Install the injector fixtures on all four fuel injectors. Note that the lever on the side of the fixtures should be in the unlocked up position.
- Rotate the fixtures counterclockwise 90 degrees then lock the levers in the down position.
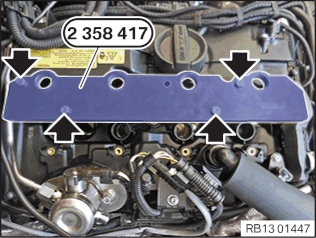
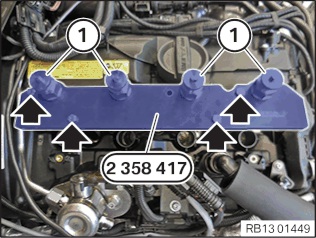
- Mount the fuel injector removal tool 2358417 to the cylinder head. Hand tighten the mounting bolts.

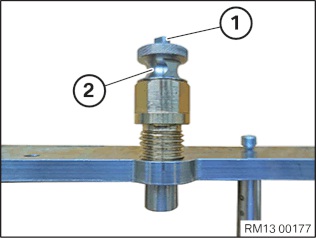
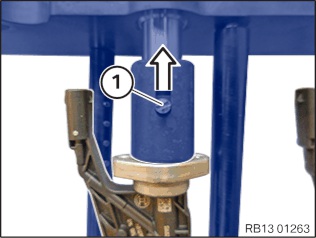
- Screw on the pull out threads to the top of the tool. Note that they have left handed threads.
- Reattach the threaded sleeves and screw completely on the fixtures.
- Using a torque wrench set at 13 Nm, slowly turn the threaded sleeves clockwise until the fuel injectors pull out of the cylinder head.
- Carefully remove the tool with the injectors out of the engine compartment.
- Unlock the fixture by sliding the lever up.
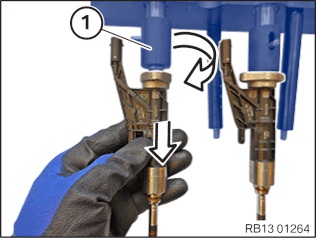
- Turn the fixture 90 degrees clockwise to release the fuel injector.
There is a very specific installation and tightening sequence for the fuel injectors.
Please follow the following fuel injector rail installation instructions closely to avoid a leak in the fuel system or a damaged injector.
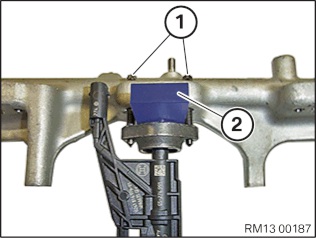
- Remove the retaining bridge (1) from the old injector and mount on the new replacement.
- The retaining bridge has a lug cast into the side of it. It is very important to make sure the lug is in the proper position when installing the new injectors.
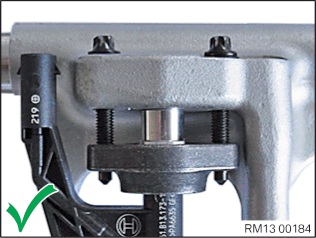
- The lug on the side of the retaining bridge should on the rear when it is mounted to the fuel rail as shown in the accompanying image.
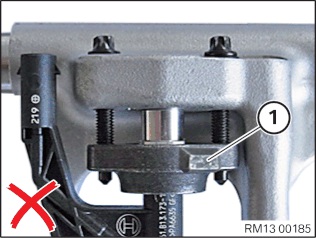
- This image shows an improperly mounted retaining bridge. The lug is in the front and not in the rear.
- It is very important that the top of the retaining bridge is installed with the exact distance between it and the fuel rail. Not installing the injector with the correct distance can crack the fuel rail at its welded seams.
- The correct distance is 8.5 millimeters. We highly recommend using the fuel injector distance gauge 83302358022 found in our required tool section at the beginning of this article.
- Check the distance between each injector and the fuel rail and make adjustments as necessary.

- make sure the fuel injectors move freely and are aligned properly before inserting back into the cylinder head.
- Install the injectors and the fuel rail into the cylinder head.
- Plug in the fuel pressure sensor (2).
- Install the injectors and the fuel rail into the cylinder head.
- Carefully push down on the rail until resistance is felt. DO NOT over apply pressure. It should just be snug
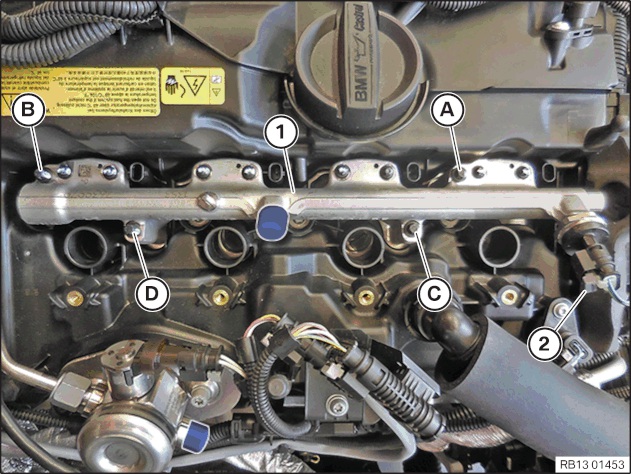
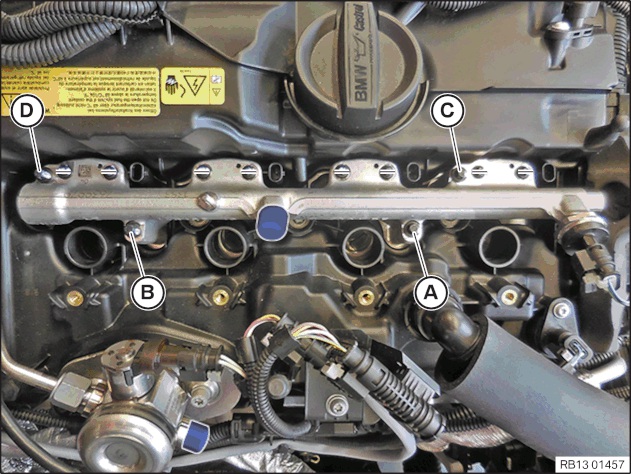
- Install long 70mm mounting bolts (A) and (B) and hand tighten. Carefully tighten the bolts with a torque wrench set at 2 Nm (1.5 ft-lb), alternating every 180 degrees, until the fuel rail rests against the cylinder head.
- Note: if 2 Nm (1.5 ft-lb) is reached on the torque wrench before the fuel rail rests on the cylinder head, the fuel injectors must be removed, the cylinder head inspected for any obstructions, and reinstalled. DO NOT try and force the injectors in using a higher torque value.
- Install the other two long 70mm mounting bolts (C) and (D) and hand tighten. Carefully tighten all four bolts to 5 Nm (3.7 ft-lb), in the following order: (A)-(D)-(B)-(C).
- Verify the fuel rail base is correctly seated on the cylinder head.
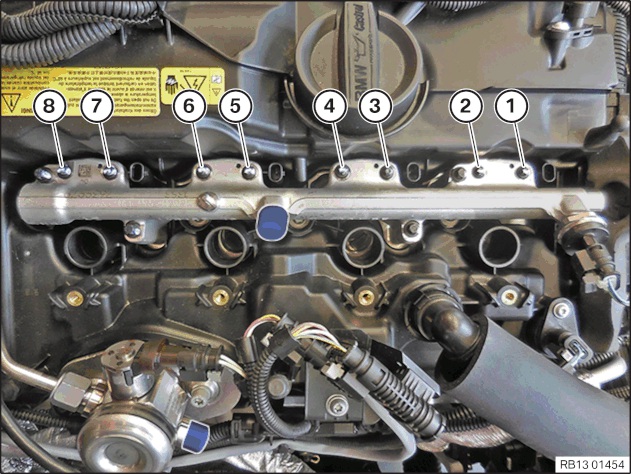
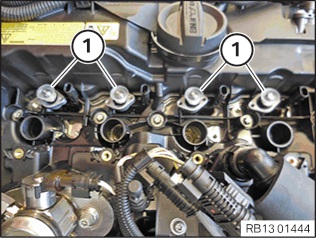
- Install the eight 30mm mounting bolts as shown in the image and hand tighten.
- Set the torque wrench to 5 Nm (3.7 ft-lb) and tighten the 30mm mounting bolts in the following sequence:
- Starting with fuel injector number 1, alternate turning mounting bolts (1) and (2) 90 degrees with torque wrench until 5 Nm (3.7 ft-lb) is reached.
- Repeat on remaining three injectors starting at number 2 and ending with number 4.

- Using a Sharpie style permanent marker, mark a vertical line on the head of each bolt to use as a reference.

- Starting with bolt #1 and continuing in order through bolt #8, turn each bolt 90 degrees until mark mark is horizontal. The bolts are now properly torqued.
- Release the four long 70mm bolts rail bolts and re-torque to 5 Nm (3.7 ft-lb) in the following order: (A)-(D)-(B)-(C)
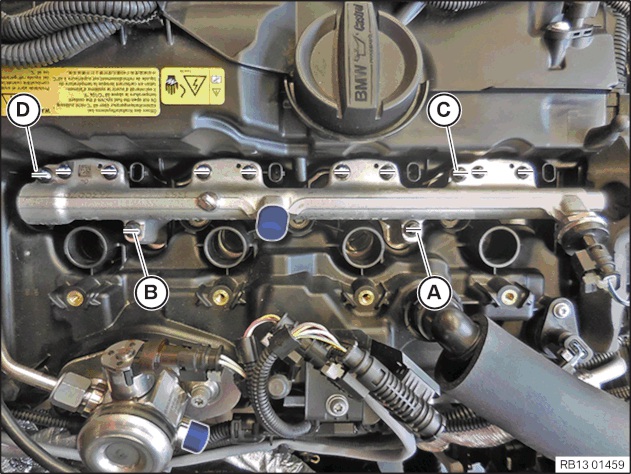
- Mark the heads of the four 70mm mounting bolts with a vertical line using a Sharpie.
- Turn the bolts 90 degrees each until the mark is horizontal in the following sequence: (A)-(B)-(C)-(D)
- The bolts are now all properly torqued.
Complete the re-assembly by following the above instructions in reverse.