
Affiliate link disclosure – The BMW Repair Guide uses affiliate links in their site. For more information on affiliate links, please click here.
Repair Summary
This article gives detailed instructions on removing the headliner (ceiling panel) in a BMW E61 touring wagon vehicle with panoramic sunroof. Even though we used a 2006 530xi to perform this repair, this article can be applied to any 2006-2010 5 series touring wagon with minor modifications to the repair steps.
See all vehicles this article applies to
E61 5 Series 550i
E61 5 Series 530d
E61 5 Series 545i
E61 5 Series 535d
E61 5 Series 530xi
E61 5 Series 530xd
E61 5 Series 525i
E61 5 Series 530i
E61 5 Series 525xi
E61 5 Series 525d
E61 5 Series 523i
E61 5 Series 520d
A BMW E61 headliner removal is a necessary step in many 5 series touring wagon repairs...especially those involving the panoramic sunroof.
As our BMWs start to age, one of the first casualties to the interior of the vehicle is a sagging headliner. Years of high interior cabin temperatures (especially during summer) start to break down the adhesives that bind the headliner fabric to the ceiling panel, causing it to sag. Owners of BMW E61 touring wagons face the double threat of leaking panoramic sunroofs which can leave unsightly stains on the fabric, especially around the edges of the retractable panels. BMW wagons also have a fair share of wiring above the headliner; the main electrical harness that supplies power to the tailgate is located above the ceiling liner, as well as the rear speakers. A BMW E61 headliner removal is also a necessity if any work needs to be done to the panoramic sunroof itself including glass and seal replacement.
Whatever the reason is behind performing a BMW E61 headliner removal, there is one issue that haunts every mechanic: how do I remove the interior trim without breaking it? Breaking interior plastic trim pieces during removal is the bane of every BMW owner. Even when we exactly follow the removal instructions, we still often end up with damaged pieces of plastic. Just like the headliner we are removing, age and heat make interior plastic bits brittle causing them to break during removal (especially those with plastic tabs). There is unfortunately no clear-cut way to avoid this other than following our instructions below and exercising extreme patience. Nothing will break interior trim faster than trying to force it off. If you break a piece of trim during a BMW E61 headliner removal try and salvage it...many pieces have multiple points of attachment and can survive losing a tab (or two).
It is also very common to break the plastic ceiling panel mounting clips during a BMW E61 headliner removal. Many mechanics forget that these clips are often engineered to break to avoid damaging the headliner during removal - a plastic clip costs a heck of a lot less than a damaged touring wagon ceiling panel. We suggest having replacements ready before performing the headliner removal to avoid any delays in reinstalling it.
A BMW E61 headliner removal requires removing the A, B, C, and D pillar trims before the ceiling panel can be lowered from the roof of the vehicle. Removing it can be easily done by one person, although we do recommend having a helper close by during reinstallation. It helps to have someone hold the headliner in place while clipping it into place. We give you detailed steps below for performing a headliner removal on your E61 wagon.


View the detailed parts diagram for this repair.
Includes detailed part diagrams, part numbers and links to purchase all of the required components needed to complete this repair.

Before starting this repair, you must have the following required parts.
Section 1 - Renmoving the Pillar Trim
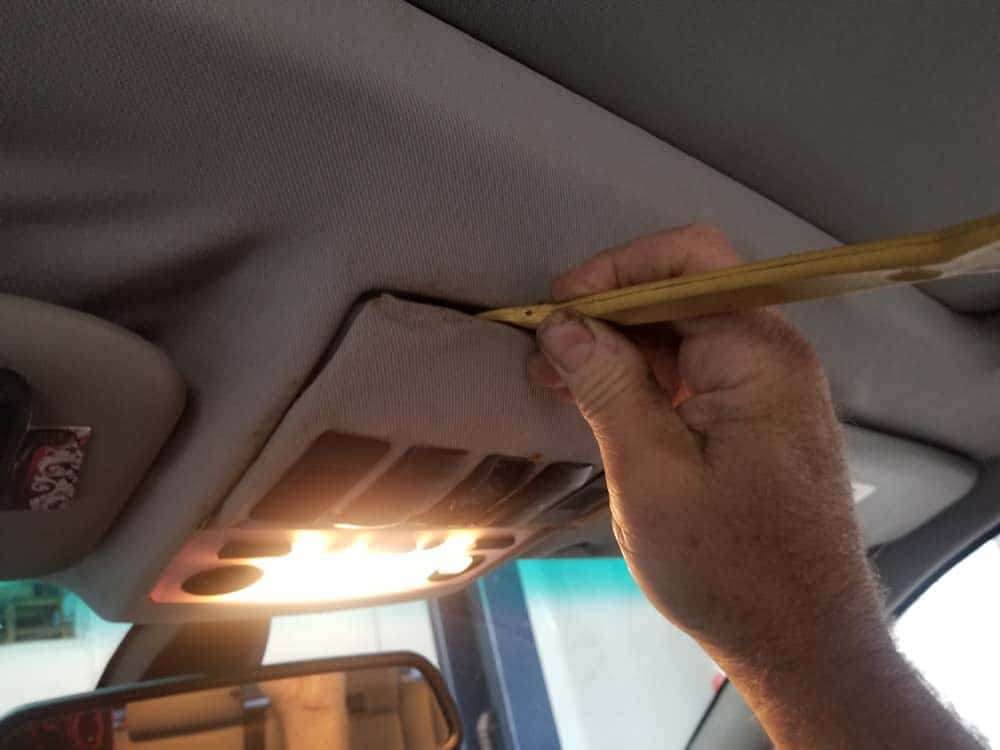
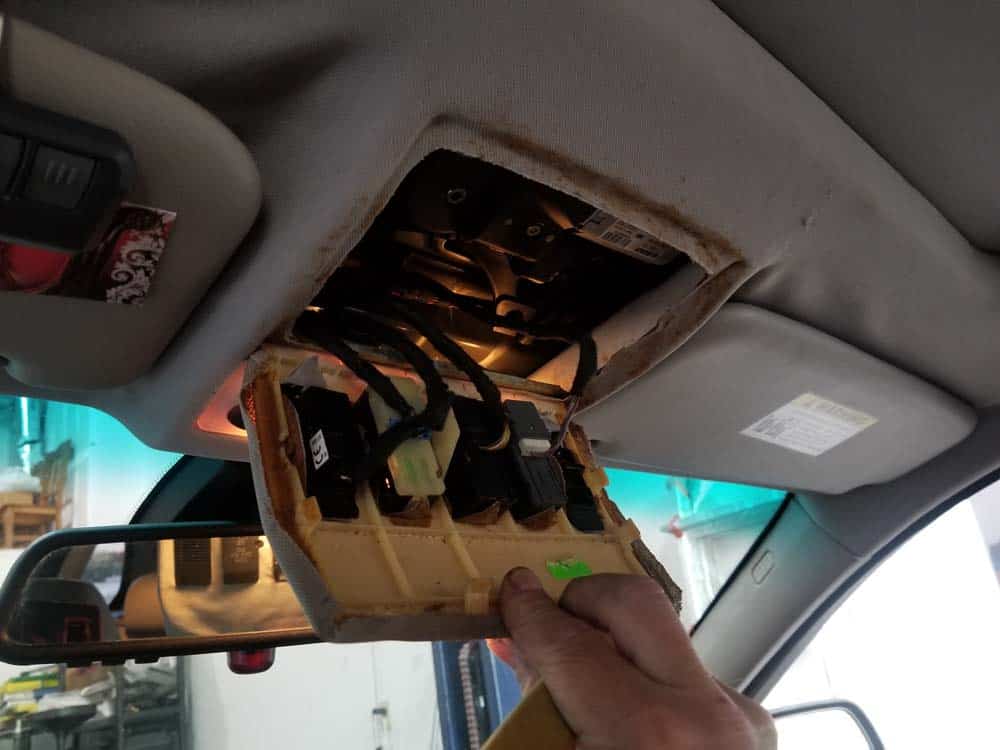
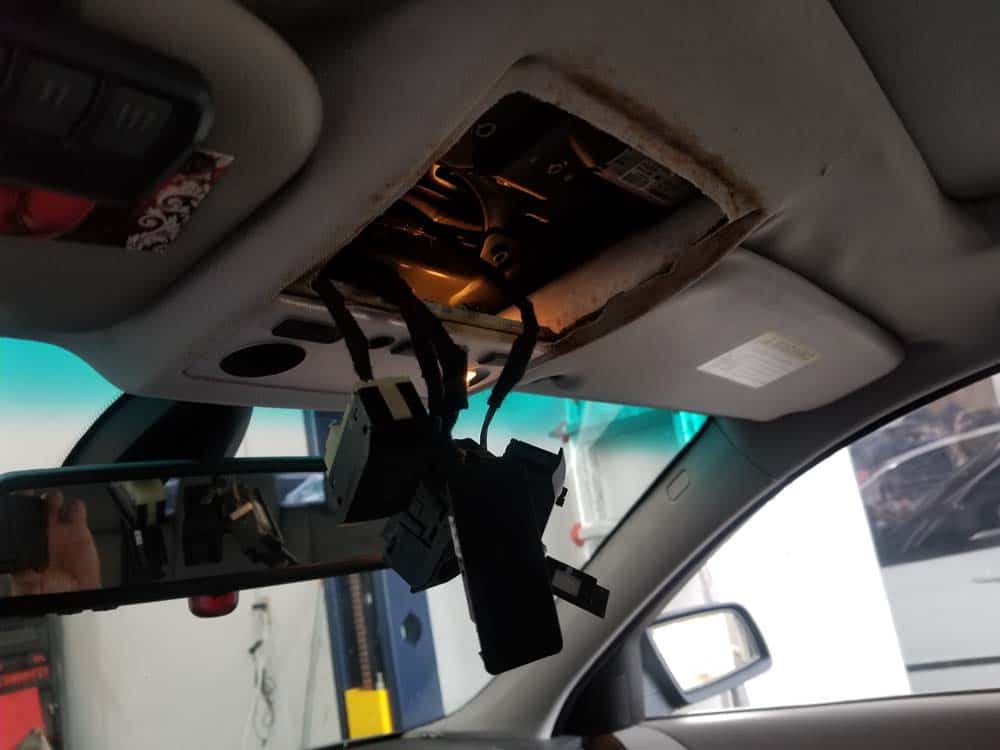
As discussed above, removing the headliner from your E61 touring wagon requires the A, B, C, and D pillar trims to be taken off. This part of the repair causes the most anxiety since the pillar trims are prone to breaking, even when removed correctly. We cannot stress the importance of exercising patience when removing the pillar trim...if force is required to extract the part then you are most likely removing it the wrong way.- Using a plastic trim removal tool, remove the front headliner cover as shown below. Carefully remove the switches (you do not have to disconnect them).
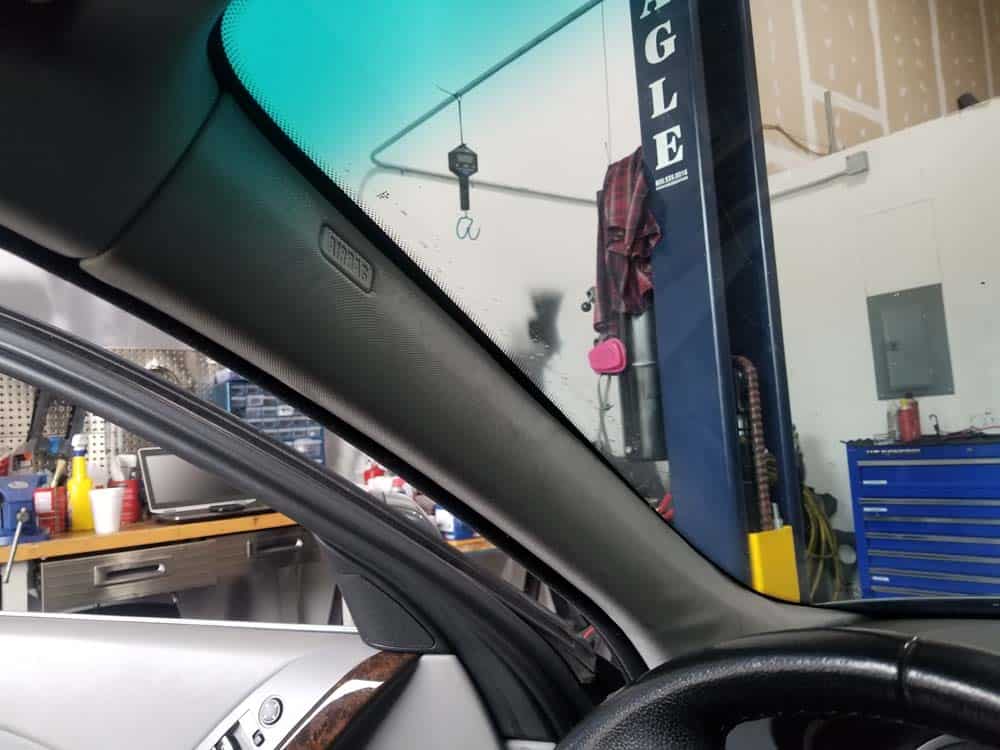
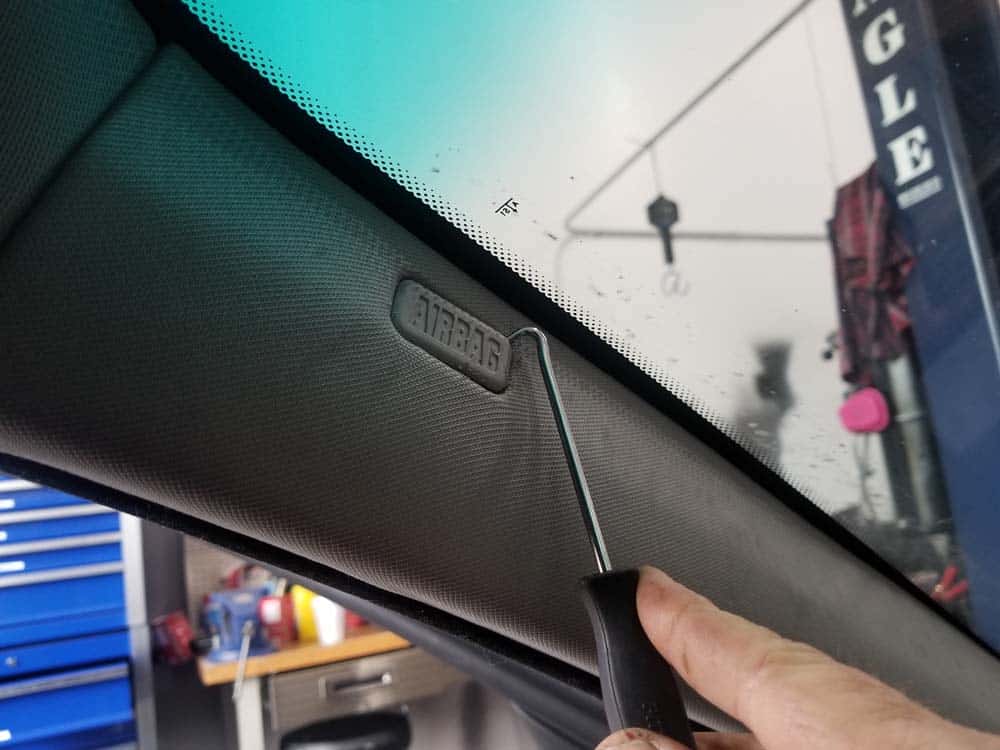
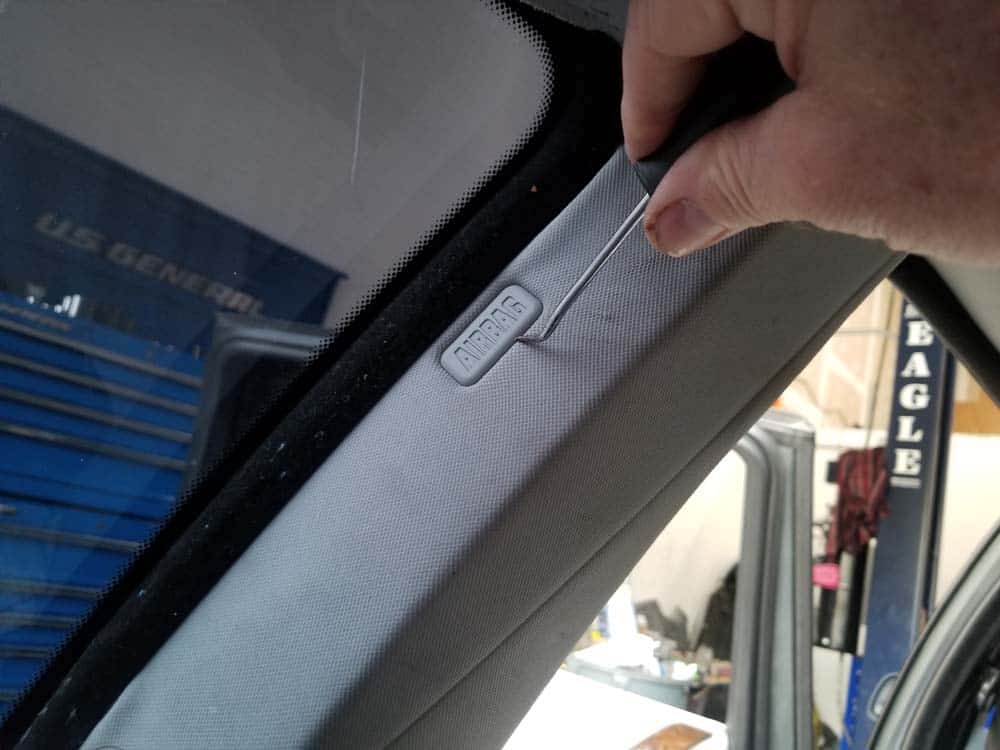
- Locate the A pillar trims at the front of the vehicle. The A pillar trims are held in place by a T20 torx bolt hidden behind the "Airbag" cover cap. Use a metal pick to carefully pop the Airbag cover cap out of the A pillar as shown below.
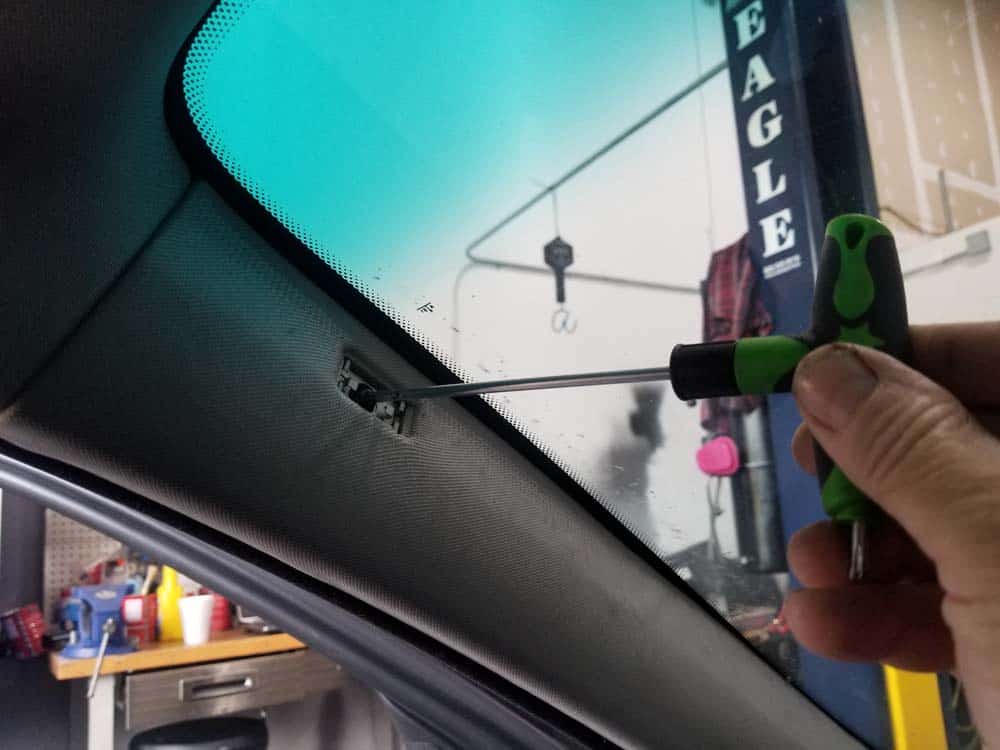
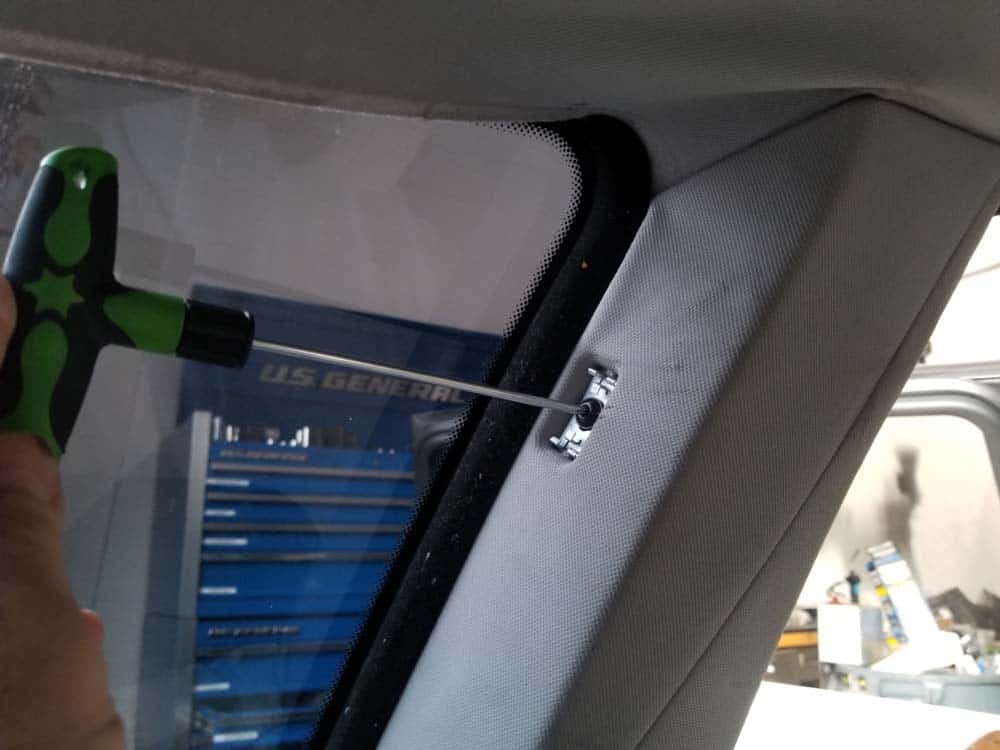
- Using a T20 torx bit, remove the bolt anchoring the A pillar trim to the body of the vehicle.
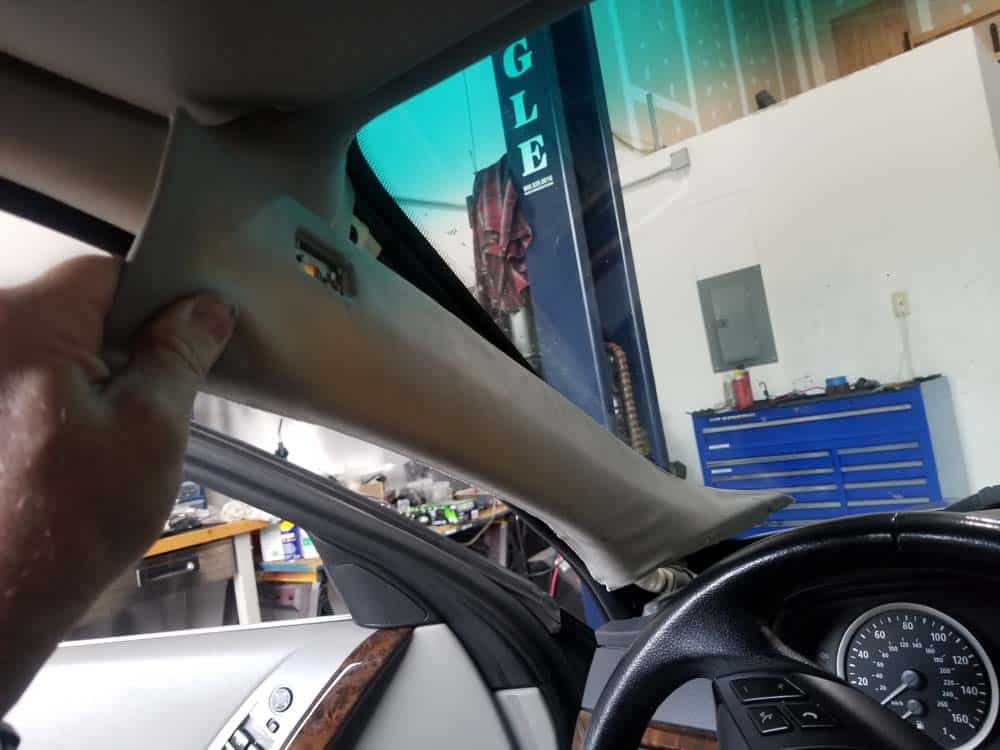
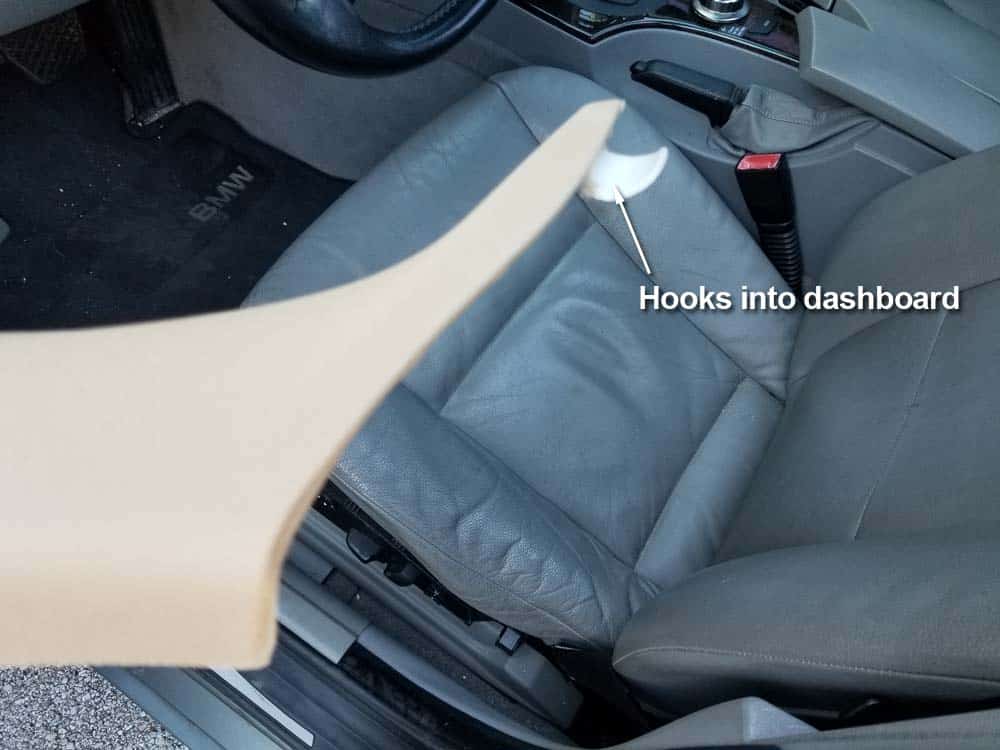
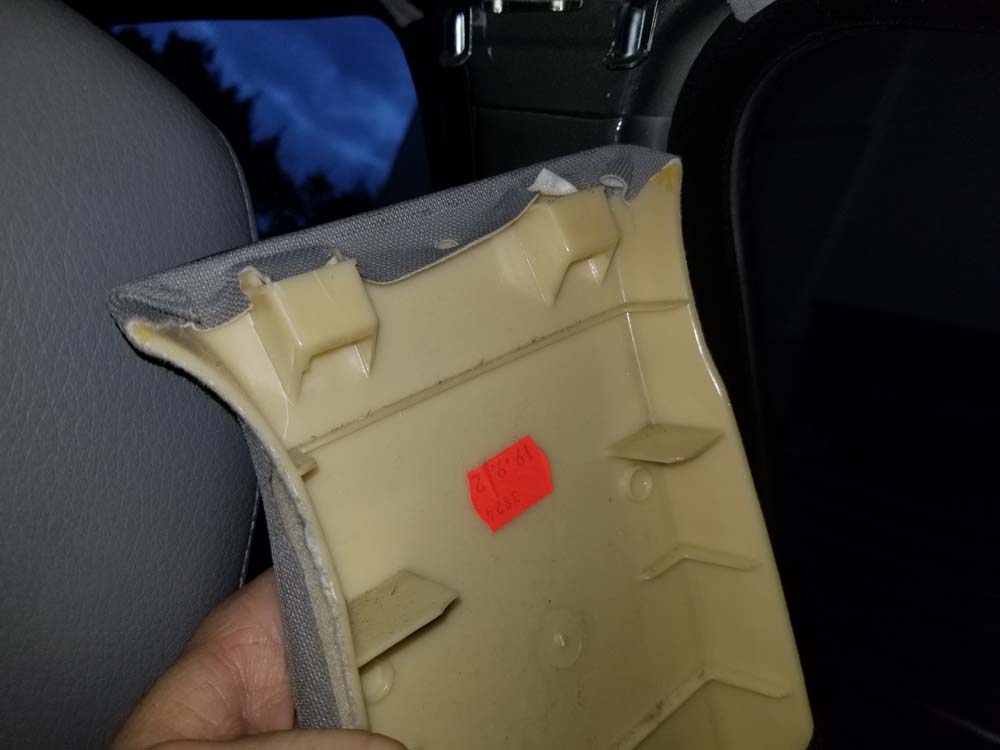
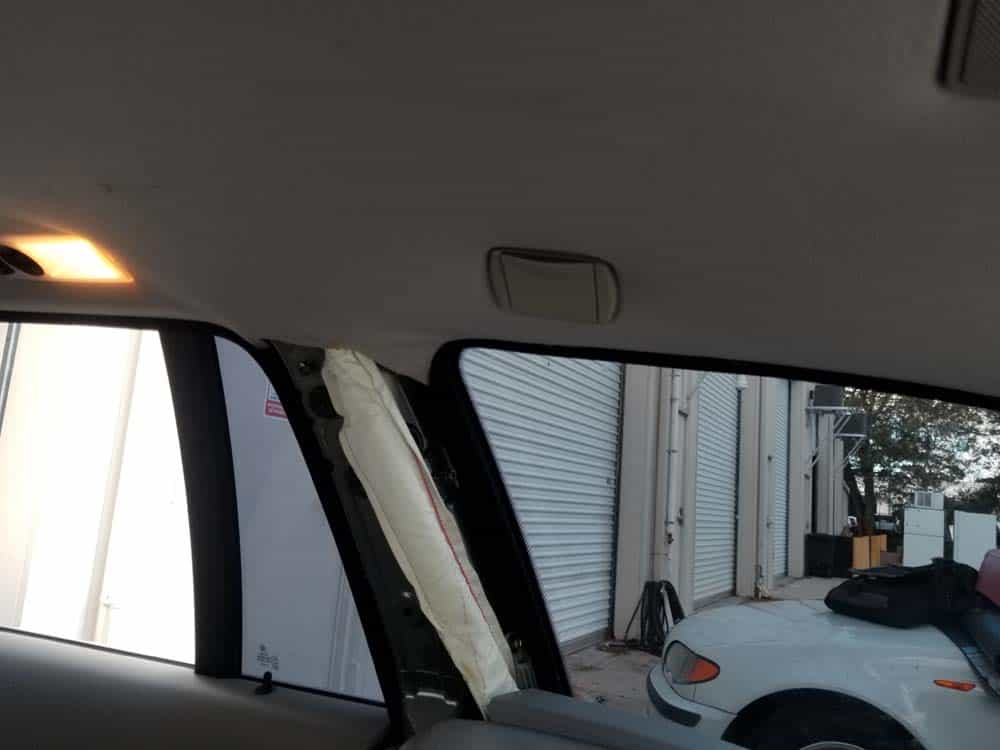
- Grasp the A Pillar trim and carefully pull it at a 90 degree angle from the vehicle until its trim clip releases. Rotate the trim until it unhooks from the dashboard (see images below). Please note that the plastic tab that secures the A pillar trim to the dashboard can become very brittle and is prone to breaking during removal. DO NOT pull on the trim if it gets hung up on the dashboard...it will easily unhook if rotated correctly.
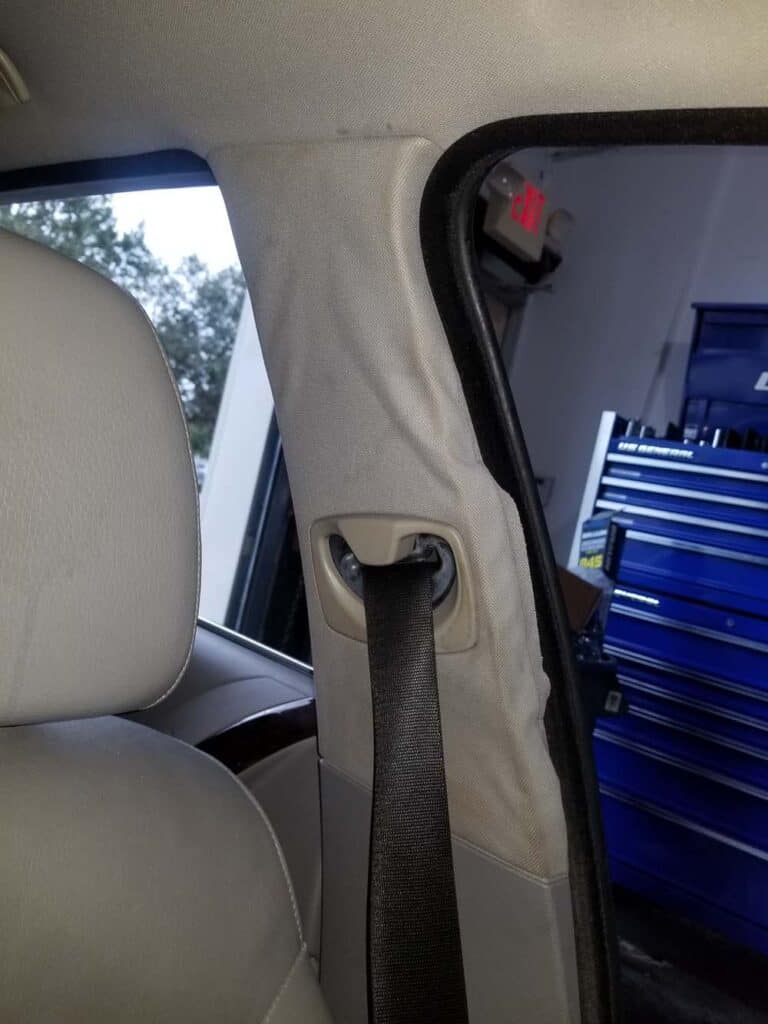
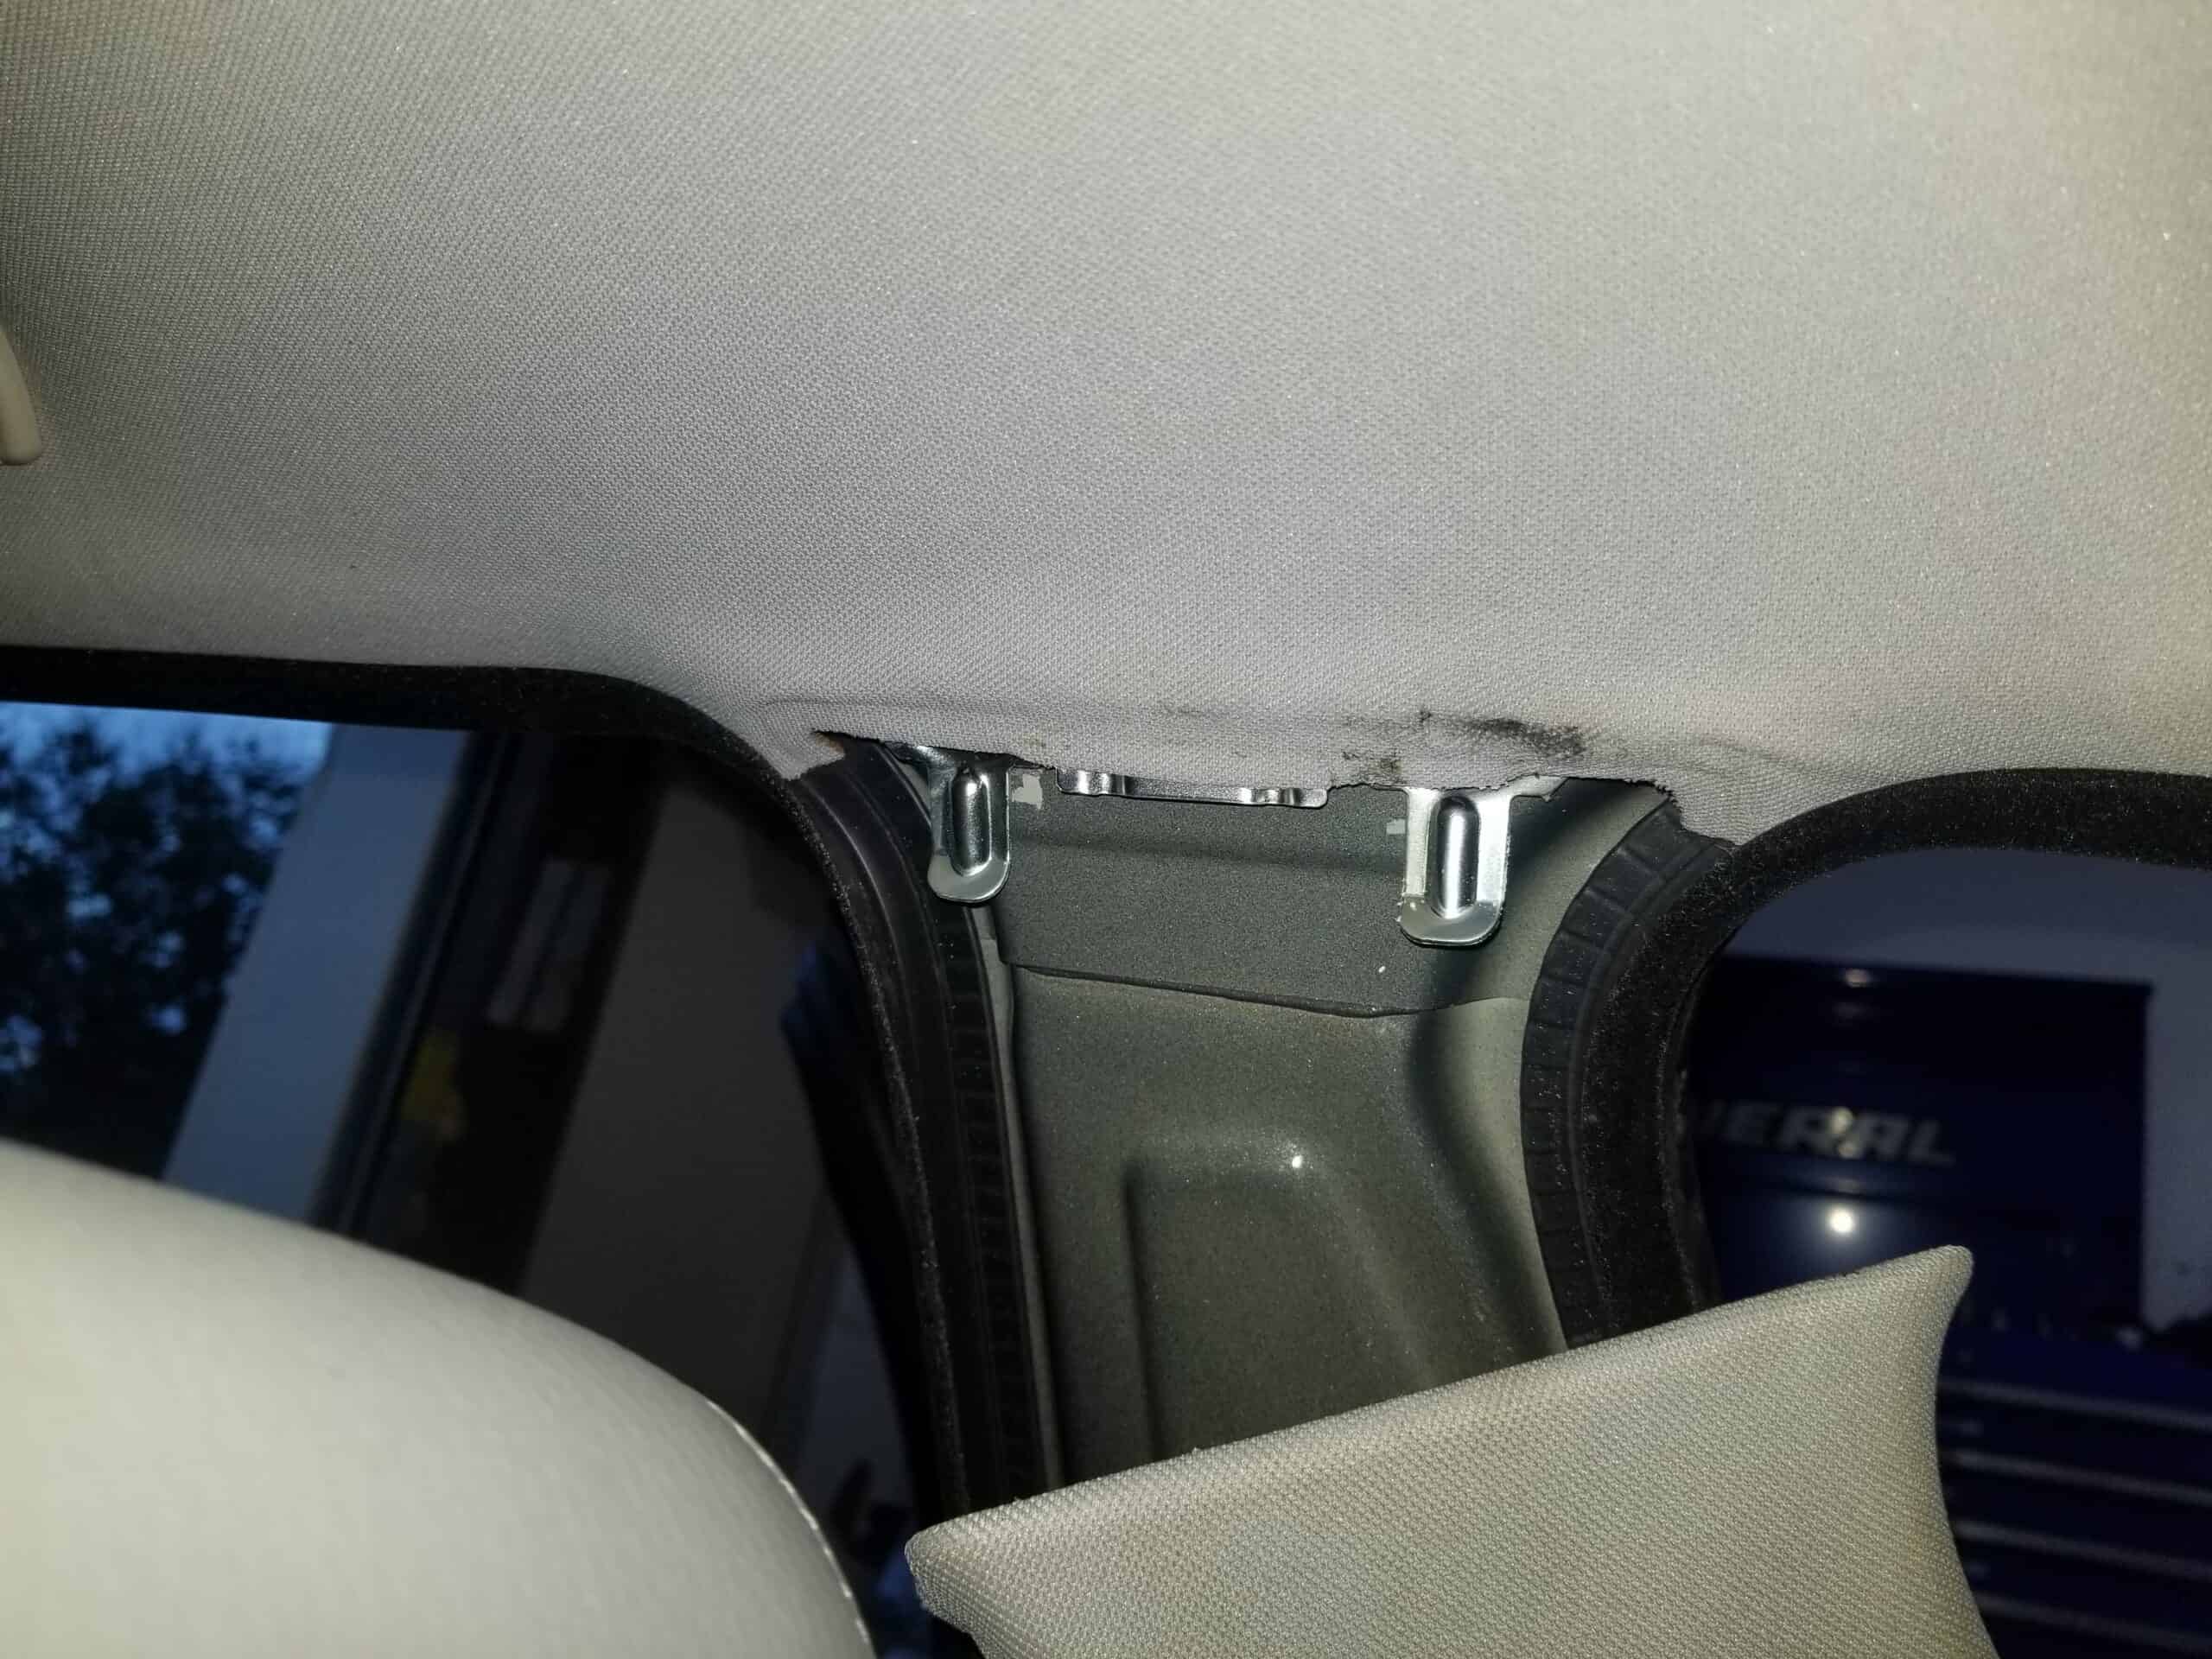
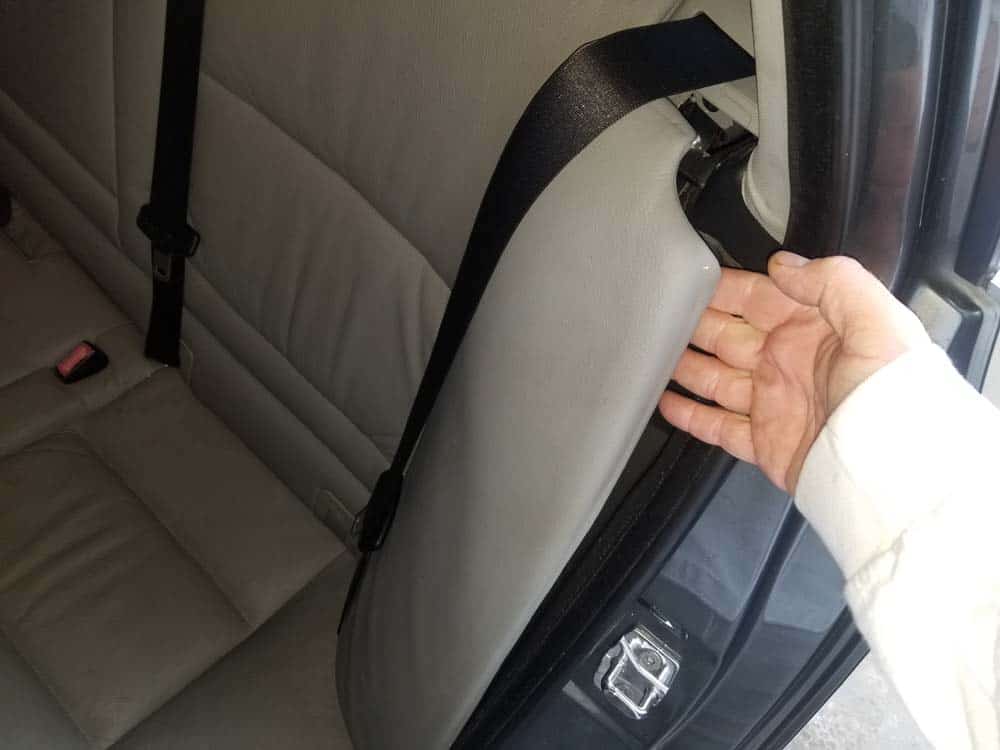
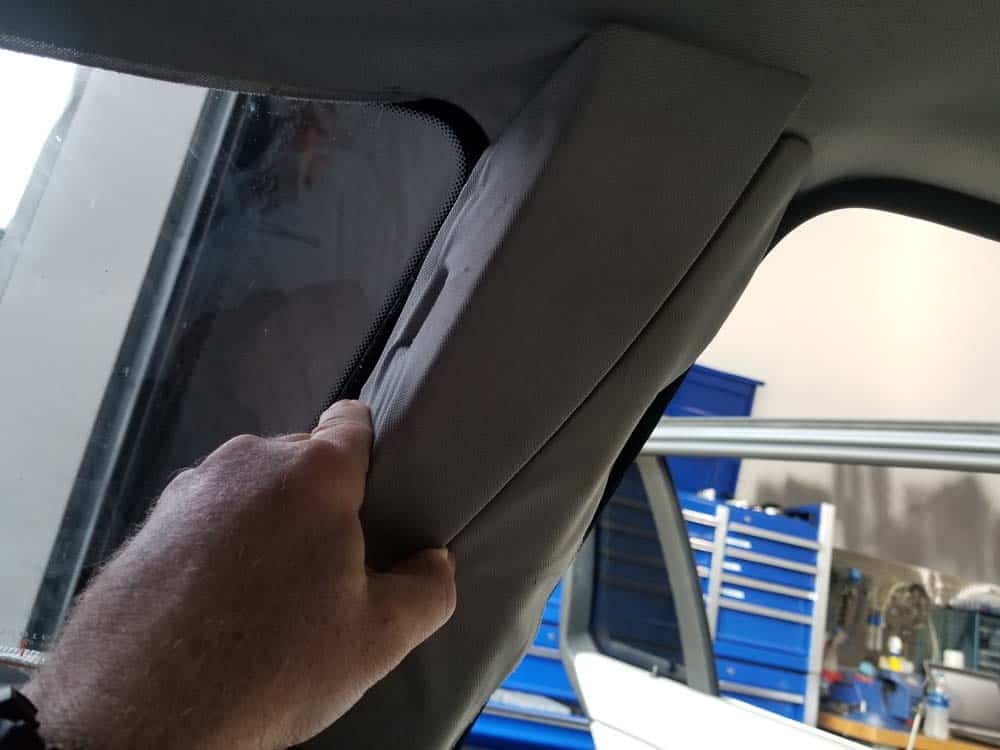
- Locate the upper B pillar trim, directly behind the driver and passenger seats. The upper B pillar trim is secured to the body of the vehicle by two plastic clips on the bottom. It also hooks into two metal clips on the top.
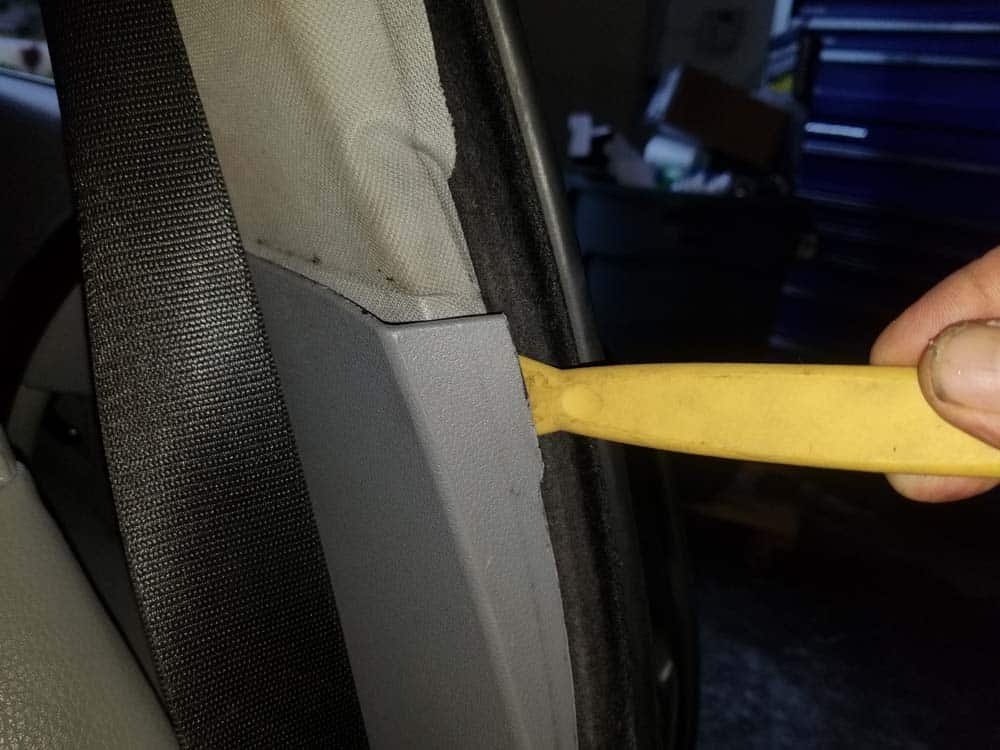
- Using a plastic trim removal tool, carefully pry the bottom of the upper B pillar trim free from the body of the vehicle where it joins the lower B pillar trim.
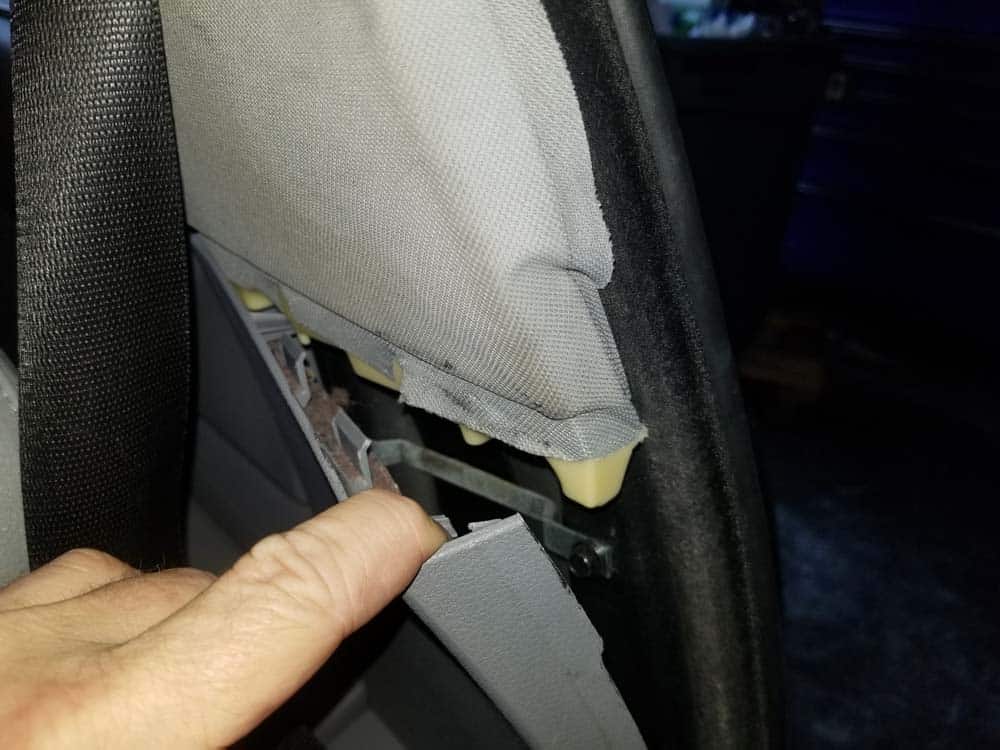
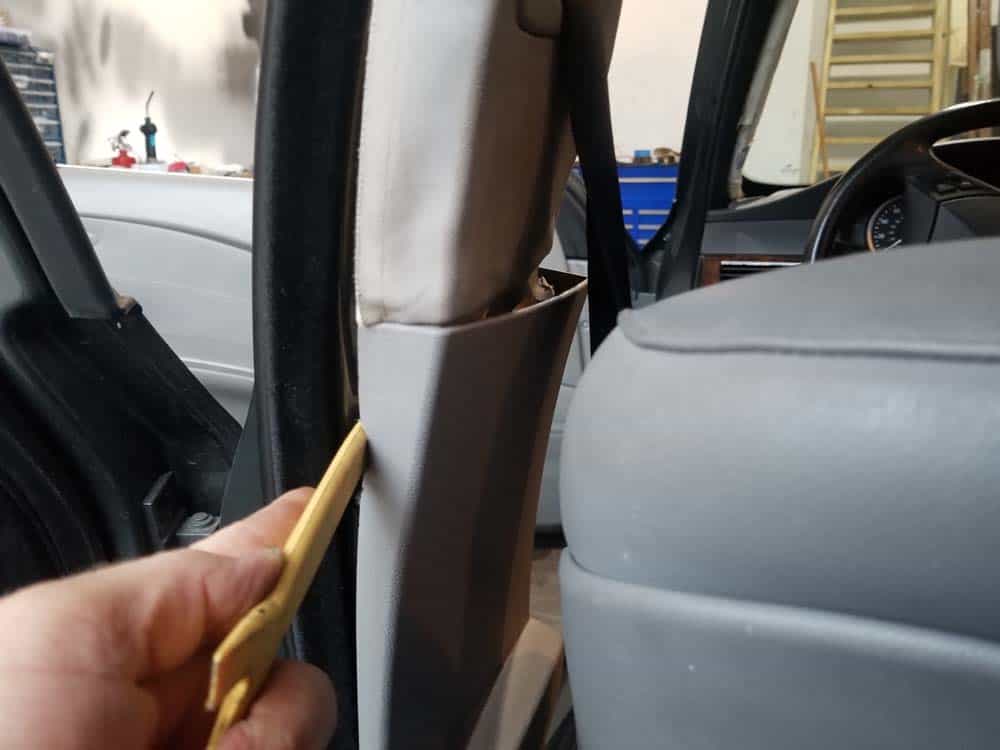
- Pull the upper B pillar trim free from the lower B pillar trim and unhook it from the metal ceiling tabs. The lower B pillar trim does not need to be removed from the vehicle.
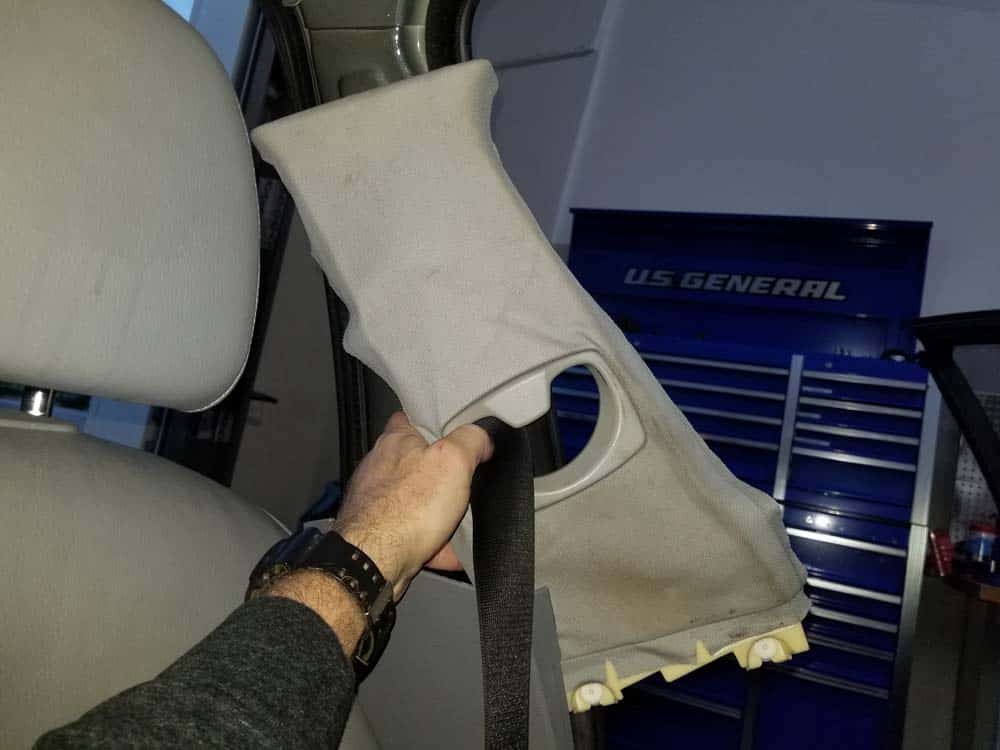
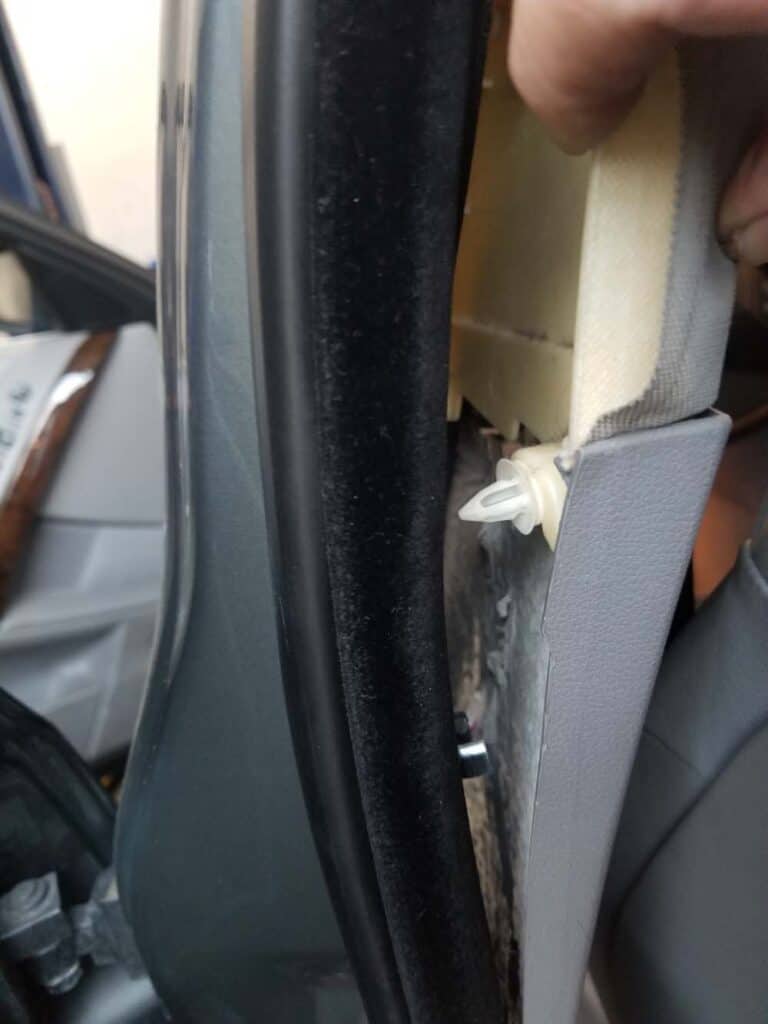
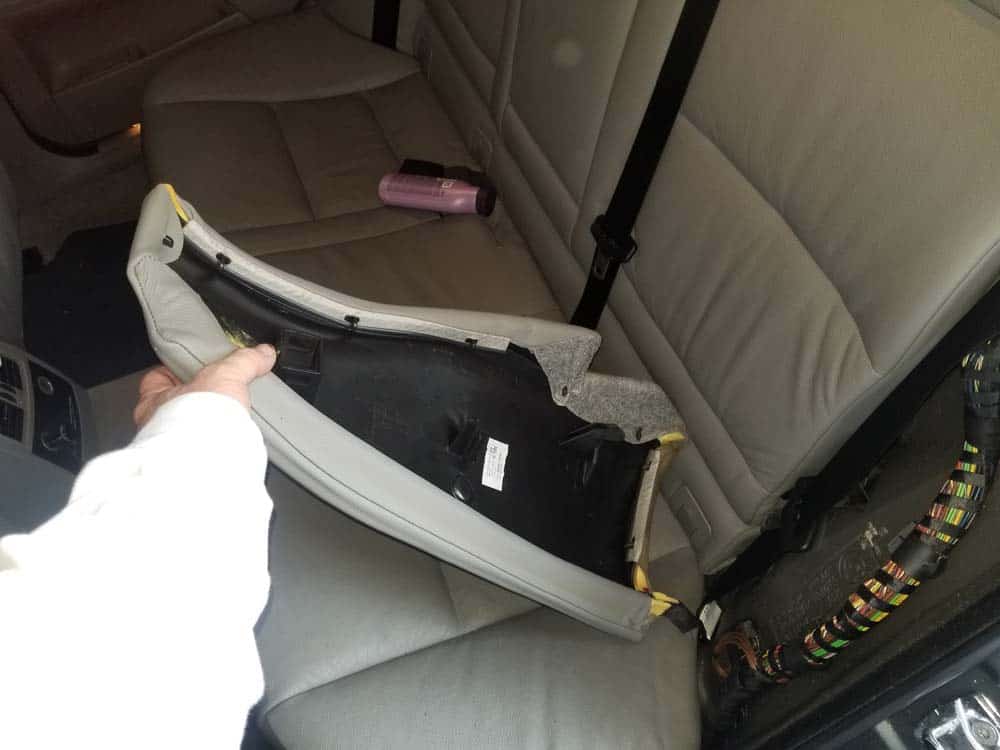
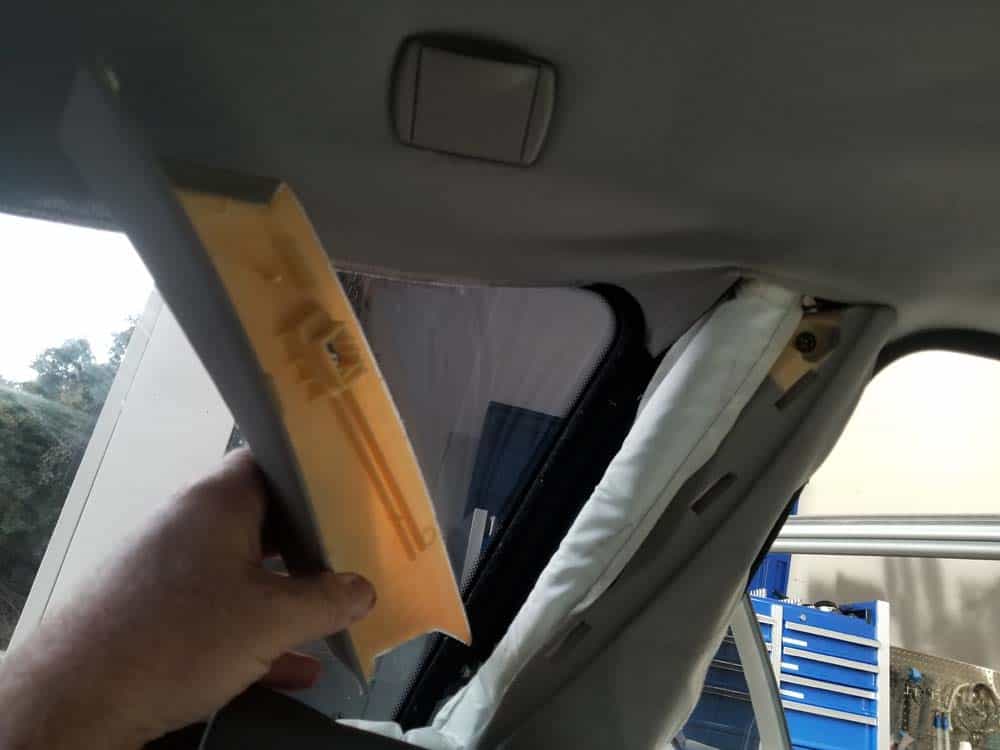
- Using a plastic trim removal tool, remove the front seat outer covering. This must be removed so the seatbelt can be unbolted - this will allow the upper B pillar trim to be removed from the vehicle. If you are not removing the upper B pillar trim from the vehicle you can skip this step and proceed to step 11.
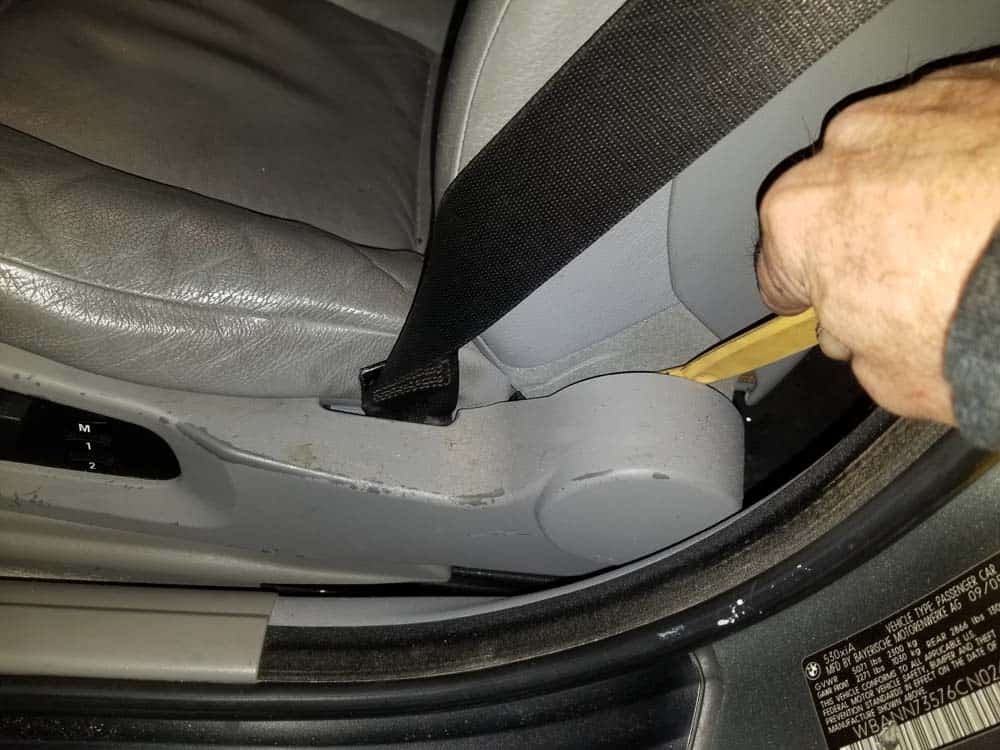
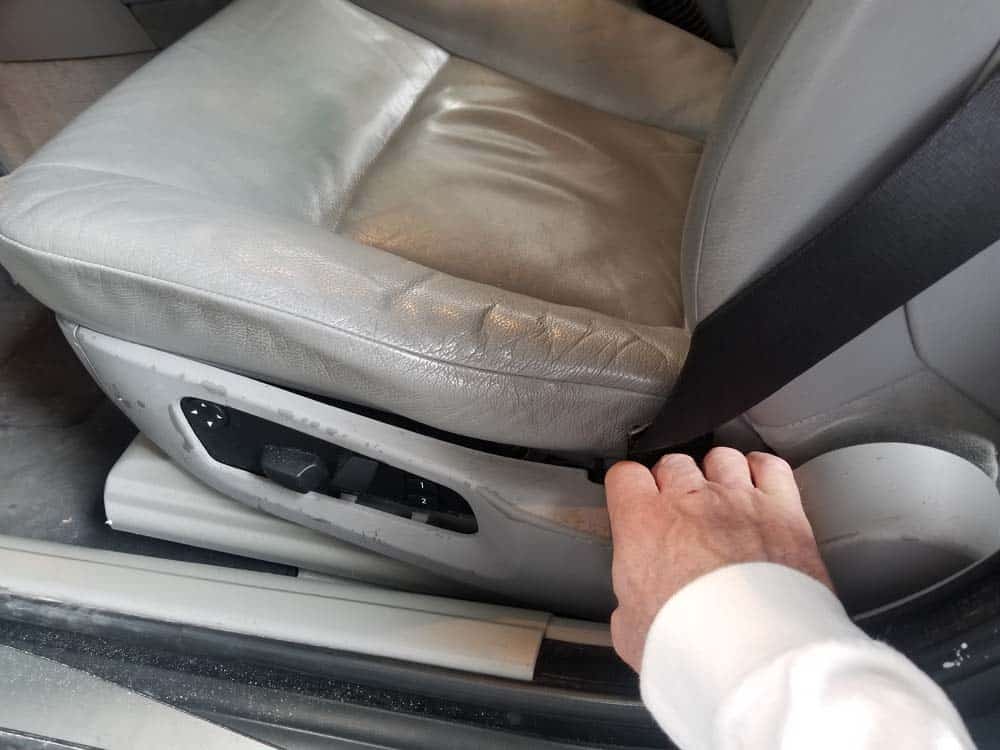
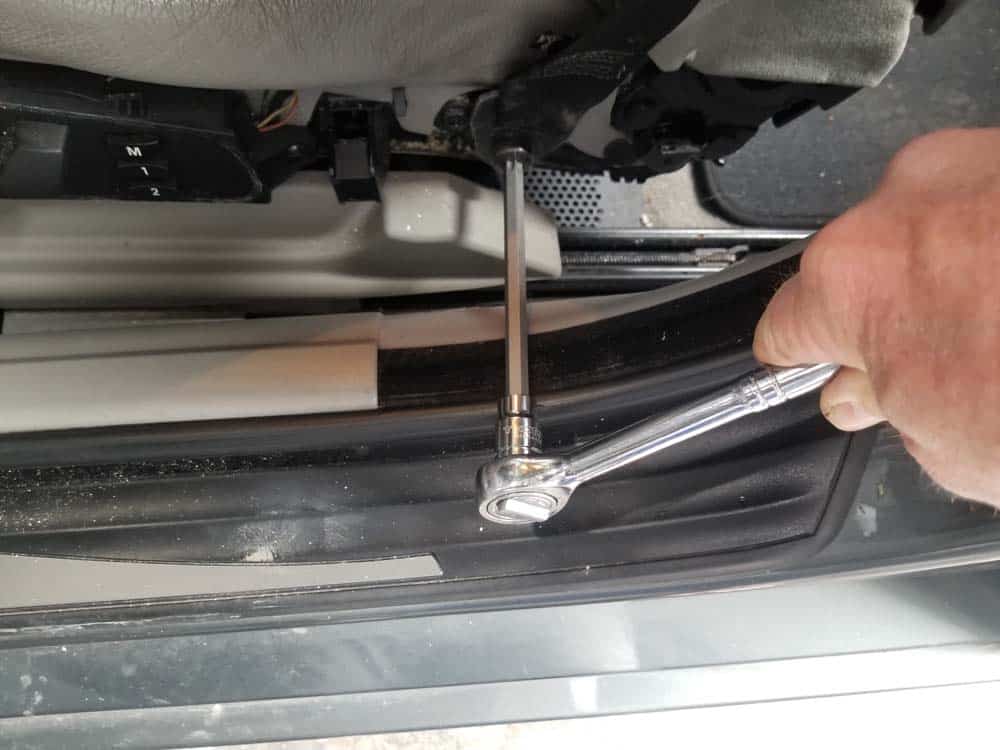
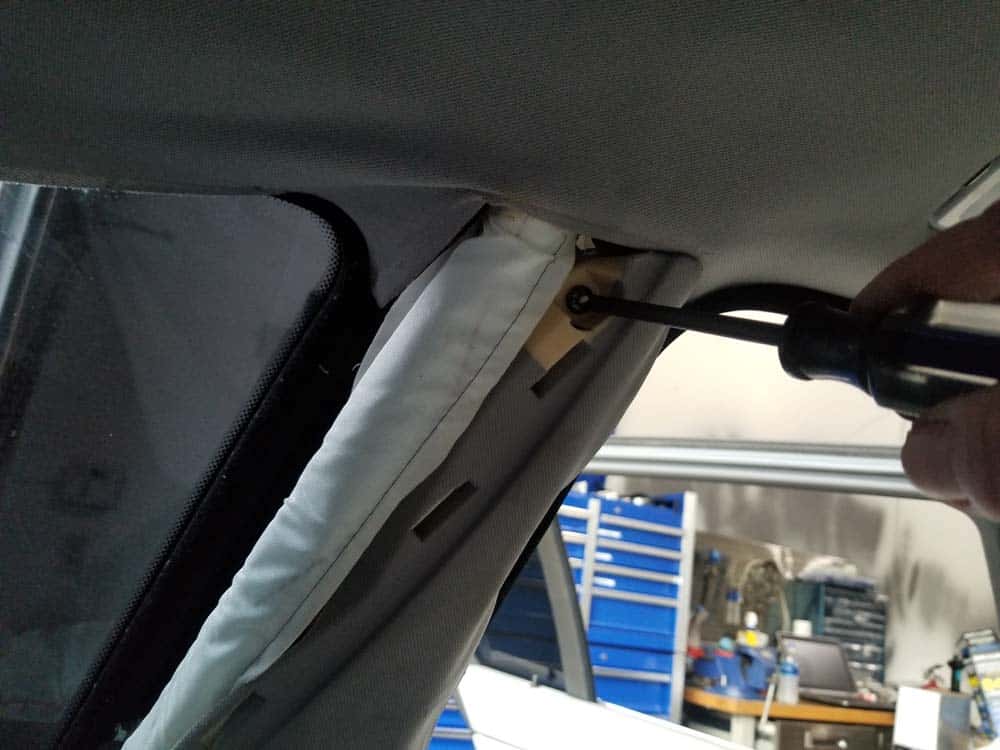
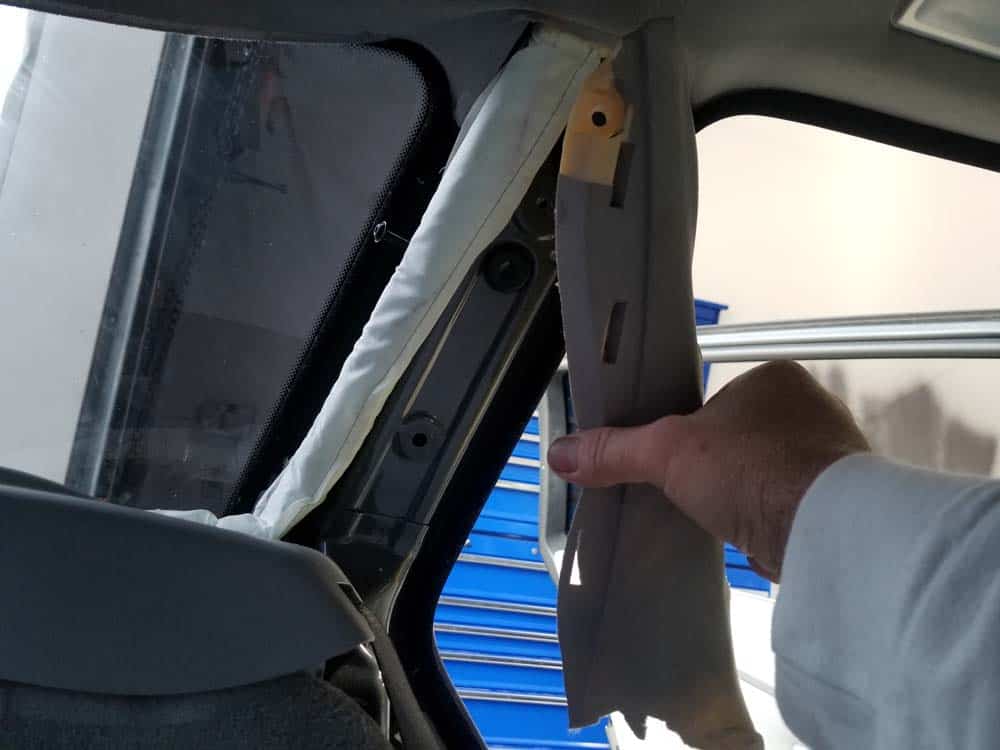
- Using a T50 torx bit, remove the bolt anchoring the seatbelt to the front seat frame. Remove the upper B pillar trim from the vehicle.

 T50 torx bit to remove the seatbelt anchor bolt" width="1000" height="750" />
 - Next the C pillar trim must be removed. The C pillar trim is actually comprised of two pieces. Begin by removing the rear seat side cushion by grasping it and pulling it loose from the body of the vehicle.
- Remove the "Airbag" cover cap from the rear C pillar piece so the mounting bolt can be accessed.
- Remove the C pillar mounting bolt with a T20 torx bit. Remove the rear portion of the C pillar trim.
- Remove the phillips head screw anchoring the front of the C pillar trim to the body of the vehicle. Remove the front C pillar trim from the vehicle.
- Moving to the rear of the vehicle, locate the D pillar trims on either side of the tailgate. Start by removing the side hatches so the trim mounting screws can be accessed.
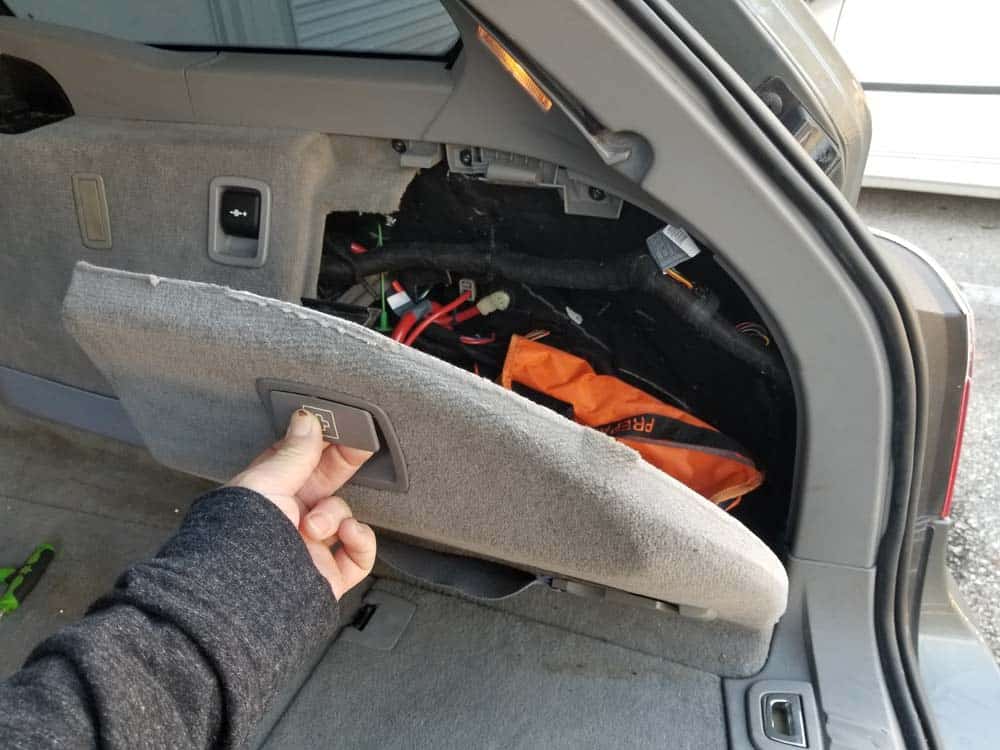
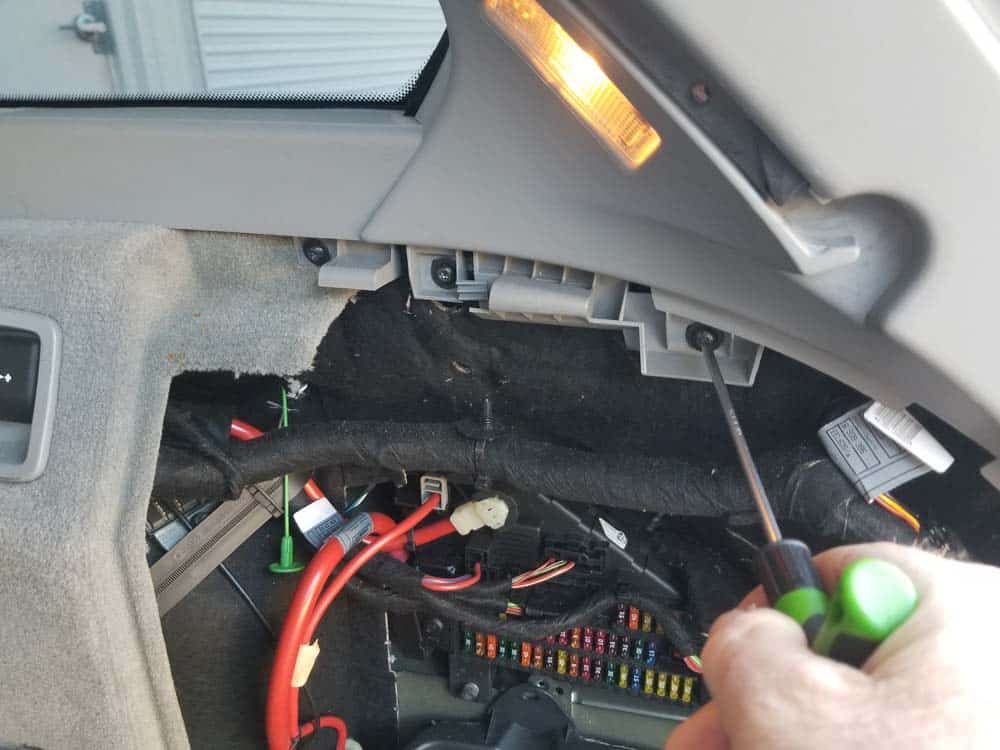
- Using a T20 torx bit, remove the six screws anchoring the D pillar trim to the body of the vehicle.

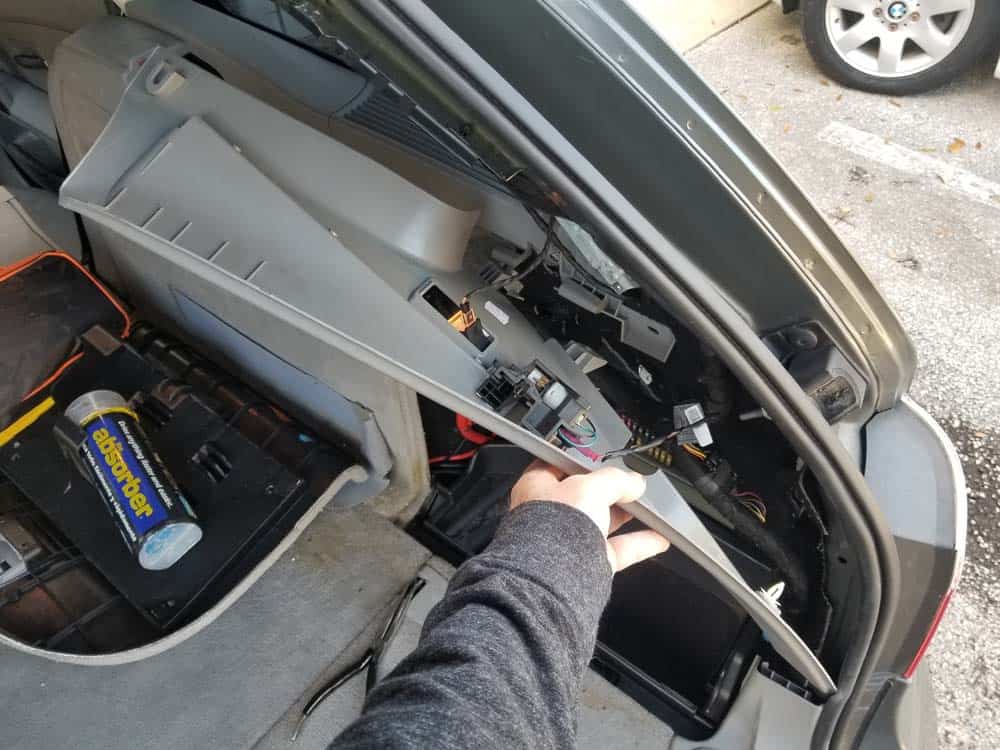
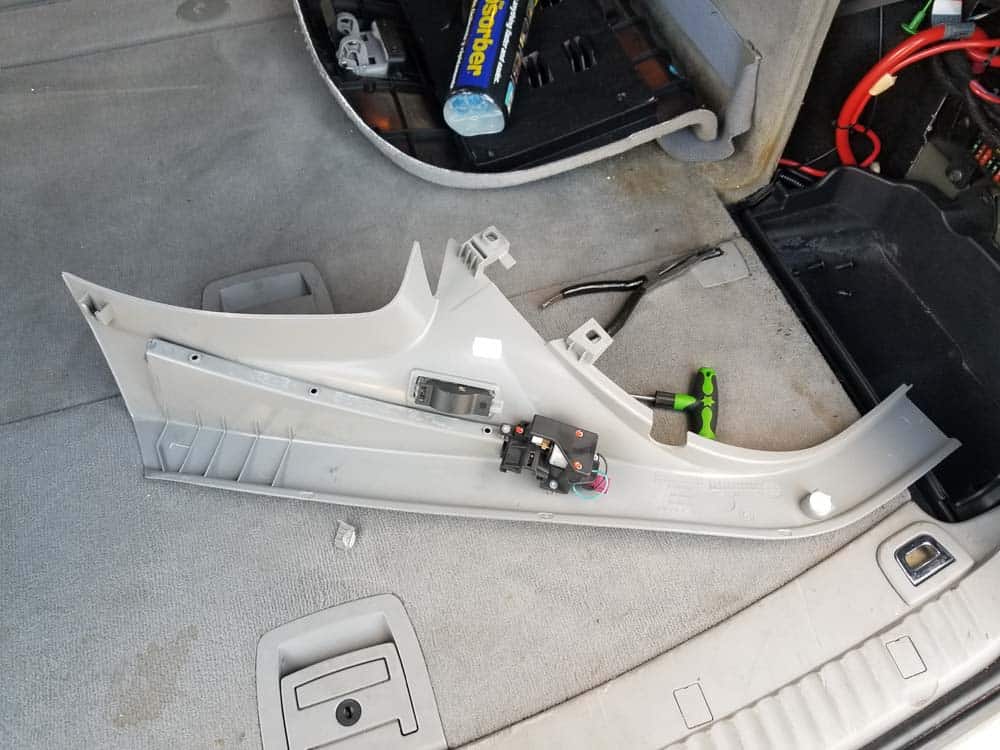
- Grasp the D pillar trim and pull it straight out at a 90 degree angle from the vehicle as shown below. Disconnect the two electrical connections from the back of the trim and remove it from the vehicle.
Section 2 - Removing the BMW E61 Headliner
Now that the pillar trims have been removed, the headliner is free to be extracted from the vehicle. The BMW E61 headliner is held in place by screws and plastic trim clips. It is important that all of the screws are removed prior to releasing the headliner from its mounting clips to avoid damaging the ceiling panel.- Using a T20 torx bit, remove the two rear divider covers as shown below.

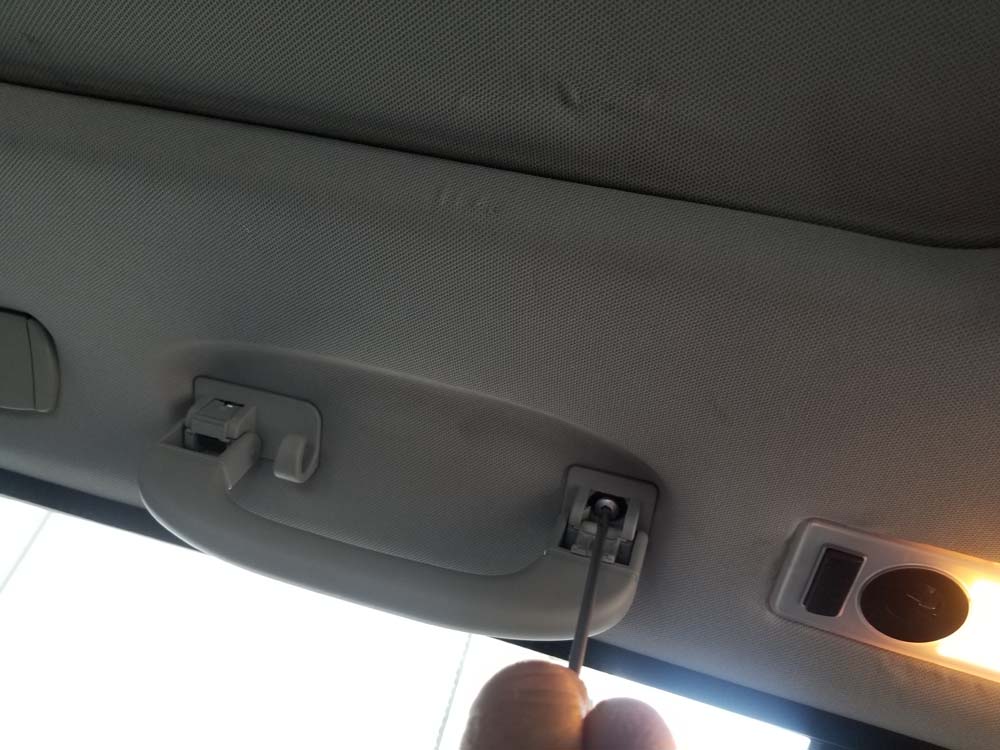
- Moving towards the front of the vehicle, remove the two rear seat grab handles using a T20 torx bit.
- Next, remove the second set of divider covers located behind the driver and passenger seats.
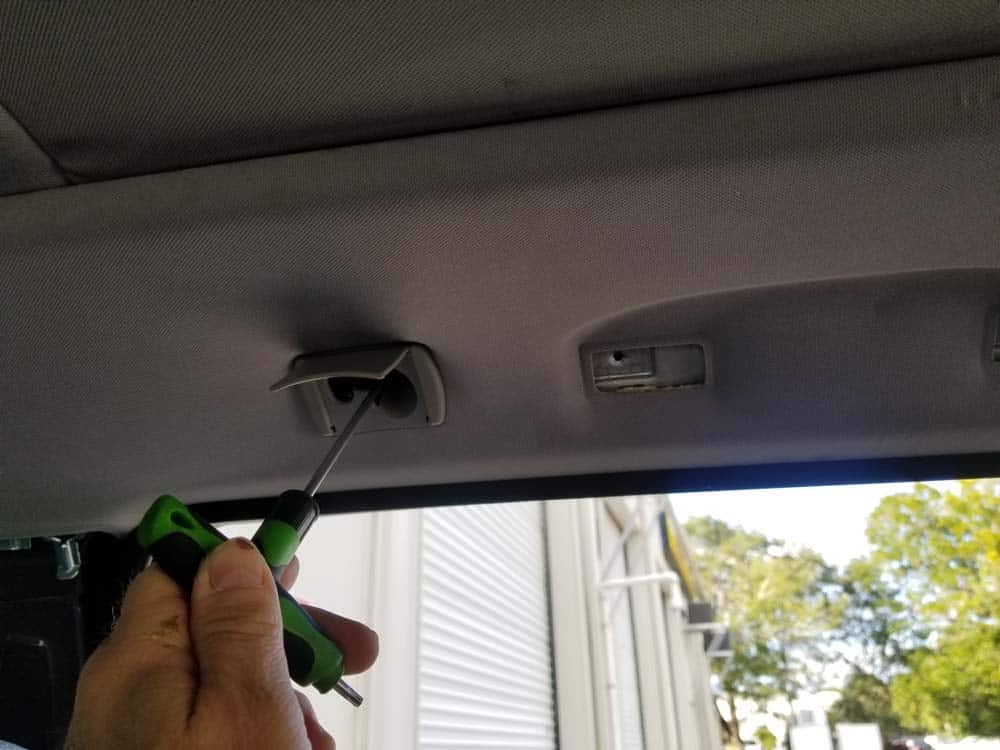
- Remove the grab handles on either side of the front seats.
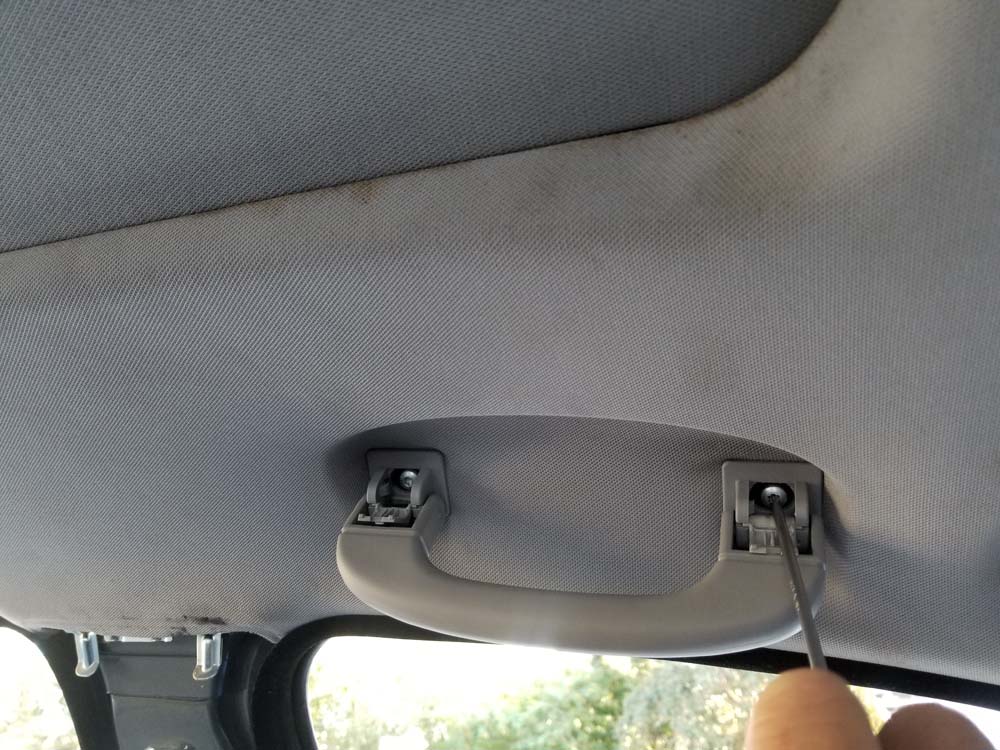
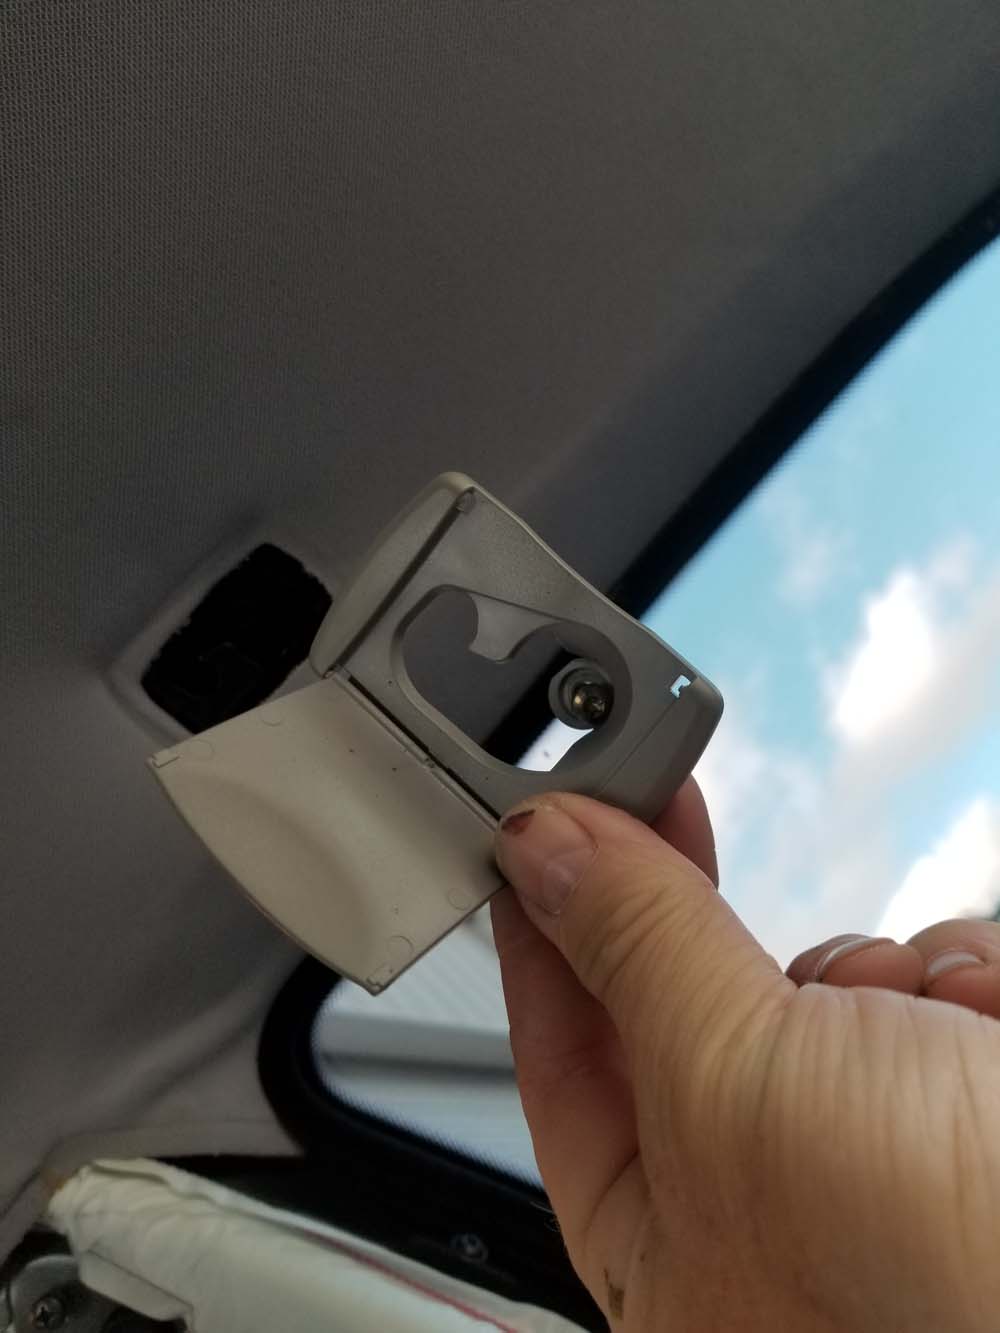
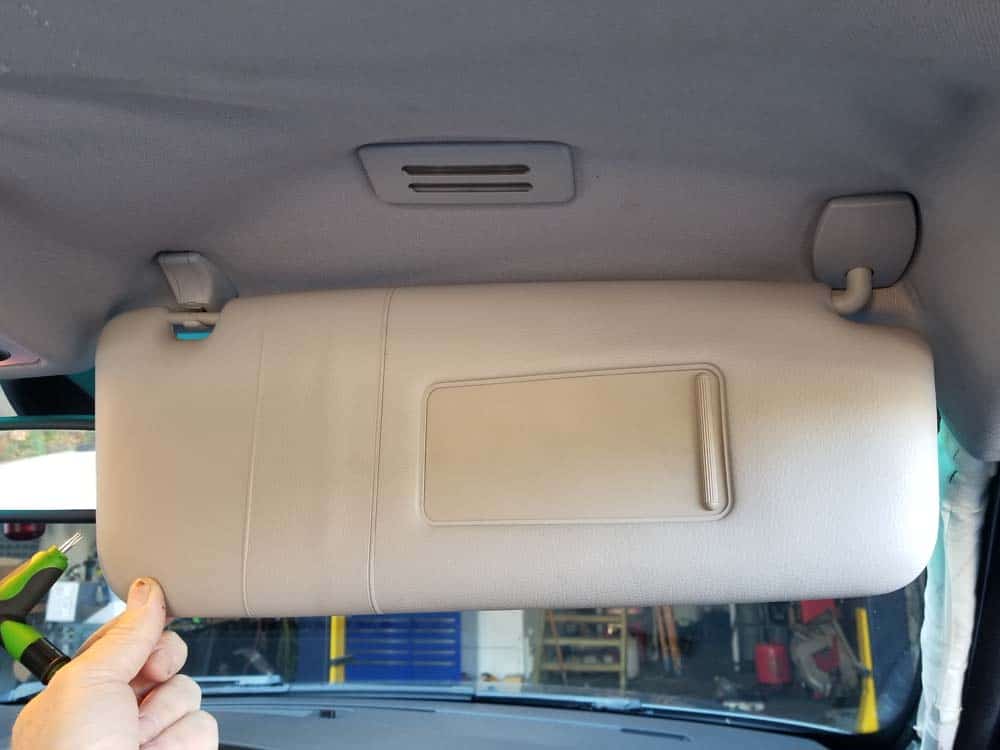
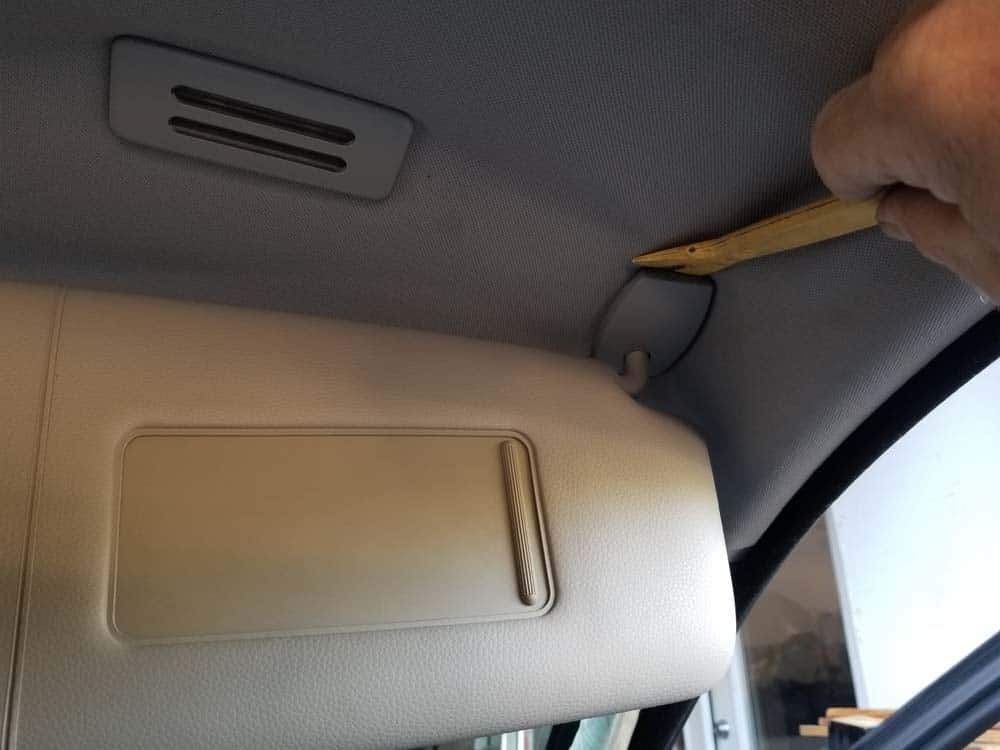
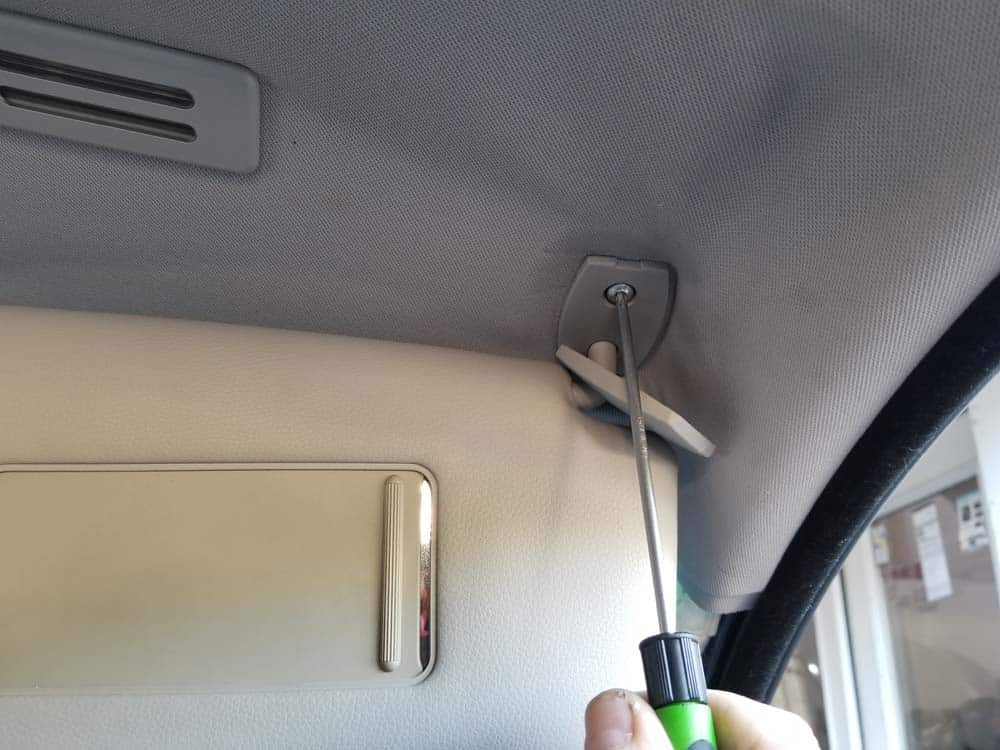
- Remove the sun visors with a T20 torx bit. Carefully unplug them when removing them from the headliner.
- DO NOT attempt to remove any of the electronics (including lights) from the headliner yet. They are tricky to remove and are easier to disconnect after the headliner is lowered.
- Starting at the rear of the vehicle, carefully pull the headliner free from the roof. The headliner is held in place with plastic trim clips.
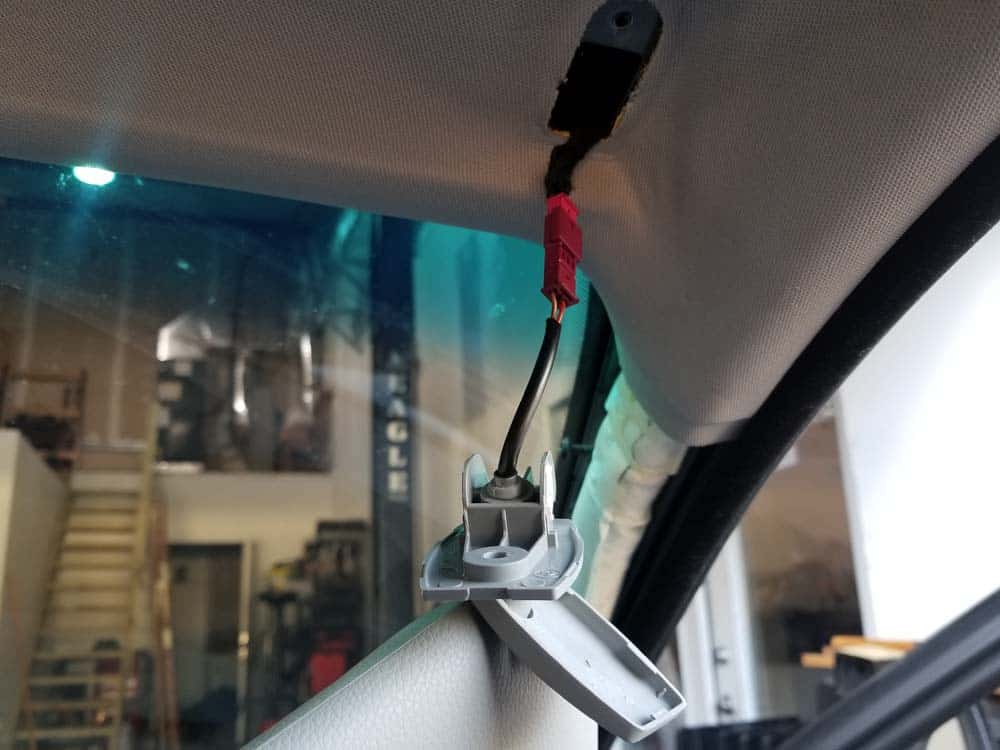
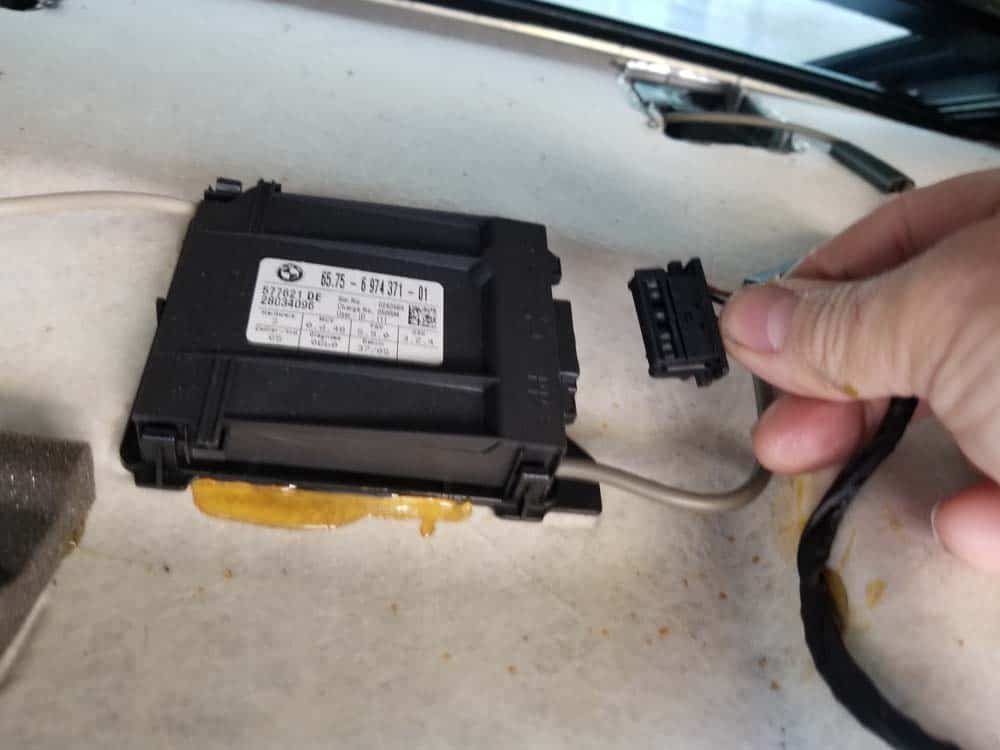
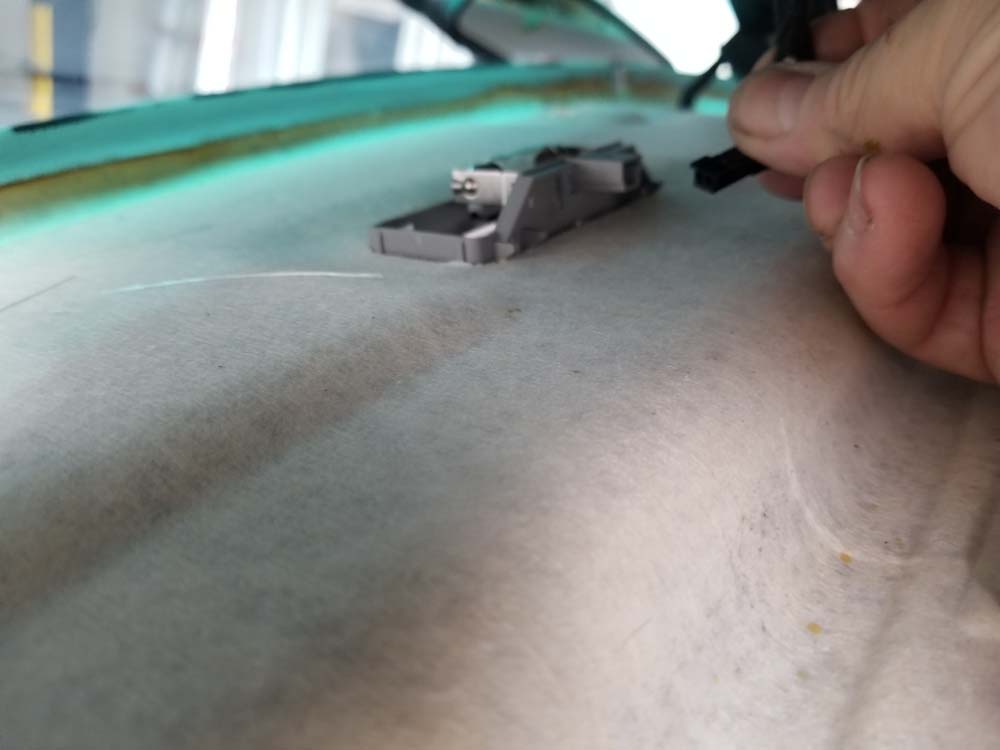
- With the headliner partially lowered, reach in and disconnect the ultrasonic alarm module. If the headliner has never been removed before, the modules wire is probably glued to the top of the headliner. Carefully pull the wire free and fold it out of the way.
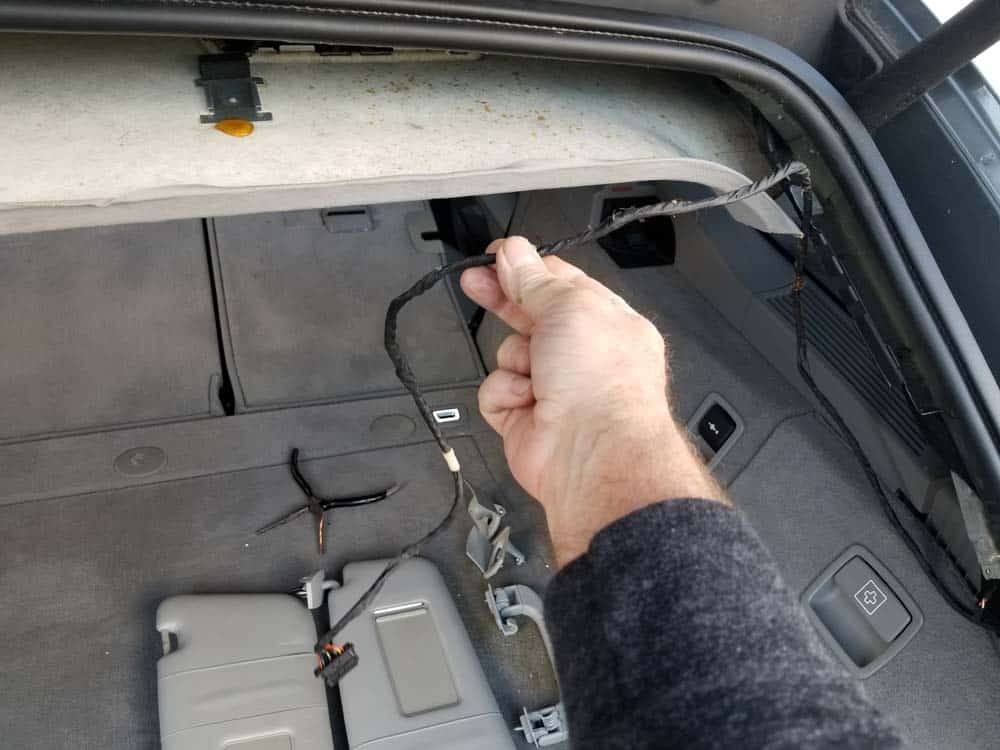
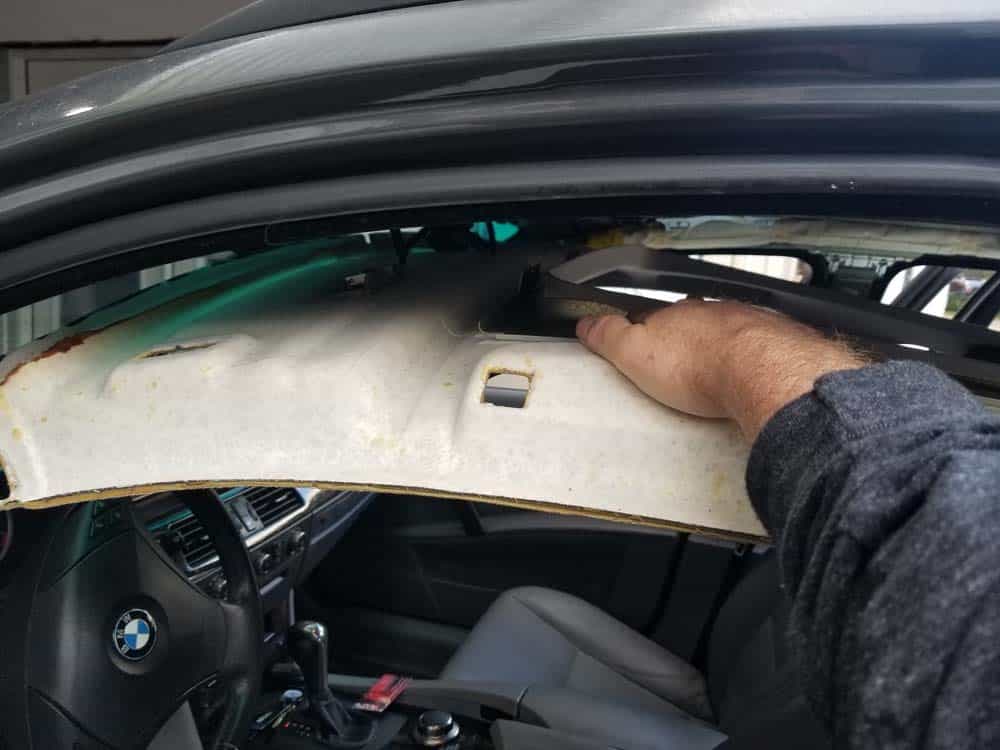
- Continue making your way forward pulling the headliner free from the ceiling. When you get to the rear passenger doors, unplug the two light fixtures. You do not have to remove the fixtures from the headliner.
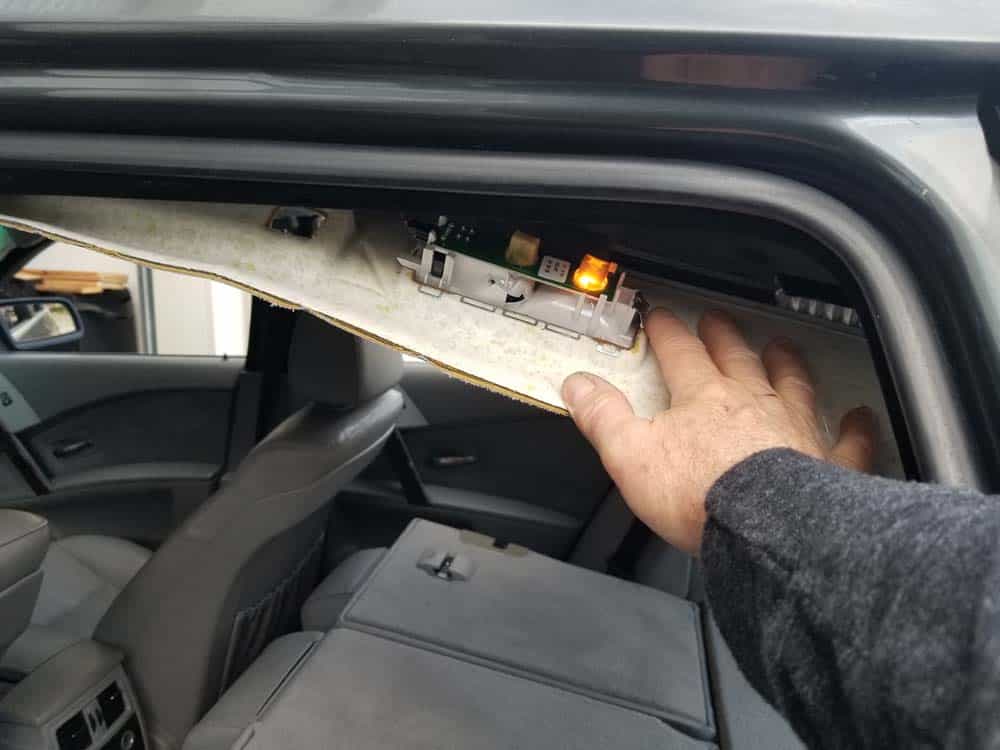
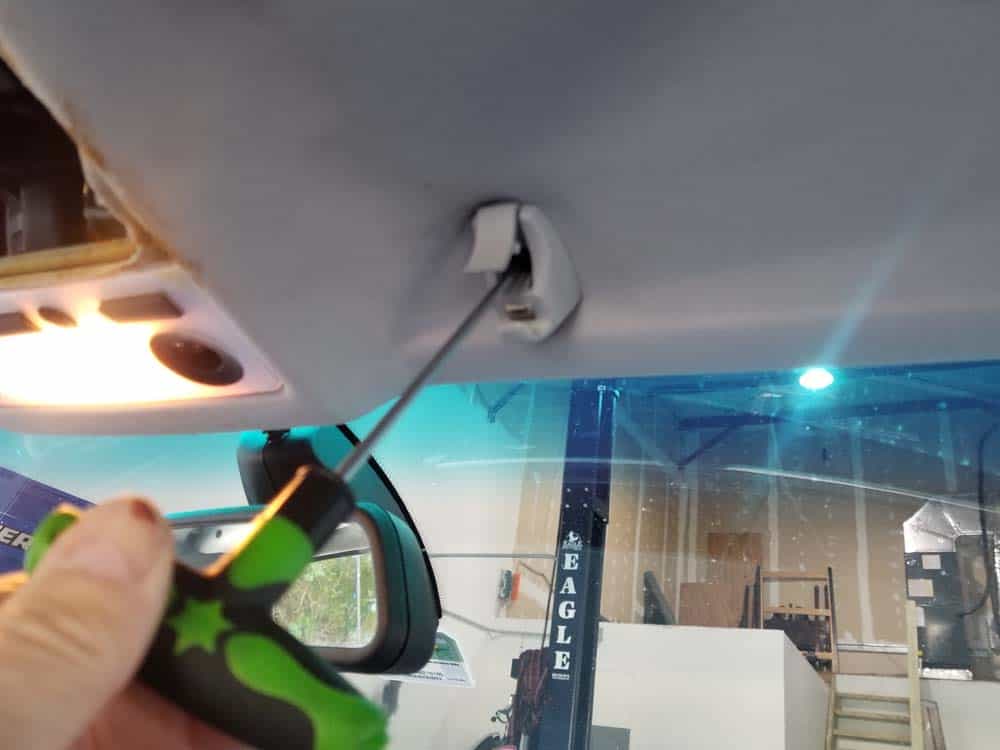
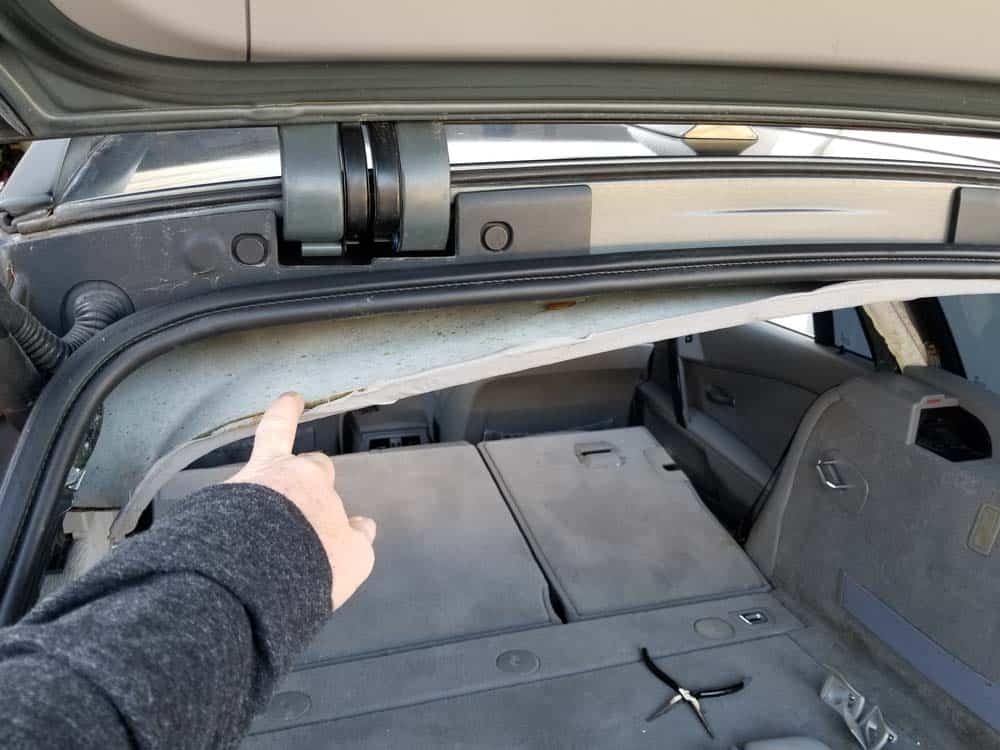
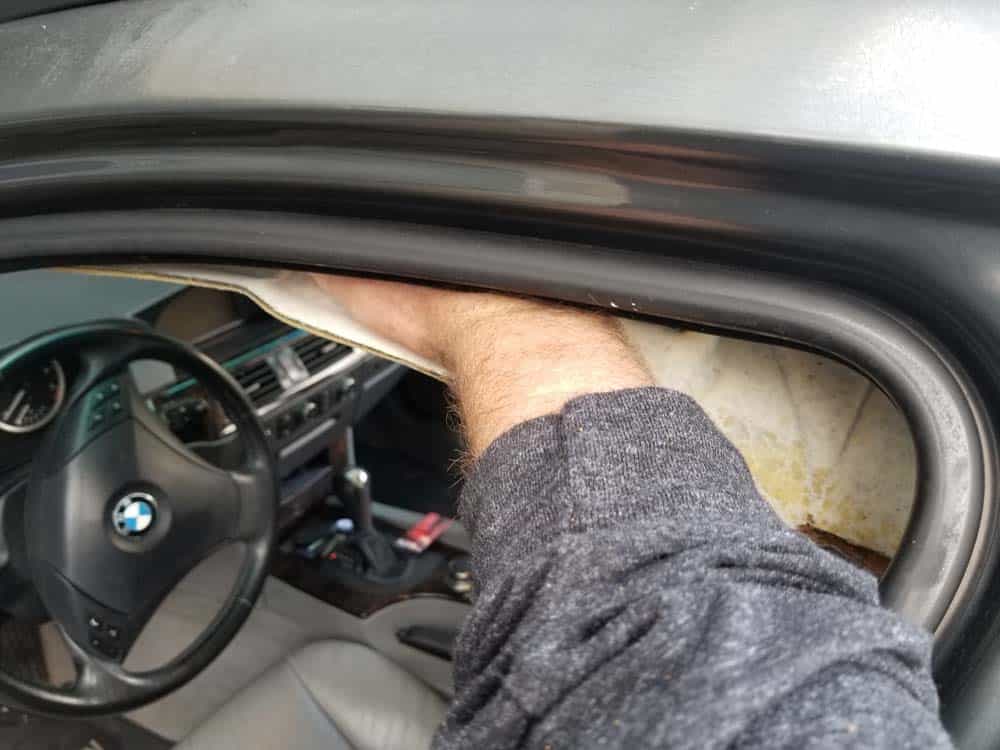
- Release the front of the headliner from the roof of the vehicle. It helps to insert your arm above the headliner as shown below and put pressure on it until it unsnaps from its plastic mounting clips.
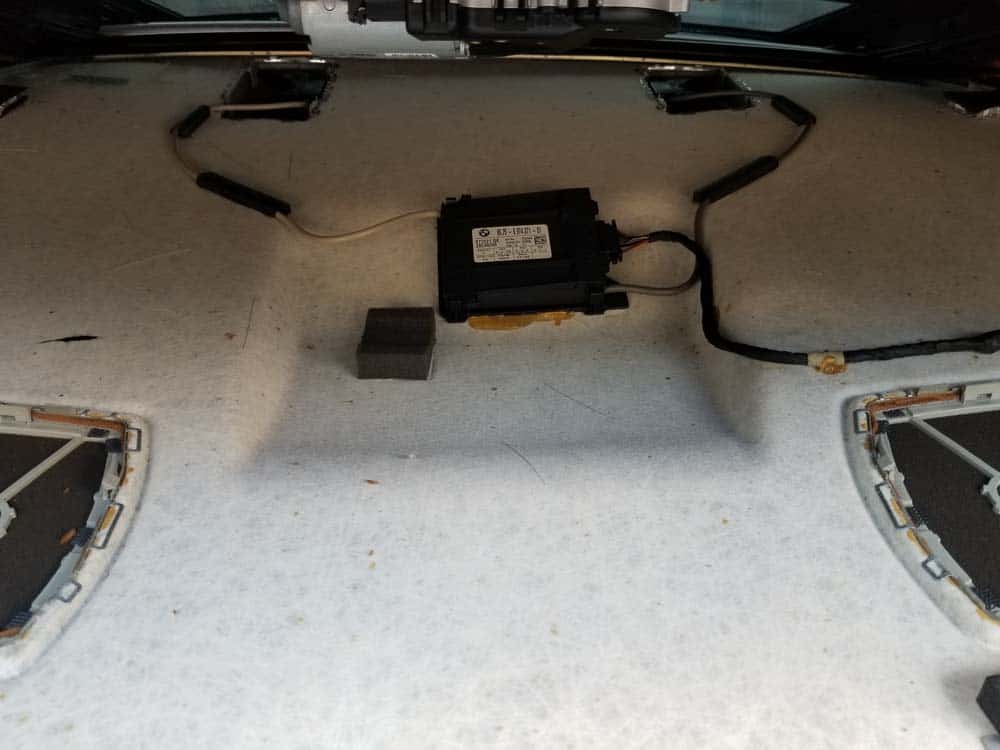
- Reach over the front of the headliner and disconnect the rest of the interior lighting. You do not have to remove the actual lighting fixtures from the headliner.
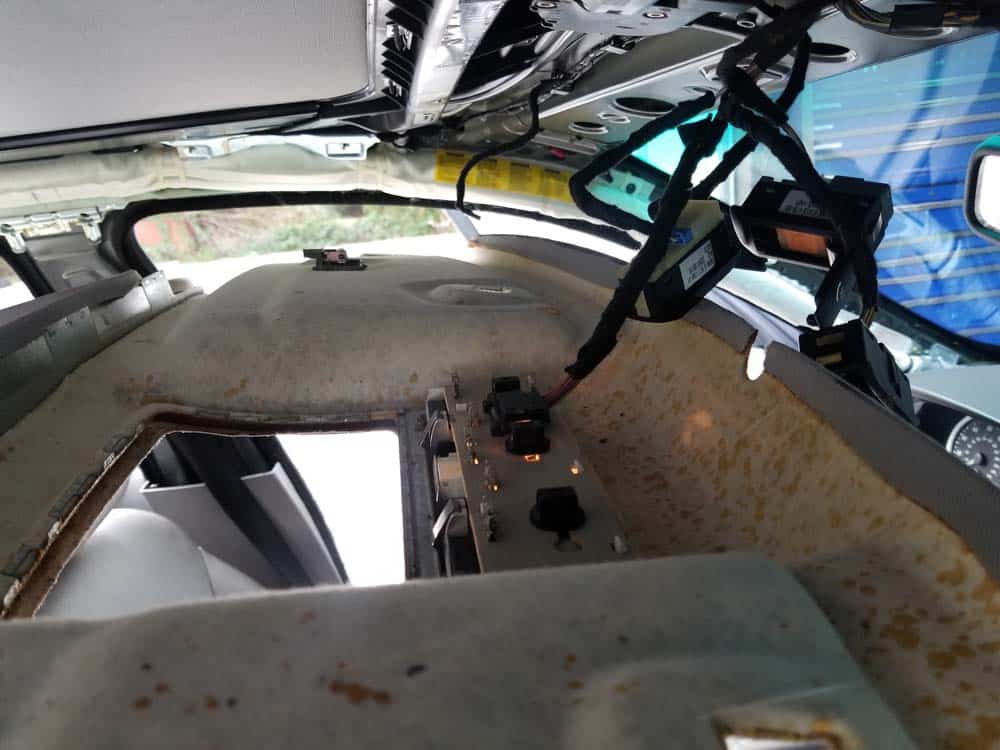
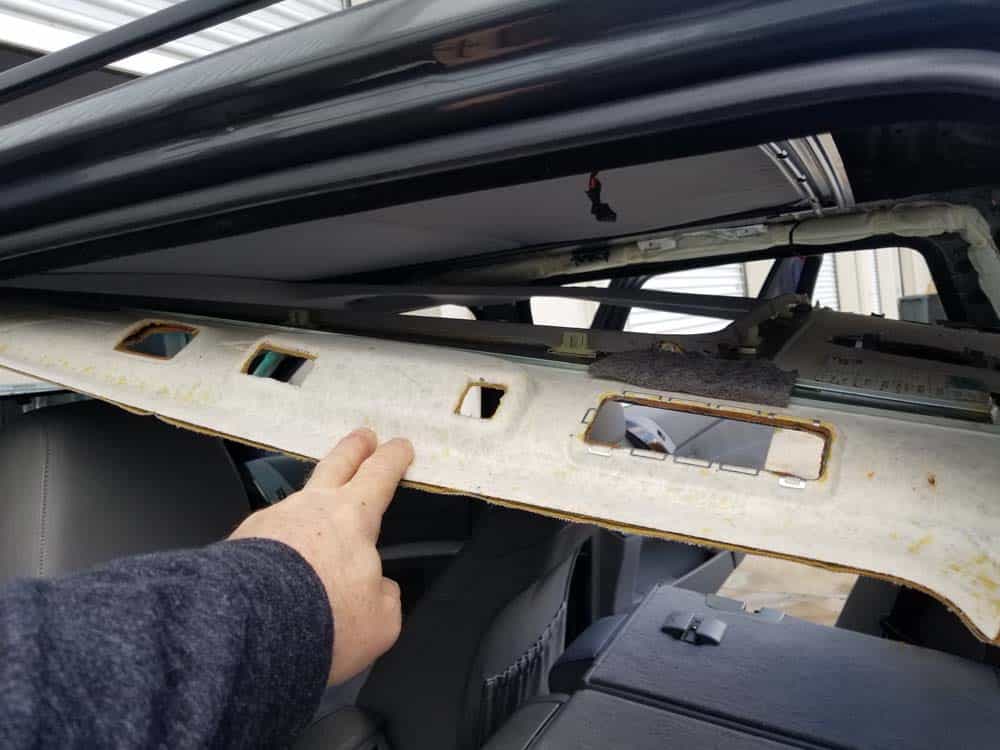
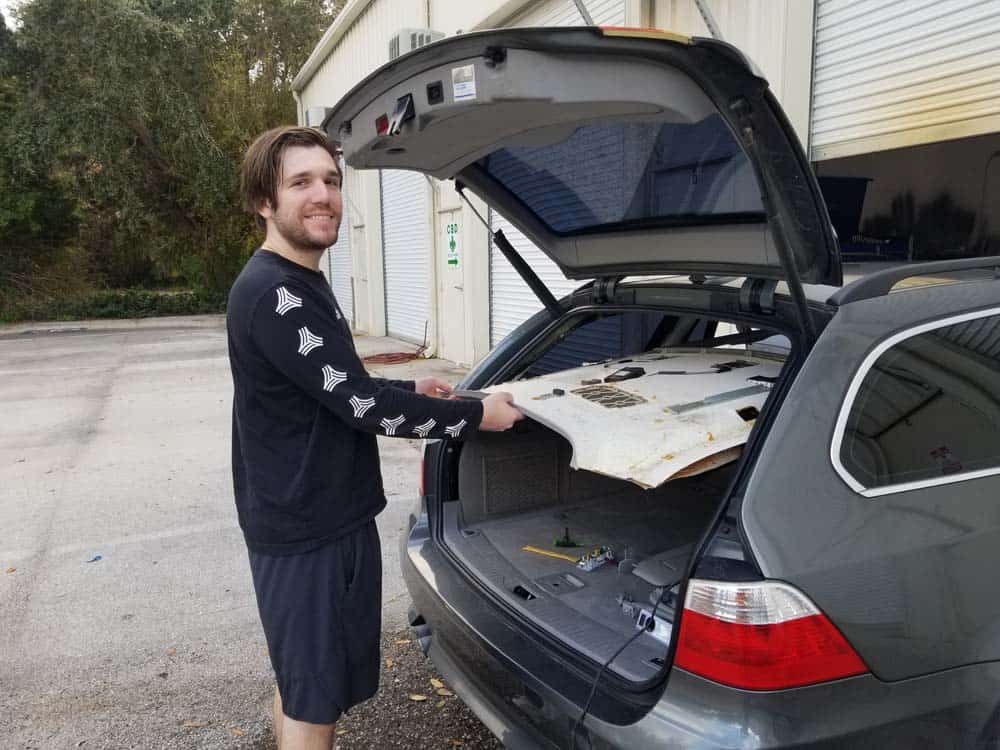
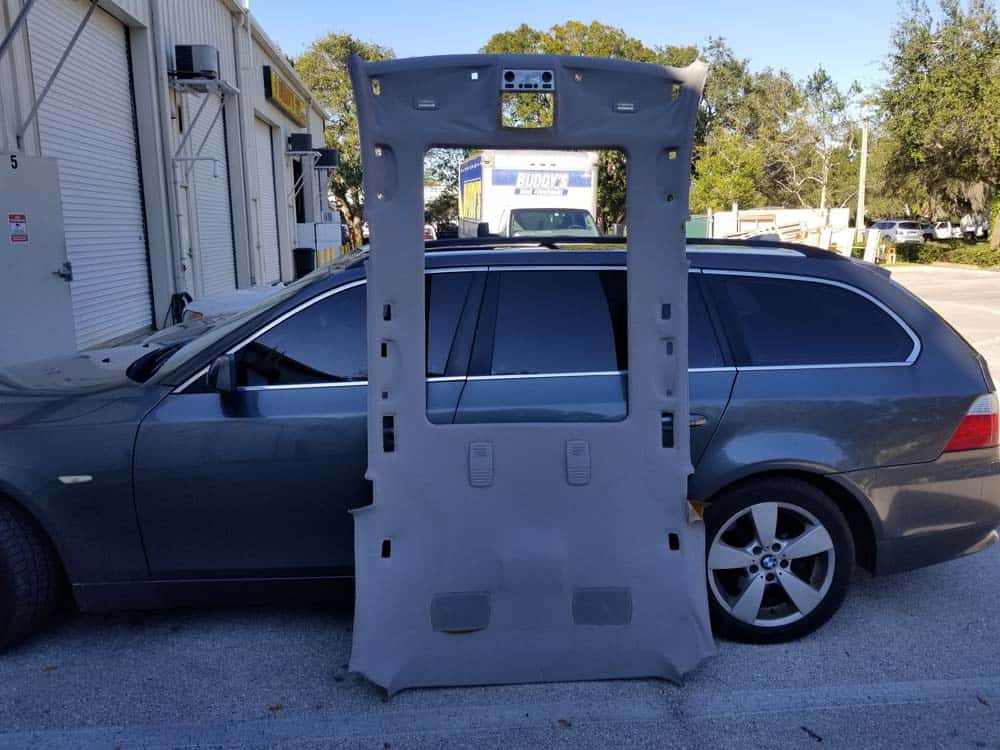
- With the headliner completely removed from the roof of the vehicle, carefully remove it from the rear of the wagon. Using a helper like this fine fellow will prevent scraping the ceiling while removing it.
Section 3 - BMW E61 Headliner Installation
Installation of the headliner is just the above steps in reverse without any special procedures. We strongly recommend using a helper to hold the headliner in position during installation.BMW E61 Headliner Removal Finished