Affiliate link disclosure – The BMW Repair Guide uses affiliate links in their site. For more information on affiliate links, please click here.
Repair Summary
This article gives detailed instructions on replacing the air-conditioning compressor in a 2006-2010 BMW E60 5 series vehicle with the N52 6 cylinder engine. Even though we used a 2006 530xi touring wagon to perform this repair, this article can be applied to any vehicle with the N52 engine including the 1,3,5,6,7 X1,X3,X5 and Z4 with minor modifications to the repair steps.
See all vehicles this article applies to
E90 3 Series 323i
E90N 3 Series 325i
E90N 3 Series 325xi
E90N 3 Series 323i
E91 3 Series 325i
E91 3 Series 323i
E91N 3 Series 325xi
E91N 3 Series 325i
E91N 3 Series 323i
E92 3 Series 325xi
E92 3 Series 325i
E92 3 Series 323i
E92N 3 Series 323i
E92N 3 Series 325xi
E92N 3 Series 325i
E93 3 Series 325i
E93 3 Series 323i
E93N 3 Series 323i
E93N 3 Series 325i
E60 5 Series 523i
E60N 5 Series 525Li
E60N 5 Series 525i
E60N 5 Series 523Li
E60N 5 Series 523i
E61 5 Series 525i
E61 5 Series 525xi
E61 5 Series 523i
E61N 5 Series 523i
E61N 5 Series 525i
F10 5 Series 523i
F11 5 Series 523i
E83N X3 Series X3 2.5si
E85 Z4 Series Z4 2.5si
E89 Z4 Series Z4 23i
F18 5 Series 523Li
F18 5 Series 520Li
E60 5 Series 523Li
E60 5 Series 525Li
E81 1 Series 130i
E87 1 Series 130i
E88 1 Series 128i
E88 1 Series 125i
E82 1 Series 128i
E82 1 Series 125i
E87N 1 Series 130i
E90 3 Series 330xi
E90 3 Series 330i
E90 3 Series 328i
E90 3 Series 328xi
E90 3 Series 325xi
E90 3 Series 325i
E90N 3 Series 330i
E90N 3 Series 328xi
E90N 3 Series 328i
E91 3 Series 330xi
E91 3 Series 330i
E91 3 Series 328xi
E91 3 Series 328i
E91 3 Series 325xi
E91N 3 Series 330i
E91N 3 Series 328xi
E91N 3 Series 328i
E92 3 Series 330xi
E92 3 Series 330i
E92 3 Series 328xi
E92 3 Series 328i
E92N 3 Series 330i
E92N 3 Series 328xi
E92N 3 Series 328i
E93 3 Series 330i
E93 3 Series 328i
E93N 3 Series 330i
E93N 3 Series 328i
E60 5 Series 530xi
E60 5 Series 530i
E60 5 Series 525i
E60 5 Series 525xi
E60N 5 Series 530xi
E60N 5 Series 530Li
E60N 5 Series 530i
E60N 5 Series 528xi
E60N 5 Series 528i
E61 5 Series 530xi
E61 5 Series 530i
E61N 5 Series 530xi
E61N 5 Series 530i
F10 5 Series 530i
F10 5 Series 528i
F11 5 Series 530i
E63 6 Series 630i
E63N 6 Series 630i
E64 6 Series 630i
E64N 6 Series 630i
E65 7 Series 730i
E66 7 Series 730Li
F01 7 Series 730i
F01N 7 Series 730i
F02N 7 Series 730Li
E84 X1 Series X1 25iX
E83N X3 Series X3 3.0i
E83N X3 Series X3 3.0si
F25 X3 Series X3 28iX
E85 Z4 Series Z4 3.0si
E85 Z4 Series Z4 3.0i
E86 Z4 Series Z4 3.0si
E89 Z4 Series Z4 30i
F18 5 Series 530Li
F18 5 Series 528Li
F18N 5 Series 530Li
F02 7 Series 730Li
E70 X5 Series X5 3.0si
E60 5 Series 530Li
Per Section 608 of the Clean Air Act, it is illegal to knowingly release automotive 134a refrigerant into the atmosphere and is punishable by fines up to $27,500 per occurrence. Removal of 134a refrigerant from your vehicle's HVAC system must be recycled or reclaimed using the proper equipment. If you are a home mechanic and are not receiving compensation for your work, you may remove your own refrigerant following proper procedures. The BMW Repair Guide in no way advocates the release of 134a into the atmosphere by publishing this article. For more information on handling your BMW's ac refrigerant please visit https://www.epa.gov/mvac.
A BMW E60 AC compressor replacement is most likely necessary if your car has over 120,000 miles and is not blowing cold air.
The well-known Achilles Heel of the BMW E60/61 5 series climate control system is its air-conditioning refrigerant compressor. Mounted on the lower right corner of the engine block, the AC compressor compresses 134a refrigerant gas from the system's evaporator and forces it into the condenser. It is a "clutchless" design compressor that runs continuously with the engine - its function is electronically controlled by the BMW's IHKA climate control module.
AC compressor failure in E60 5 series vehicles is usually sudden and without warning. The vehicle will be blowing ice-cold air from its vents one moment, and hot air the next. Although no official study has ever been done, the BMW Repair Guide has determined that AC compressor failure in 2006-2010 5 series sedans usually happens after the vehicle passes 120,000 miles on the odometer.
Replacing the AC compressor on E60/E61 sedans and touring wagons is a difficult job. The vehicle must be supported in the air high enough to allow ample working room under the engine. The engine coolant system must be partially drained and the water pump and thermostat removed in order to access the compressor's lower mounting bolts and to allow enough room for the compressor to be removed from the vehicle. The compressor cannot be removed from the top of the engine compartment - there is simply not enough clearance. Further complicating the procedure is the need to remove the front left wheel from the vehicle so the rear compressor mounting bolt can be removed.
The good news is a savvy home mechanic who is not afraid to take on the job can literally save a thousand plus dollars in repair costs. It is perfectly legal for a home mechanic to work on their own air-conditioning system as long as they are not getting compensated for the job and they follow proper protocol by not releasing refrigerant into the atmosphere. The storage tank, vacuum pump, recovery machine, and manifold gauges needed to properly remove and reinstall the 134a refrigerant in your BMW are readily available on sites like Amazon and are easy to use. Since there is already an abundance of online articles and videos that cover removing and recycling the 134a refrigerant in your BMW, we have elected not to cover it in this article. We do give full step-by-step instructions below on removing the refrigerant compressor along with a parts list for easy ordering of the supplies you will need to do the job correctly.


View the detailed parts diagram for this repair.
Includes detailed part diagrams, part numbers and links to purchase all of the required components needed to complete this repair.

Before starting this repair, you must have the following required parts.
Fits all E60 and E61 sedans and touring wagons
The average lifespan of an AC compressor in your BMW is less than 120,000 miles. If your BMW is over 100,00 miles and hot air is blowing out of your vents, you are most likely ready for a new refrigerant compressor.
Fits all E60 and E61 AC compressors
Aluminum screws are one-time use and should be replaced each time the AC compressor is serviced. Please follow the torque specifications outlined in our repair steps below.
All vehicles with the BMW N52 engine
Accessory drive belts keep everything turning off of the crank pulley. Generator, fans, water pumps and AC compressors all rely on this belt to keep everything working properly. If your drive belt is getting old, cracking, glazing, or squeaking, replace it.
Section 1 - Removing the water pump and thermostat
As discussed above, the water pump and thermostat must be removed from 2006-2010 E60 and E61 5 series sedans and wagons in order to remove the AC compressor from the vehicle - there is simply not enough room to get it out any other way. If you were planning on replacing your thermostat or water pump now is the time to do it while they are removed from the vehicle.- Raise and support your vehicle so there is plenty of clearance to work safely under the vehicle.
- Please refer to our article BMW E60 Water Pump Replacement – 2006-2010 5 Series – N52 6 Cyl for complete instructions on removing the water pump and thermostat from your N52 6 cylinder engine.
Section 2 - Removing the AC refrigerant compressor
Removing the AC compressor first requires removing the refrigerant from the system. It is perfectly legal for the home mechanic to remove their own refrigerant as long as you follow the correct procedure and DO NOT knowingly release any into the atmosphere. For more information on removing and recycling the 134a refrigerant from your BMW please refer to the wealth of online articles and videos from other automobile enthusiasts.- Begin by removing the 134a refrigerant from the AC system. Per Section 608 of the Clean Air Act, it is illegal to knowingly release automotive 134a refrigerant into the atmosphere and is punishable by fines up to $27,500 per occurrence. Removal of 134a refrigerant from your vehicle's HVAC system must be recycled or reclaimed using the proper equipment. Always use proper safety equipment including eye protection when working on your vehicle's AC system.
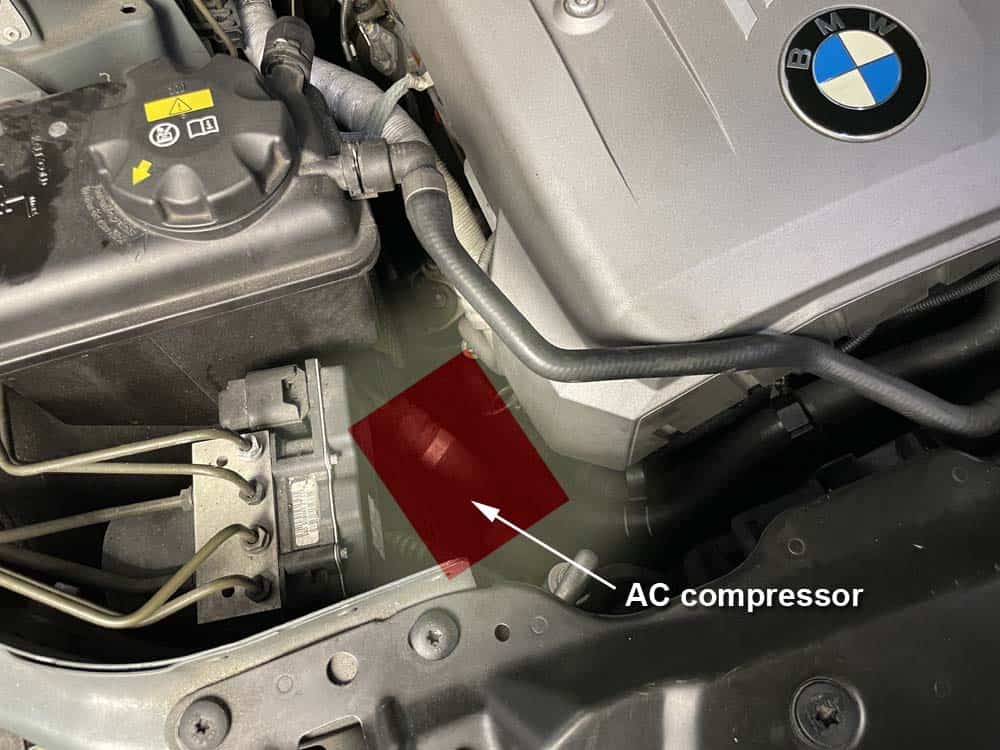
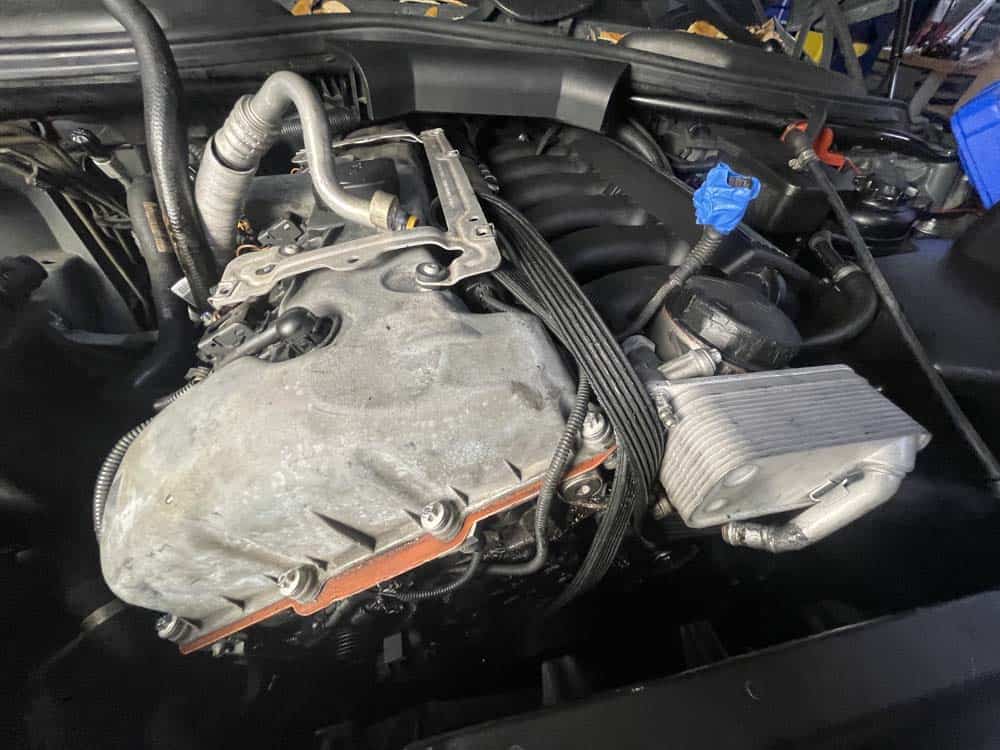
- The refrigerant compressor in E60 and E61 sedans and touring wagons is located at the front right side of the engine block. It is located underneath a maze of coolant lines that will need to be cleared out of the way before the compressor can be removed.
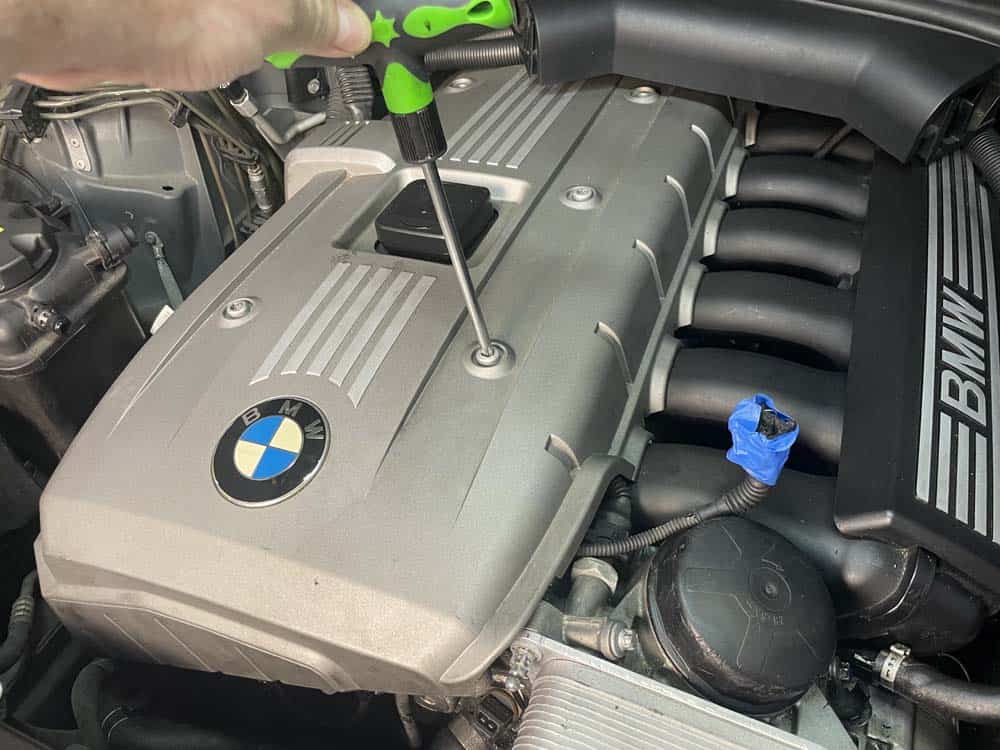
- Remove the engine cover.
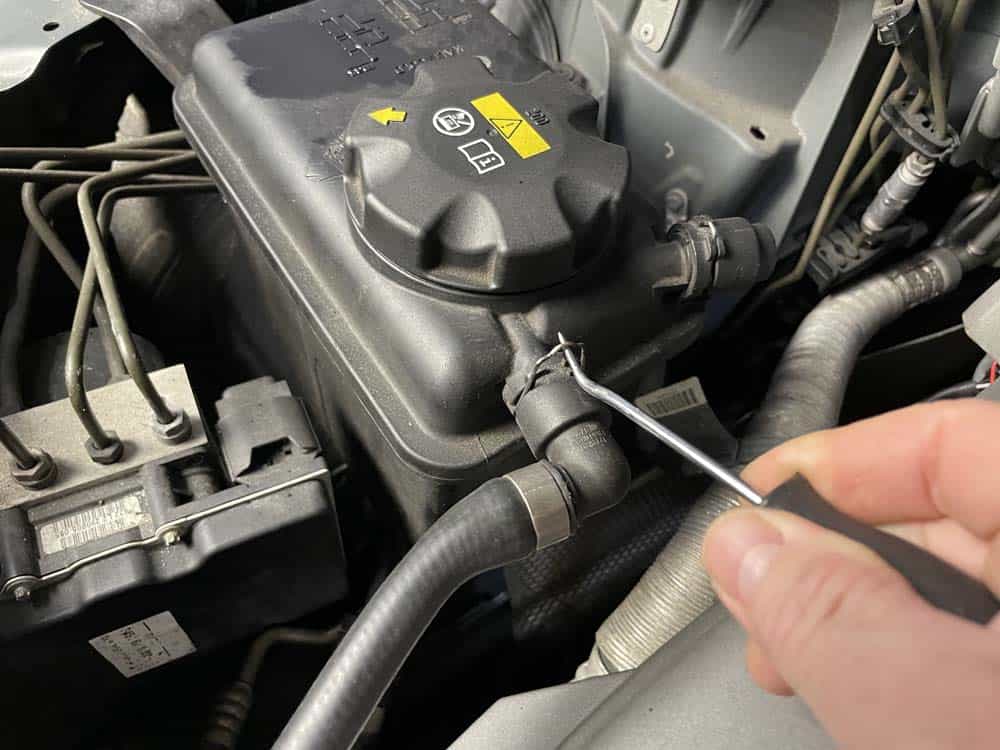
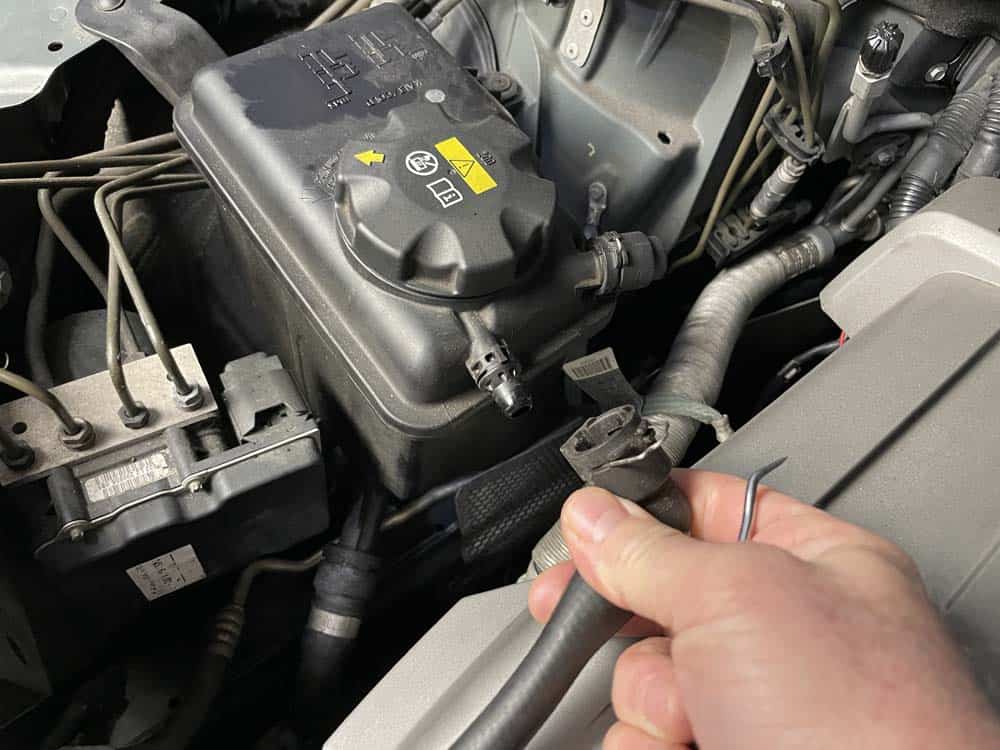
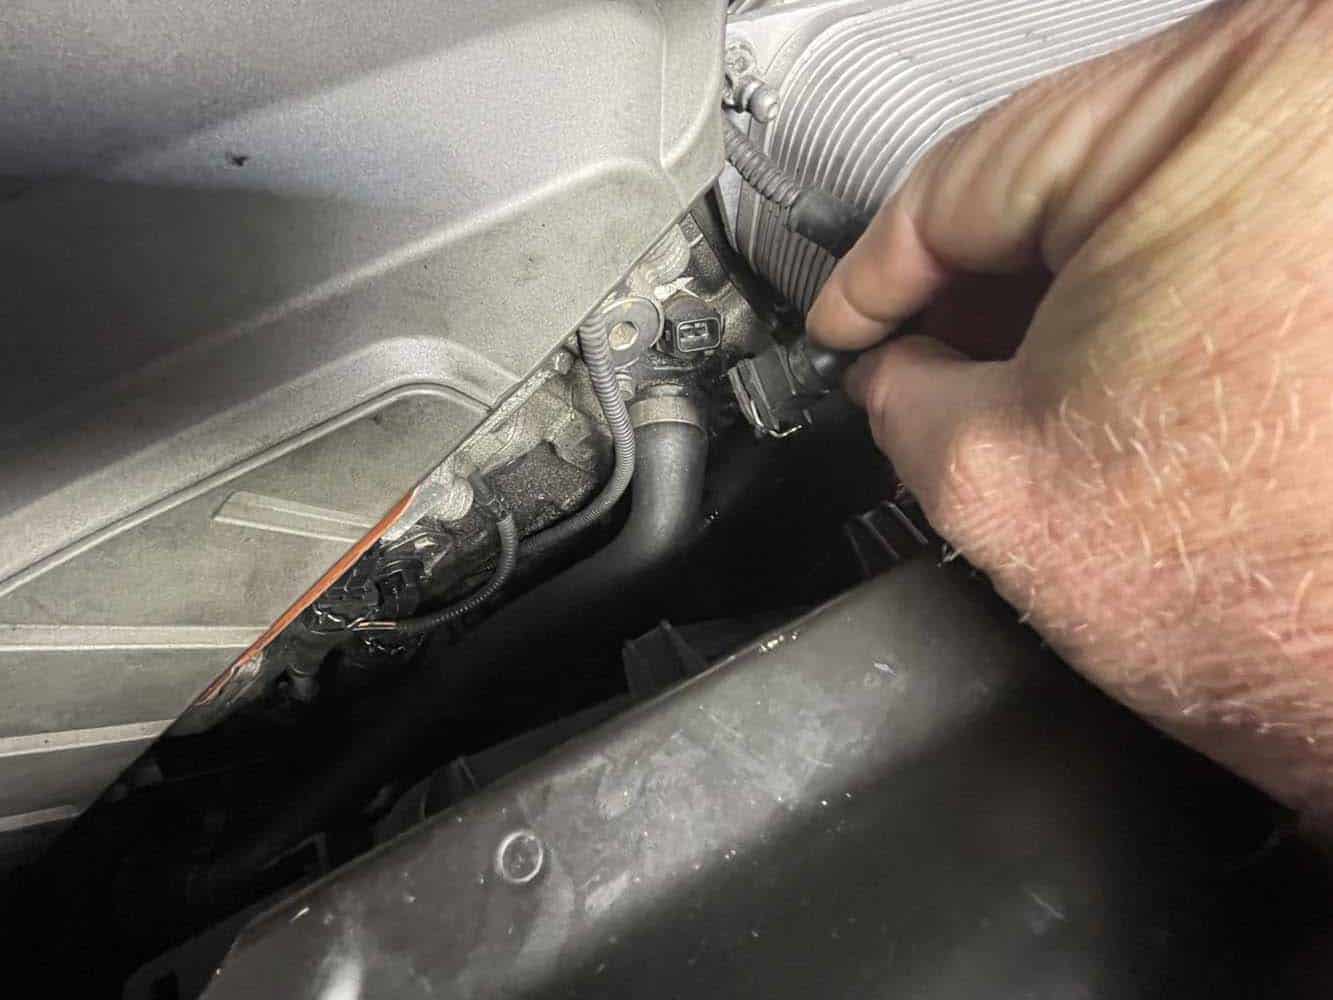
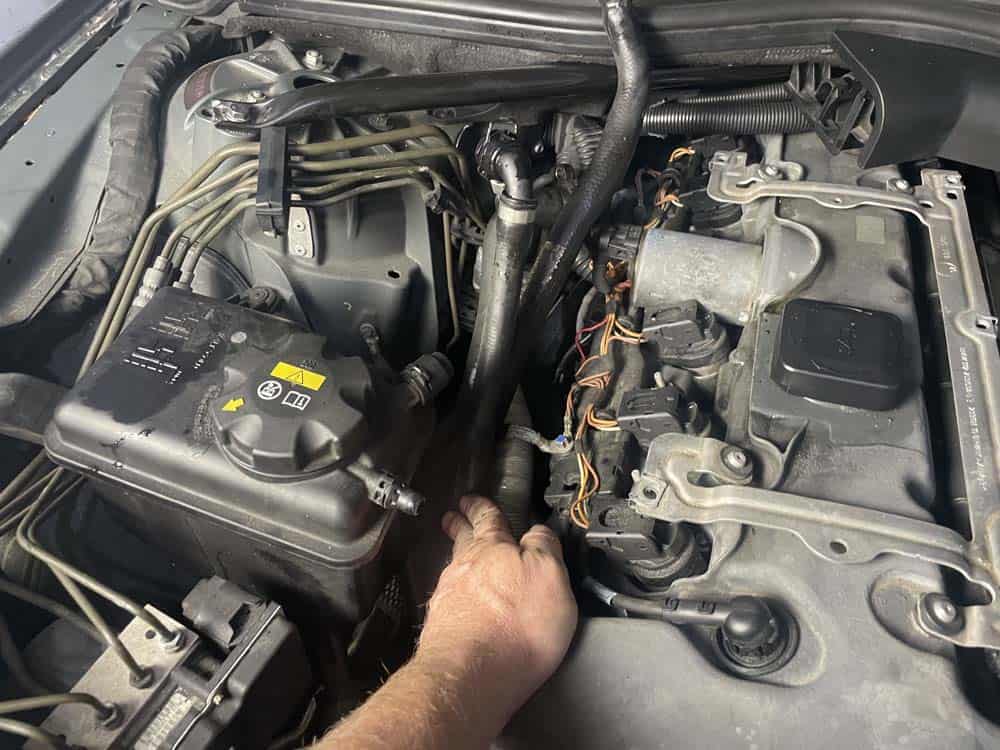
- Release the metal clip on the expansion tank coolant hose and fold it back out of the work area.
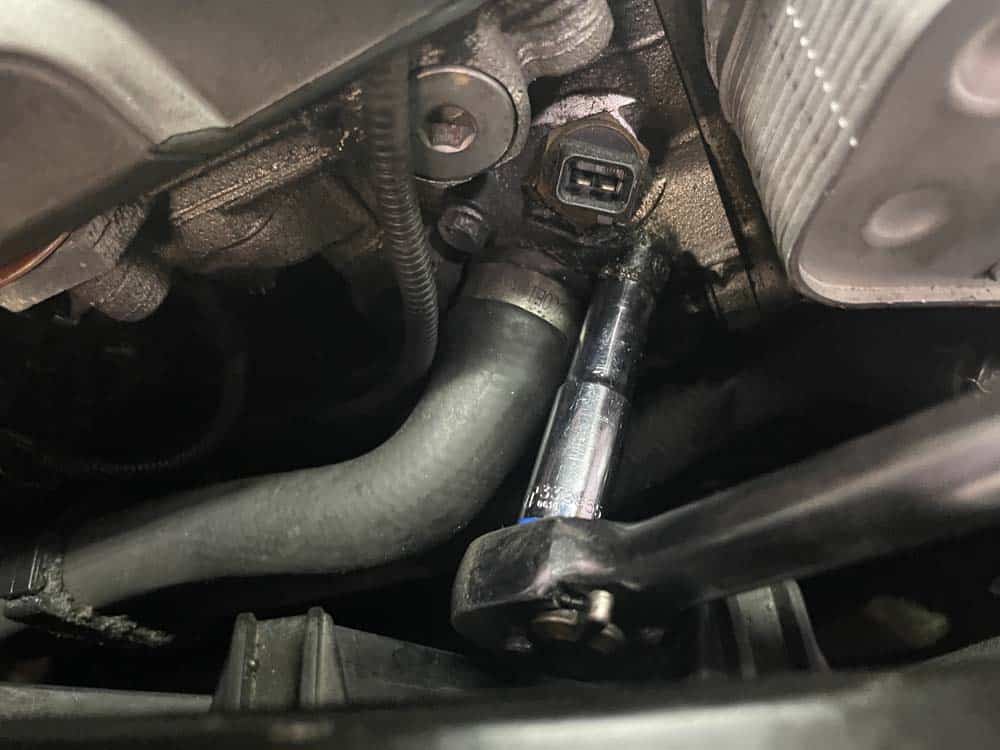
- Unplug the cylinder head temperature sensor. Remove the two 10mm bolts securing the cylinder head coolant hose and gently fold it back out of the work area.
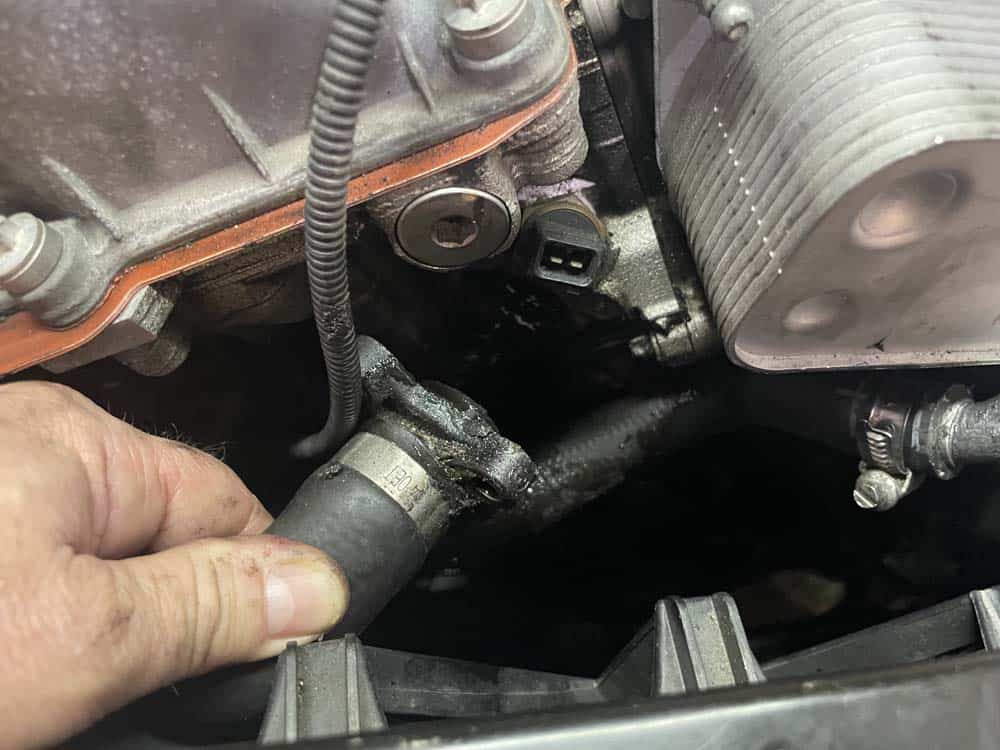
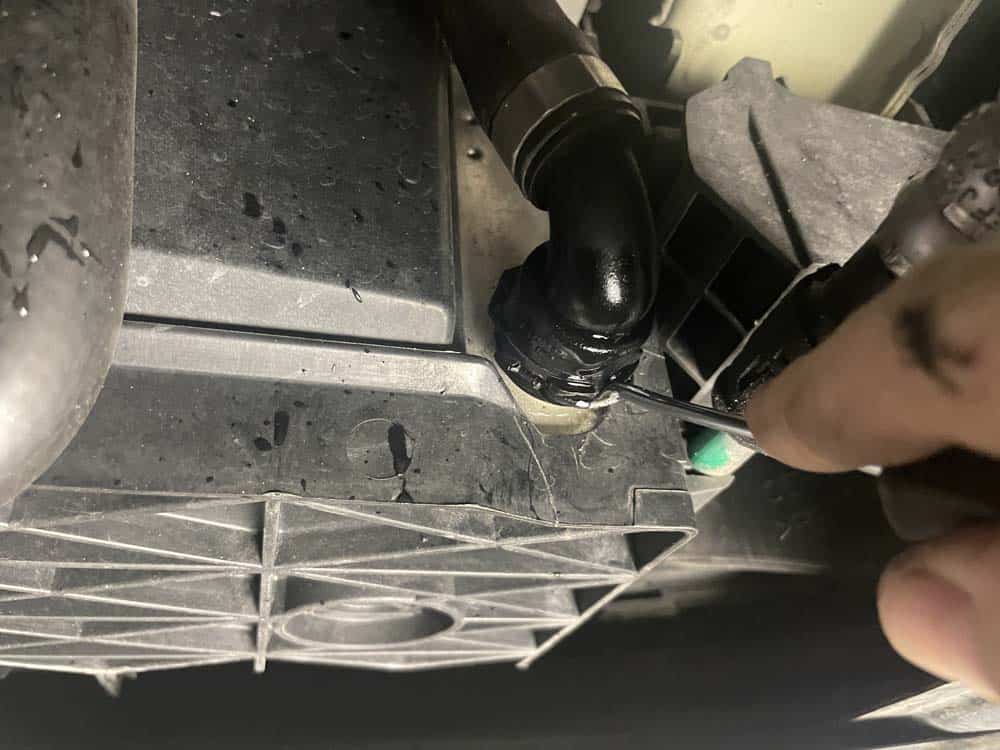
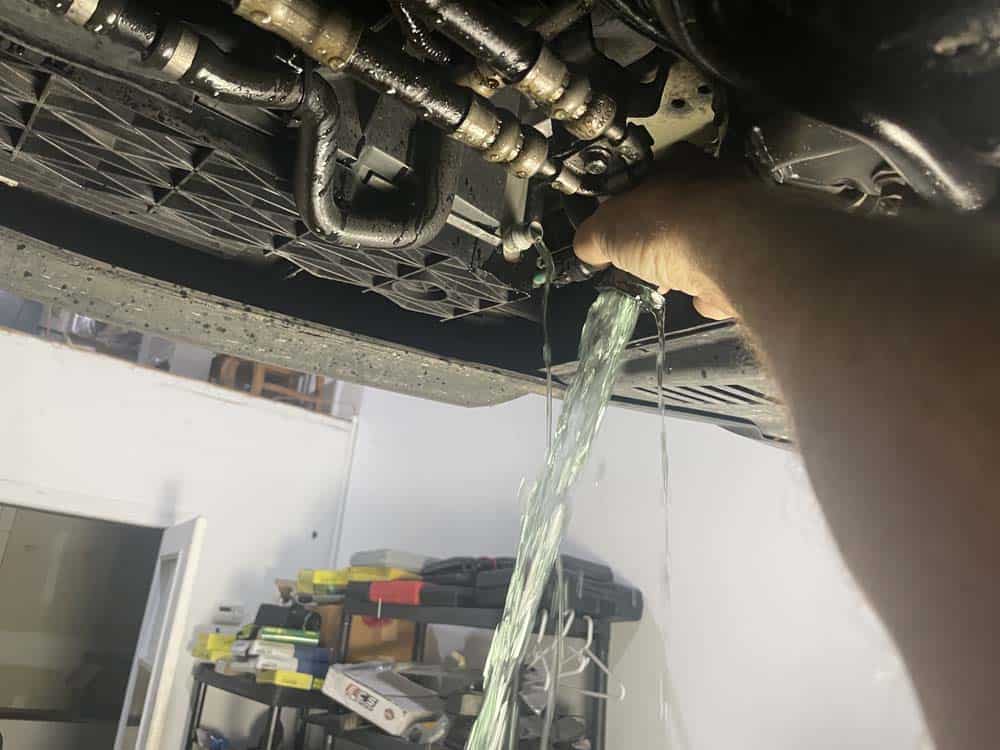
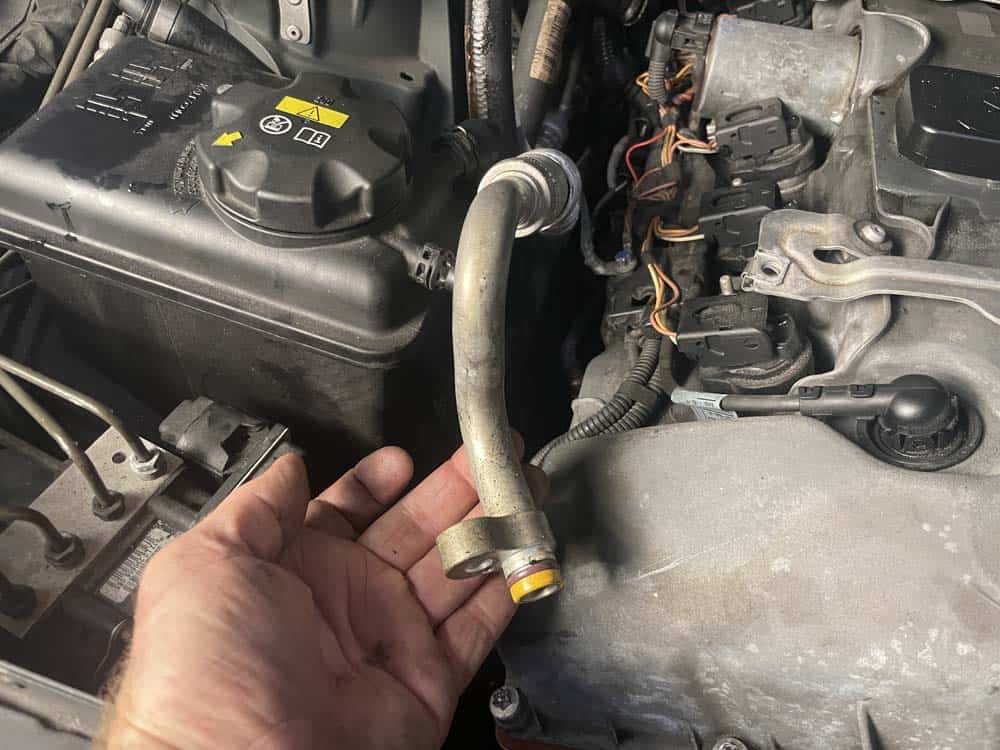
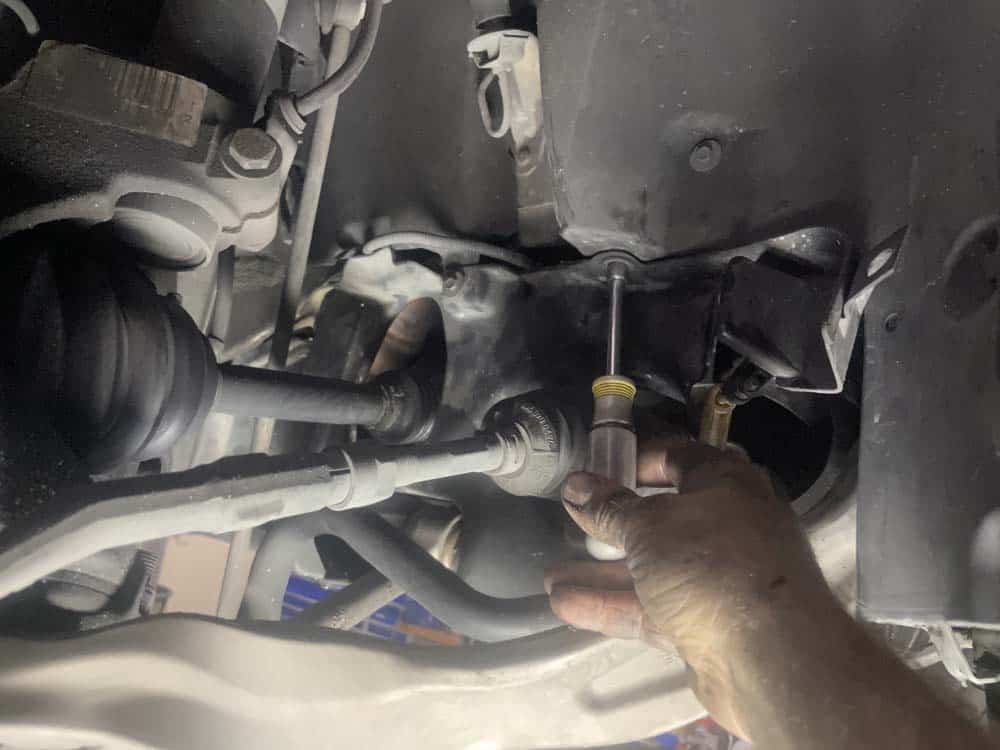
- Remove the oil cooler coolant hose from the oil cooler. Move under the vehicle and disconnect the oil cooler hose from the bottom right side of the radiator. BE CAREFUL! It's full of coolant...have a drain pan ready. Tuck the oil cooler hose out of the work area along with the other coolant lines.
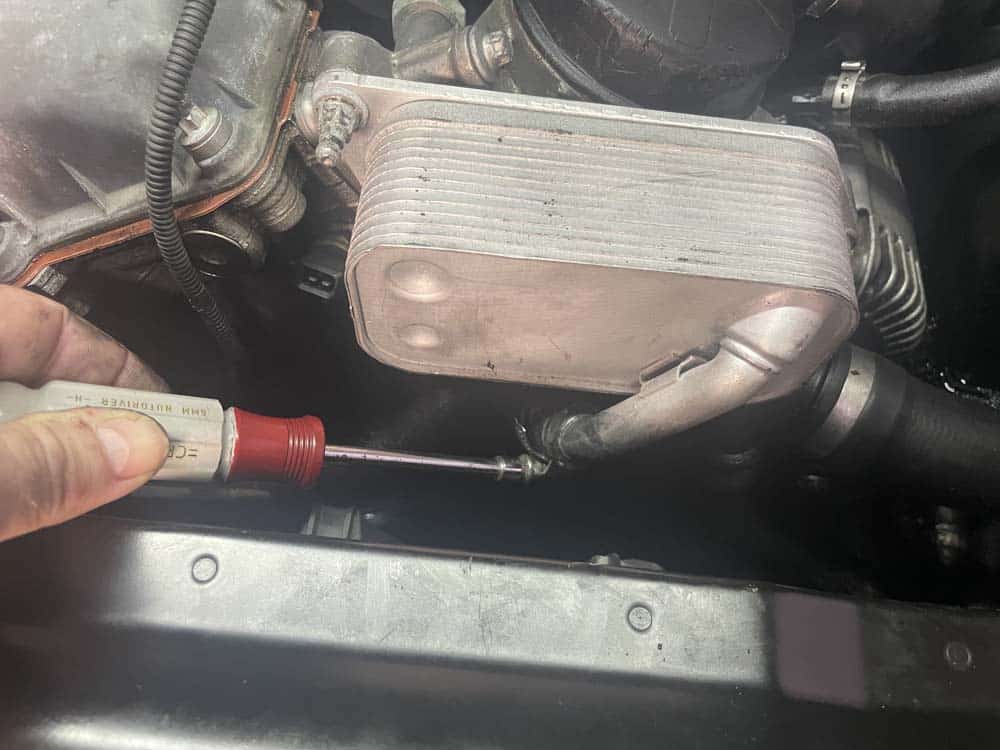
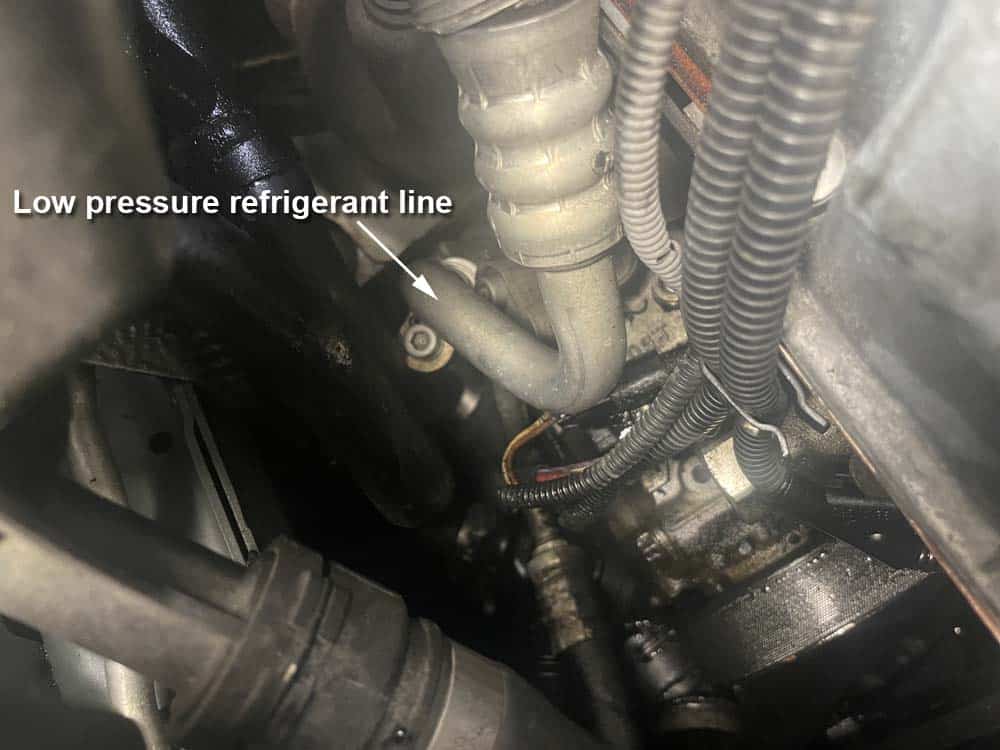
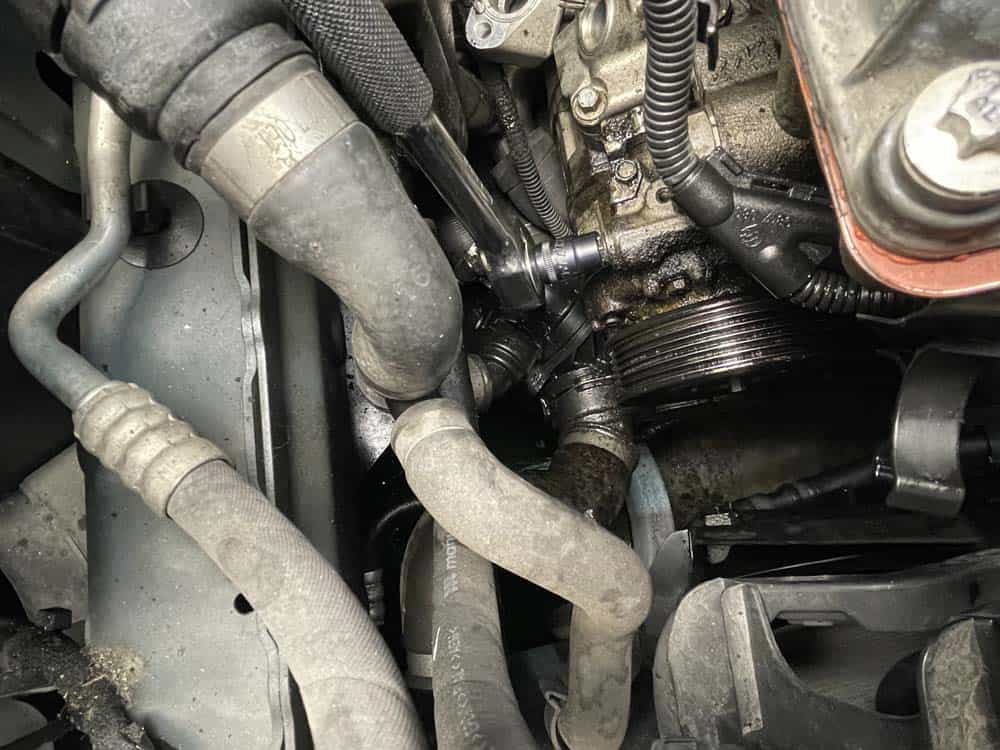
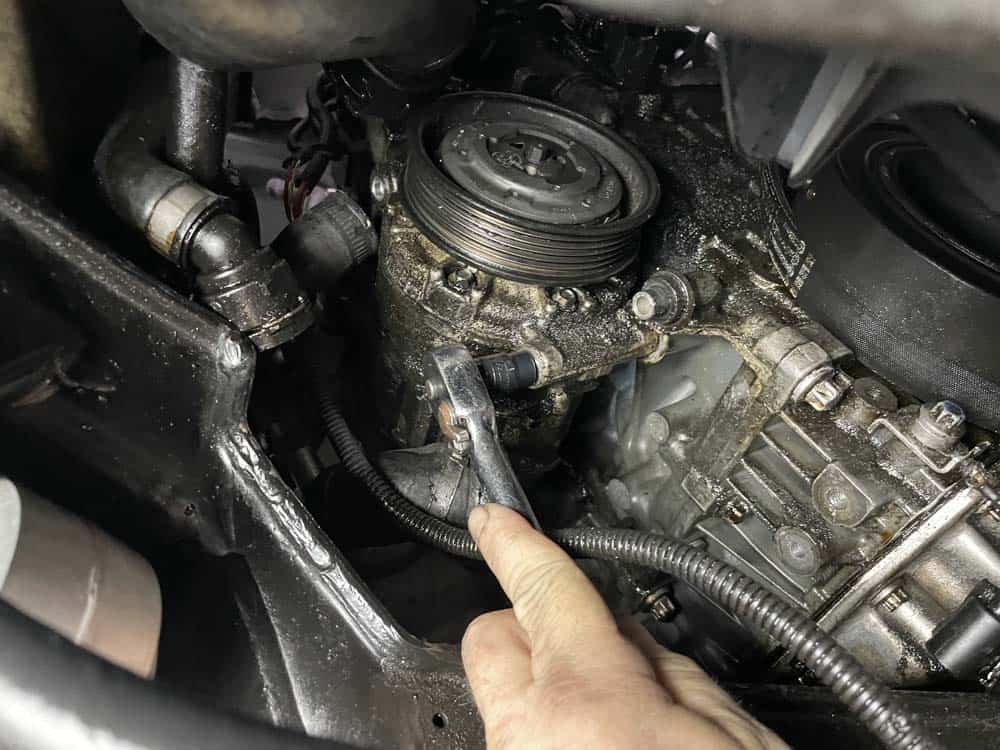
- Locate the low-pressure refrigerant line on the top of the compressor. Remove it with a T40 torx bit.

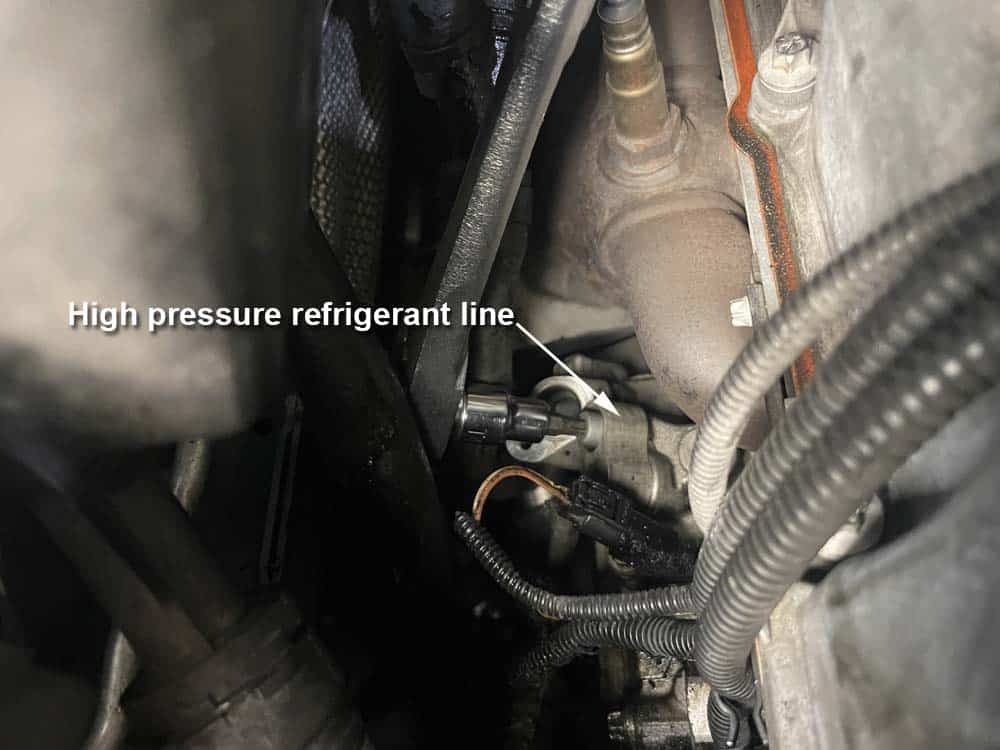
- Locate and remove the high-pressure refrigerant line from the compressor using a T40 torx bit.
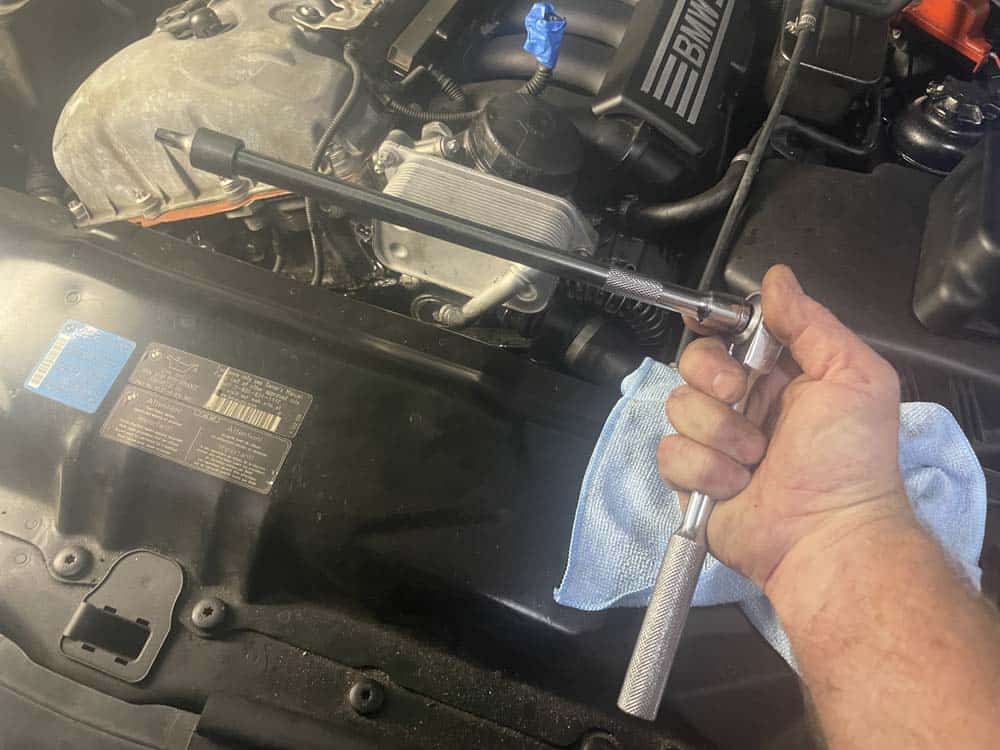
- Using a T50 torx bit, turn the main accessory belt tensioner pulley clockwise to release the pressure on the main accessory belt. Remove the belt from the AC compressor and tuck it away out of the work area. It is not necessary to completely remove the belt unless you are replacing it.
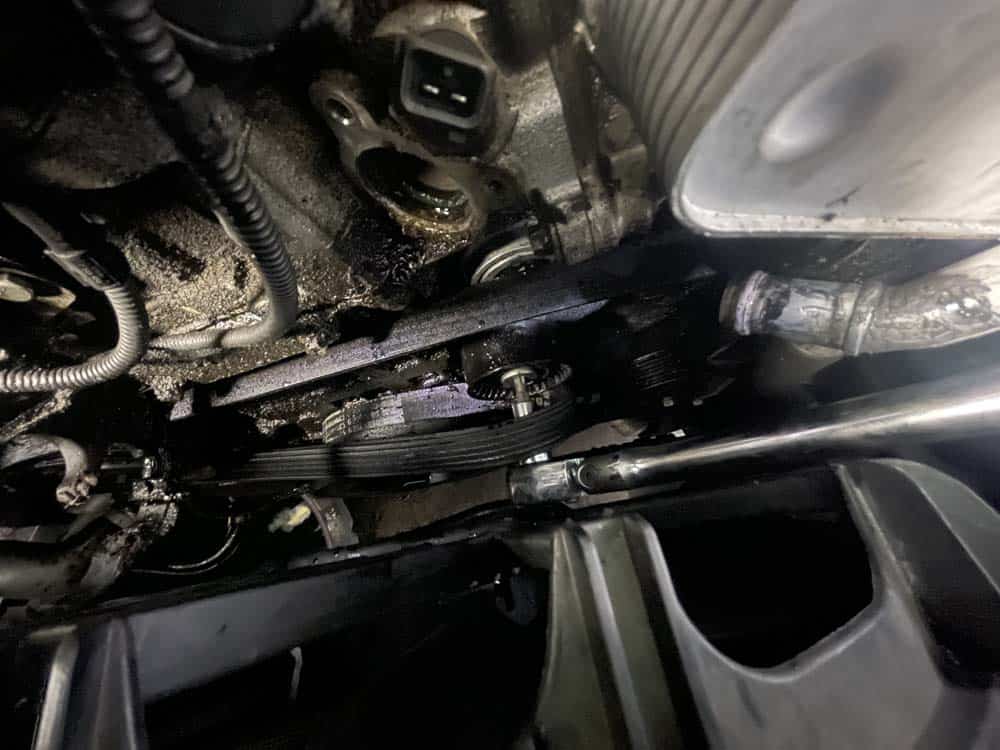
- Using an E12 external torx bit, remove the top compressor mounting bolt.
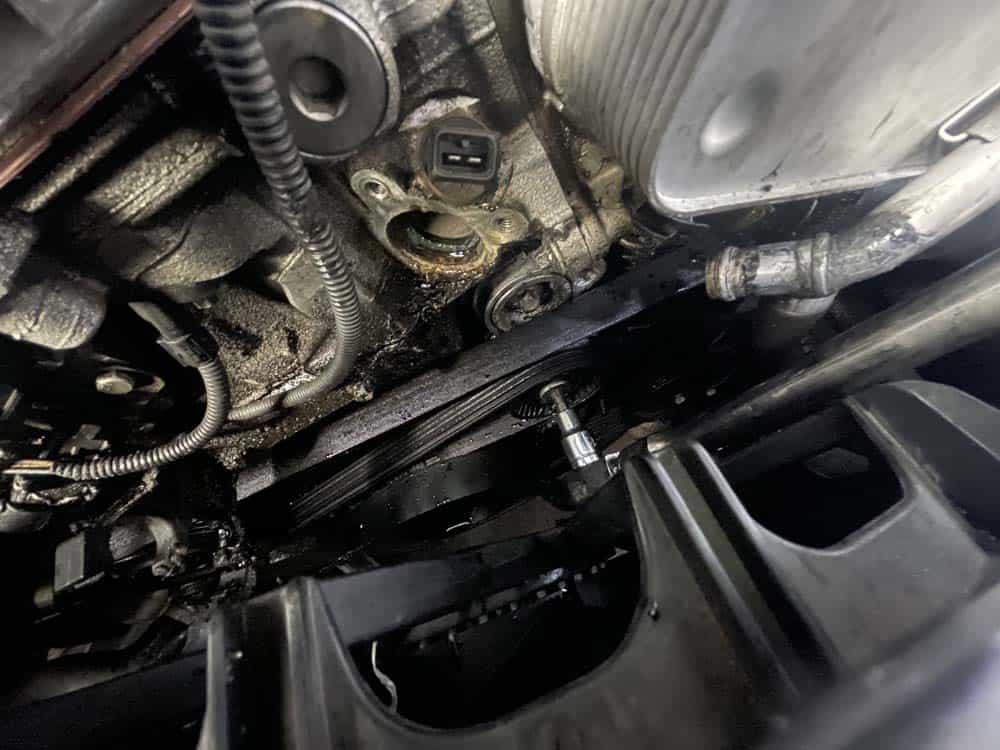
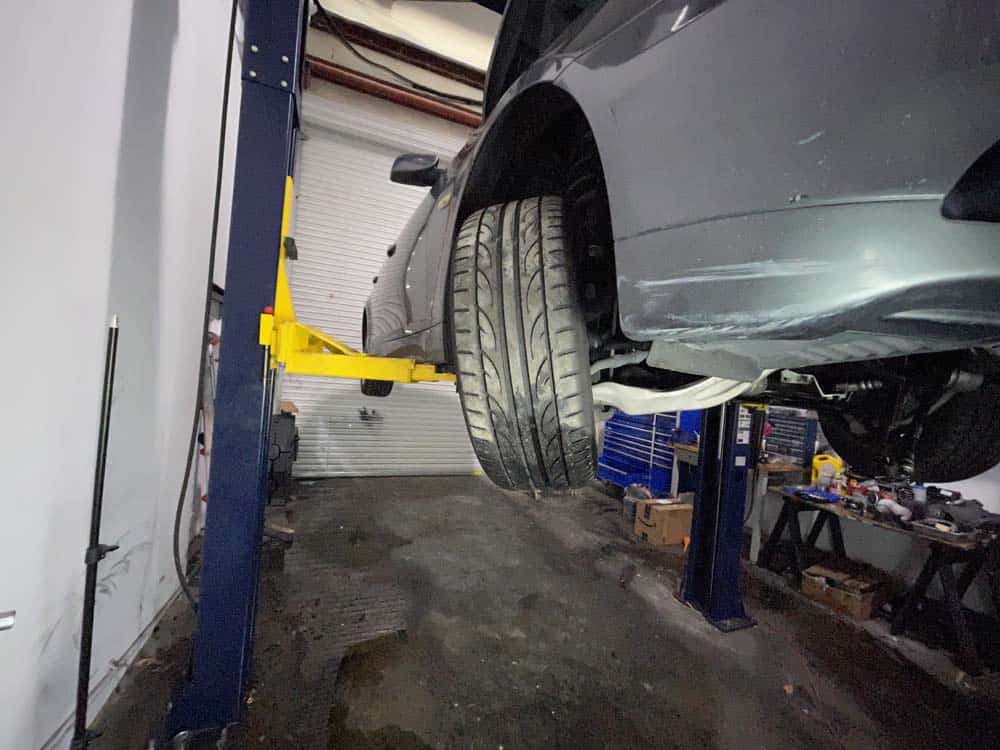
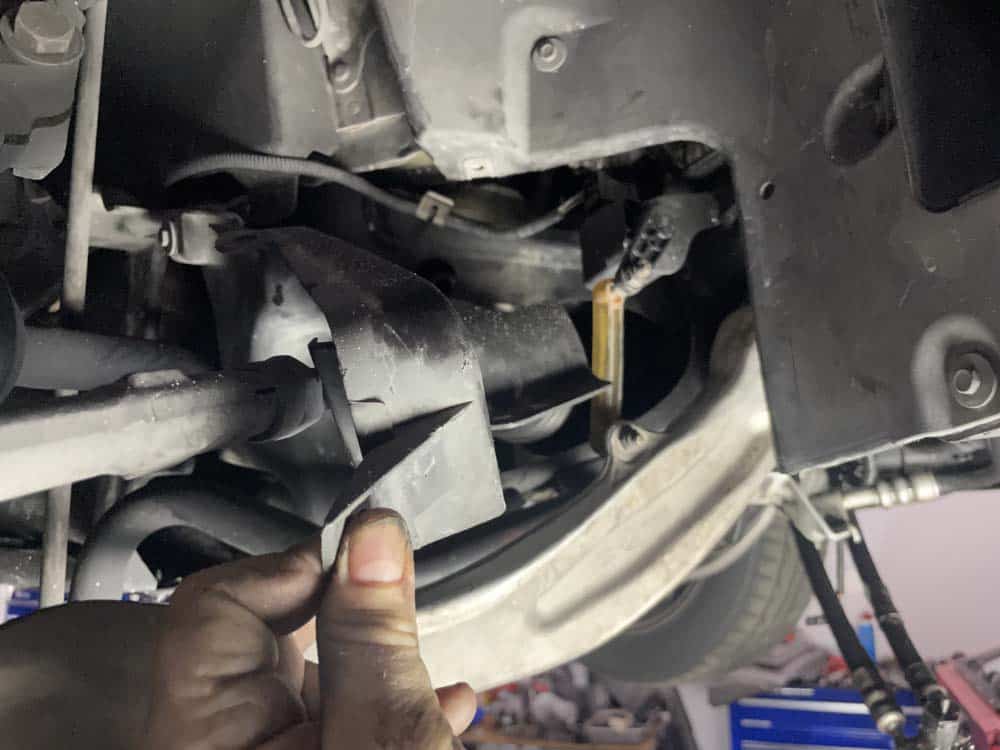
- Next, the lower rear mounting bolt must be removed. In order to access the lower rear mounting bolt, the right front wheel must be removed, the plastic lateral trim removed, and the steering wheel turned all the way to the right. This will allow enough clearance to get a socket extension under the fender to access the rear compressor bolt.
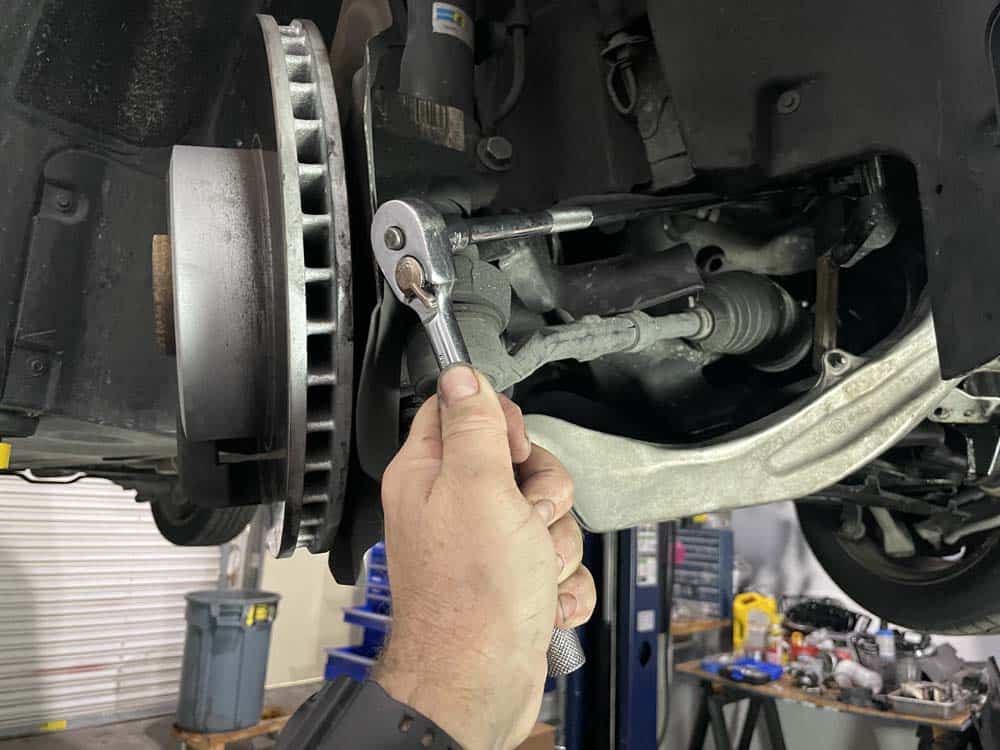
- Using a long socket extension and an E12 external torx socket, remove the rear mounting bolt from the compressor.
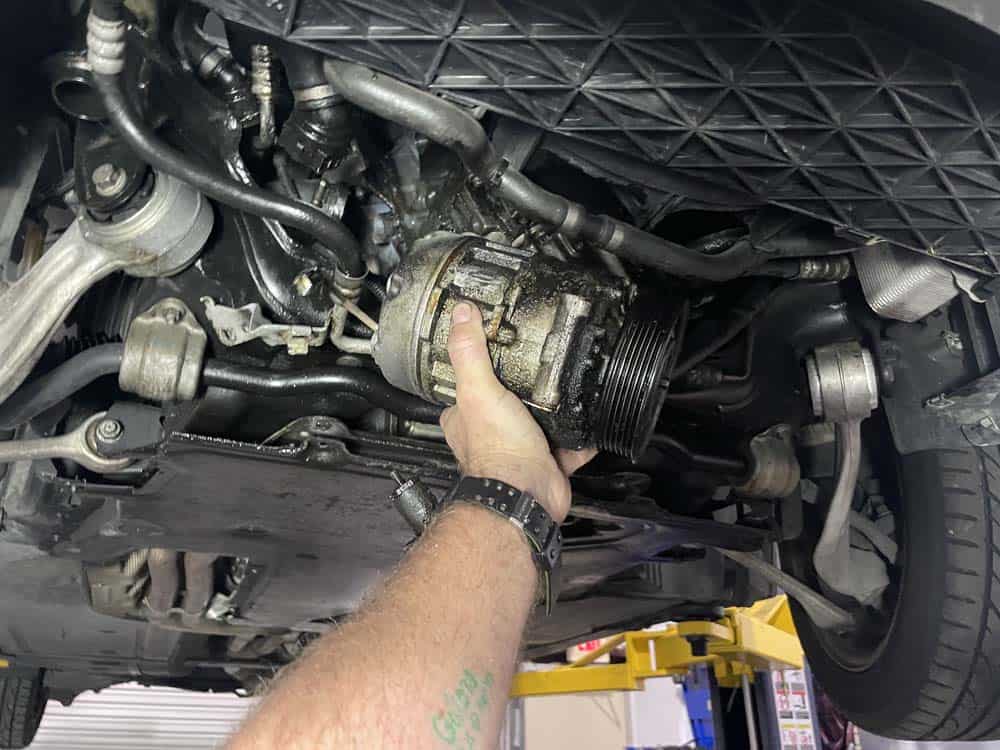
- Finally, while holding the compressor, remove the front mounting bolt. Remove the compressor from the vehicle.
Section 3 - Installing the new compressor
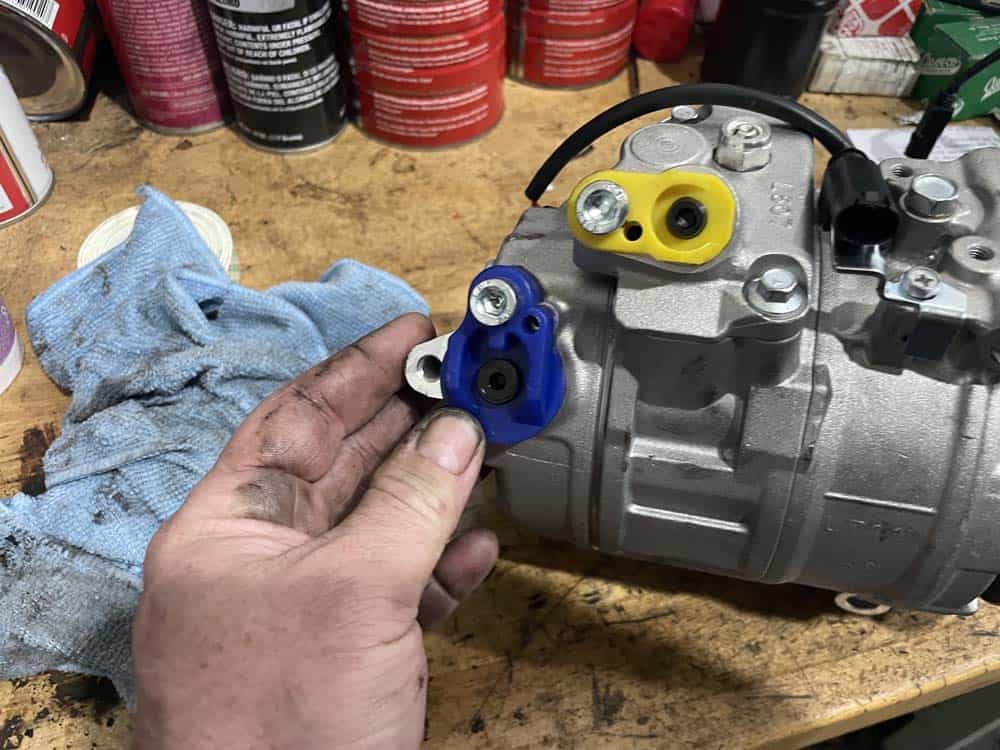
Installing the new compressor is essentially the reverse of the above steps with a few important notes. First, always use new aluminum mounting bolts - never reuse the old ones! Aluminum bolts stretch and should always be replaced. Please see our parts list above to order a set if needed. Second, new compressors come pre-filled with oil - to avoid losing oil, do not remove the plastic plugs on the high and low refrigerant line ports until the compressor is installed. Finally, to avoid the compressor falling out of the bottom of the vehicle and becoming damaged, always install the lower front bolt first. This is the easiest to install and will keep the compressor in place as you install the other two bolts.- The new compressor should come prefilled with oil and with plastic plugs installed in the refrigerant line ports. DO NOT remove these plugs until the compressor is installed back on the engine block.
- Install a new aluminum lower front mounting bolt and hand tighten. DO NOT torque yet.
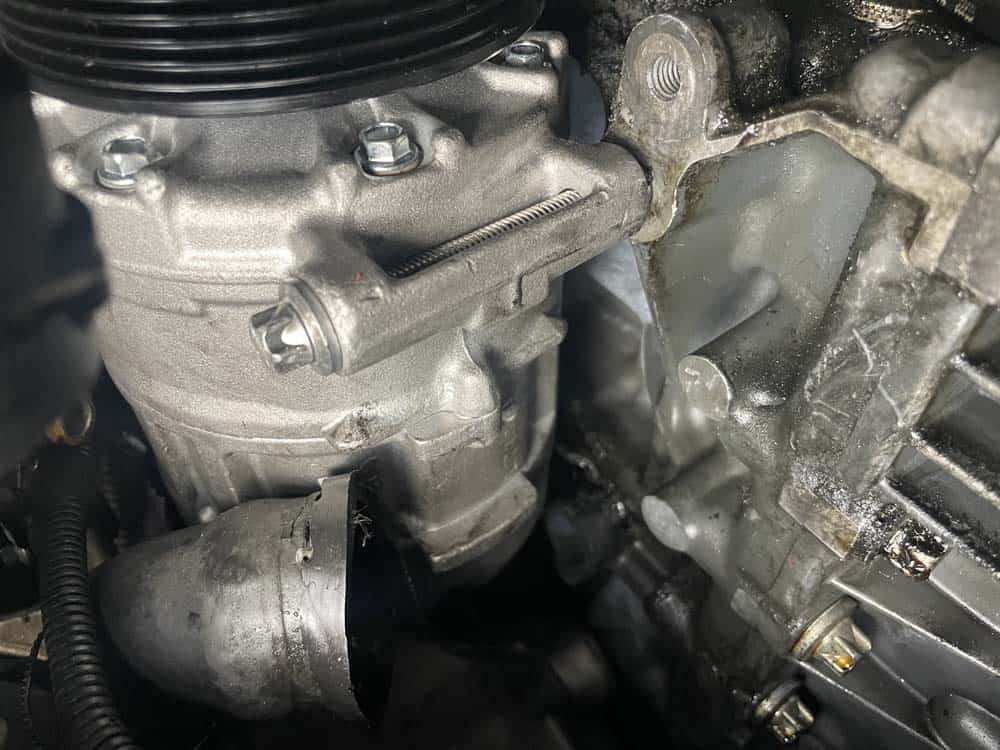
- Install a new upper mounting bolt and hand tighten
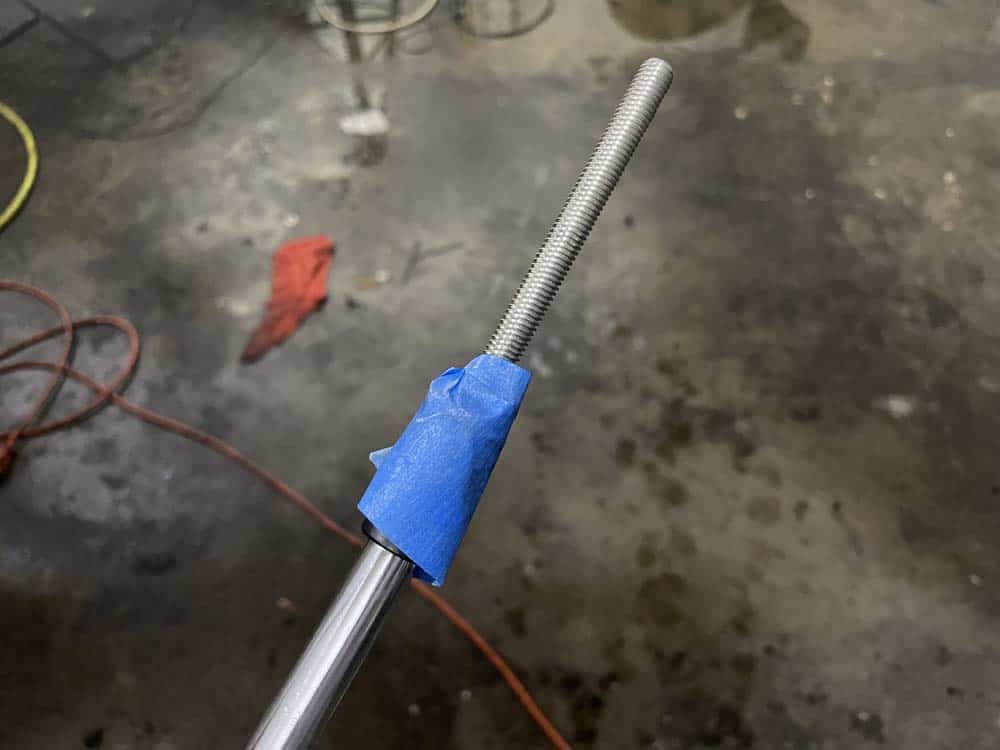
- Install a new lower rear mounting bolt. We suggest holding it in place with some tape to avoid having it fall off of the socket when installing.
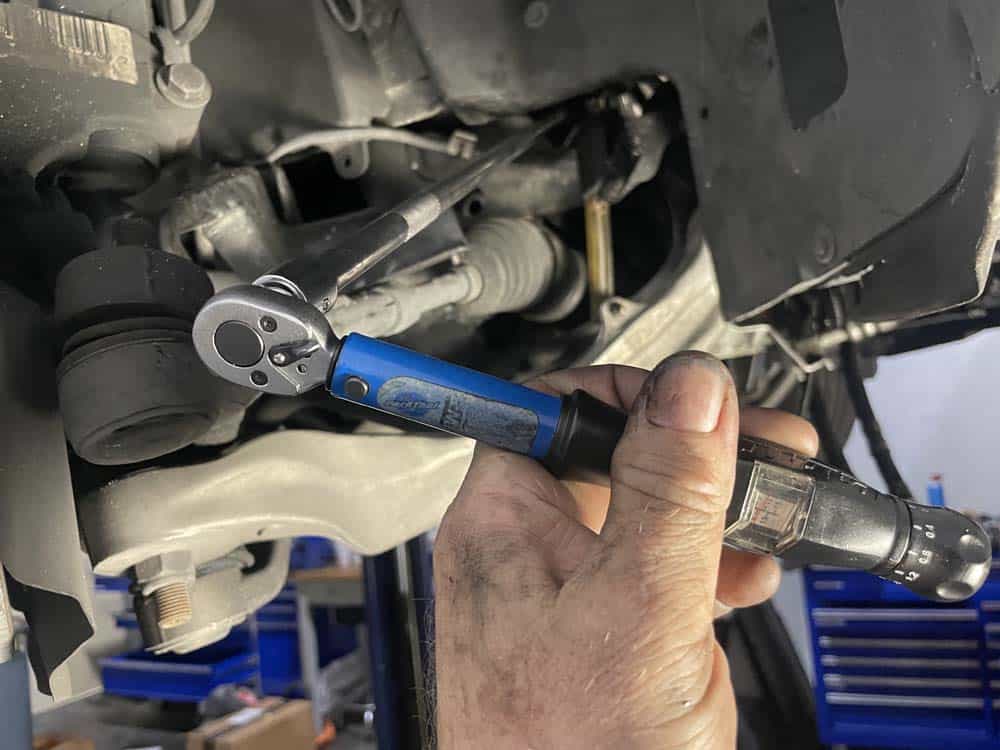
- Starting with the lower rear bolt, torque the bolt to 7 Nm (5 ft-lb). Then using a socket wrench, turn the bolt another 180 degress. The bolt is now torqued to factory specifications.
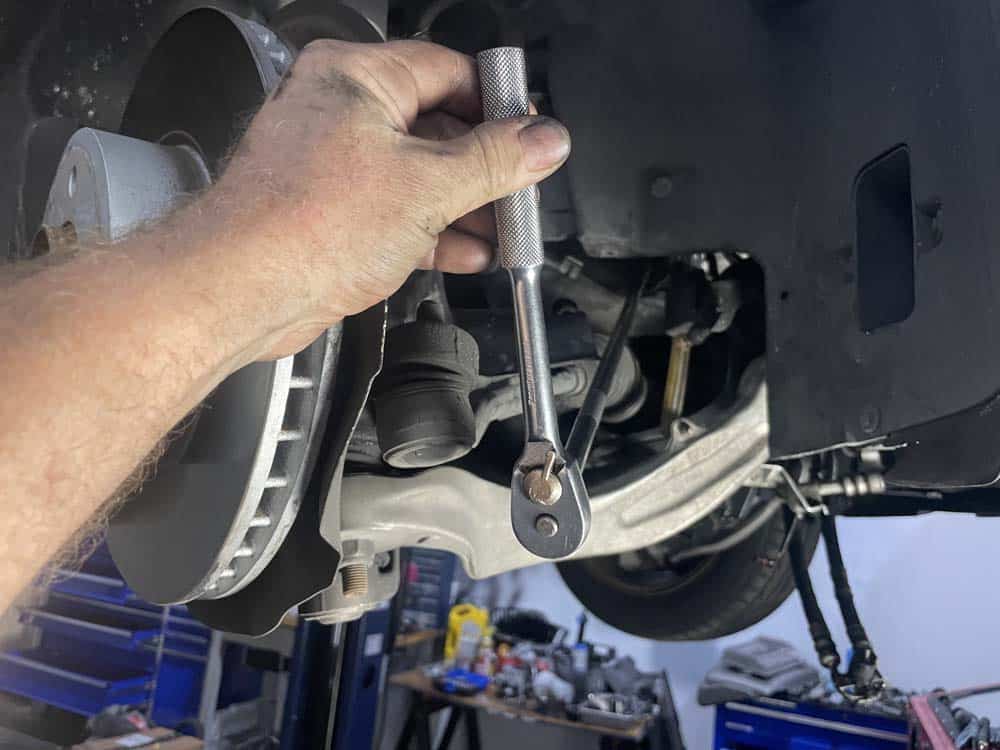
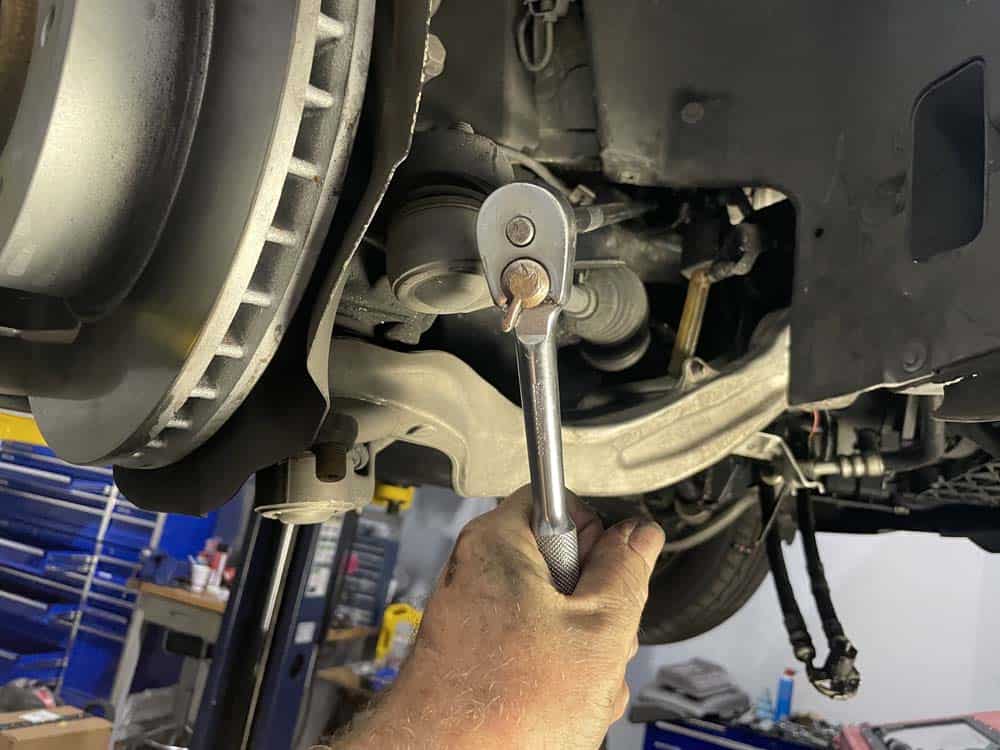
- Repeat step 5 above on the lower front and upper mounting bolts.
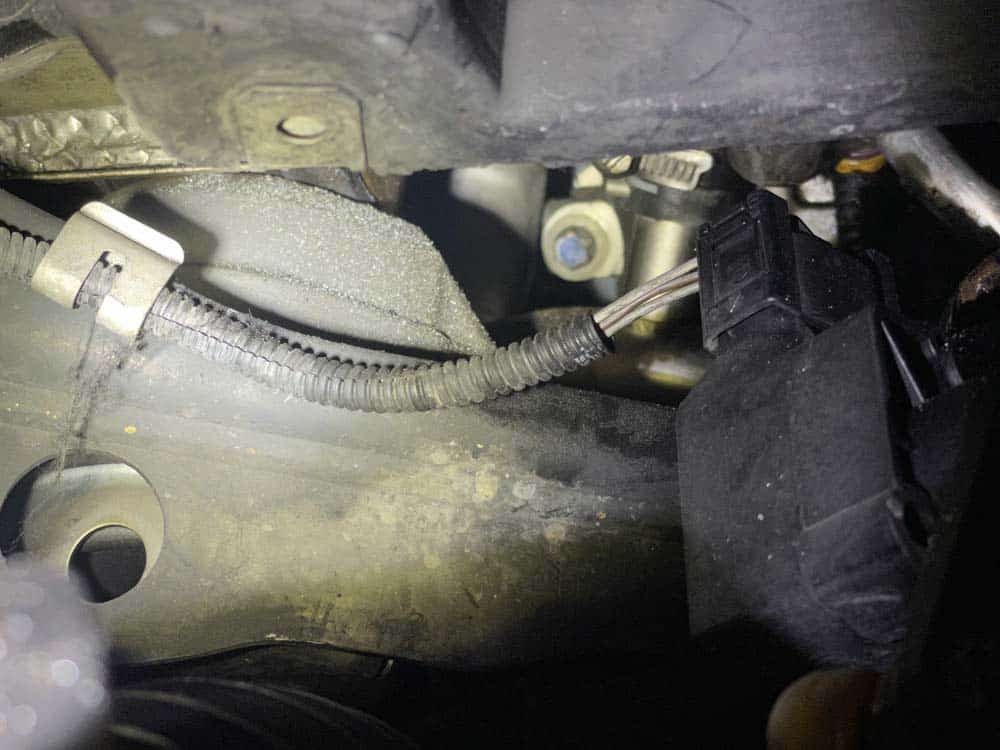
- Plug the electrical connector back into the compressor.
- Reinstall the high and low-pressure refrigerant lines. Torque their mounting bolts to 25 Nm (18.5 ft-lb).
- Reinstall the main accessory belt to confirm it lines up correctly on the compressor's pulley.
- Do not reassemble any more of the vehicle until the system is thoroughly cleaned and checked for leaks. Please refer to the wealth of online articles on how to do this simple proccedure.
Section 4 - Final reassembly
Final reassembly is simply Section 2 steps 1-6 and Section 1 in reverse. Pay extra attention when reinstalling the coolant lines to confirm they "click" properly into place. Also note that the coolant system must be properly bled after it is refilled with fluid. This is an extremely simple procedure that is done automatically by the vehicle's engine control module. For more information on bleeding the coolant system, please refer to our article BMW E60 Water Pump Replacement – 2006-2010 5 Series – N52 6 Cyl.Section 5 - Recharging the system
As previously discussed, there are numerous online articles dealing with recharging the AC system with 134a refrigerant. It is a straightforward process that can be performed by any home mechanic. Remember, you do not have to be a licensed HVAC technician to recharge your vehicle's AC system as long as you are not being compensated for the job.BMW E60 AC Compressor Replacement Finished