
Affiliate link disclosure – The BMW Repair Guide uses affiliate links in their site. For more information on affiliate links, please click here.
Repair Summary
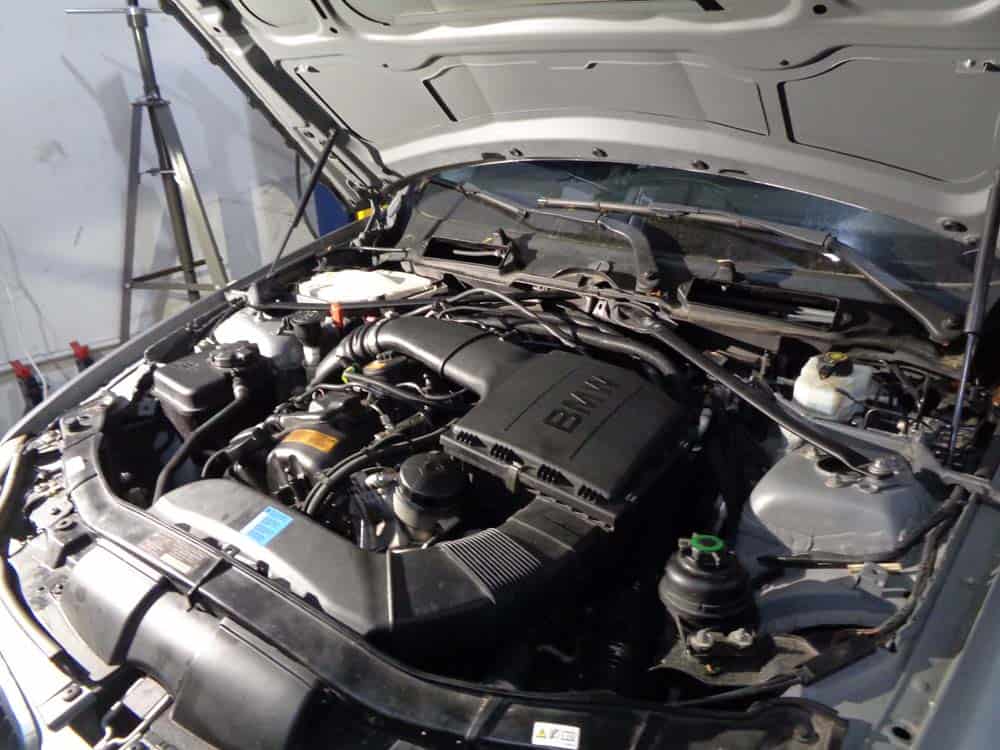
This article covers replacing the high pressure fuel pump in a BMW E90 with the N55 turbocharged engine. Even though we used a 2011 335i to perform this repair, this article can be applied to any BMW vehicle with the N54/N55 turbocharged engine including the 1,3,5,7,X3,X5,X6,Z4 series with minor modifications to the repair steps.
See all vehicles this article applies to
E88 1 Series 135i
E82 1 Series 135i
F20 1 Series M135iX
F20 1 Series M135i
F20N 1 Series M135iX
F20N 1 Series M135i
F21 1 Series M135iX
F21 1 Series M135i
F21N 1 Series M135iX
F21N 1 Series M135i
F22 2 Series M235iX
F22 2 Series M235i
F87 2 Series M2
F87N 2 Series M2
F23 2 Series M235iX
F23 2 Series M235i
E90N 3 Series 335xi
E90N 3 Series 335i
E91N 3 Series 335xi
E91N 3 Series 335i
E92N 3 Series 335xi
E92N 3 Series 335i
E93N 3 Series 335i
F30 3 Series Hybrid 3
F30 3 Series 335iX
F30 3 Series 335i
F31 3 Series 335iX
F31 3 Series 335i
F34 3 Series 335iX
F34 3 Series 335i
F35 3 Series 335Li
F35N 3 Series 335Li
F32 4 Series 435iX
F32 4 Series 435i
F33 4 Series 435i
F33 4 Series 435iX
F36 4 Series 435i
F36 4 Series 435iX
F07 5 Series 535i
F07 5 Series 535iX
F07N 5 Series 535i
F07N 5 Series 535iX
F10 5 Series Hybrid 5
F10 5 Series 535iX
F10 5 Series 535i
F10N 5 Series Hybrid 5
F10N 5 Series 535iX
F10N 5 Series 535i
F11 5 Series 535iX
F11 5 Series 535i
F11N 5 Series 535iX
F11N 5 Series 535i
F18 5 Series 535Li
F18N 5 Series 535Li
F06 6 Series 640iX
F06 6 Series 640i
F06N 6 Series 640iX
F06N 6 Series 640i
F12 6 Series 640i
F12 6 Series 640iX
F12N 6 Series 640iX
F12N 6 Series 640i
F13 6 Series 640iX
F13 6 Series 640i
F13N 6 Series 640iX
F13N 6 Series 640i
F01N 7 Series Hybrid 7
F01N 7 Series 740i
F02N 7 Series Hybrid 7L
F02N 7 Series 740LiX
F02N 7 Series 740Li
E84 X1 Series X1 35iX
F25 X3 Series X3 35iX
F26 X4 Series X4 M40iX
F26 X4 Series X4 35iX
E70N X5 Series X5 40iX
E70N X5 Series X5 35iX
F15 X5 Series X5 35iX
F15 X5 Series X5 35i
E71 X6 Series X6 40iX
E71 X6 Series X6 35iX
F16 X6 Series X6 35iX
F16 X6 Series X6 35i
If your twin turbo N54/N55 engine is hard to start, is experiencing cylinder misfires, idling rough, and(or) is in "limp mode", you may need a BMW high pressure fuel pump (HPFP) replacement.
It is well known that BMW has had issues with the direct injection system on its turbocharged 6 cylinder N54/N55 engines. These issues are directly related to failure of the high pressure fuel pump - or "injection exchange pump" - on popular models such as the 135i, 335i and 535i vehicles. For a complete list of BMW vehicles affected by premature failure of the high pressure fuel pump, please click the model box at the beginning of this article.
Causes for a BMW high pressure fuel pump failure are not always straightforward, although recent investigation has pointed towards poor engine oil service intervals or use of the incorrect engine oil (not BMW certified) as the likely culprits (see our article on choosing the correct engine oil for your vehicle). Since the pump is driven by the engine camshaft, improper lubrication can wreak havoc on its internal parts. Other causes for failure are fuel leakage and solenoid issues.
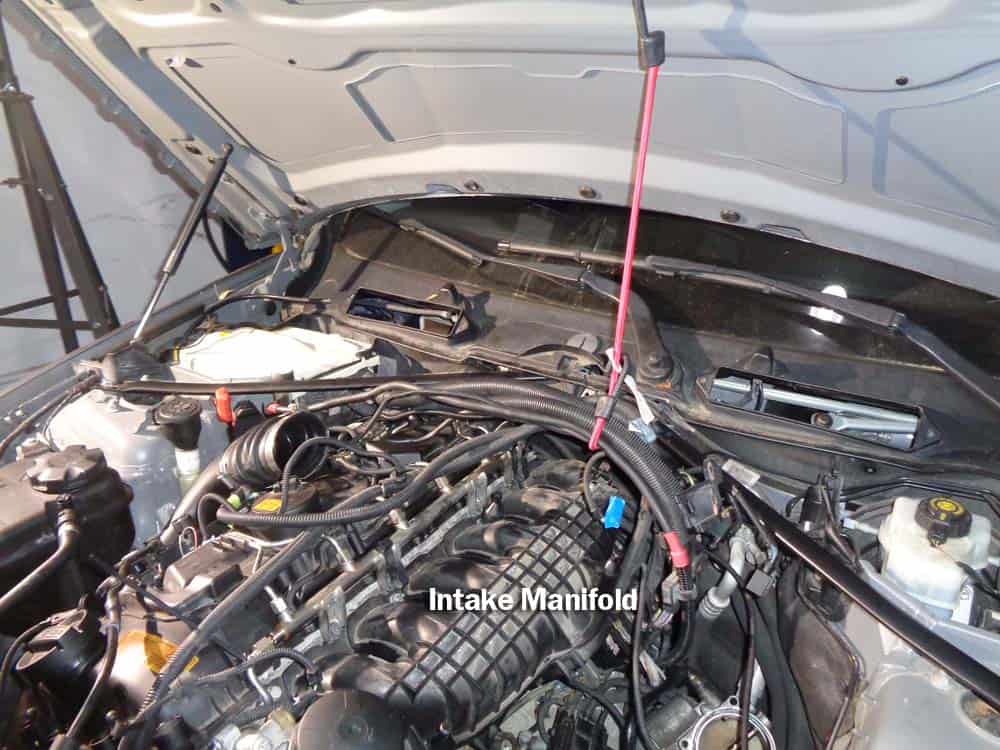
A BMW high pressure fuel pump replacement is a fairly straightforward repair with one caveat: the intake manifold must also be removed from the engine in order to access the fuel pump mounting bolts. Since the intake manifold must be removed, you should also replace your intake gaskets which are also prone to failure if reused. You should also replace the o-ring on your throttle body since it must be removed as well.
***Avoid purchasing "cheap" generic branded fuel pumps on sites like Amazon or eBay. We have dealt with multiple reports of these generic pumps failing with less than 1000 miles of driving on them. THESE PUMPS WILL FAIL. The BMW Repair Guide strongly recommends only installing a Genuine BMW pump for this repair.


View the detailed parts diagram for this repair.
Includes detailed part diagrams, part numbers and links to purchase all of the required components needed to complete this repair.

Before starting this repair, you must have the following required parts.
All N54 and N55 turbocharged engines
This is the same factory high pressure fuel pump installed at the BMW dealership. Fits all BMW vehicles with the N54/N55 turbocharged engine.
All N52, N54, and N55 engines
Intake gaskets go in between the head and the intake runners. We reccomend replacing these gaskets when doing removal and re-install of intake manifolds.
All BMW N54 and N55 engines
This is the same factory throttle body gasket that would be installed at the BMW dealership.
Fits all BMW vehicles
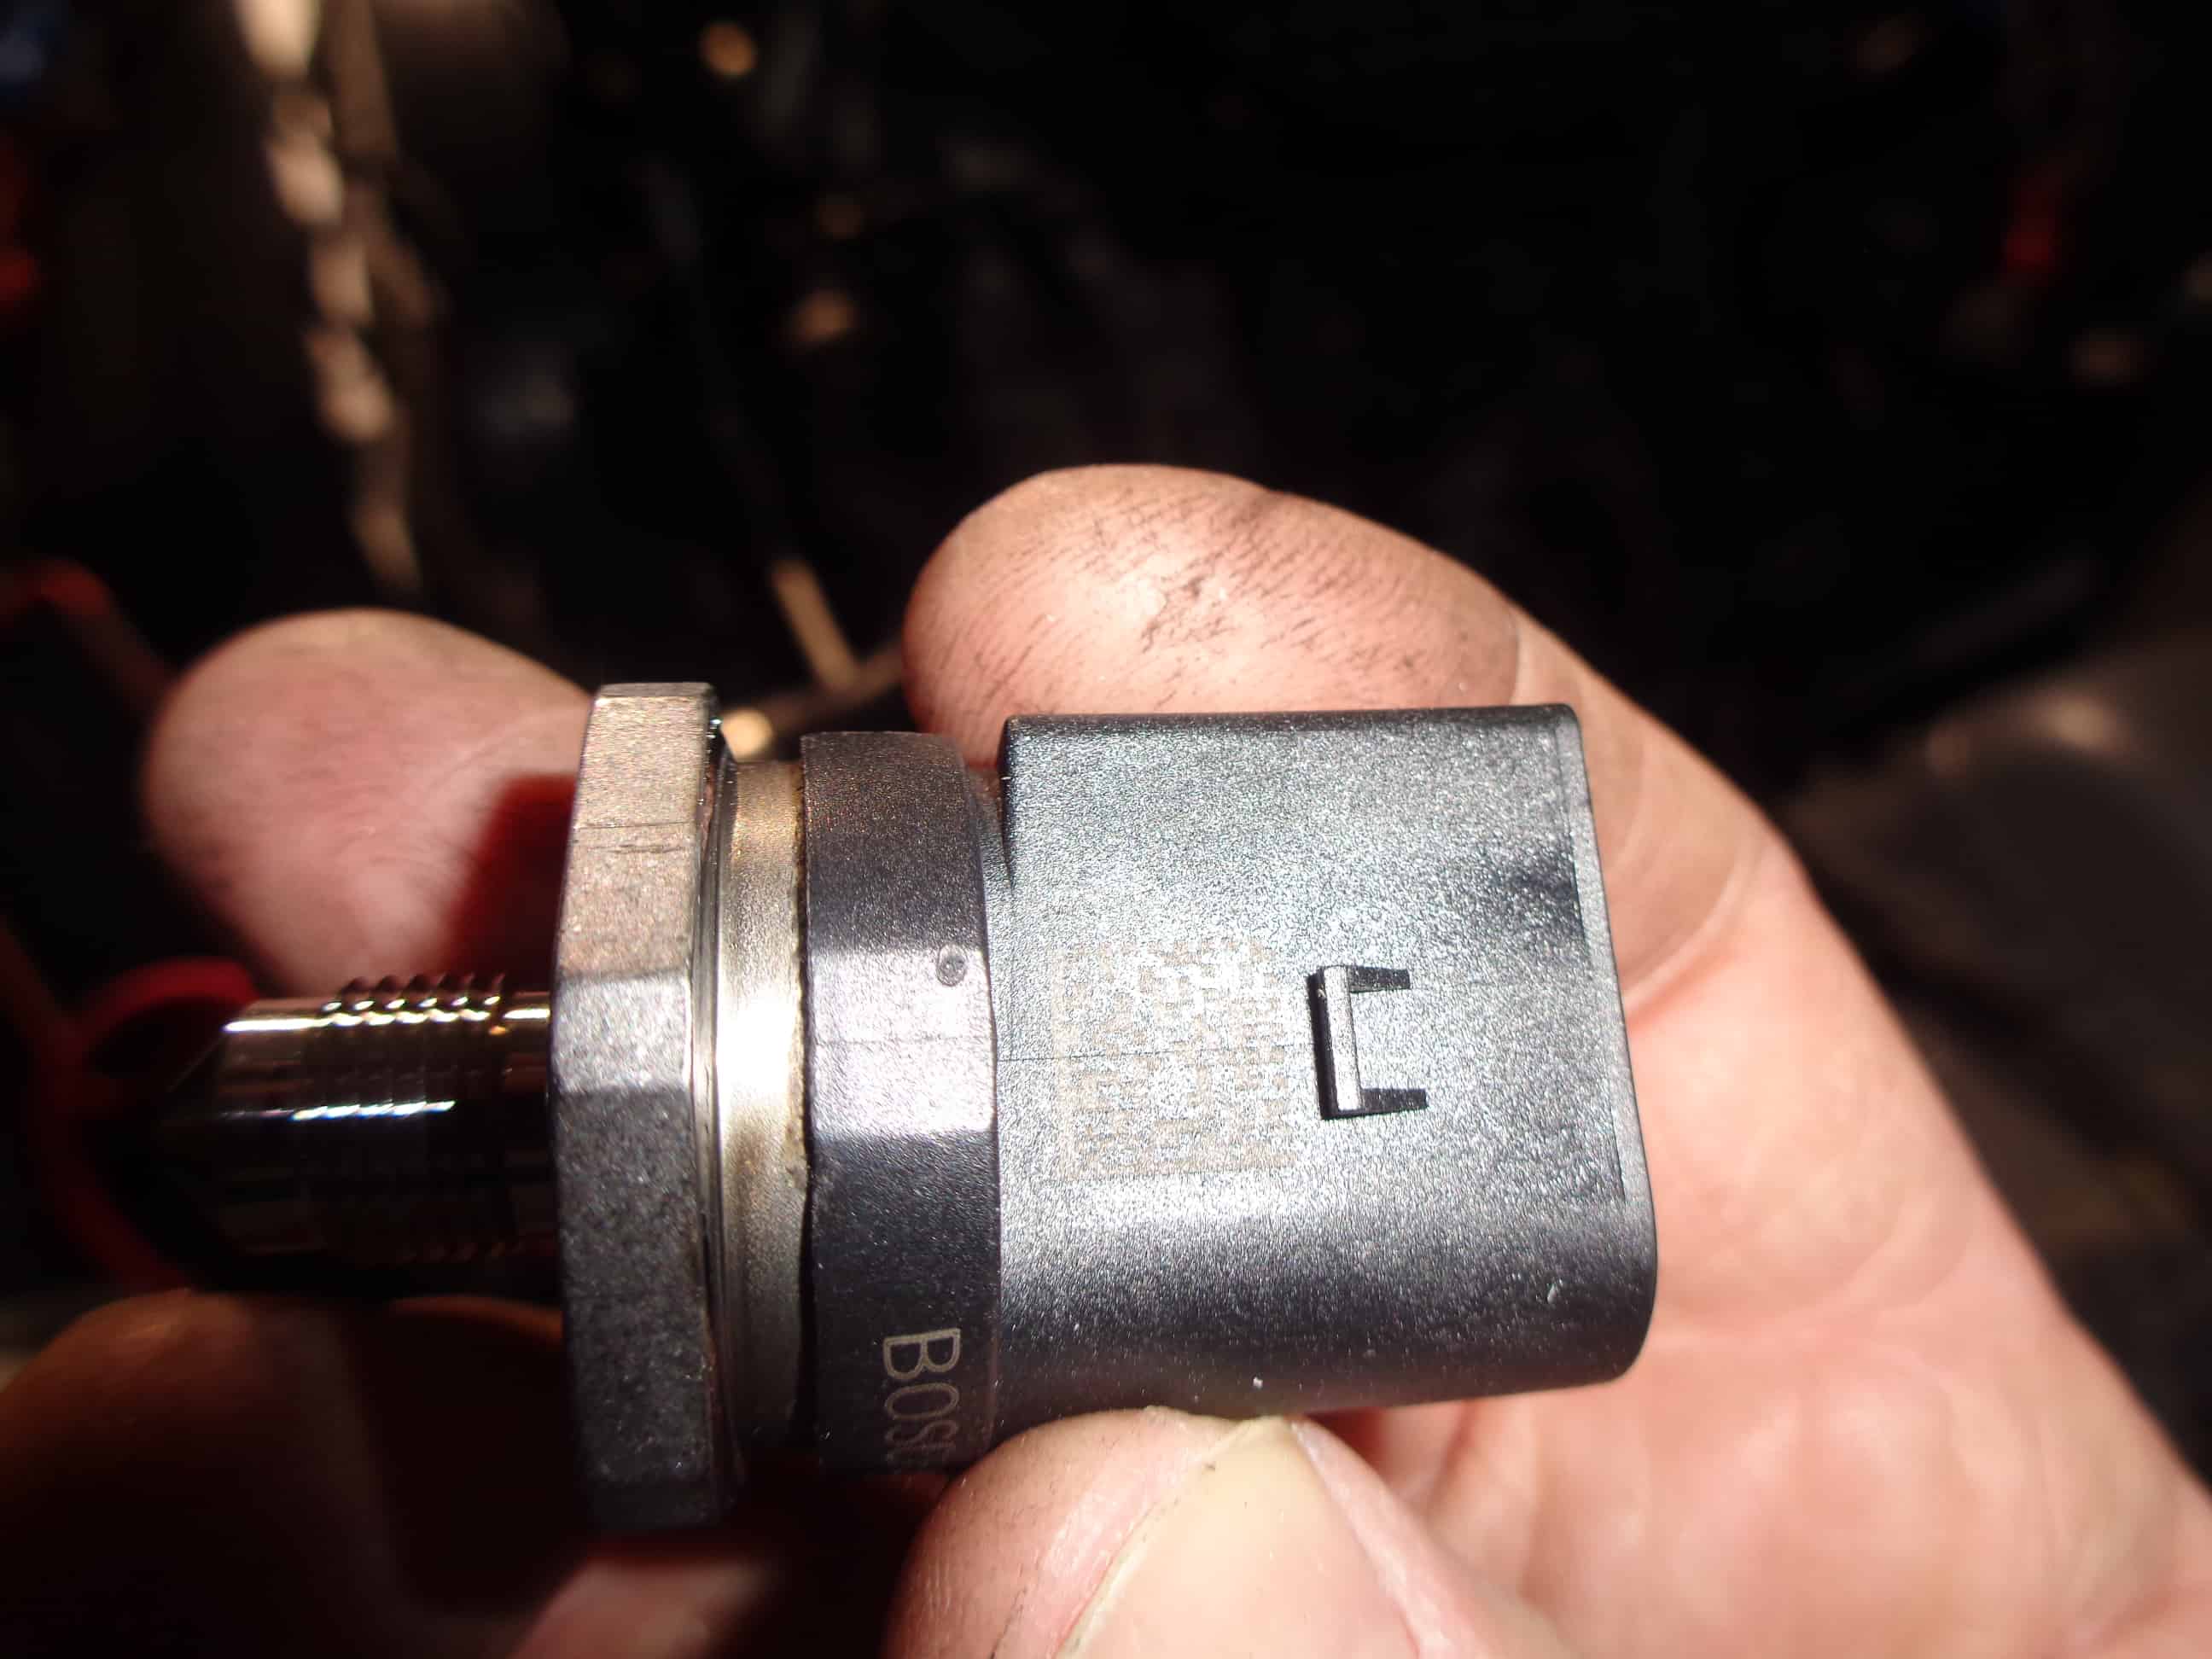
This sensor monitors the fuel pressure coming from the fuel pump to regulate how much fuel your engine is getting. It monitors for low fuel pressure to let you know if there are issues with your high pressure fuel pump.
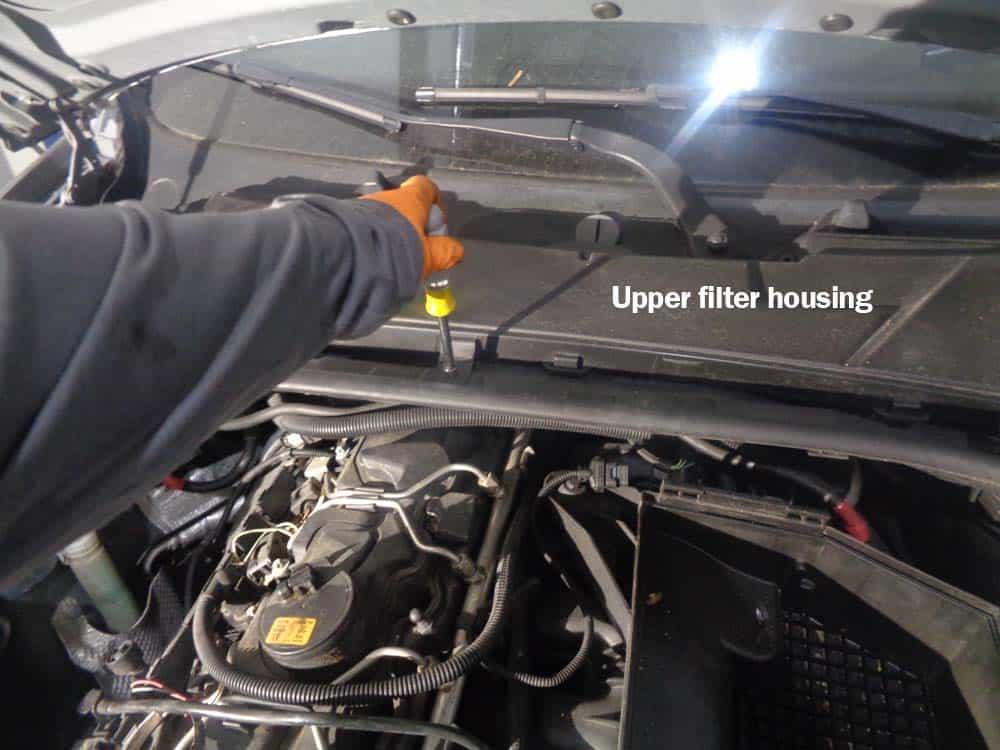
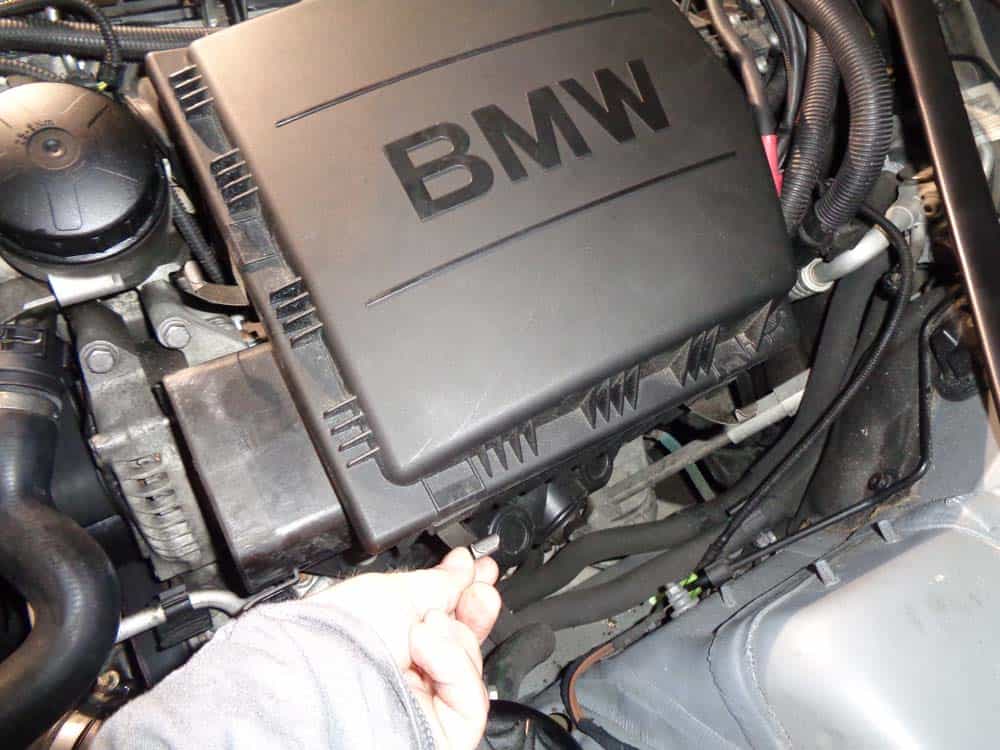
Section 1 - Cabin Filter Housing Removal
The cabin filter housing is located at the back of the engine and must be removed to gain access to the intake manifold.- Remove the five 8mm screws anchoring the upper filter housing. Remove upper filter housing from vehicle.
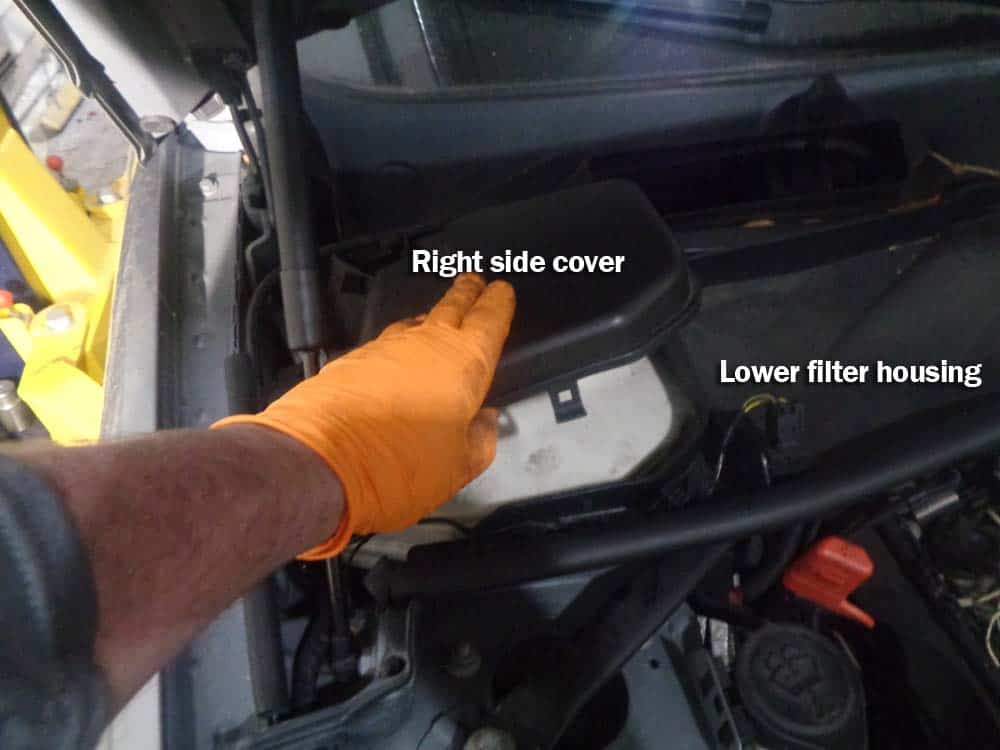
- Unsnap and remove the two side covers (both left and right) from the lower filter housing and remove from vehicle.
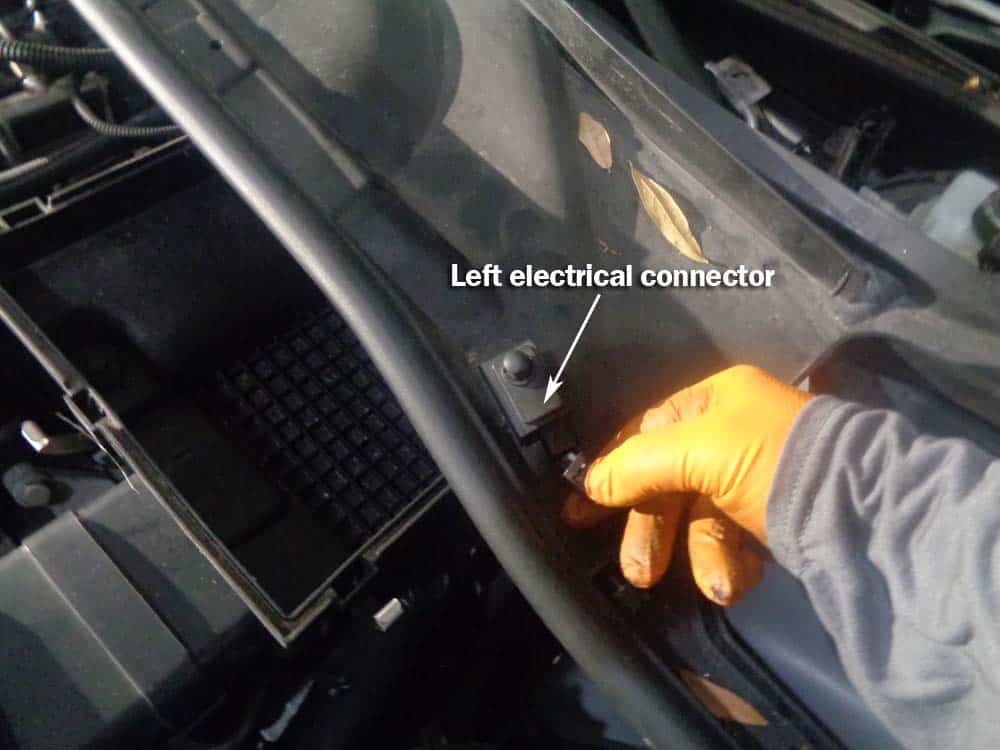
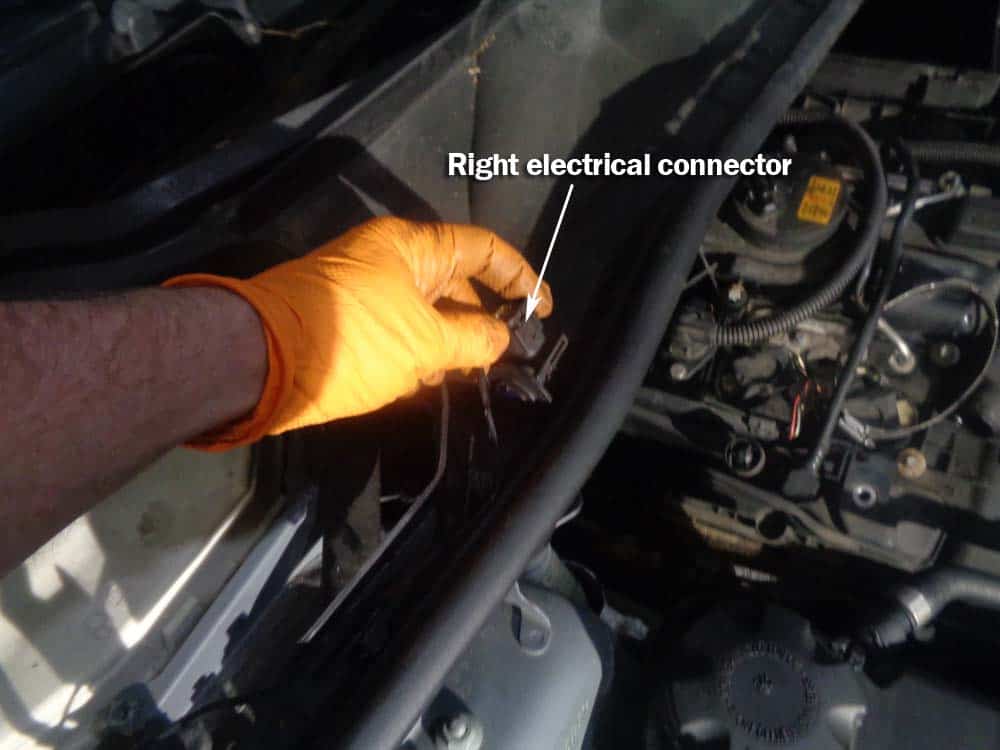
- Remove the right and left electrical connections from the lower filter housing.
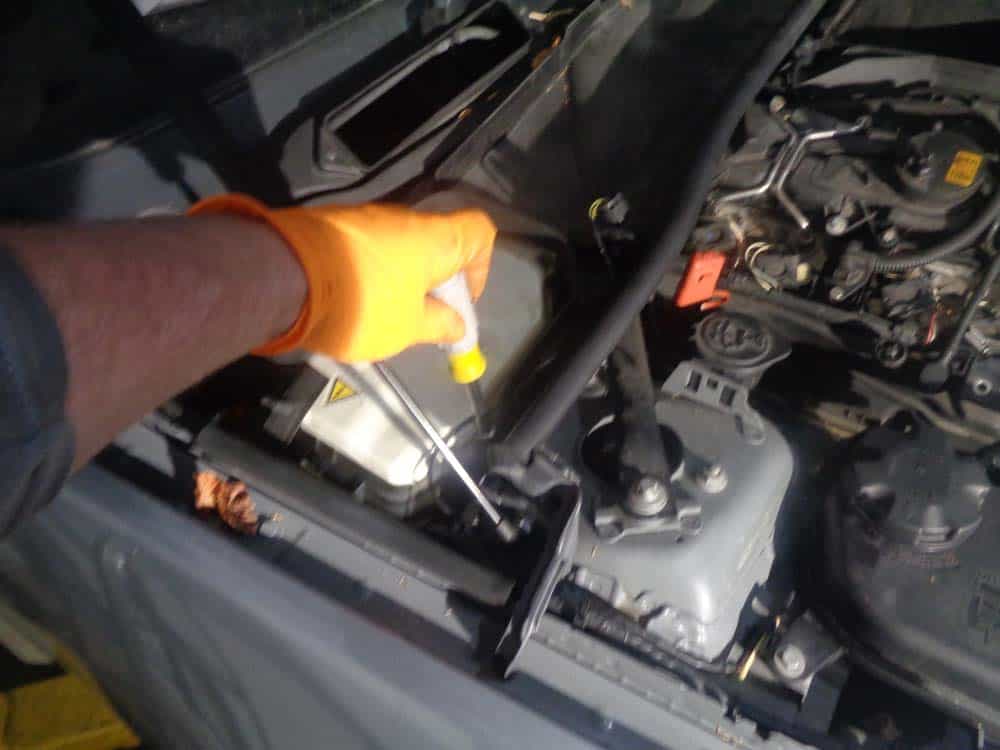
- Use an 8mm nut driver to remove the two screws anchoring the lower filter housing to the vehicle. There is a screw on both the right and left side of the lower filter housing.
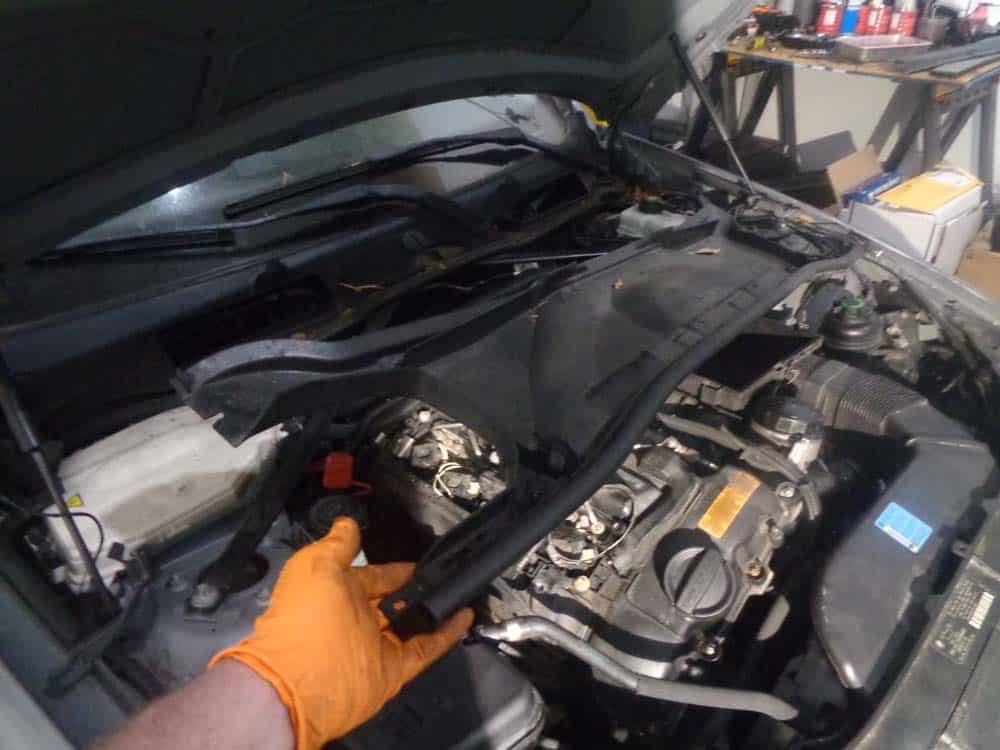
- Remove the lower filter housing from the vehicle.
Section 2 - Removing the Air Intake and Throttle Body
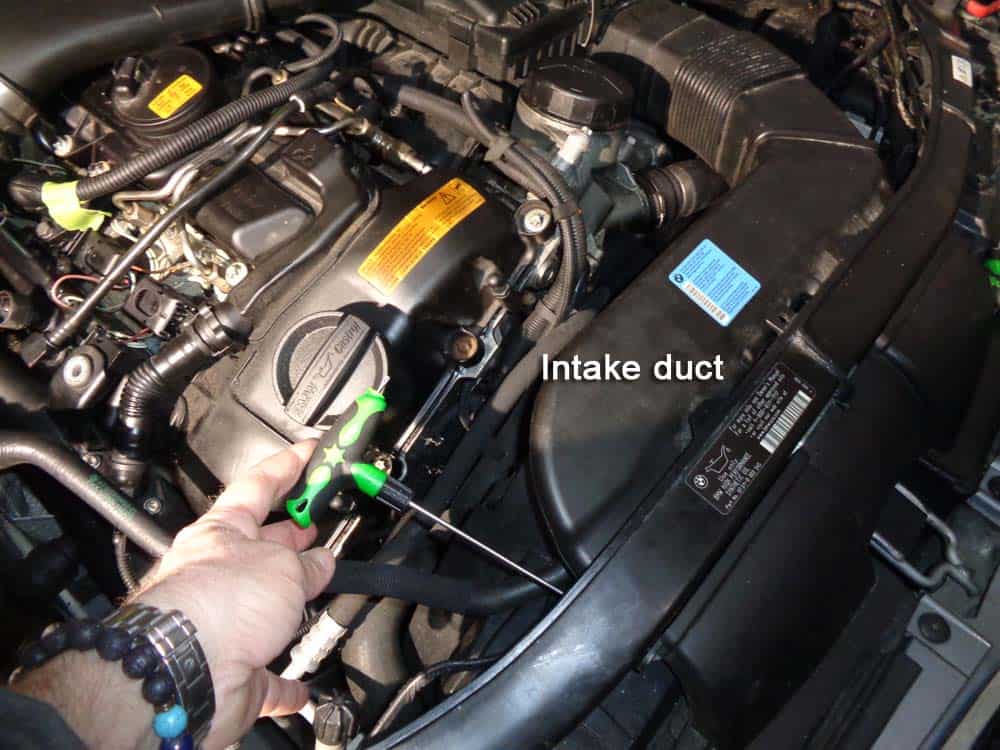
- Use a T20 torx bit (or phillips head screwdriver) to remove the two screws anchoring the intake duct to the front of vehicle.
- Unsnap the intake duct from the air cleaner assembly and remove from the vehicle.
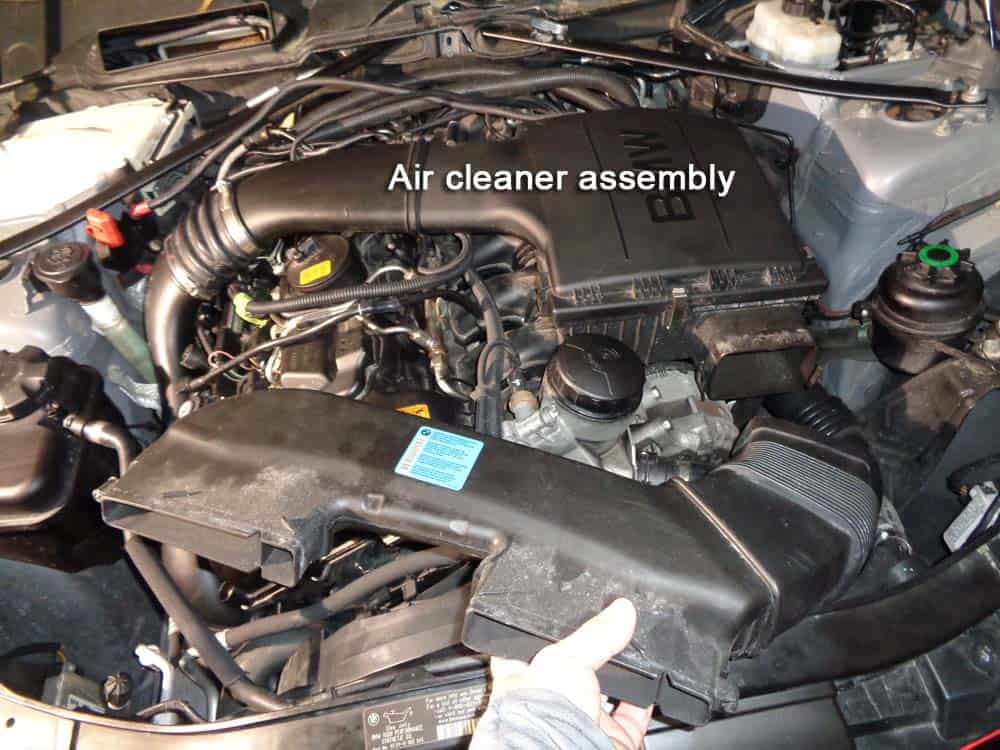
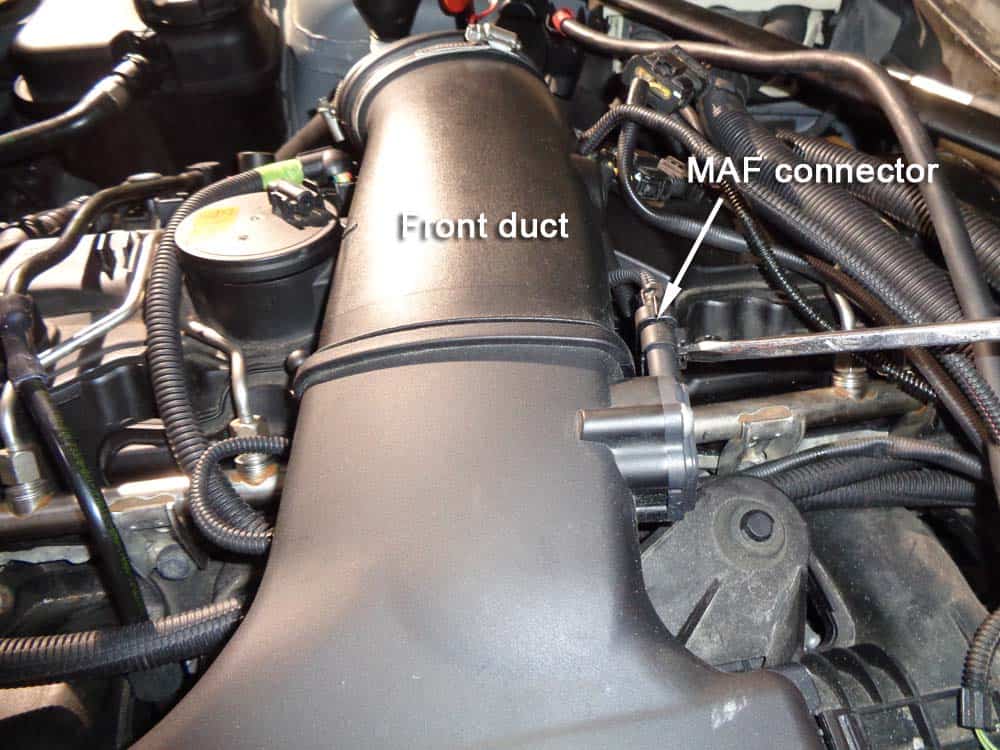
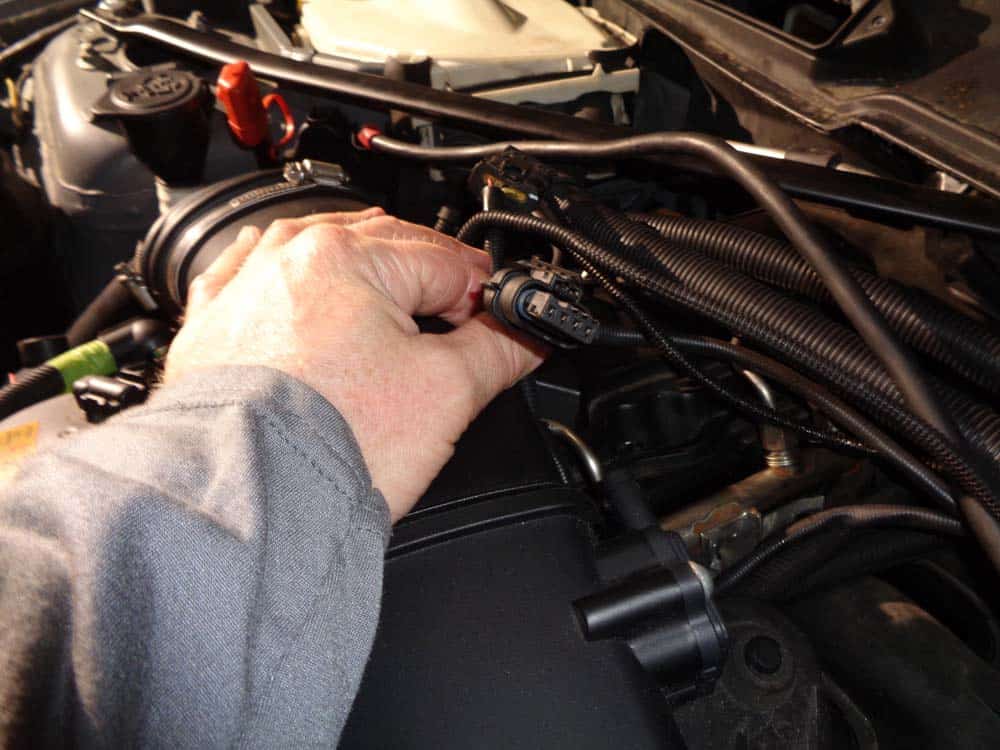
- Use a flat blade screwdriver to remove the mass air flow (MAF) electrical connector from the front duct.
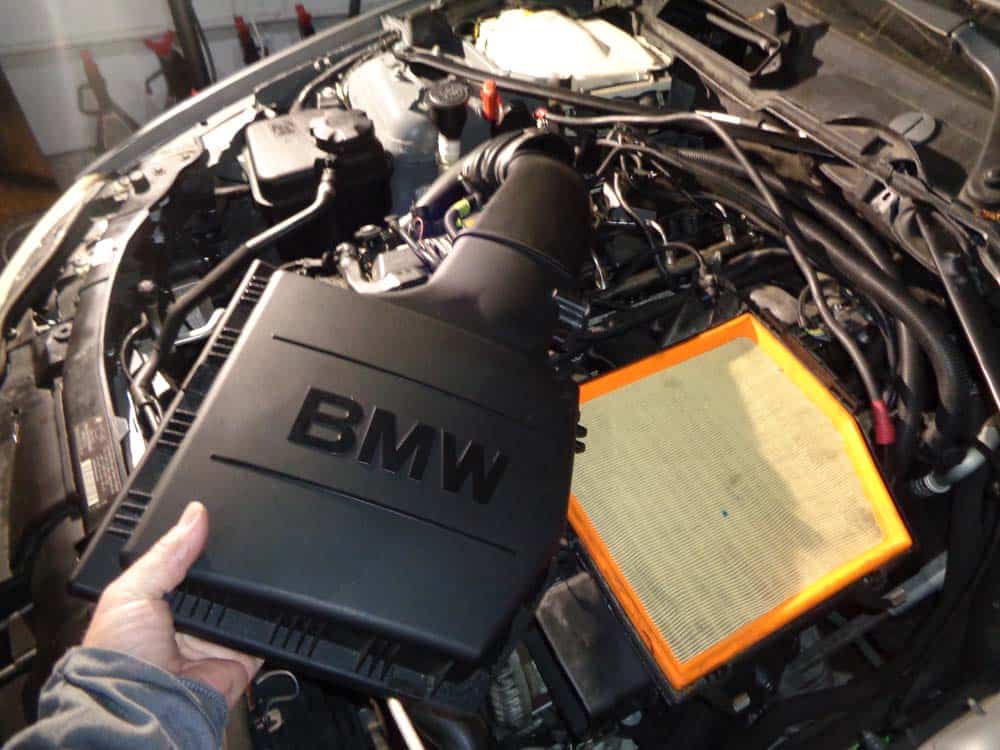
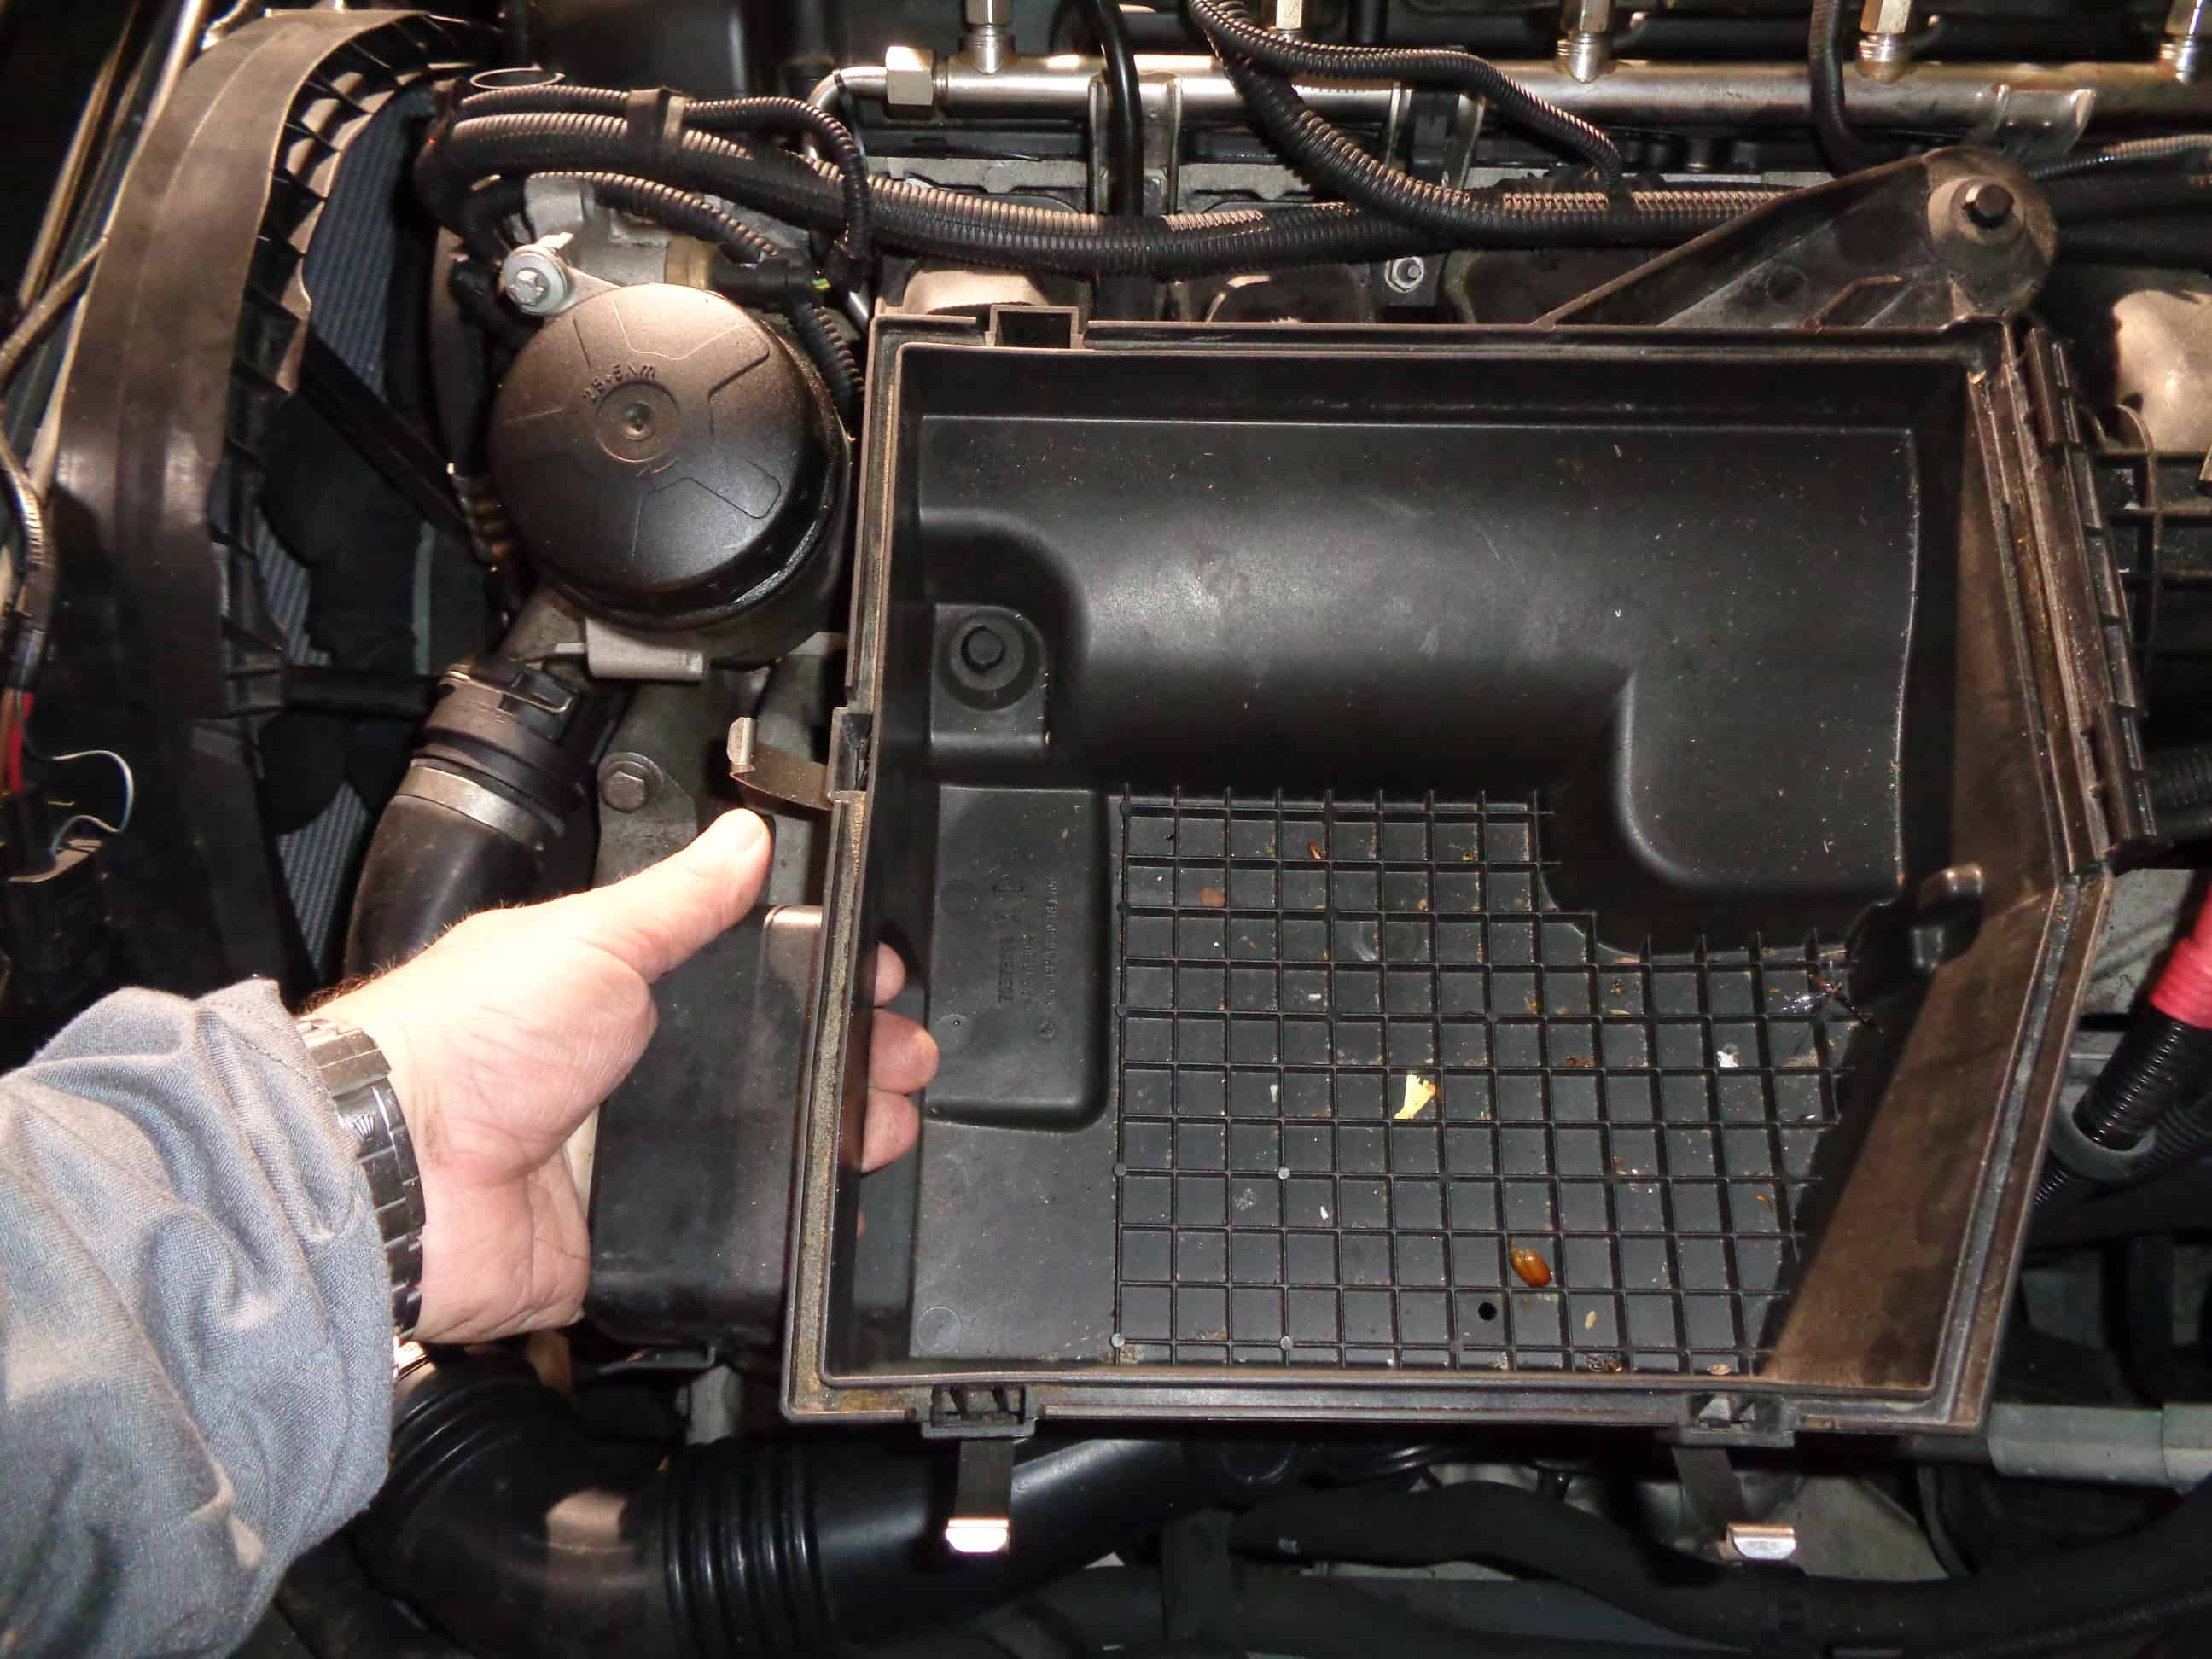
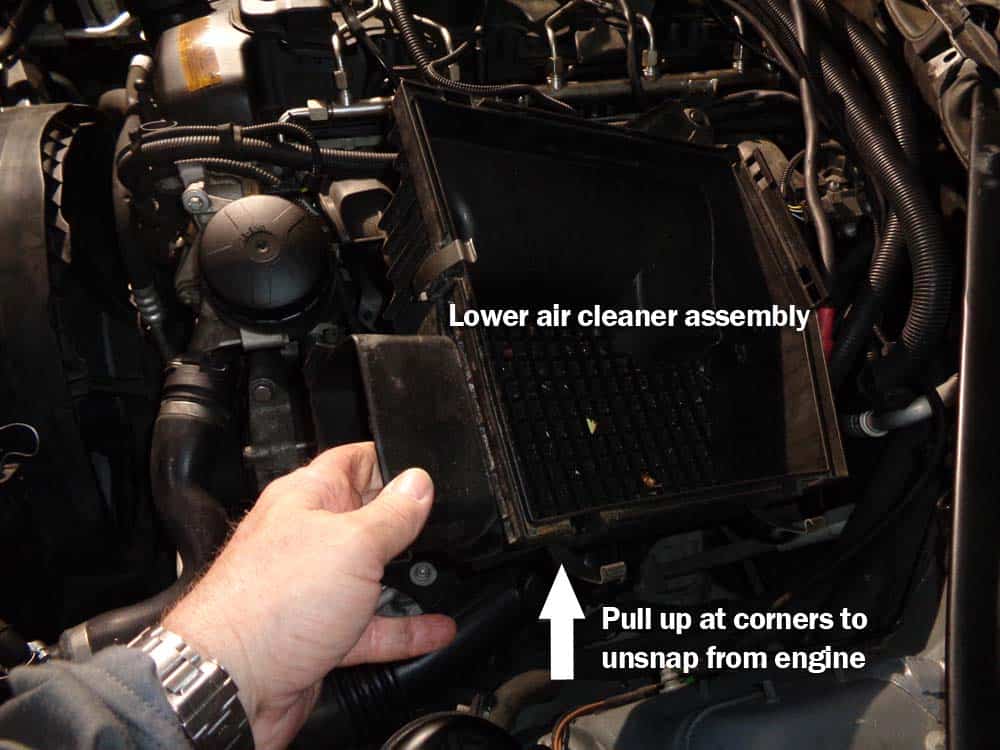
- Loosen hose clamp connecting air cleaner assembly to front duct. Unclip the lid of the air cleaner assembly and remove. Remove air filter.
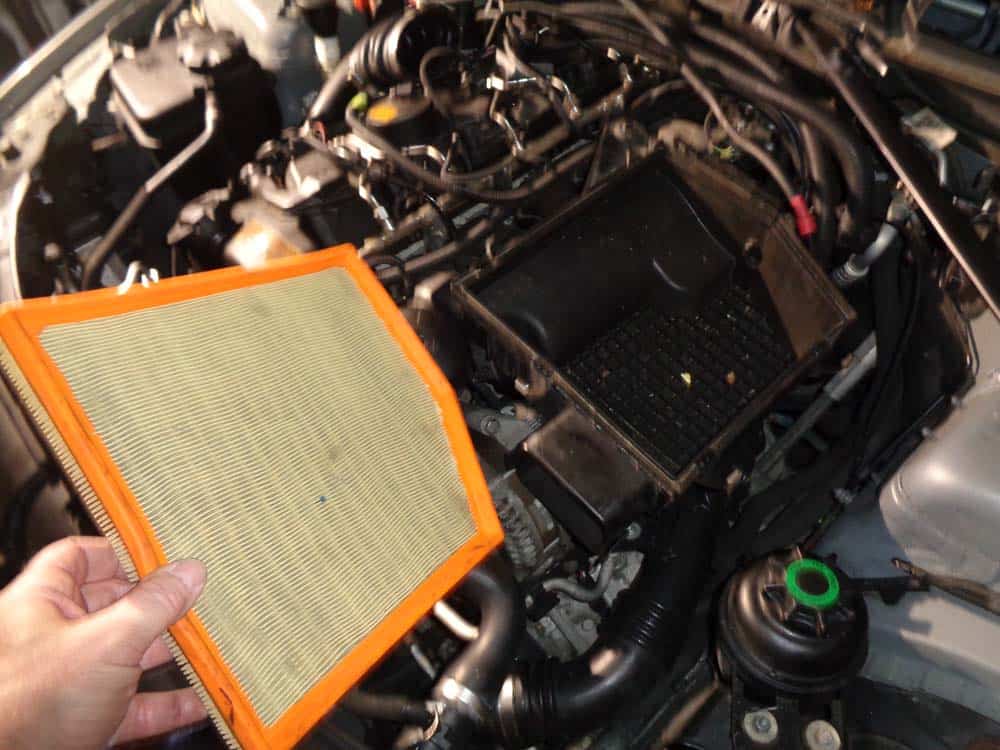
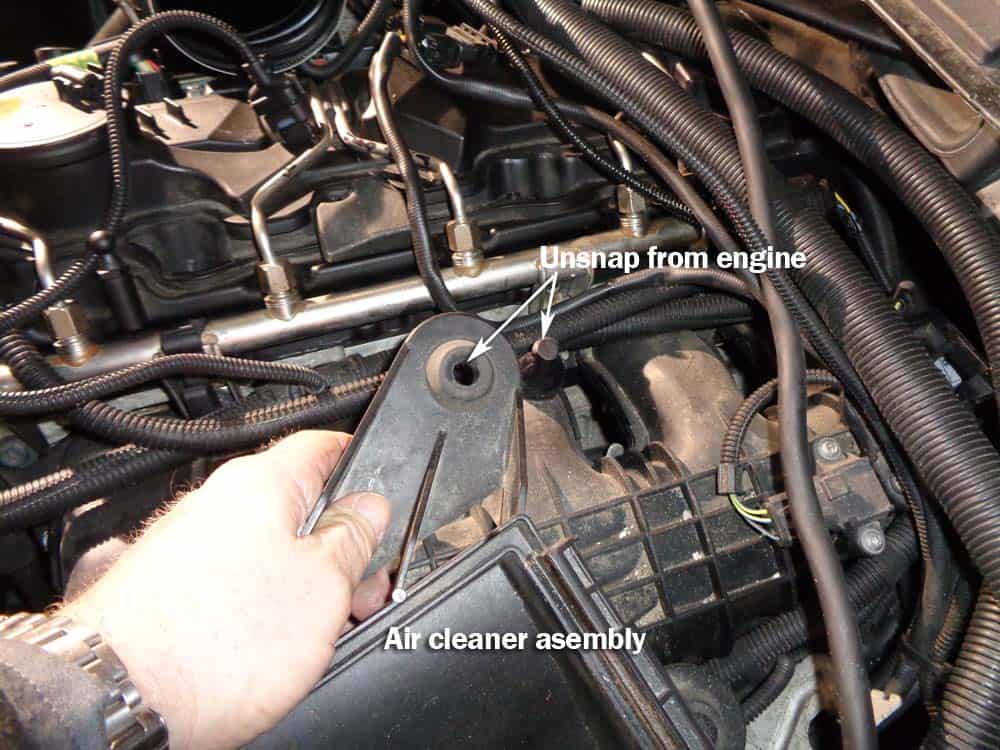
- The lower air cleaner assembly simply unsnaps from the engine. Remove from engine bay.
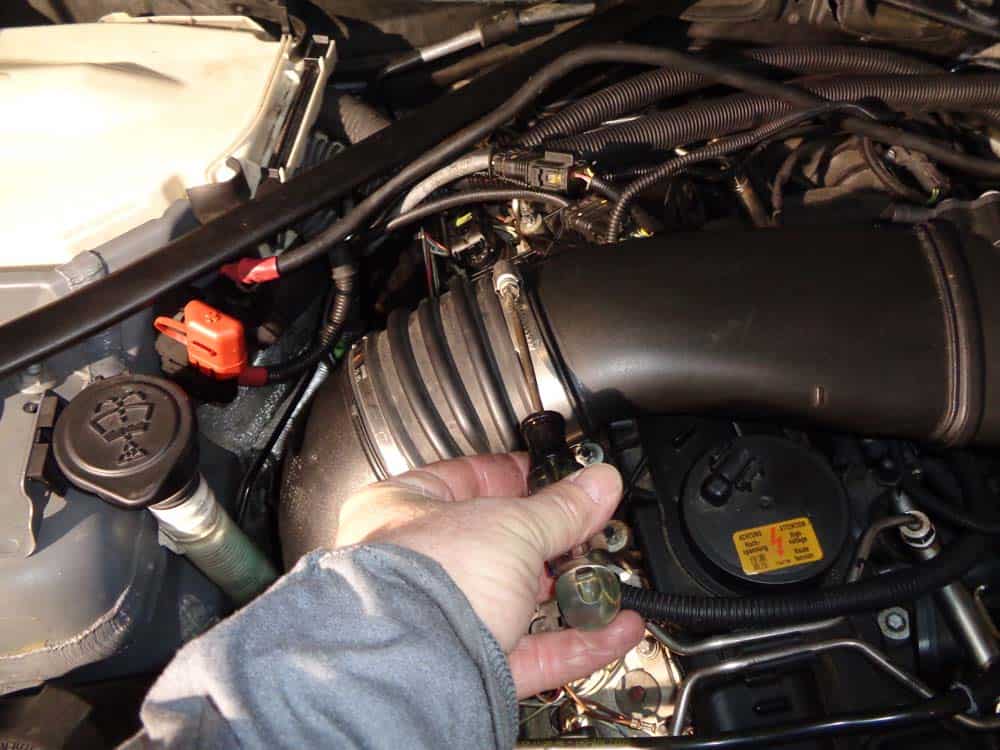
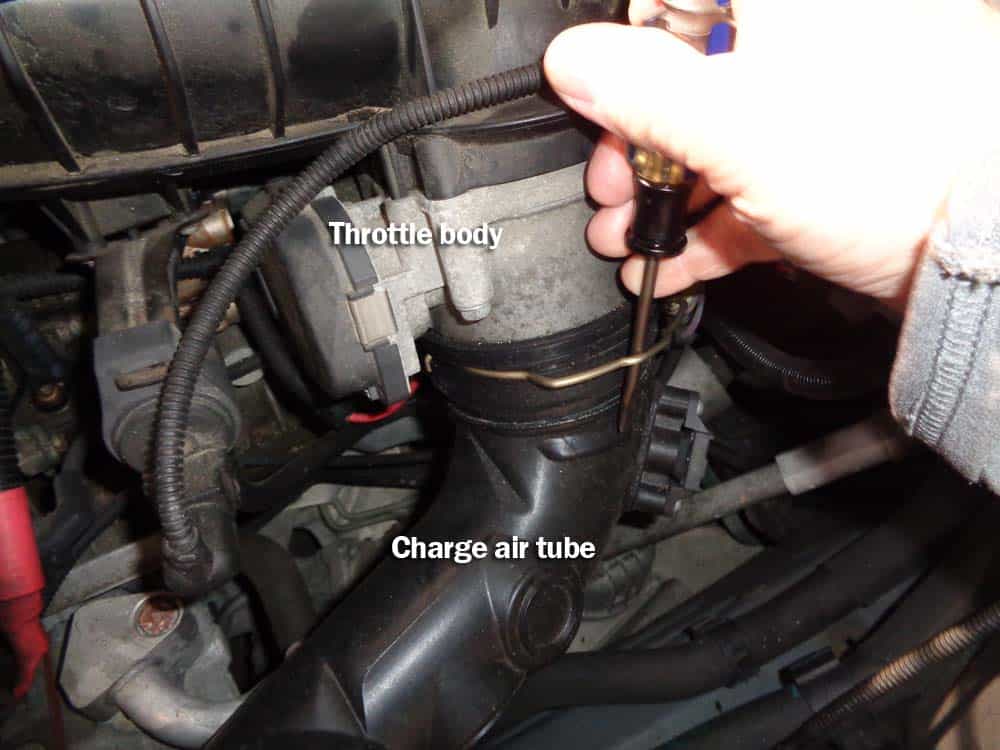
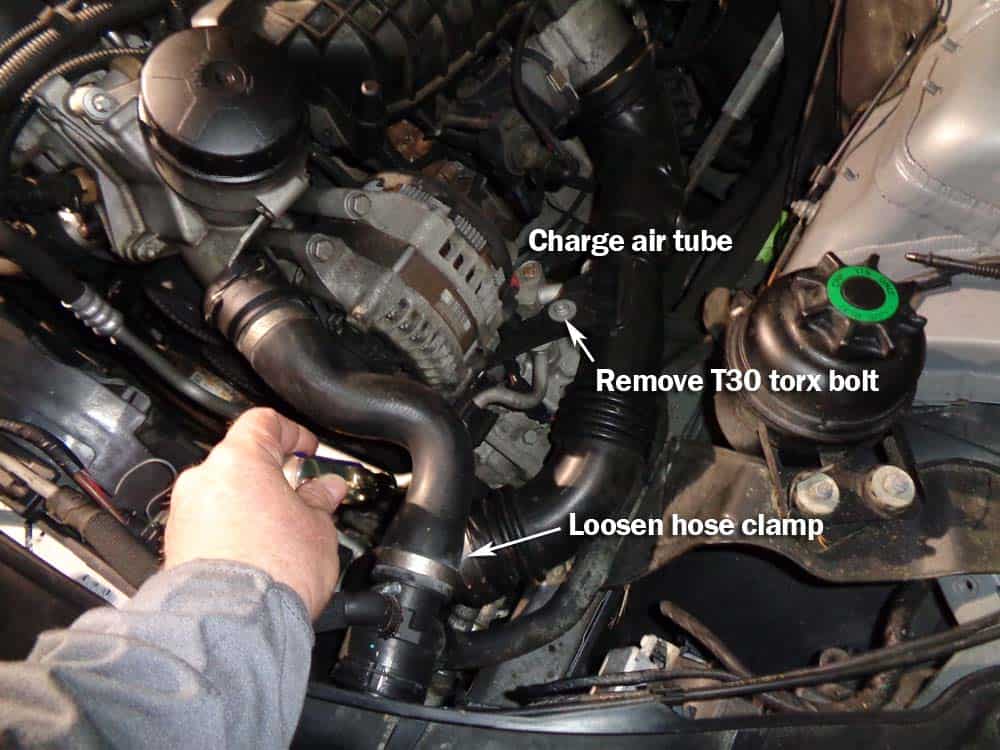
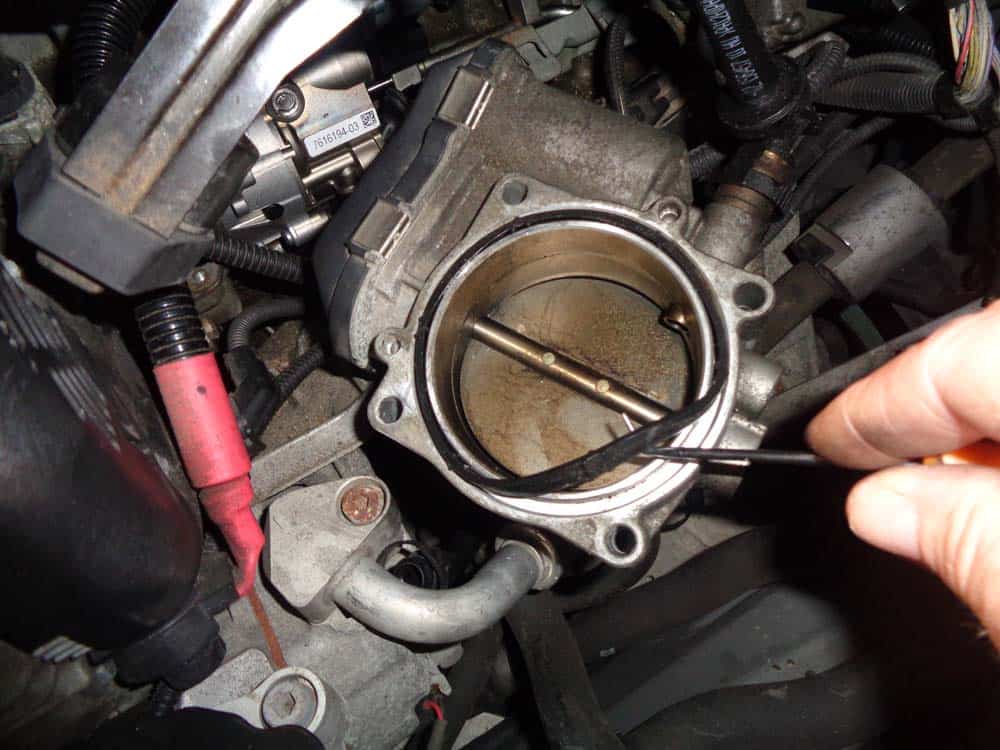
- Unsnap the locking ring that connects the turbo charge air tube to the throttle body with flat blade screwdriver. Loosen hose clamp and remove T30 torx bolt anchoring tube to engine. Remove the air charge tube from throttle body (a flat blade screwdriver helps remove a "stuck" air tube from throttle body-see below).
- Remove electrical connector from charge air tube and remove tube from engine compartment.

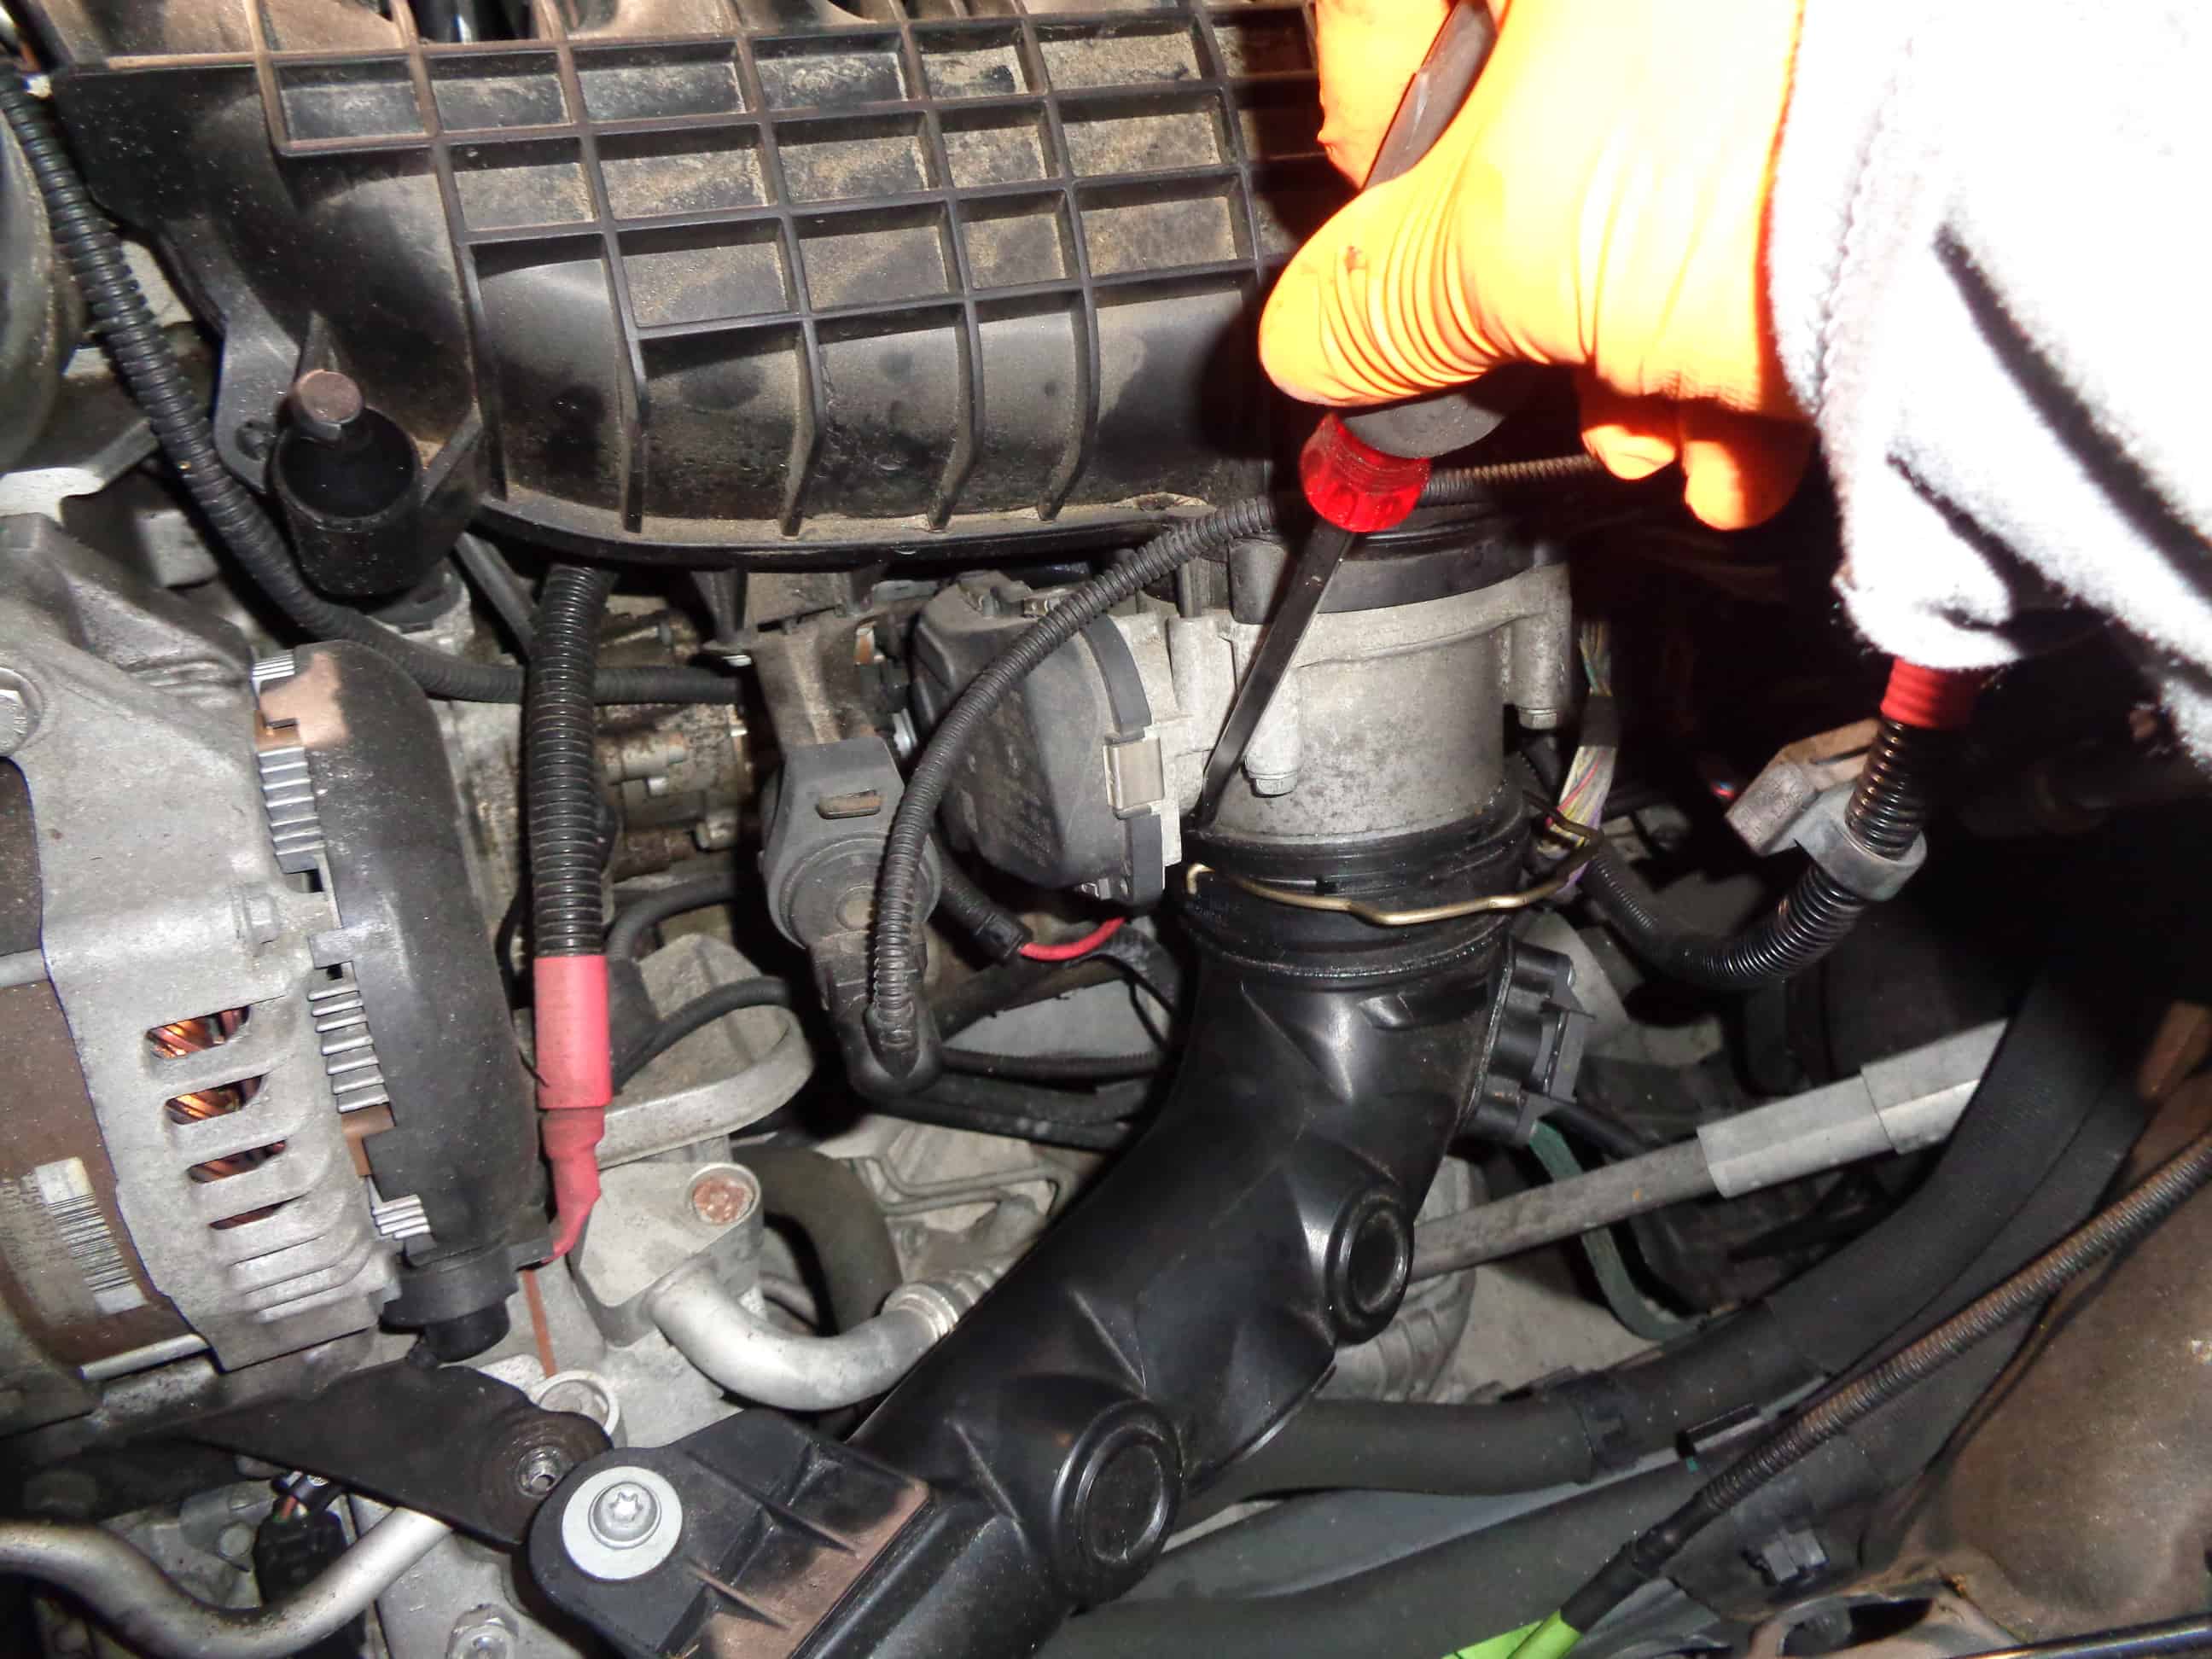
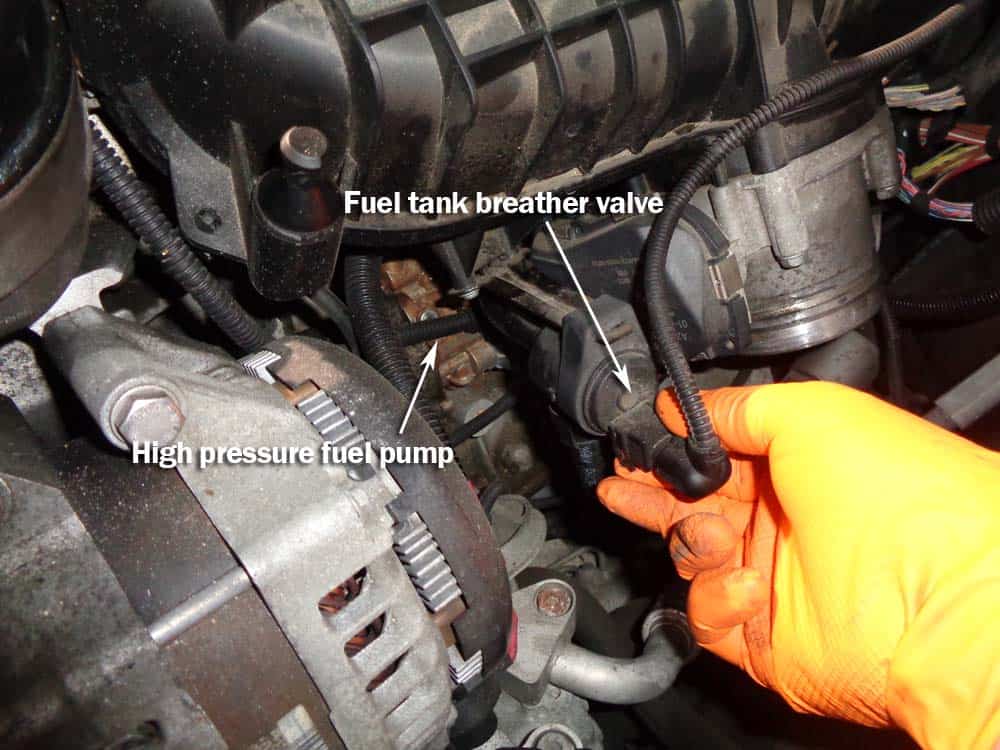
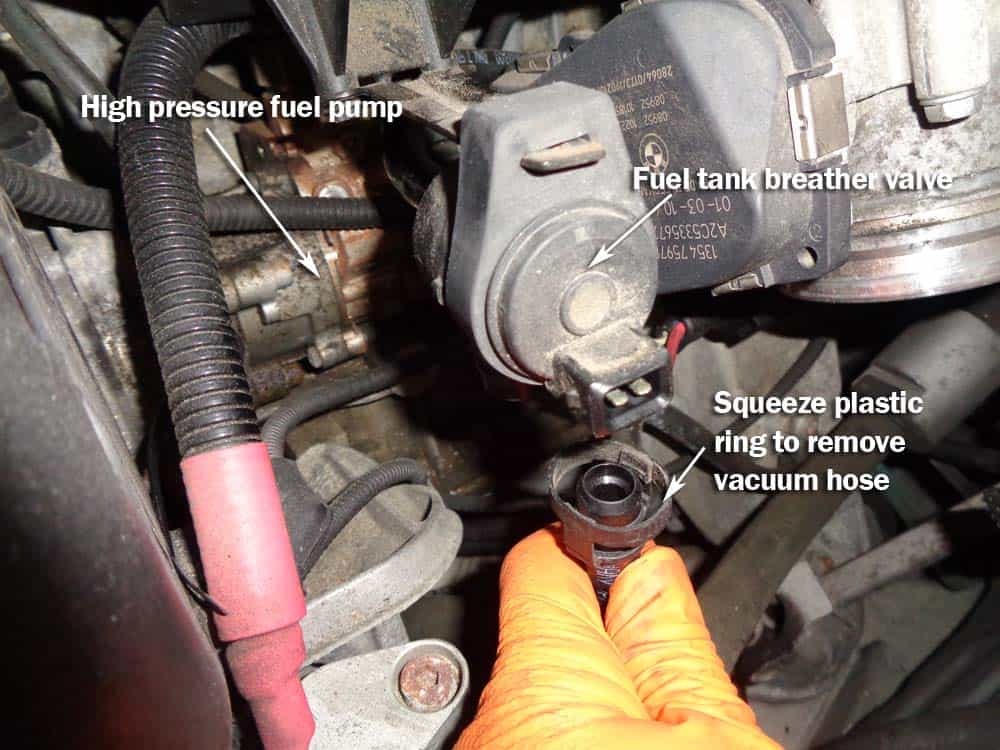
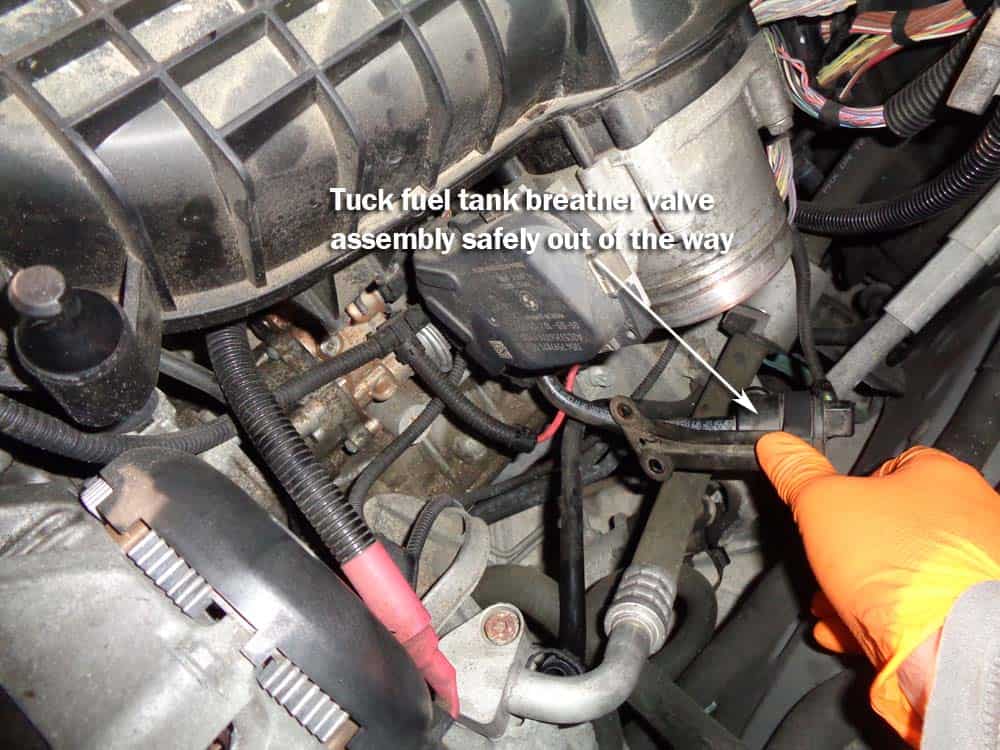
- Remove the electrical connection from the fuel tank vent (breather) valve. Remove the plastic vacuum hose from the bottom of the valve by squeezing the plastic ring and pulling off. Finally remove the two T25 screws anchoring the valve bracket to the engine and tuck away safely.
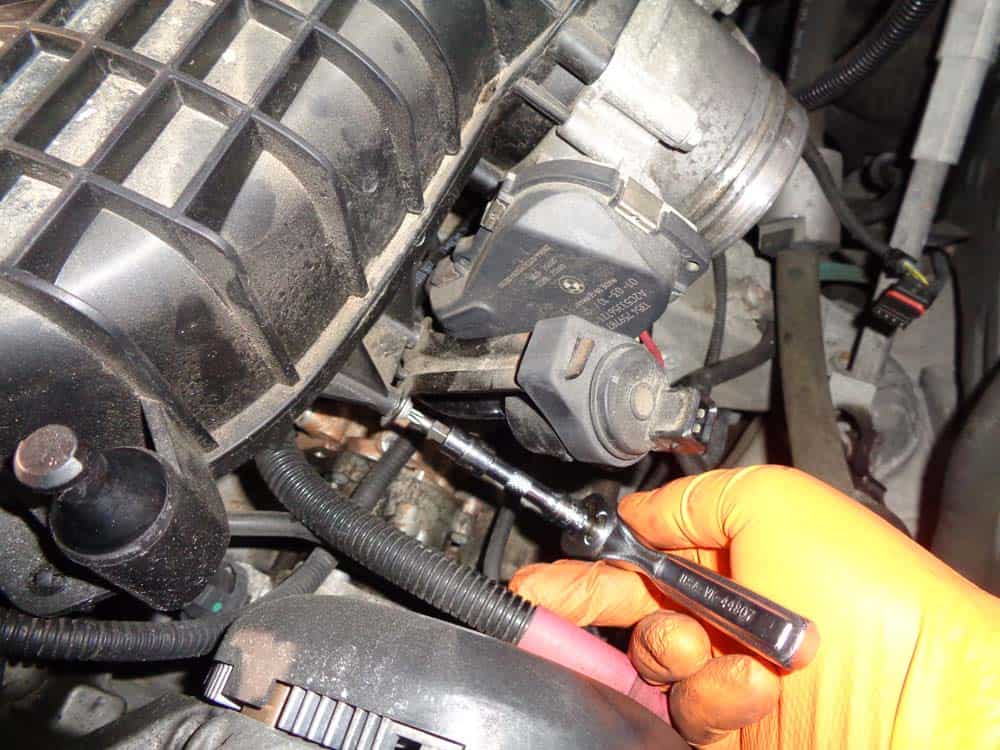
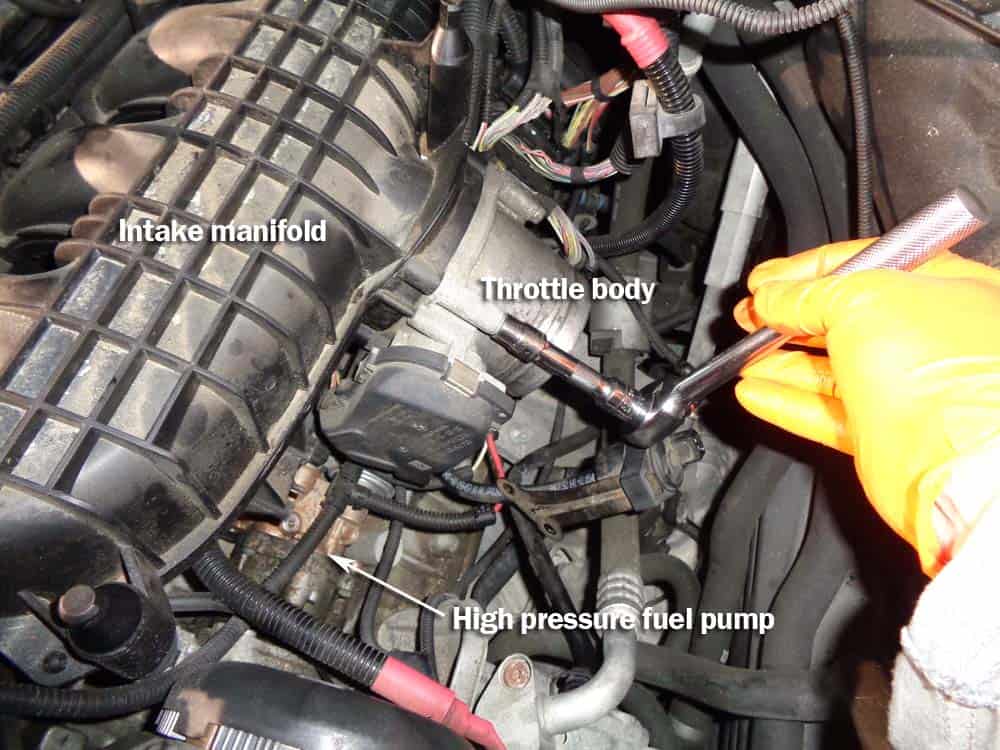
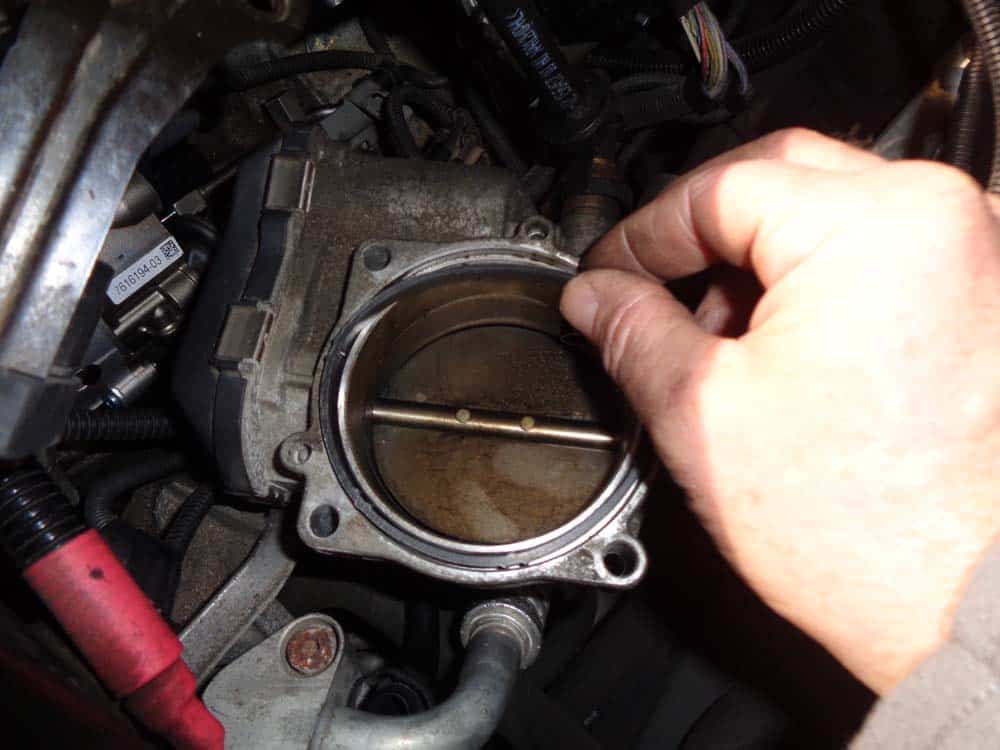
- Remove the four 10mm throttle body bolts and pull loose from intake manifold. Push to side out of the way.
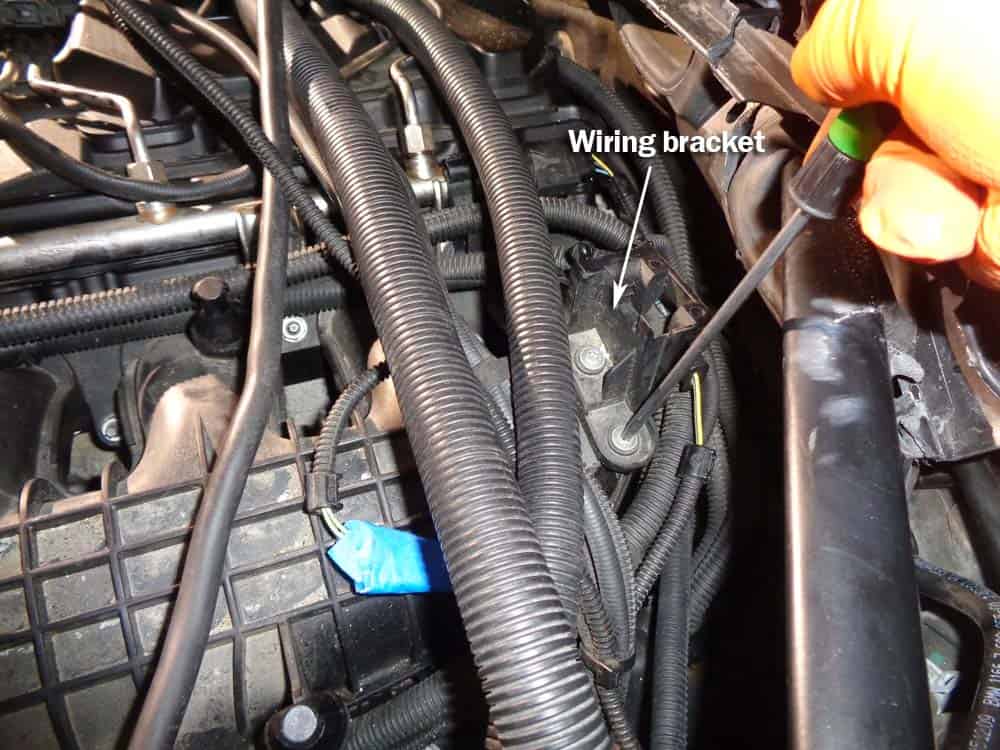
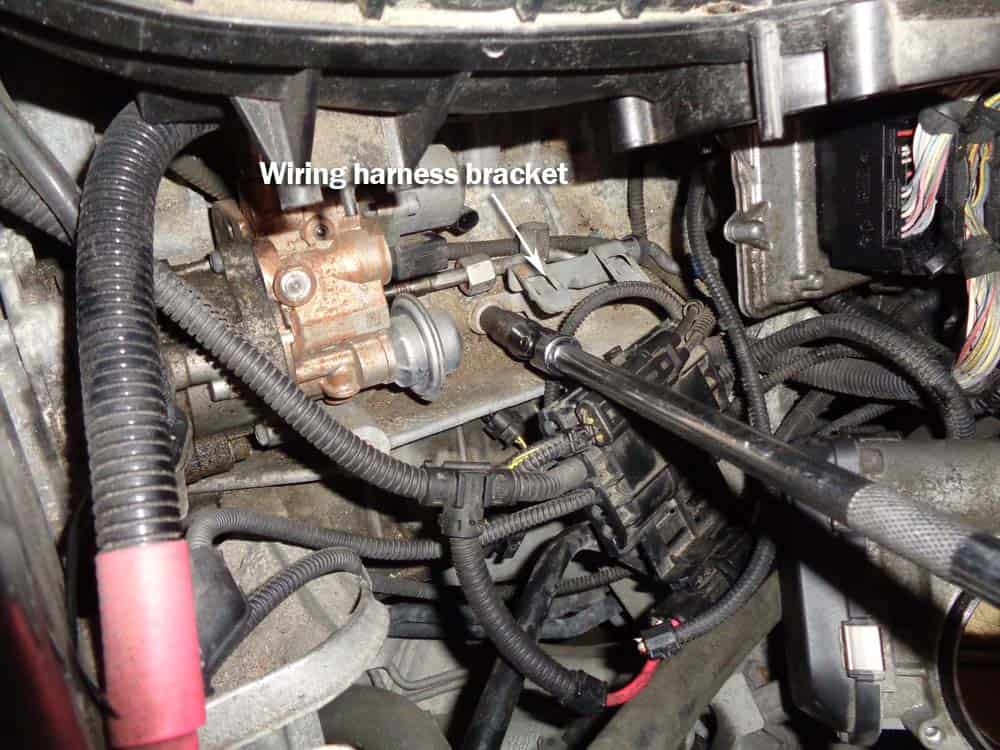
- Grab the wiring harness and pull out and off of mounting bracket. Push out of the way.

- Disconnect engine block electrical connector behind fuel pump.
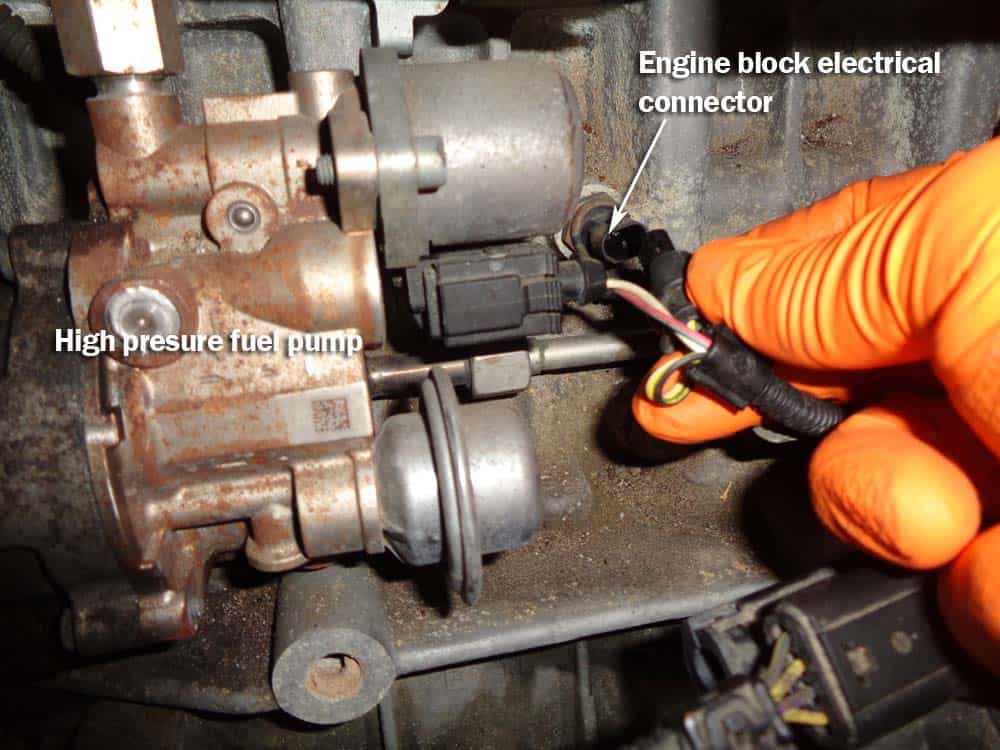
- Disconnect electrical connector from back of fuel pump.

Section 3 - Removing the Intake Manifold
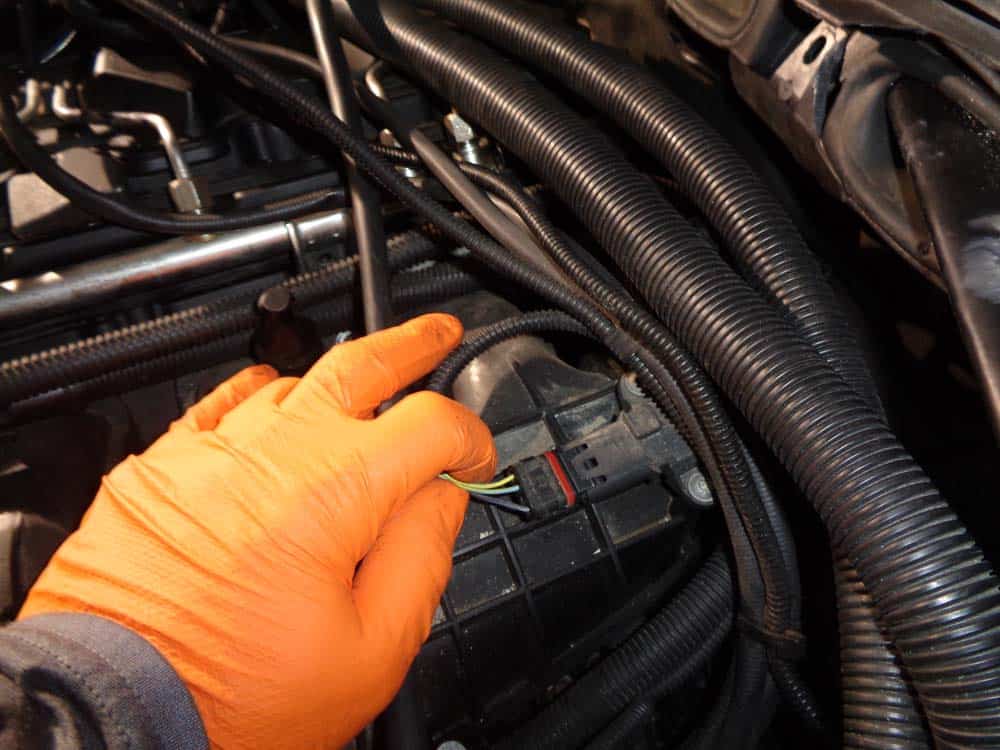
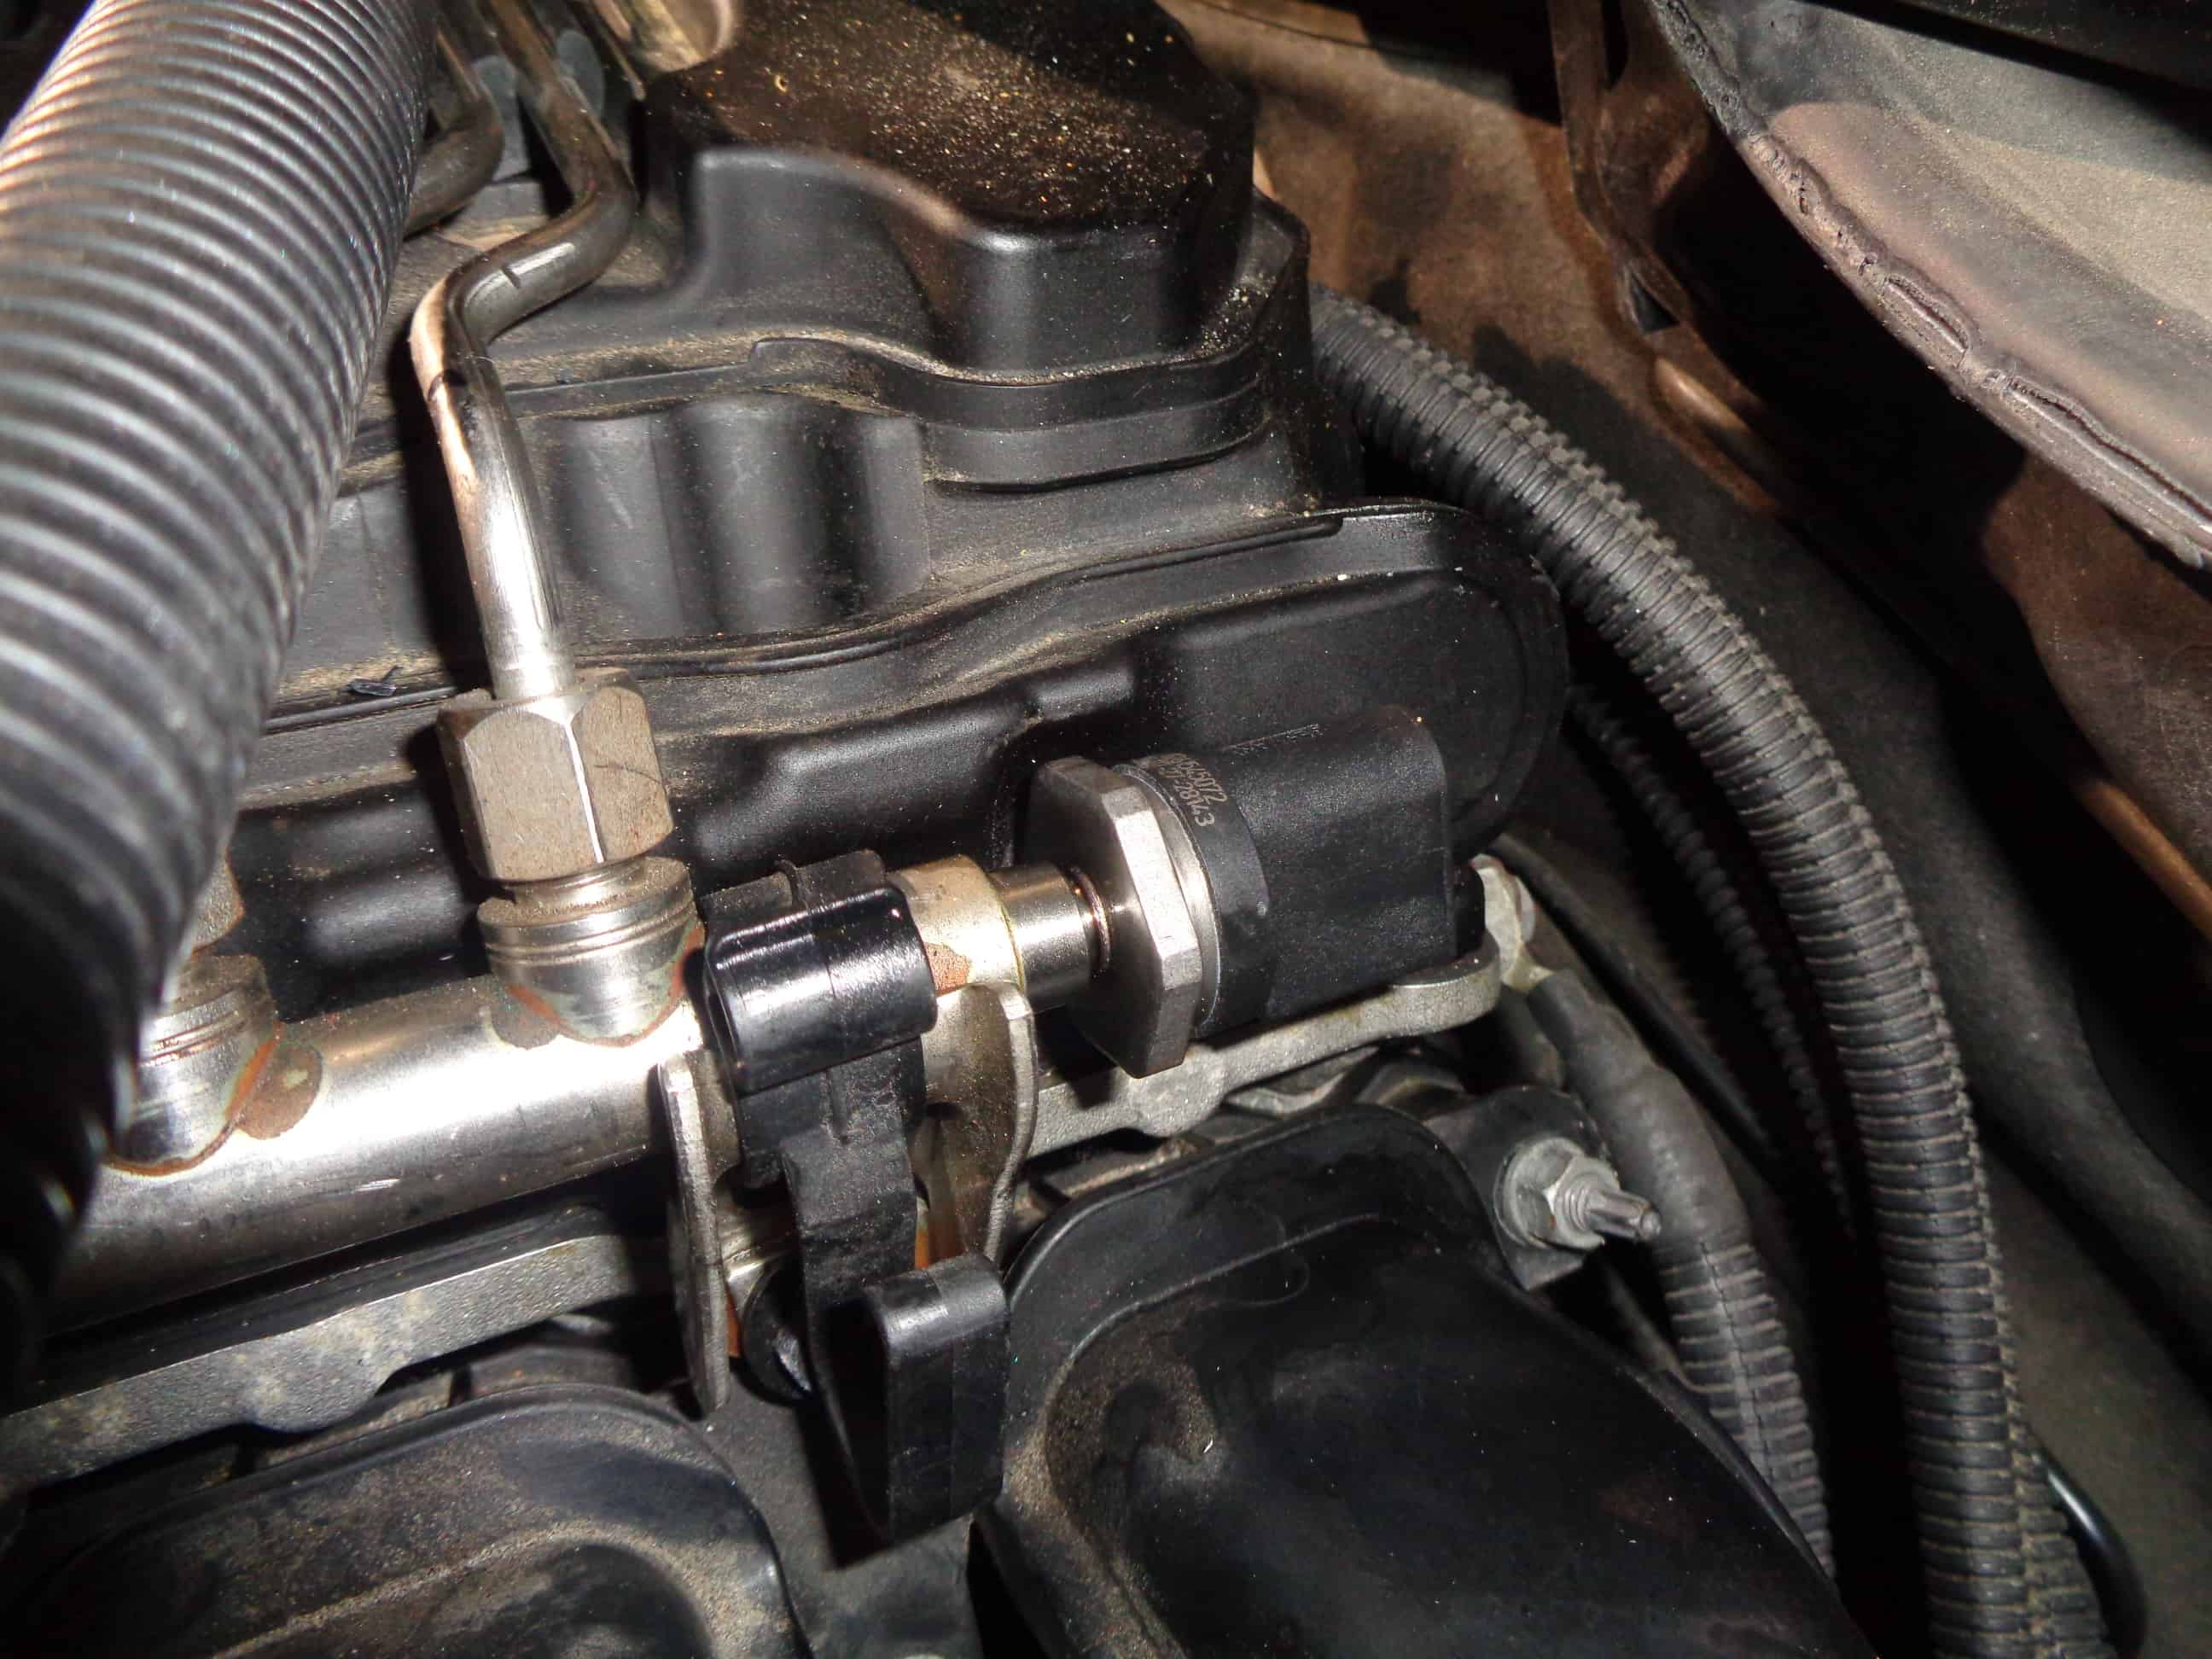
The intake manifold does not have to be completely removed from the engine...it just needs to be removed from the cylinder head and stored out of the way so the high pressure fuel pump's fuel lines can be accessed and removed. In fact, we strongly recommend not removing any of the wiring harnesses connected at the bottom of the intake manifold during this repair. The pump is buried underneath the intake manifold...there is, unfortunately, no other way to access it.- Remove the electrical connection from the sensor located on rear of intake manifold (see images below). A metal pick helps in releasing the connection.
- Use a T25 torx t-handle to remove the wiring bracket from the rear of manifold.
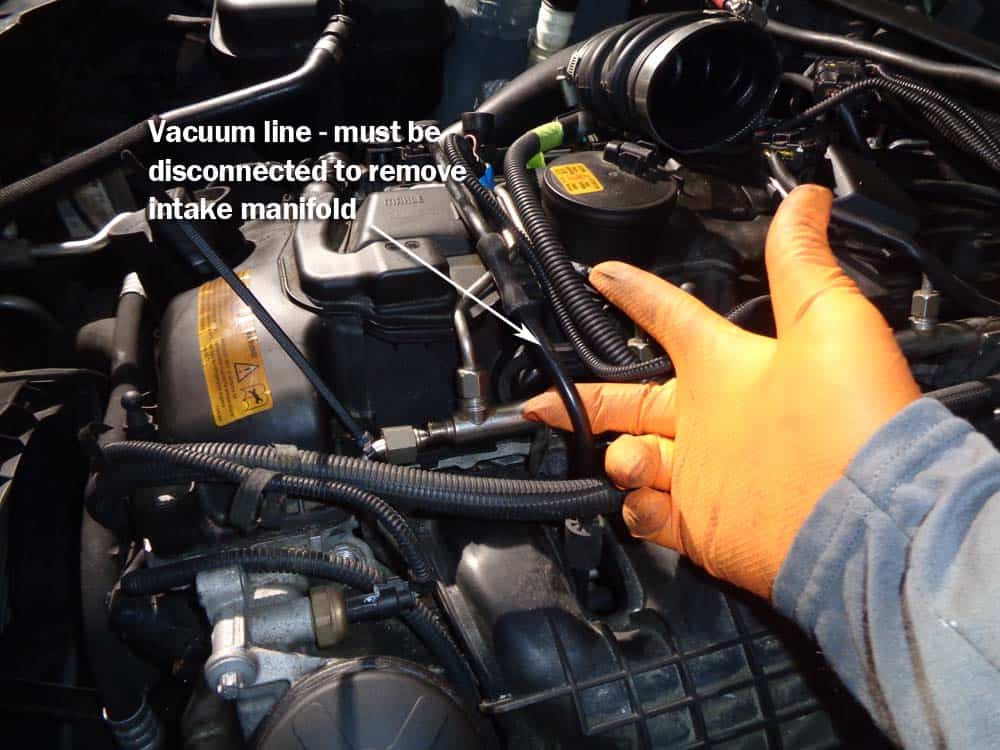
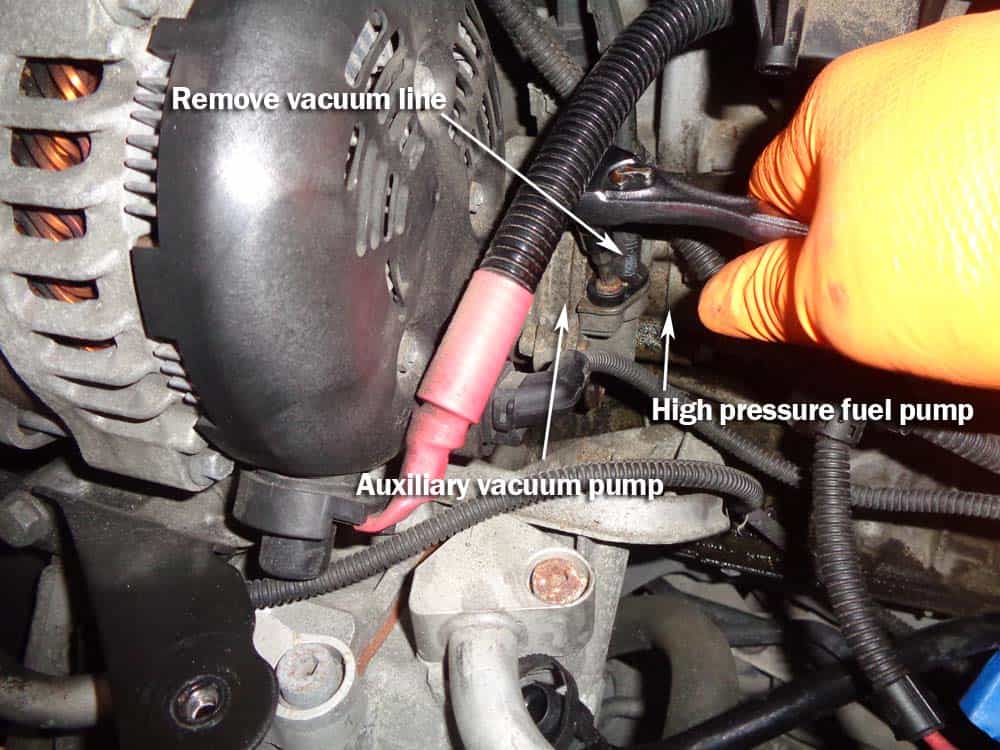
- The vacuum line that runs from the cylinder head cover to the auxiliary vacuum pump must be removed. Use an E25 external torx socket to remove the bolt securing it to the pump housing and then pull out and clear of intake manifold.
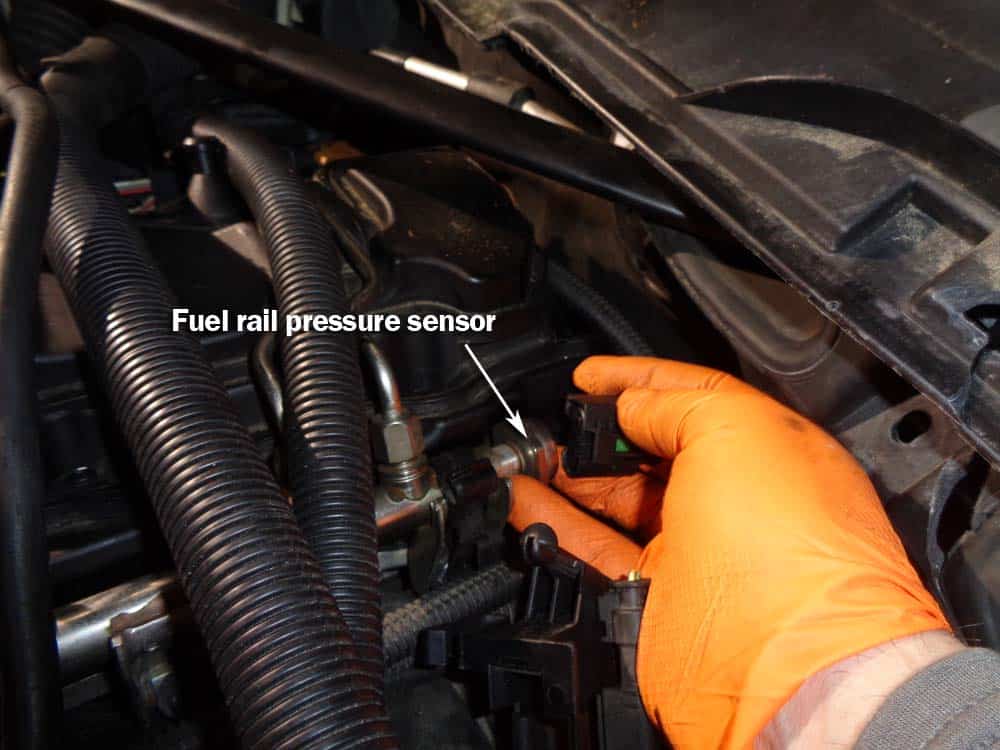
- Disconnect electrical connection from fuel rail pressure sensor. The pressure sensor is located at end of fuel rail near firewall of vehicle. ***The BMW Repair Guide recommends also replacing your pressure sensor when doing a BMW high pressure fuel pump replacement (please see our parts list to order the correct one).
- Gather up all of the loose wiring on top of intake manifold and neatly bungee cord out of the way.
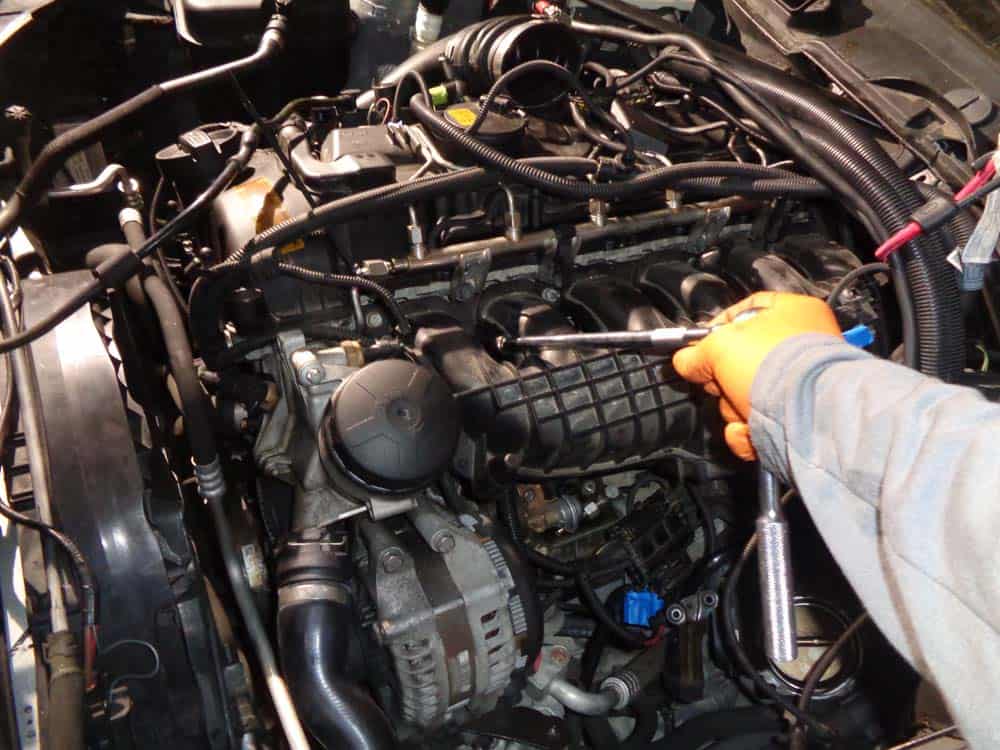
- Remove the seven 11mm nuts anchoring the intake manifold to the engine block.
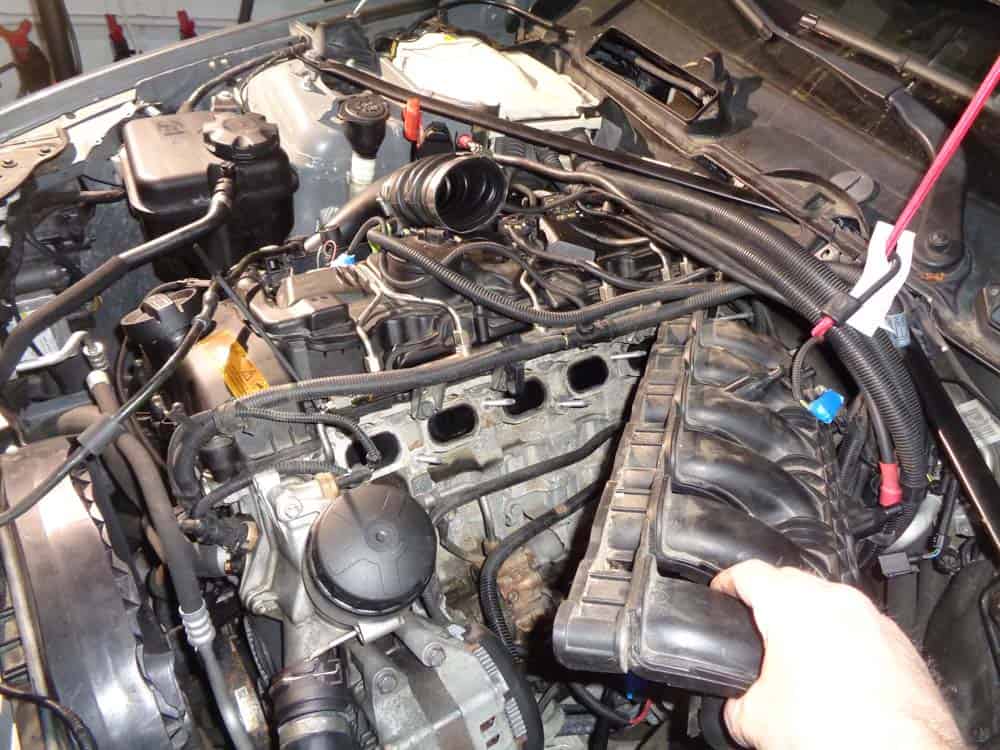
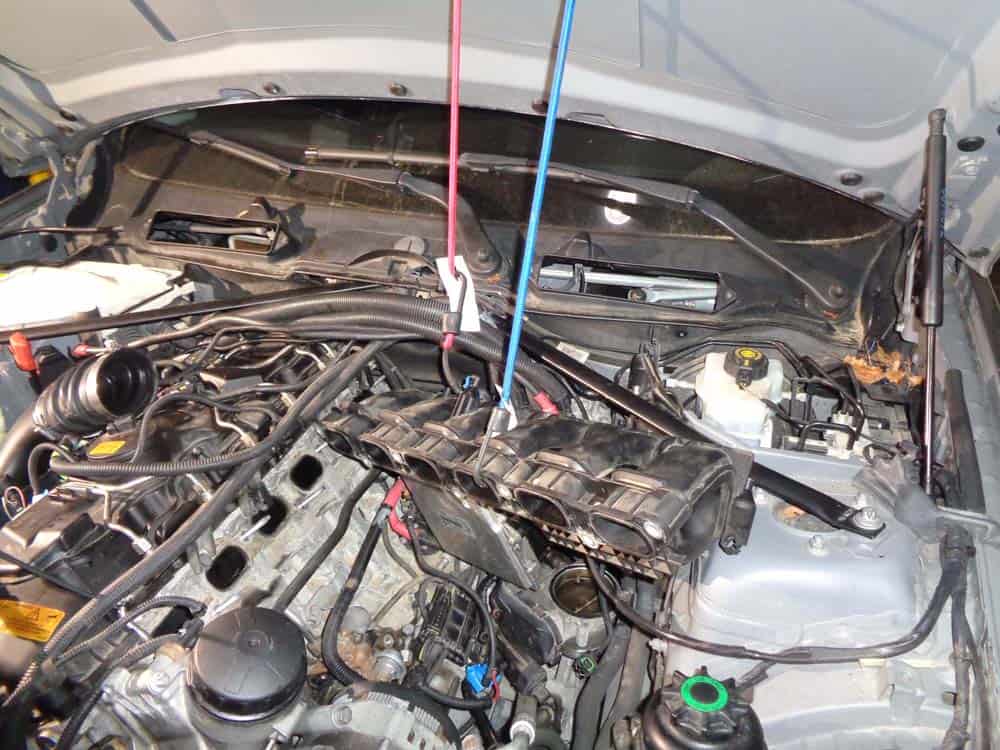
- Remove intake manifold and bungee cord out of the way. ***Note - avoid removing the wiring harnesses on bottom of intake manifold if possible. You should be able to remove intake manifold and bungee cord to hood without removing them.
Section 4 - BMW High Pressure Fuel Pump Removal
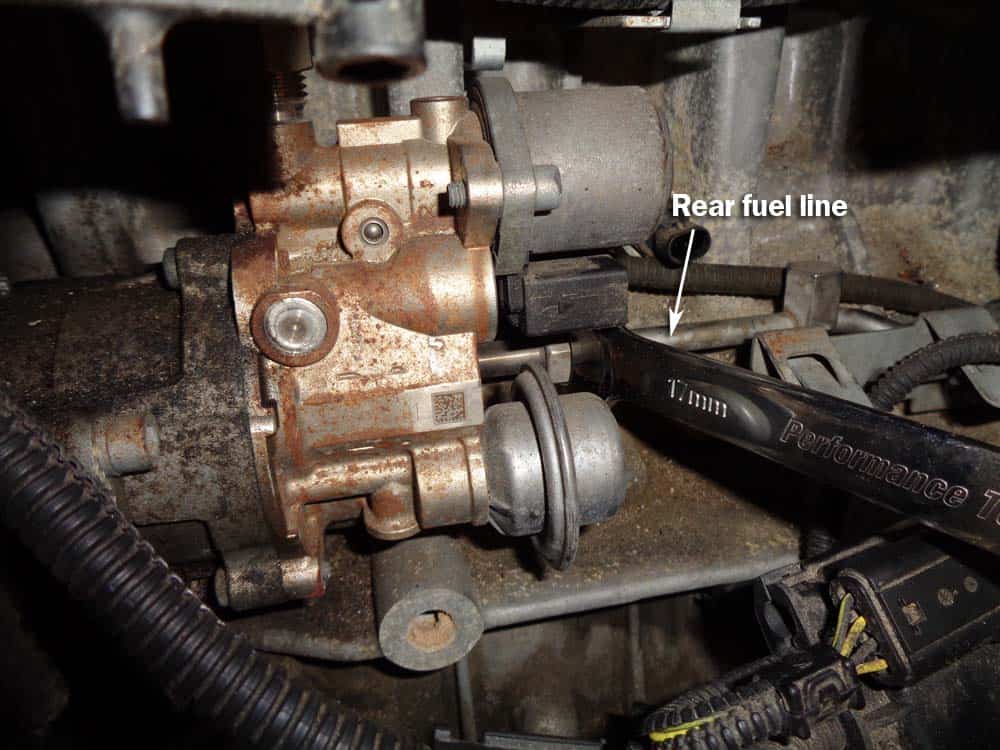
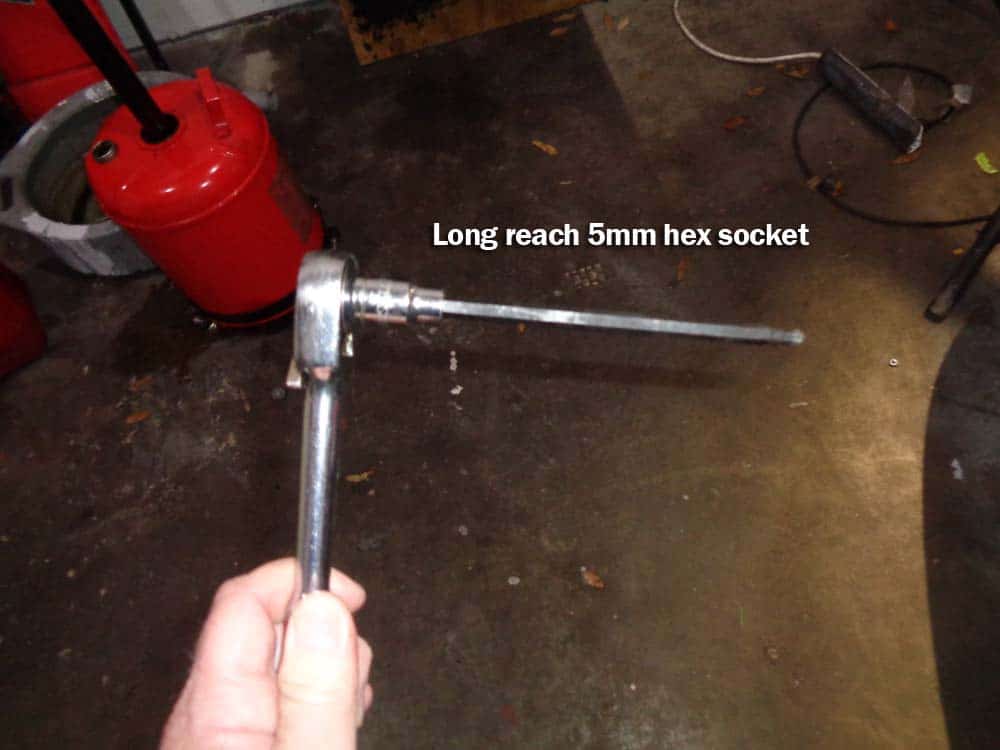
The BMW high pressure fuel pump can now be easily accessed and removed. Remember that you will need a long reach 5mm hex socket to reach the fuel pump bolts...a regular hex wrench will not work. Please see our tool list if you need to order one now.- Using a 17mm open end wrench, loosen the nut attaching the rear fuel line to pump.
- Remove the two wiring harness bracket bolts using an E10 torx socket. The wiring harness bracket also serves as the rear fuel line anchor to the engine block.
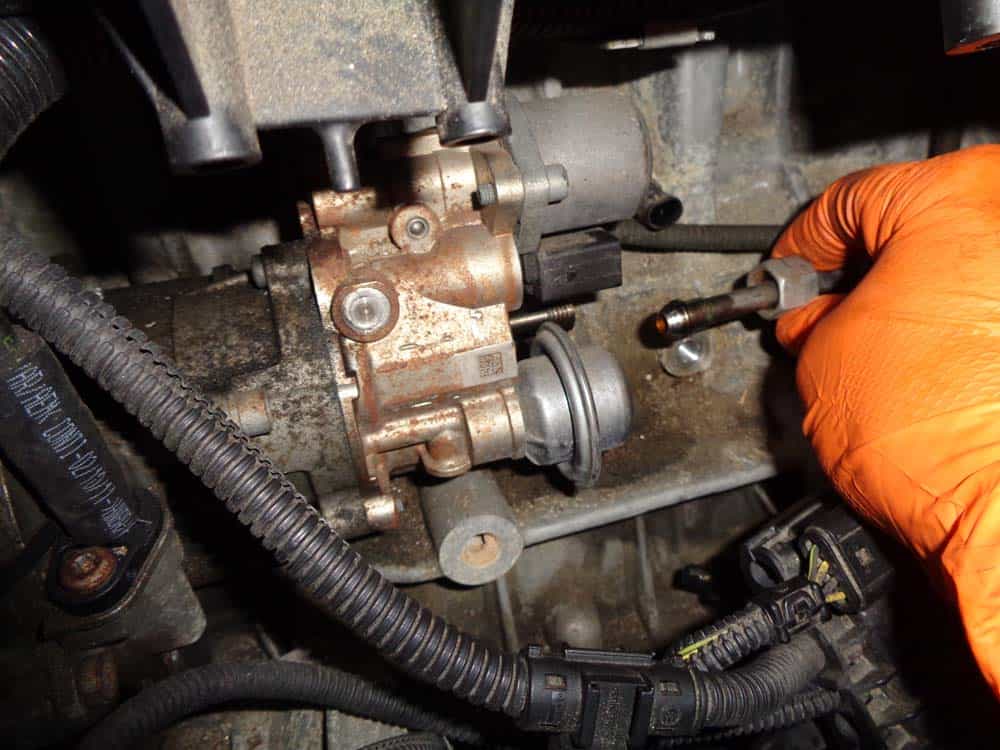
- Pull rear fuel line loose from pump and tuck away safely.
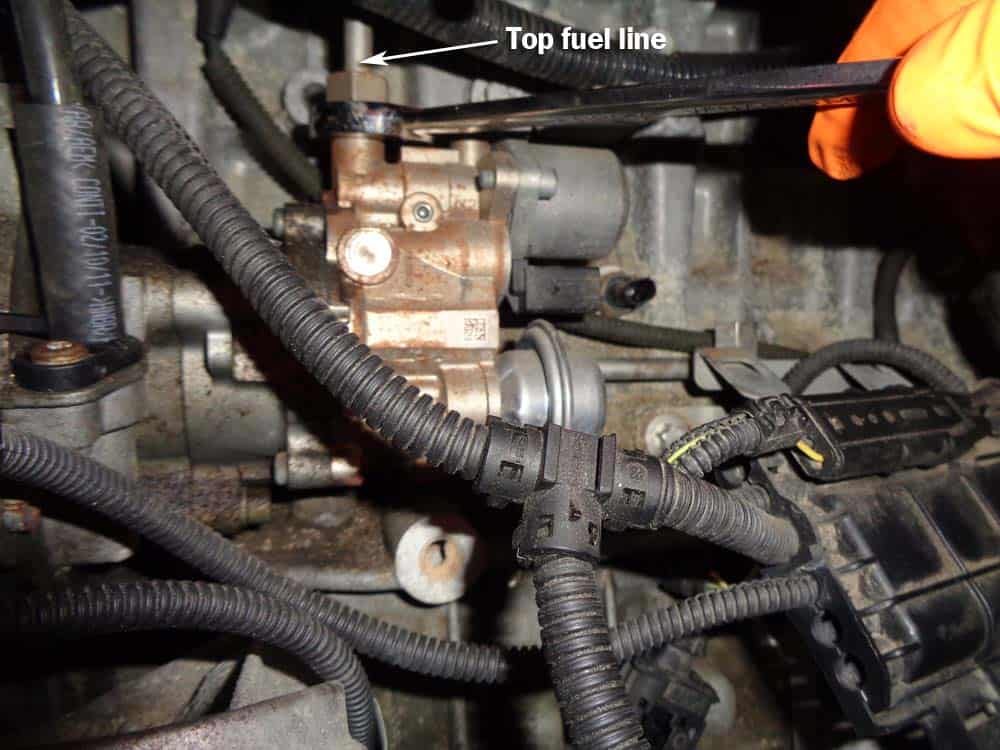
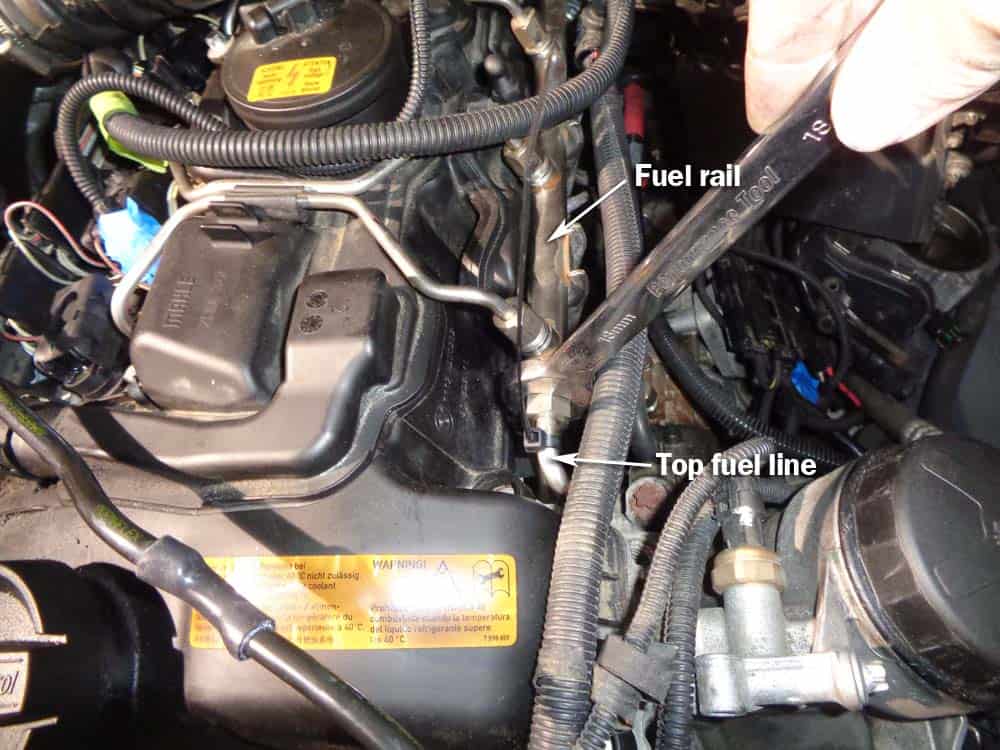
- Using a 17mm open end wrench, loosen the nut attaching the top fuel line to the pump.
- Use a 17mm wrench to disconnect the top fuel line from fuel rail.
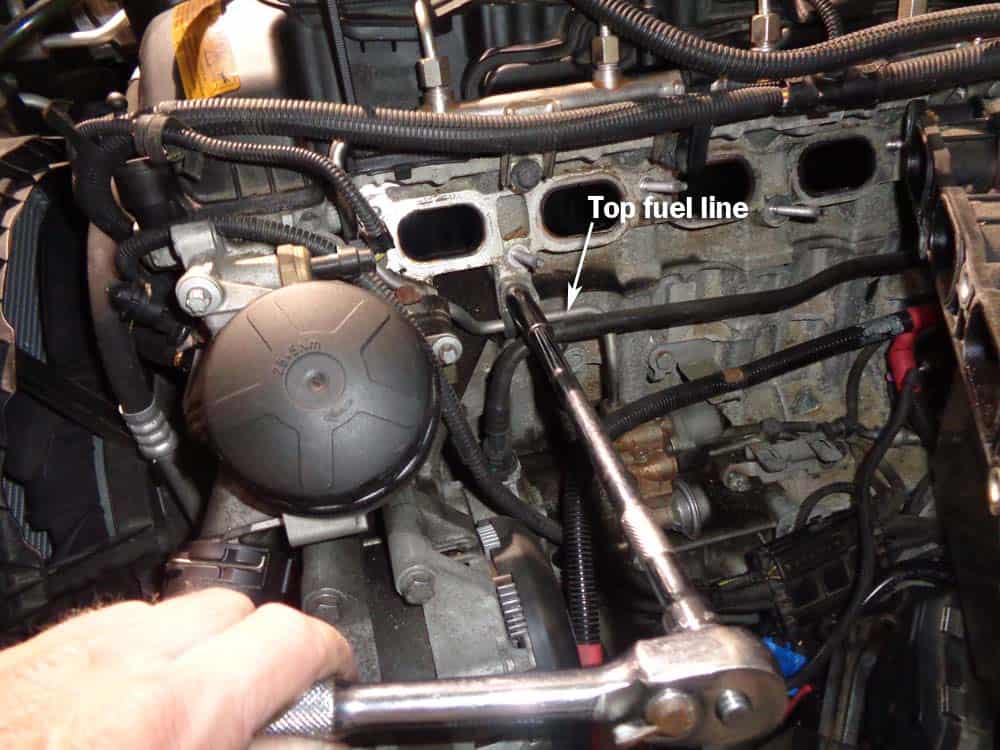
- Use a 10mm socket to remove the bolt anchoring the top fuel line to the engine block. Remove fuel line from engine.
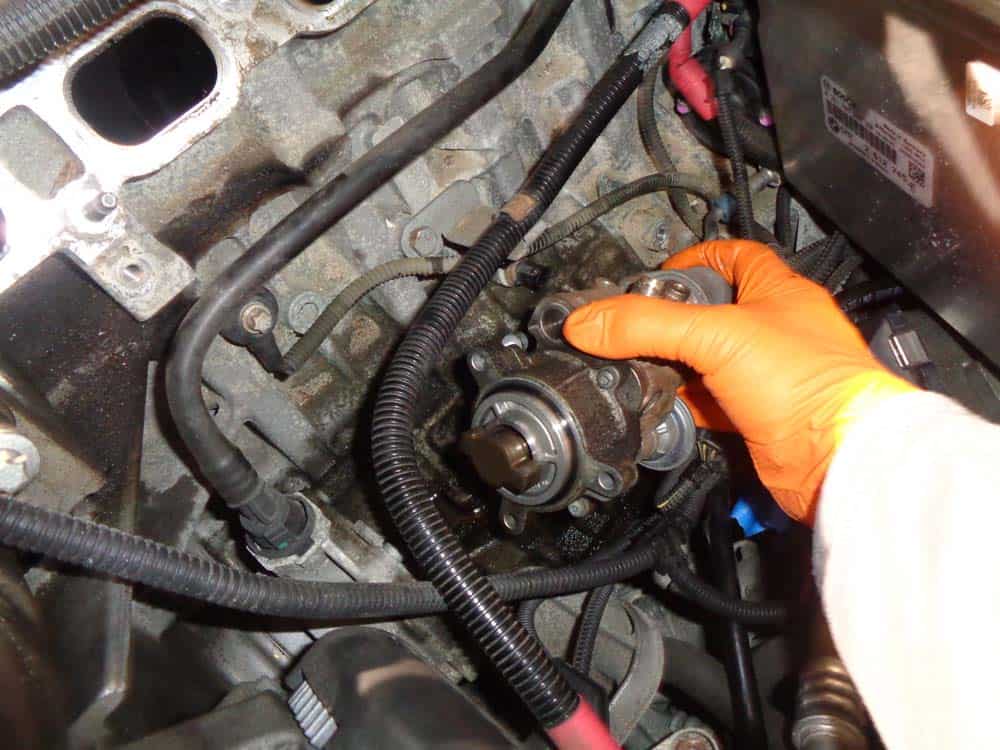
- Use a 5mm long reach hex socket to remove the three bolts anchoring the fuel pump to the engine. ***You must use long reach hex sockets. You will not be able to remove the fuel pump mounting bolts with a small hex socket or hex wrench.
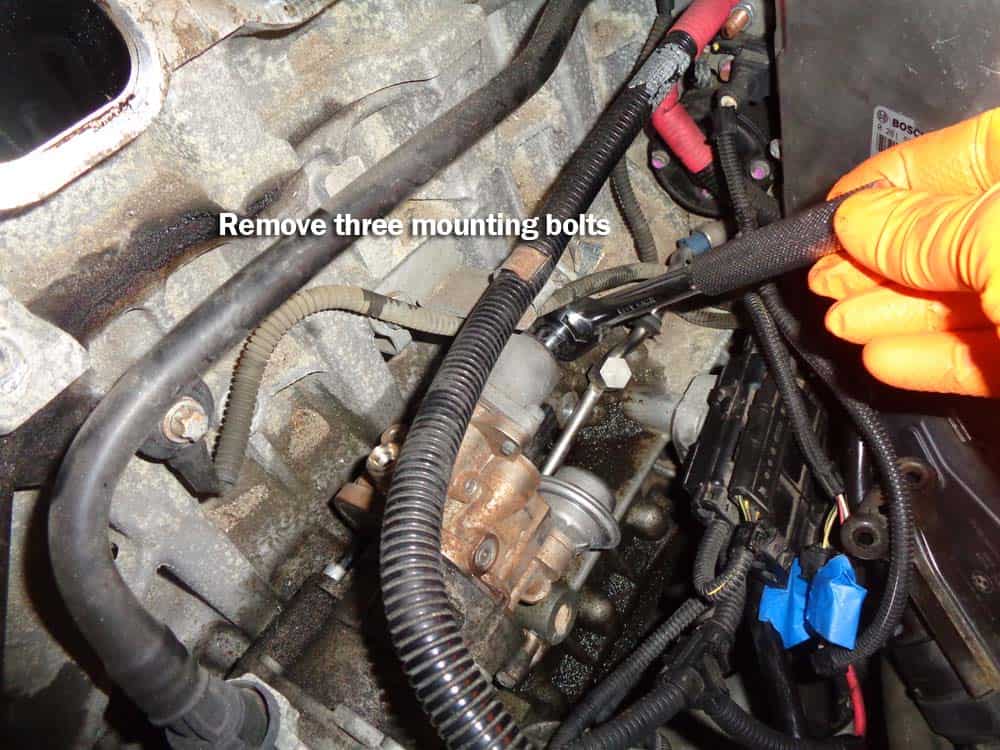
- Remove old fuel pump from vehicle.
Section 5 - New BMW High Pressure Fuel Pump Installation
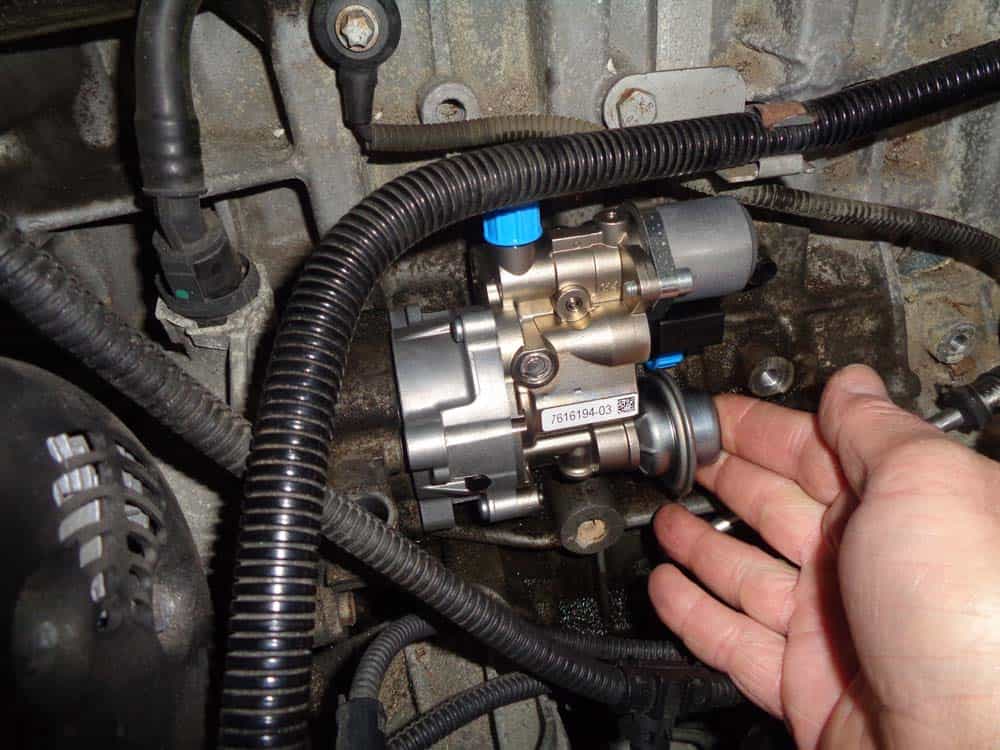
Reinstalling the new BMW high pressure fuel pump is simple...just be sure to install a new o-ring on pump (if it wasn't shipped with one) and new gaskets on the intake manifold and throttle body.- Verify the new fuel pump comes with a new o-ring before installing. If it did not come with a new o-ring, please see our parts list and order one now. ***DO NOT install new pump with old o-ring.

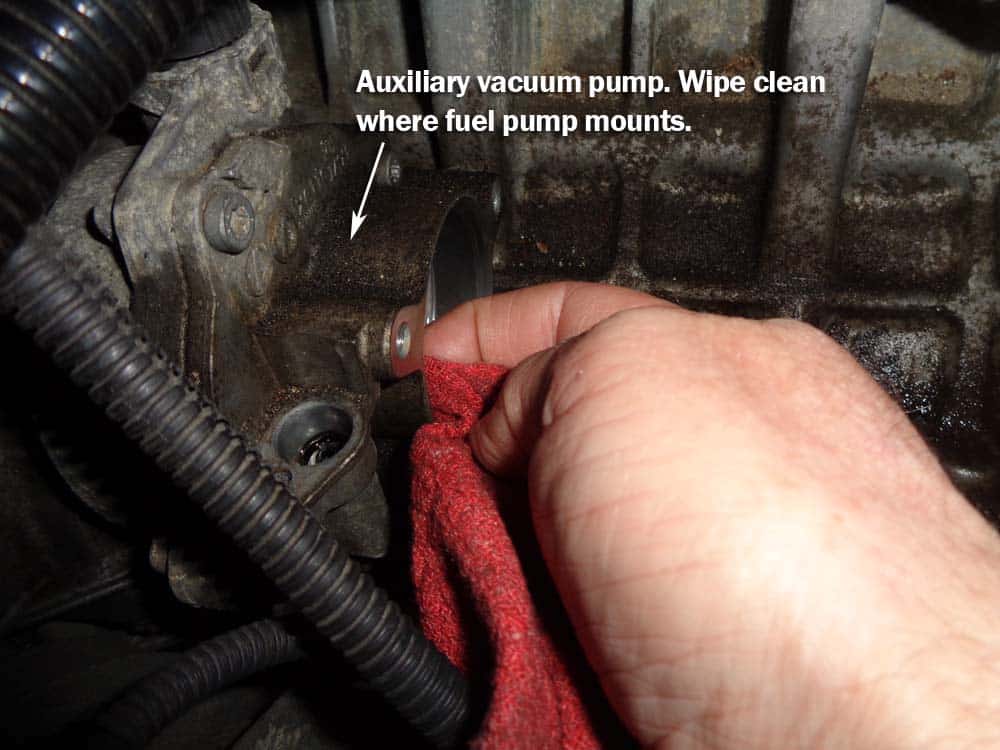
- Make sure the auxiliary vacuum pump (where fuel pump mounts to) is clean so there is a tight unobstructed fit with fuel pump o-ring.
- Install the new BMW high pressure fuel pump. Torque fuel pump mounting bolts to 14 Nm (10 ft-lb).
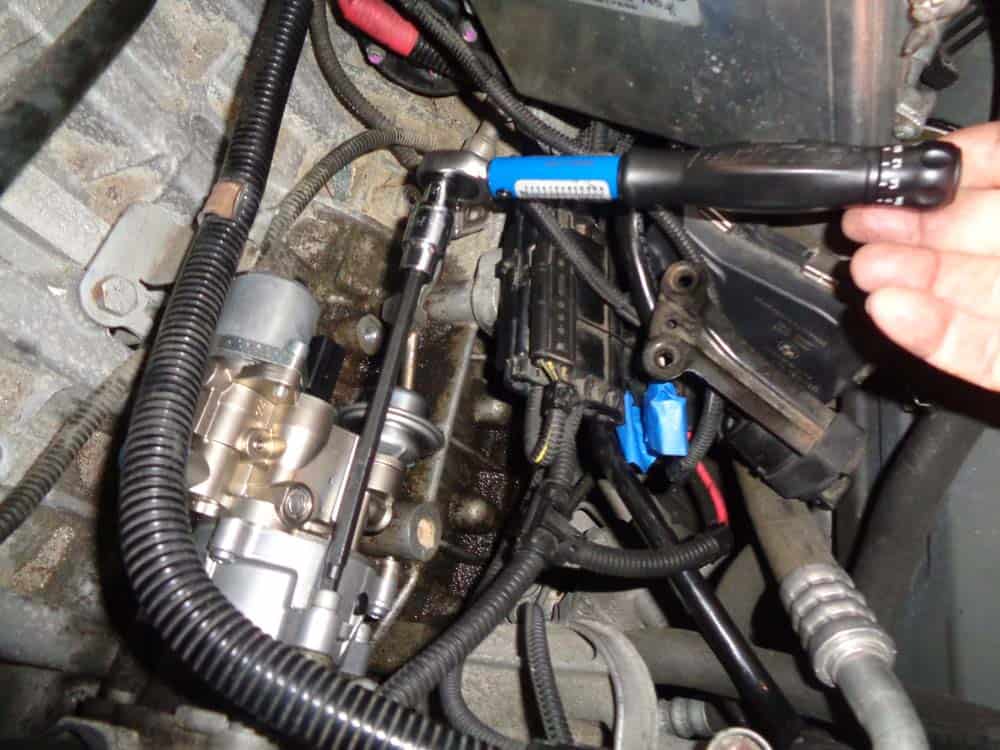
- Reinstall fuel lines in the following sequence: Top fuel line - a) Hand tighten to top of pump, hand tighten to fuel rail, LOOSELY install bolt in fuel line mount (just a couple turns), b) Final tighten to top of pump, then final tighten to fuel rail, c) Final tighten fuel line mount to engine block. Rear fuel line - a) Final tighten to back of pump. b) Reinstall wiring harness mounting bracket and tighten bolts.
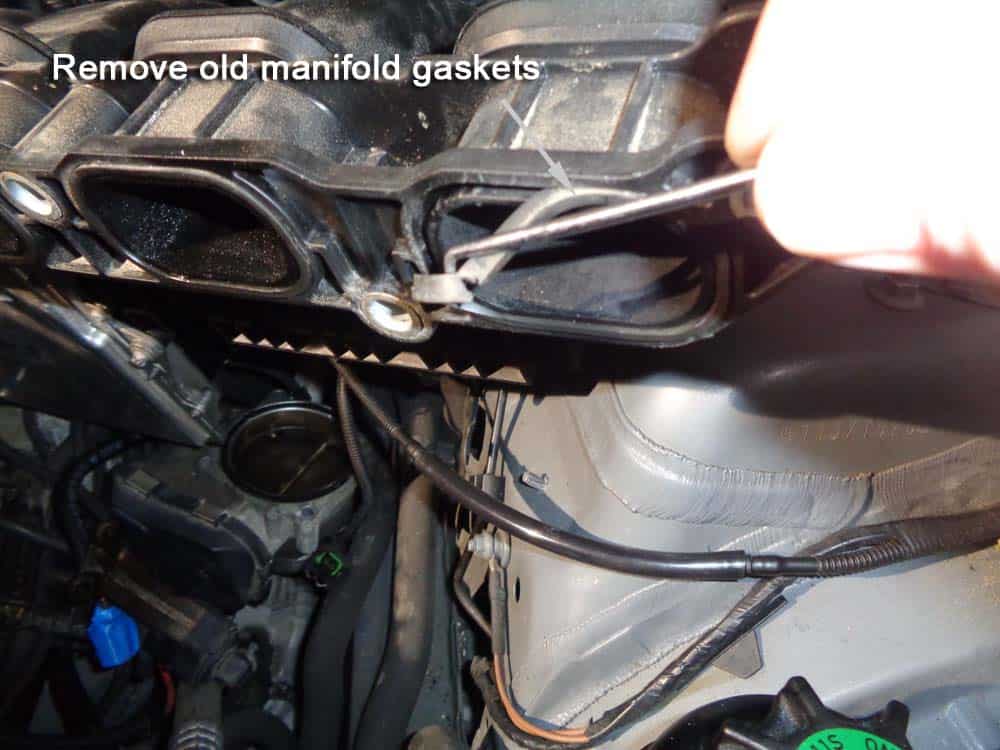
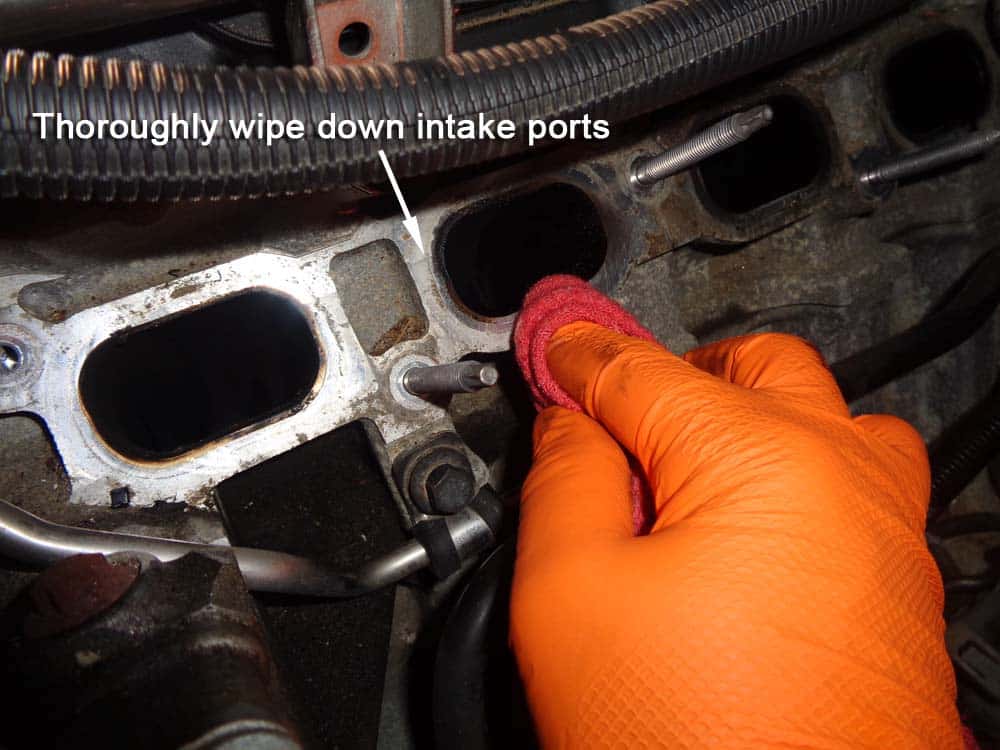
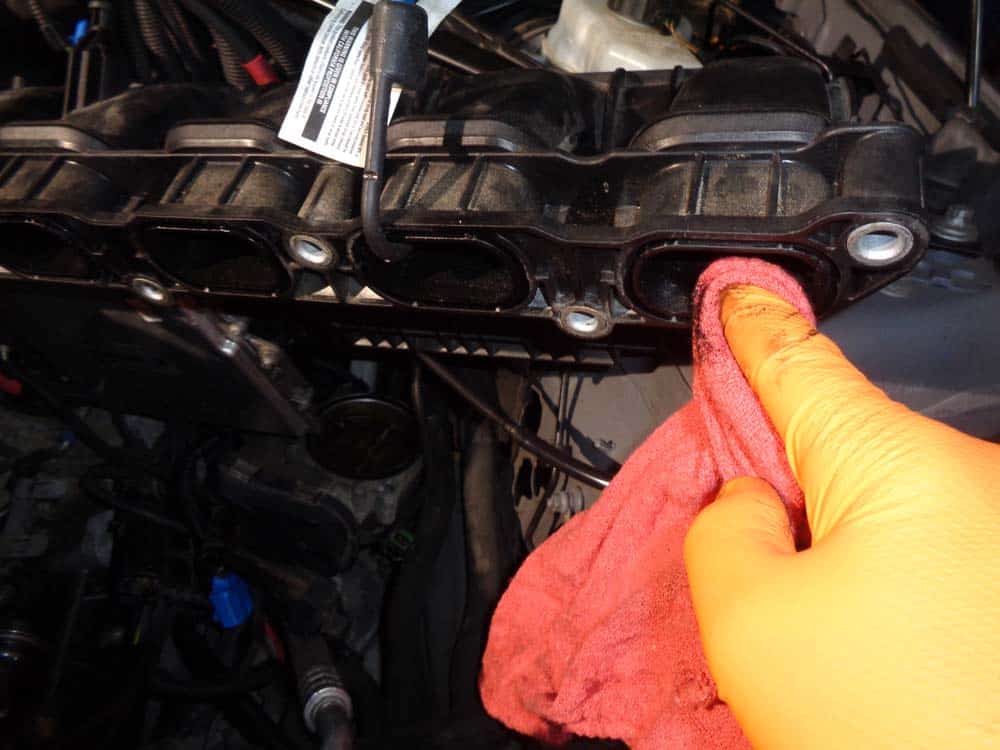
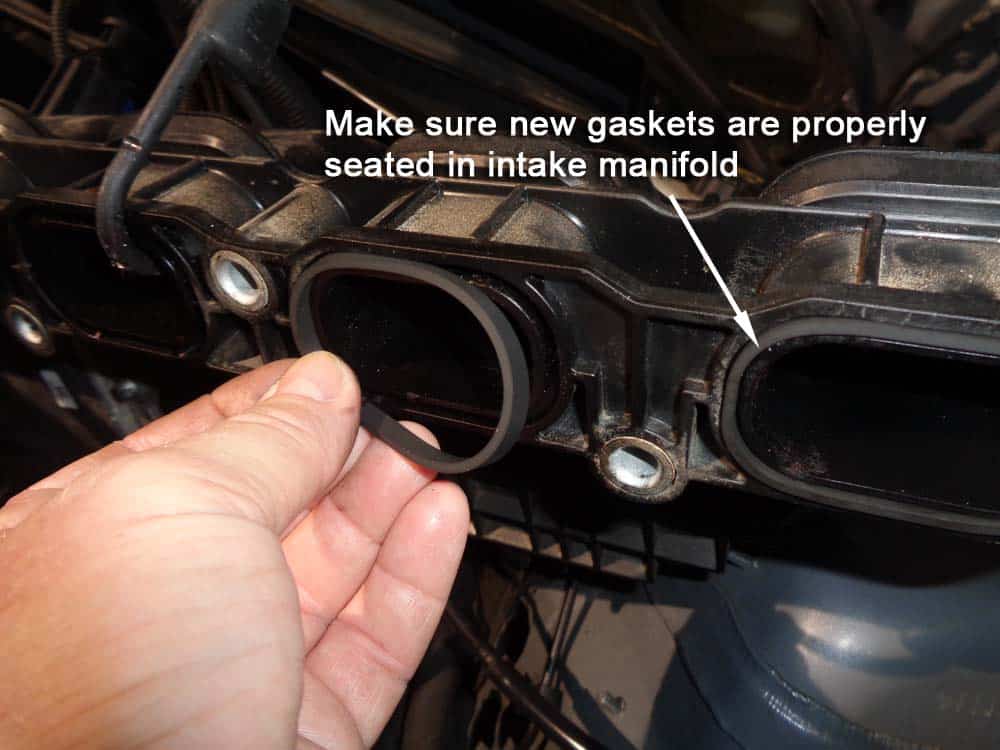
- Reinstall intake manifold following above steps in reverse. Make sure to install new intake manifold gaskets. The old gaskets could leak if reused. Make sure to thoroughly clean the engine head with a rag before reinstalling the intake manifold (see images below). Torque the intake manifold nuts to 15 Nm (11 ft-lb).
- Reinstall the throttle body following above steps in reverse. Make sure to install a new throttle body o-ring when reassembling. The old o-ring could leak if reused. Torque throttle body mounting bolts to 8 Nm (70 in-lb) (6 ft-lb).
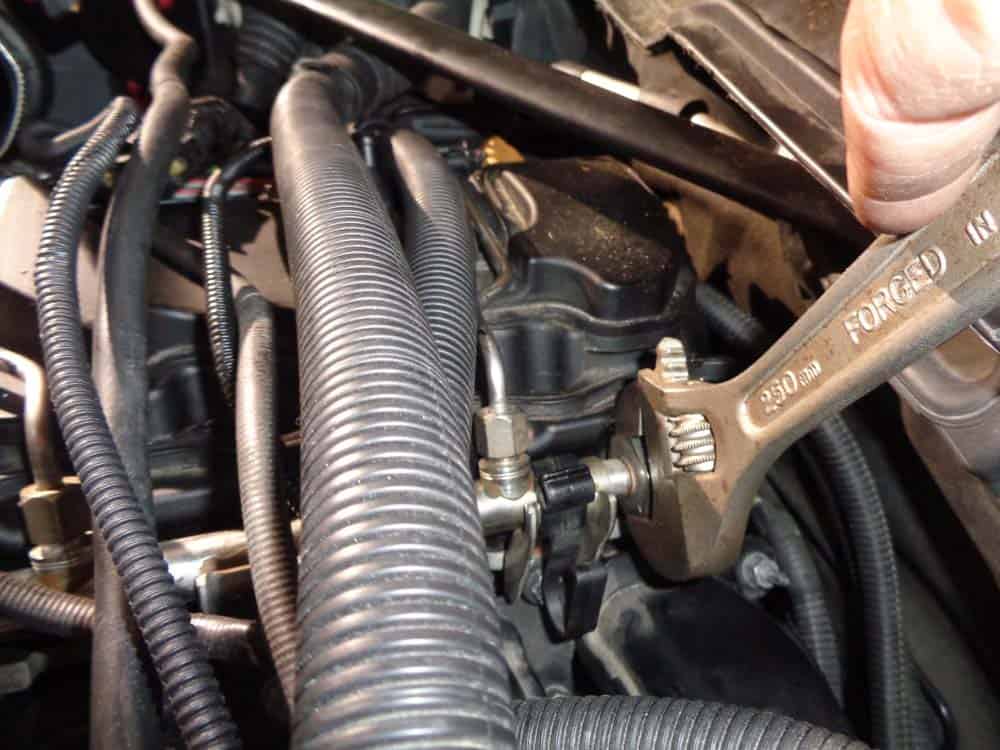
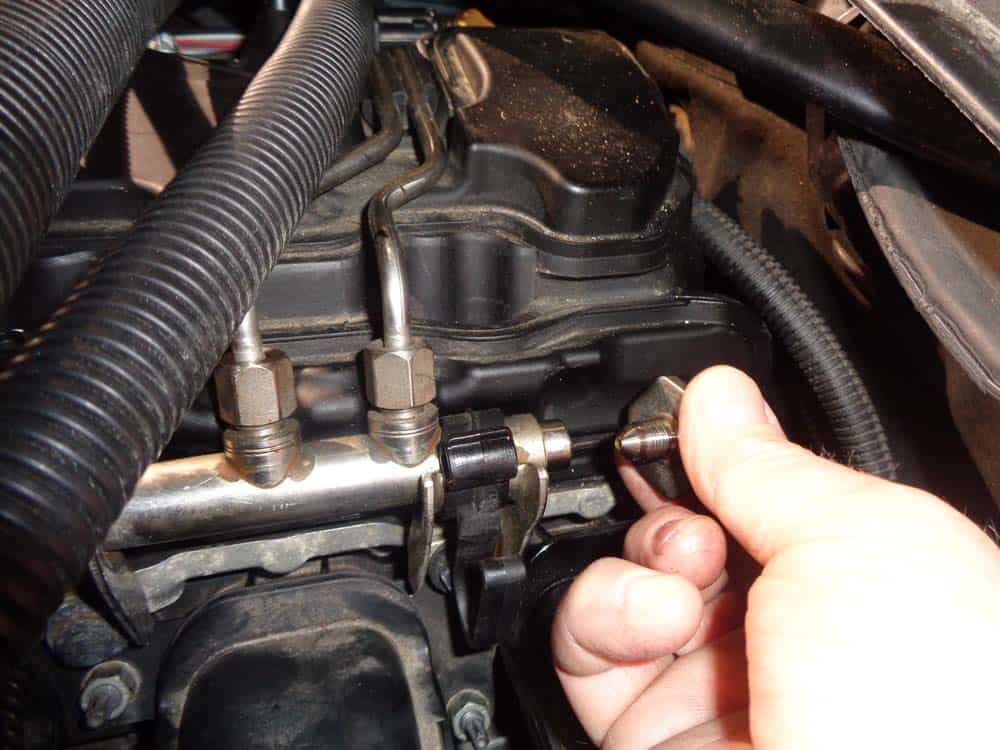
- Optional step - install new high pressure fuel rail pressure sensor. Use an adjustable wrench to remove old sensor from fuel rail. Install new sensor and tighten (do not over tighten...just make snug).
- Reinstall the air intake assembly.
- Reinstall the cabin filter housing.
- Start car and test system. It will take the engine a few cranks to get the fuel into the cylinders so vehicle can start.
BMW High Pressure Fuel Pump Replacement Finished