Affiliate link disclosure – The BMW Repair Guide uses affiliate links in their site. For more information on affiliate links, please click here.
Repair Summary
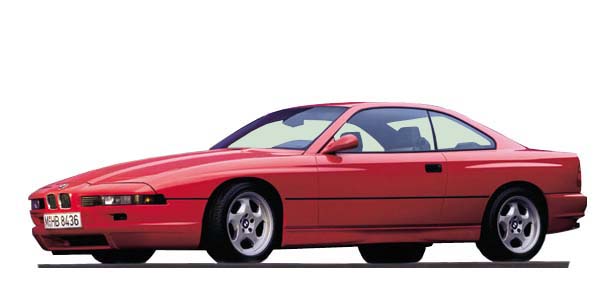
This article gives detailed instructions on deleting the metal sunroof from your BMW vehicle and enclosing the ceiling opening. This repair only works on vehicles with a metal sunroof - it does not work on glass moonroofs. Even though we used a 1995 840ci (E31) to perform this repair, this article can be applied to any vehicle with minor modifications to the repair steps.
See all vehicles this article applies to
All BMW Models
Converting your BMW to a "true" hardtop by deleting the metal sunroof is not as difficult as it may seem.
Vehicle sunroofs...probably the dumbest invention ever conceived by the automotive industry. I know I'm going to get trolled for that comment, but if upsets you, let's first discuss the difference between a sunroof and a moonroof and what their function is.
This article is about sunroofs - that metal panel in the roof of your BMW that slides back and forth allowing sunlight and wind to enter through the ceiling of your vehicle. Sunroofs are made out of metal and are manufactured to match the contour of the roof when closed.
Moonroofs on the other hand are made specifically of glass. They operate just like a sunroof with the added benefit of allowing sunlight into the cabin of the vehicle without being opened. They also generate quite a bit of heat - they usually are installed with a retractable panel in the ceiling liner to keep the cabin cool on hot sunny days.
The automobile sunroof first appeared in the 1937 Nash and slowly evolved into a necessity for weekend cruises down a beachside highway or a bachelorette party in the back of a limo. The theory is they allow light and fresh air into the cabin of the vehicle creating a more pleasurable driving experience. Oh...and they also serve as a wonderful opening for a drunk girl in a tiara to stand up in, whilst cruising down a bar-lined avenue.
As technology advanced in automobiles, so did their heat-air-ventilation-air conditioning (HVAC) systems. These advancements made opening sunroofs unnecessary to keep the cabin purged of foul air. Furthermore, as sunroofs age their internal parts are notorious for breaking, creating an inoperable leaking eyesore that serves absolutely no purpose. Glass moonroofs (especially panoramic ones) are undeniably a nice option since they let sunlight into the cabin without having to open them. But metal sunroofs only let light in when opened, along with a lot of excessive noise and a loss of all of your air conditioning.
If you want to cruise around and enjoy the outside freshness of air and sunlight, buy a convertible.
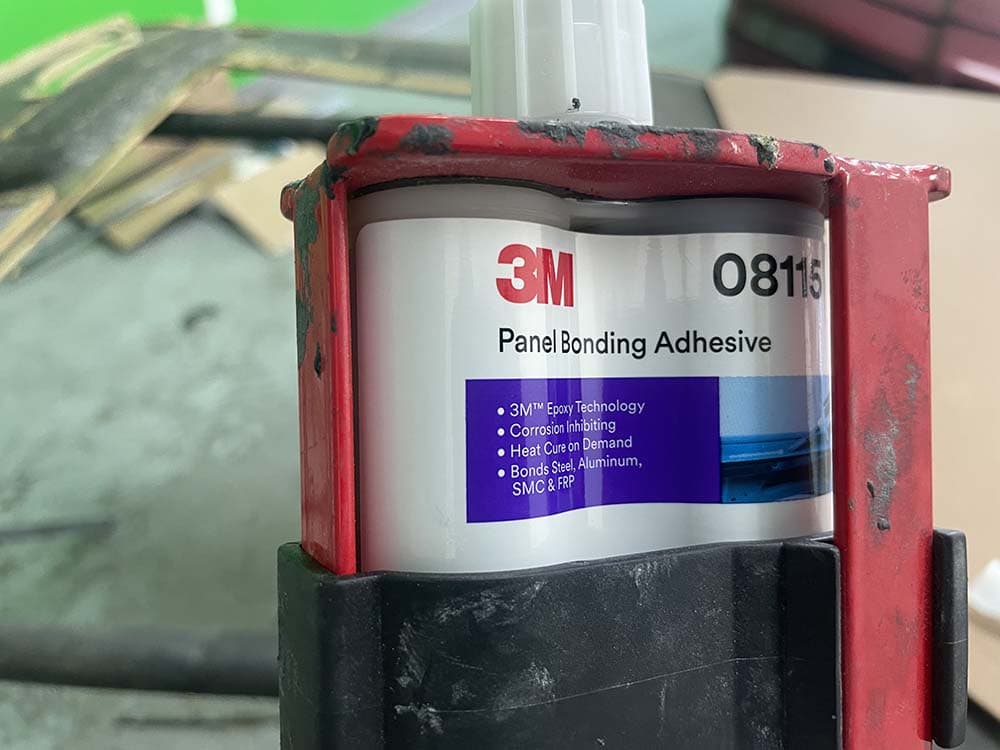
Removing and enclosing a metal sunroof So what do you do if you own an older model BMW (or any brand car for that matter) and want to remove and enclose the metal sunroof opening? I encountered this situation recently in my 1995 BMW 840ci. After repairing the internal sunroof parts twice and then frying its irreplaceable motor, I had had enough. I was luckily right in the middle of a mild restoration of the vehicle, including replacing all of the interior fabric with Alcantara and an exterior body repaint. If I was going to delete the metal sunroof from the vehicle, now was the best time to do it. But could this be done in my garage without the need of welding a new piece of metal in the sunroof opening? The answer was yes. The procedure was actually quite easy - in fact, the toughest part of the repair was getting the ceiling liner and sunroof frame out of the vehicle. I had a lot of experience using 3M body panel adhesive, which in my opinion is the strongest glue known to humans. I felt very confident that with a little ingenuity, I could use it to glue the metal sunroof back into the roof of the vehicle without fabricating and welding a replacement piece. I also felt very confident that I could patch the sunroof opening in the ceiling liner and recover it so it looked like a factory hardtop. I was right on both counts. Epoxing the original metal sunroof panel into the roof of the vehicle was simple with the clever use of four "fishing" magnets that held it firmly in place until the glue dried. Yes, I said fishing magnets. The 3M body panel adhesive is so strong that I honestly feel the folded steel edge of the sunroof panel would fail before the glue would. As for the ceiling liner, I simply glued a thin piece of masonite on the backside of the opening. I then finished it off with short-strand fiberglass filler and Bondo and blended it into the existing curves of the ceiling liner. I am by no means a good body man - in fact, I had a horrid experience trying to patch a fender with Bondo once. But filling in the sunroof opening in the ceiling liner was easy and came out looking like it was done at the factory. I have included detailed step-by-step instructions with photos of the entire procedure (see Repair Steps tab) along with a parts list that includes the exact supplies I used to do the job. Please note that the final bodywork was performed at a professional body shop and is not included in this article.


Before starting this repair, you must have the following required parts.
All BMW vehicles
Don't be fooled by manufacturers that claim their glue is strong. There is only one adhesive that has the strength to keep external body parts from flying off your BMW...3M Panel Bonding Adhesive. 3M Panel Bonding Adhesive is a simple one component adhesive that doesn't require primer on most painted surfaces and plastic trim parts. It is the same factory adhesive used by BMW that let's you fix body trim, wheel-arch extensions, spoilers and other items easily and without drilling.
Super strong rare earth magnet
These magnets are so strong they easily hold even the most heaviest steel body panels in place so they can be welded or epoxied to the rest of the vehicle.
original formula
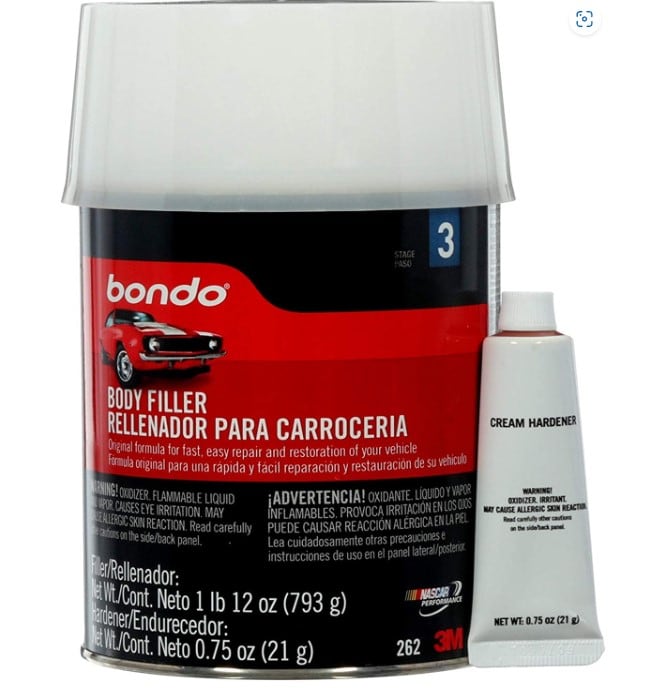
Bondo Body Filler is a two-part putty compound used to repair dents, dings, holes, rusted areas and scratches in vehicle exteriors. The filler cures fast, shapes in minutes and is formulated to be non-shrinking and permanently durable. This is the original formula for quickly and easily repairing vehicle exteriors and other metal surfaces, as well as wood, fiberglass, concrete and more.
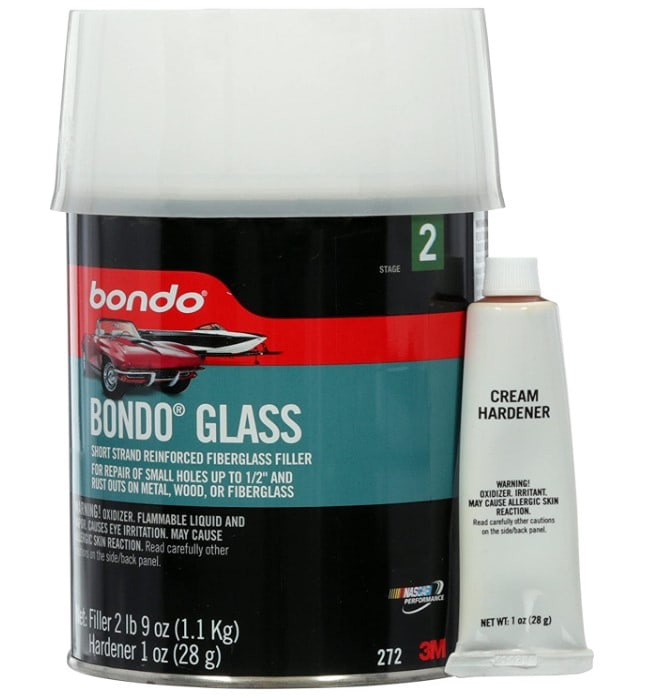
Short strand fiberglass filler
Bondo Glass Reinforced Filler makes an excellent foundation for hole, dent and rust-out repairs without the need for backing strips, cloths and resins. It contains short, interlocking fiberglass strands and fibers that make it twice as strong as regular body filler. It is also slightly thicker and provides a fast drying time, making the filler less messy on vertical surfaces like car doors.
Section 1 - Enclosing the ceiling liner opening
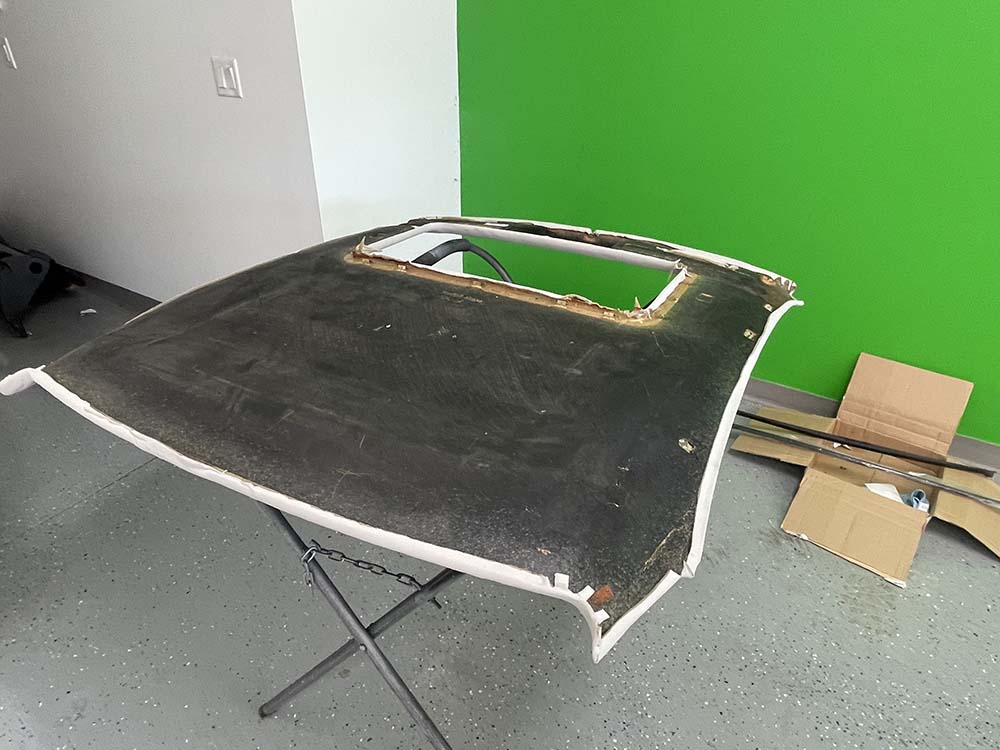
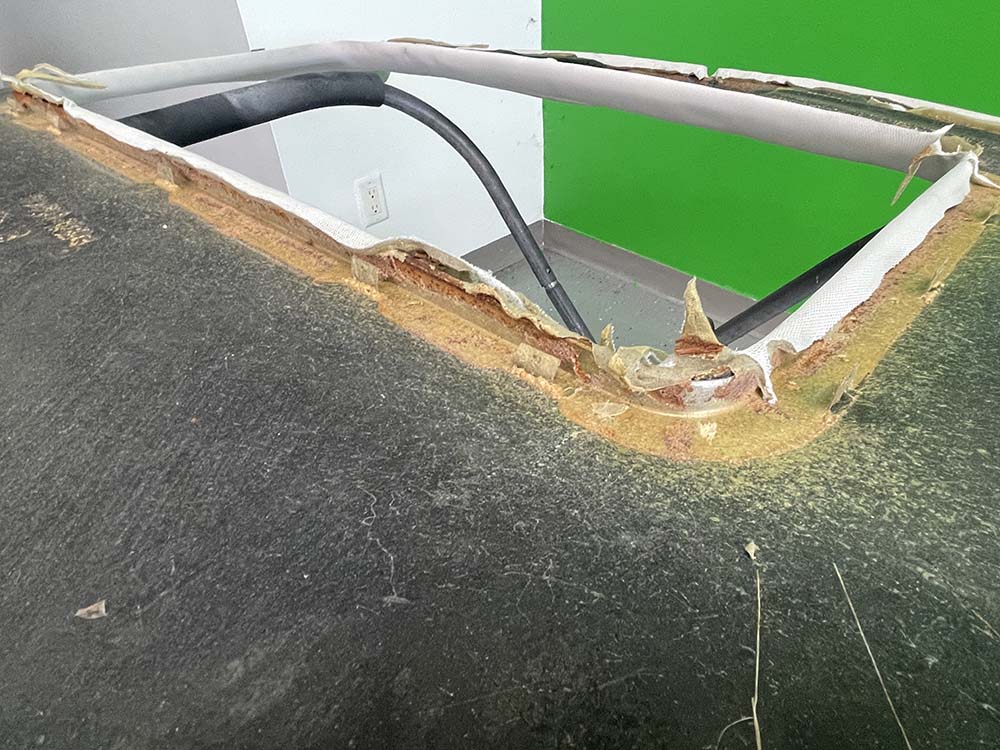
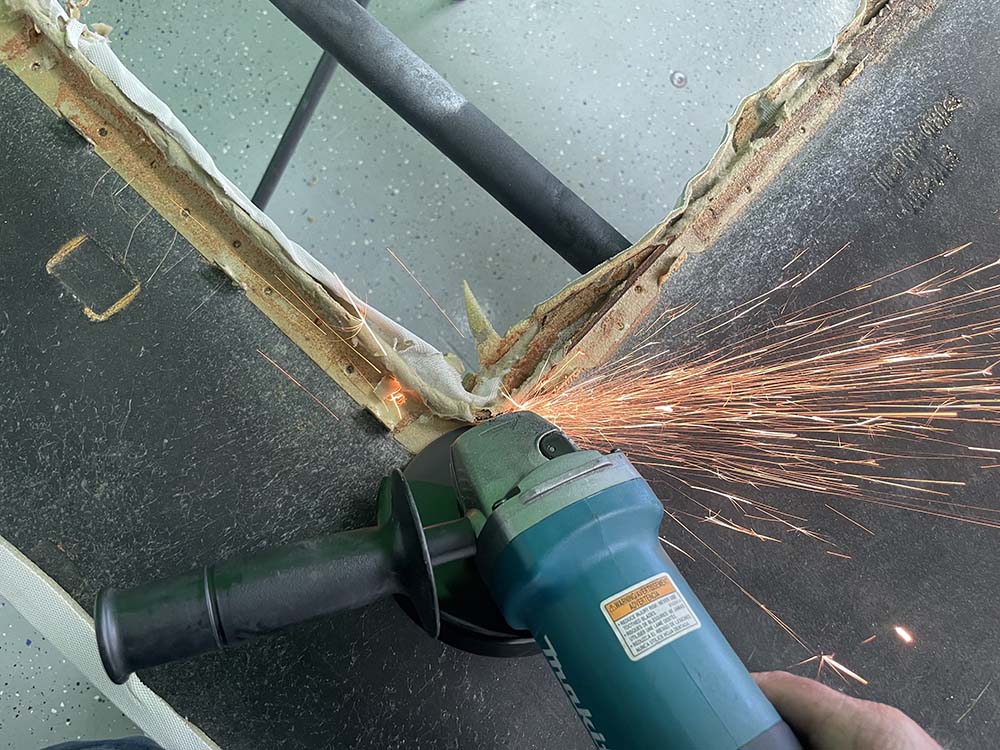
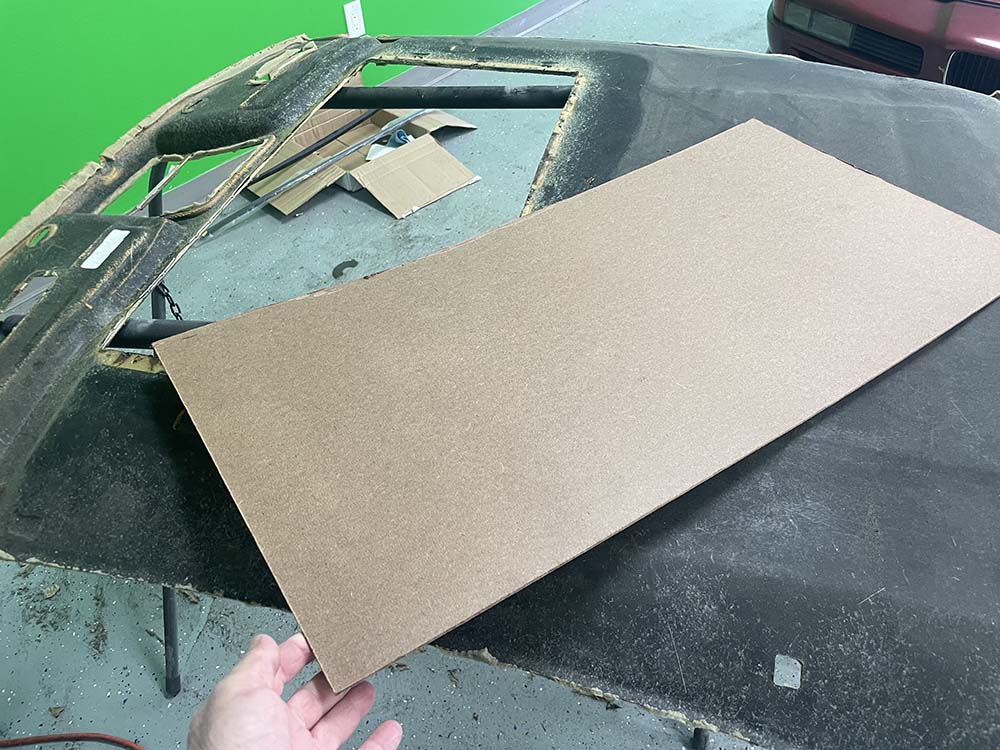
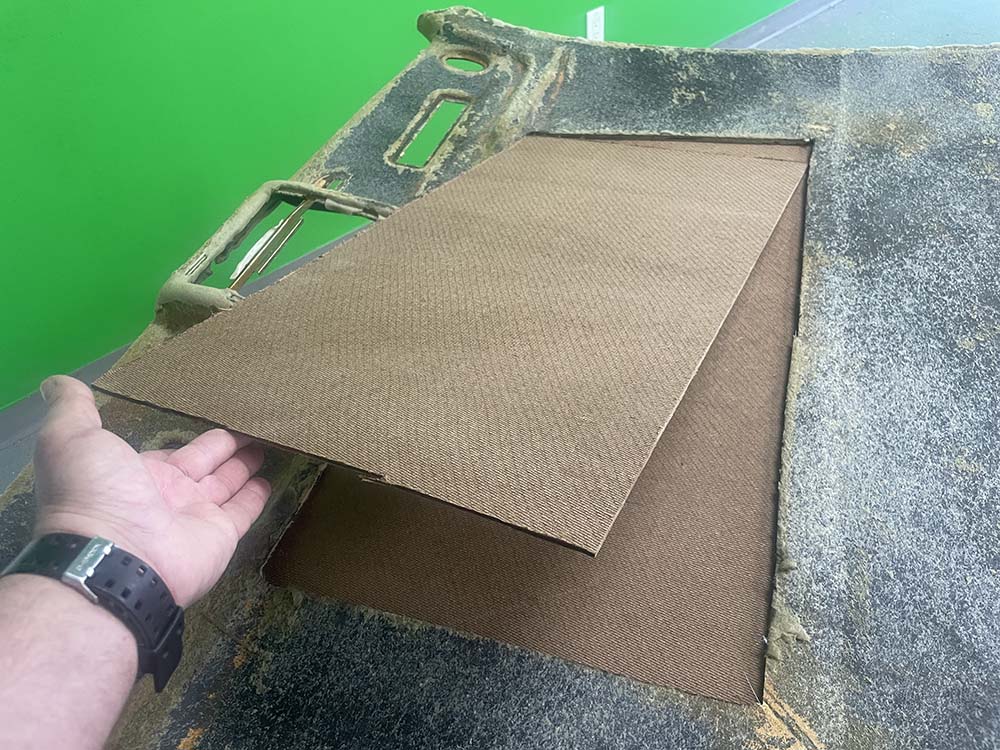
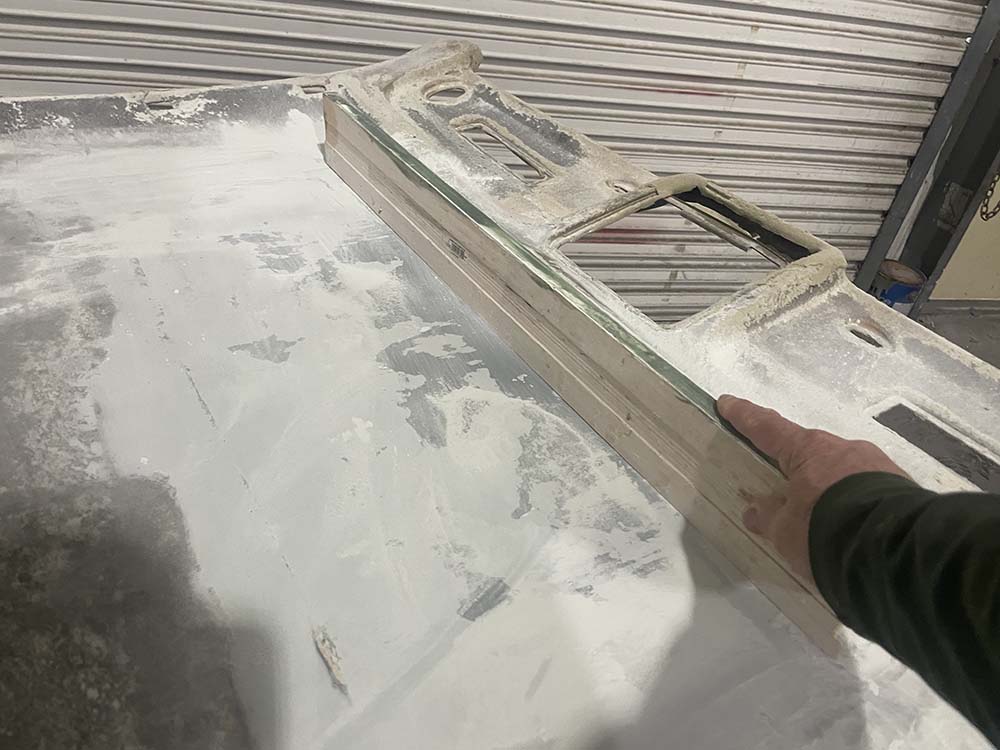
As previously discussed, this article assumes that you have removed the ceiling liner and steel sunroof panel from the roof of your vehicle. Enclosing the ceiling liner opening requires gluing a backing panel in, then applying Bondo and sanding until it matches the contour of the rest of the liner.- Place the ceiling liner on a workbench - it will most likely need a little bit of prep work before enclosing the sunroof opening. Just about all ceiling liners have metal lips or rails surrounding the opening that need to be removed...if left in place they would impede gluing the backing panel in. We simply used an angle grinder with a metal cutting blade to remove the metal lip on our 1995 840ci it as shown below.
- Go to your local home improvement store and purchase a sheet of their thinnest masonite. Unfortunately it usually only comes in 4'x8' sheets. Measure and cut a piece of masonite that is approximately 1/2" inch wider on all sides than the sunroof opening - this will give you enough space to glue it to the ceiling liner.
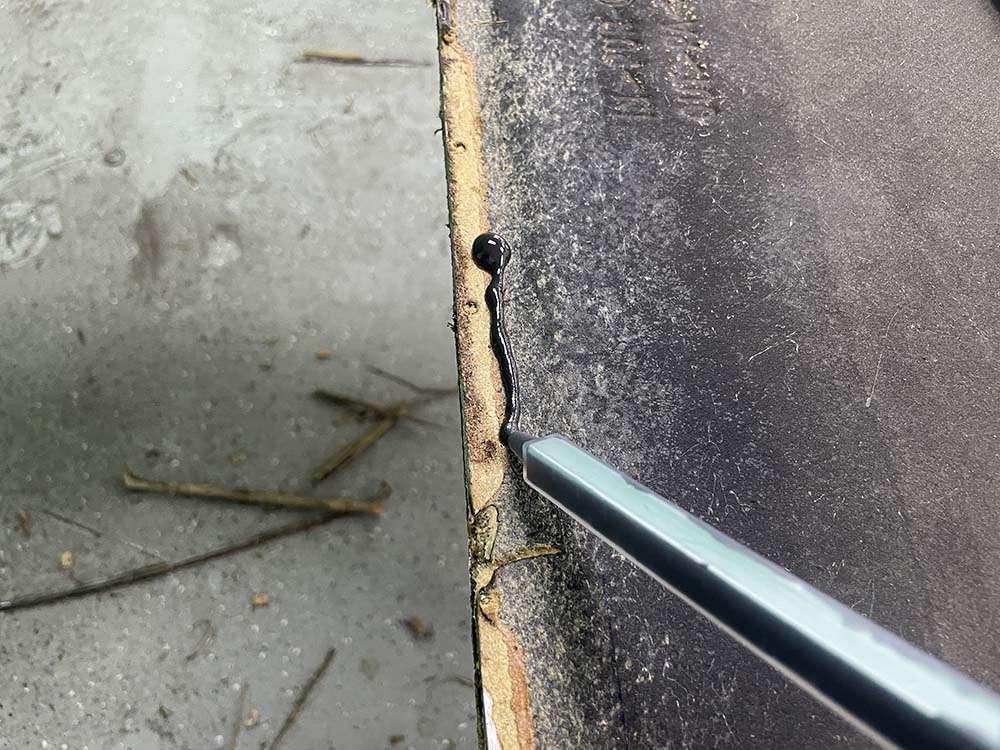
- Apply a thin line of 3M Body Panel Adhesive around the perimeter of the sunroof opening and glue the panel in place.
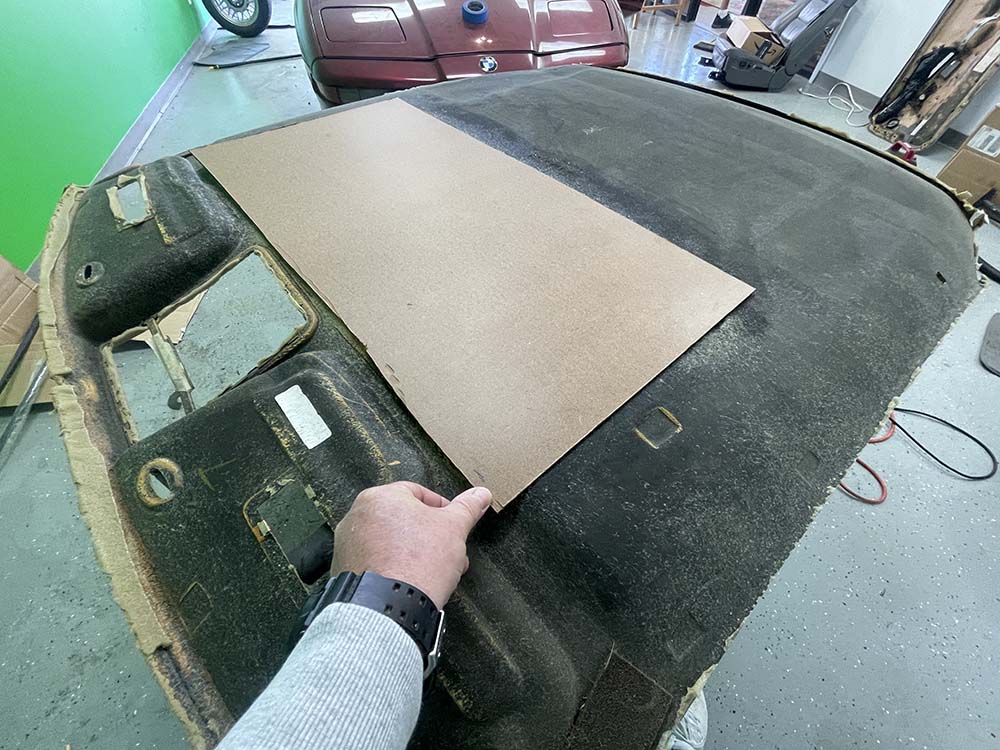
- Allow the glue to dry overnight. Flip the ceiling liner over. Cut another piece of masonite and glue it to the piece you just installed. This will help fill in the gap and require less Bondo to fill it in. We placed a little weight on top of the masonite to make sure it bonded well.
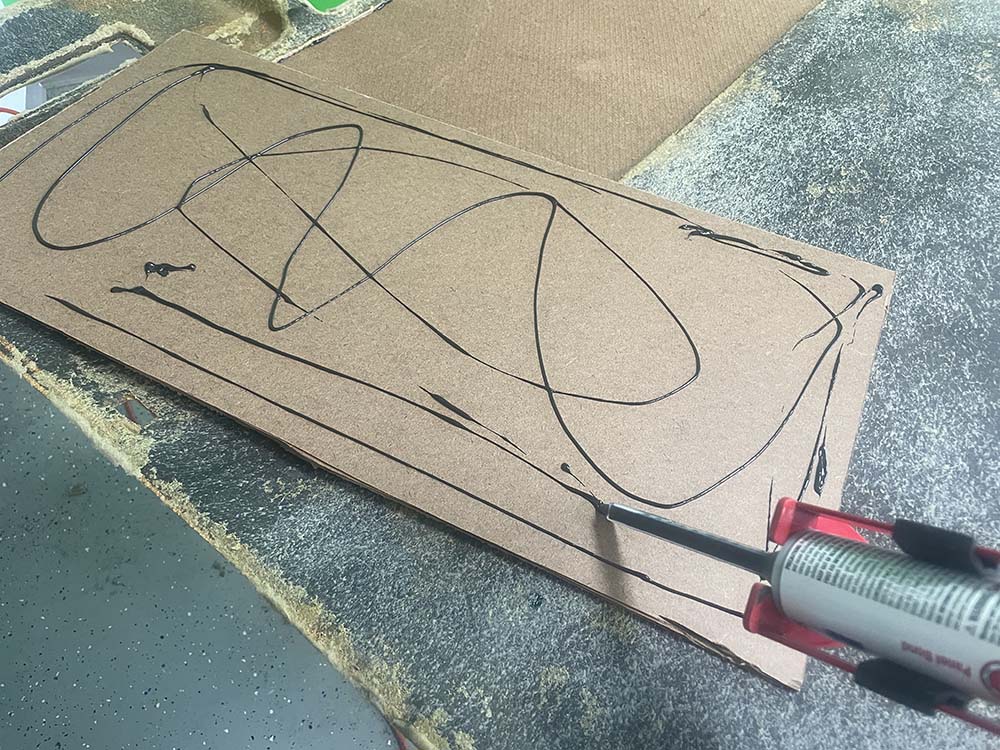
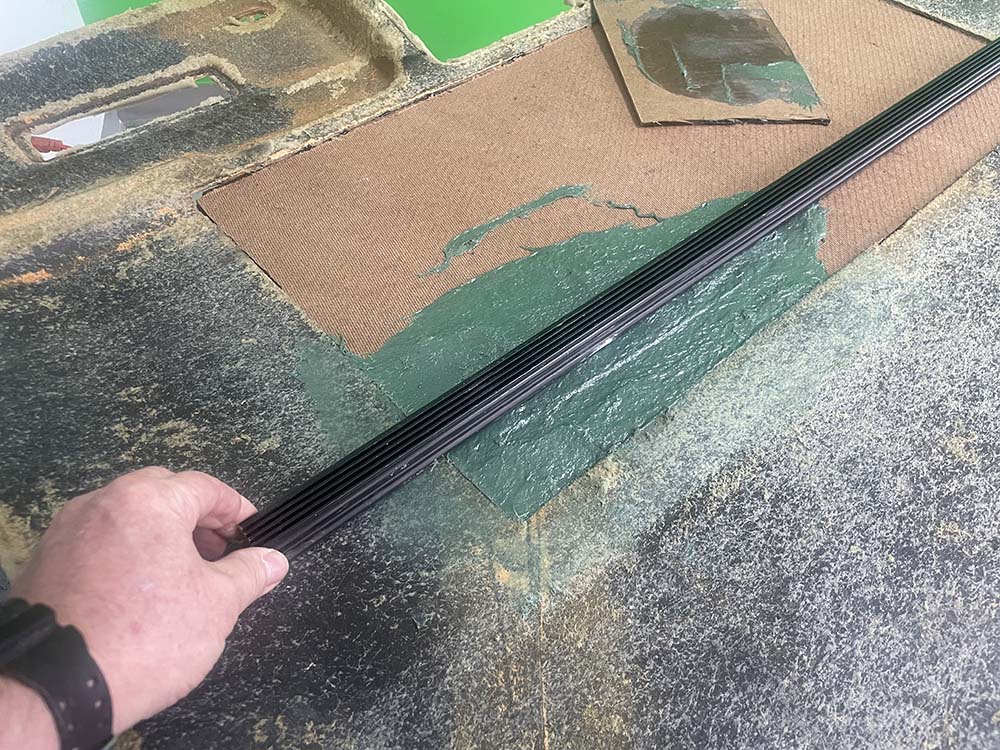
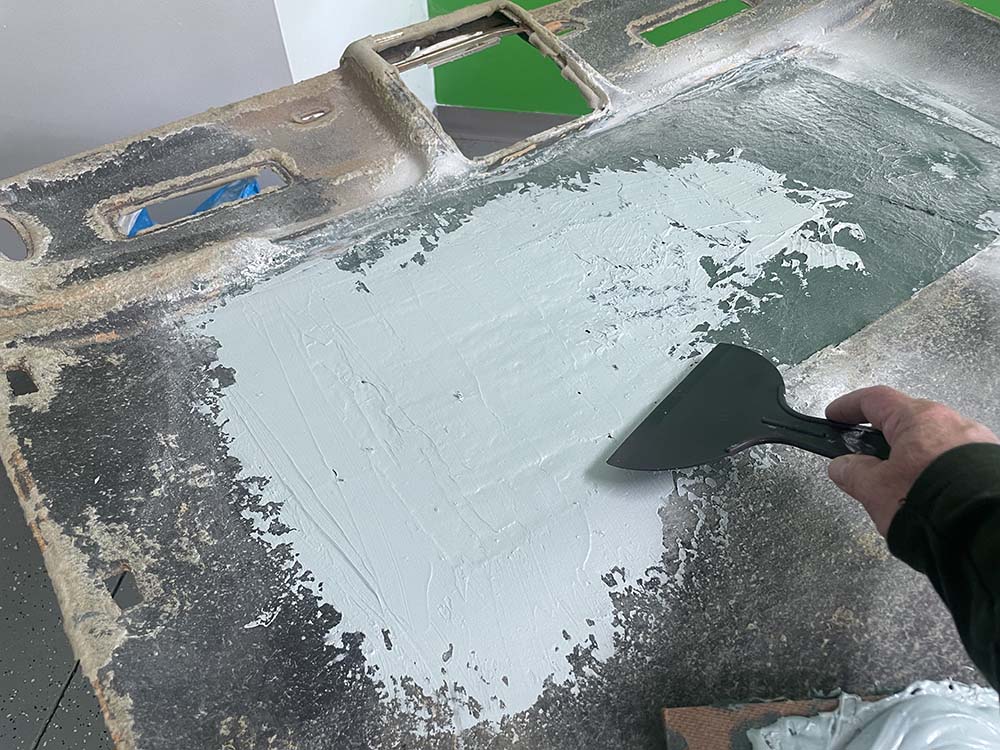
- Mix up a batch of Bondo Glass short strand fiberglass body filler. If you need to order some, see our parts list above for a great deal. Using a putty knife, start filling in on top of the masonite panels until it is close to being even with the ceiling panel. it doesn't have to be exactly even...we will be finishing it off in regular Bondo in the next step. Note...Bondo Glass dries quickly! Use a straightedge to make sure the Bondo Glass stays level with the top of the ceiling liner (see image below).
 Bondo Glass" width="400" height="434" />
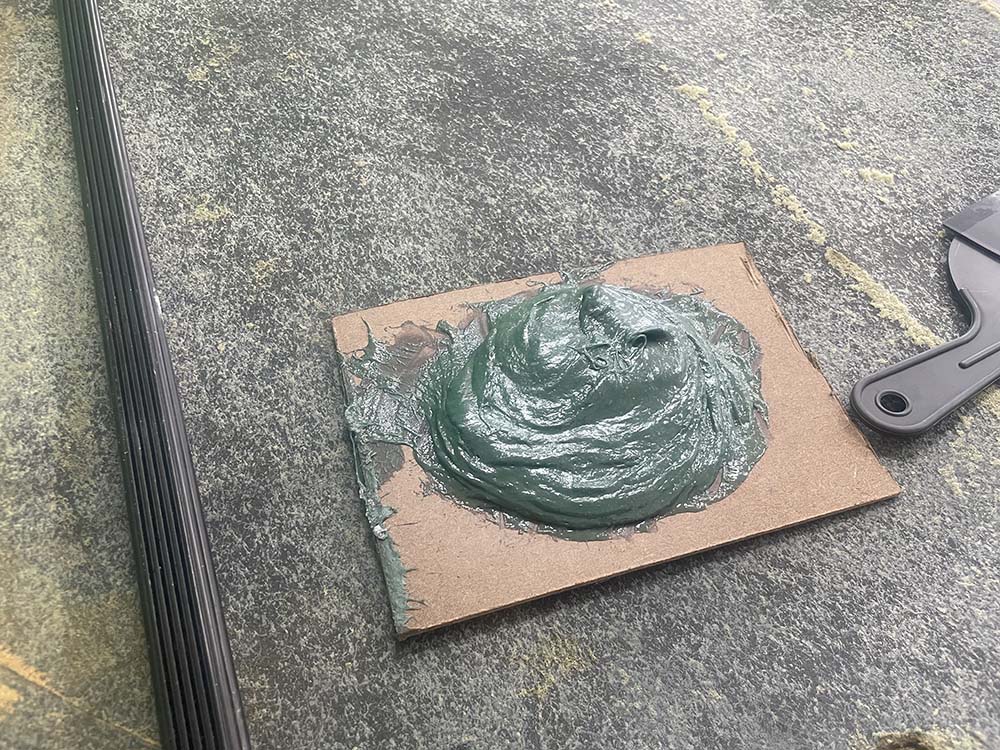 Bondo Glass" width="1000" height="750" />
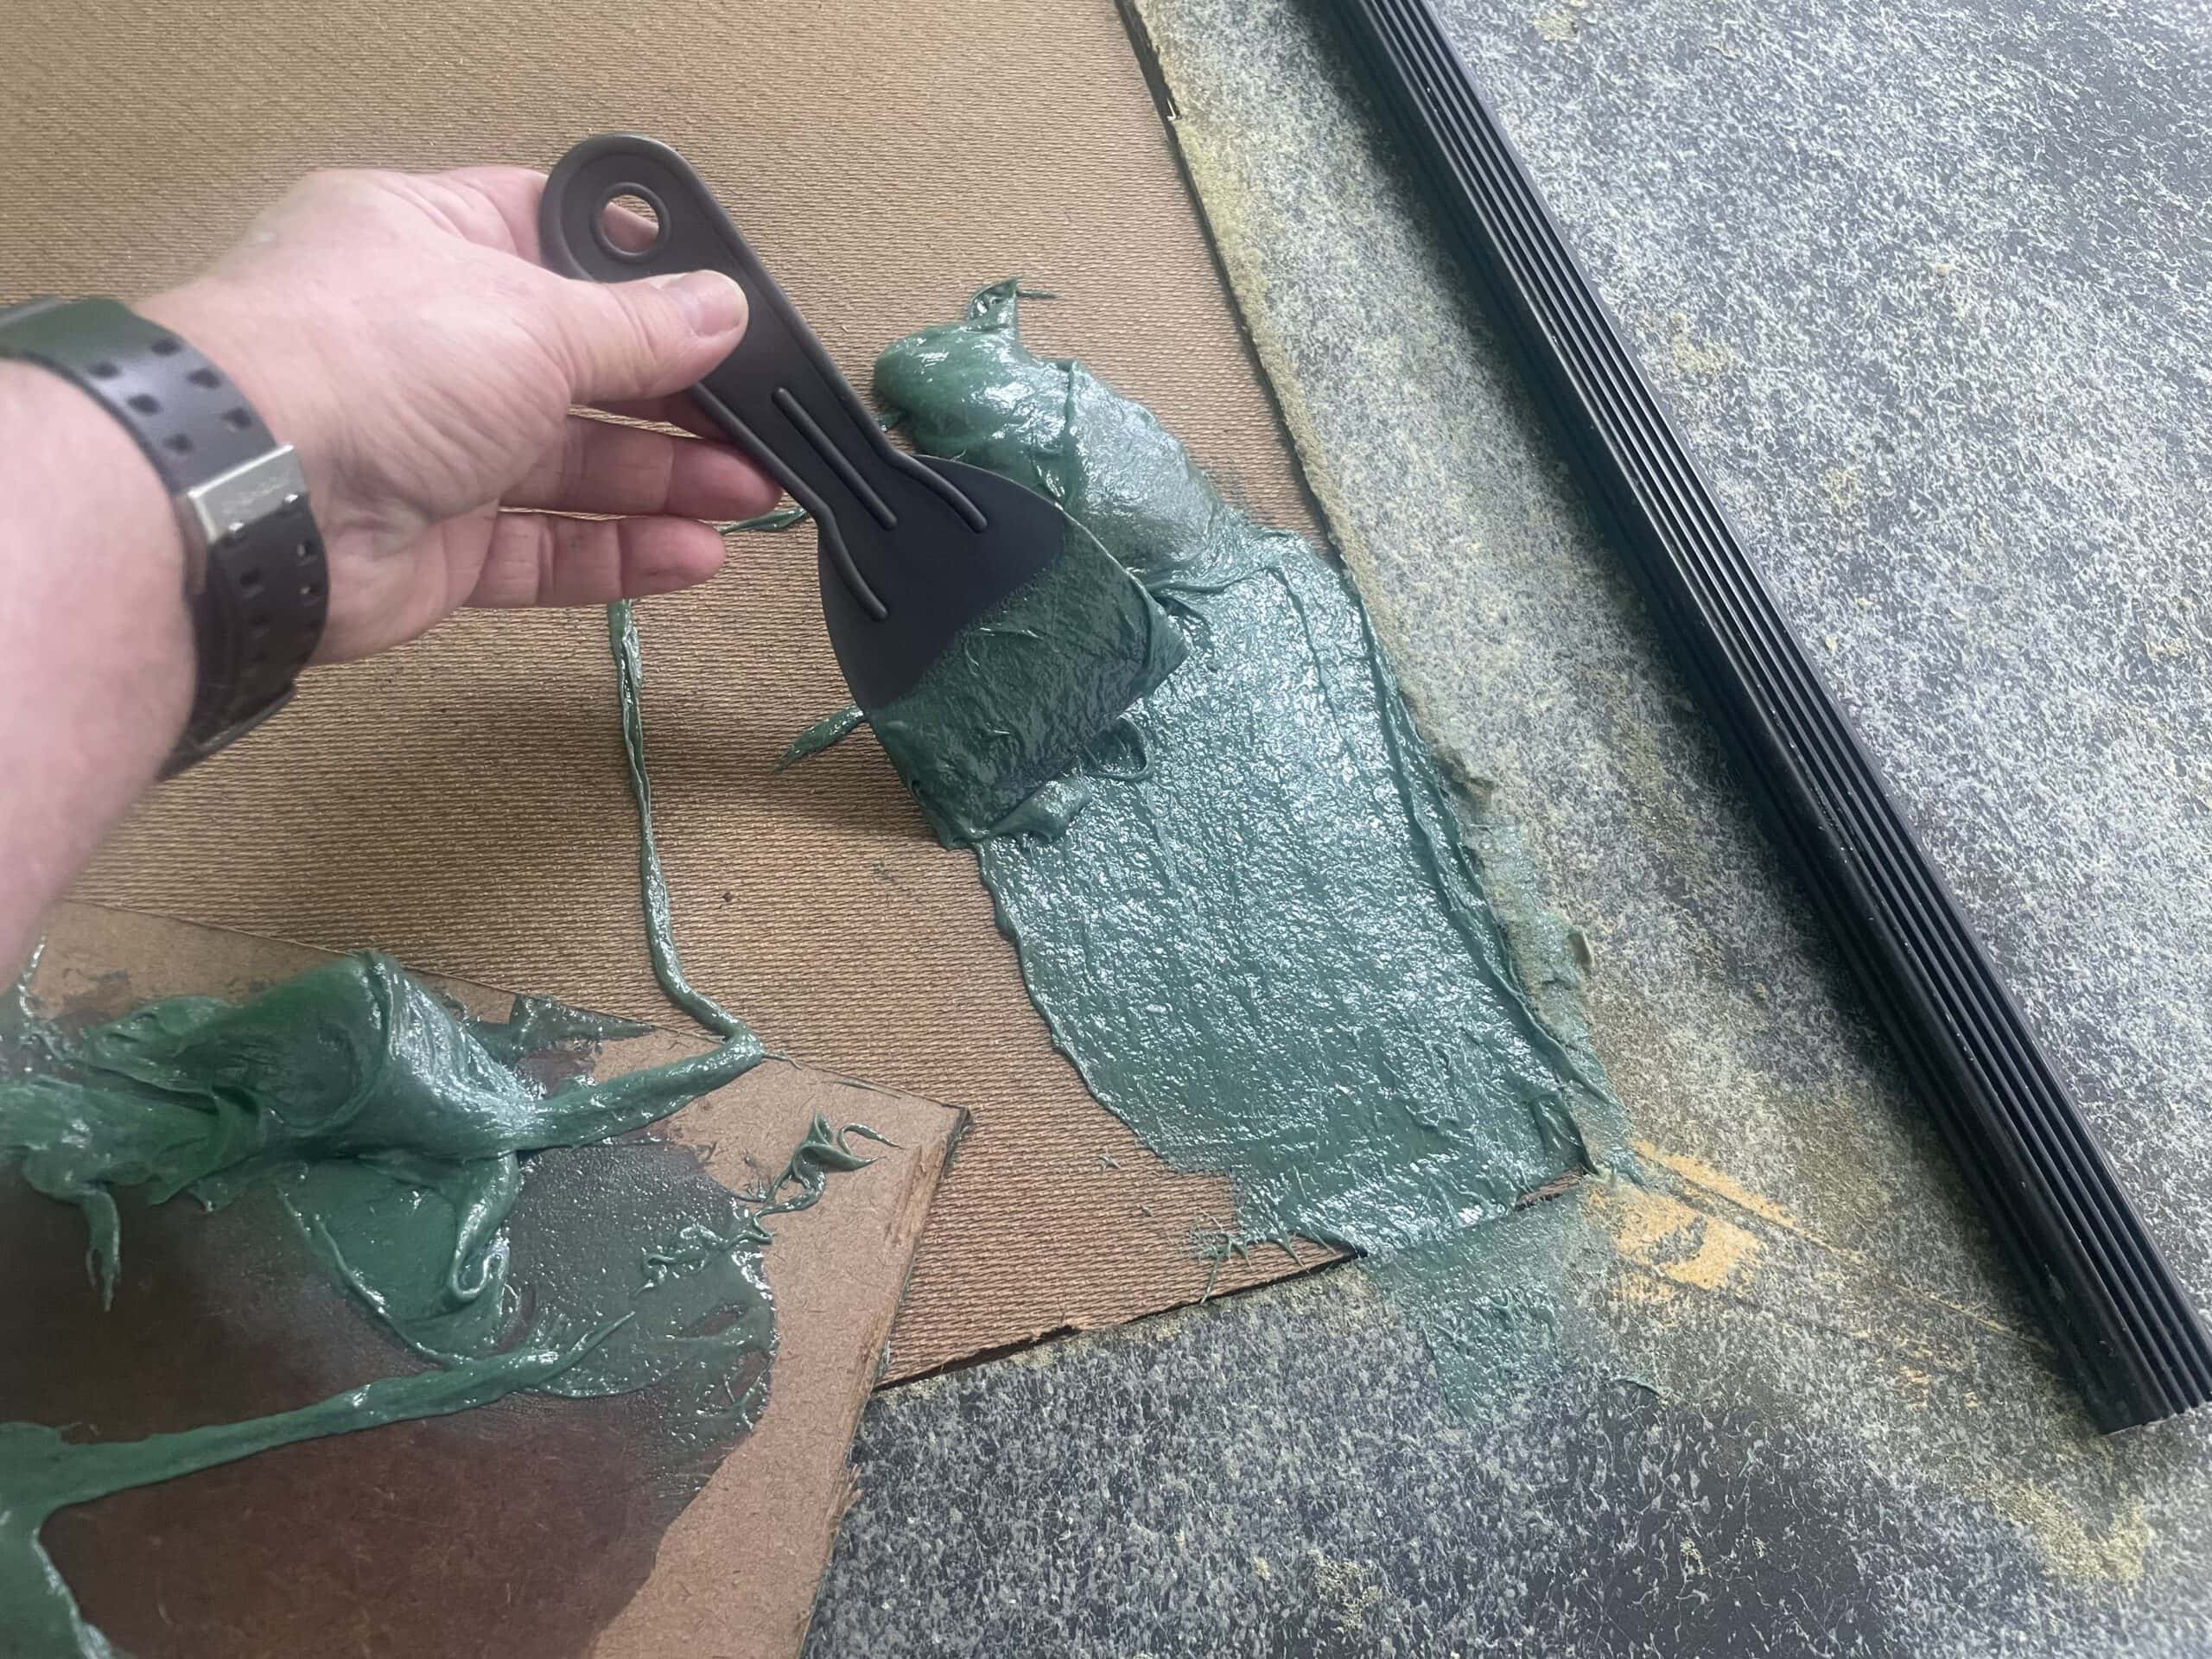
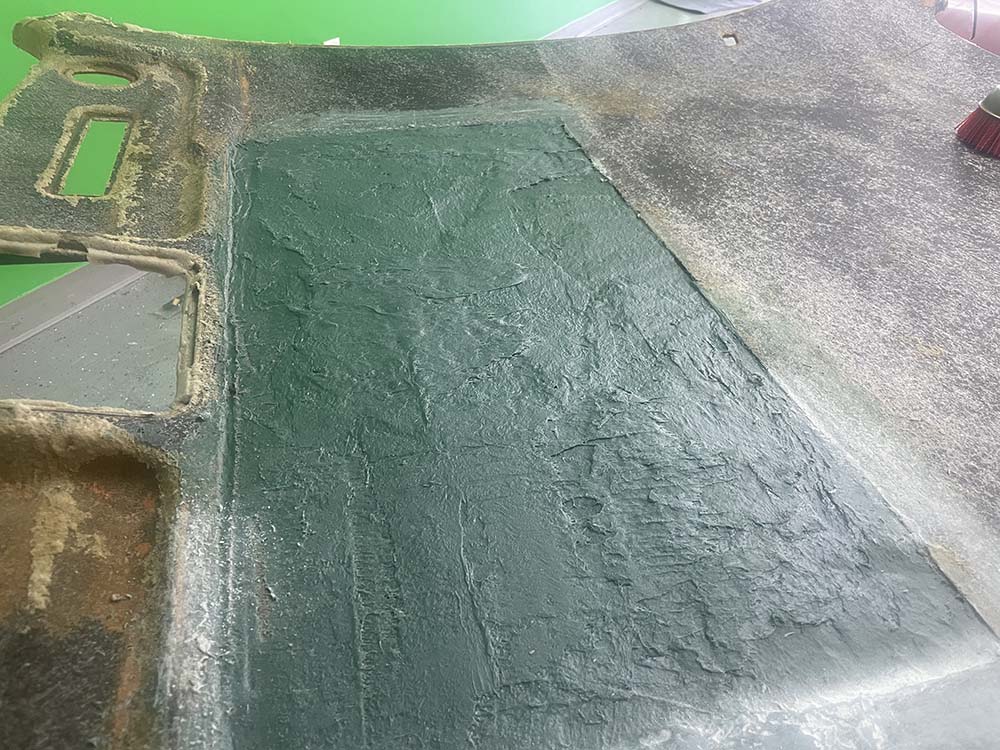 Bondo Glass ready for sanding" width="1000" height="750" />
 - Mix up a batch of regular Bondo Body Filler. Apply a thin layer over the Bondo glass and finish off evenly with the ceiling liner. Let the Bondo dry thoroughly then use 60 grit sandpaper to cut it down until it matches the contour of the ceiling liner perfectly. Use a straightedge to identify and high spots in the Bondo that need to be cut down.

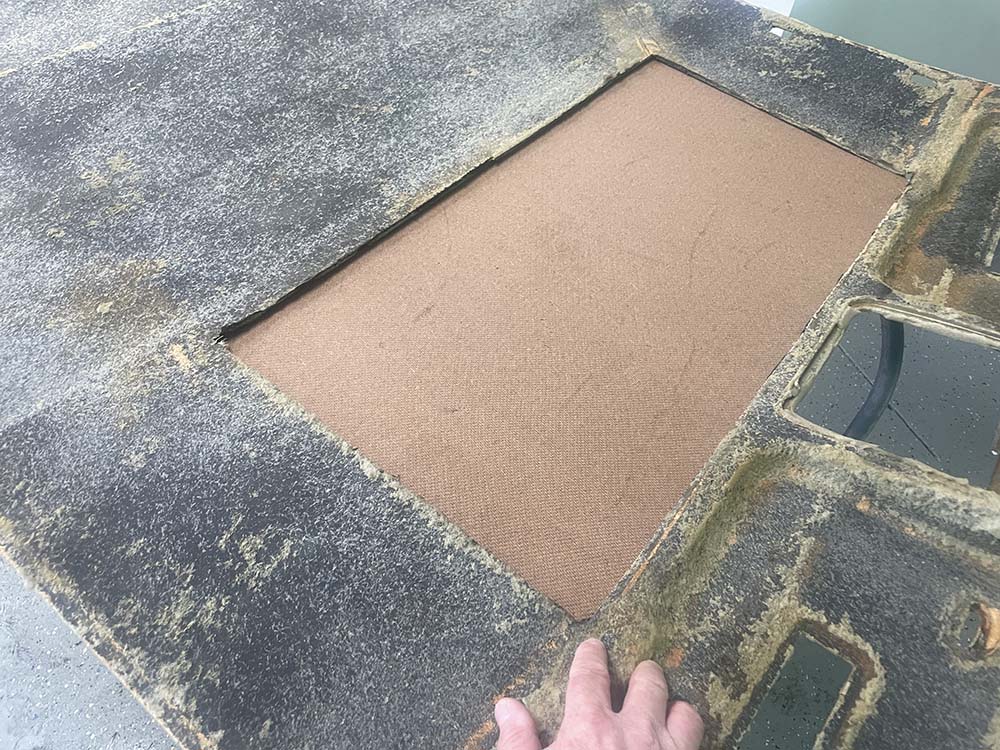
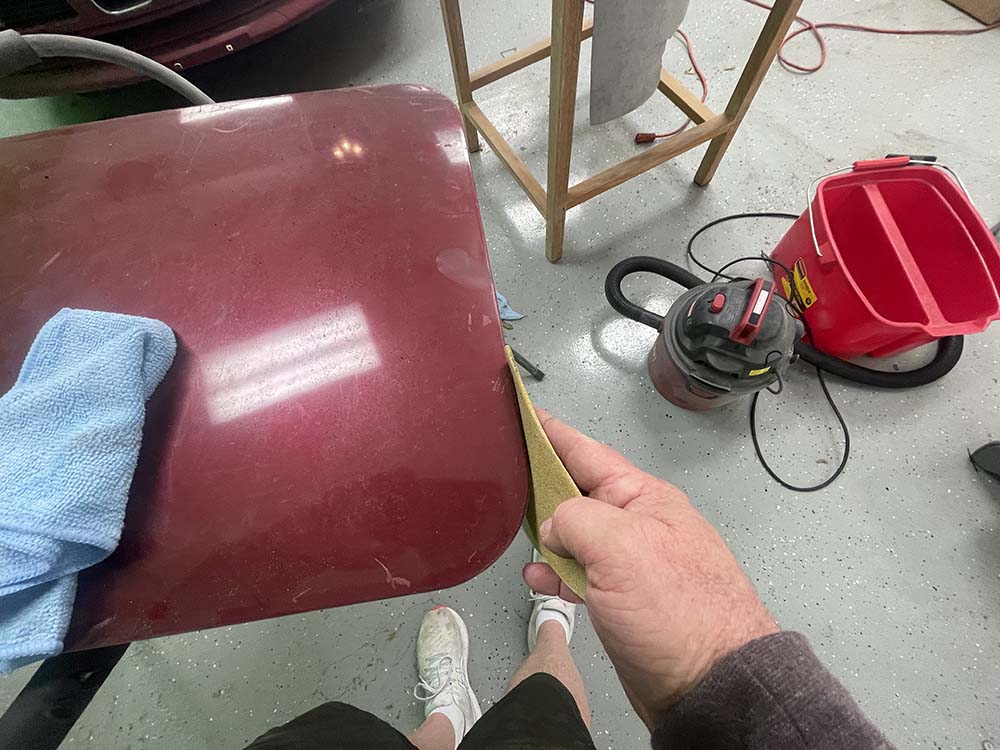
- Continue to sand the Bondo lightly until smooth. Fill any small holes or imperfections with Glazing Putty and sand until smooth.
- The ceiling liner is now ready to be recovered with fabric.
Section 2 - Enclosing the roof opening using epoxy (non-welding method).
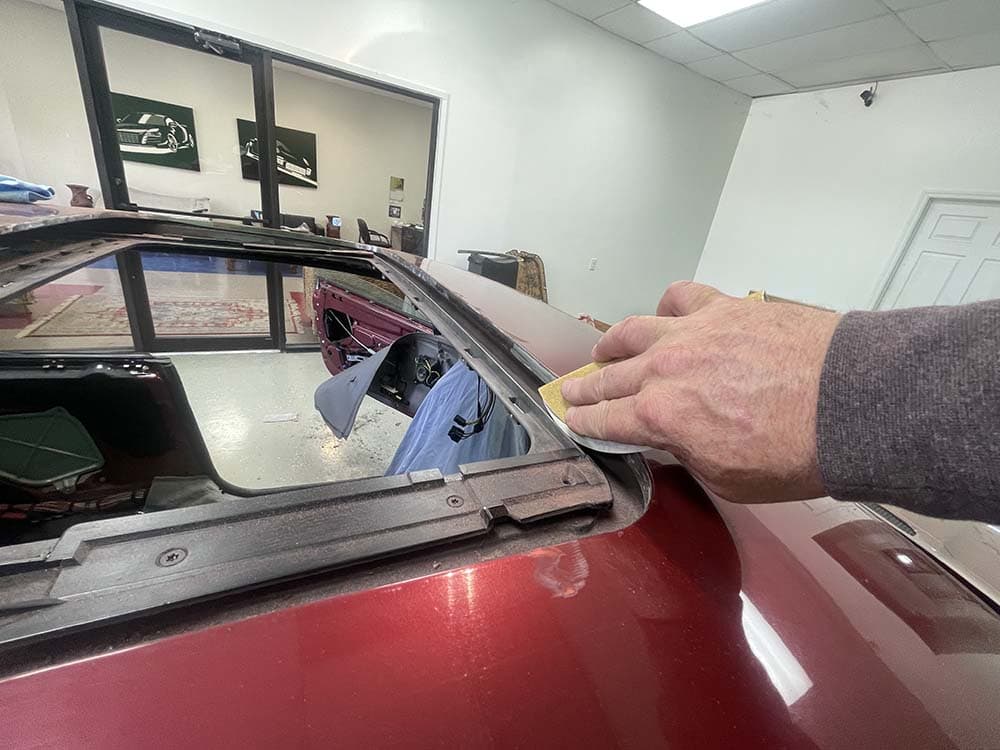
Enclosing the roof opening is very straightforward - it requires gluing or welding the original steel sunroof panel back into the roof of the vehicle. Even though welding may be the preferred method in professional body shops, using a high-strength epoxy-like 3M Body Panel Adhesive is perfectly acceptable and will produce results (if applied correctly) comparable to welding. For my 840ci, I elected to epoxy my panel back into the roof. Please note that most sunroof panels require two tubes of 3M Body Panel Adhesive.- It is very important that the edges of the sunroof panel and roof opening are stripped of any paint down to the raw metal. They must also be thoroughly cleaned to remove any dirt or oil from the surfaces. Not following this procedure may cause the epoxy not to adhere correctly and cause possible roof failure.
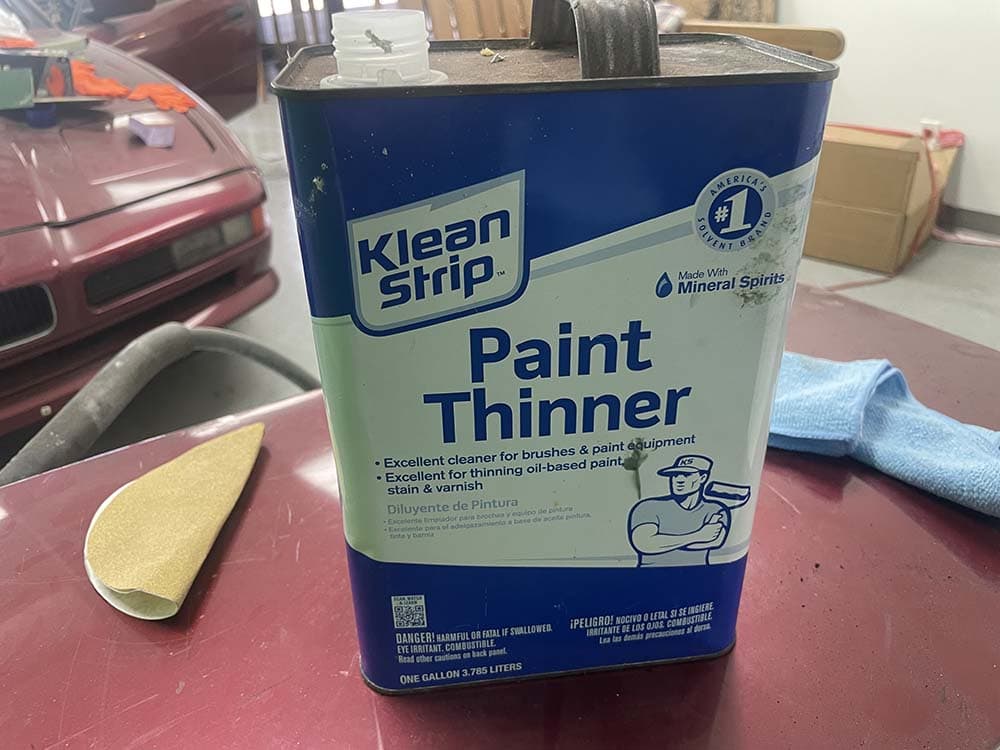
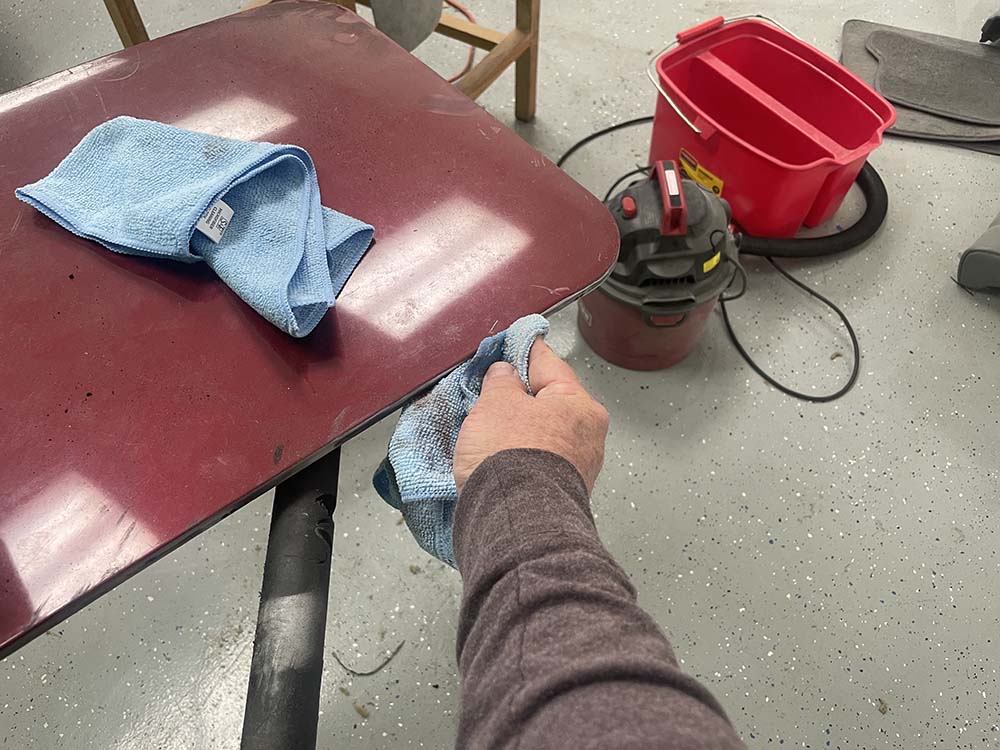
- Use 60-grit sandpaper to remove the paint from the edges of the sunroof panel and roof opening until only raw metal is exposed. Thoroughly clean the edges with mineral spirits to remove any dirt or grease.
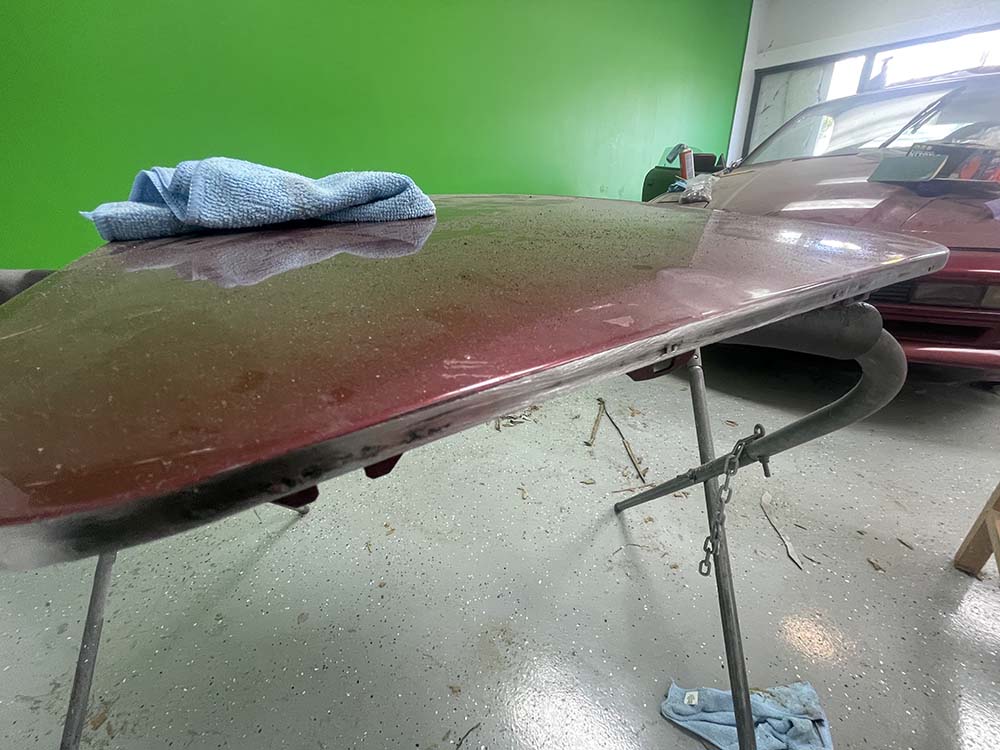

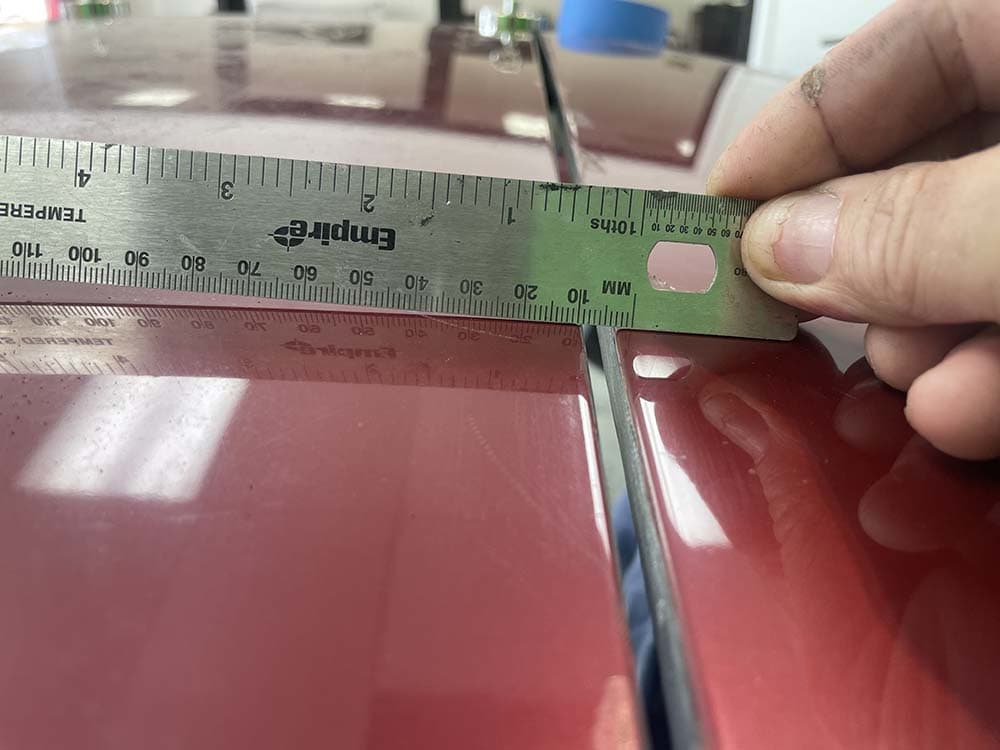
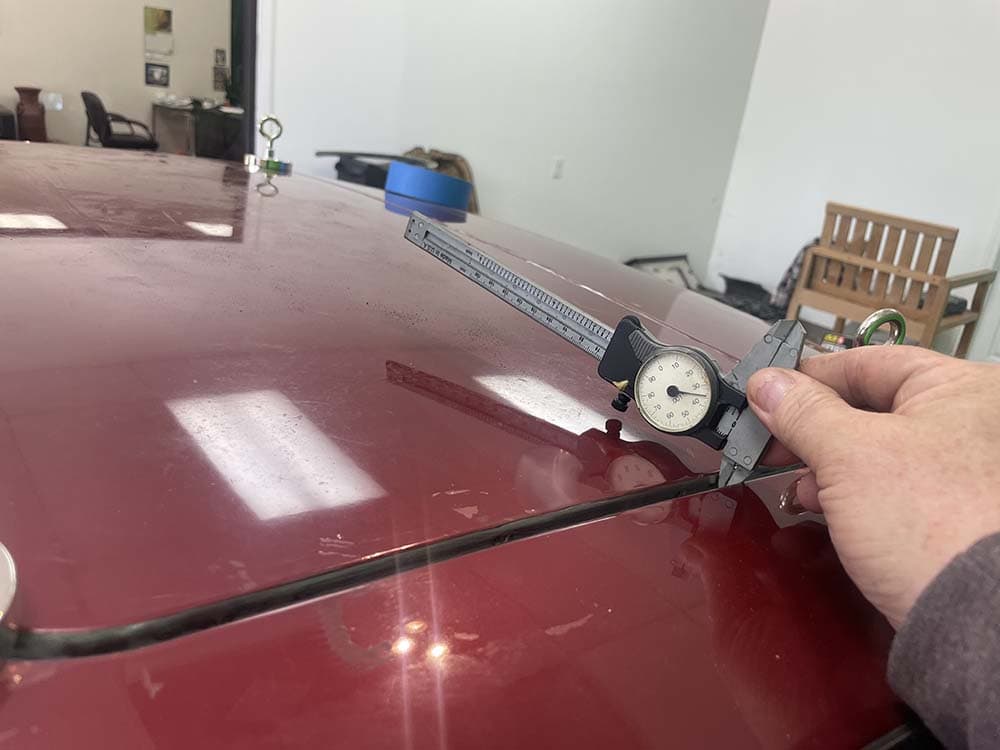
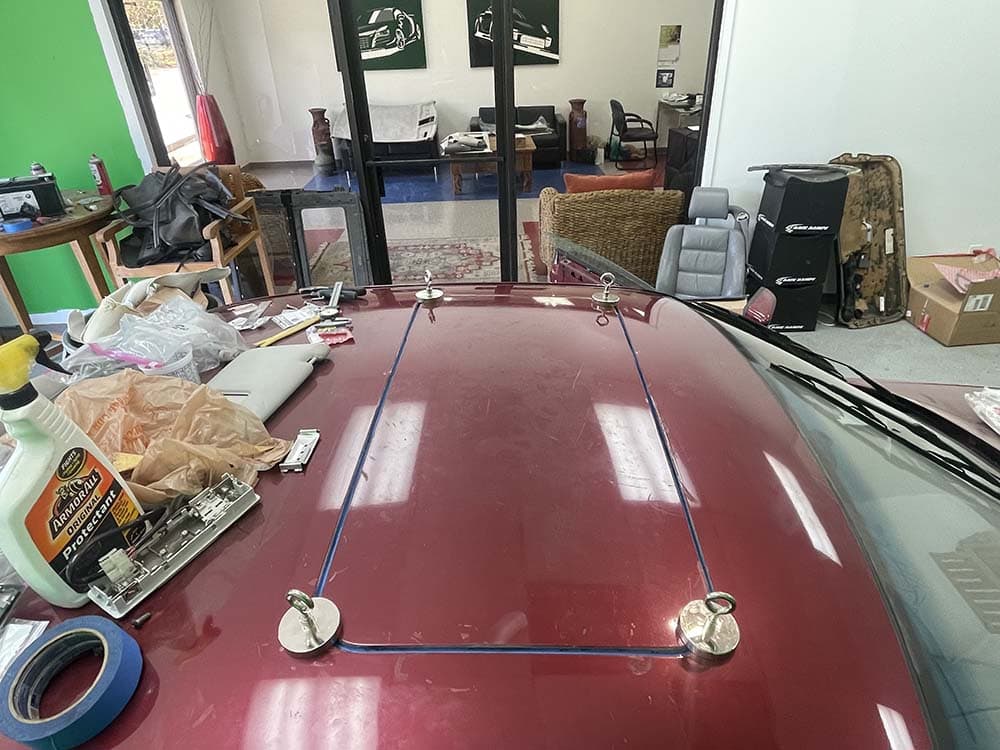
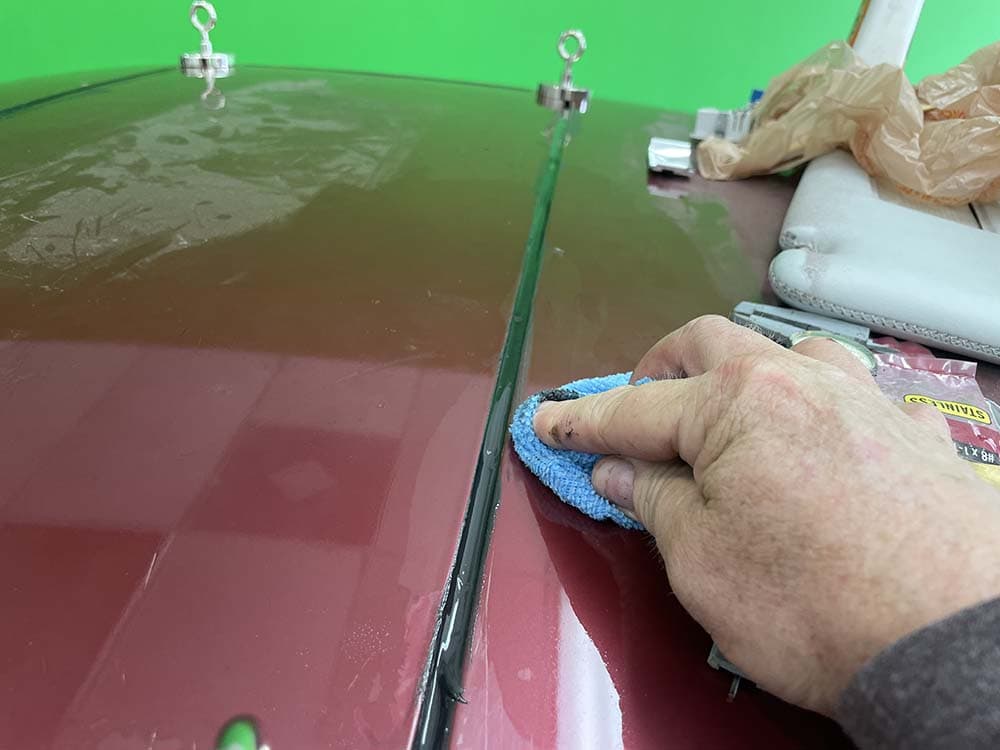
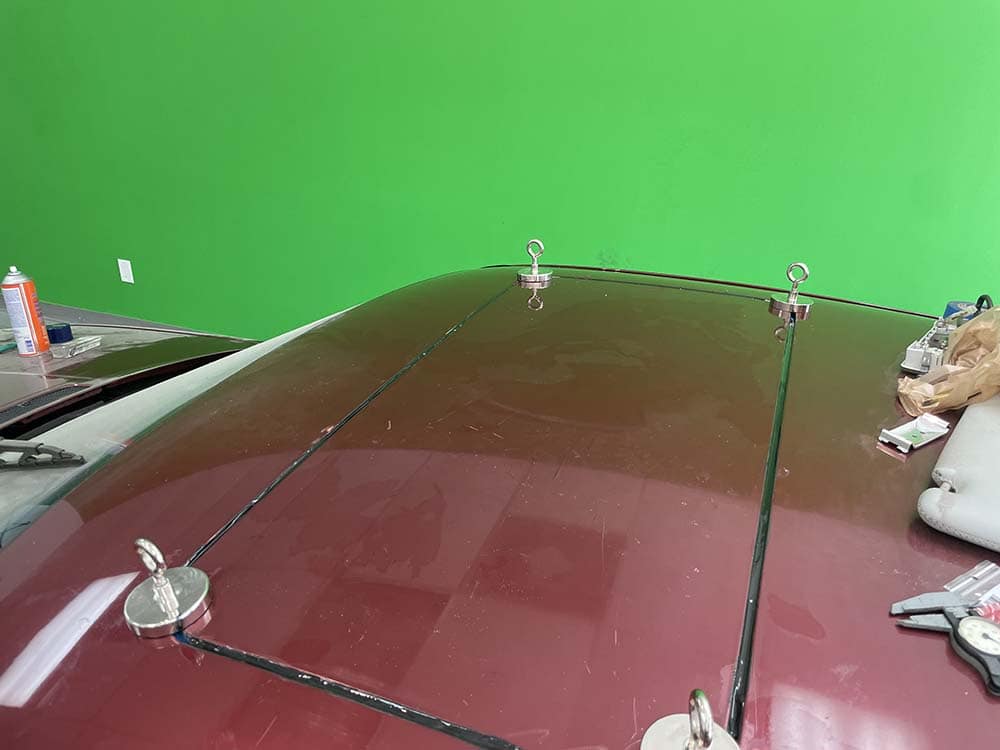
- Using high-strength fishing magnets, position the sunroof panel within the roof of the vehicle. Use a high-strength magnet on all four corners as shown below. Use a ruler or micrometer to get the panel perfectly centered in the opening paying particular attention to the contour of the roof line. You want to make sure the panel matches the curve of the roof perfectly - this takes time and patience so don't rush through this step.
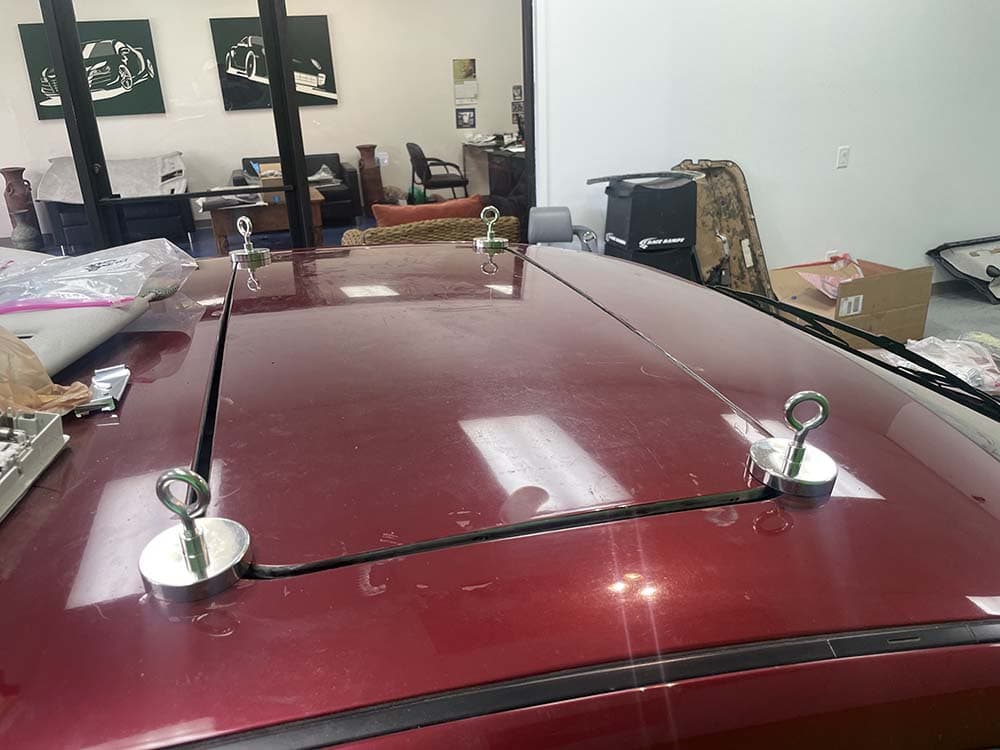 fishing magnets to hold sunroof panel in place" width="1000" height="750" />
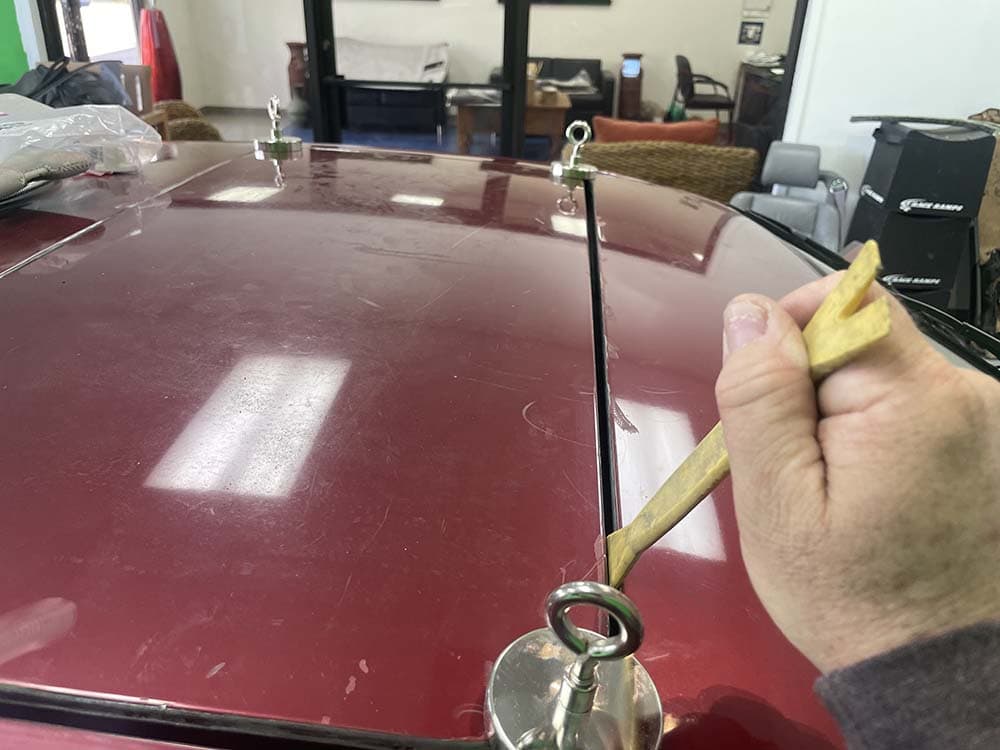
- When you are satisfied that you have the panel perfectly aligned within the roof, apply tape to the bottom of the sunroof panel sealing the gap between the panel and roof edges. The tape will keep the epoxy from running out of the gap and into the interior of the vehicle when applied in the next step.
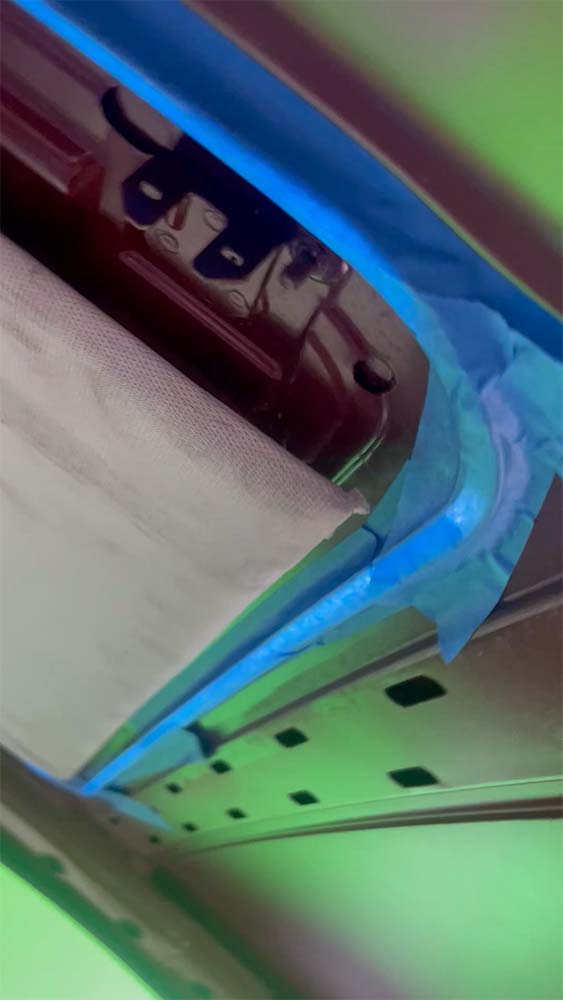
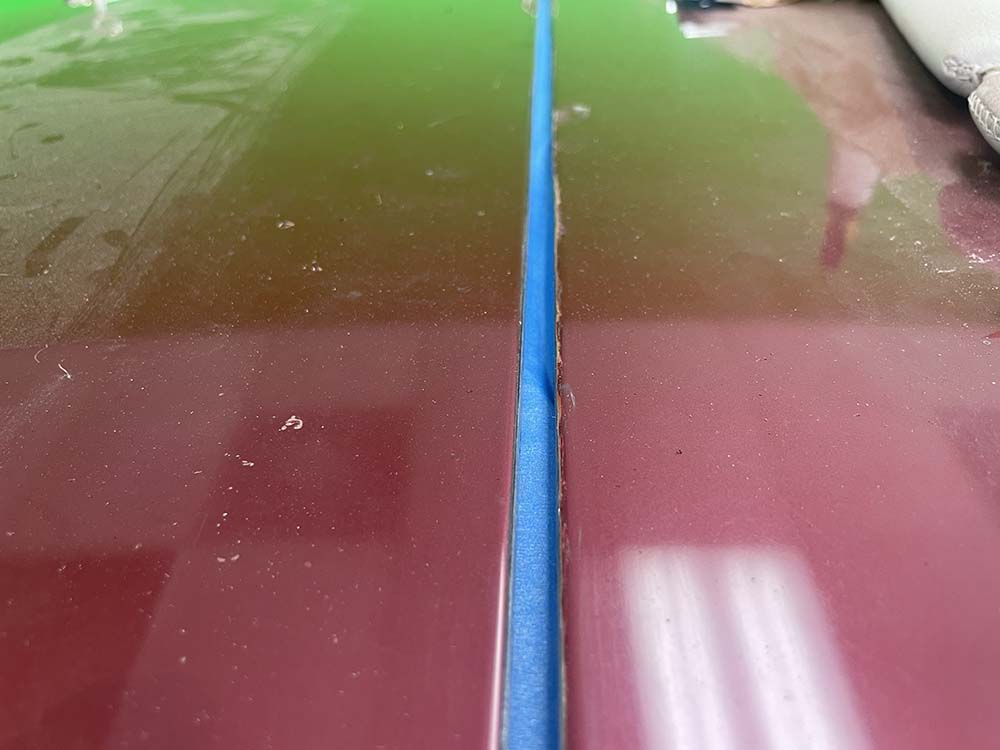
- Carefully fill the gap between the sunroof panel and the roof of the vehicle with 3M Body Panel Adhesive. Use a wooden stick to create a small trough at the top of the epoxy as shown below...this will allow your body shop enough space to finish of with Bondo before painting. Do not put epoxy under the magnets! This will be done in the next step.
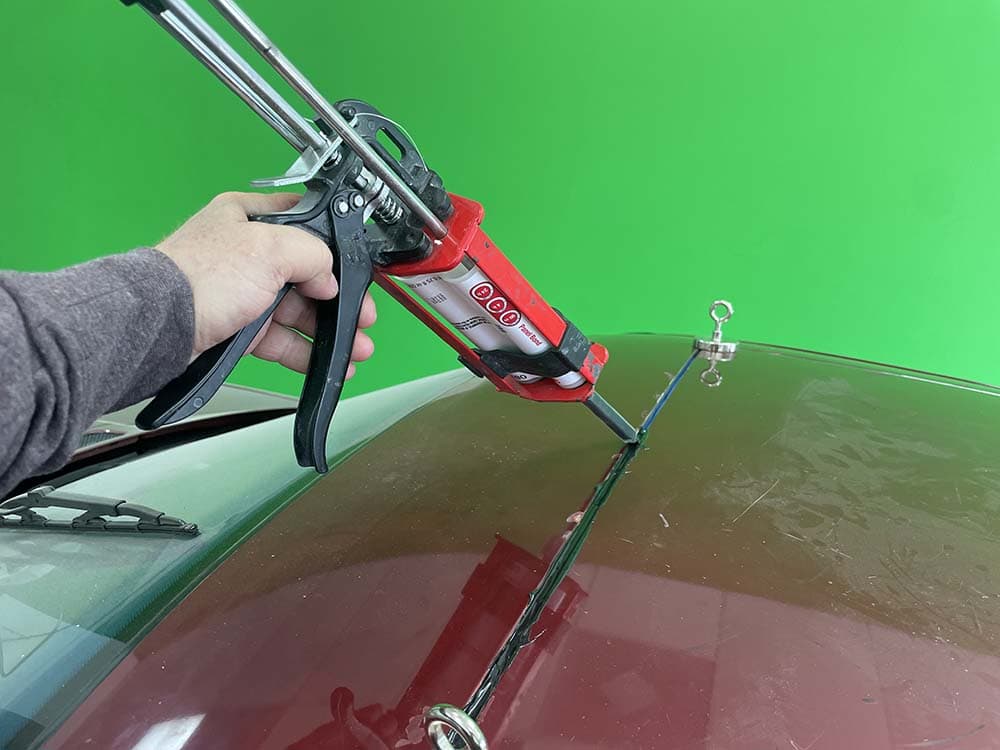 3M Body Panel Adhesive" width="1000" height="750" />
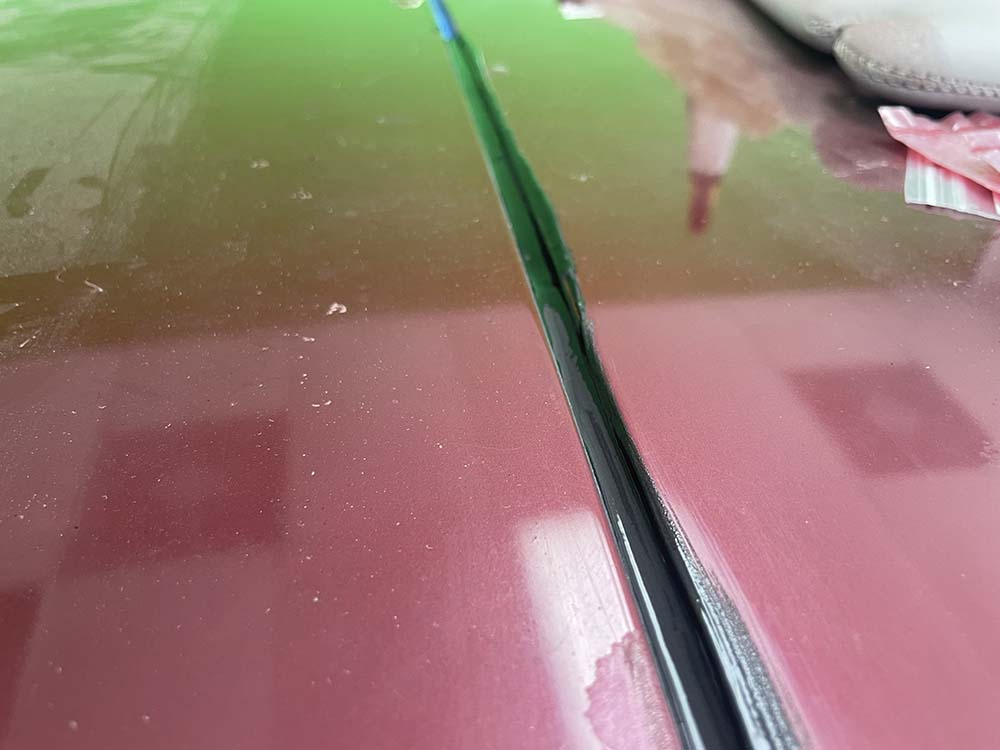
- Allow the epoxy to dry for 24 hours. Remove the four magnets and apply epoxy to the corners of the panel.
- After the corners have dried, remove the tape from the interior of the roof.