Brake Pads and Rotor Replacement Rear – 2012-2019 BMW 3 Series (F30)
Step 1 - Purchase Parts
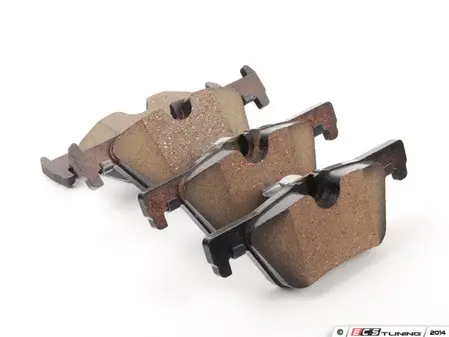
Rear Brake Pads
We have said it before...and we will continue to stand behind it. No other brand feels or performs like a factory Genuine BMW brake pad. Their softness and durability cannot be duplicated, even by other brands that claim that they are "OEM". They cost a little bit more, but in the long run you will be happy you installed them. These are the exact same factory brake pads installed at the BMW Dealership.
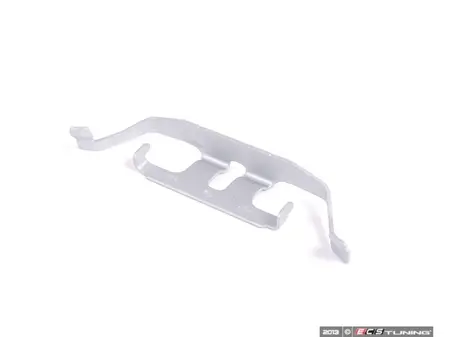
Brak Pad Retaining Clip
The brake pad retaining clip puts pressure on the outside brake pad so it doesn't rattle loosely inside the caliper. Some mechanics reuse the old rusty one when servicing brakes. Not only does it look ugly, but older clips loose their elasticity deeming them uneffective. These are the same factory clips used at the dealership.

Rear Brake Pad Wear Sensor
It is very important that you replace the brake pad sensor every time you service your BMW's front brakes. Why? Your brake pad wear sensor operates in brutal conditions. Water, dust, mud and extreme heat and cold conditions severely limit the lifespan of the sensor. There is nothing more irritating than a warning light displaying on your dashboard after you just serviced your brakes because the sensor is bad! This is a factory sensor that would be installed at the BMW dealership.

Protective Plug - Guide Bolts
The plastic protective plugs that insert into the ends of the caliper guide bolts are usually lost or just plain thrown out by some mechanics when servicing BMW brakes. Bad idea. These little plugs keep dirt and water from infiltrating the guide bolts, causing them to seize up. Remember...each caliper requires two if you are ordering new ones.
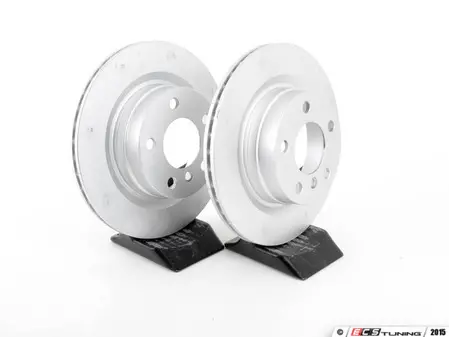
Rear Brake Rotor
There is a myth floating around that all brake rotors are built the same and you are just paying for the name. Nothing could be further from the truth. Cheap brake rotors from your neighborhood auto parts store are inferior to factory rotors - they wear quicker and are prone to deformities due to poor quality materials. These Genuine BMW factory rotors are superbly built and will give you many miles of factory fresh stopping power.
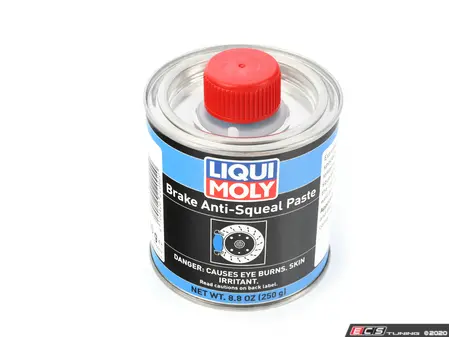
Brake Paste (Anti-Squeal)
Never...and we mean never...forget to apply brake paste to the your pads, caliper bracket and piston when installing new pads and rotors on your BMW. Not applying brake paste will cause an annoying squeal that will not go away. Liqui Moly makes a high grade paste specially formulated for high performance cars and SUVs. It has long legevity and will not degrade with heat like cheaper brands.
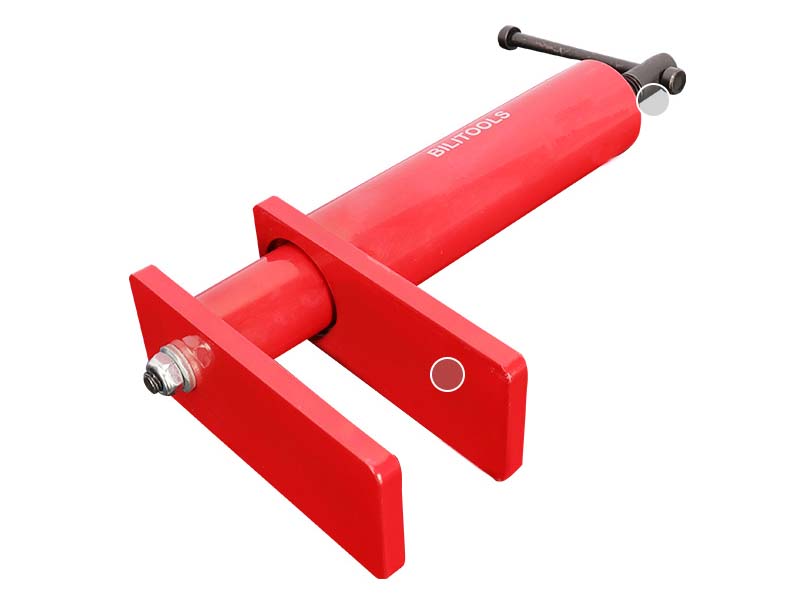
Brake Pad Piston Compressor
This brake pad spreader by Bilitools is an affordable alternative to the expensive BMW piston compression tool used at the dealership. Made of high-grade steel, this tool works on all BMW vehicles and is a necessity for home mechanic and repair shop tool boxes.
Step 2 - Repair Procedure
- Remove the rear wheels from the vehicle.
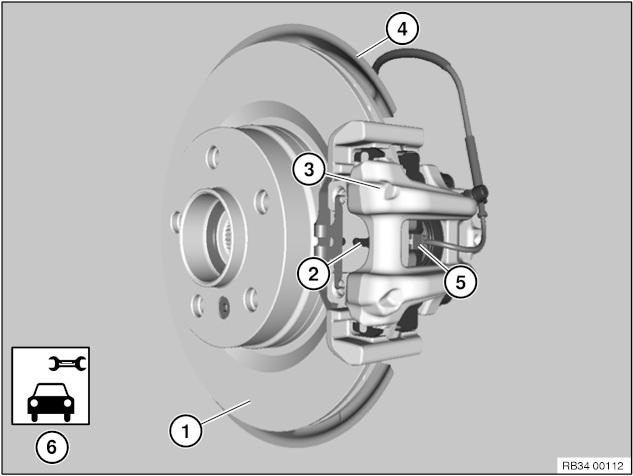
- The four main components comprising the brakes are the brake rotor (1), brake pads (2), brake caliper (3), and brake pad wear sensor (5).
Make sure to have some bungee cords handy while removing the brake caliper. Its better to bungee cord the caliper safely to the wheel hub than alllowing it to dangle by its rubber brake line during disassembly.
- Use a flat blade screwdriver to remove the metal brake pad retaining clip (1). Make sure to note its position in the caliper before removing...they can be tricky to reinstall.
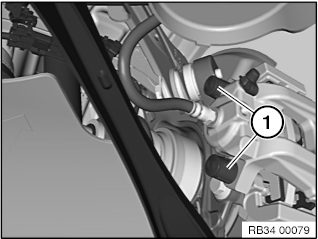
- Remove the two plastic plugs (1) that protect the caliper guide bolts on the back of the brake caliper.

- Remove the two guide bolts (1) from the caliper. Remove the caliper from the rotor.
- Unclip the brake pad wear sensor from the right brake caliper.

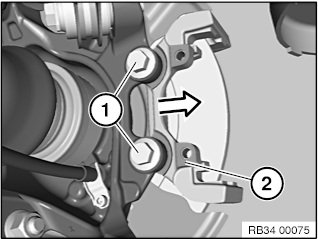
- Remove the brake pads from the caliper. Note the inner brake pad is held in place with a clip that inserts inside the piston. Pull it straight out in the direction of the arrow.
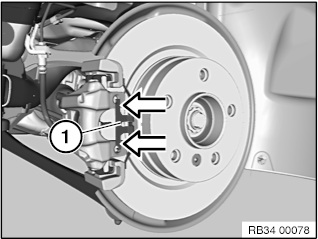
- Remove the two M12 torx bolts (1) anchoring the caliper carrier bracket (2) to the wheel hub. Remove the bracket from the vehicle.
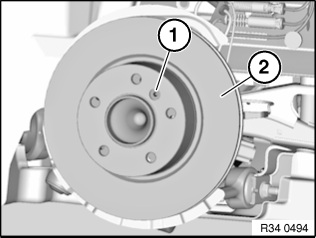
- Remove the rotor set screw (1). Grasp the rotor and remove from the wheel hub. If the rotor is stuck, give it a few strikes with a rubber mallet until it pops of the hub.
- Install a new brake rotor. Torque the set screw (1) to 14 Nm (18 ft-lb)
- Clean the rotor thoroughly with brake cleaner, being sure to remove any grease.
Its important to apply brake paste to the piston, brake pads and caliper during reassembly. Brake paste keeps new pads and rotors from squealing!
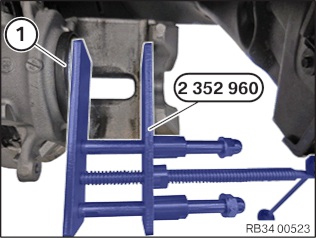
- Using a brake pad piston compression tool like the one shown in the image, compress the brake piston all the way back into the caliper. This must be done to allow enough space for the new pads to be installed.
- Please see our tools and suppplies block above to order a high quality piston compression tool like the one used in this article.

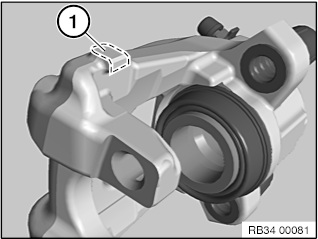
- Clean the brake piston and apply a thin layer of brake paste to the edge (1) as shown in the image.
- Please see the tools and supplies block above if you need to order brake paste.
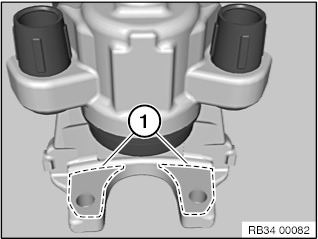
- Clean the brake caliper and apply brake paste to area depicted in image (1).
- Clean the brake pads and apply brake paste the rear of them in area (1) shown in image.

- Clean the caliper carrier bracket and apply brake paste in areas (1) and (2) as shown in image.

- Apply a thin coat of paste on the inner areas of the brake pad "T-Head" (1)(2) as shown in image.

- Apply a thin coat of paste on the outer areas of the brake pad "T-Head" (1)(2) as shown in image.

Torque specifications:
Caliper carrier bracket M12 mounting bolts - 63 Nm (47 ft-lb)
Caliper guide bolts - 30 Nm (22 ft-lb)
Wheel bolts - 122 Nm (90 ft-lb)