Coolant Flush and Replacement – BMW N52 6 Cylinder Engine
Step 1 - Purchase Parts
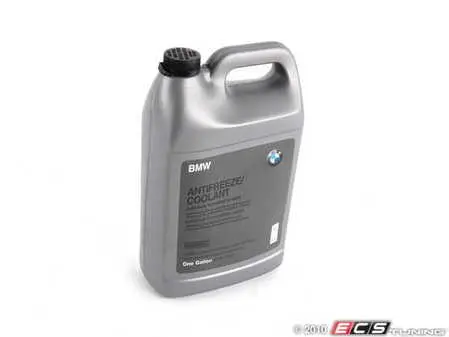
Antifreeze/Coolant
This is the same factory coolant that would be installed at the dealership. Aftermarket coolants actually cost more than Genuine BMW...so why would you use them? Mixed 50/50 with distilled water, this container makes 2 gallons of factory coolant.
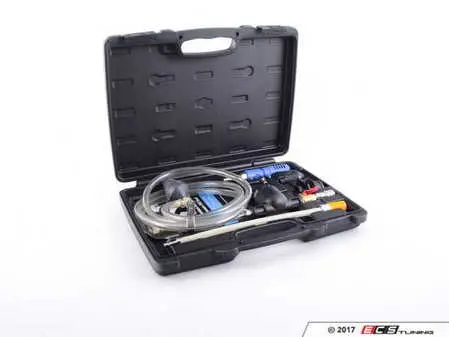
Coolant Vacuum Fill Tool
Whether you are a home mechanic or shop professional, there is only one way to properly refill the coolant system on a BMW - with a vacuum fill tool. This inexpensive tool easily attaches to the expansion tank creating a vacuum that "sucks" the coolant into system, virtually eliminating any air pockets that could cause engine overheating. Never try and refill your coolant system without one.
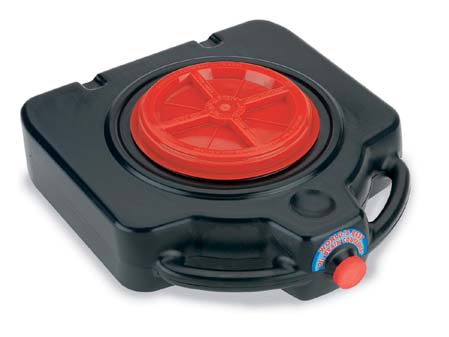
Drain Pan 15 qt
The best oil and coolant drain pans do the following: catch the fluids without spilling and store them in a container that can be easily taken to the recycling center for dumping. This fantastic 15 qt drain pan does both. Not only is it low enough to slip easily under your vehicle, but it seals tightly so you can take the fluids to a responsible recycling facility without spilling in your vehicle.
Step 2 - Repair Procedure

The N52 six-cylinder engine was found in many different BMW vehicles. The following instructions may differ slightly depending on year and model.
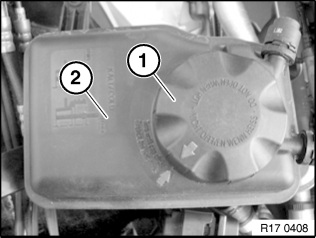
- Locate the coolant reservoir and remove its cap.
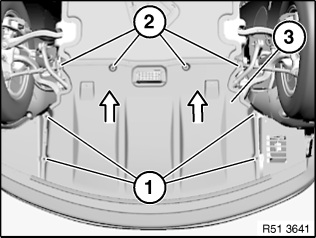
- Remove the front underbody protection panel. The panel must be removed so the radiator can be drained.
Note - The repair step image is for a 2010 E60 528i. Panel removal will differ among make and model.
There are two ways to drain the radiator in N52 6-cylinder engines depending on which model BMW you have. Some models have a coolant drain plug located at the bottom of the radiator. For those models that don't have the drain plug, the coolant hose at the bottom right side of the radiator will have to be removed instead.

Radiator Option 1:
- Look at the bottom right side of radiator. If there is a drain as shown in the adjoining image, turn its handle counter-clockwise (1) and allow the radiator to completely drain. Tighten the handle.
- If there is no drain, procede to the next step (Option 2).
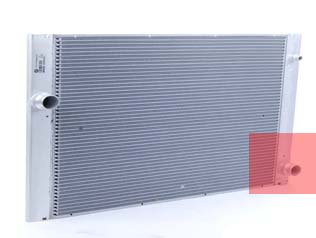
Radiator Option 2:
- If there is a not a coolant drain on your model vehicle, then remove the coolant hose at the bottom right side of radiator and allow it to thoroughly drain. Replace the hose making sure it clicks snugly back on.
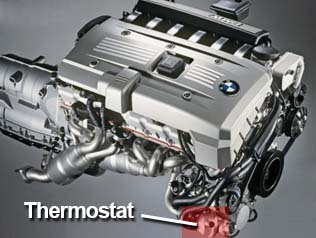
- When the radiator is completely drained, the next step is to drain the engine block. Locate the thermostat housing. It is located at the bottom right side of the engine block as shown in the adjoining image.
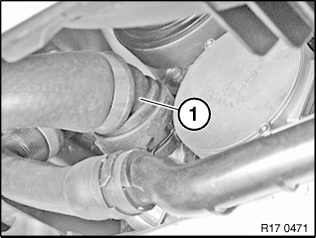
- Remove the coolant hose (1) from the front of the thermostat. Allow the engine block to completely drain then replace the hose.
- The engine must be refilled with coolant using a vacuum refill tool. The vacuum refill tool is inexpensive and should be a standard item in every home mechanic's or professional repair shop's tool box. Please see our parts block to order a vacuum refill tool if you do not have one.
- Never attempt to refill the coolant system without the vacuum refill tool. It will leave air pockets that could potentially cause engine overheating.
Please watch the following video to learn how to properly use the coolant vacuum refill tool.
The N52 engine has an automated bleeding process that takes approximately 12 minutes.
Initiating the automated bleeding process
- (Optional) Hook a battery charger to the vehicle. Since the bleeding process takes 12 minutes, it may run down the battery to a point where the vehicle can't be started.
- Make sure the coolant reservoir cap is has been snugly back on.
- Turn the ignition on (do not start vehicle).
- Turn on the low-beam headlights and hazard warning lights. If these lights are not turned on, the ignition will shut itself off before the bleeding process is done!
- Verify the vehicle is not set to ECO PRO.
- Set the heater to maximum temperature and the blower to its lowest setting.
- Depress the accelerator pedal all the way to the floor for 10 seconds then release.
- The automated bleeding process has been initiated. You can verify by listening for a humming sound coming from the water pump.
- The bleeding process takes approximately 12 minutes. When it is finished, top off the coolant and secure the expansion tank cap.