
Affiliate link disclosure – The BMW Repair Guide uses affiliate links in their site. For more information on affiliate links, please click here.
Repair Summary
This article gives detailed instructions on replacing the engine mount in a MINI R56 vehicle. Even though we used a 2007 MINI Cooper to perform this repair, this article can be applied to any 2007-2013 MINI vehicles with minor modifications to the repair steps.
A MINI R56 engine mount replacement may be needed if you are experiencing thumping sounds and excessive vibrations from the engine compartment.
One thing we love about the four cylinder Prince engines in the Generation 2 Mini Cooper and Cooper S is their compact size and simplicity. And although many MINI enthusiasts are quick to demonize the R56 MINI Cooper and Cooper S for their reliability issues, one thing stands with certainty; many repairs that are difficult on other vehicles are pretty darn simple on the Coopers.
Performing a MINI R56 engine mount replacement qualifies for one of those repairs. Most vehicles on the road require quite a bit of finesse to replace the engine mounts. Most engine mounts are located in narrow spaces under the vehicle requiring mechanics to put their fingers under a raised motor to access hard-to-reach bolts. Luckily for MINI R56 owners, the two engine mounts are easily accessed without a lot of hoopla.
Symptoms of failing engine mounts on a MINI R56 are very distinct. They usually begin with thumping or impact sounds coming from under the hood (especially when you hit a bump) followed by excessive engine shaking or vibration. The MINI R56 has two engine mounts that need to be replaced; one in the right engine compartment that connects the motor to the body of the car, and one underneath the car at the right rear of the engine that connects the MINI's motor to the sub-frame. Both engine mounts help damper movement in the engine block and are important components of the MINI's overall suspension.
Replacing the right engine mount does require supporting the engine with a floor jack (the engine support bracket must be removed to access the mount), but other than that no special tools are needed. It is a very easy repair for the home mechanic and can save hundreds of dollars in parts and labor "doing it yourself".
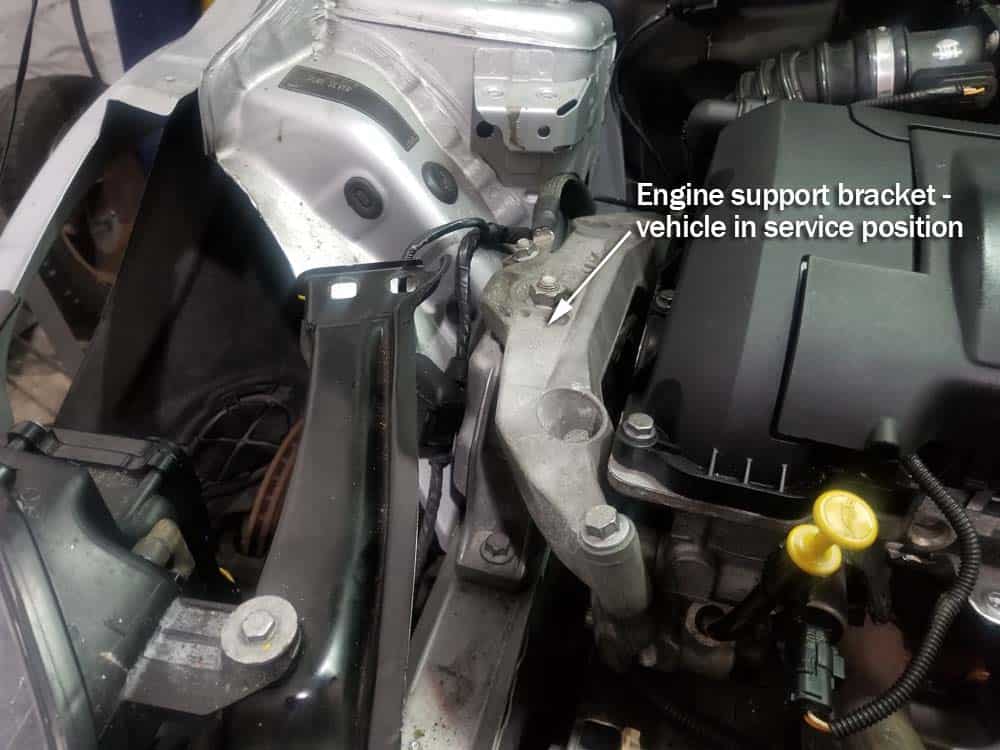
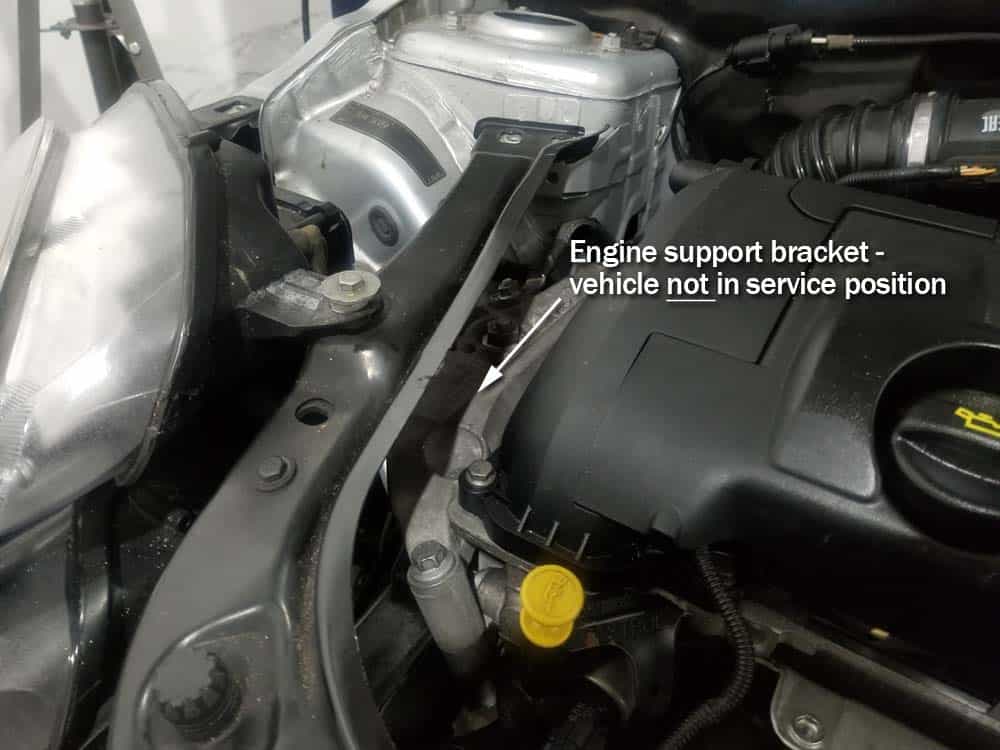
***It is possible to replace the upper engine mount without putting the vehicle in its "service position". The support bracket bolts are slightly more difficult to access, but it will save you about 30 minutes in time (and aggravation) not having to slide the front of the car away from the body. The following images show the difference in access to the upper engine mount with the car in and out of the service position. For more information on putting your MINI R56/R57 in the service position, please read our article MINI R56 Service Position – 2006-2013 Cooper.


View the detailed parts diagram for this repair.
Includes detailed part diagrams, part numbers and links to purchase all of the required components needed to complete this repair.

Before starting this repair, you must have the following required parts.
All MINI R56/R57 vehicles
MINI engines do produce the torque as you know and the engine can shake and vibrate. These mounts were designed to prevent these vibrations from being transmitted, but over time, they can wear down. Typically, the rubber wears out and can crack and if this occurs, you will notice noises, exhaust leaks, clunking, lurching, or possibly even damaged hoses and belts.
Section 1 - Preparing the Vehicle for a MINI R56 Engine Mount Replacement
As discussed above, putting your MINI Cooper in the service position definitely makes replacing the upper engine mount a lot easier, but is not required to do the repair. If you have been putting off other repair or maintenance issues that require additional space in the engine compartment to perform, now is a great time to put the MINI in its service position and do them all...including the upper mount.- If you want to put your MINI R56 in the service position for this or any other repair, please refer to our article MINI R56 Service Position – 2006-2013 Cooper for detailed instructions. If you are not putting your MINI in the service position, then please proceed to the next step.
- Jack and support your vehicle using the "four corner" wheel stand method. For more information on this procedure, please read our article BMW Jacking and Supporting for Repairs and Maintenance.
- If you are replacing both engine mounts in this repair, always start with the lower mount under the vehicle.
Section 2 - Replacing the Lower Engine Mount
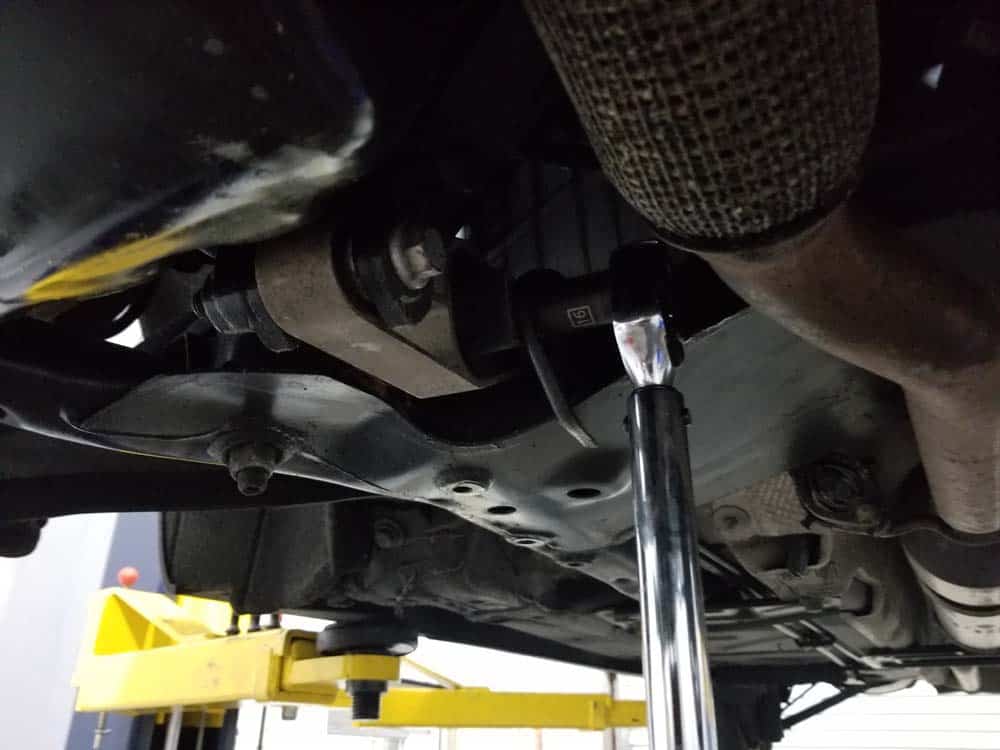
If you are replacing both engine mounts in this repair, it is good practice to always start with the lower. The lower mount only takes about 15 minutes to replace...just be sure to read our comments below on moving the exhaust pipe.- Locate the lower engine mount. Is located at the rear of the engine on the right side.
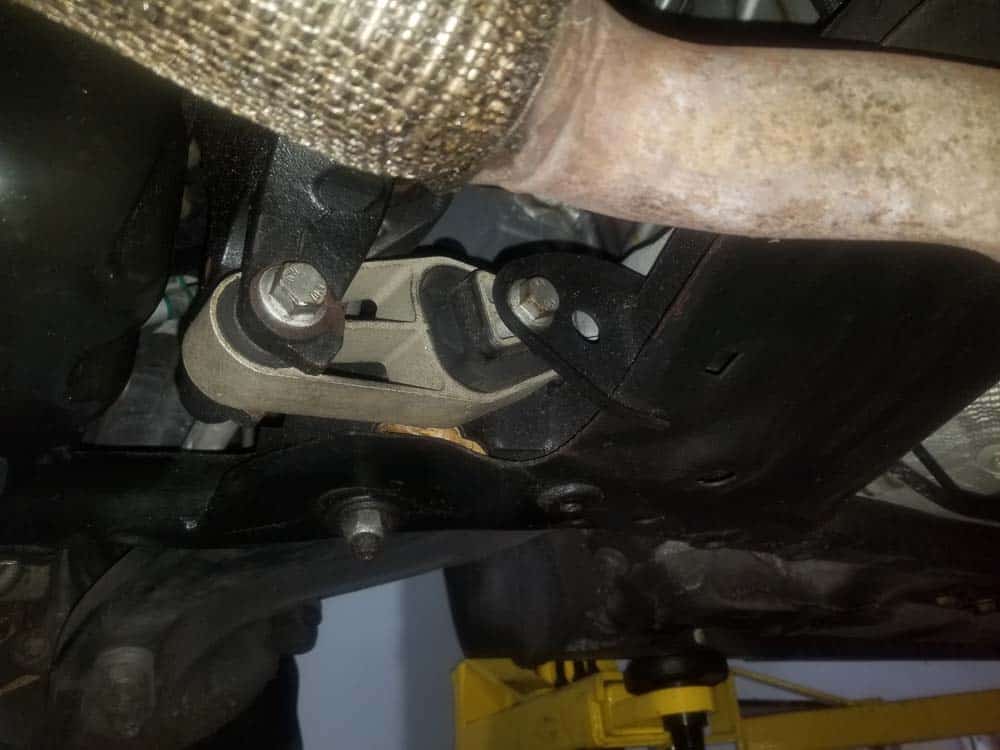
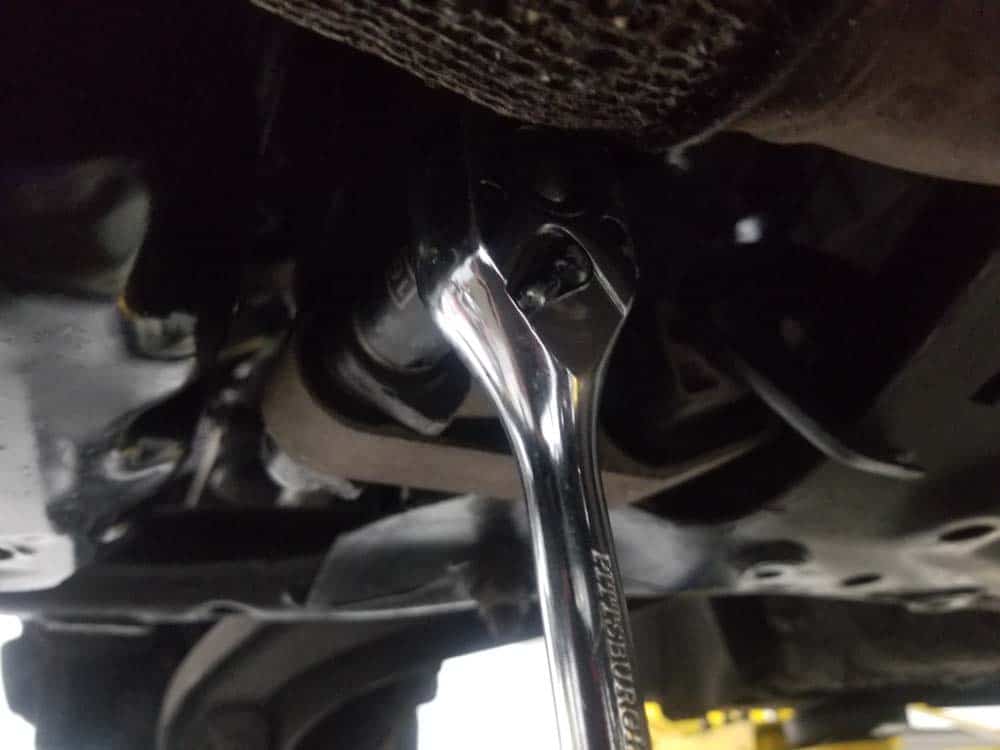
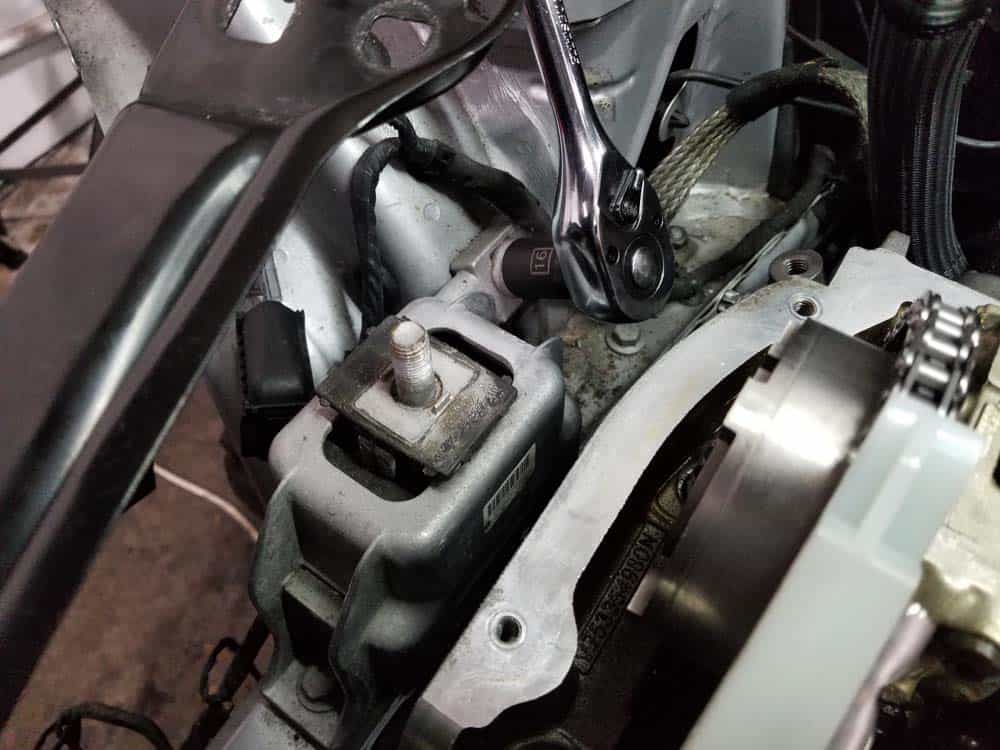
- Use a 16mm socket wrench to remove the rear bolt anchoring the lower engine mount to the vehicle's sub-frame.
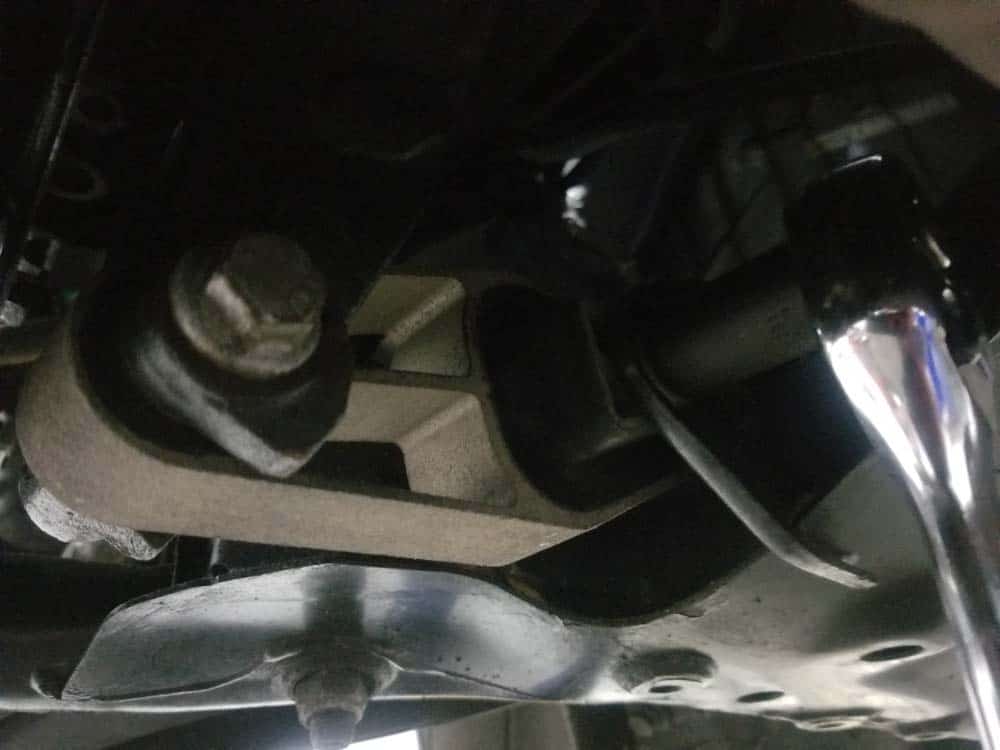
- Using the 16mm socket wrench, remove the front bolt anchoring the mount to the engine.
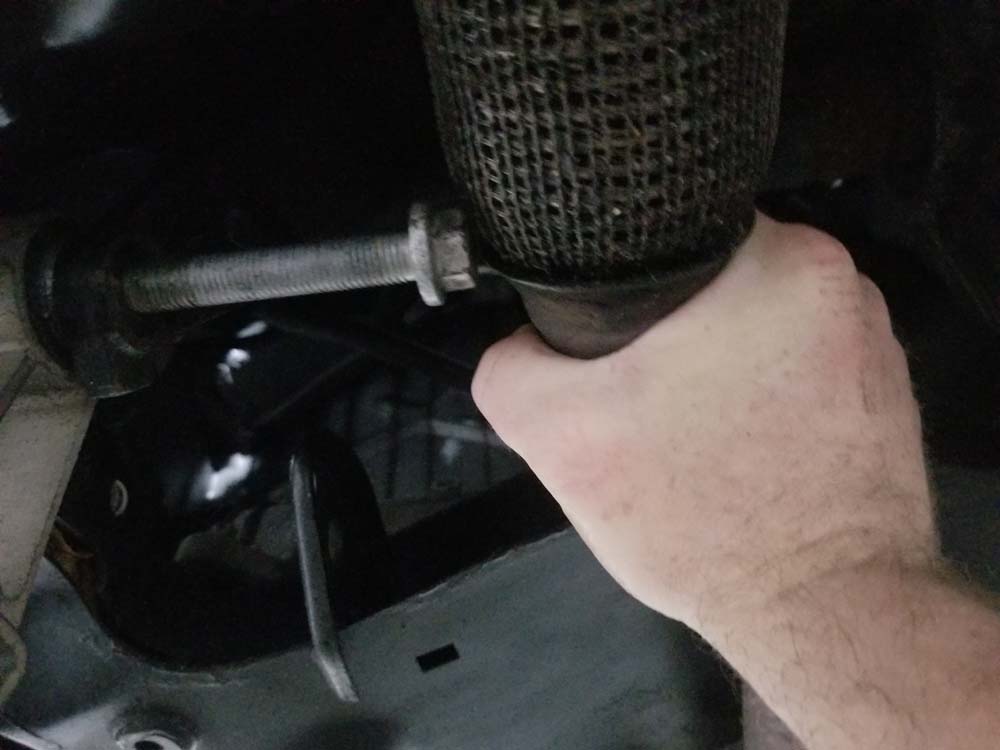
- The front bolt can be difficult to remove because the exhaust pipe is in the way. Use one hand to push up on the exhaust pipe...this will give you enough clearance to get the bolt out of the mount.

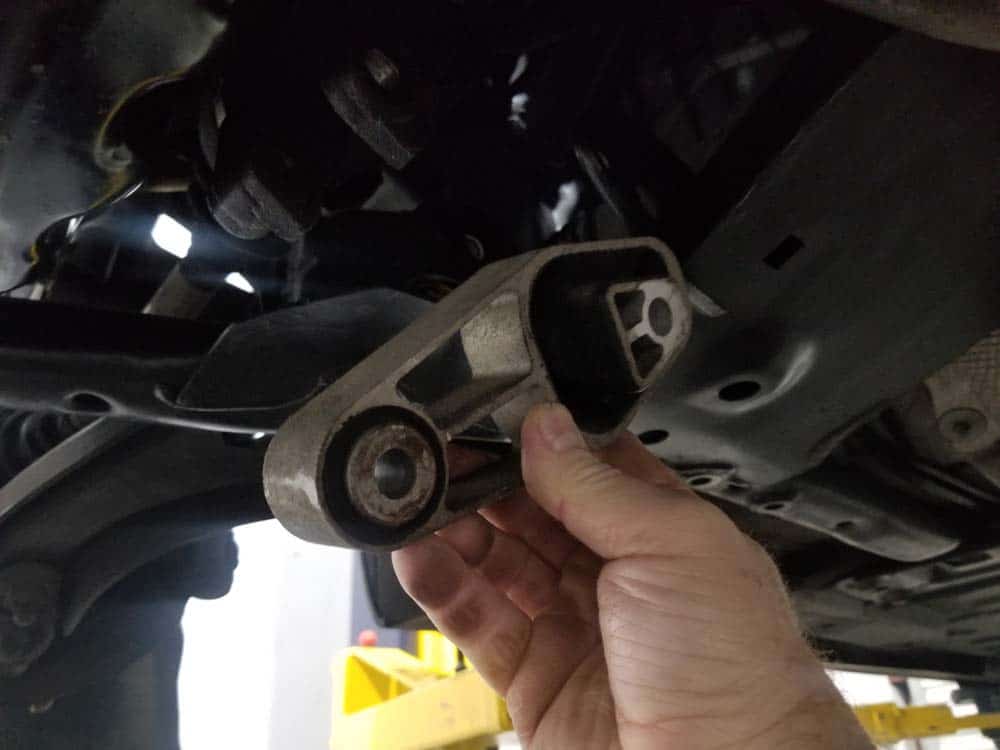
- Grasp the engine mount and remove from the vehicle.
- Install the new lower engine mount and torque the bolts to 115 Nm (84 ft-lb).
Section 3 - Replacing the Upper Engine Mount
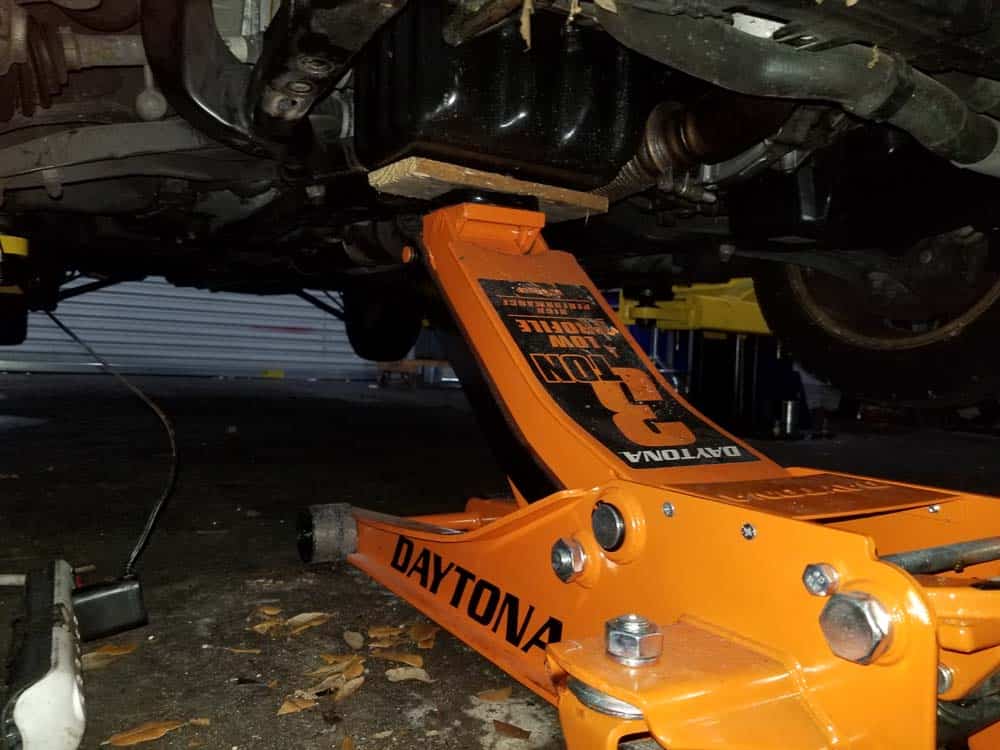
The upper engine mount is located in the right side of the engine compartment. Replacing the upper engine mount requires supporting the engine with a floor jack.- Position a floor jack under the oil pan of the vehicle. Use a scrap piece of wood to protect the pan from being damaged by the jack.
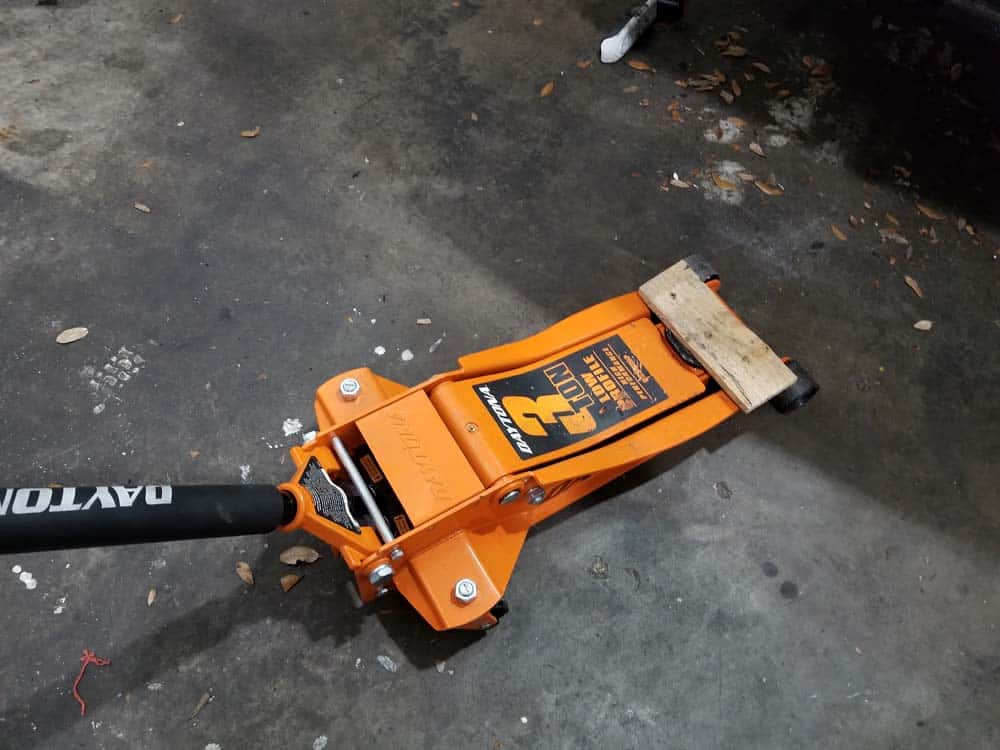
- Raise the floor jack up until it applies just a small amount of pressure against the oil pan. DO NOT apply too much pressure on the pan or try and raise the vehicle. The goal is to just keep the engine from dropping when the support bracket is removed in the next step.
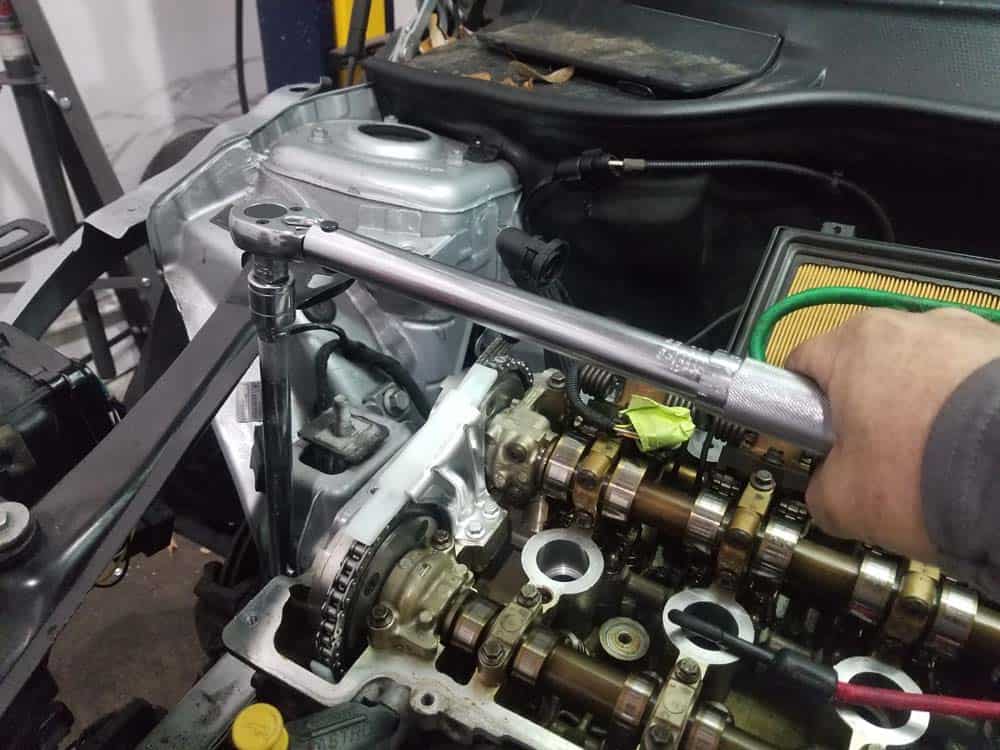
- Use a 13mm socket wrench to remove the engine grounding strap from the support bracket.
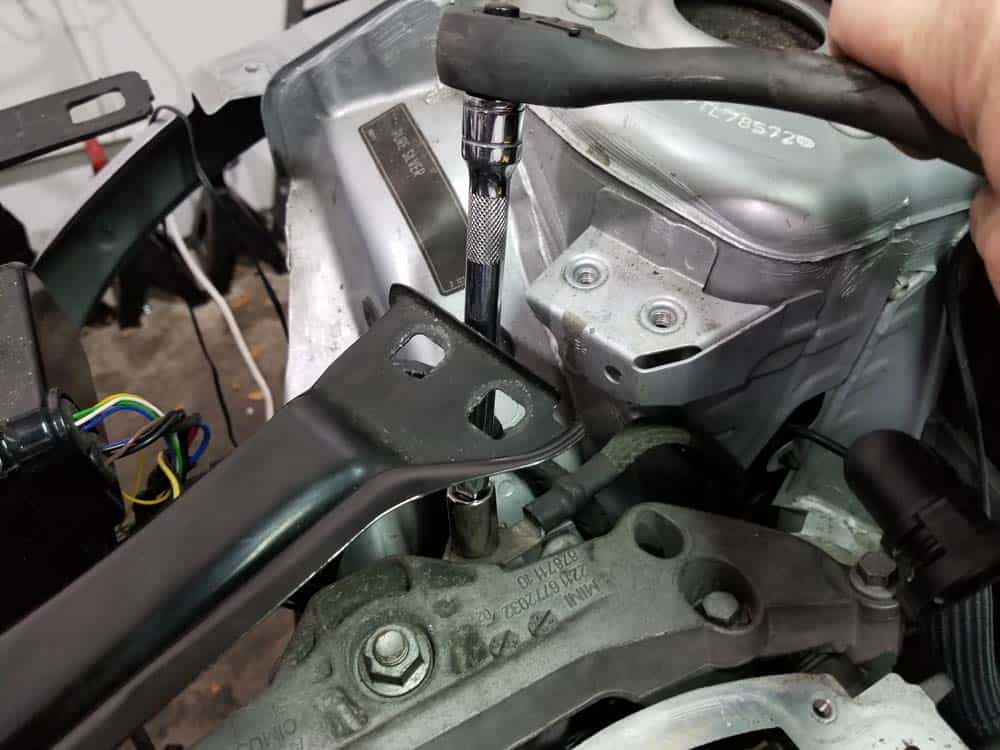
- Using a 13mm socket wrench, remove the four bolts anchoring the support bracket to the vehicle's engine.

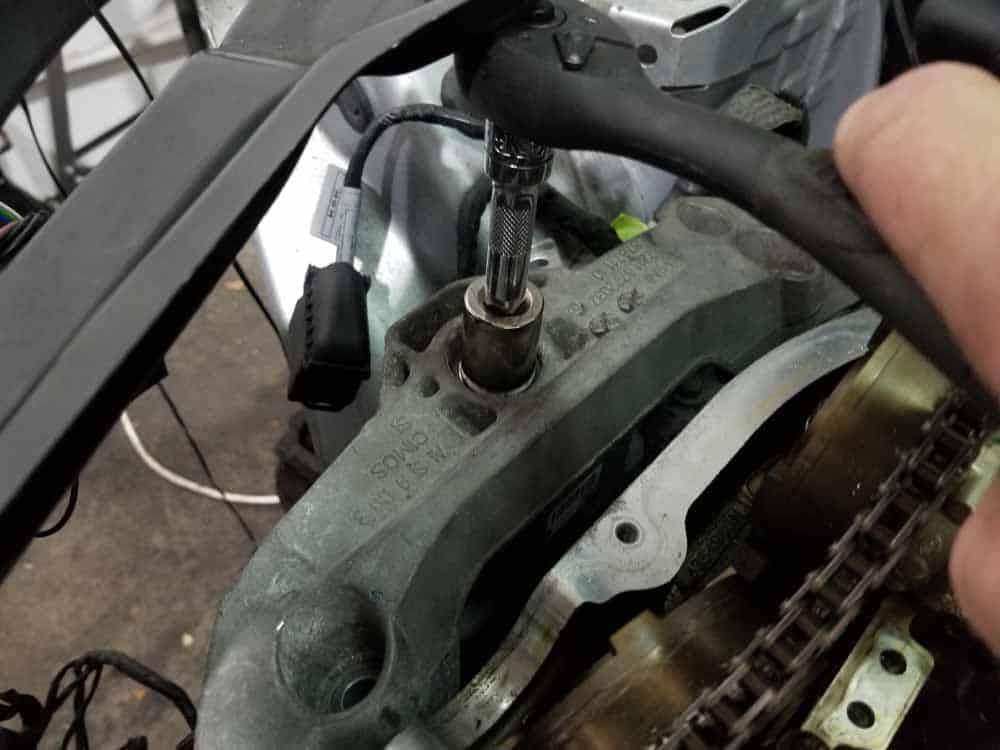
- Next, use an 18mm socket wrench to remove the nut securing the bracket to the engine mount. Remove the support bracket from the engine compartment.
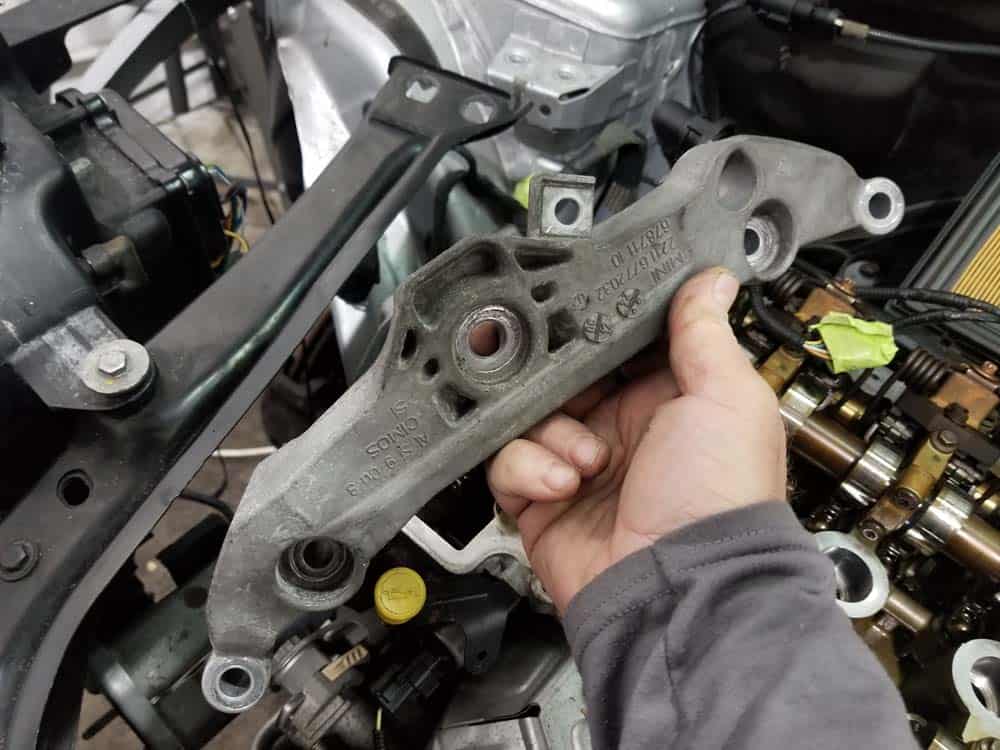
- Remove the two mounting bolts securing the engine mount to the frame using a 16mm socket wrench for the rear M12 bolt and a 13mm socket for the front M10 bolt.

- Grasp the engine mount and remove from the vehicle.

- Install the new engine mount and torque the mounting bolts as follows: Rear M12 bolt: 82 Nm (60 ft-lb). Front M10 bolt: 66 Nm (48.5 ft-lb).
- Reinstall the engine bracket and torque the mounting bolts to 47 Nm (34.5 ft-lb).
- Lower the floor jack. Reinstall the engine mount nut and torque to 47 Nm (34.5 ft-lb).
- Reinstall the engine ground strap.
MINI R56 Engine Mount Repair Finished