Affiliate link disclosure – The BMW Repair Guide uses affiliate links in their site. For more information on affiliate links, please click here.
Repair Summary
This article gives detailed instructions on replacing the air-conditioning pressure sensor and expansion valve in a 2004-2010 BMW E60/E61 5 series vehicle. Even though we used a 2006 530xi touring wagon to perform this repair, this article can be applied to any BMW vehicle with minor modifications to the repair steps.
See all vehicles this article applies to
E60 5 Series M5
E60 5 Series 523Li
E60 5 Series 550i
E60 5 Series 545i
E60 5 Series 540i
E60 5 Series 535d
E60 5 Series 530xi
E60 5 Series 530xd
E60 5 Series 530Li
E60 5 Series 530i
E60 5 Series 530d
E60 5 Series 525i
E60 5 Series 525xi
E60 5 Series 525Li
E60 5 Series 525d
E60 5 Series 523i
E60 5 Series 520i
E60 5 Series 520d
E60N 5 Series 550i
E60N 5 Series 525xi
E60N 5 Series 540i
E60N 5 Series 535xi
E60N 5 Series 535i
E60N 5 Series 535d
E60N 5 Series 530xi
E60N 5 Series 530xd
E60N 5 Series 530Li
E60N 5 Series 530i
E60N 5 Series 528xi
E60N 5 Series 530d
E60N 5 Series 528i
E60N 5 Series 525Li
E60N 5 Series 525xd
E60N 5 Series 525i
E60N 5 Series 525d
E60N 5 Series 523Li
E60N 5 Series 523i
E60N 5 Series 520Li
E60N 5 Series 520d
E60N 5 Series 520i
Per Section 608 of the Clean Air Act, it is illegal to knowingly release automotive 134a refrigerant into the atmosphere and is punishable by fines up to $27,500 per occurrence. Removal of 134a refrigerant from your vehicle's HVAC system must be recycled or reclaimed using the proper equipment. If you are a home mechanic and are not receiving compensation for your work, you may remove your own refrigerant following proper procedures. The BMW Repair Guide in no way advocates the release of 134a into the atmosphere by publishing this article. For more information on handling your BMW's ac refrigerant please visit https://www.epa.gov/mvac.
Replacing the refrigerant pressure sensor and expansion valve in your BMW will stop the A/C system from cycling between cold and hot air.
Although there can be several symptoms indicating a faulty air-conditioning pressure sensor and/or expansion valve in your BMW, the most common one is the system cycling between cold and hot air.
The air conditioning pressure sensor, also known as the "pressure switch", is located on the high-pressure refrigerant line near the passenger side strut tower in the engine compartment. As its name indicates, its sole function is to monitor refrigerant pressure in the A/C system to prevent damage to the compressor. Abnormally high or low refrigerant pressure will trigger the sensor to shut down the system to protect the compressor from being damaged. A faulty A/C pressure switch can send mixed signals to the HVAC controller, causing it to intermittently start and stop the compressor causing the air temperature to cycle between hot and cold. If the pressure sensor has failed altogether, the air conditioning system will not blow cold air at all.
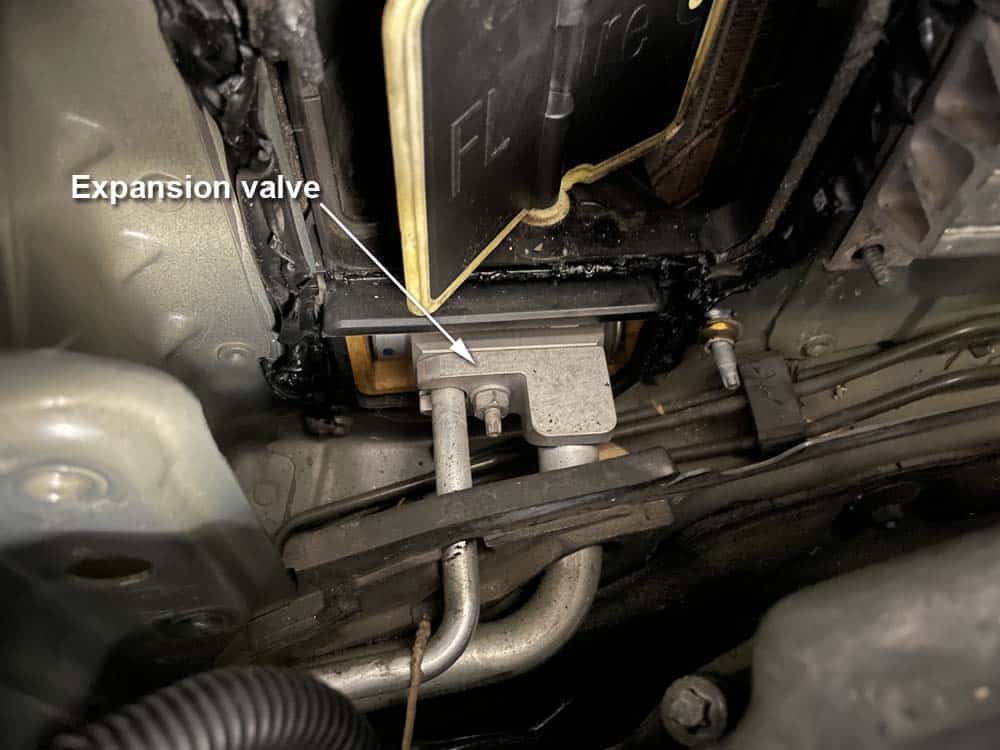
The refrigerant expansion valve is located at the rear of the engine on the right side of the vehicle. It is mounted in the firewall and is connected to the evaporator which is located under the dashboard. Its sole purpose is to regulate the amount of refrigerant entering the evaporator to avoid it being damaged. Too much refrigerant can cause the evaporator to freeze, causing internal damage and water to accumulate under the dashboard when it defrosts. Too little refrigerant can cause the evaporator to overheat, also causing internal damage. A failing expansion valve will cause the air temperature to fluctuate between hot and cold. Like the pressure sensor, if it has failed completely the system will only blow hot air.
Replacing the pressure switch on 2004-2010 5 series models is very easy...it is conveniently located on the right side of the engine and can be accessed without removing any parts. Unfortunately removing the expansion valve is a little more challenging...it is mounted to the firewall and requires the cabin air filter assembly and strut brace to be removed to gain access to it.
We give full step-by-step instructions below as well as a detailed parts list for your convenience.


View the detailed parts diagram for this repair.
Includes detailed part diagrams, part numbers and links to purchase all of the required components needed to complete this repair.

Before starting this repair, you must have the following required parts.
Fits all BMW E60,E61,E63 and E64 models
The air-conditioning expansion valve controls the amount of refrigerant entering the evaporator under the dashboard. Too much or too little refrigerant can destroy the evaporator requiring a very expensive repair! Replacing your expansion valve is cheap insurance against more costly repairs down the line.
All BMW and MINI models
If the air-conditioning in your BMW or MINI is cycling on and off, most likely you have a failing pressure sensor.
Section 1 - Replacing the BMW E60 air-conditioning pressure sensor
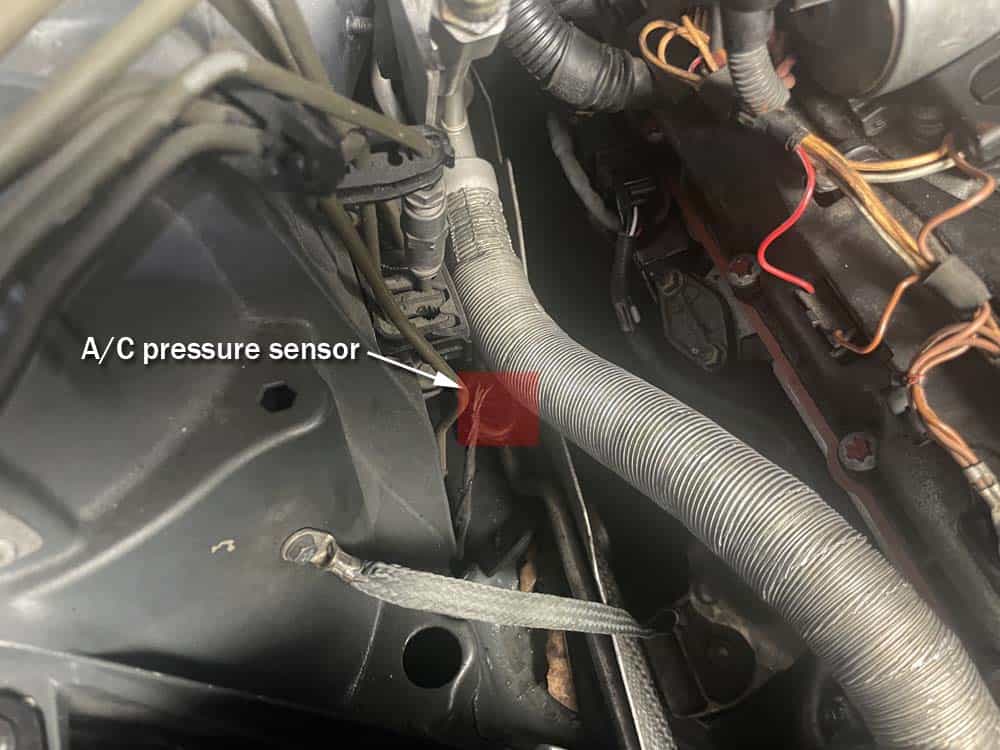
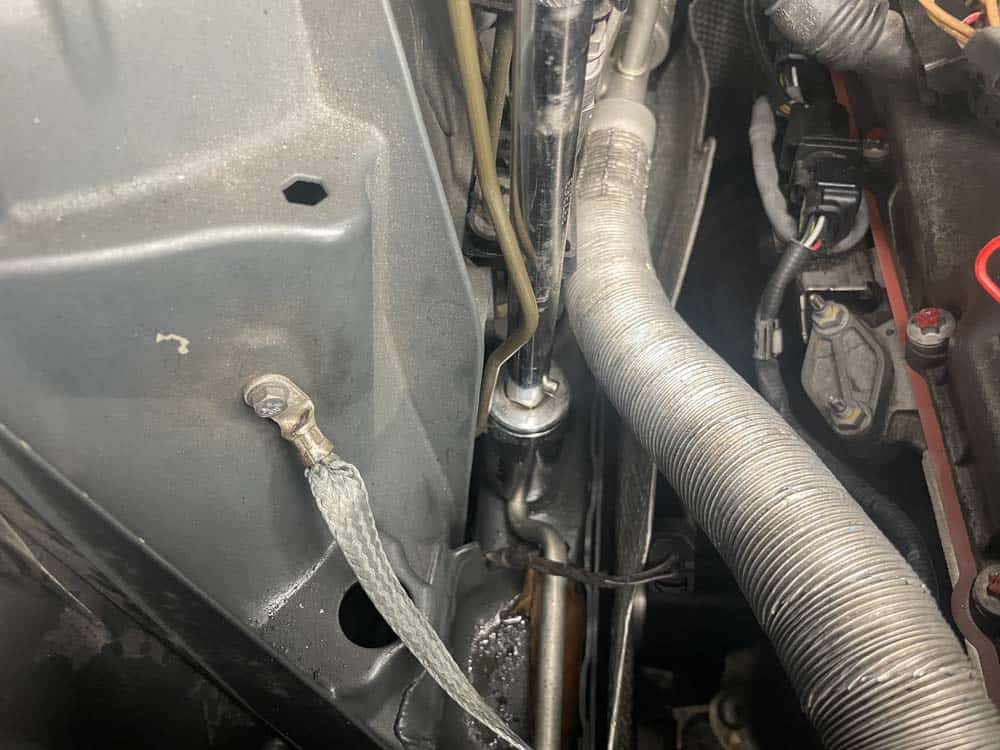
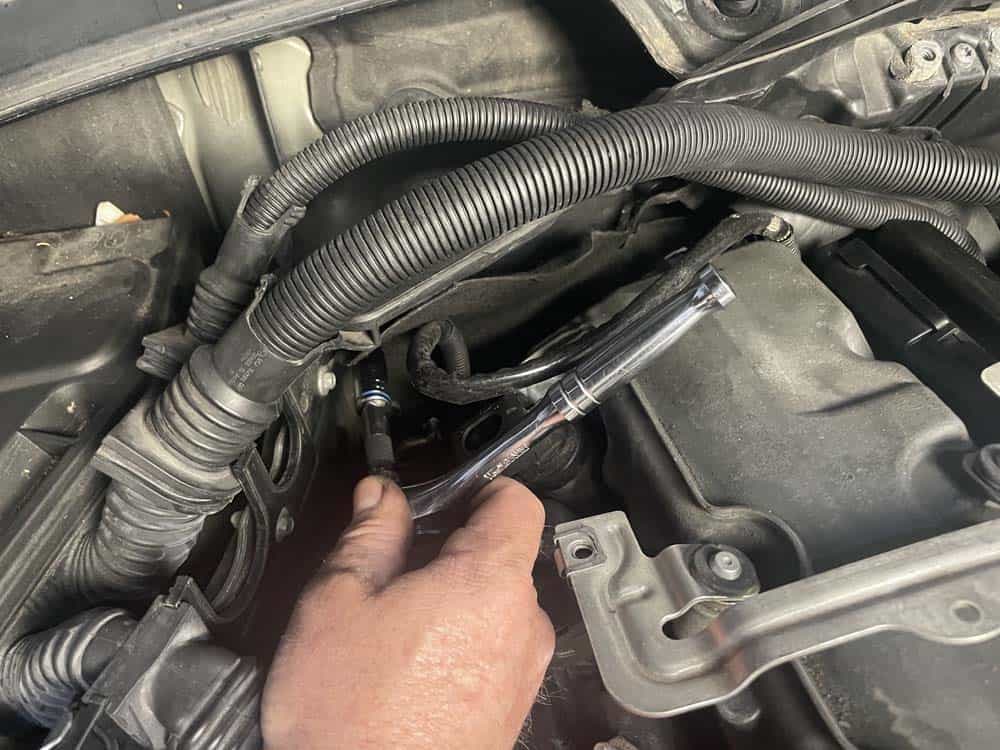
As previously discussed, the A/C pressure sensor in 2004-2010 5 series models is located on the high-pressure refrigerant line on the right side of the engine compartment. Remember that the A/C system must be completely evacuated of all refrigerant before starting this repair in accordance with Section 608 of the Clean Air Act.- Locate the air-conditioning pressure switch. It is on the right side of the engine near the right strut tower.
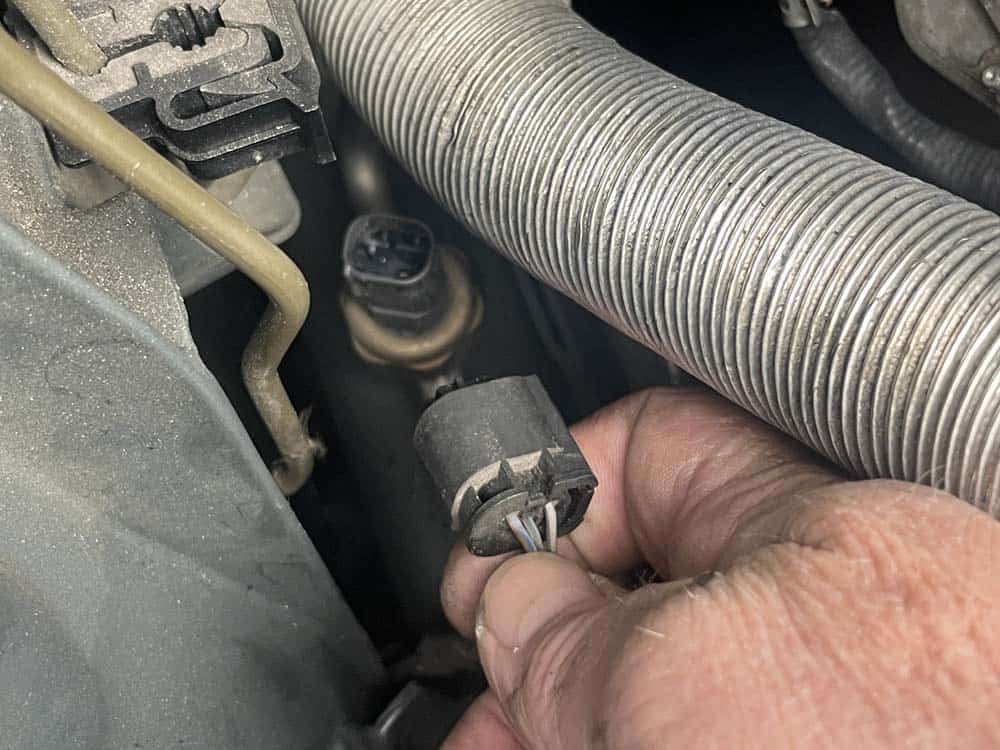
- Unplug the pressure sensor by squeezing its connector and pulling it free.
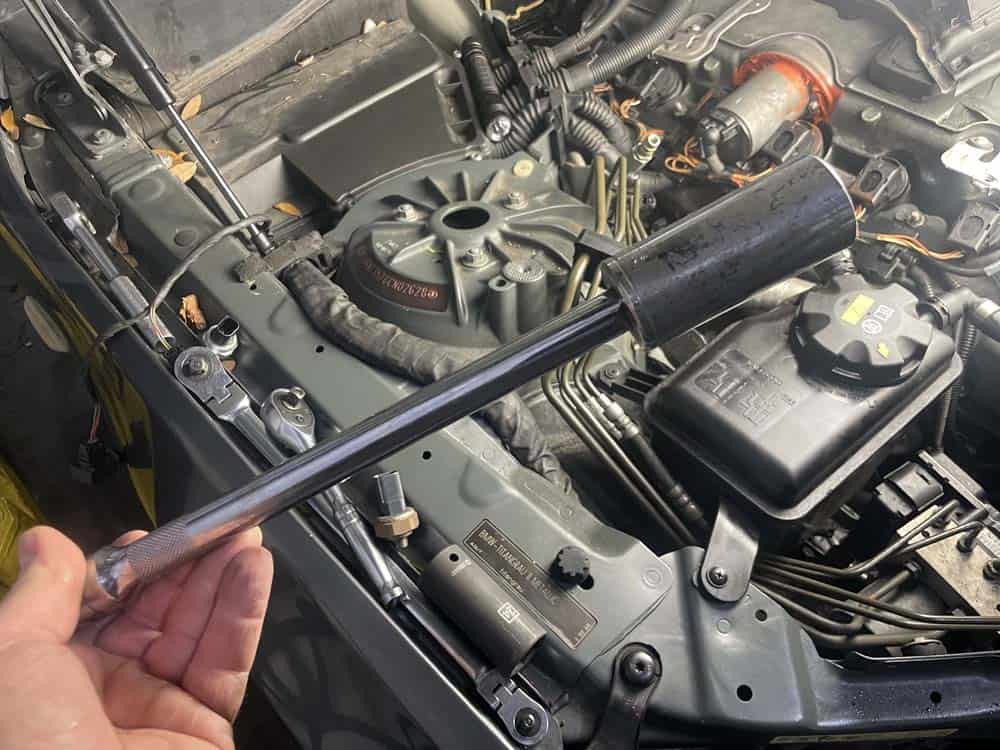
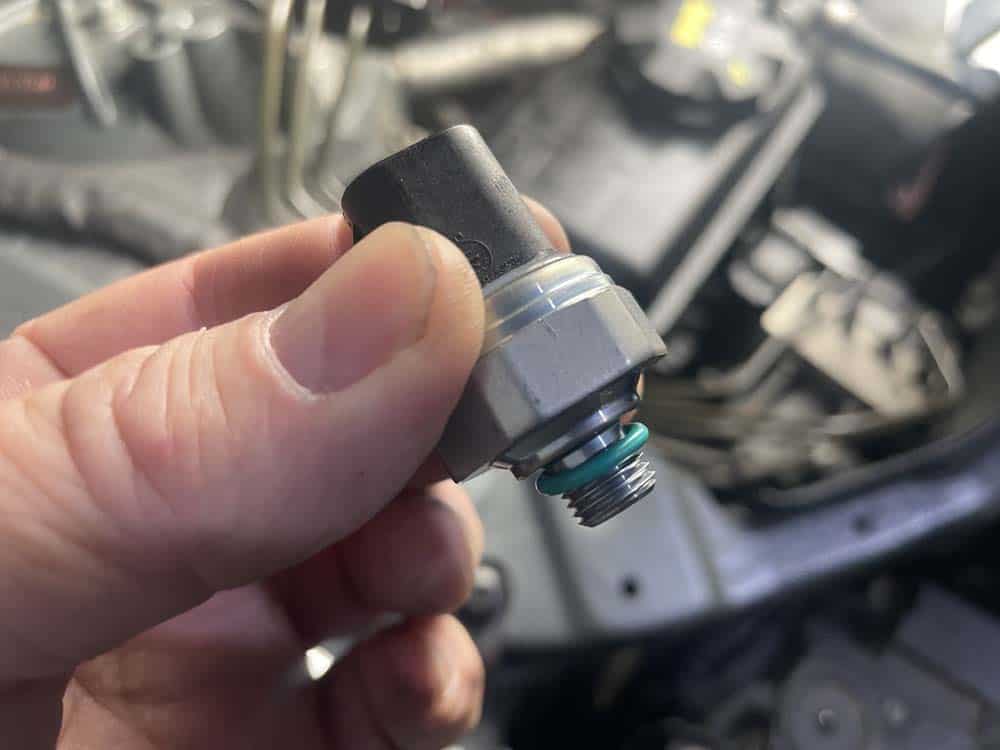
- Using a deep socket and extension, remove the pressure switch from the refrigerant line. The socket size may be different depending on the brand of the installed sensor.
- Make sure there is an o-ring on the new pressure sensor before installing.
Section 2 - Replacing the expansion valve
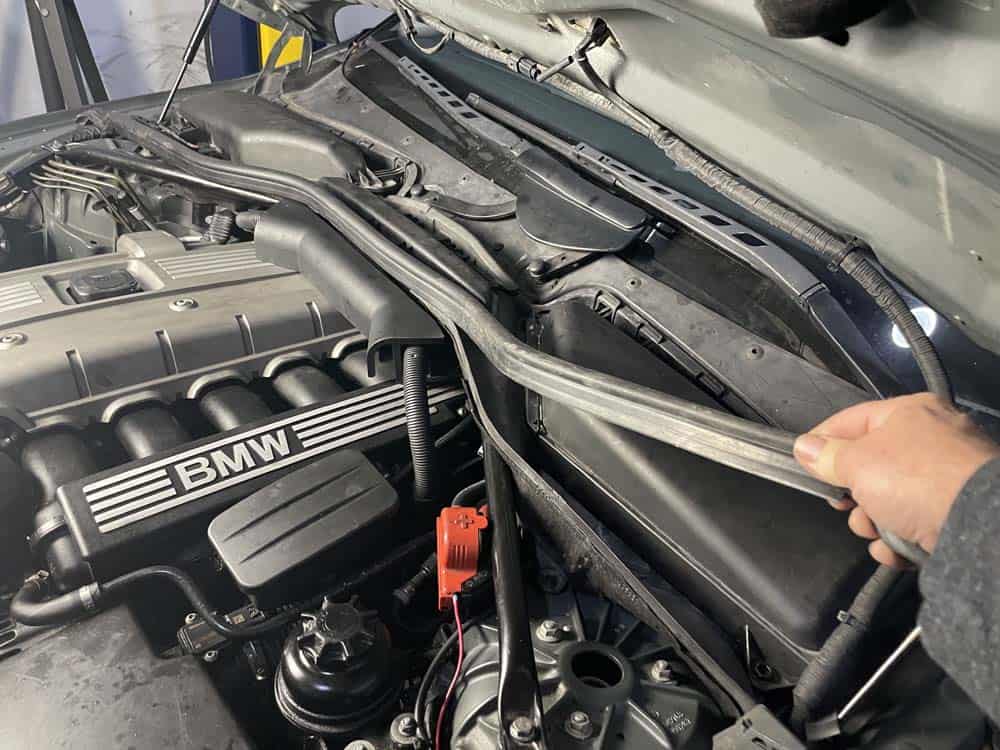
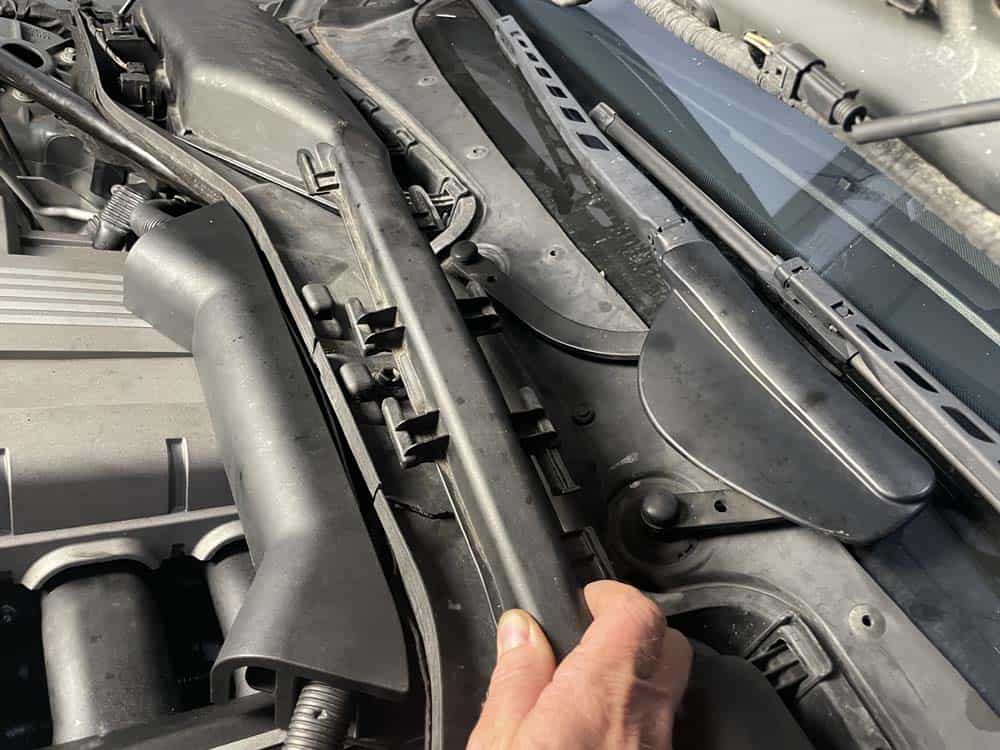
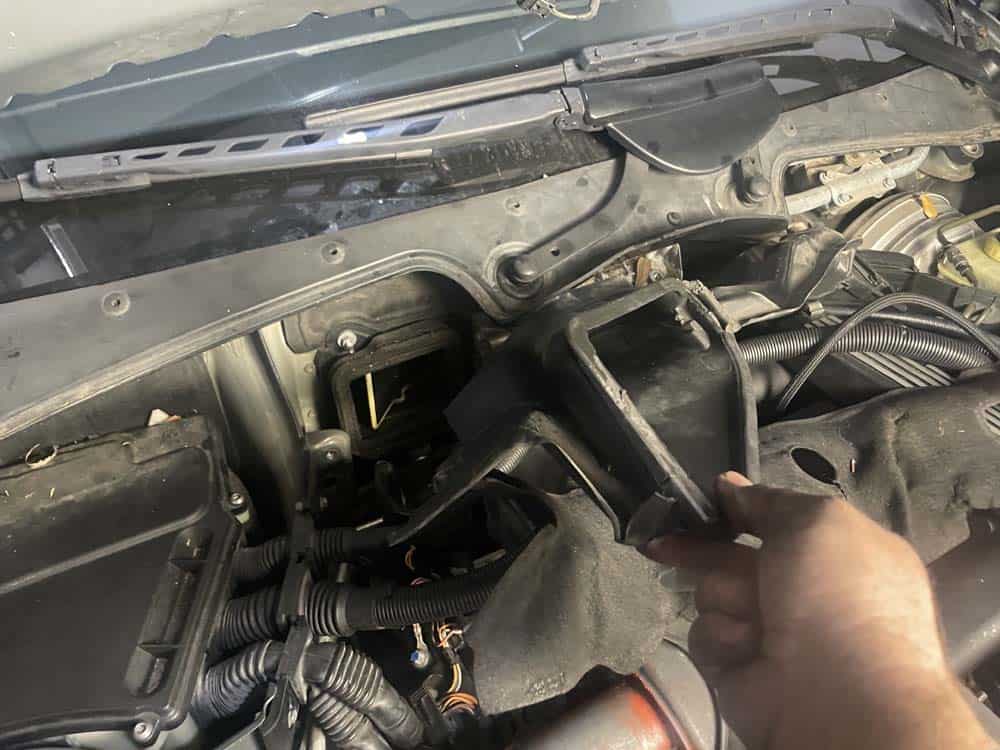
The expansion valve is located at the rear of the engine on the right side of the vehicle. It is hidden behind the right side of the filtered air duct which channels air from the cabin filter assembly into the evaporator. The cabin filter assembly must be removed from the vehicle to gain access to the expansion valve.- Remove the hood gasket from the cabin filter housing.
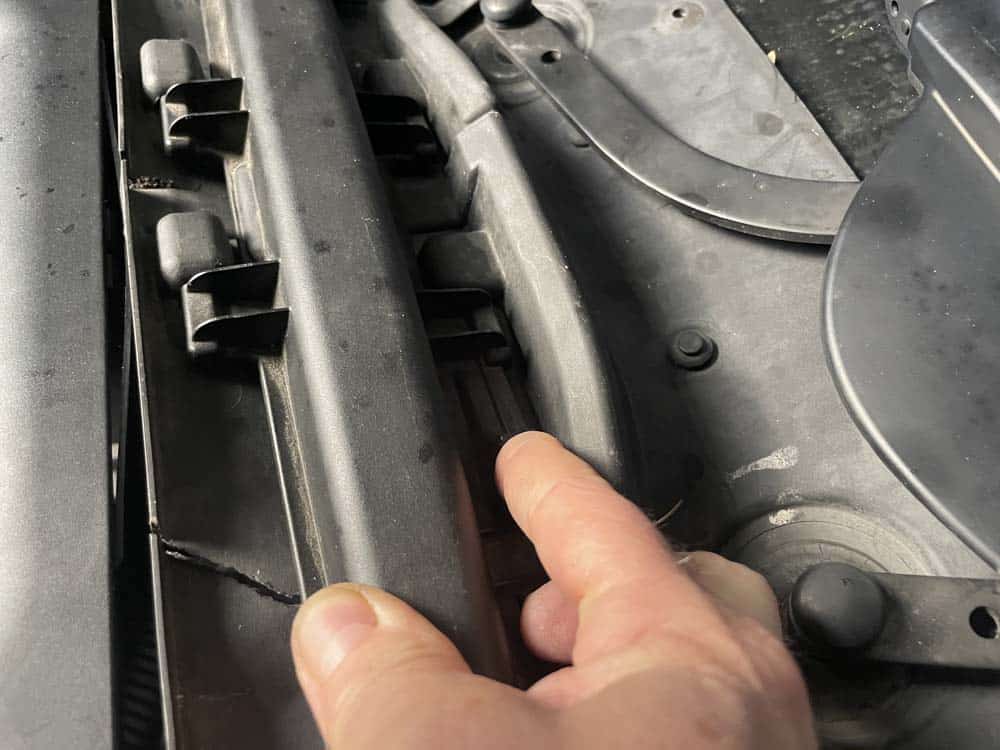
- Begin by removing the cabin filter cover by pressing the side tab and sliding the cover off.
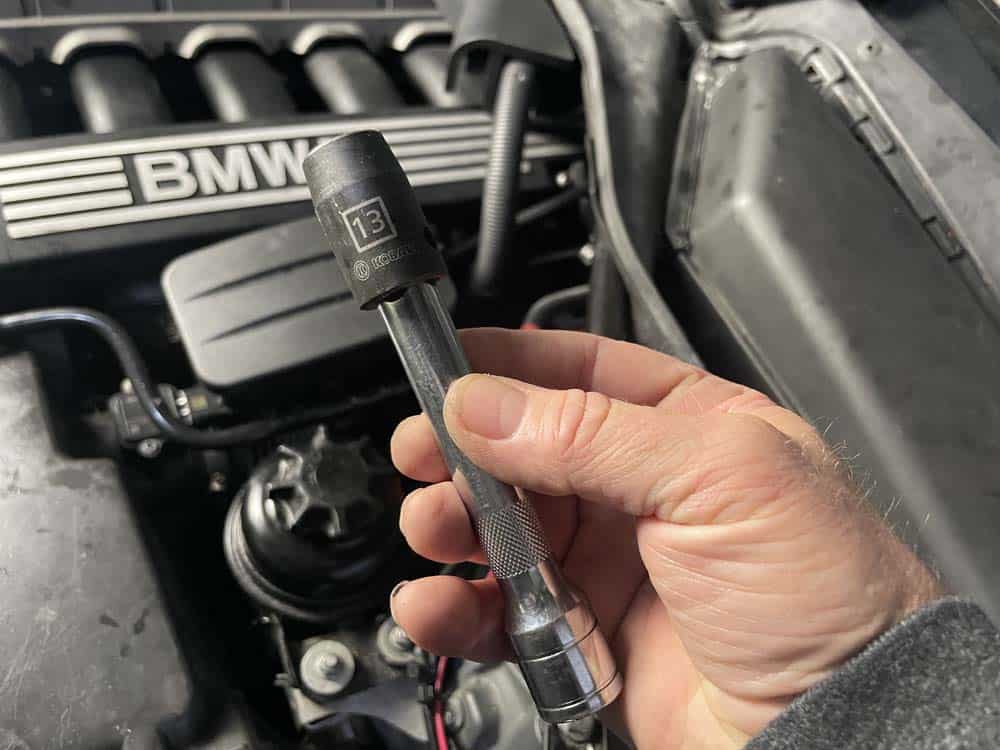
- Use a 13mm socket to release the plastic nut joining the left and right air inlets together.
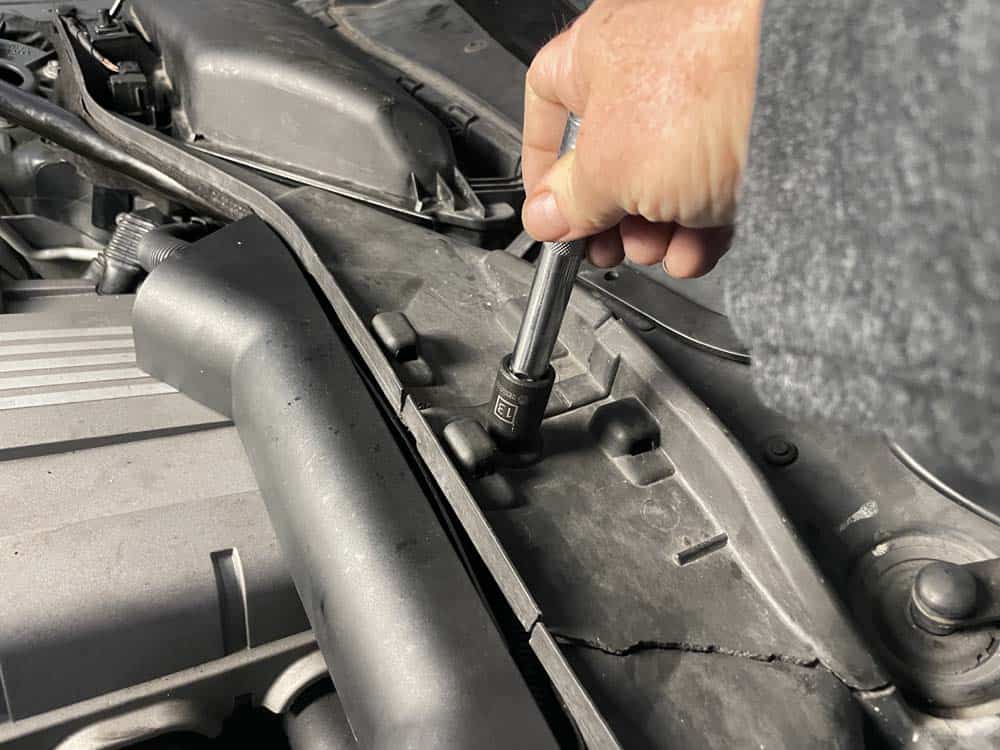
- Use a flat blade screwdriver and a 13mm socket to remove the cabin filter housing cover.
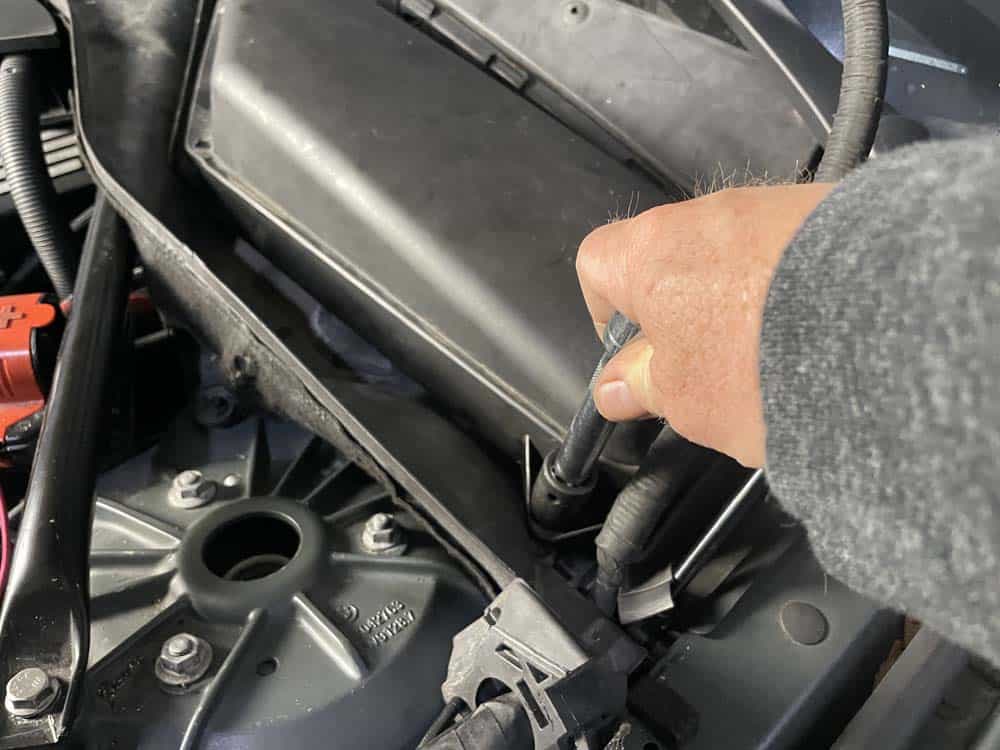
- Use a torx bit to remove the screw anchoring the left air inlet to the body of the vehicle. Use a 13mm socket to release the three locking nuts and remove the left air inlet from the vehicle.
- Repeat the above steps with the right cabin filter container and air inlet. Note that most models will need to have the hood switch removed from the right cabin filter container.
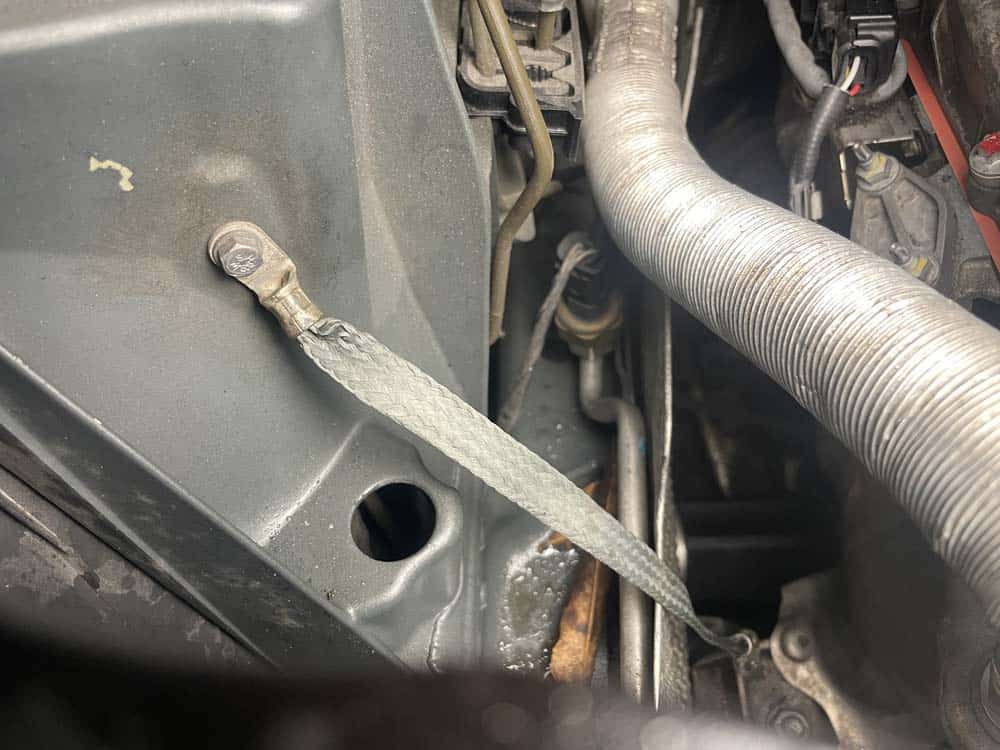
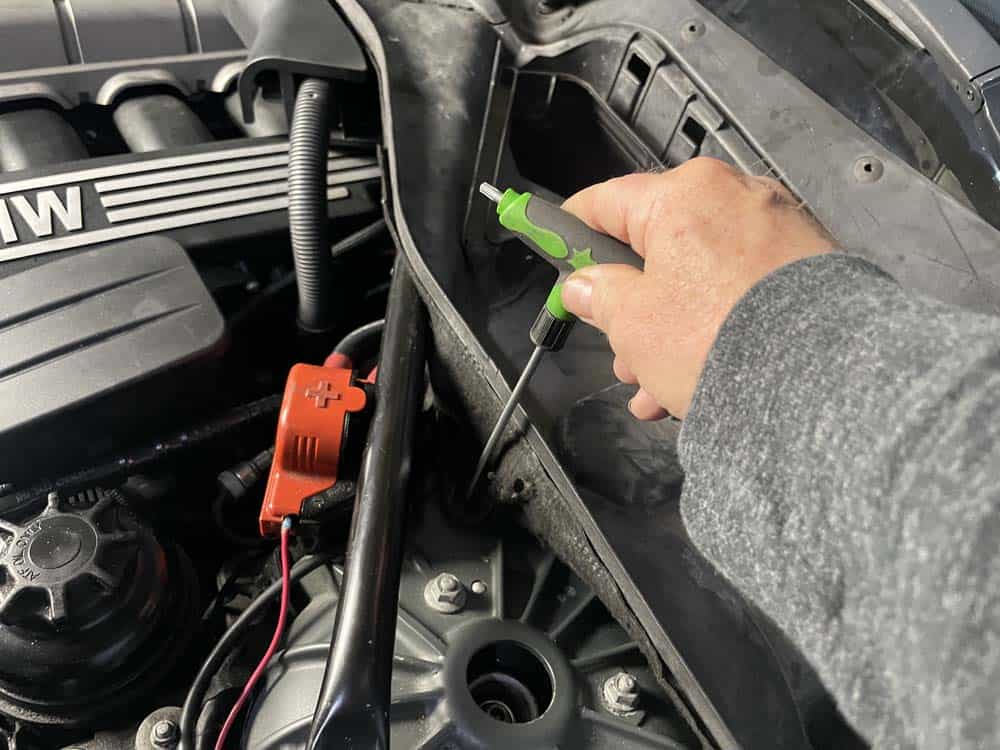
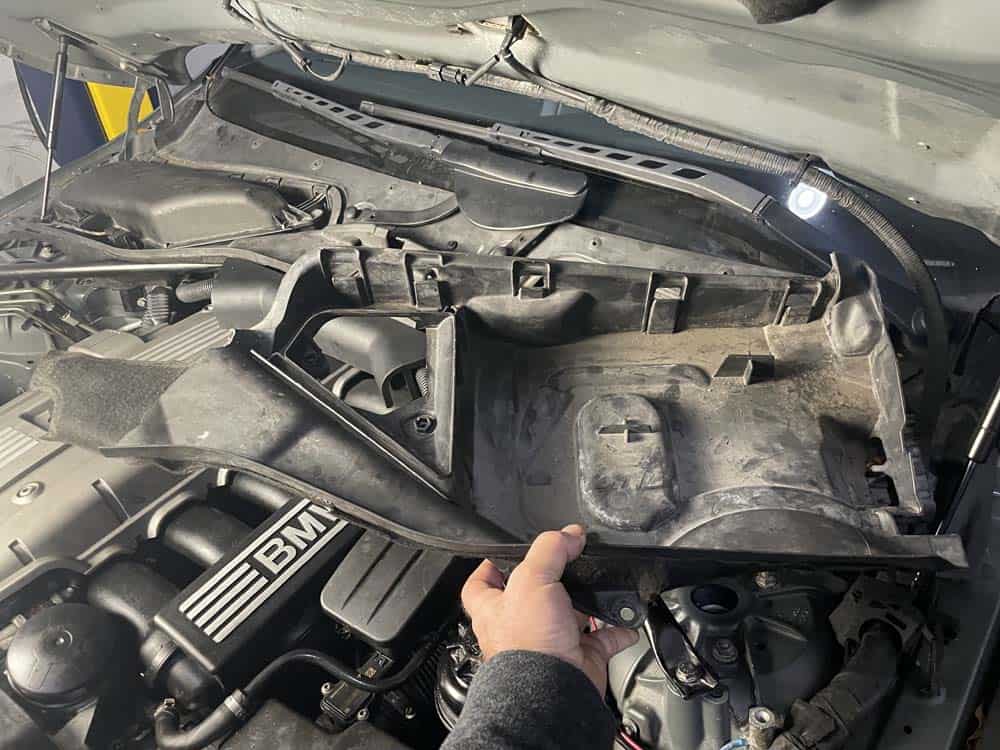
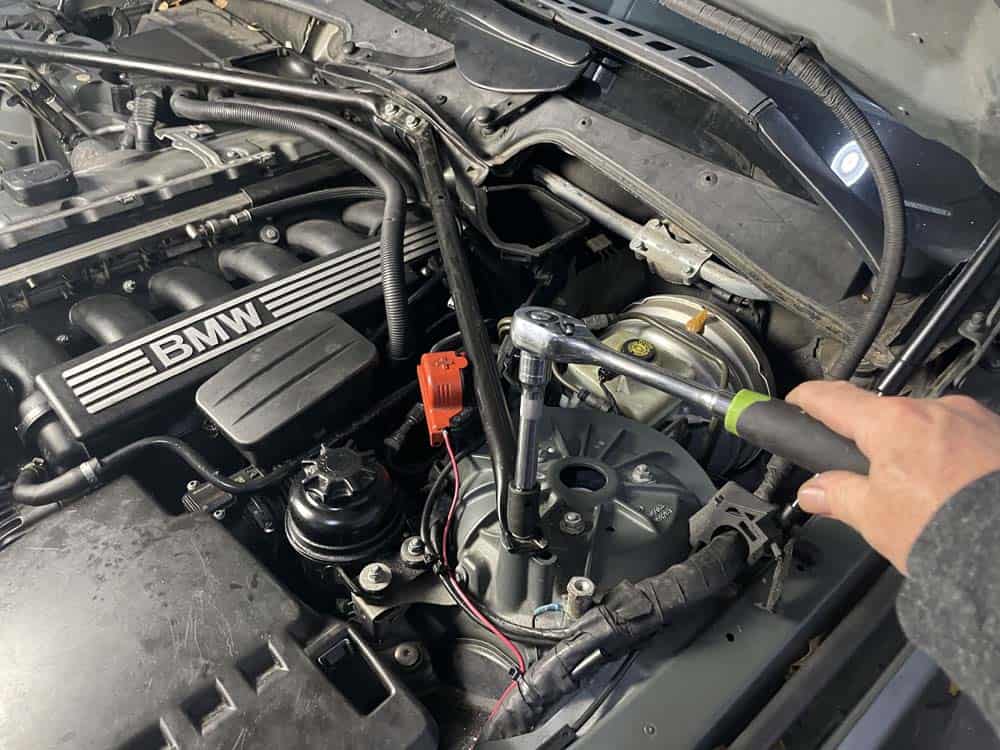
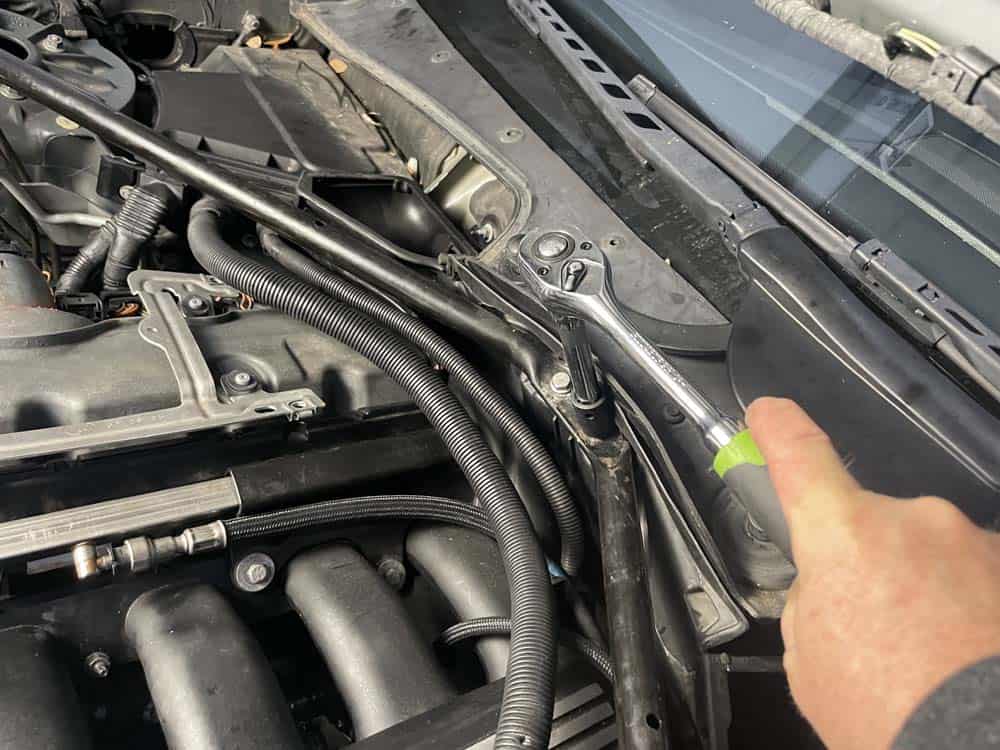
- Remove the wiring harness from the strut brace. Remove the four bolts anchoring the strut brace to the body of the vehicle.
- Remove the strut brace's four anchor bolts. Remove the brace from the vehicle.

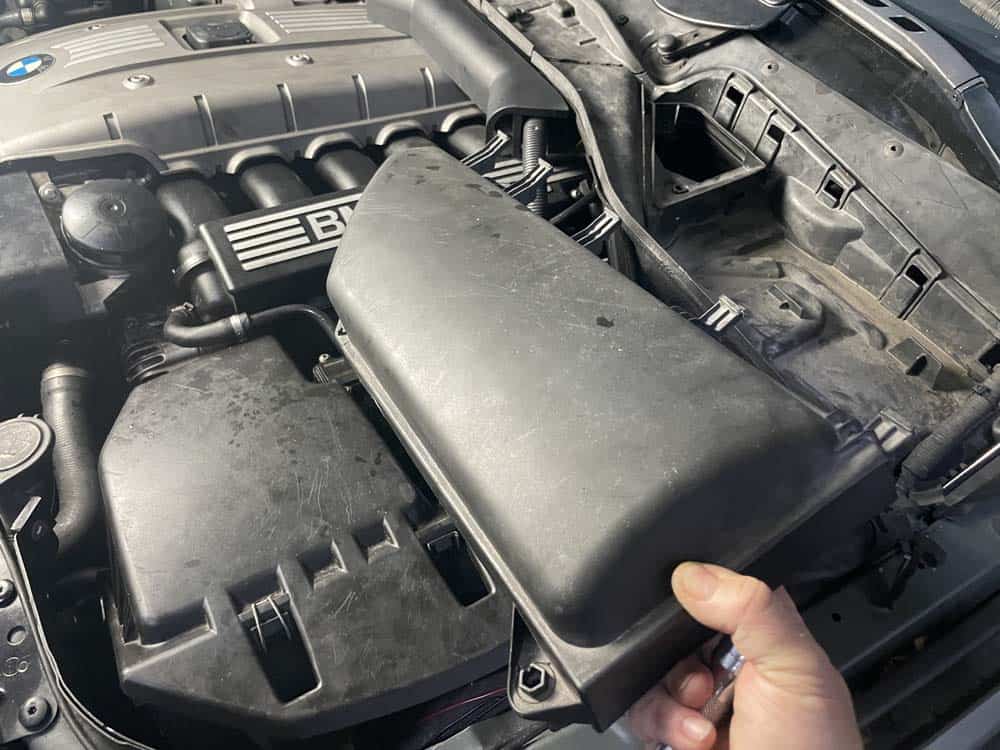
- Remove the engine cover.

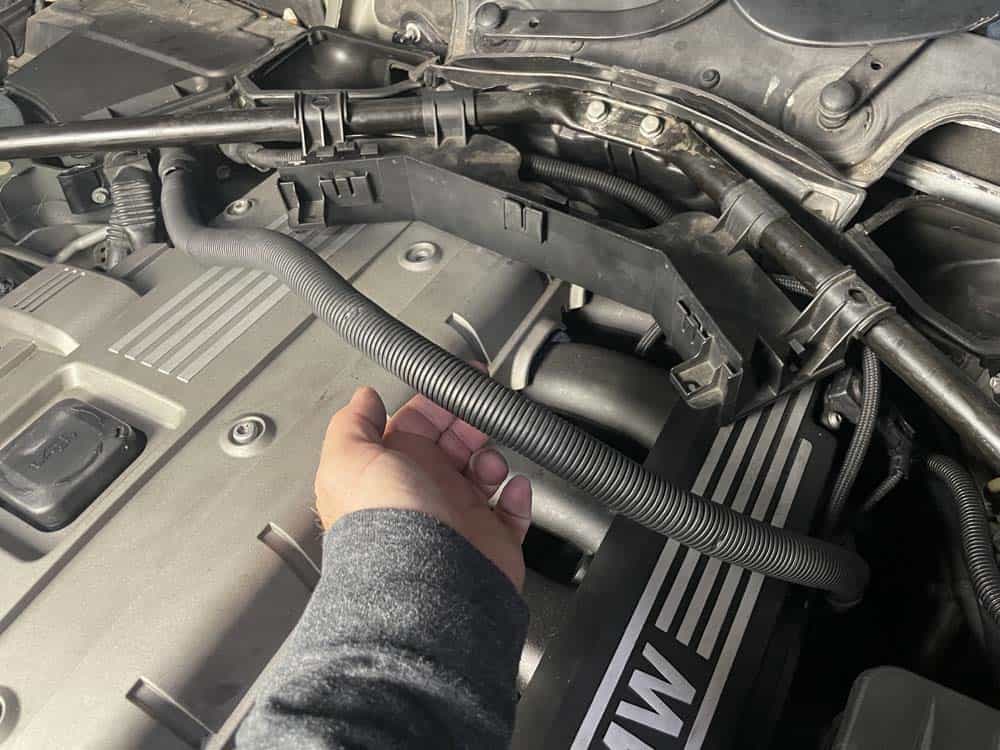
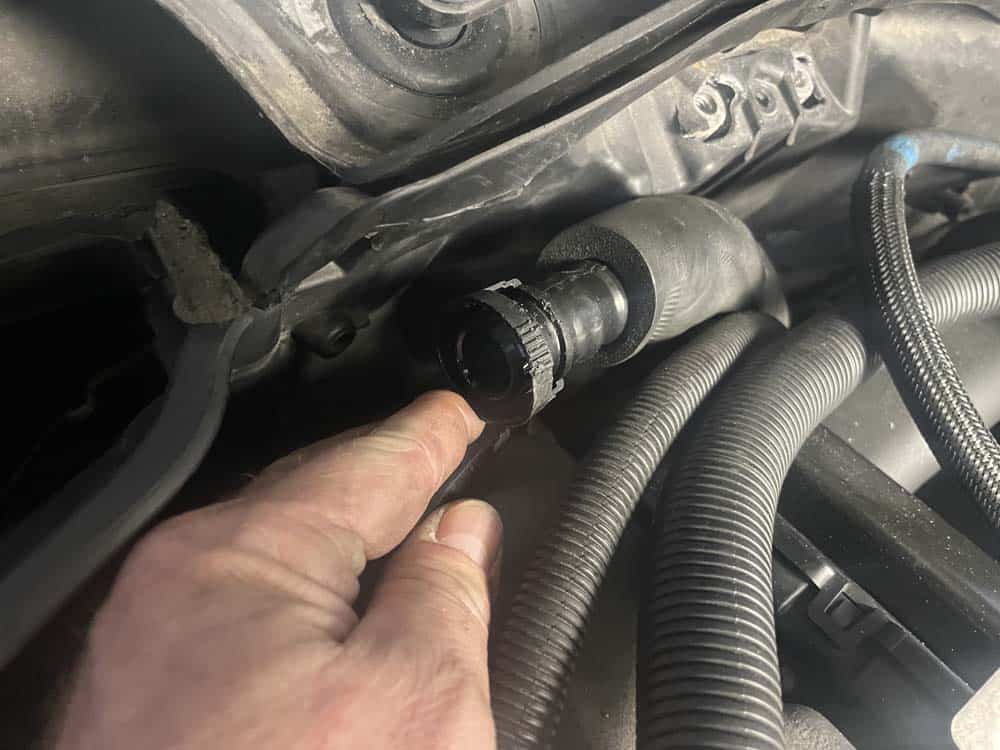
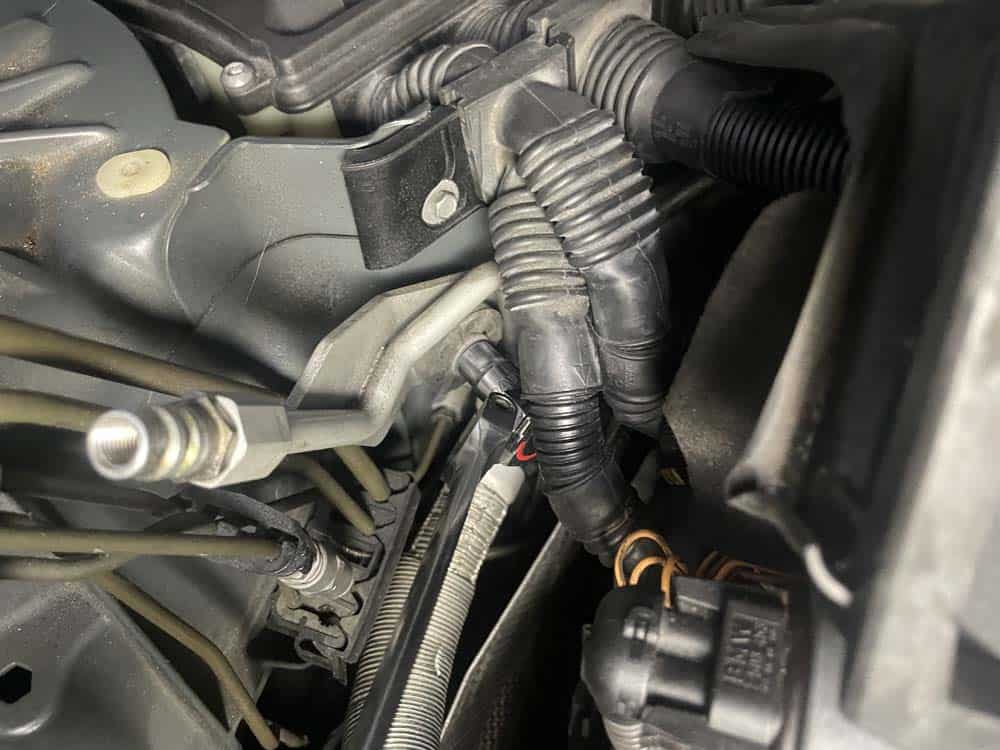
- Next, the crankcase vent pipe must be disconnected from the rear of the engine. BE CAREFUL when disconnecting...the pipe is prone to breaking. If you break the pipe there will be a vacuum leak that will cause the engine to malfunction and you will have to remove the intake manifold to replace it. We always use two people to remove the crankcase vent pipe...one to depress the locking tabs and another to pull it free from the engine.
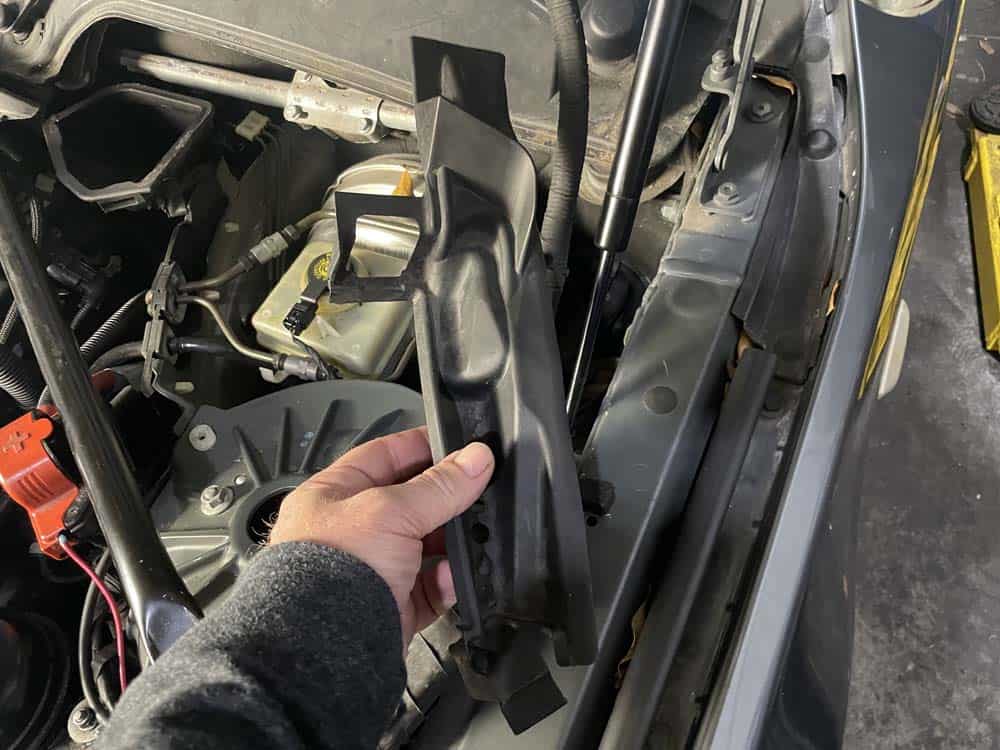
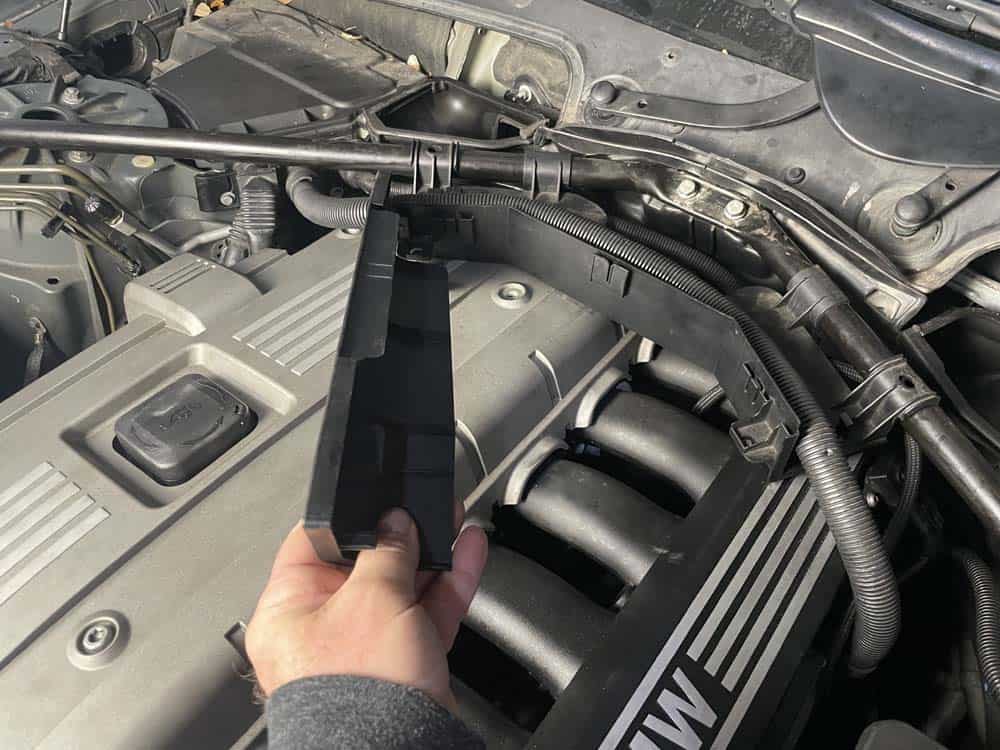
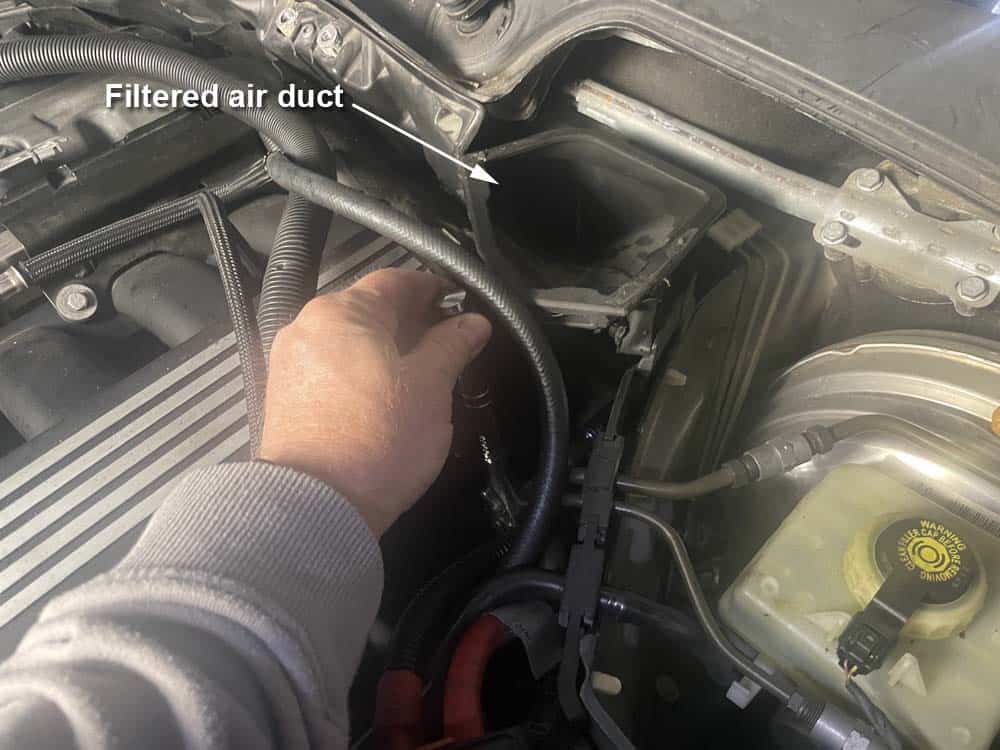
- Next, the filtered air duct must be removed from the firewall. It is held in place with four bolts, a torx bolt, and a plastic release. Begin by removing the four 10mm anchor bolts (two on each side) of the filtered air duct. Using a torx bit, remove the upper anchor bolt. Pull the insulation back and locate the plastic release nut in the lower center of the air duct behind the engine - turn it 90 degrees to release. Grasp the filtered air duct and carefully remove it from the firewall.
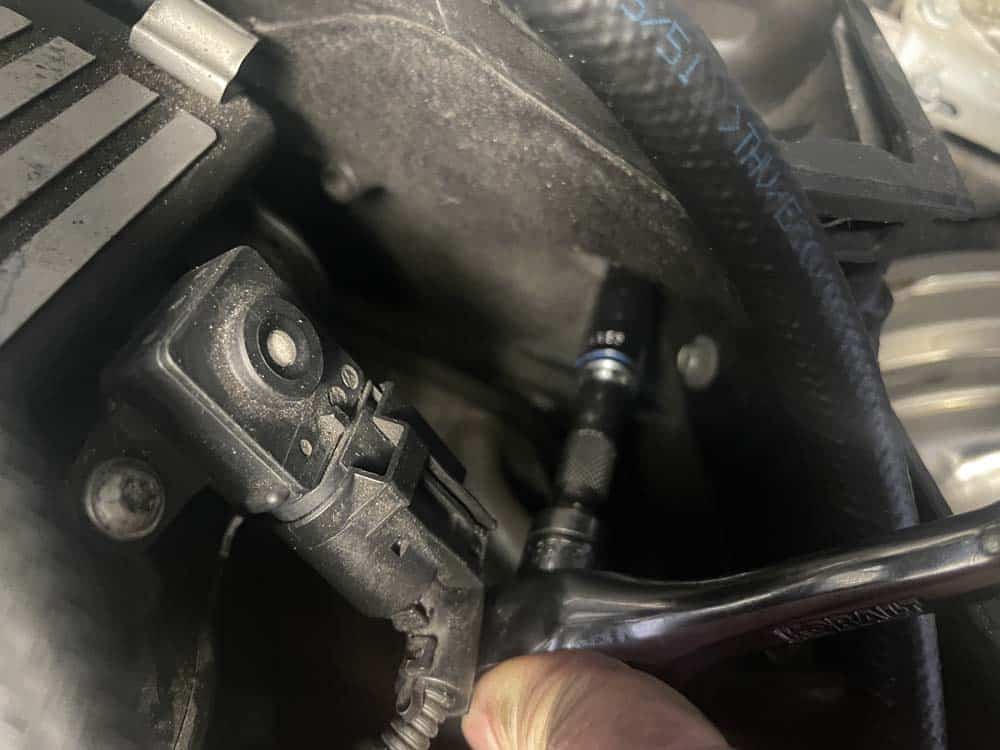
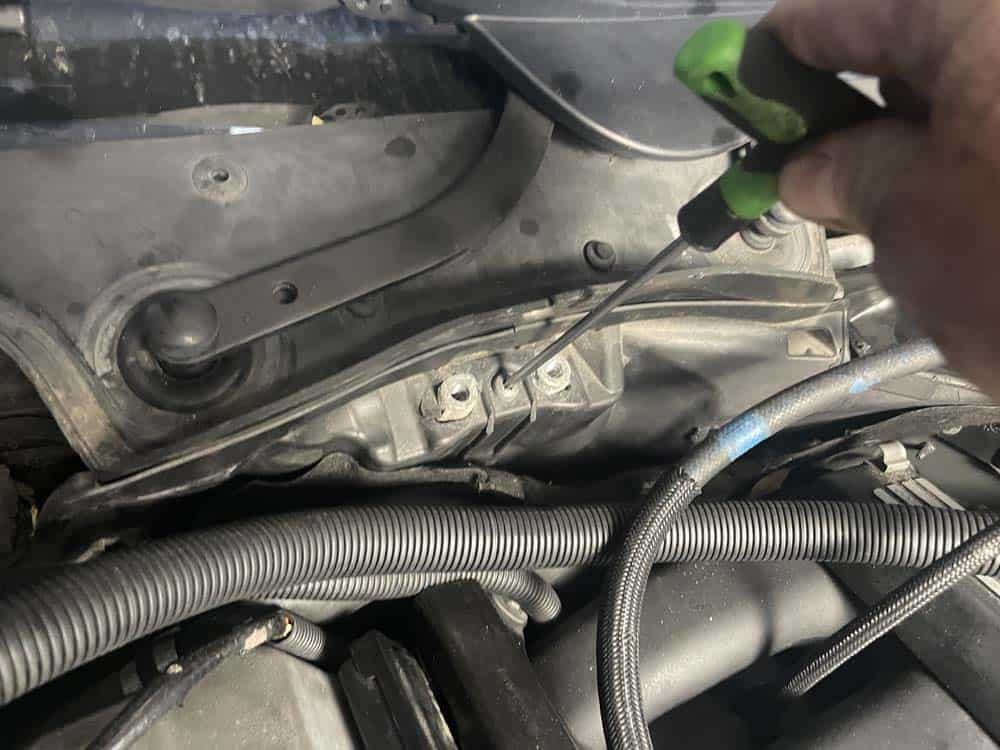
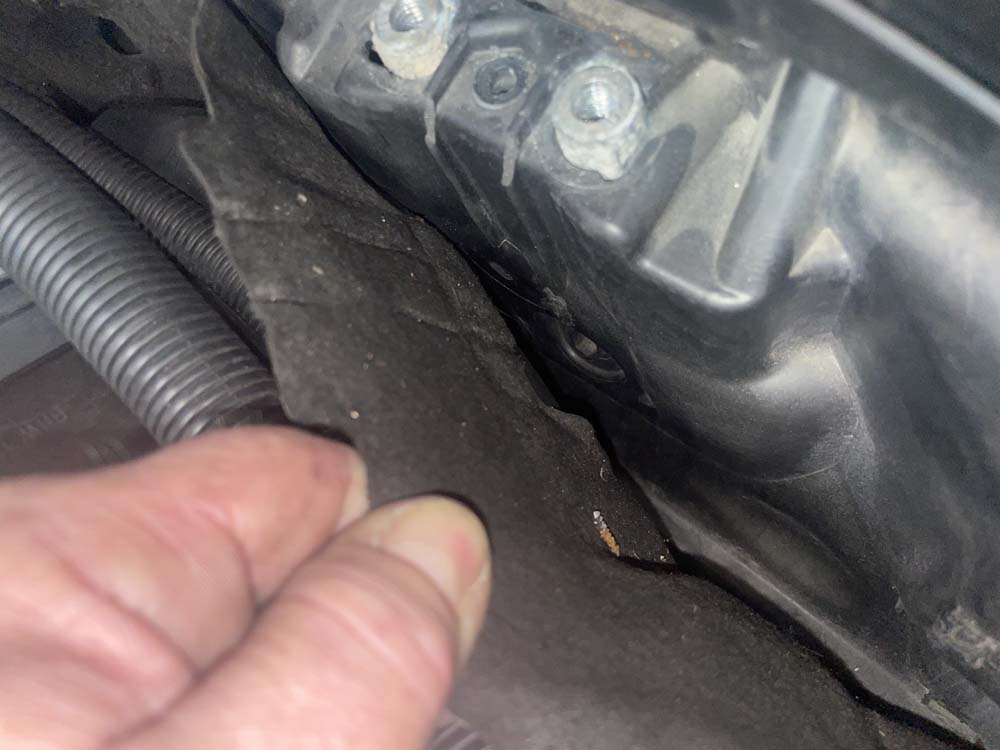
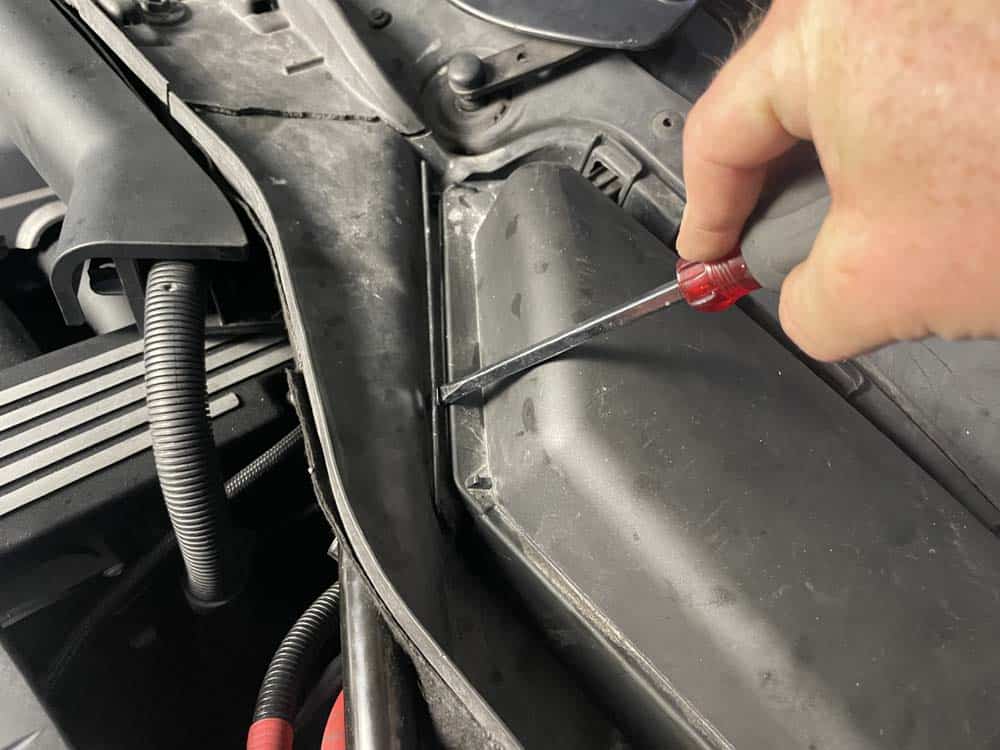
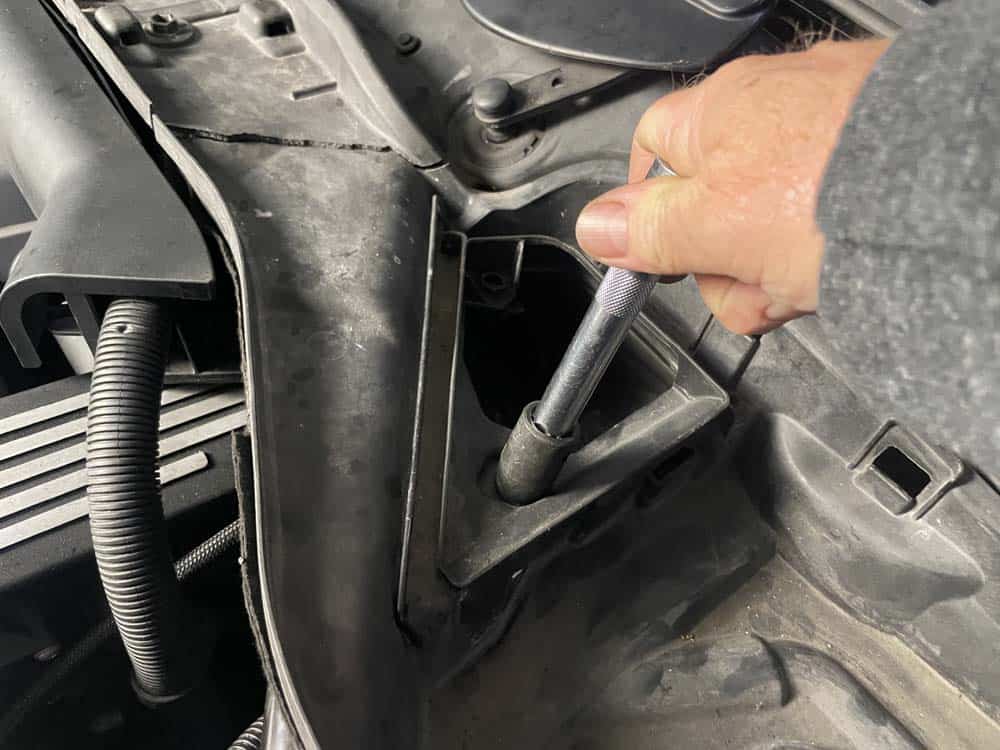
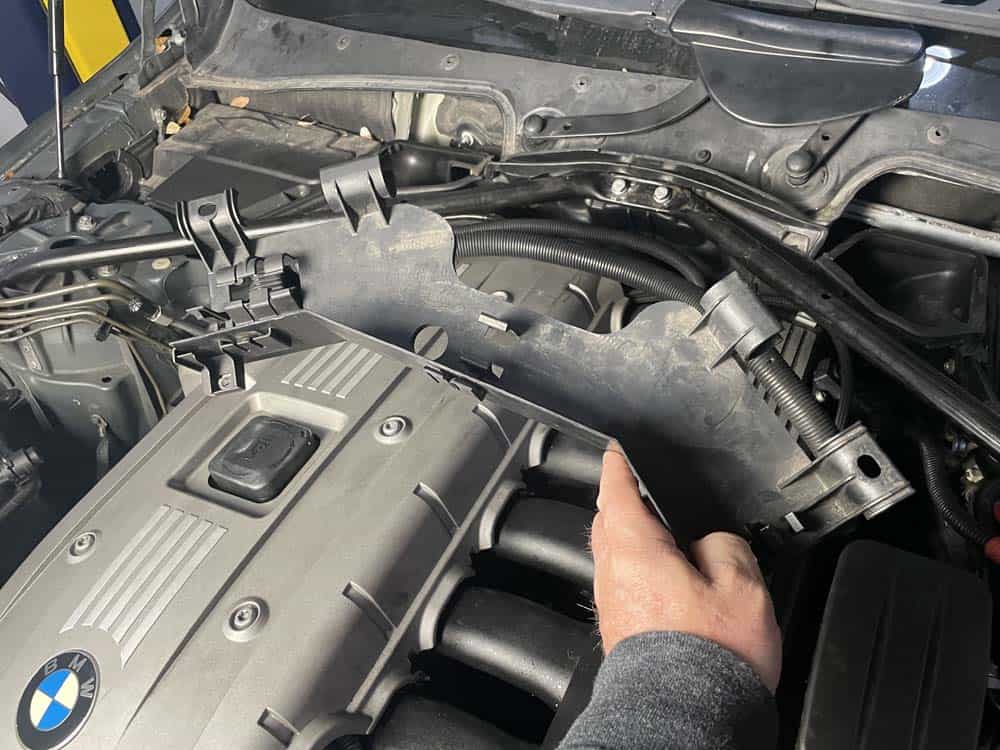
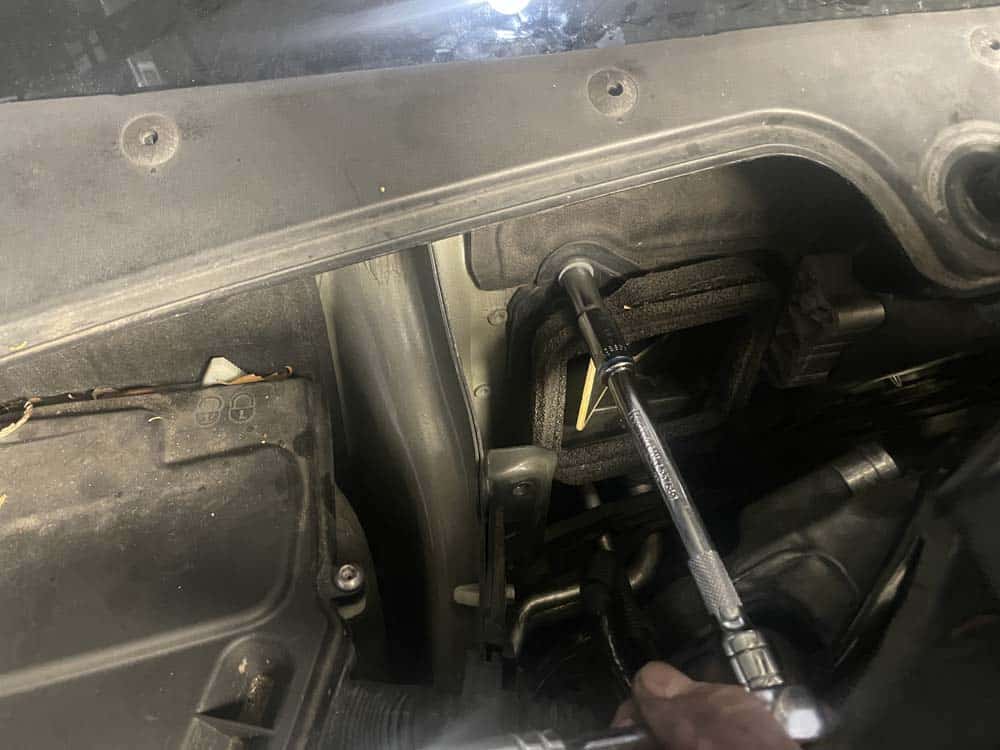
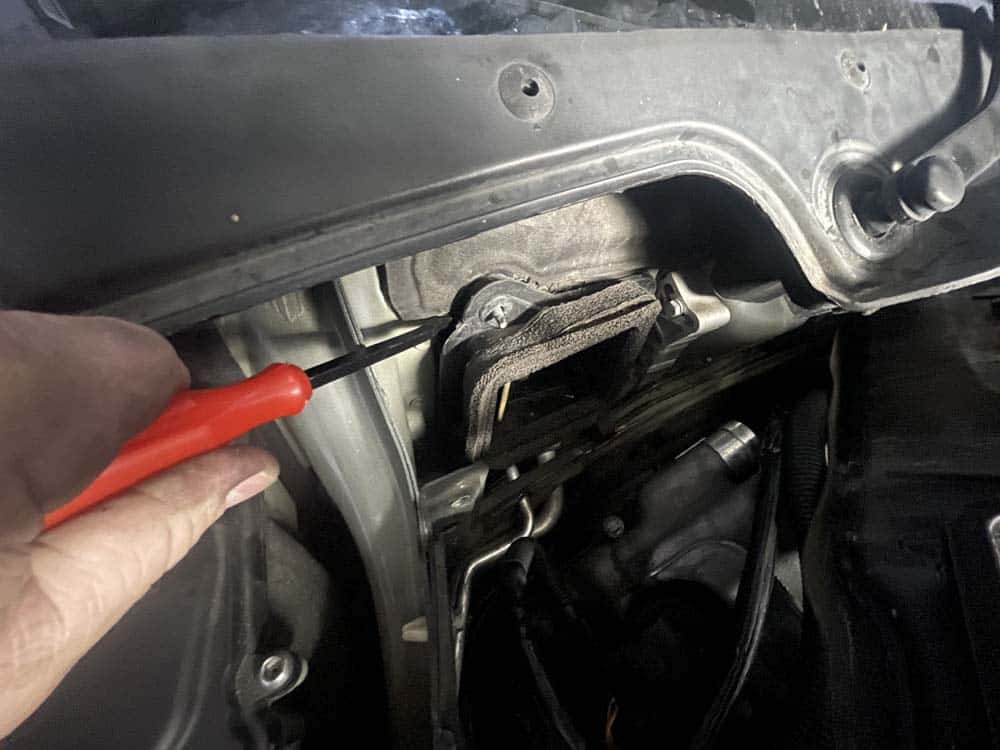
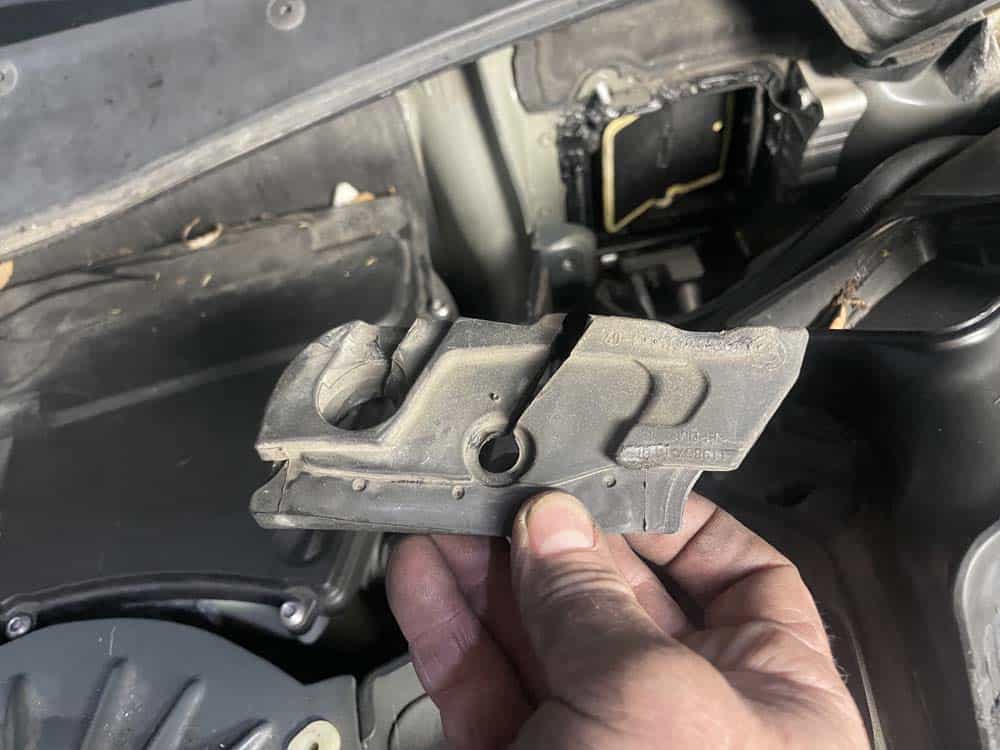
- In order to access the expansion valve, the right sealing frame must be removed. It is anchored to the firewall by two nuts and sealing glue. Using a 10mm socket wrench, remove the anchor nuts. Use a trim removal tool to slowly and carefully pry the sealing frame off of the firewall.
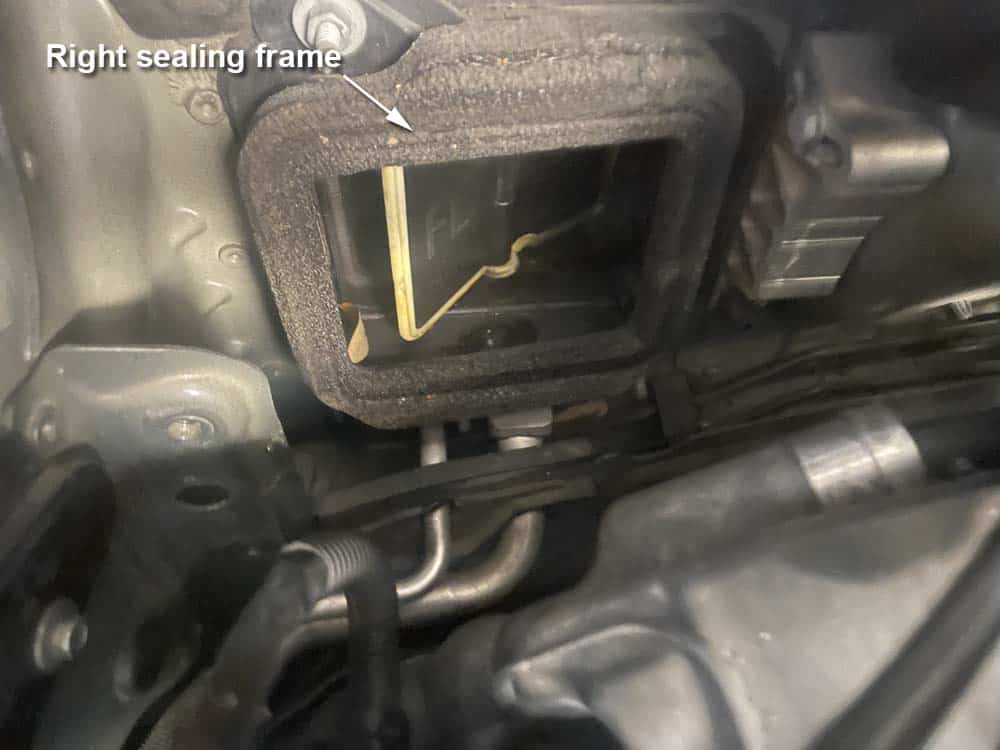
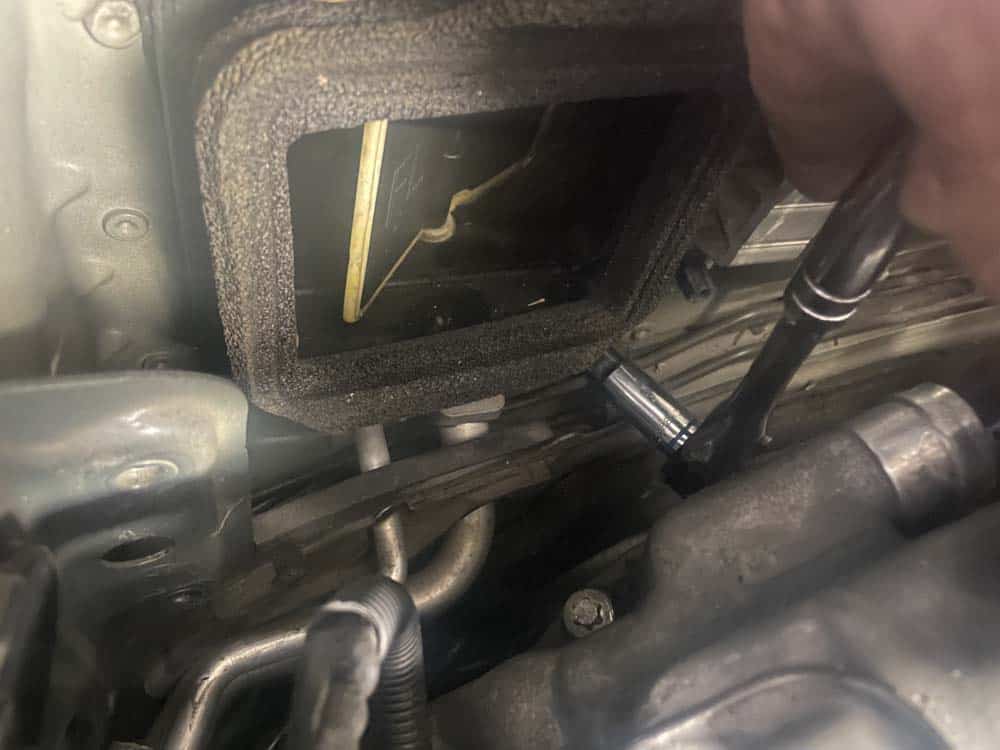
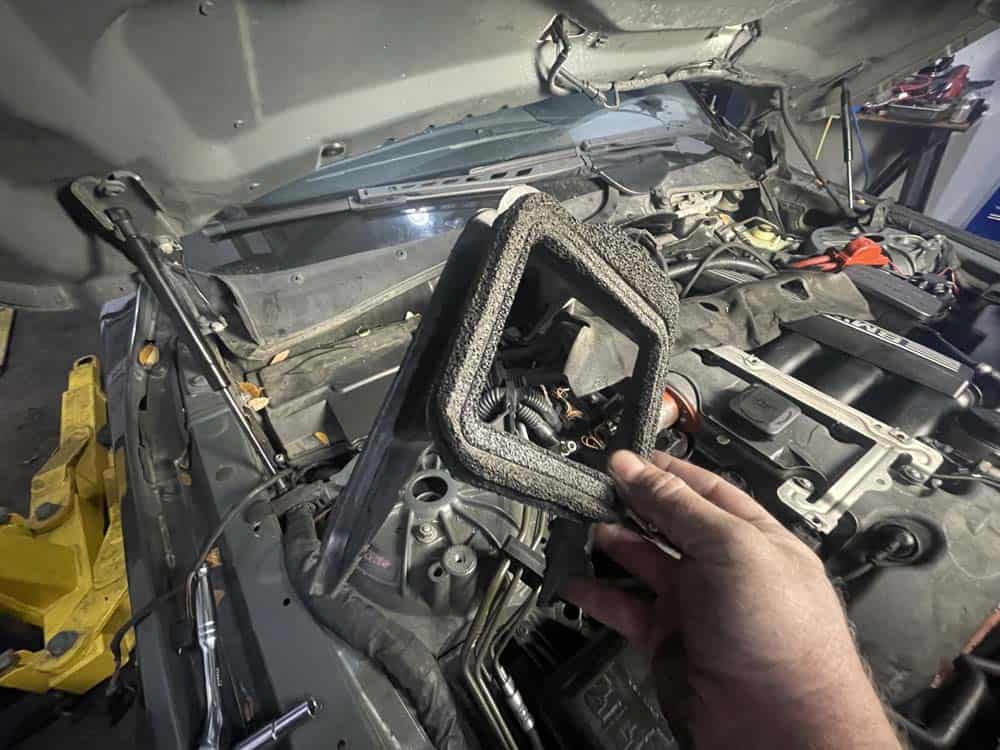
- The expansion valve is now accessible.
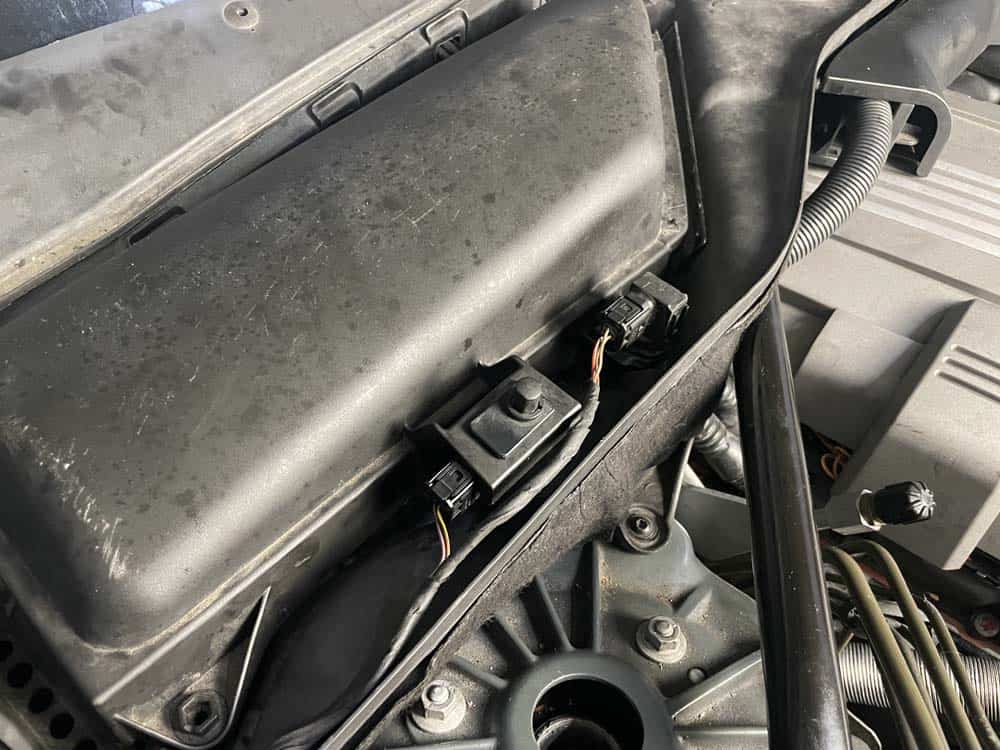
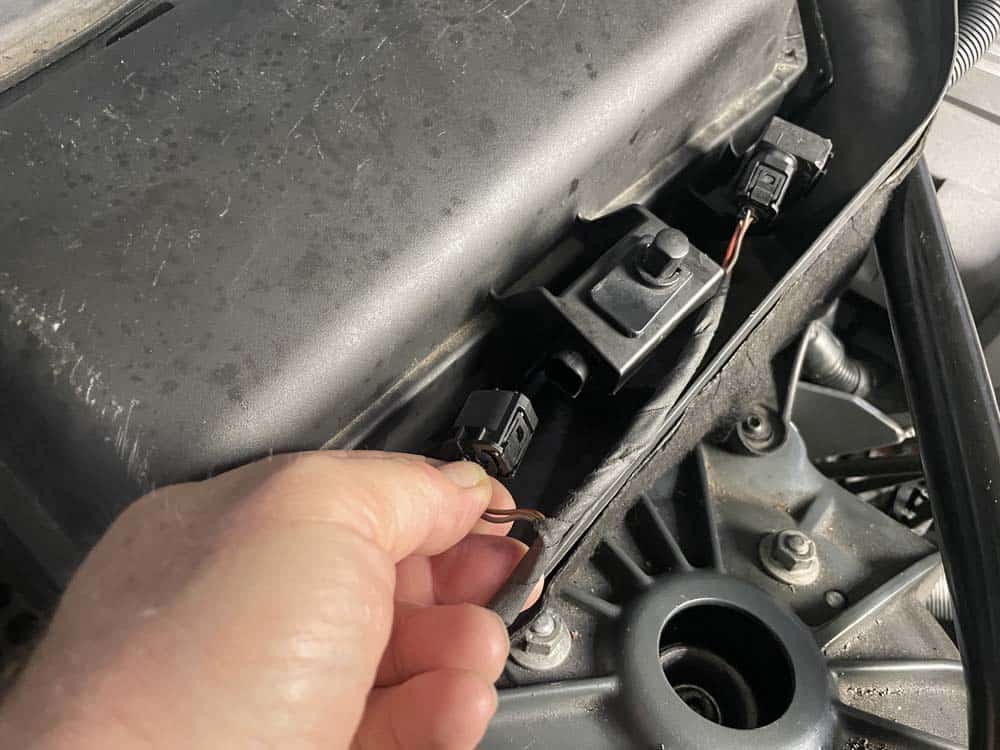
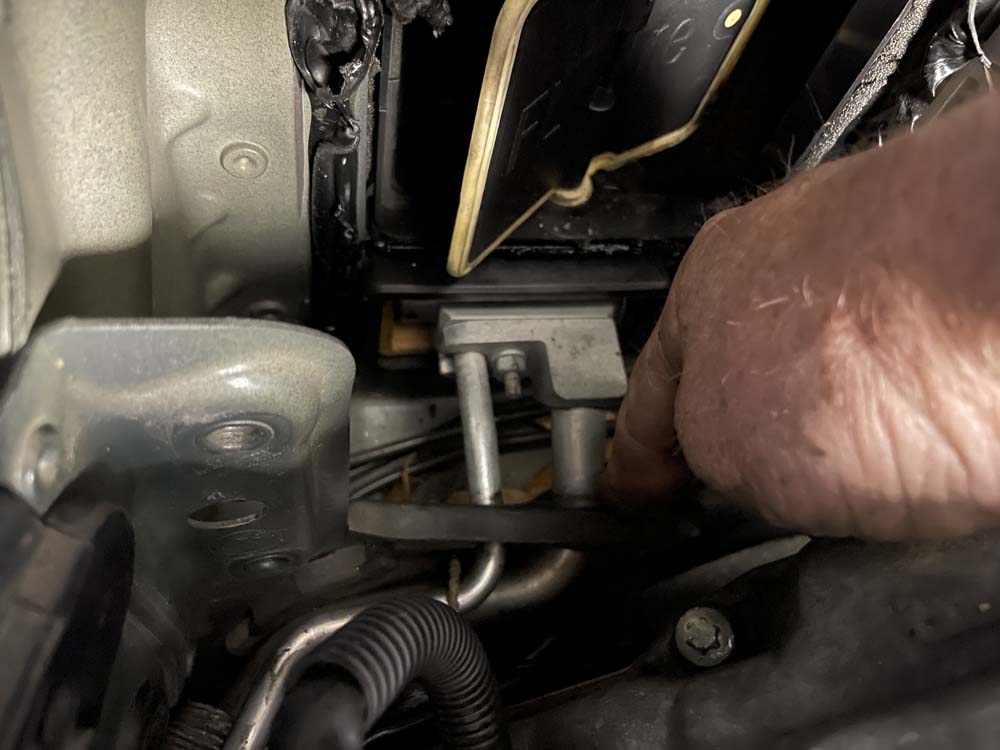
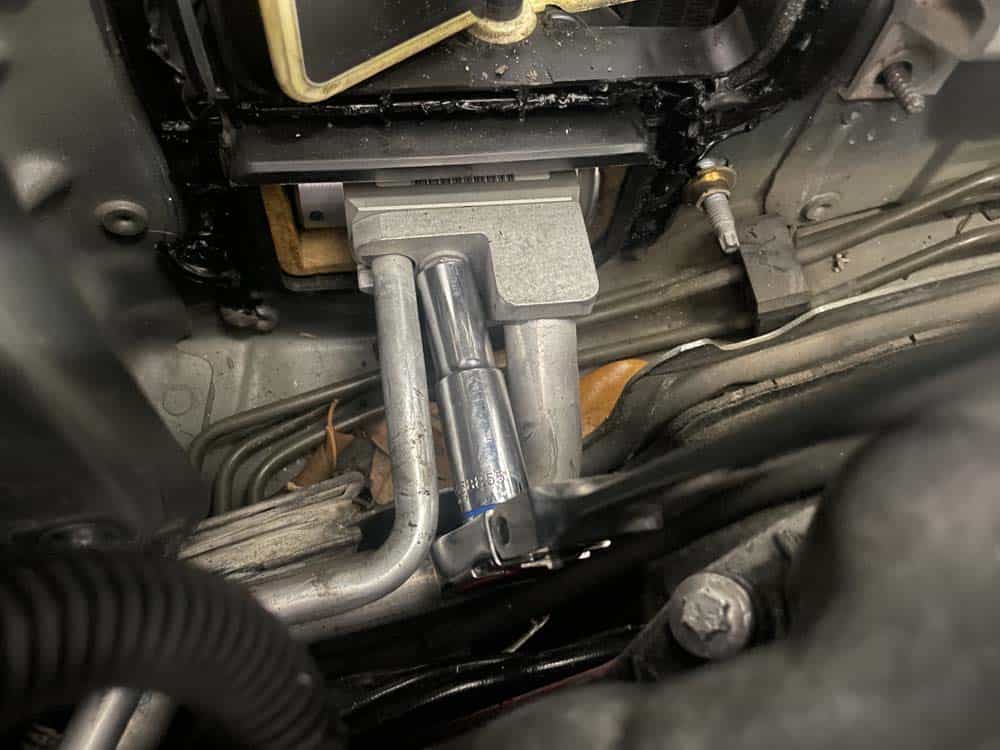
- In order to provide enough slack in the refrigerant lines so they can be removed from the expansion valve, remove the low-pressure refrigerant line mounting bracket from the body of the vehicle. It is held in place with two 10mm nuts.
- The expansion valve can now be removed. Start by removing the rubber refrigerant line mount as shown below. This rubber mount must be removed in order to gain access to the valves mounting nut and screws.
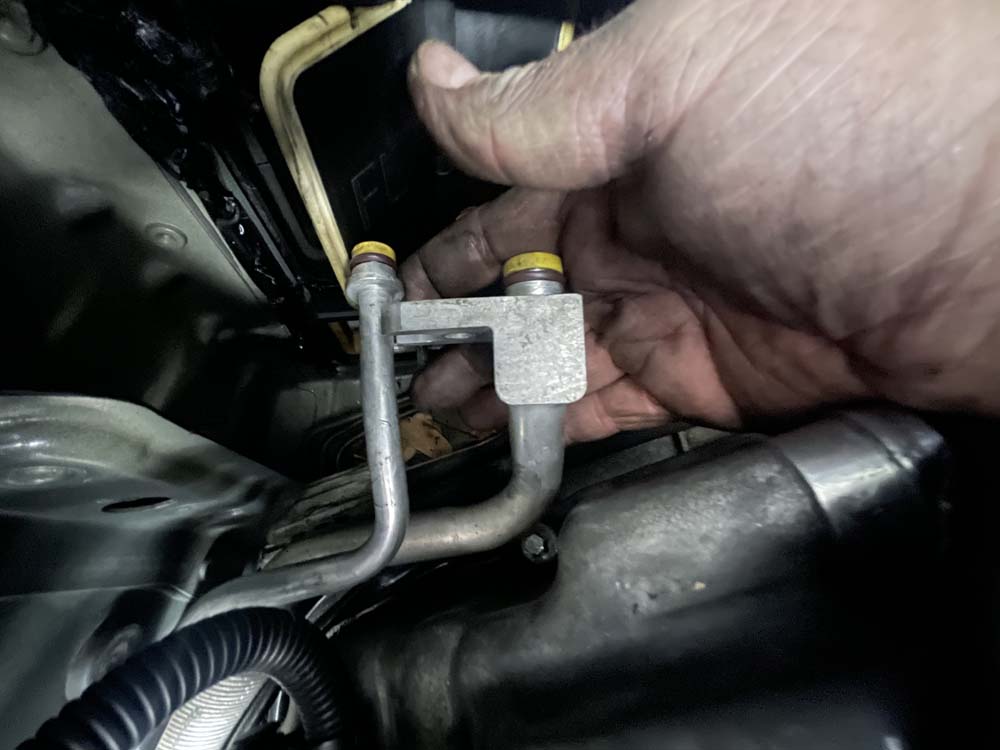
- Using a 10mm socket wrench, remove the front mounting nut and pull the refrigerant lines free of the expansion valve.
- Next, use a 4mm hex bit to remove the two expansion valve mounting bolts as shown below. BE CAREFUL...these bolts can be tight. Use caution to avoid stripping them.
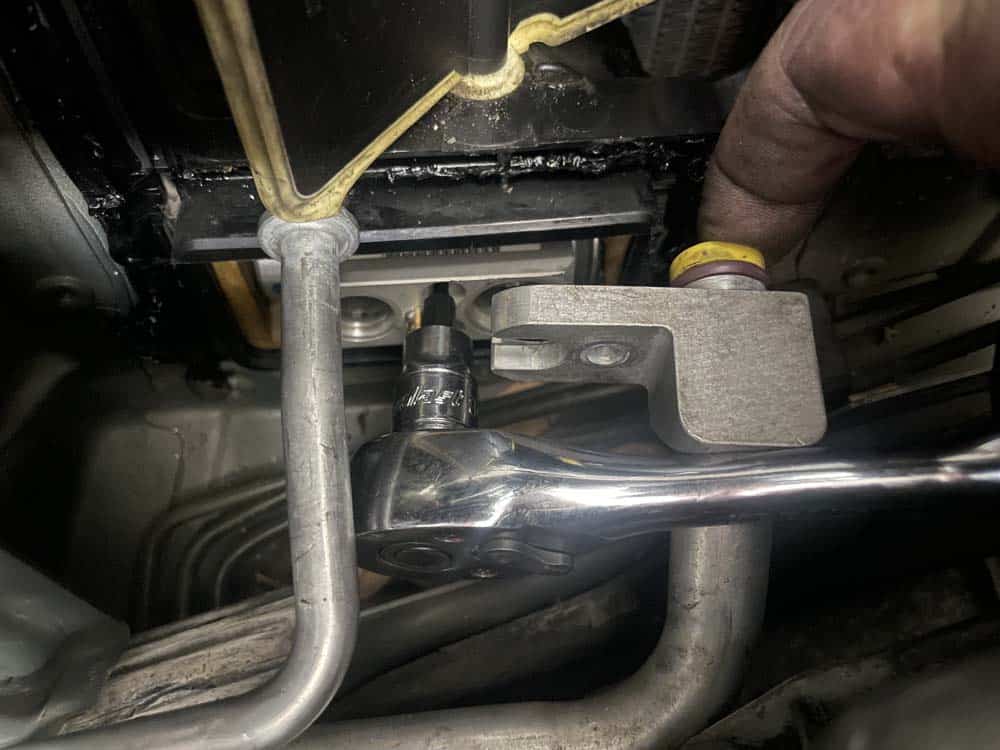
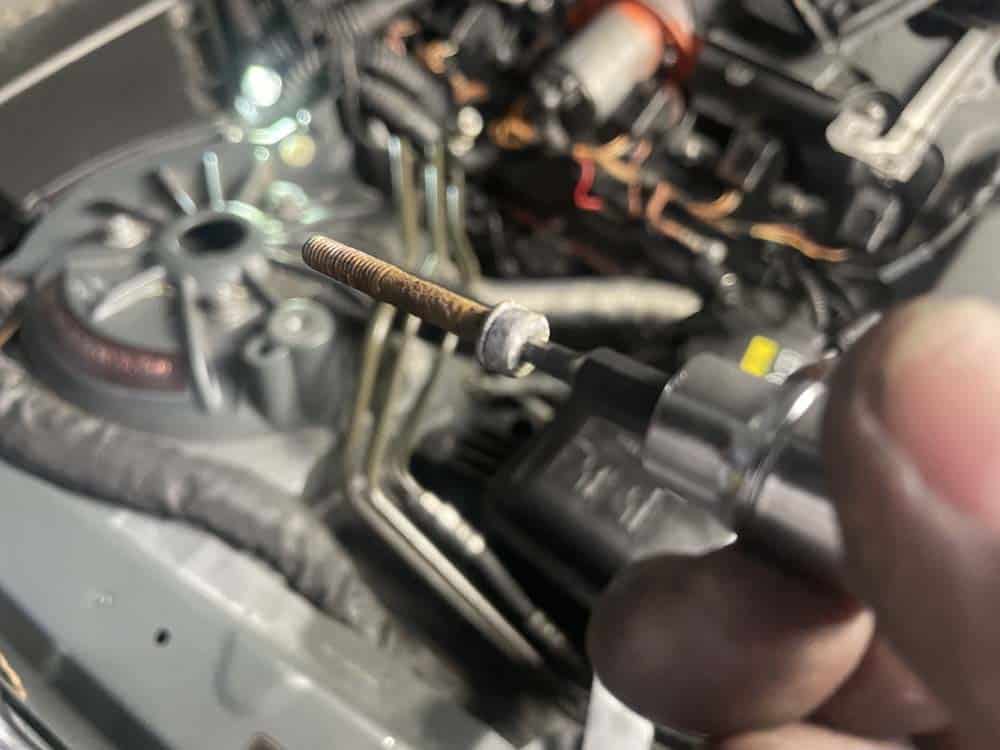
- Grasp the expansion valve and pull it free from the evaporator lines.
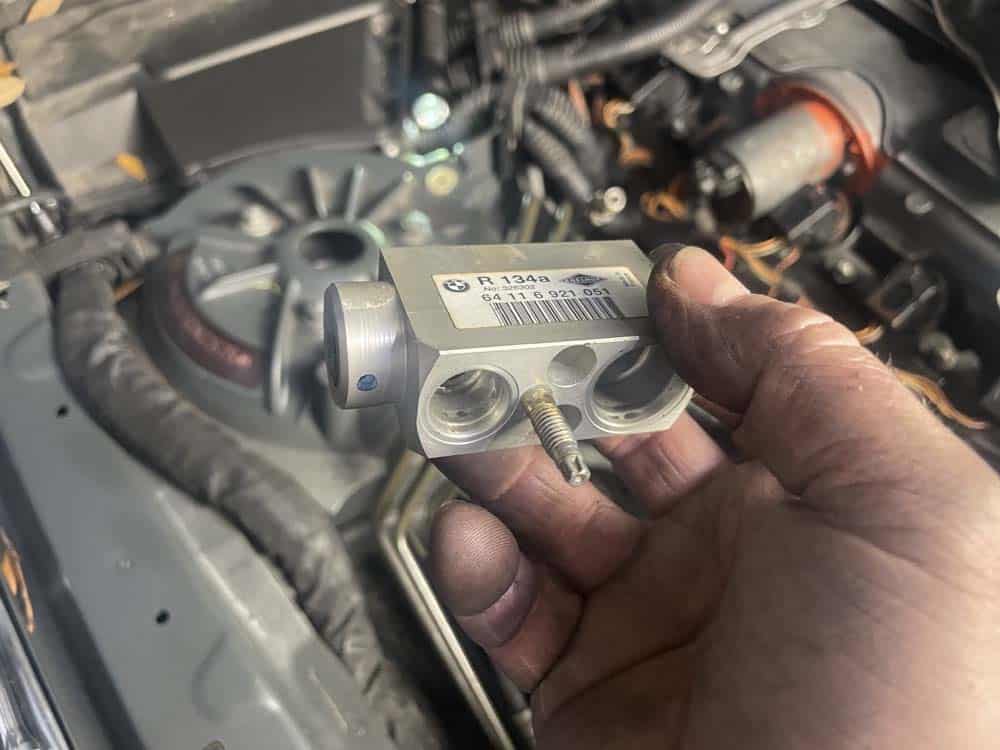
- Install a new expansion valve and reassemble the vehicle following the above steps in reverse.
BMW E60 A/C Pressure Sensor and Expansion Valve Replacement Finished