
Affiliate link disclosure – The BMW Repair Guide uses affiliate links in their site. For more information on affiliate links, please click here.
Repair Summary
This article gives detailed instructions on removing the intake manifold from a BMW with the N52 6 cylinder engine. Even though we used a 2006 530xi touring wagon to perform this repair, this article can be applied to any vehicle with the N52 engine including most 2004-2013 1, 3, 5, 6, 7, X1, X3, X5, and Z4 series 6 cylinder models with minor modifications to the repair steps.
See all vehicles this article applies to
E90 3 Series 323i
E90N 3 Series 325i
E90N 3 Series 325xi
E90N 3 Series 323i
E91 3 Series 325i
E91 3 Series 323i
E91N 3 Series 325xi
E91N 3 Series 325i
E91N 3 Series 323i
E92 3 Series 325xi
E92 3 Series 325i
E92 3 Series 323i
E92N 3 Series 323i
E92N 3 Series 325xi
E92N 3 Series 325i
E93 3 Series 325i
E93 3 Series 323i
E93N 3 Series 323i
E93N 3 Series 325i
E60 5 Series 523i
E60N 5 Series 525Li
E60N 5 Series 525i
E60N 5 Series 523Li
E60N 5 Series 523i
E61 5 Series 525i
E61 5 Series 525xi
E61 5 Series 523i
E61N 5 Series 523i
E61N 5 Series 525i
F10 5 Series 523i
F11 5 Series 523i
E83N X3 Series X3 2.5si
E85 Z4 Series Z4 2.5si
E89 Z4 Series Z4 23i
F18 5 Series 523Li
F18 5 Series 520Li
E60 5 Series 523Li
E60 5 Series 525Li
E81 1 Series 130i
E87 1 Series 130i
E88 1 Series 128i
E88 1 Series 125i
E82 1 Series 128i
E82 1 Series 125i
E87N 1 Series 130i
E90 3 Series 330xi
E90 3 Series 330i
E90 3 Series 328i
E90 3 Series 328xi
E90 3 Series 325xi
E90 3 Series 325i
E90N 3 Series 330i
E90N 3 Series 328xi
E90N 3 Series 328i
E91 3 Series 330xi
E91 3 Series 330i
E91 3 Series 328xi
E91 3 Series 328i
E91 3 Series 325xi
E91N 3 Series 330i
E91N 3 Series 328xi
E91N 3 Series 328i
E92 3 Series 330xi
E92 3 Series 330i
E92 3 Series 328xi
E92 3 Series 328i
E92N 3 Series 330i
E92N 3 Series 328xi
E92N 3 Series 328i
E93 3 Series 330i
E93 3 Series 328i
E93N 3 Series 330i
E93N 3 Series 328i
E60 5 Series 530xi
E60 5 Series 530i
E60 5 Series 525i
E60 5 Series 525xi
E60N 5 Series 530xi
E60N 5 Series 530Li
E60N 5 Series 530i
E60N 5 Series 528xi
E60N 5 Series 528i
E61 5 Series 530xi
E61 5 Series 530i
E61N 5 Series 530xi
E61N 5 Series 530i
F10 5 Series 530i
F10 5 Series 528i
F11 5 Series 530i
E63 6 Series 630i
E63N 6 Series 630i
E64 6 Series 630i
E64N 6 Series 630i
E65 7 Series 730i
E66 7 Series 730Li
F01 7 Series 730i
F01N 7 Series 730i
F02N 7 Series 730Li
E84 X1 Series X1 25iX
E83N X3 Series X3 3.0i
E83N X3 Series X3 3.0si
F25 X3 Series X3 28iX
E85 Z4 Series Z4 3.0si
E85 Z4 Series Z4 3.0i
E86 Z4 Series Z4 3.0si
E89 Z4 Series Z4 30i
F18 5 Series 530Li
F18 5 Series 528Li
F18N 5 Series 530Li
F02 7 Series 730Li
E70 X5 Series X5 3.0si
E60 5 Series 530Li
A BMW N52 intake manifold removal is necessary for performing many repairs including vacuum leaks and starter motor replacement.
The BMW N52 engine first made its appearance in vehicles in 2005. The N52 marked a new generation of efficient six-cylinder power plants and was a direct replacement for the aging M54 engine. The N52 was BMW's six-cylinder workhorse until it was replaced in 2013 by a new line of turbocharged four cylinders. It can be found in a vast array of BMW models produced from 2005-2013 including 1,3,5,6,7,X1,X5 and Z4 series cars and SUVs.
The N52 intake manifold is located on the left side of the engine block and is the heart of the vehicle's air management system. It comprises most of the engine's air management system components including throttle body, DISA valves, and intake ducting. It also is home to the crankcase ventilation system, oil separation valve, fuel tank ventilation, vacuum lines, and wiring harnesses. The vehicle's starter motor is also located directly underneath the intake manifold.
Being able to efficiently remove the intake manifold from the N52 engine is an important practice for those professional and home mechanics that are diagnosing and repairing intake system vacuum leaks, servicing the crankcase ventilation/oil separation valve system, or replacing the starter motor. Although it may seem intimidating at first, removing the N52 intake manifold is actually a very straightforward repair and can be performed without any special tools in about an hour. Before starting this repair, please note the following:
The BMW Repair Guide strongly recommends purchasing the following items before removing the intake manifold.
- Intake manifold gaskets - Always replace the six gaskets after removing the BMW N52 intake manifold. Reusing the old gaskets may cause a vacuum leak requiring the manifold to be removed from the vehicle again.
- Crankcase vent hose - The crankcase vent hose is actually a hard plastic pipe that runs from the oil separation valve on the bottom of the intake manifold to the valve cover. It is infamous for breaking during intake manifold removal causing a nasty vacuum leak and a rough idling engine. It should be considered an expendable part like the manifold gaskets and be replaced every time the manifold is removed. Please see our parts list below for ordering.
- Return pipe - Like the crankcase vent hose, the return pipe is connected to the oil separation valve and is prone to breaking during intake manifold removal. We strongly recommend having a replacement ready when doing this repair. Please see our parts list below for more information.


View the detailed parts diagram for this repair.
Includes detailed part diagrams, part numbers and links to purchase all of the required components needed to complete this repair.

Before starting this repair, you must have the following required parts.
All N52, N54, and N55 engines
Intake gaskets go in between the head and the intake runners. We reccomend replacing these gaskets when doing removal and re-install of intake manifolds.
All N52 six-cylinder engines
The crankcase vent hose should be replaced when doing this repair. Since they are made of plastic, they are prone to breaking during disassembly.
BMW N52 engine
The crankcase return pipe is notoriously difficult to remove without breaking, especially in older vehicles. Avoid vacuum leaks by purchasing a new vent pipe before starting this repair.
Section 1 - Preparing the engine compartment for intake manifold removal
In order to safely remove the BMW N52 intake manifold from the engine compartment, several parts and components will need to be cleared out of the work area. Which parts and components need to be cleared out is dependent on the model vehicle being repaired and can vary in methodology.
The following steps were performed using a 2006 530xi. There were many different models produced with the N52 engine. Some of these steps may vary depending on the model.
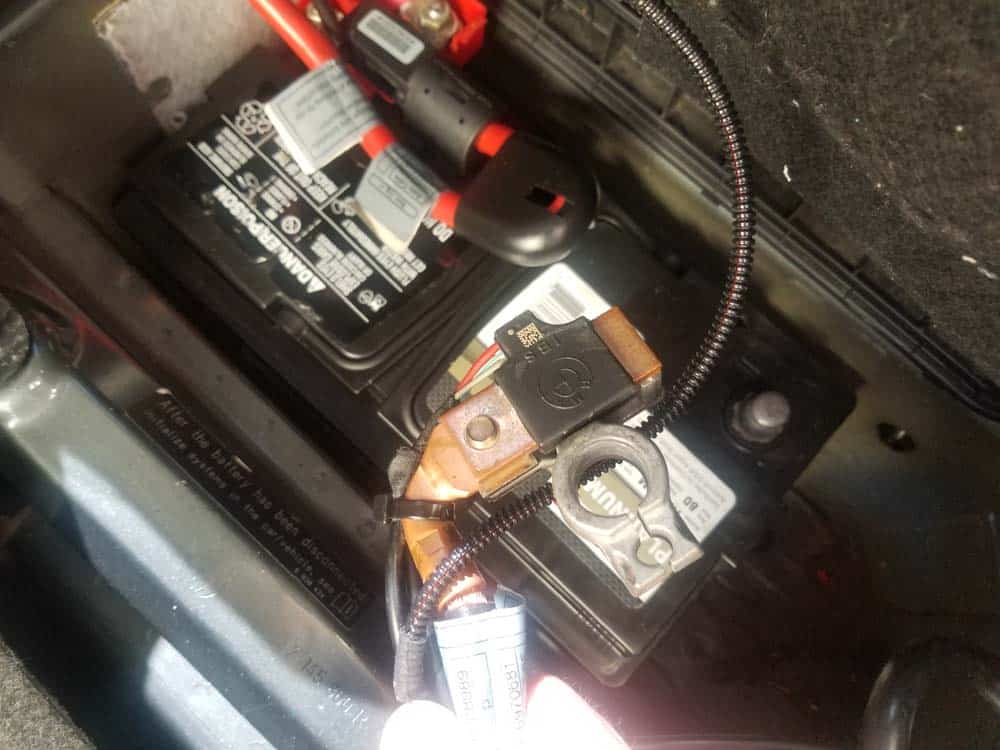
- ALWAYS disconnect the negative terminal from the battery before starting this repair. Since you will be using tools around the engine compartment battery terminals, it is very easy to create a short circuit and destroy sensitive electronics. Play it safe - take a couple of minutes to disconnect the power!
- Begin by removing the cabin filter cover by pressing the side tab and sliding the cover off.
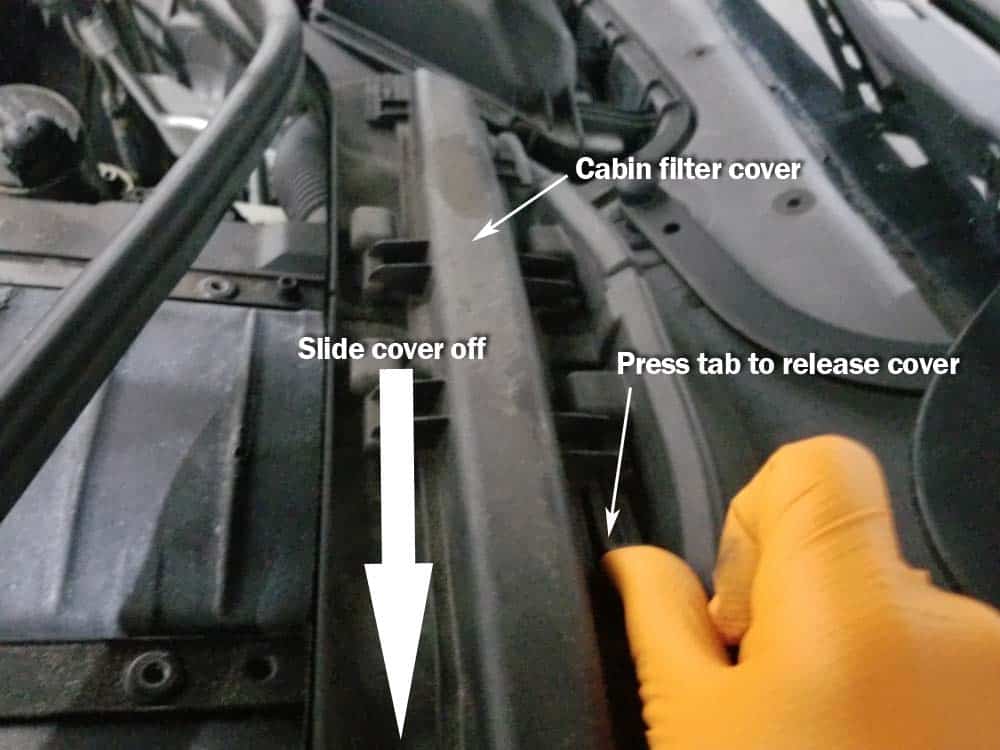
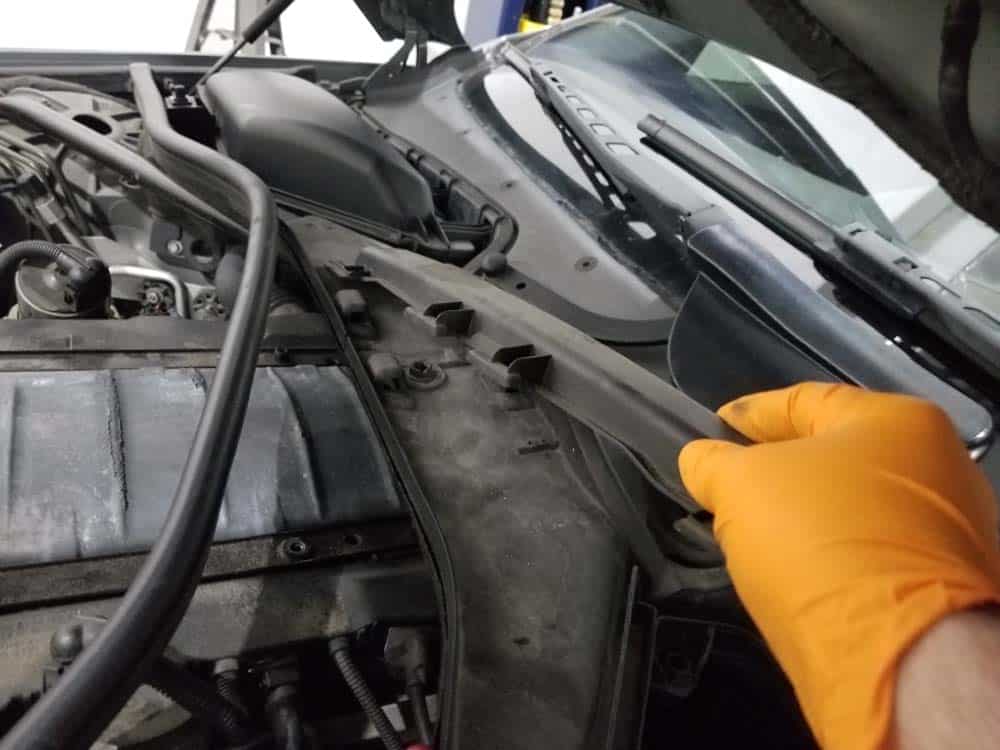
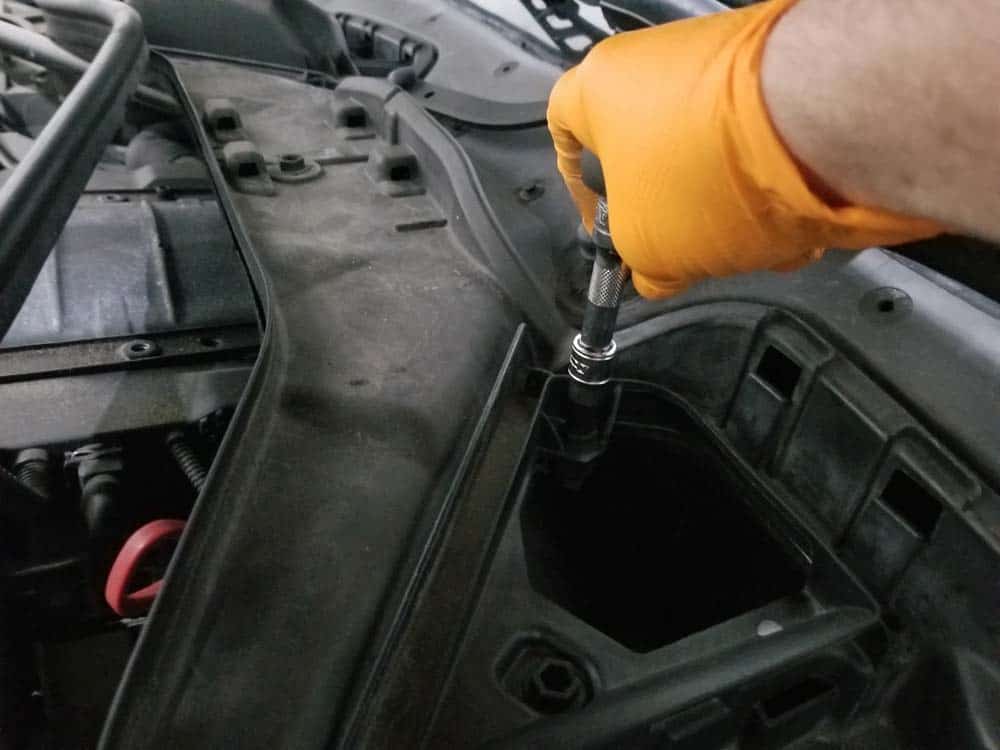
- Use a flat blade screwdriver and an 13mm socket to remove the cabin filter containers.
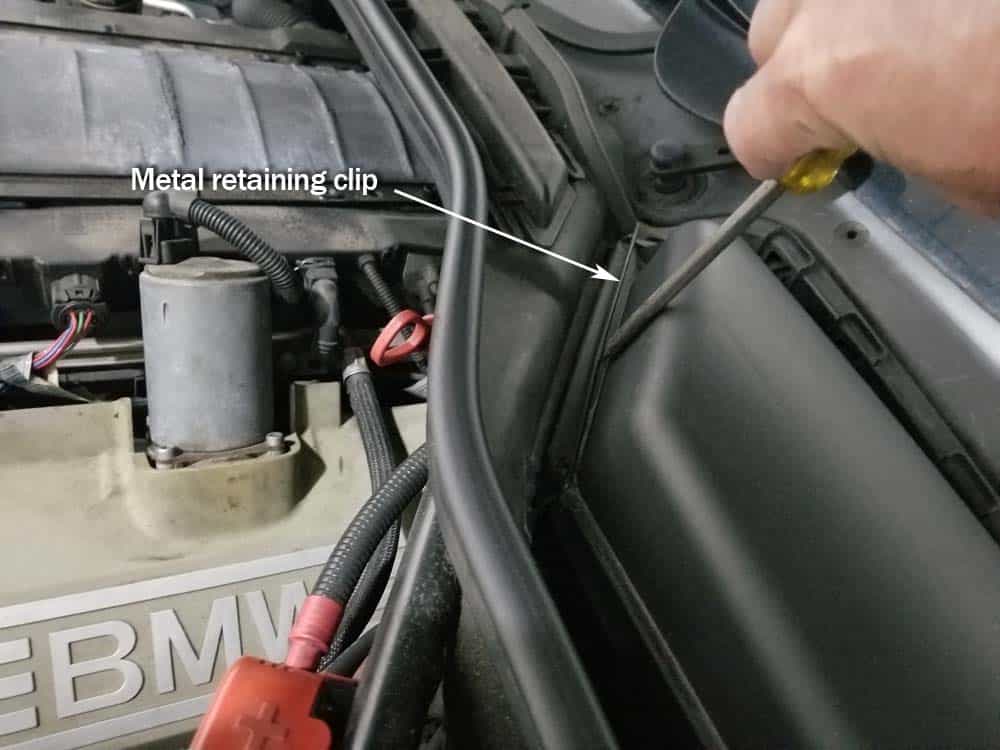
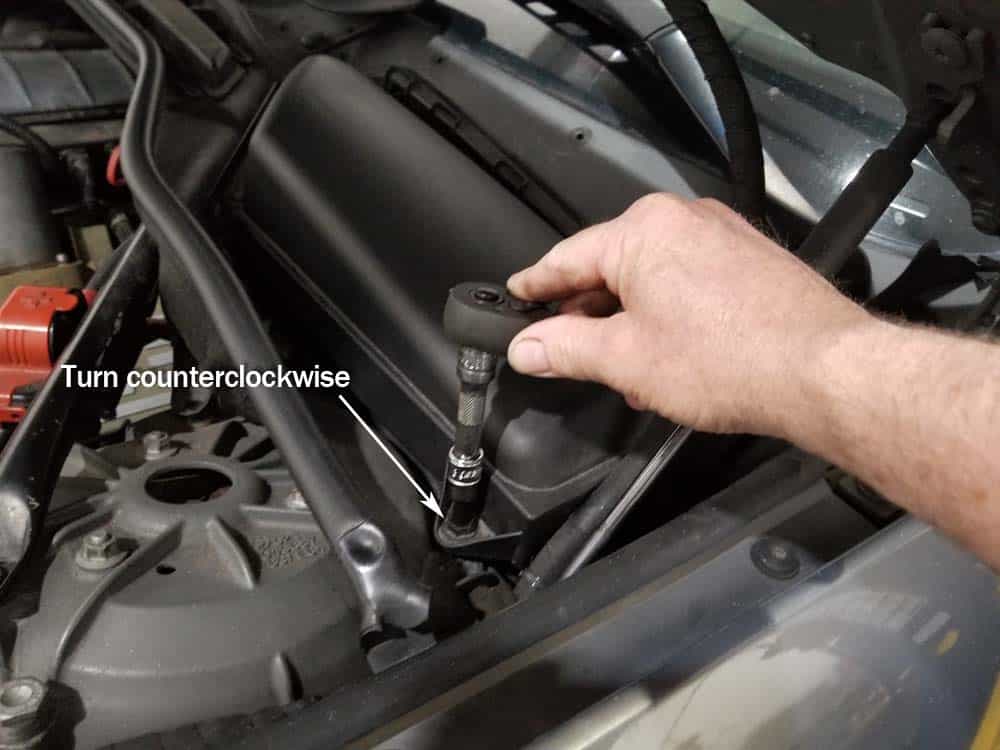
- Next, remove the right air inlet.
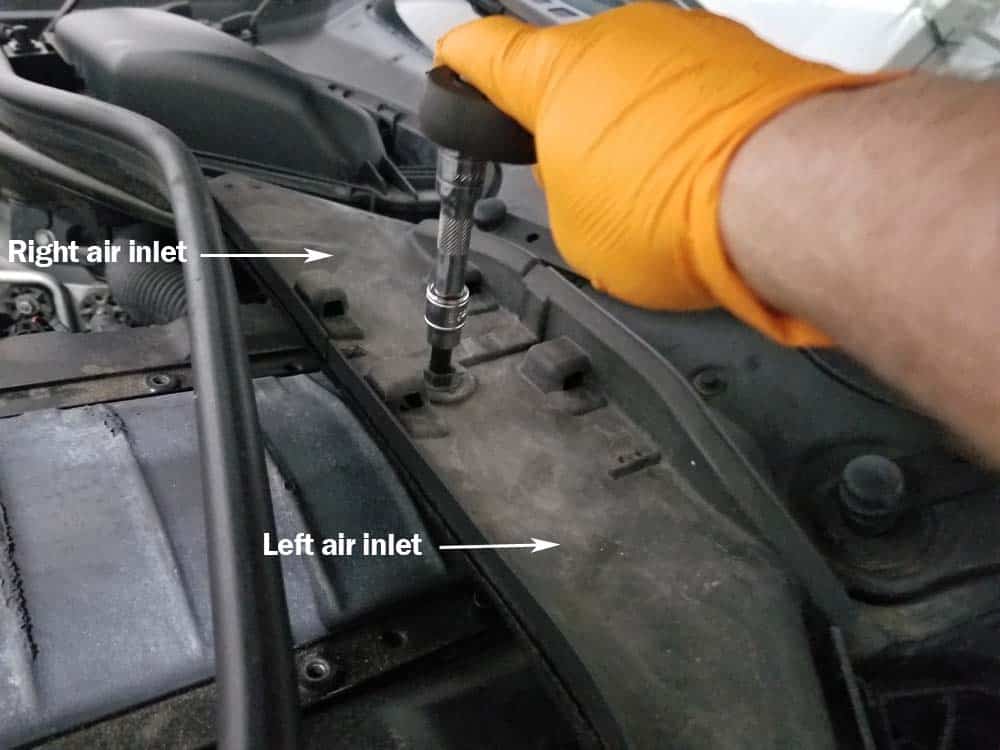
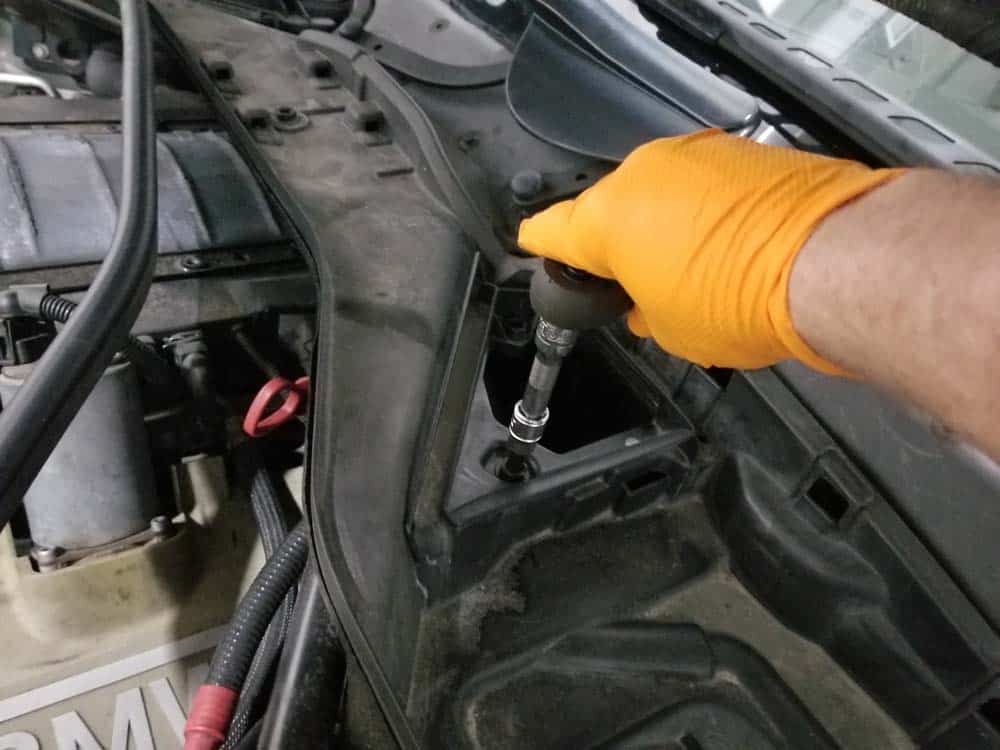

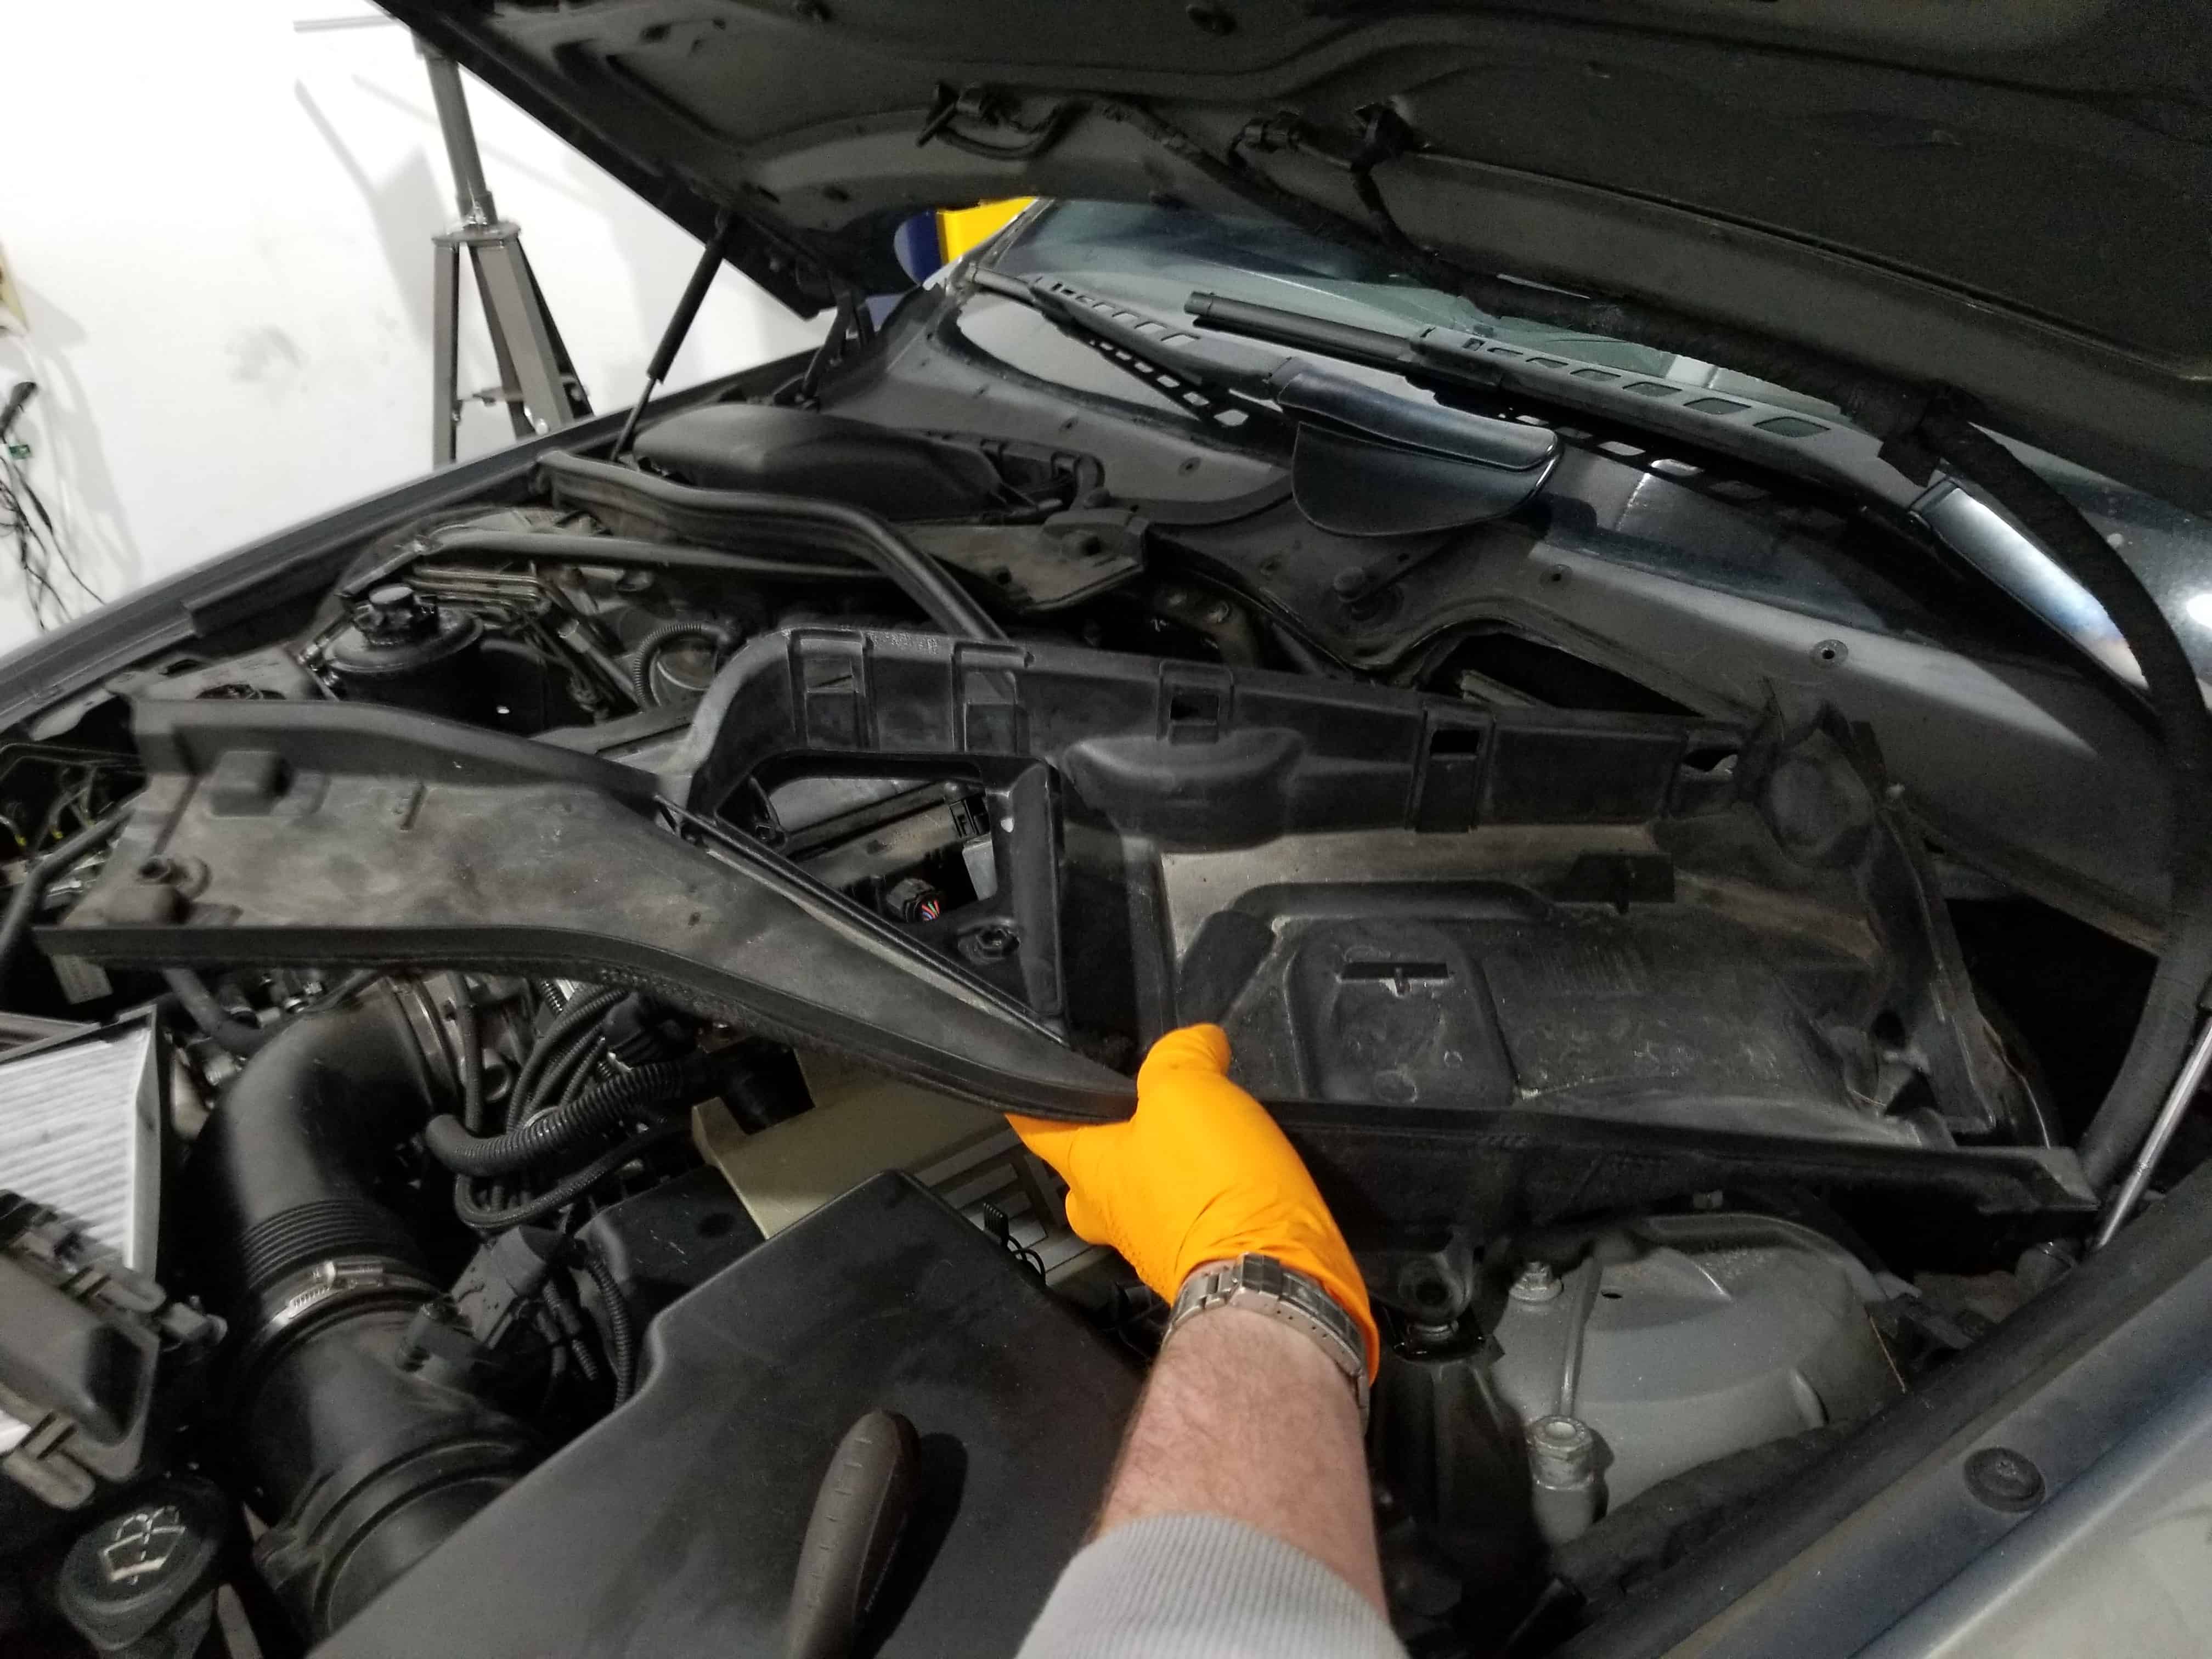
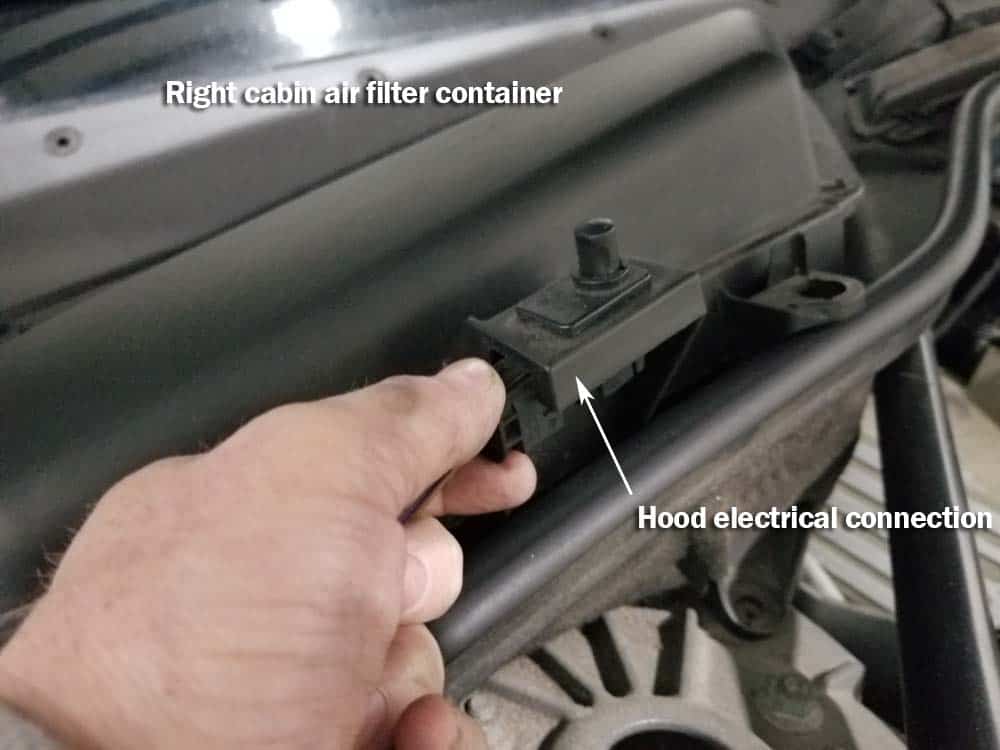
- Repeat above steps with right cabin filter container and air inlet. Note that most models will need to have the hood switch removed from the right cabin filter container.
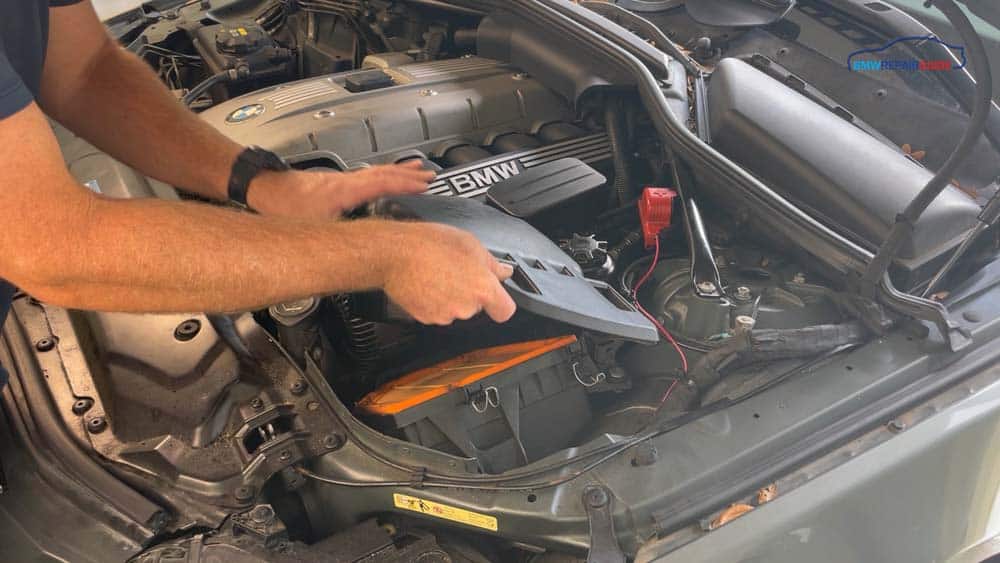
- Remove the engine cover(s) from vehicle.

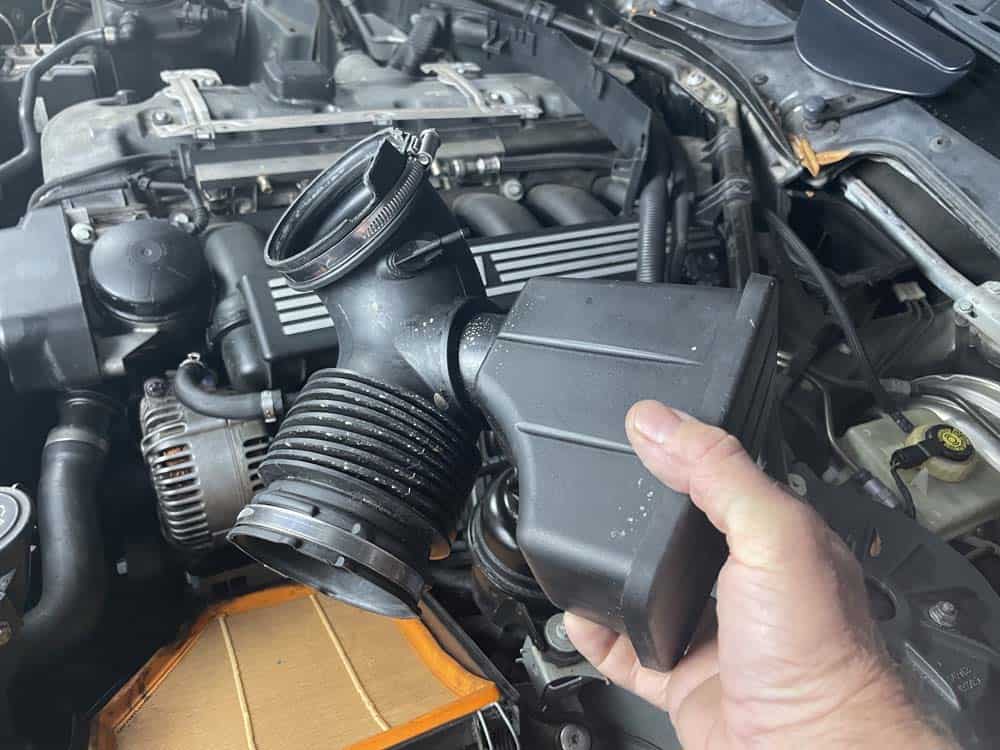
- Remove the lid from the intake muffler (air filter housing) . In most models, the lid is held in place with plastic latches.
- Using a metal pick, GENTLY lift the plastic retaining tab on the mass air flow sensor plug. Unplug the mass air flow sensor.
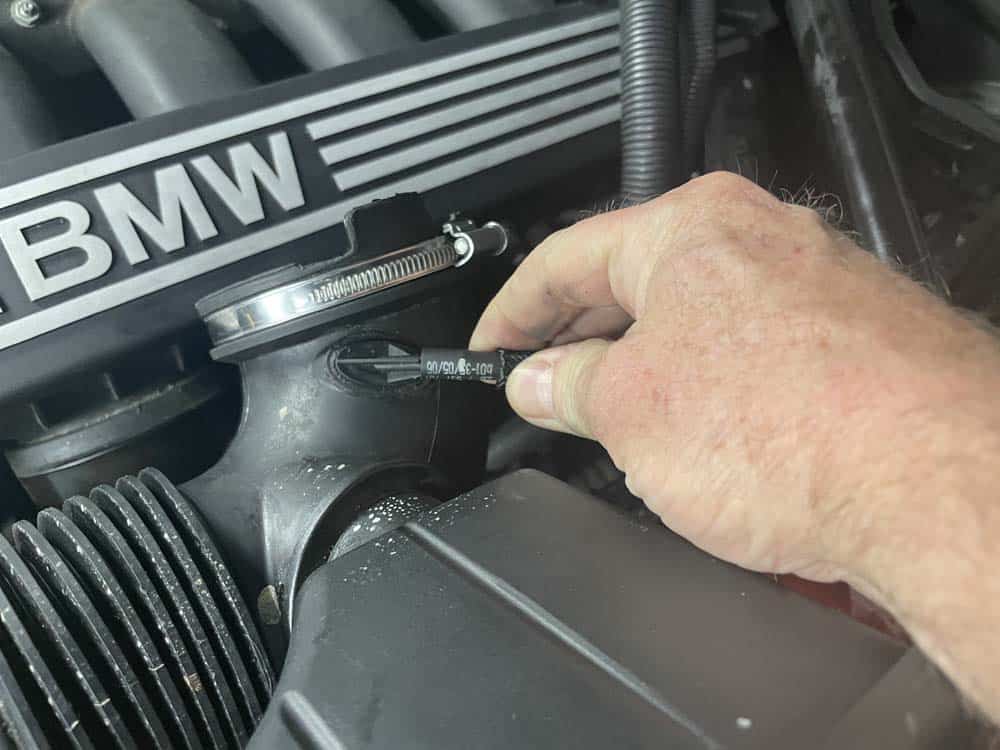
- Use a flat blade screwdriver to loosen the hose clamp securing the intake pipe to the intake muffler lid.
- Remove the lid and the mass air flow sensor from the vehicle.
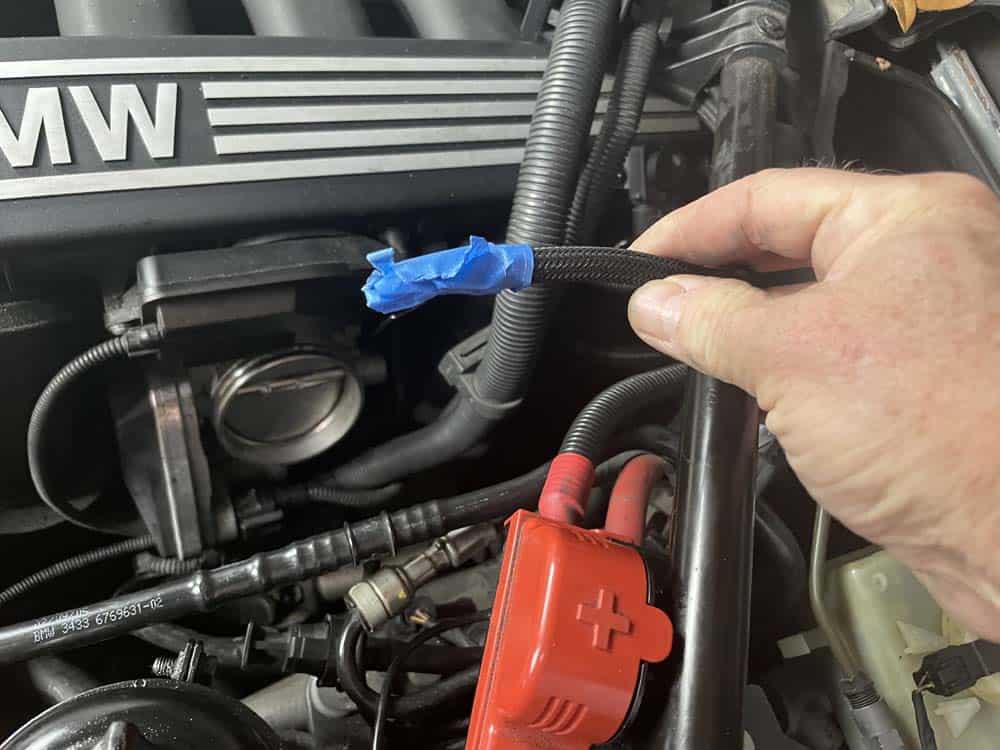
- Next, the intake pipe needs to be removed from the throttle body. Begin by loosening the hose clamp where the intake pipe is attached to the throttle body. Pull the intake pipe loose and remove any vacuum lines attached to it. We strongly recommend marking any loose connections like vacuum lines with a high visibility tape - this helps avoid missing any connections during reassembly.
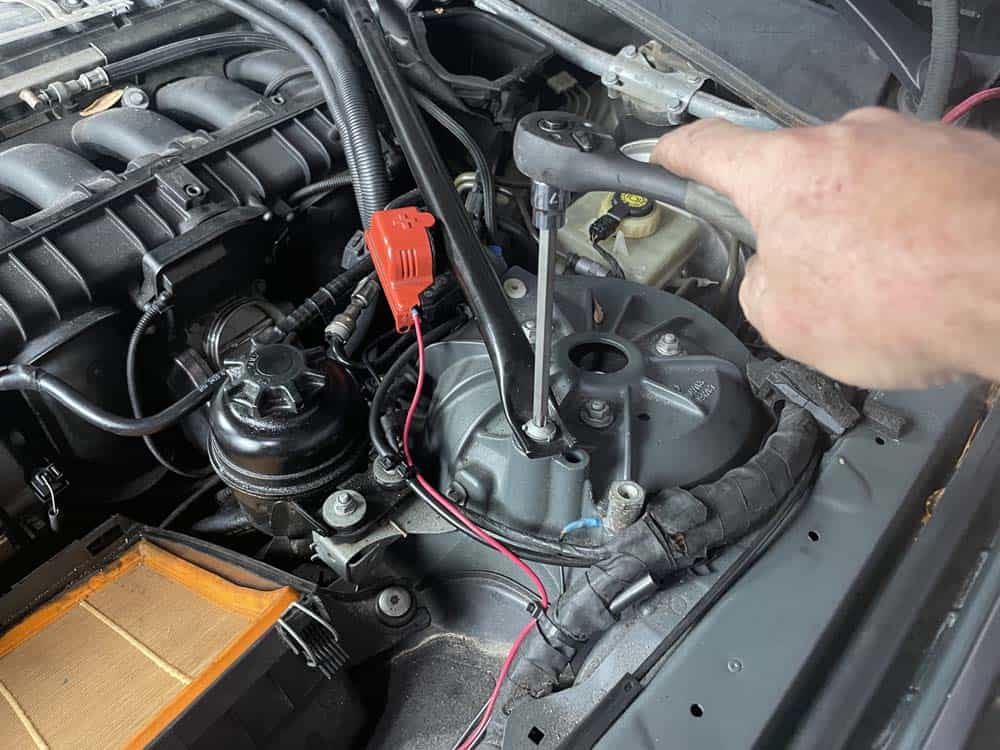
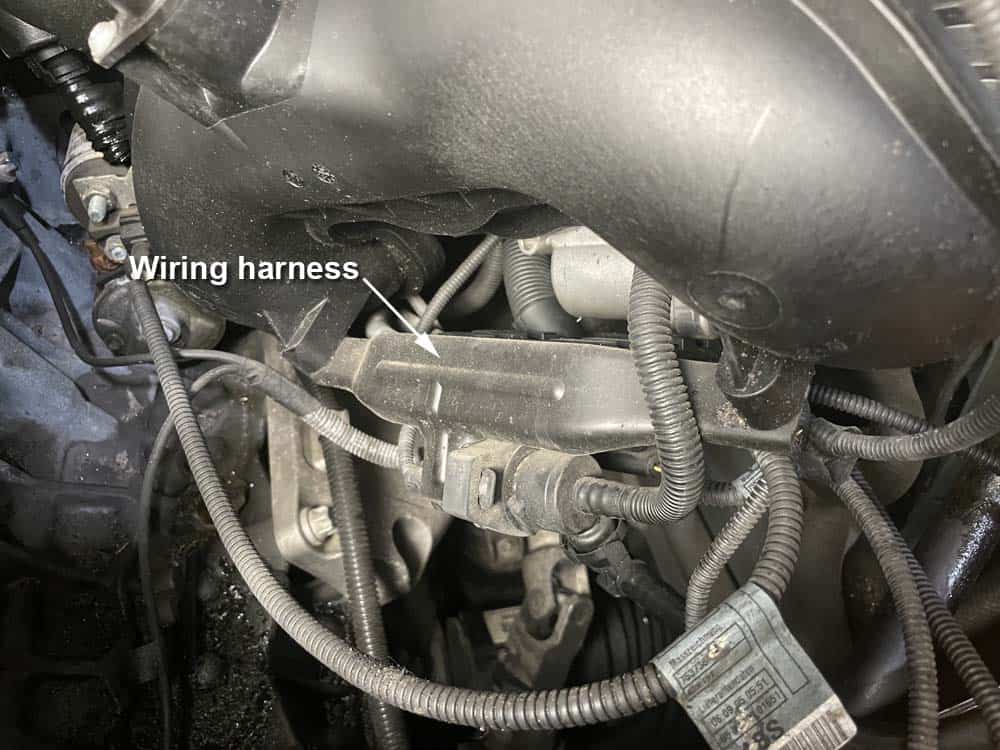
- Remove the wiring harness and its plastic mounting bracket from the strut brace. It is usually attached with two plastic rivets as shown below.

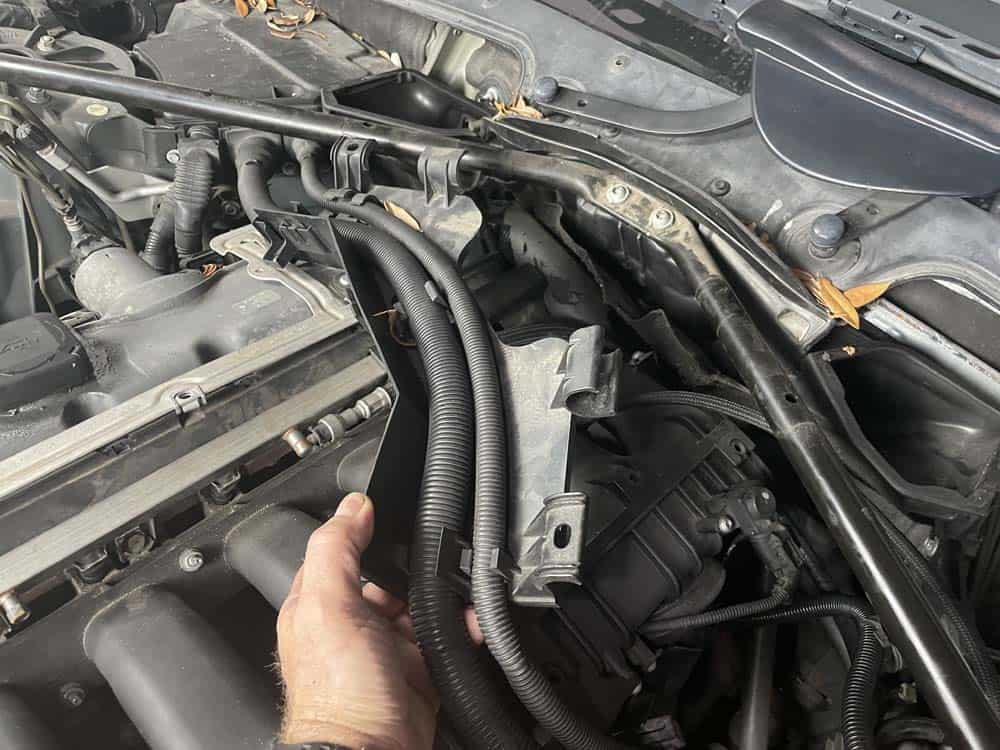
- The strut brace is held in place with four torx bolts. These bolts strip very easily and can be expensive to replace! If you do strip one, please click here for an affordable alternative to the expensive factory replacements.
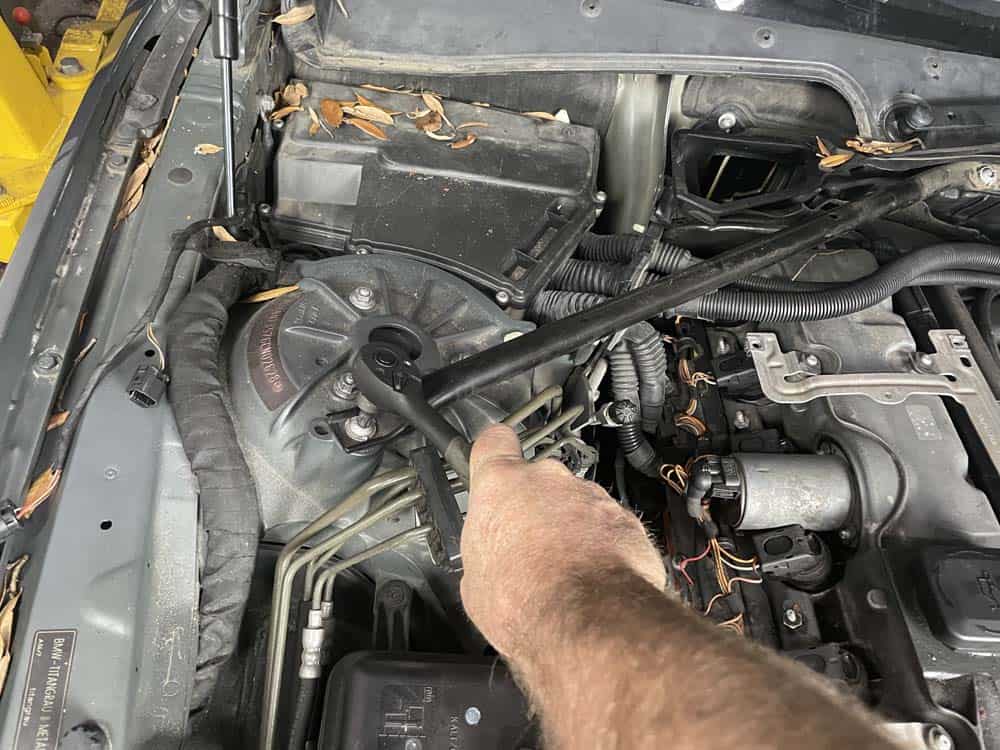
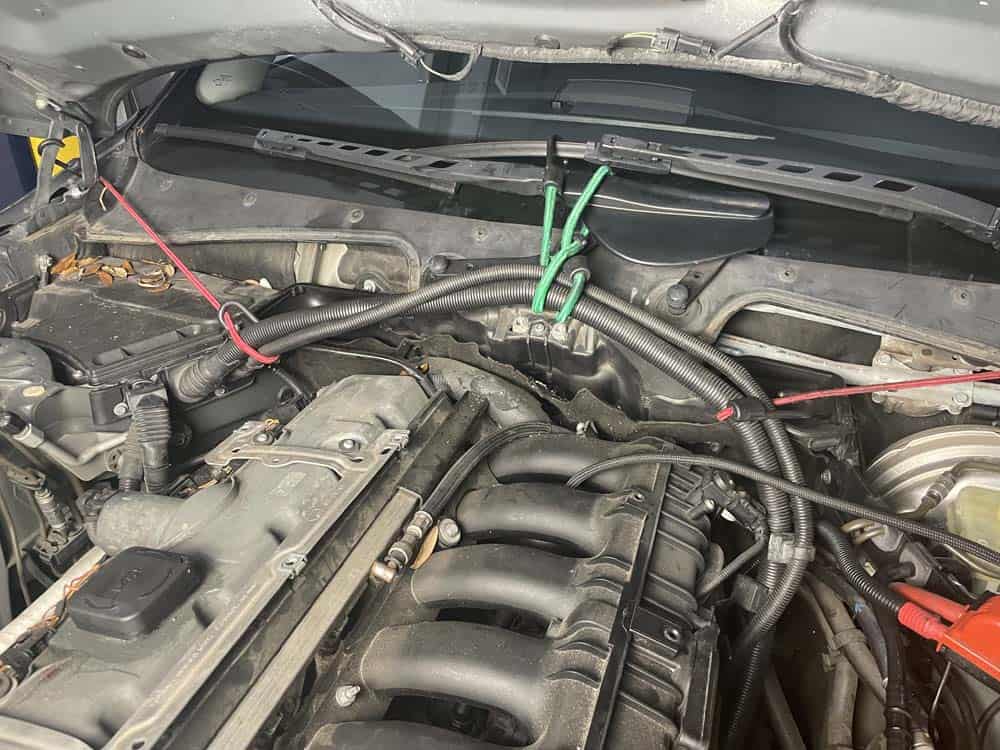
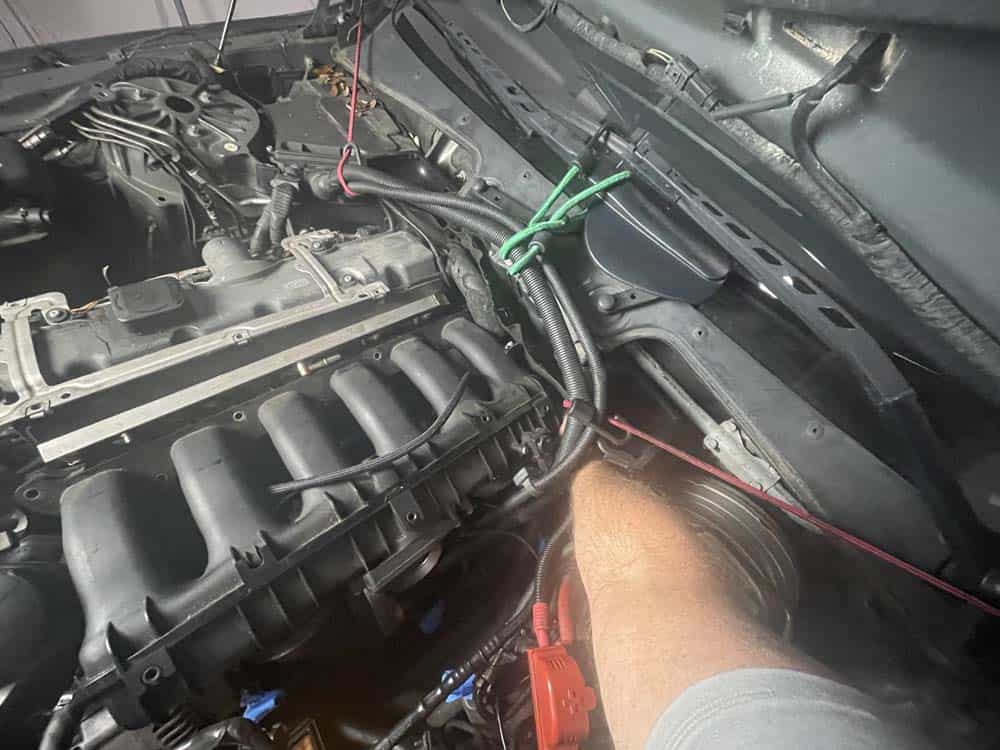
- Use a couple of bungee cords to secure the wiring harnesses out of the work area.
Section 2 - Removing the intake manifold
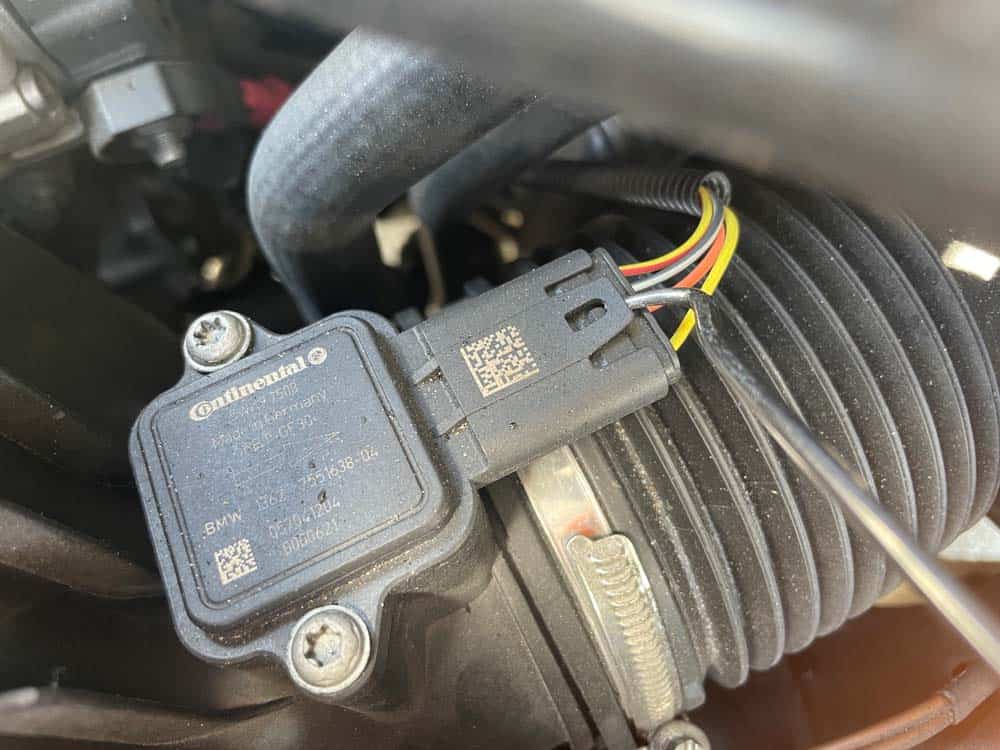
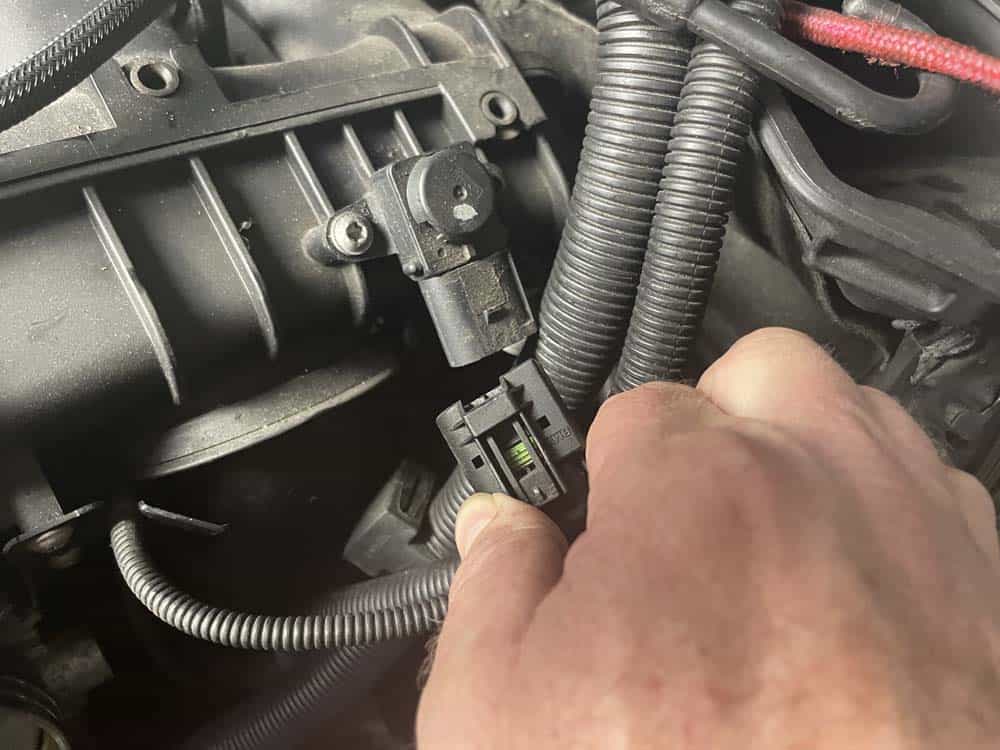
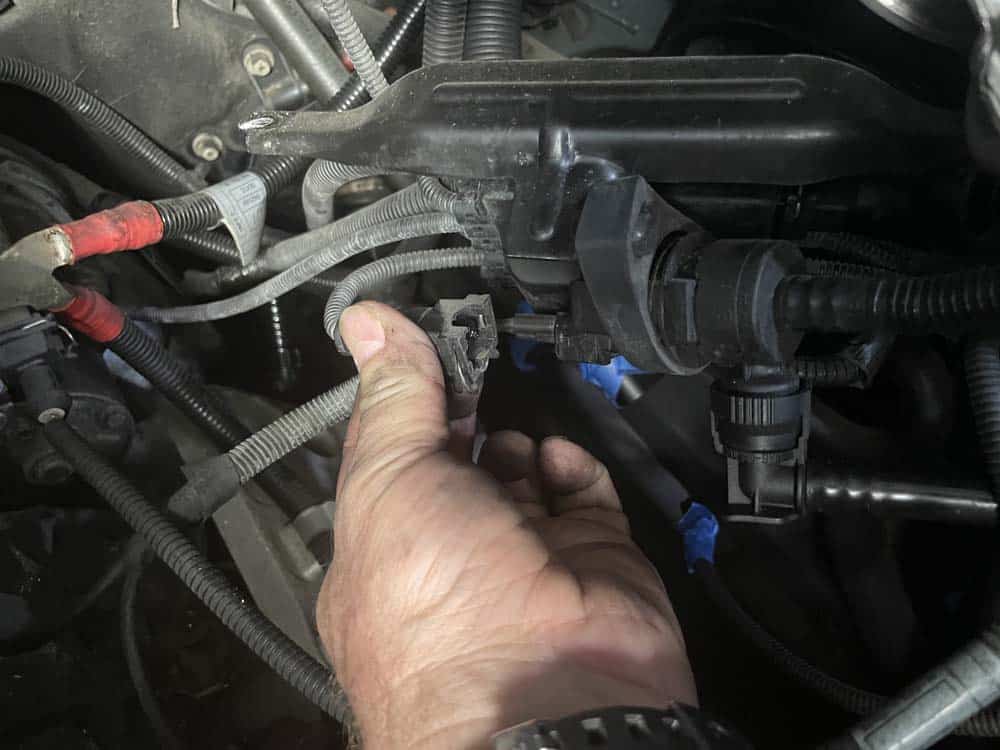
Once the work area is cleared out, removing the BMW N52 intake manifold is relatively easy. The BMW Repair Guide strongly recommends replacing the crankcase vent hose and return pipe when removing the intake manifold. They are notorious for breaking while being removed. If you are planning on replacing the vent hose and return pipe, do not waste time trying to disconnect them in steps 10 and 11 below. Just break them off and continue to the next step.- Begin by unplugging the differential pressure sensor from the rear of the intake manifold.
- Unplug the outer DISA valve (adjuster unit).
- Remove the cap from the fuel rail Schrader valve. Using a small screwdriver, depress the Schrader valve to release the fuel pressure in the fuel rail. We suggest putting a rag under the valve to catch the small amount of fuel that may leak out.
- Disconnect the fuel line from the fuel rail by releasing the plastic locking collar and pulling the line free from the rail. Remove the fuel line from the back of the intake manifold and store it safely out of the work area.
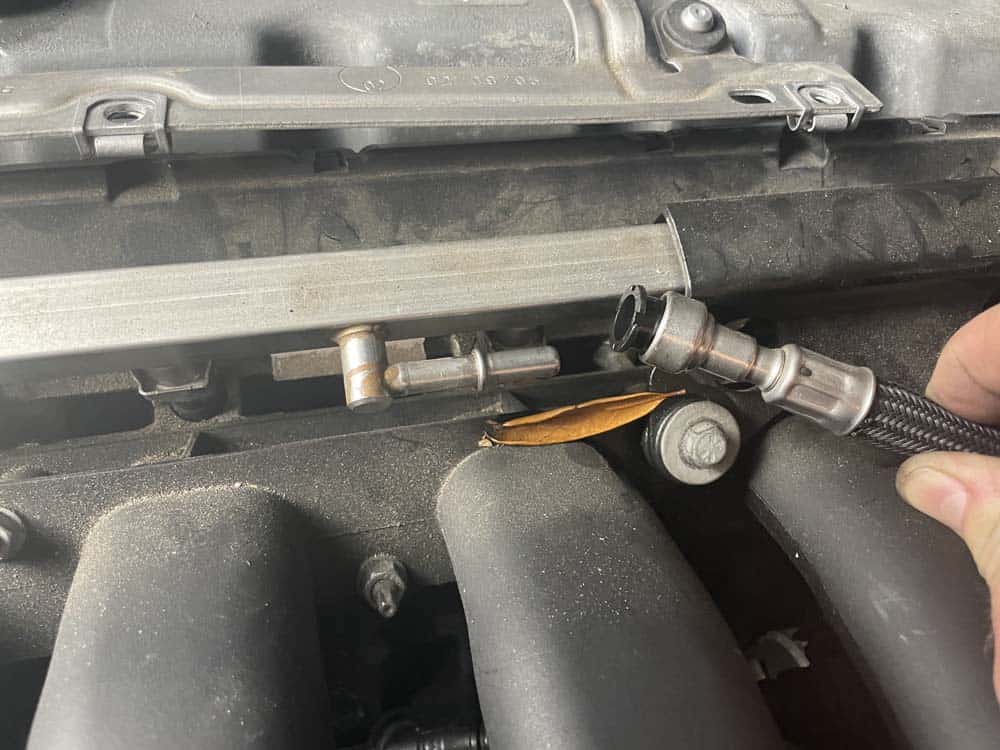
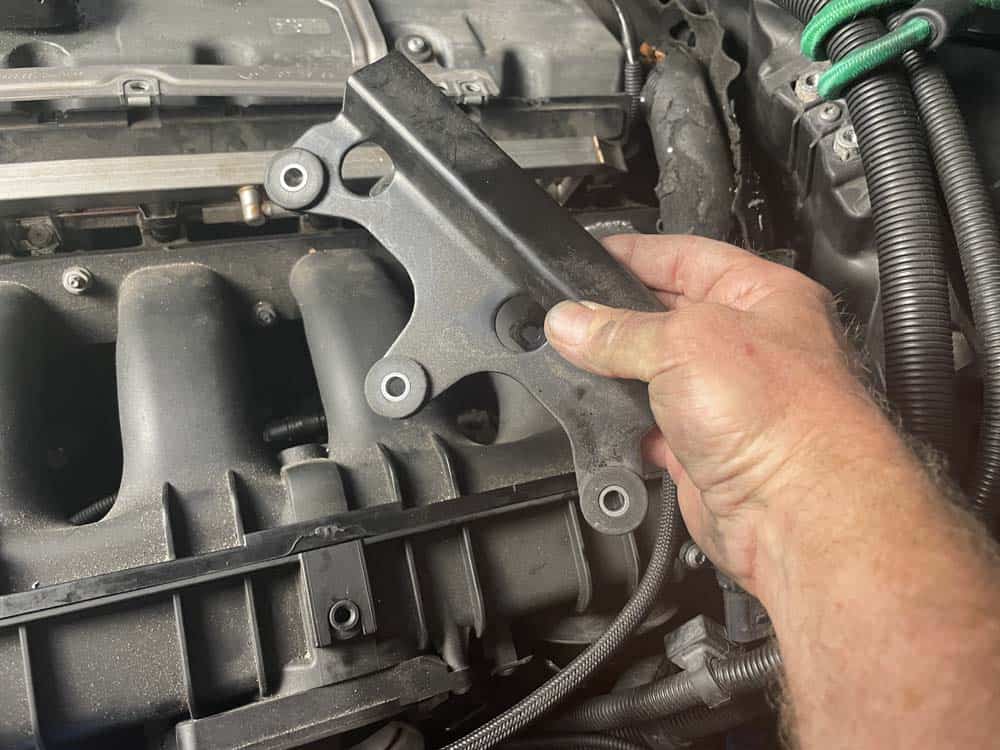
- Using an 11mm socket, remove the three intake manifold mounting bolts that also anchor the fuel rail bracket. Use a 10mm socket to remove the two inner fuel rail bracket bolts. Remove the bracket from the vehicle.

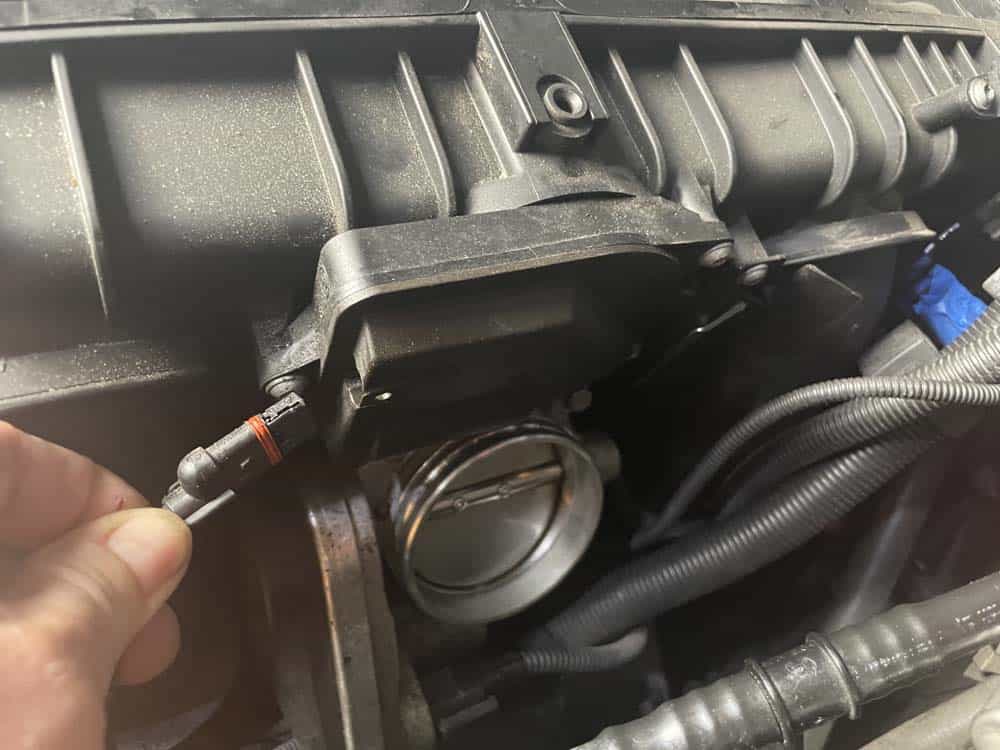
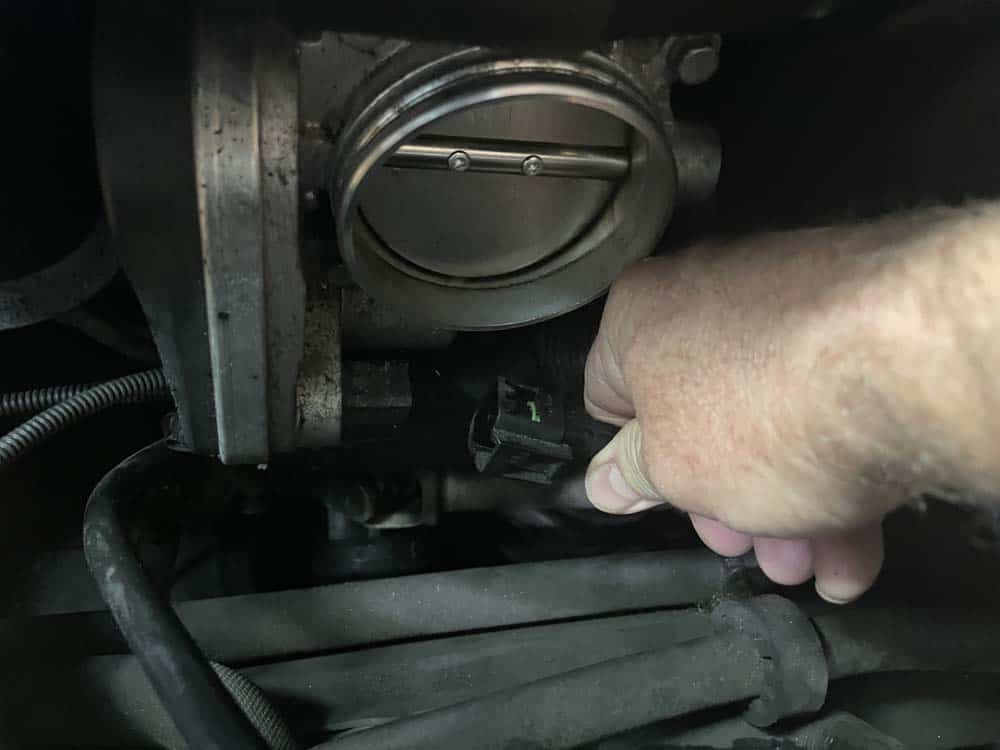
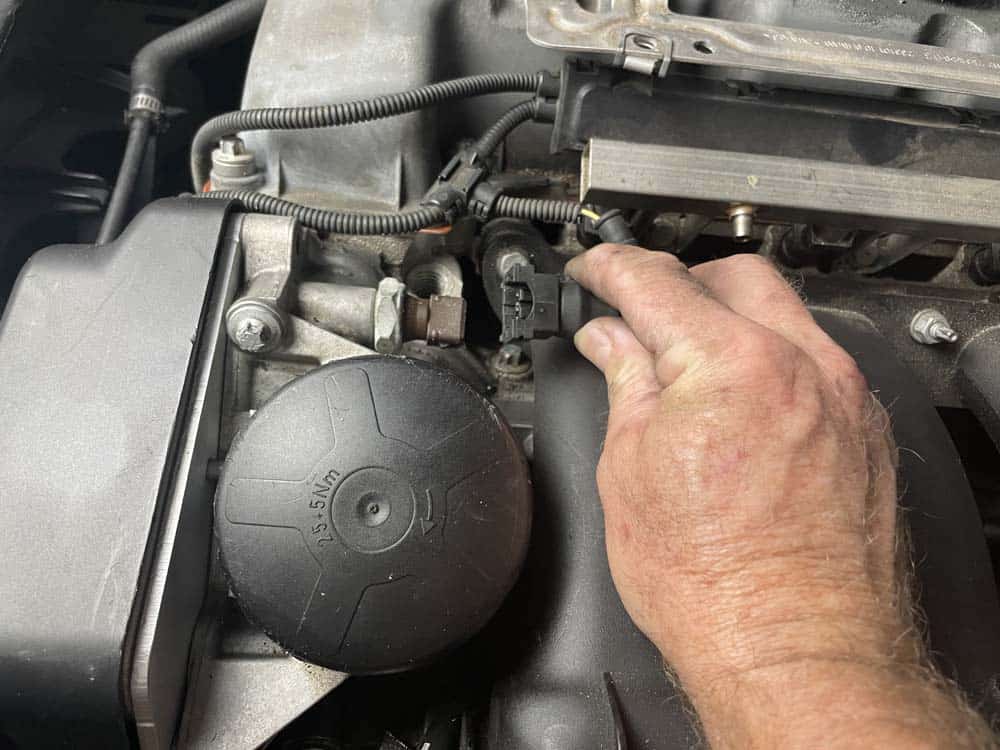
- Unplug the throttle body.
- Disconnect the fuel tank vent valve.
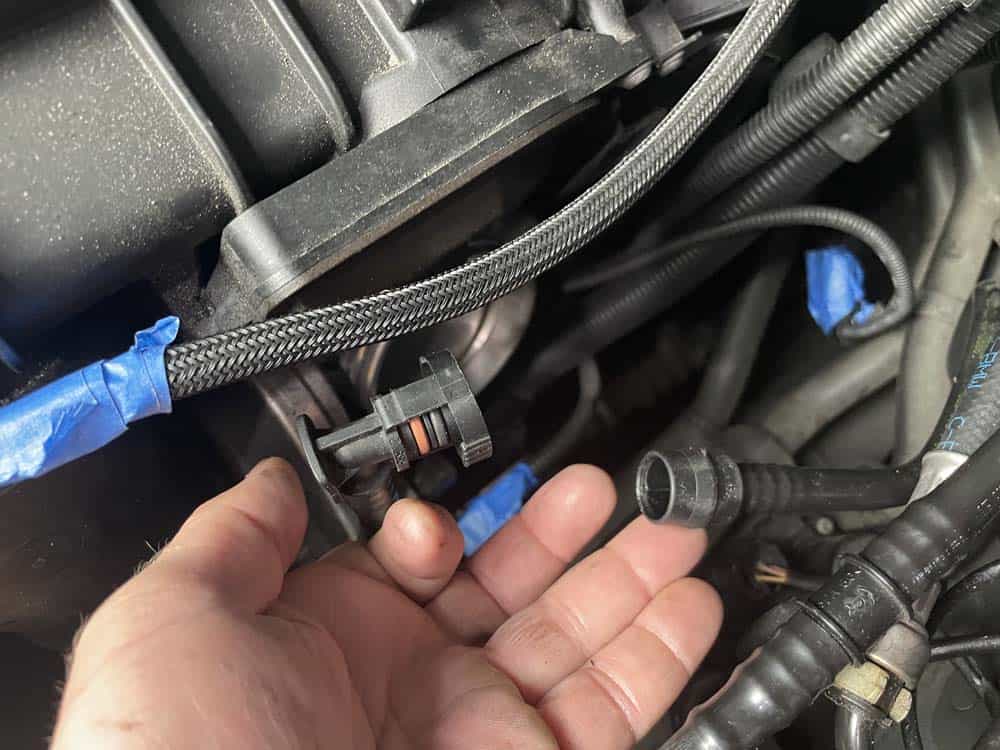
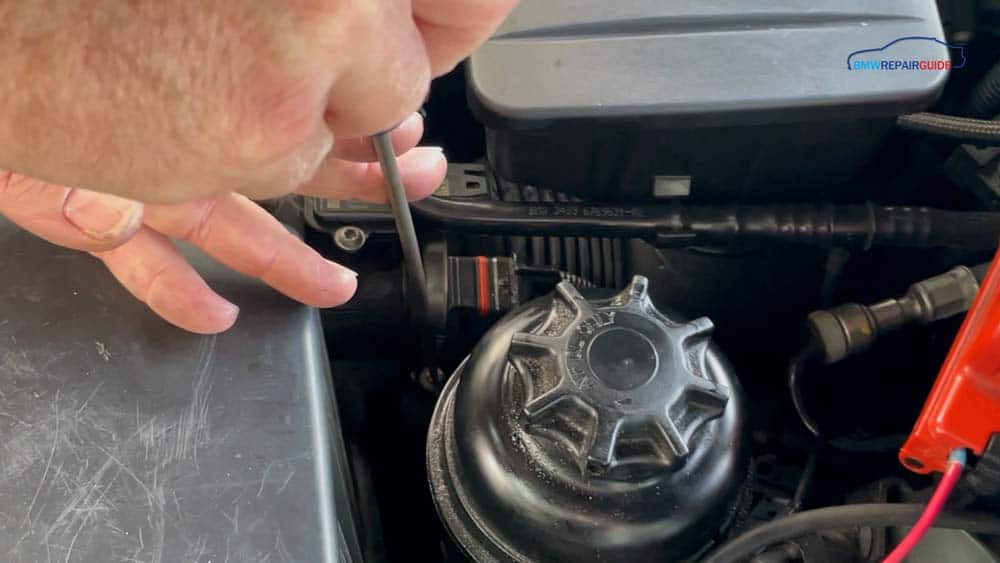
- Unplug the oil pressure switch.
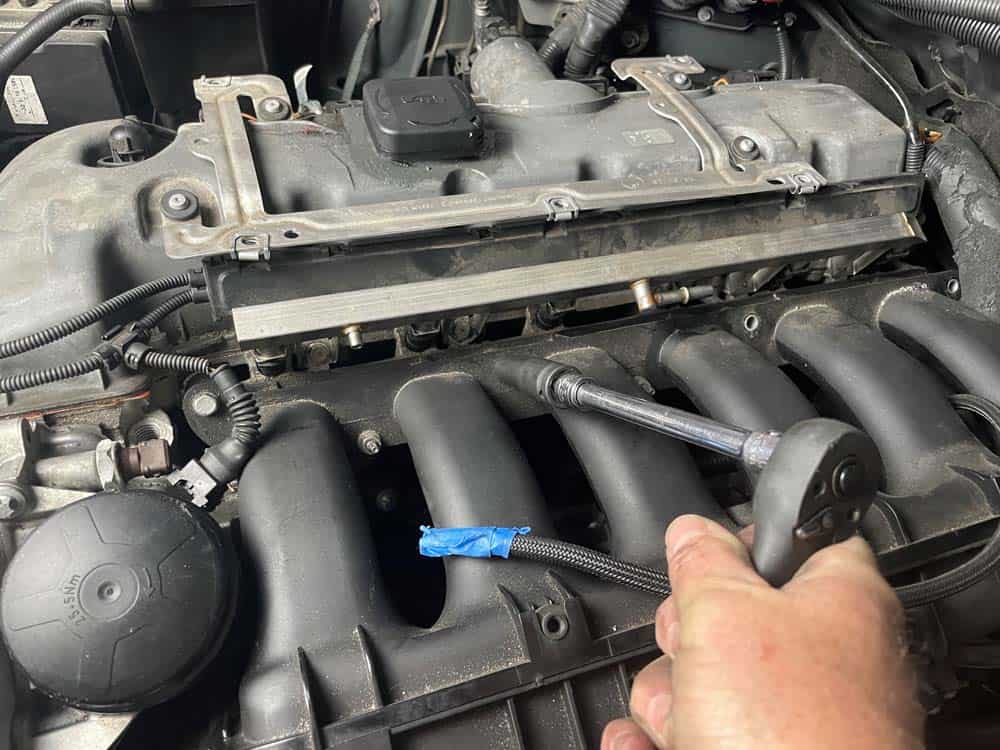
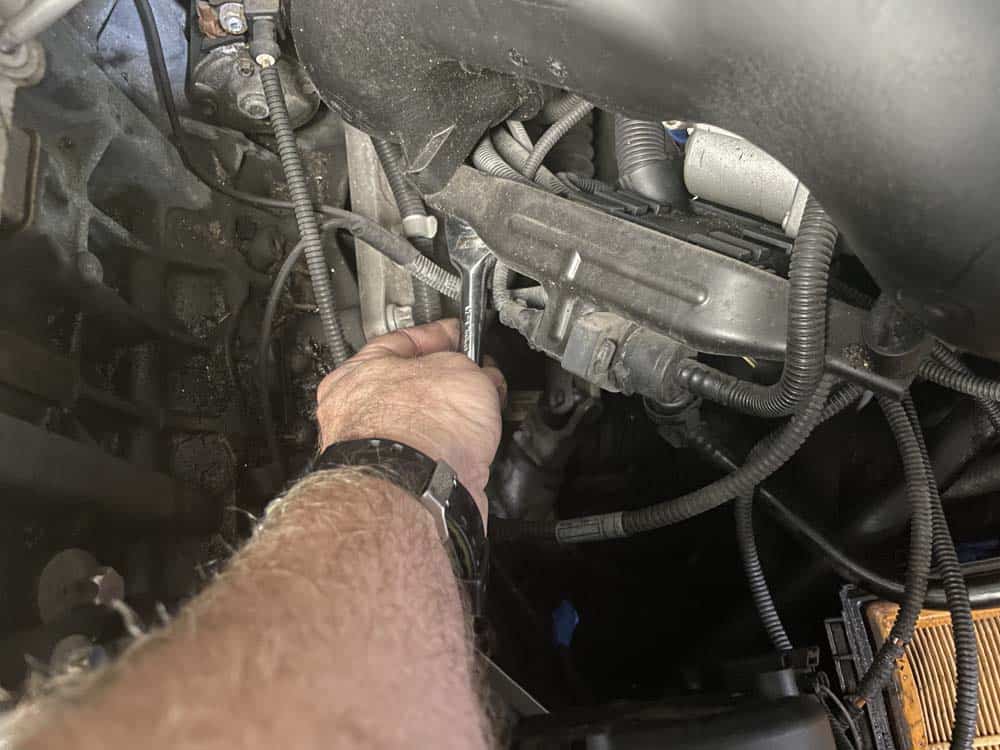
- Using an 11mm socket, remove the last four intake manifold fasteners.
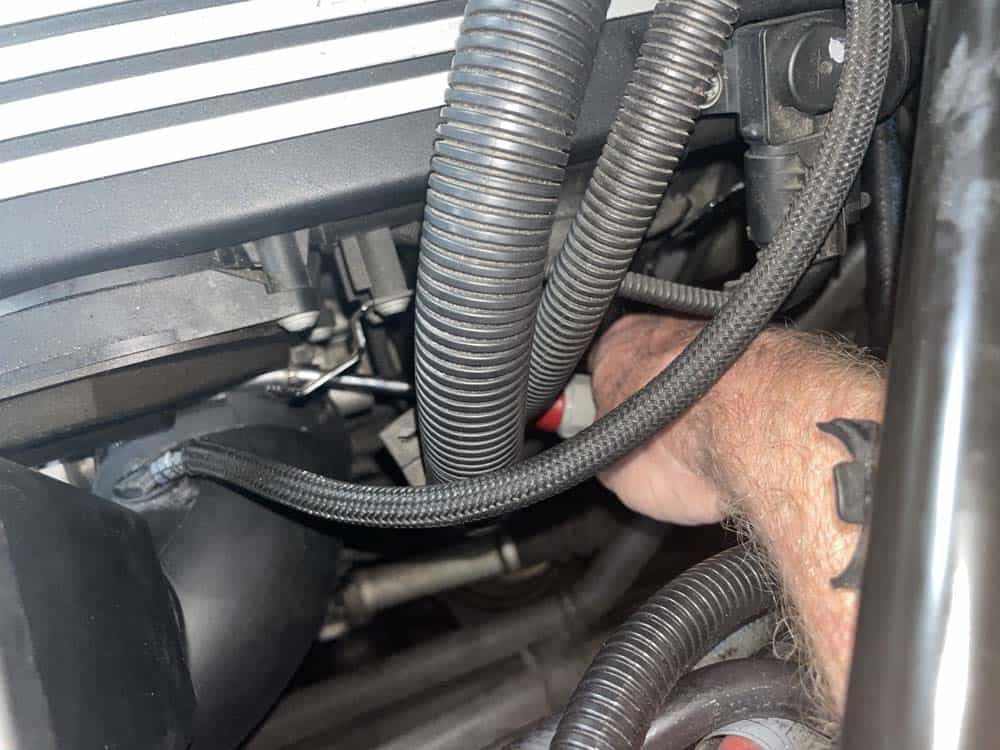
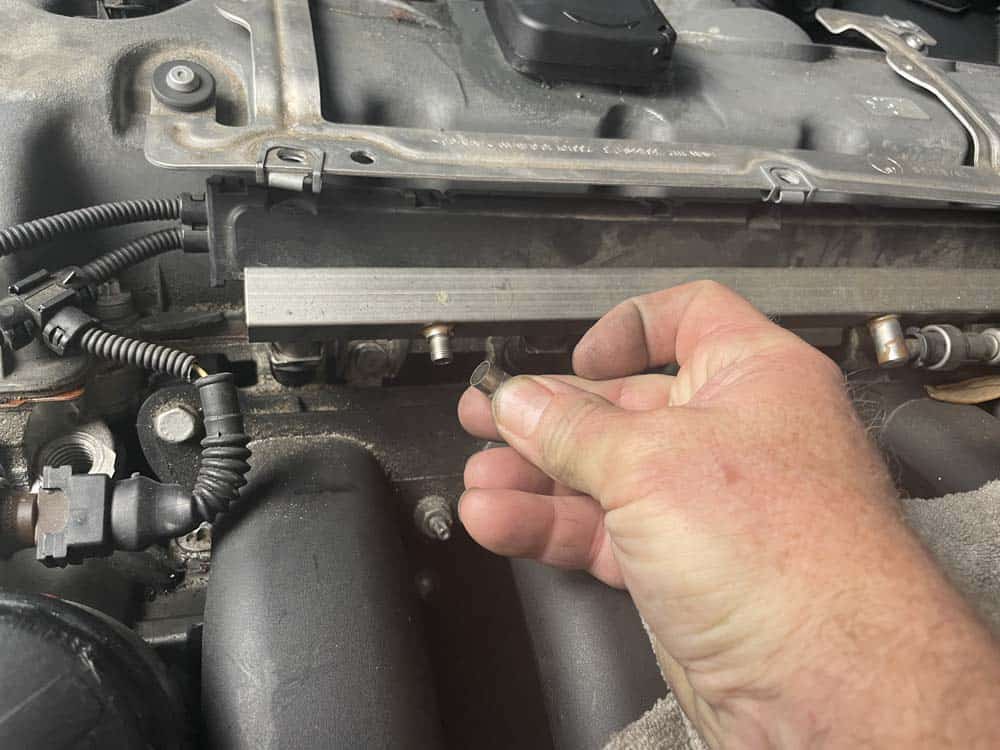
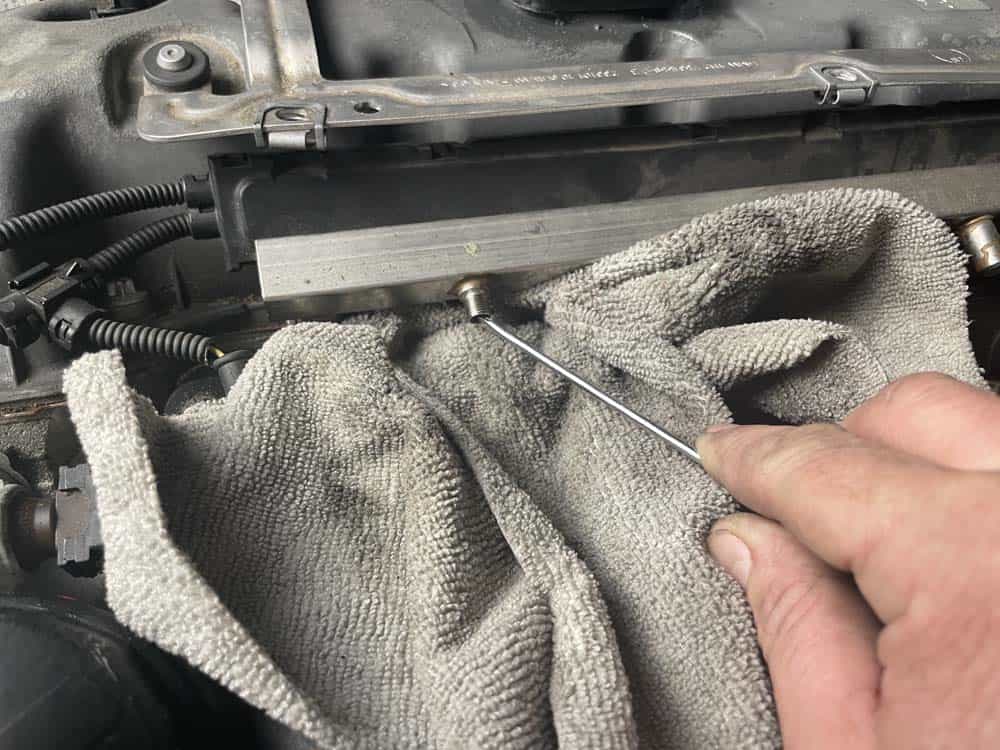
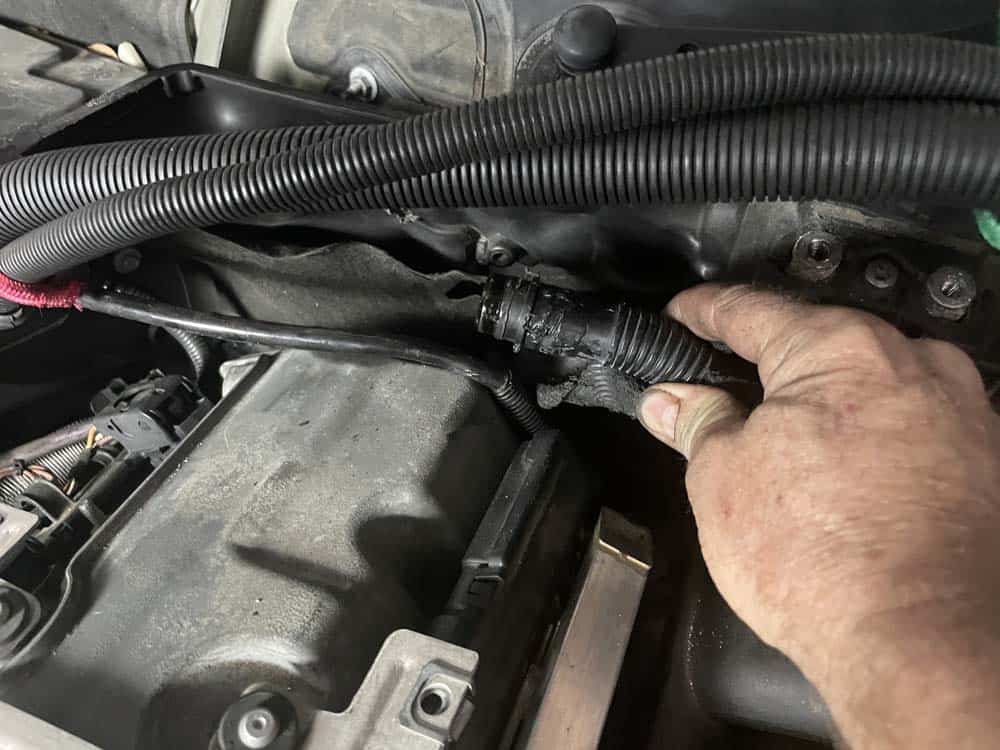
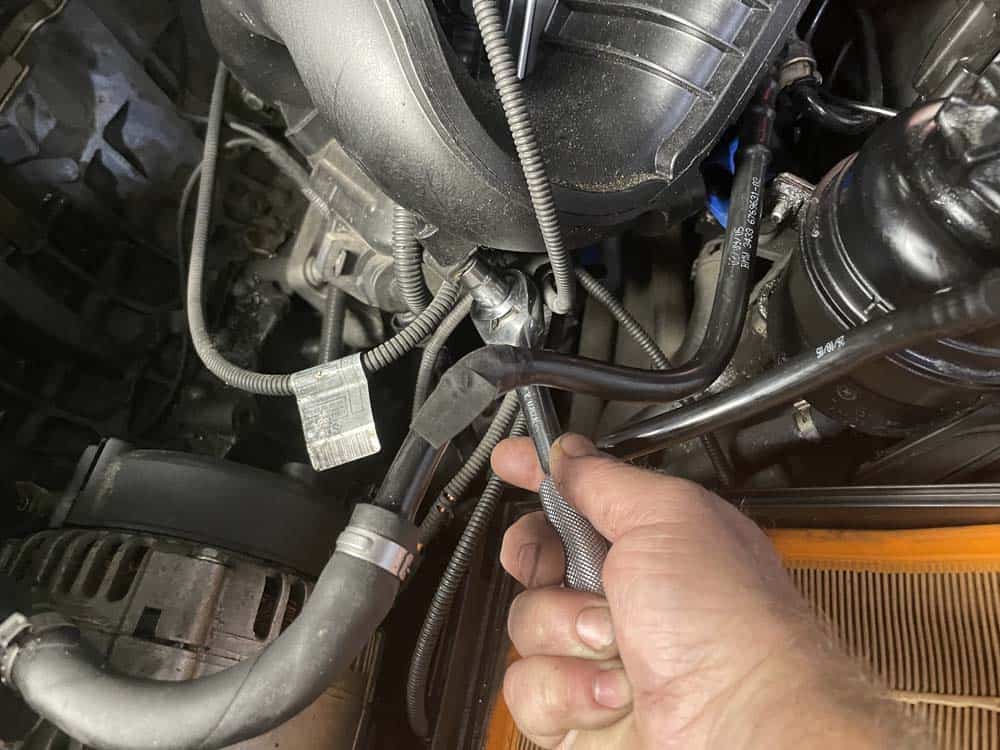
- The next step requires disconnecting the crankcase return pipe from the oil pan. It requires reaching down behind the intake manifold, squeezing the return pipe connection, and pulling it loose. If you are planning on replacing the return pipe, do not waste time trying to remove it....just reach down and break it off with your hand.
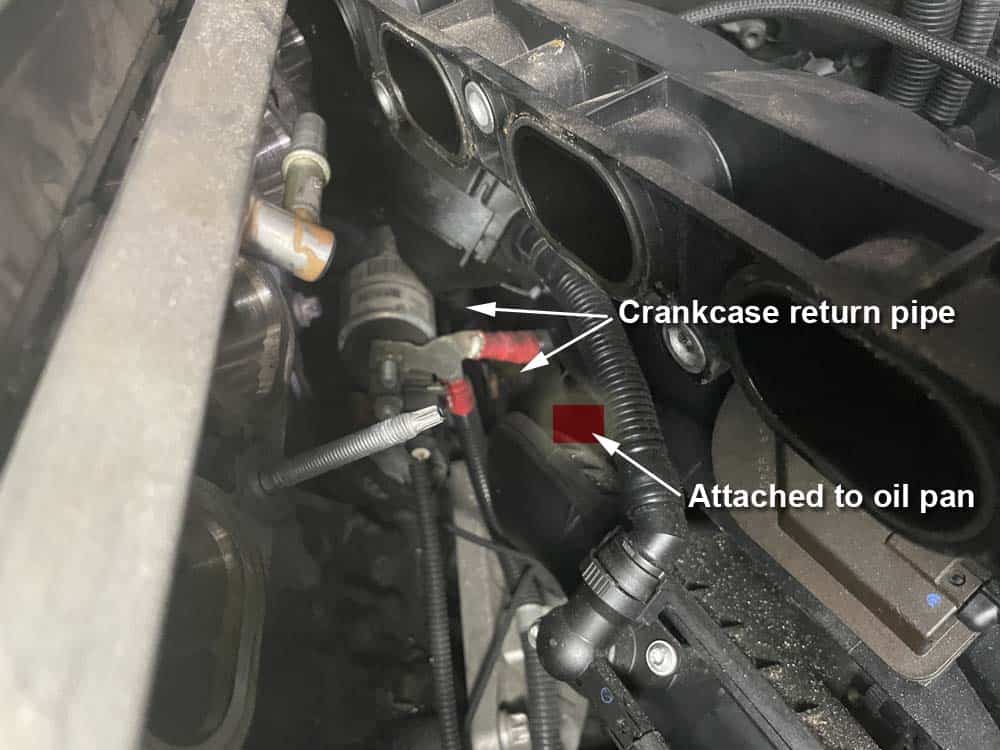
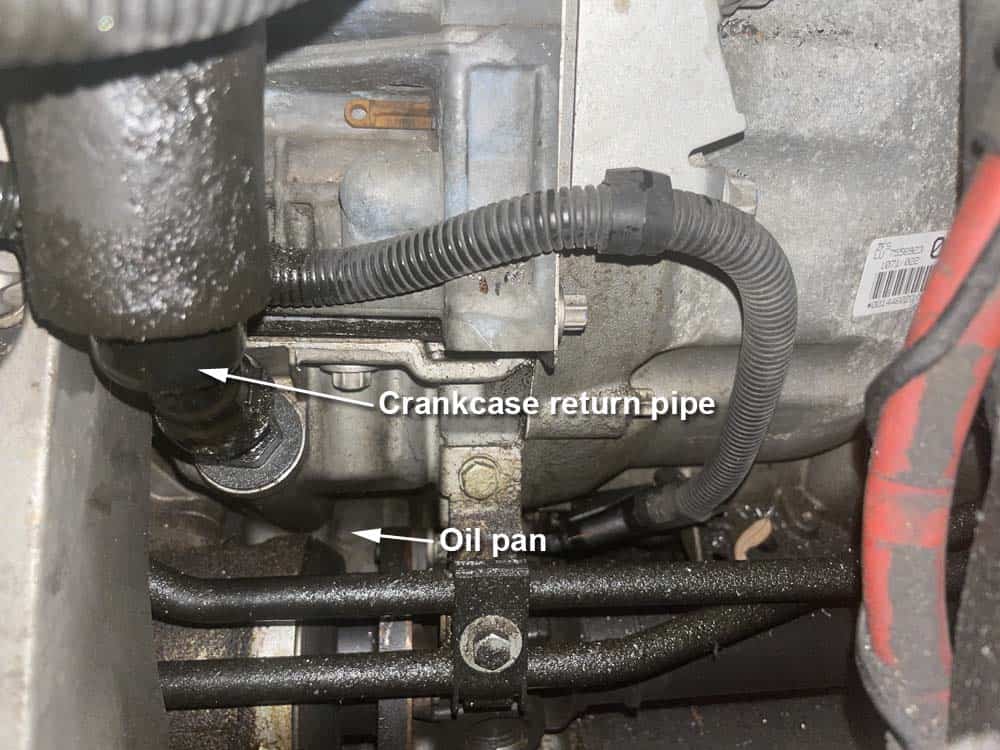
- Disconnect the crankcase breather hose from the valve cover. Like the return pipe above, if you are planning on replacing the breather hose don't waste time trying to disconnect it...just break it off.
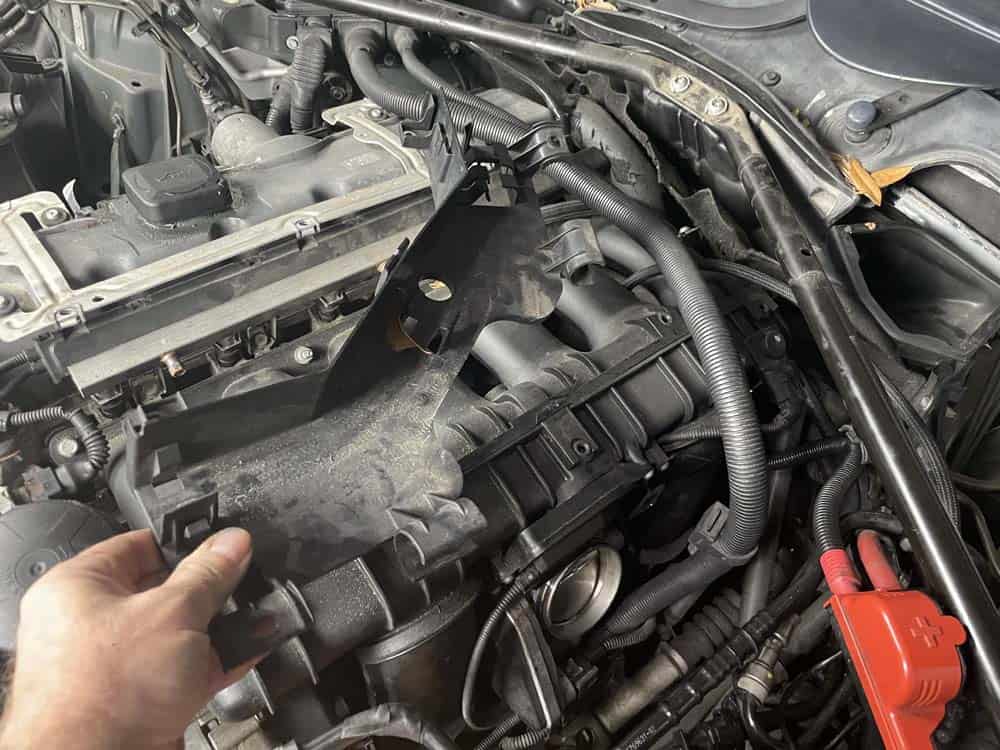
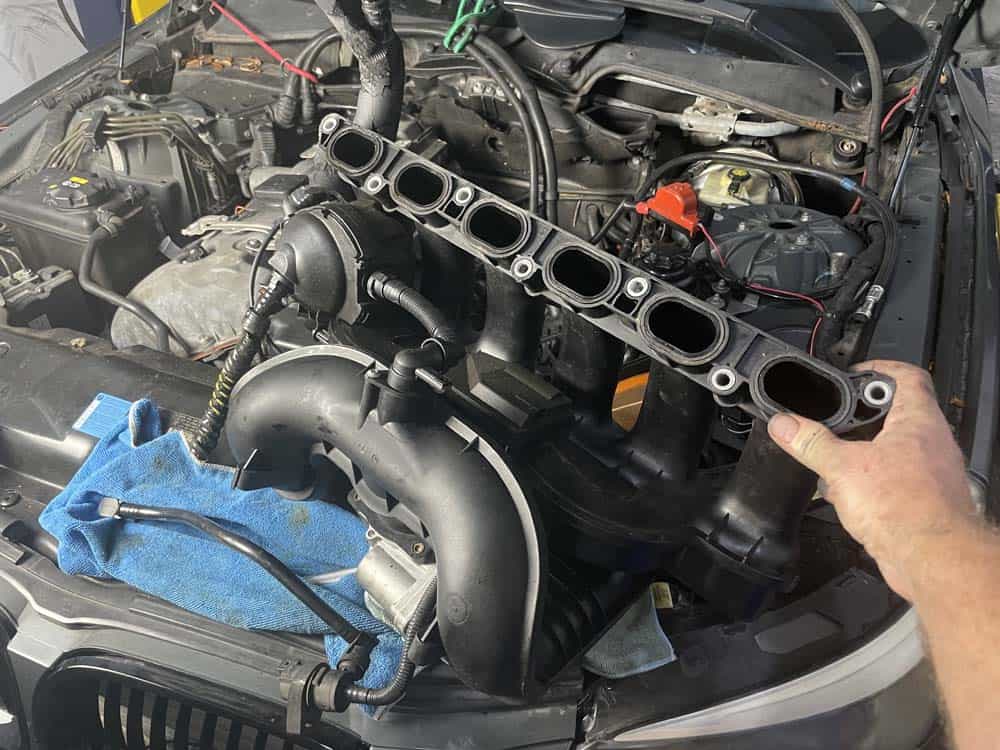
- Grasp the intake manifold and pull it loose from the cylinder head.
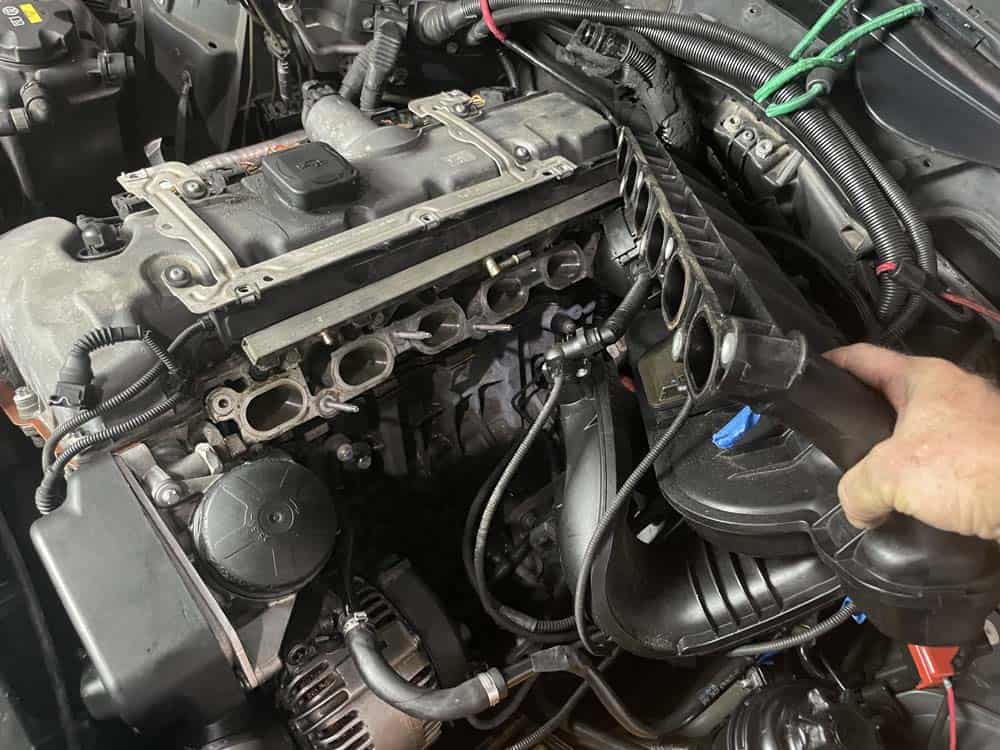
- Carefully rotate the intake manifold so the back can be accessed. Disconnect the PVC heating element.
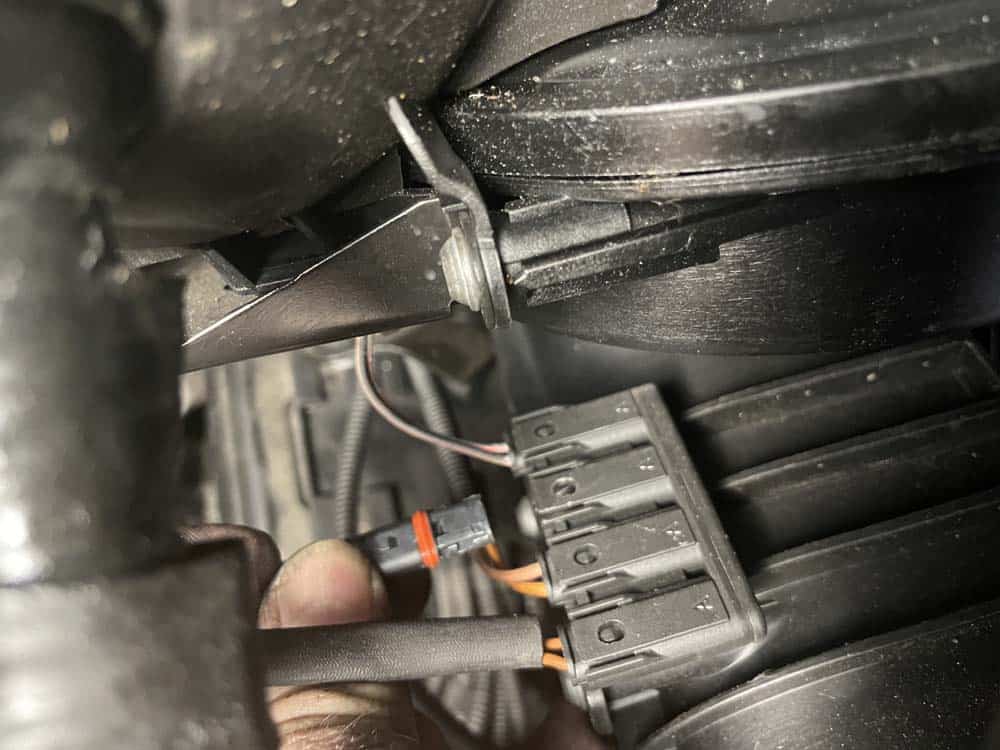
- Locate the wiring harness on the bottom of the intake manifold. Using a 10mm socket, remove the two wiring harness mounting bolts.
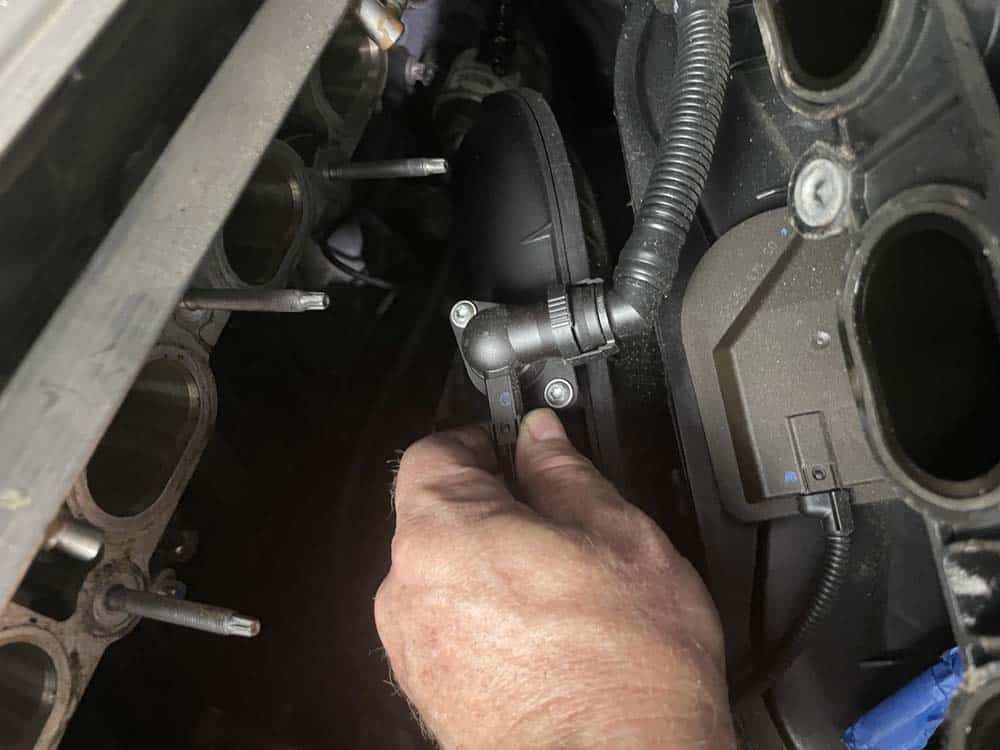
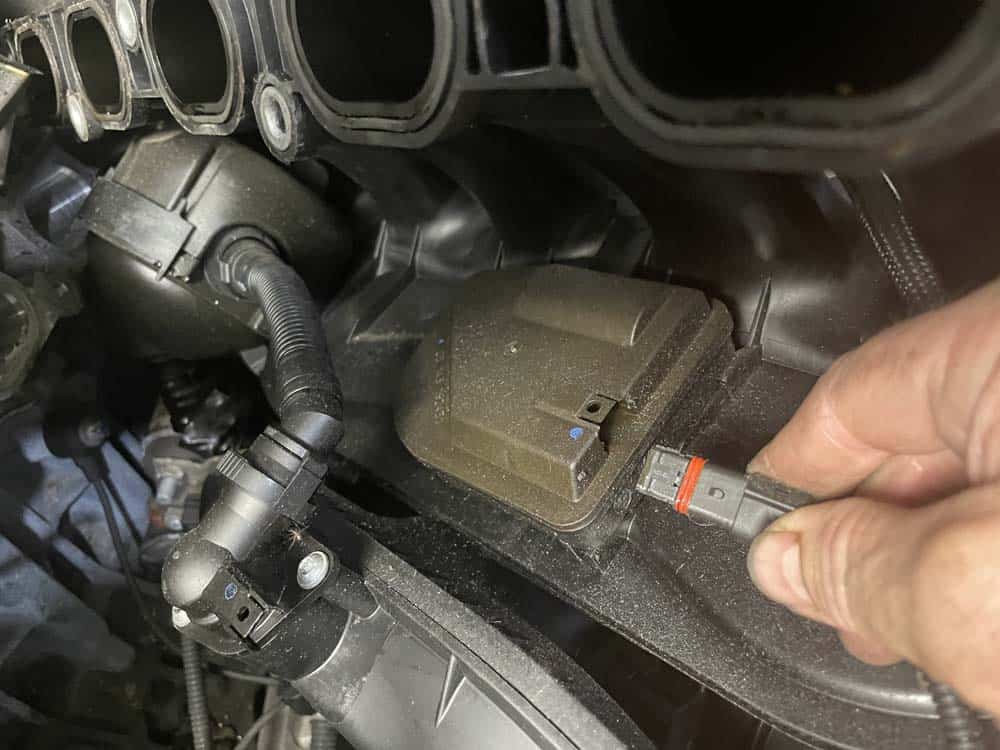
- Unplug the inner DISA valve.
- Unplug the fuel tank vent valve sensor.
- Remove the fuel tank vent valve from the wiring harness bracket.

- Disconnect the wiring harness from the back of the intake manifold.
- Remove the intake manifold from the vehicle.
Section 3 - Final reassembly
Final reassembly is very straightforward with no special procedures. We have supplied a handy checklist below with important torque values.BMW N52 Intake Manifold Reassembly Checklist
***The following steps were performed on a 2006 530...other models may vary.- Plug the wiring harness back into the rear of the intake manifold.
- Install the fuel tank vent valve back onto the wiring harness and plug it back in.
- Plug the inner DISA valve back in.
- Reinstall the wiring harness. Torque the wiring harness mounting bolts to 10.5 Nm (8 ft-lb).
- Plug the PVC heating element back in.
- Carefully position the intake manifold back onto the cylinder head. Make sure not to pinch any of the gaskets.
- Attach the crankcase breather hose back onto the valve cover. Make sure to apply enough pressure until you hear it click into place on the fitting.
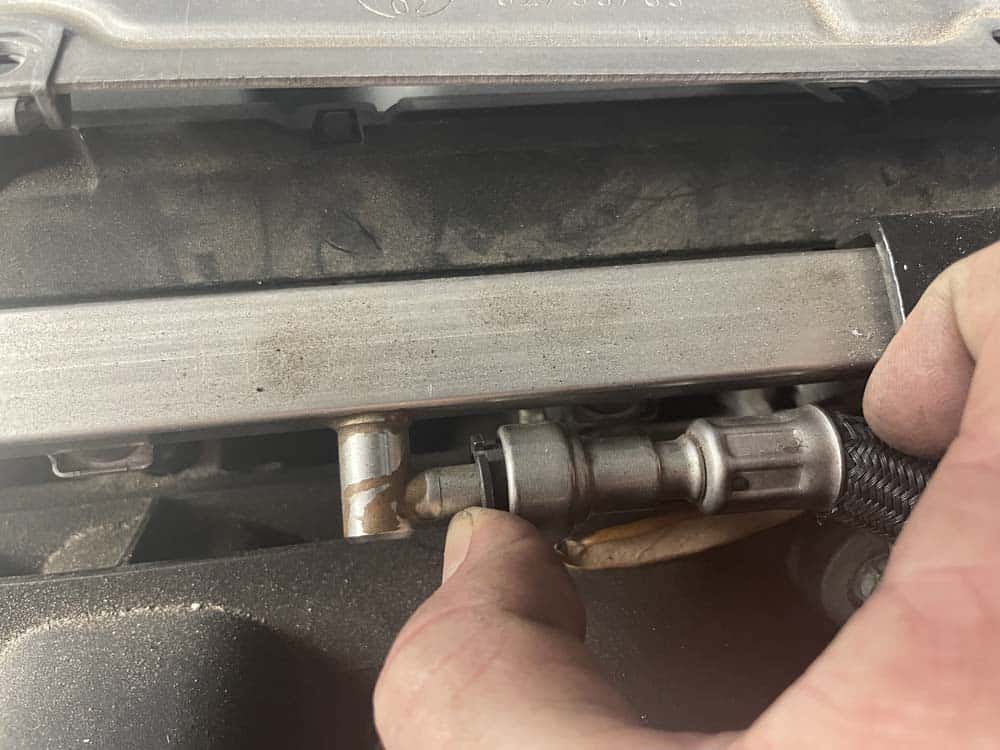
- Reach down behind the intake manifold and attach the return pipe back onto the oil pan. Once again, make sure to press on it until it clicks into place.
- Install the intake manifold fasteners and hand tighten them. DO NOT torque until the fuel rail bracket mounting bolts are installed below.
- Plug the oil pressure switch back in.
- Attach the fuel tank vent hose back together.
- Plug the throttle body back in.
- Reinstall the fuel rail bracket and hand tighten the mounting bolts.
- Starting from the middle and working your way out, torque the intake manifold bolts to 17 Nm (12 ft-lb).
- Plug the fuel line back in.
- Plug the outer DISA valve back in.
- Plug the differential pressure sensor back in.
- Reinstall the strut braces and torque the mounting bolts to 25 Nm (18 ft-lb).
- Reinstall the wiring harness bracket.
- Reinstall the intake boot and intake muffler lid.
- Reinstall the engine covers.
- Reinstall the cabin filter assembly.
- Reconnect the battery.
BMW N52 Intake Manifold Removal Finished