
Affiliate link disclosure – The BMW Repair Guide uses affiliate links in their site. For more information on affiliate links, please click here.
Repair Summary
This article gives detailed instructions on replacing the starter motor in a BMW vehicle with the turbocharged N55 engine. Even though we used a 2011 335i to perform this repair, this article can be applied to any vehicle with the N55 turbo engine including 1,2,3,4,5,6,7,X1,X3,X5 and X6 with minor modifications to the repair steps.
See all vehicles this article applies to
E88 1 Series 135i
E82 1 Series 135i
F20 1 Series M135iX
F20 1 Series M135i
F20N 1 Series M135iX
F20N 1 Series M135i
F21 1 Series M135iX
F21 1 Series M135i
F21N 1 Series M135iX
F21N 1 Series M135i
F22 2 Series M235iX
F22 2 Series M235i
F87 2 Series M2
F87N 2 Series M2
F23 2 Series M235iX
F23 2 Series M235i
E90N 3 Series 335xi
E90N 3 Series 335i
E91N 3 Series 335xi
E91N 3 Series 335i
E92N 3 Series 335xi
E92N 3 Series 335i
E93N 3 Series 335i
F30 3 Series Hybrid 3
F30 3 Series 335iX
F30 3 Series 335i
F31 3 Series 335iX
F31 3 Series 335i
F34 3 Series 335iX
F34 3 Series 335i
F35 3 Series 335Li
F35N 3 Series 335Li
F32 4 Series 435iX
F32 4 Series 435i
F33 4 Series 435i
F33 4 Series 435iX
F36 4 Series 435i
F36 4 Series 435iX
F07 5 Series 535i
F07 5 Series 535iX
F07N 5 Series 535i
F07N 5 Series 535iX
F10 5 Series Hybrid 5
F10 5 Series 535iX
F10 5 Series 535i
F10N 5 Series Hybrid 5
F10N 5 Series 535iX
F10N 5 Series 535i
F11 5 Series 535iX
F11 5 Series 535i
F11N 5 Series 535iX
F11N 5 Series 535i
F18 5 Series 535Li
F18N 5 Series 535Li
F06 6 Series 640iX
F06 6 Series 640i
F06N 6 Series 640iX
F06N 6 Series 640i
F12 6 Series 640i
F12 6 Series 640iX
F12N 6 Series 640iX
F12N 6 Series 640i
F13 6 Series 640iX
F13 6 Series 640i
F13N 6 Series 640iX
F13N 6 Series 640i
F01N 7 Series Hybrid 7
F01N 7 Series 740i
F02N 7 Series Hybrid 7L
F02N 7 Series 740LiX
F02N 7 Series 740Li
E84 X1 Series X1 35iX
F25 X3 Series X3 35iX
F26 X4 Series X4 M40iX
F26 X4 Series X4 35iX
E70N X5 Series X5 40iX
E70N X5 Series X5 35iX
F15 X5 Series X5 35iX
F15 X5 Series X5 35i
E71 X6 Series X6 40iX
E71 X6 Series X6 35iX
F16 X6 Series X6 35iX
F16 X6 Series X6 35i
A BMW N55 starter replacement has unfortunately become a common repair in older turbocharged vehicles.
One of the biggest nightmares you can encounter as a BMW owner is trying to start your vehicle and absolutely nothing happens. What is even more irritating is often the vehicle's engine probably turned over normally just prior to it failing. Unfortunately, that is how fast your BMW starter motor can fail...literally within one push of the button (or turn of the key). Even more unfortunate is the fact that you usually have no prior warning.
The BMW N55 starter actually consists of two parts; the starter motor and the starter solenoid switch. The 12V electric starter motor does the actual physical labor by extending a small pinon gear into the engine's flywheel which turns the motor's crankshaft (hence the term "turning over" the engine). The starter's solenoid switch is simply a relay that controls the starter motor. When the vehicle is started, a low voltage signal from the car access system (CAS) causes the solenoid switch to close sending current to the starter motor.
Like all mechanical parts on your vehicle, the BMW N55 starter has a definitive lifespan and will eventually need replacement. As discussed above, the starter in your BMW will usually fail with a very little prior warning...and usually at the worst possible time. The most common symptom of a failing BMW N55 starter is the vehicle will only turn over when cold, but will not start after the engine heats up (more force is needed to turn a hot engine). Other symptoms include a grinding (or whining) sound when attempting to start the vehicle, or the car won't start at all even though all of the other electronics work normally.
Although the starter's solenoid switch can be replaced independently of the motor, the BMW Repair Guide highly discourages mechanics from doing this. Saving a few bucks by only replacing the solenoid switch makes little sense when a complete unit can be purchased for nearly the same price. Furthermore, if the starter solenoid has failed, the starter motor is most likely worn out as well. Replacing them both will save you the agony of having to perform this repair twice.
The BMW N55 starter is located underneath the intake manifold on the rear left side of the engine. It has a bad (and incorrect) reputation of being a difficult repair due to the fact that the intake manifold must be partially removed in order to perform a BMW N55 starter replacement; there is no way to get to the starter from underneath the vehicle. Actually replacing the starter in the N55 turbocharged engine is not that difficult and is a very "doable" repair for the home mechanic with average skills as long patience is exercised. A BMW N55 starter repair is also an excellent time to perform another service like intake manifold and oil filter mount gasket replacement. Since you will have to partially remove most of the intake system from the car to perform this repair, it makes sense to plan ahead and replace all of the common high failure parts in your N55 turbocharged engine.


View the detailed parts diagram for this repair.
Includes detailed part diagrams, part numbers and links to purchase all of the required components needed to complete this repair.

Before starting this repair, you must have the following required parts.
All BMW N52, N54 and N55 Engines
Has your BMW starter not been cranking your engine like it used to? Are you getting an intermittent clicking while attempting to start? Check your battery and all is well, but your starter still runs slow? Odds are, the starter is beginning to fail. Replace it now with this factory replacement.
All N52, N54, and N55 engines
Intake gaskets go in between the head and the intake runners. We reccomend replacing these gaskets when doing removal and re-install of intake manifolds.
Section 1 - Removing the Intake Manifold
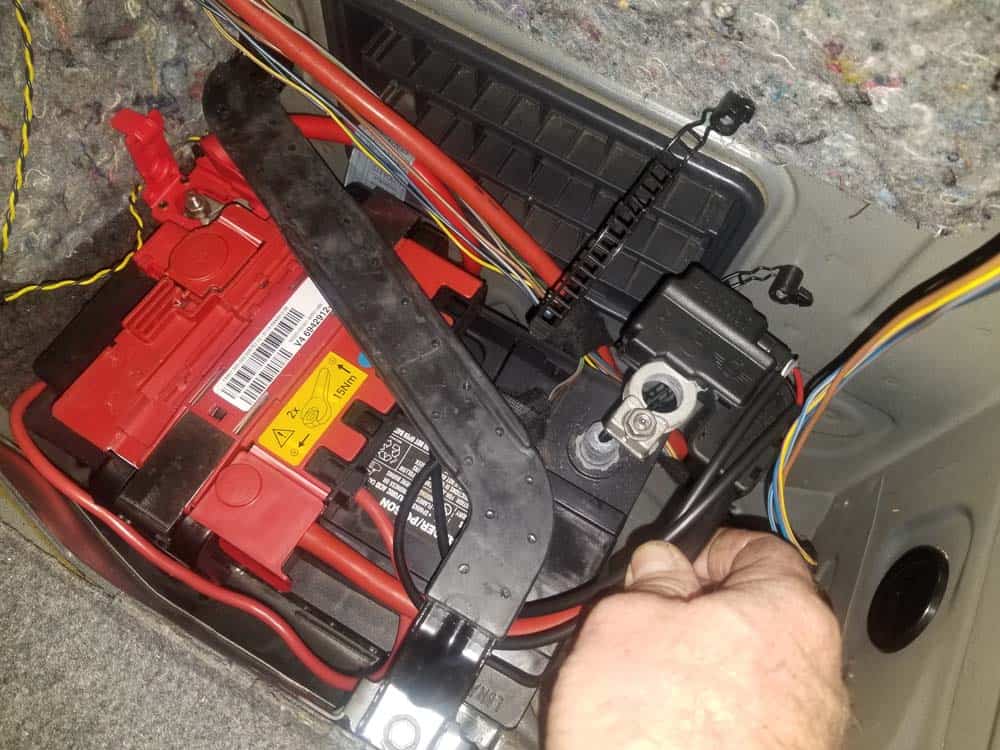
As discussed at the beginning of this article, the BMW N55 starter is located under the intake manifold. In order to access the starter mounting bolts, the intake manifold must be removed from the cylinder head and cleared out of the work area. Please note that there are many different BMW models produced with the N55 engine and the following steps may vary between them. We are using a 2011 335i with the N55 turbocharged engine for this repair.- Remove the negative terminal from the battery. Since this repair deals with the engine's electrical system, the battery must be disconnected to avoid damage to your vehicle's sensitive electronics. Not disconnecting the battery for this repair will most likely cause catastrophic damage to sensitive electronics.
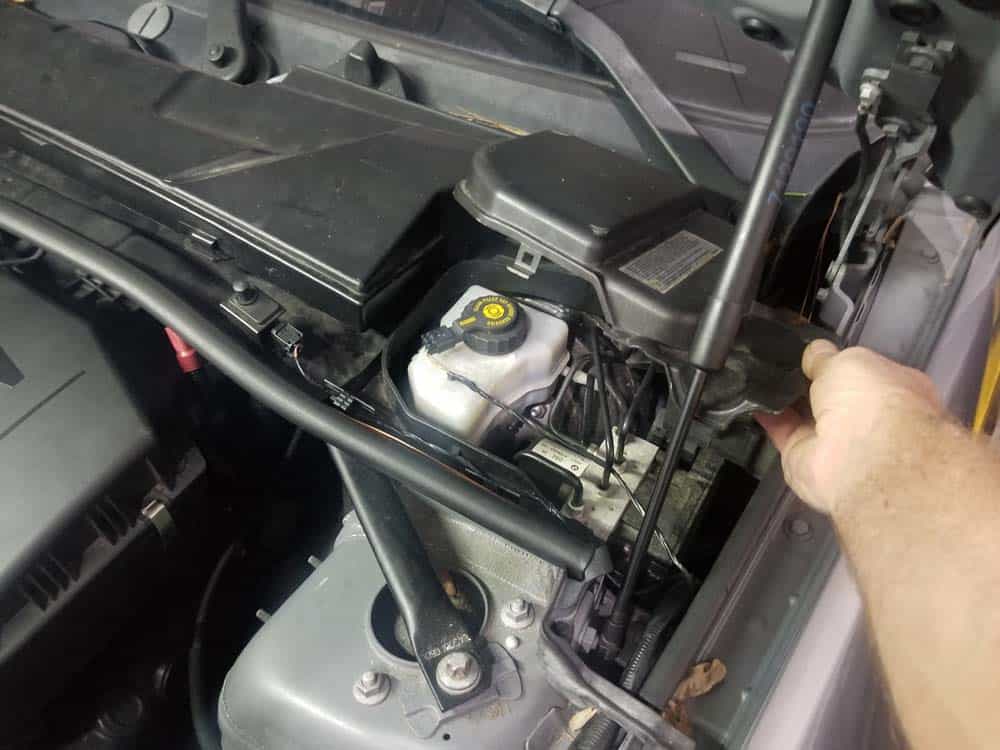
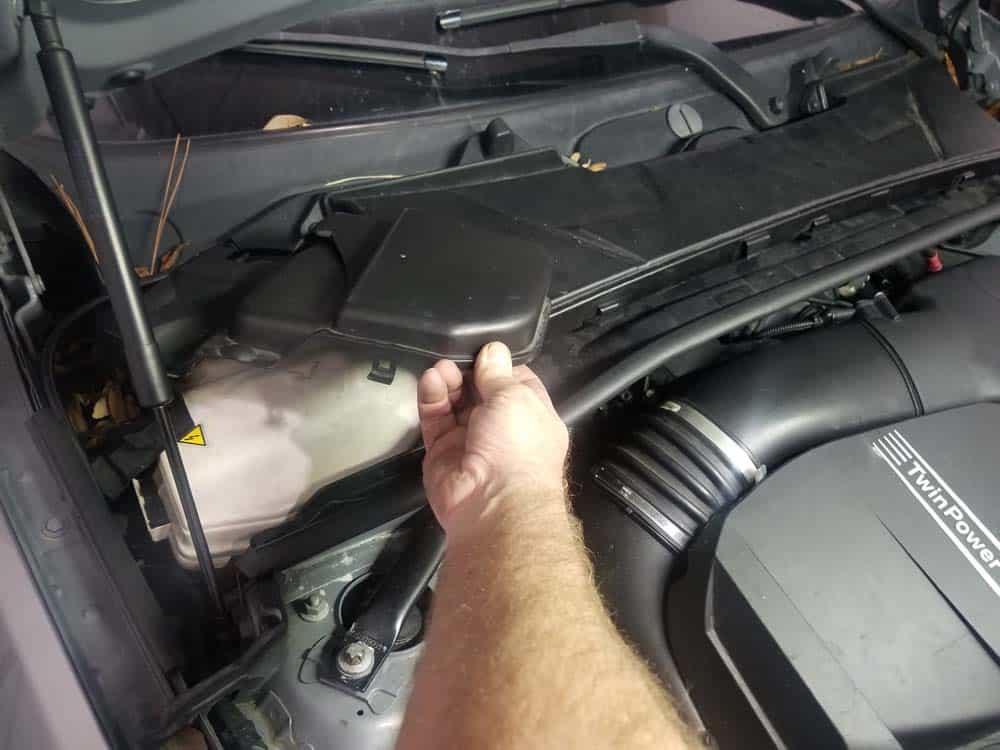
- Remove the left and right plastic covers from the sides of the microfilter housing.
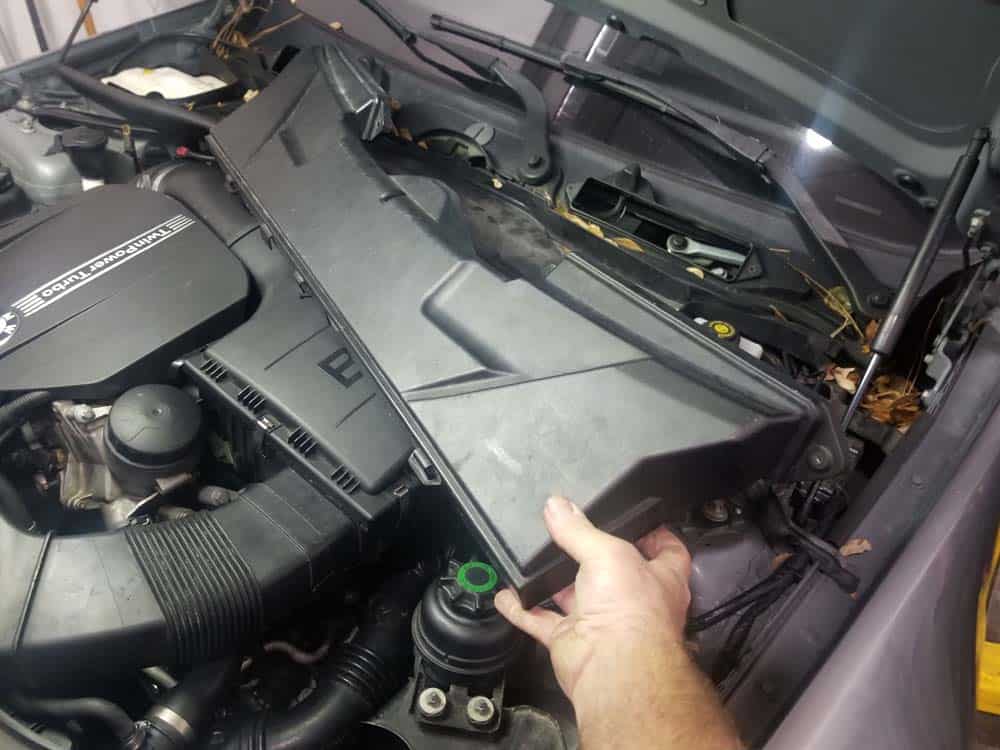
- Remove the four screws anchoring the upper microfilter housing to the cowl of the engine. Remove the upper microfilter housing from the vehicle.

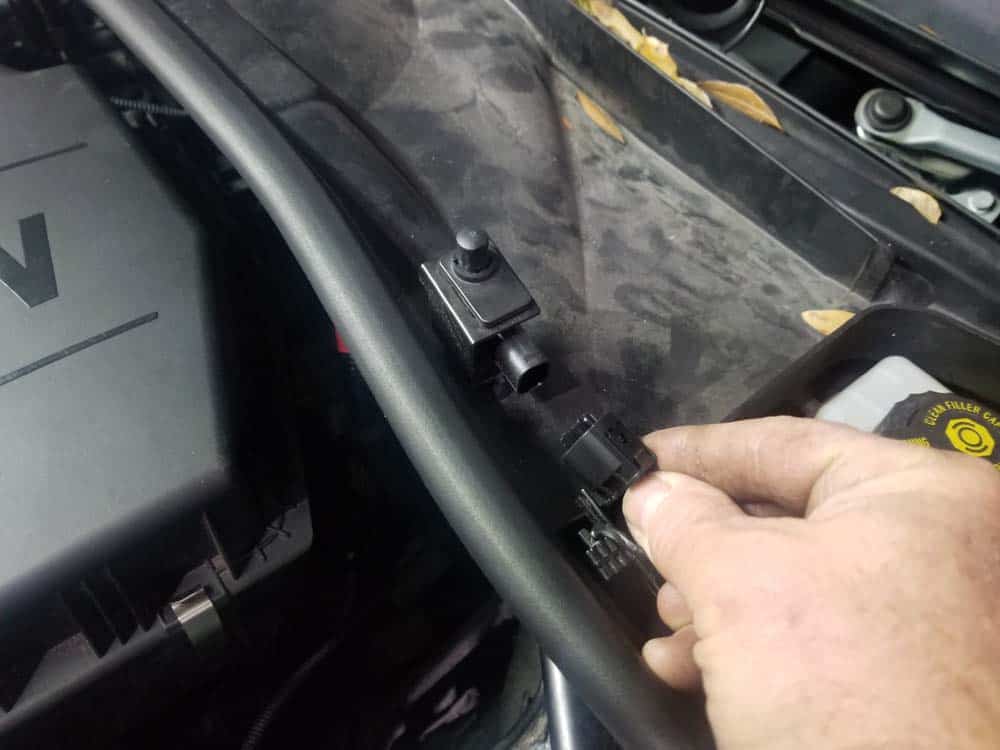
- Disconnect the hood electrical switch from the left side of the microfilter housing.
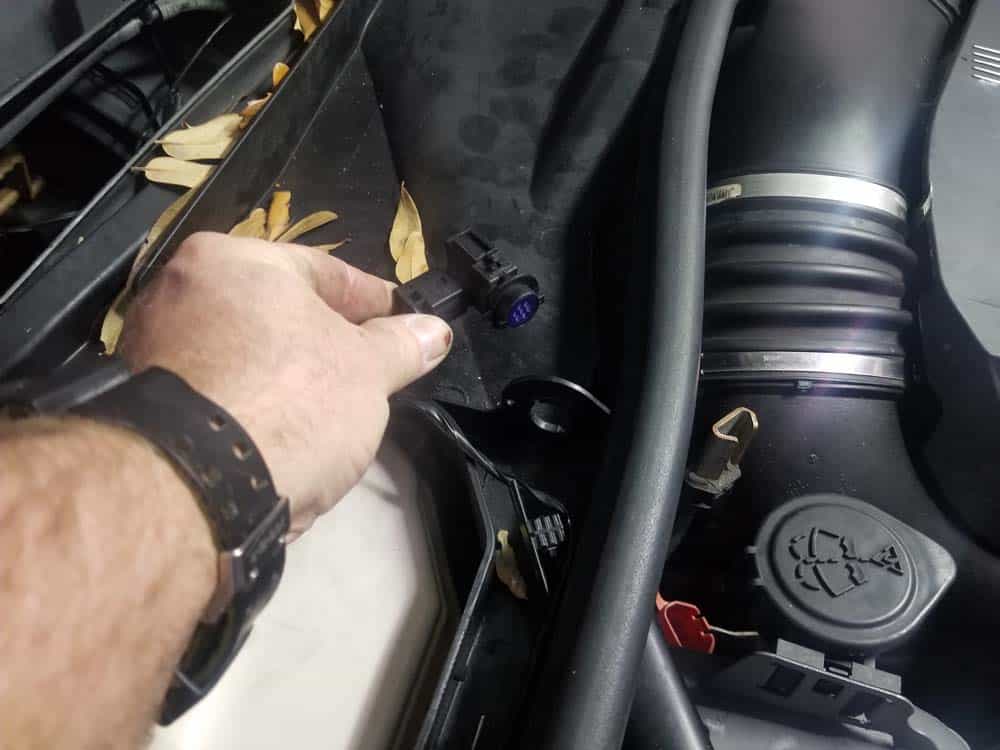
- Remove the air sensor from the right side of the microfilter housing.
- Remove the left and right fasteners anchoring the lower microfilter housing to the body of the vehicle. Remove the lower housing from the engine compartment.


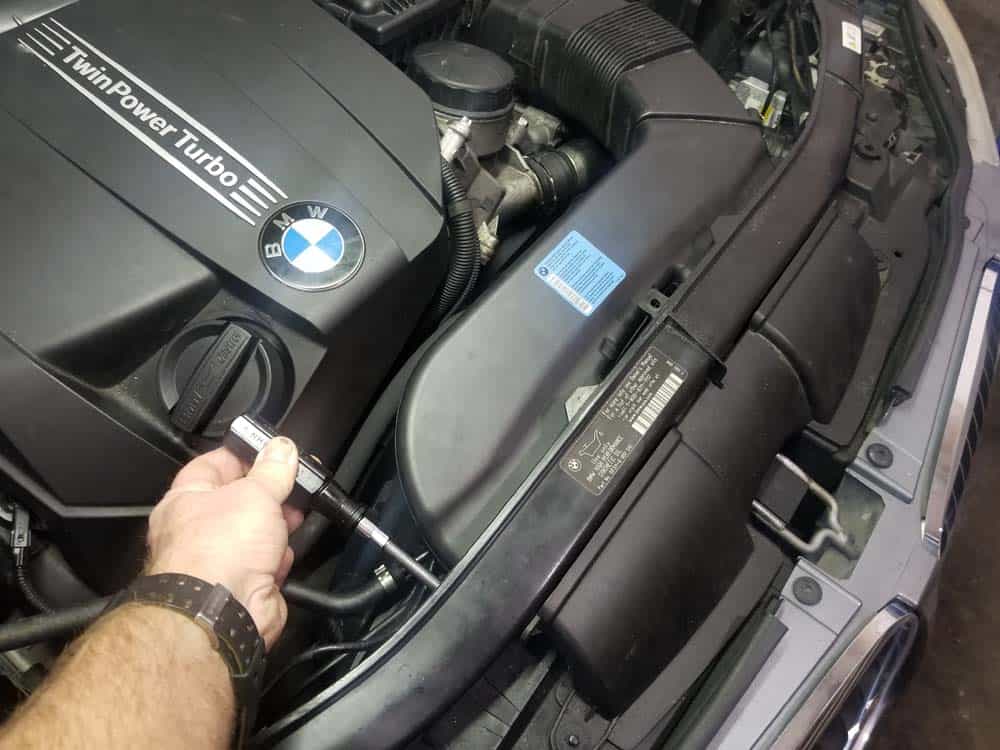
- Remove the two torx screws anchoring the intake duct to the suction hood. Unsnap the intake duct from the intake muffler and remove from the vehicle.
- Unplug the mass air flow sensor (MAF).
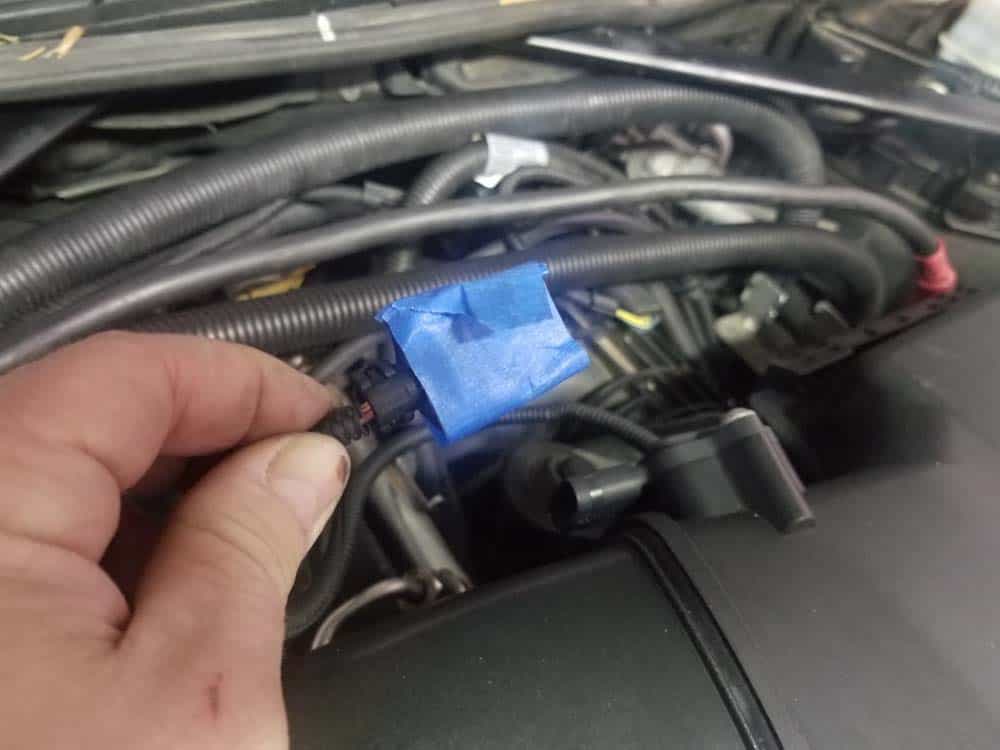
- It is good practice to mark connections with high visibility tape so you don’t miss any during reassembly.
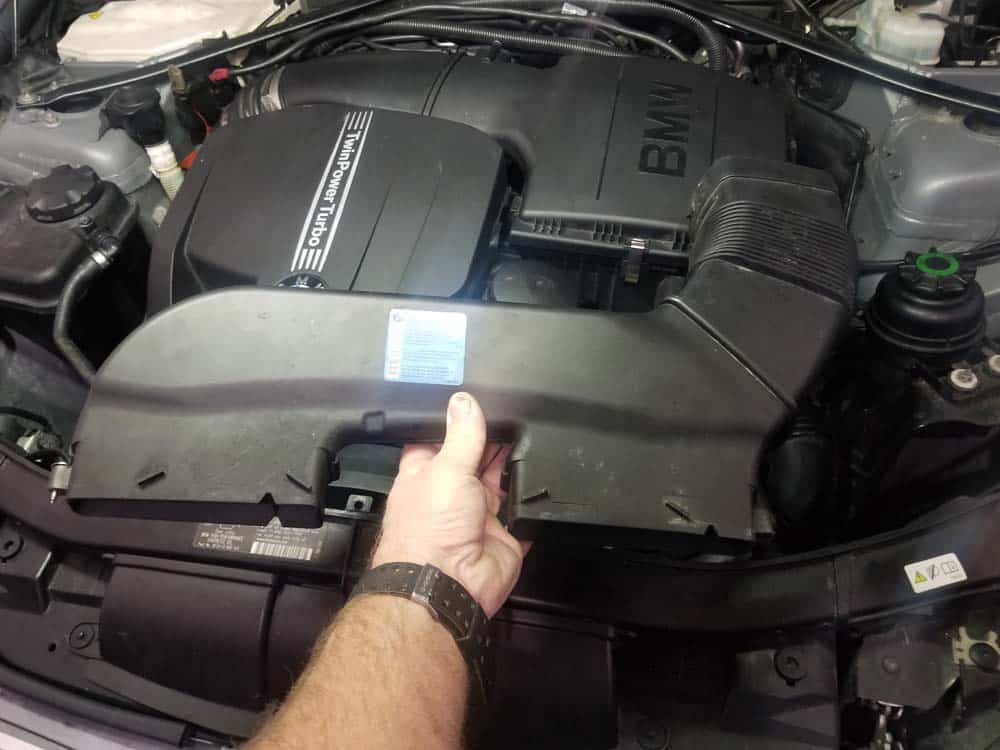
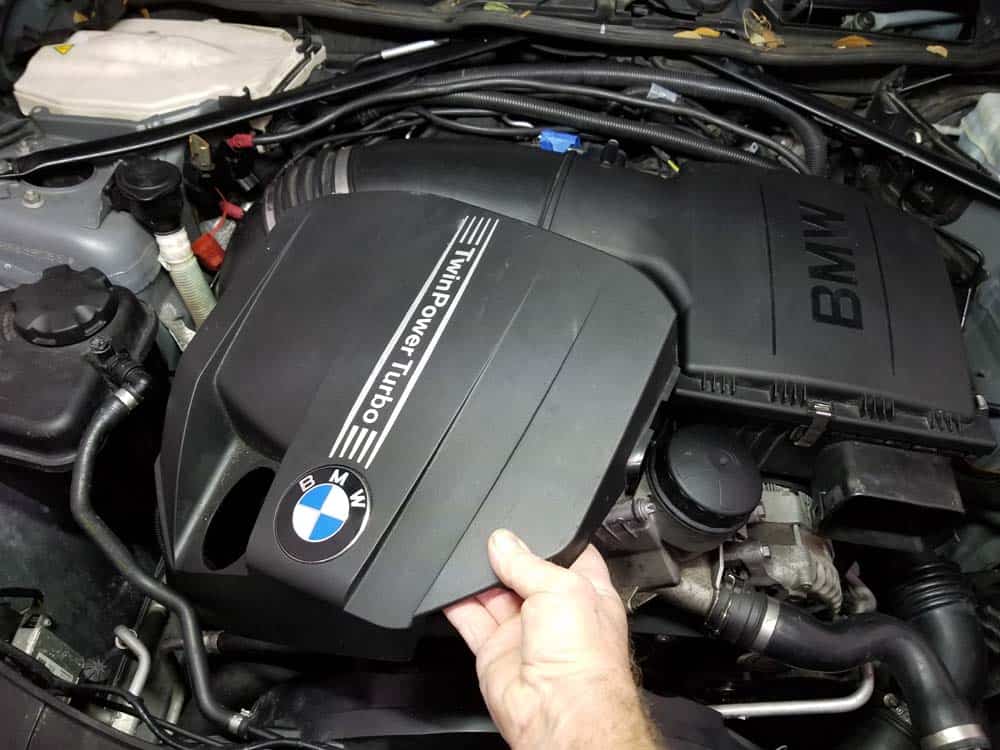
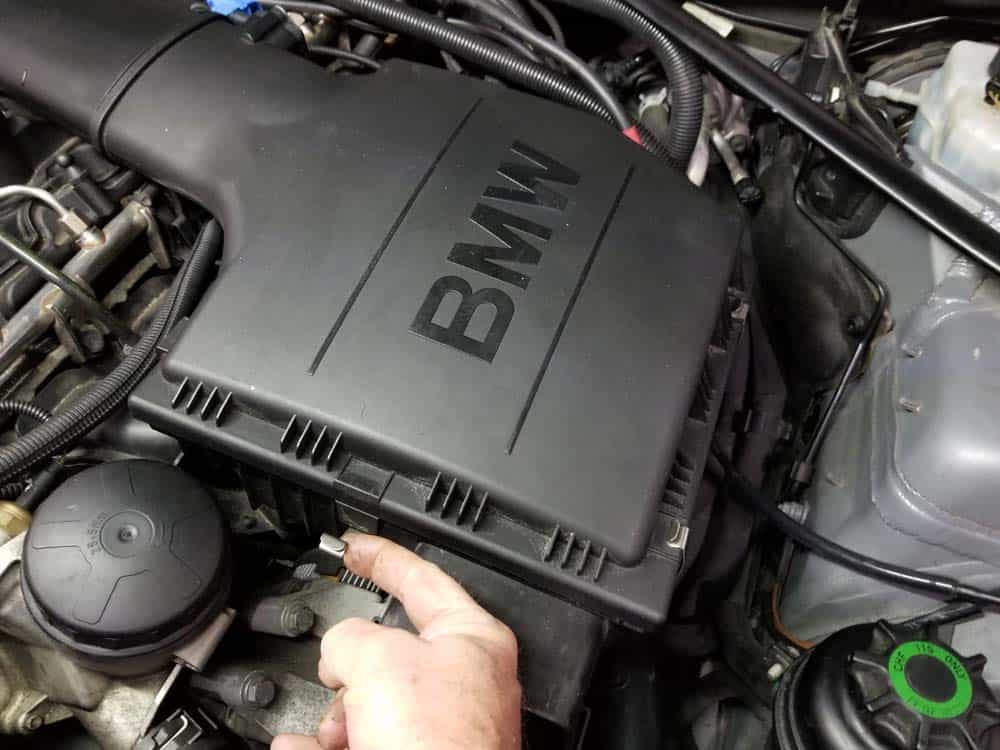
- Grasp the top engine cover and pull it free from the engine.
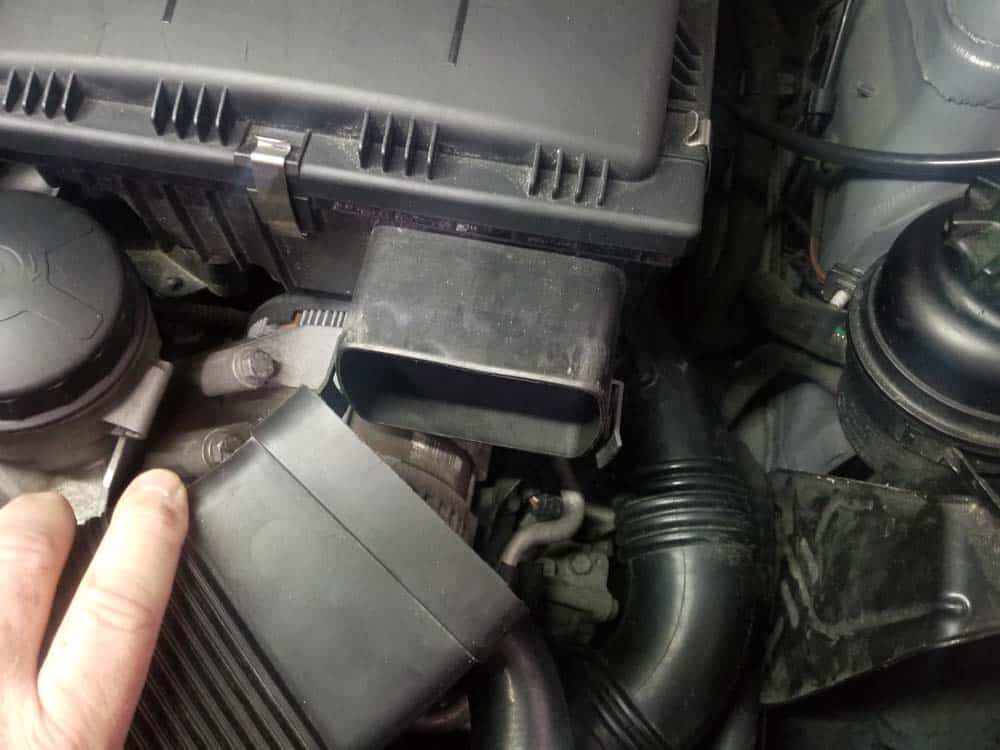
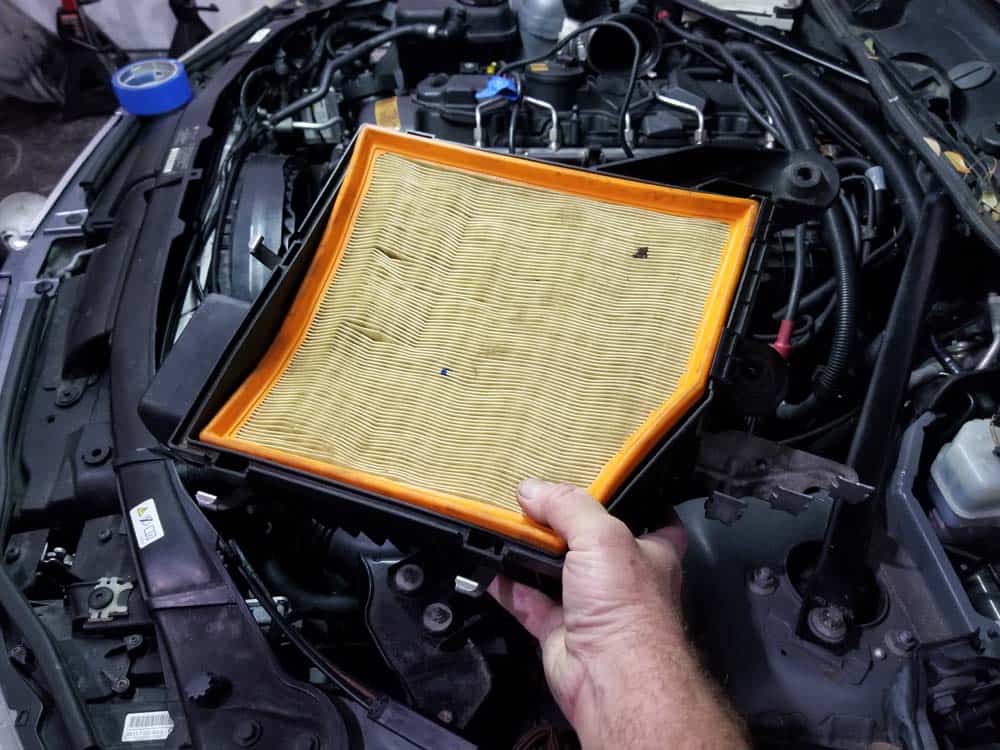
- Loosen the hose clamp on the air duct. Unclip the lid on the intake muffler and remove it from the vehicle.

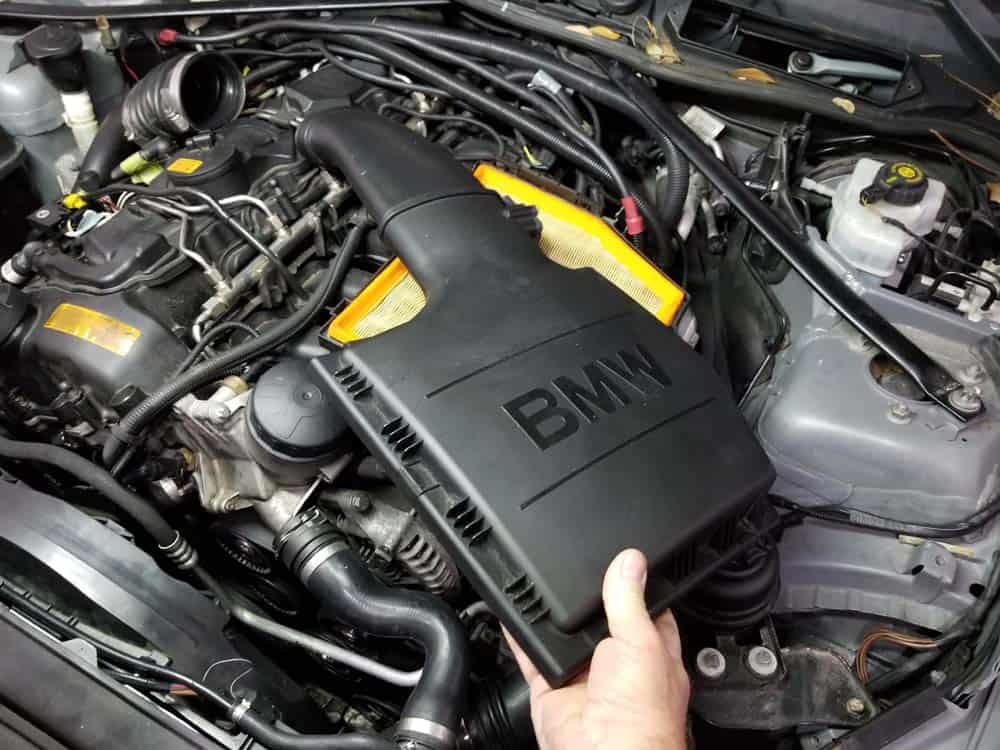
- Grasp the base of the intake muffler and pull it free from the engine. Disconnect any wiring harnesses attached to the bottom of the intake muffler and remove it from the vehicle.
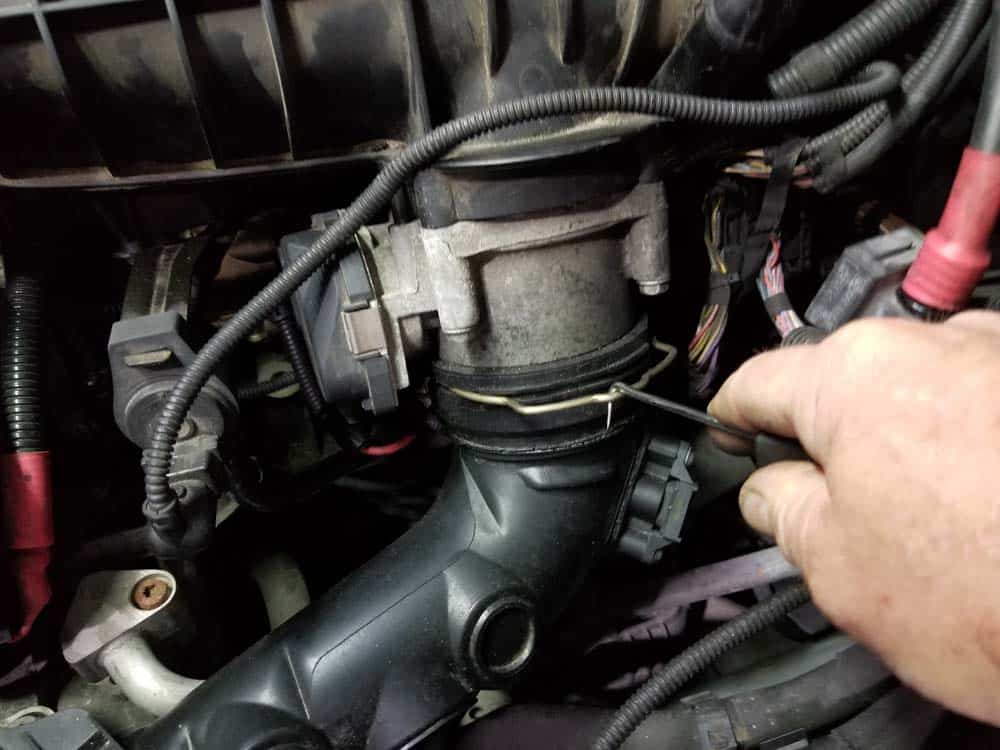
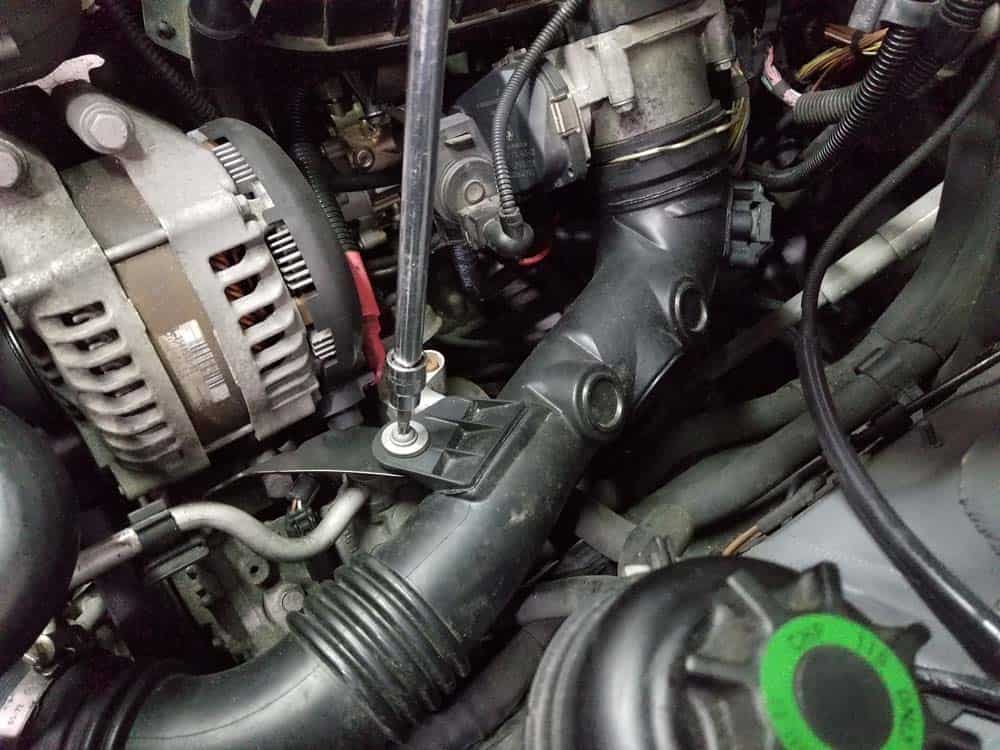
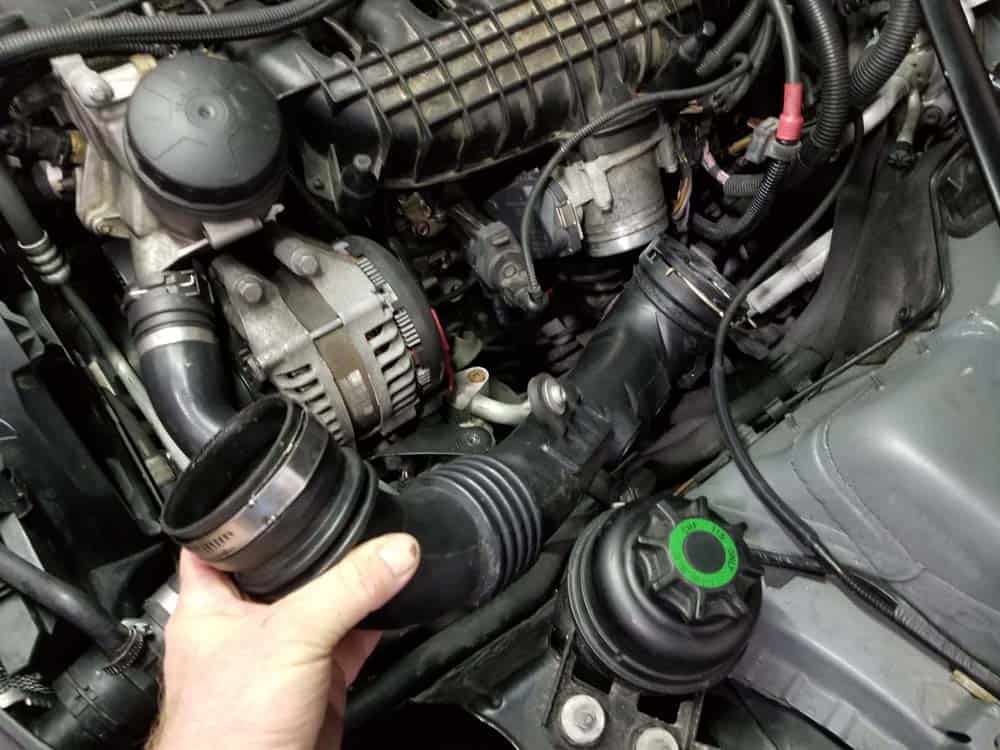
- Loosen the hose clamp on the charge induction pipe. Use a pick to raise the pipe’s metal release where it connects to the throttle body. Use a torx bit to remove the charge induction pipes mounting bolt and CAREFULLY remove the pipe from the intake system.
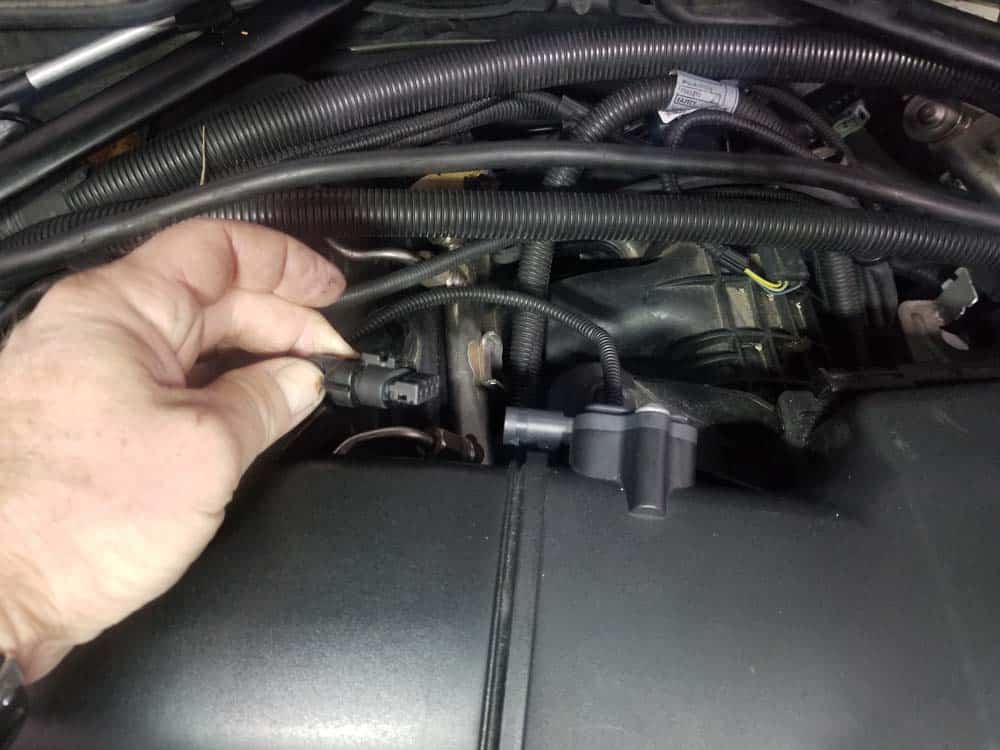
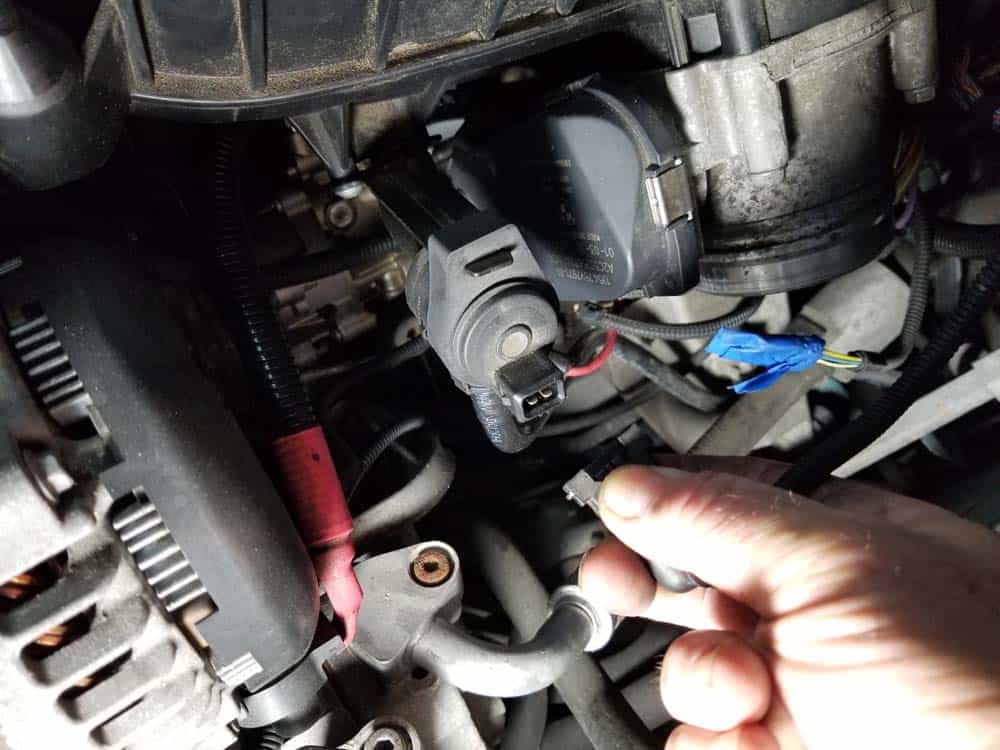
- Turn the pipe over and remove its electrical connection by using a metal pick to raise its locking tab while pulling the plug free.

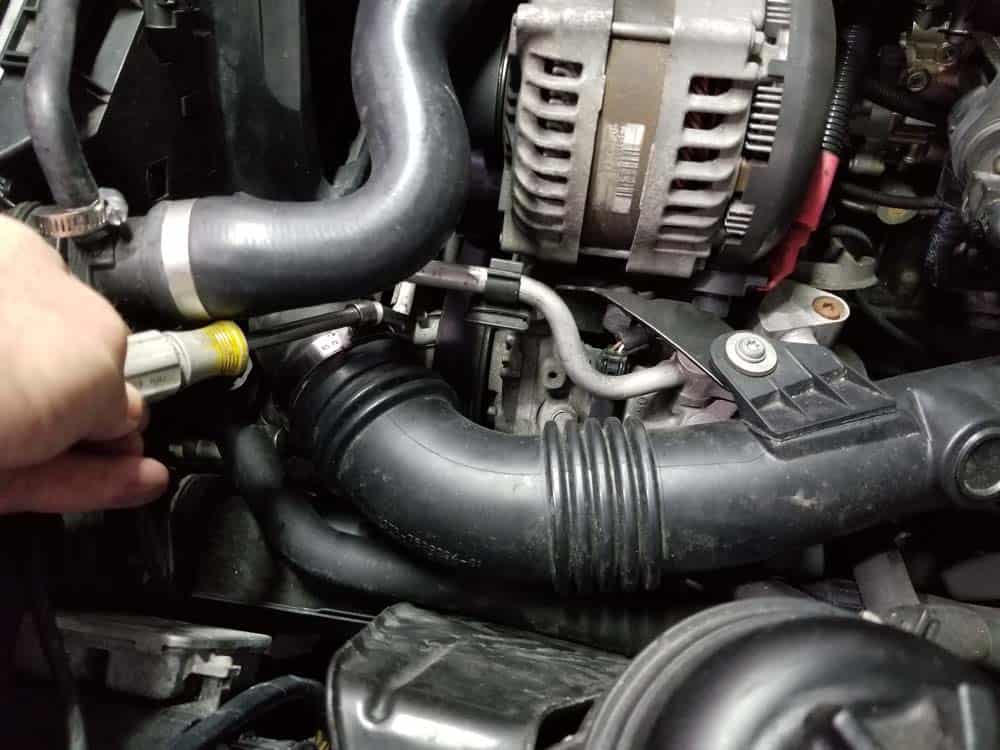
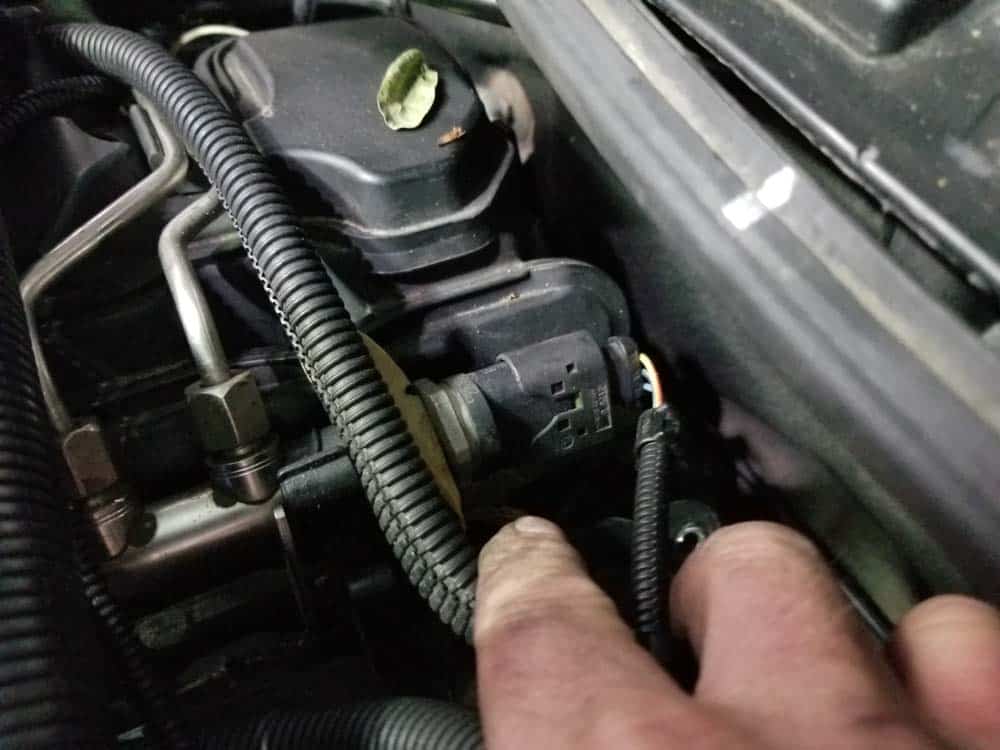
- Unplug the fuel vent valve by depressing the metal locking clip and pulling the connection free. Disconnect the plastic vacuum tube from the bottom of the valve and stow safely out of the work area.

- Disconnect the vacuum pipe from the valve cover. Sometimes it helps to use a pair of long nose pliers to release it.
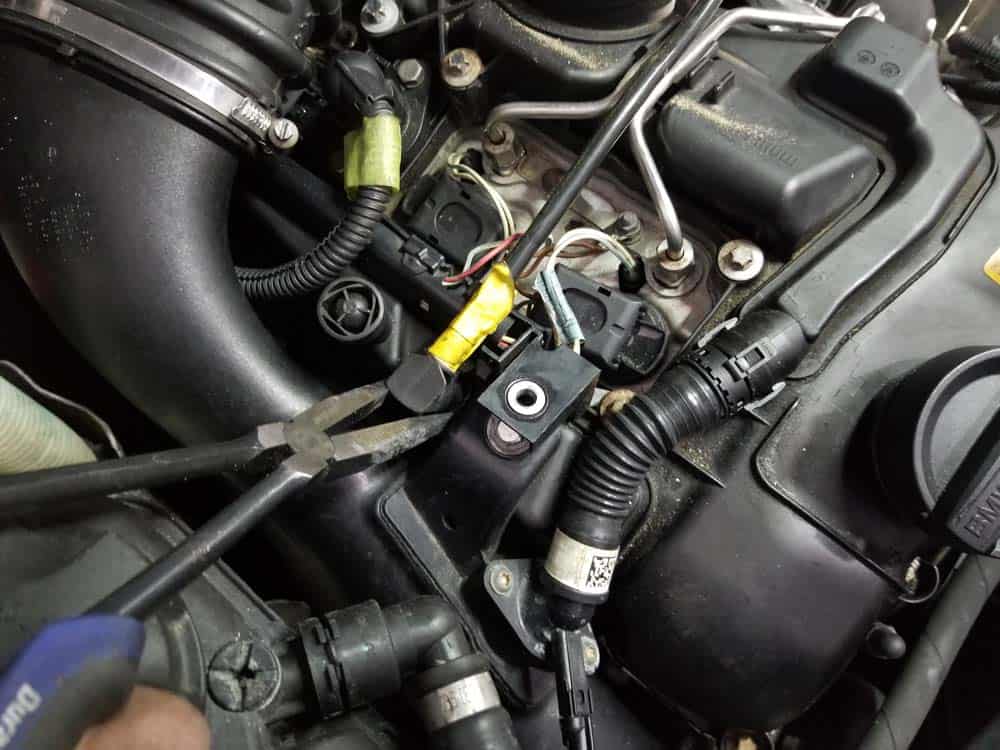
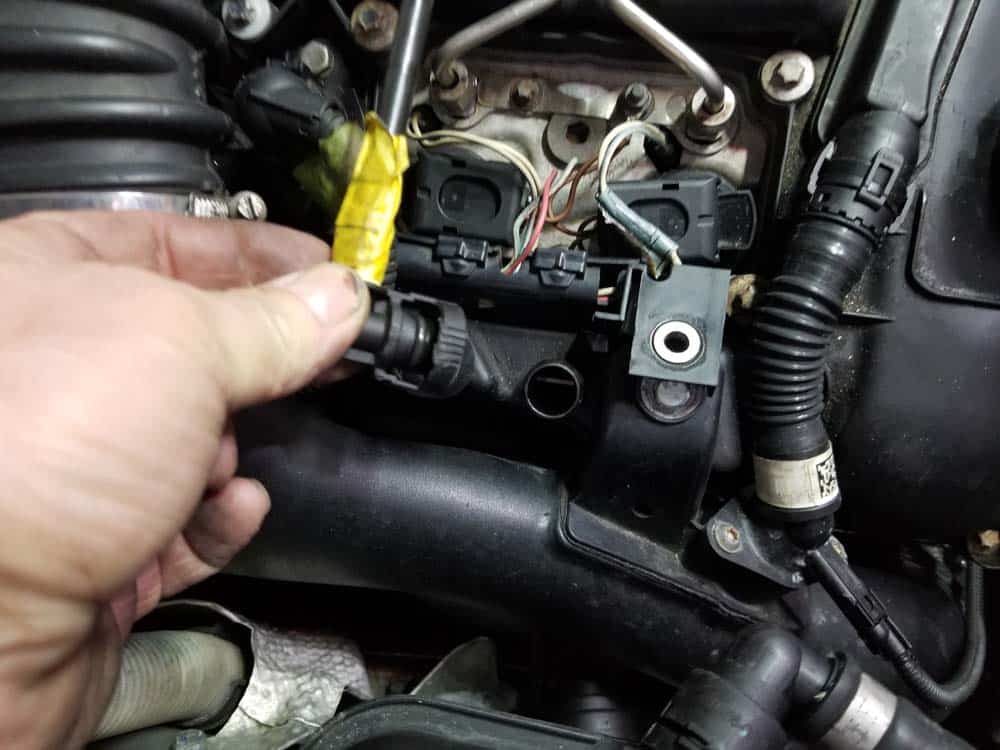
- Disconnect the fuel rail sensor by depressing the locking tab and pulling the plug free.
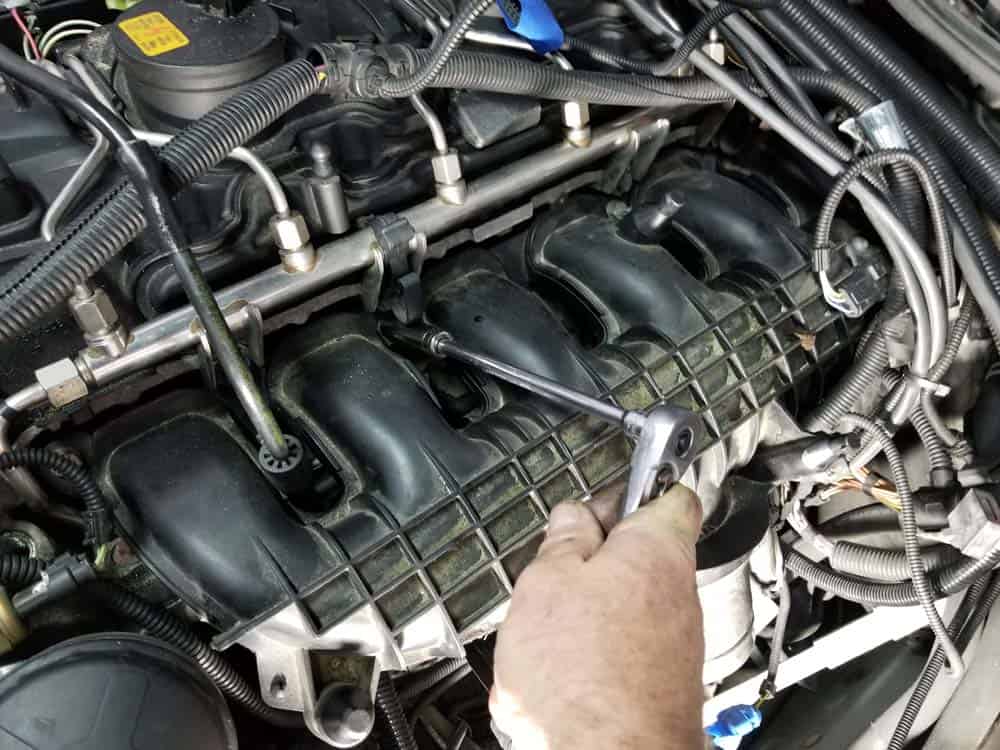
- Use an 11mm socket wrench to remove the one mounting bolt and six mounting nuts securing the intake manifold to the cylinder head.
- Grasp the intake manifold and CAREFULLY pull it free from the cylinder head. There are a lot of wires surrounding the back of the manifold...but with patience you will be able to slowly work the manifold out without disconnecting the main wiring harness.
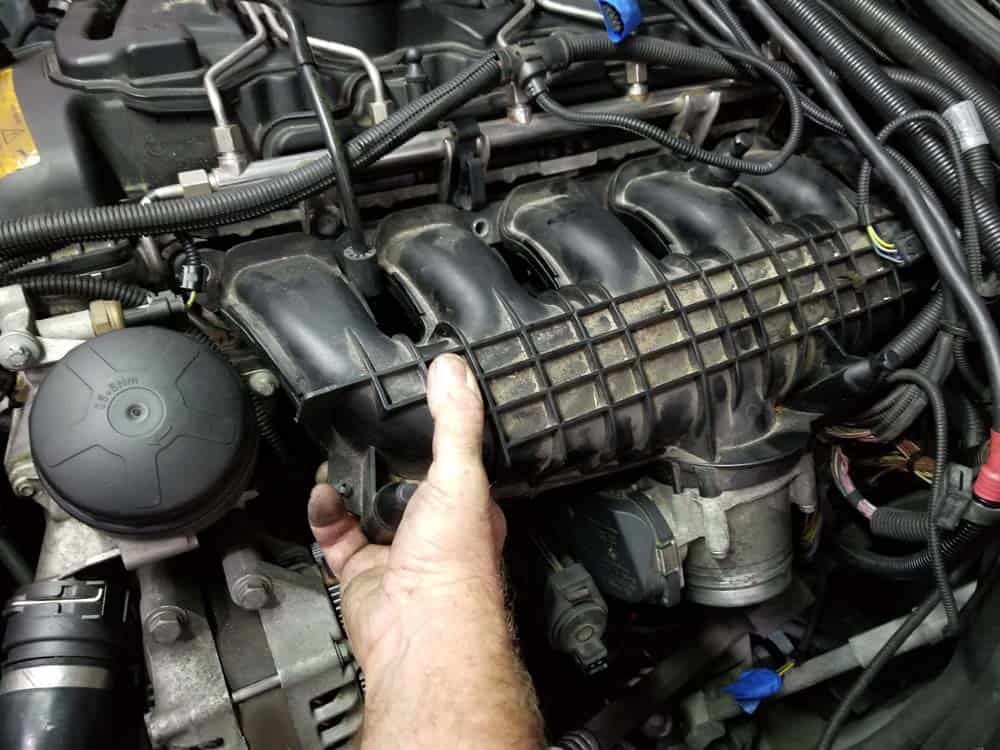
- Use bungee cords to secure the intake manifold out of the work area.
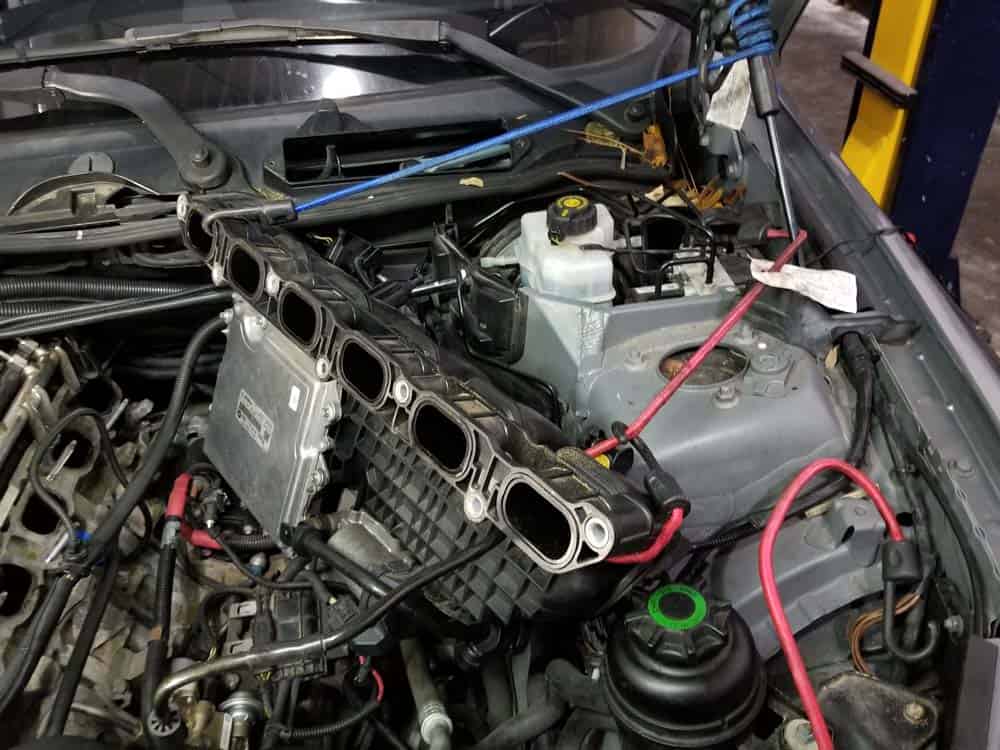
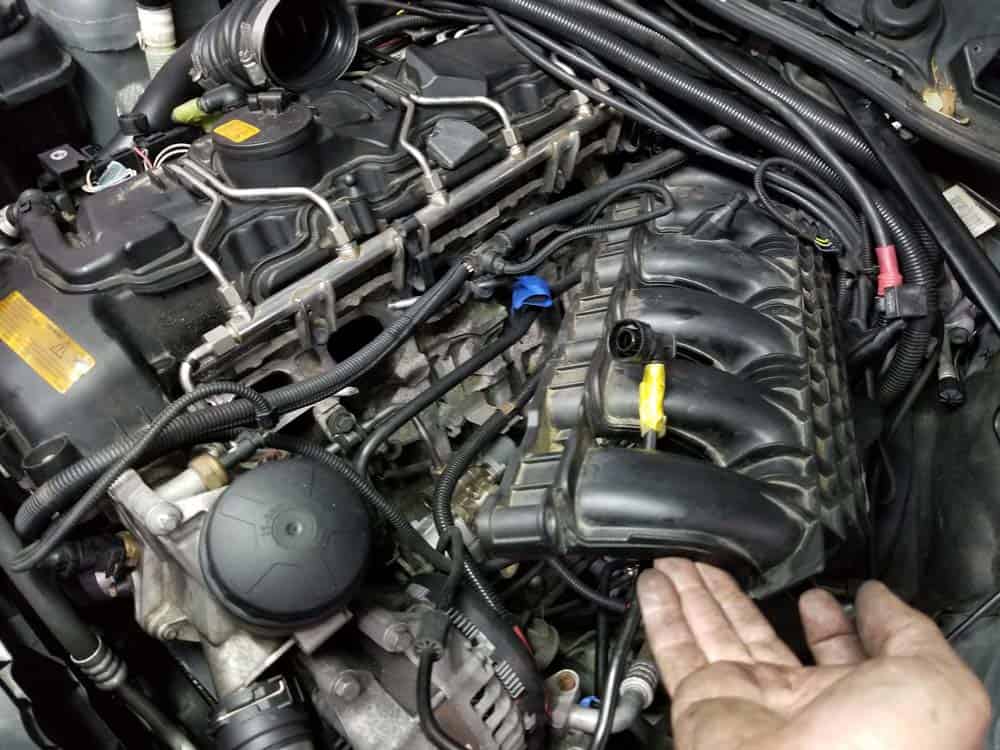
Section 2 - Removing the BMW E90 Starter
With the intake manifold cleared out of the way, the starter can now be easily accessed. It is important to note that the starter has two mounting bolts, an upper and a lower. The upper bolt is notoriously difficult to get to since it is facing towards the rear of the vehicle. We cannot stress the importance of being patient while trying to extract this bolt...even seasoned professional mechanics struggle with it. If you follow our instructions below you shouldn't have any issues.- Locate and identify the starter motor at the rear of the engine.
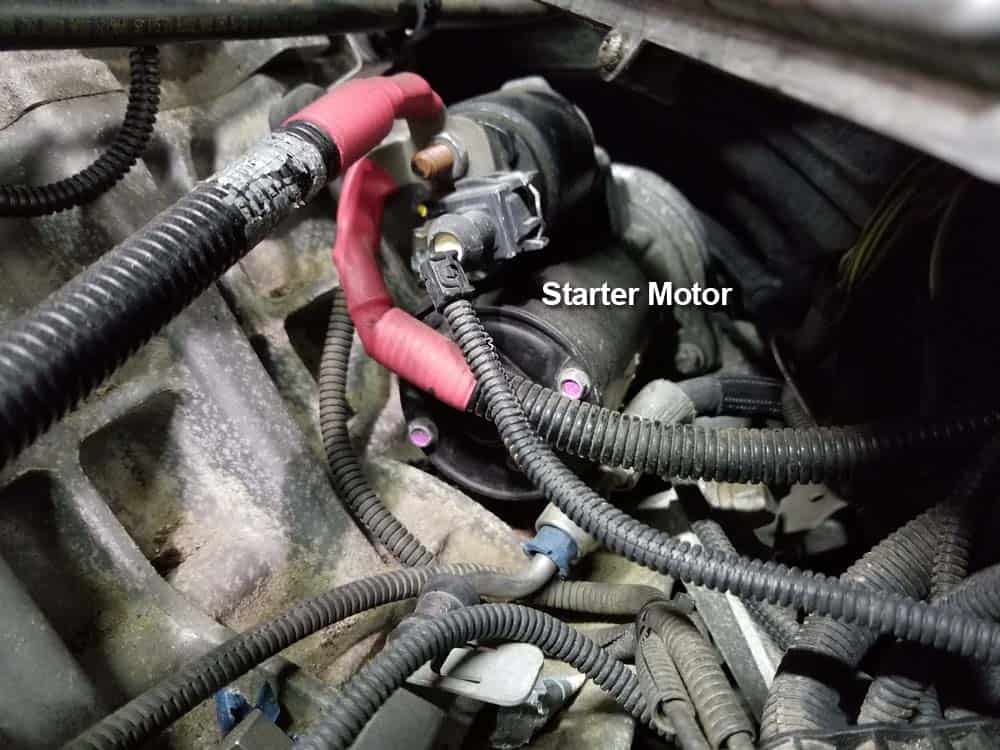
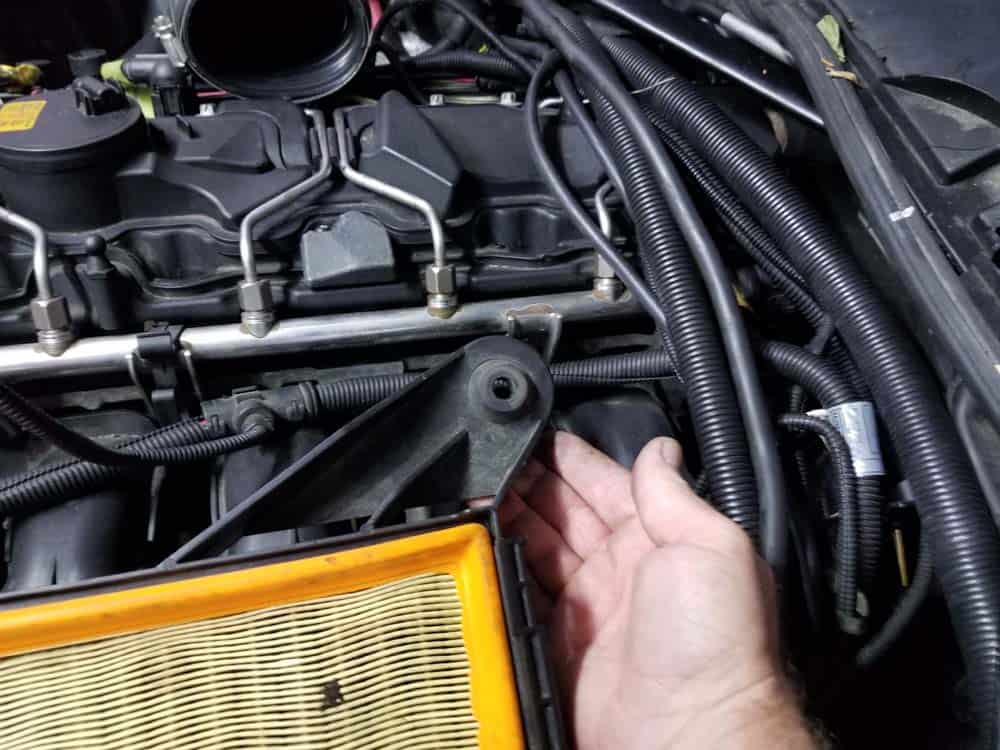
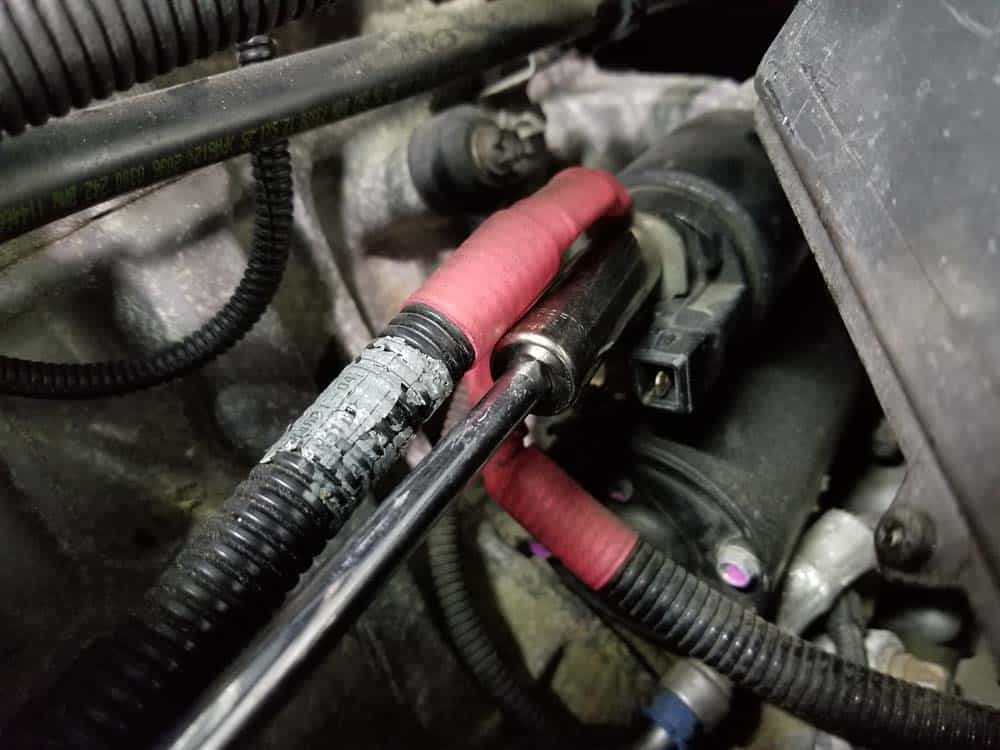
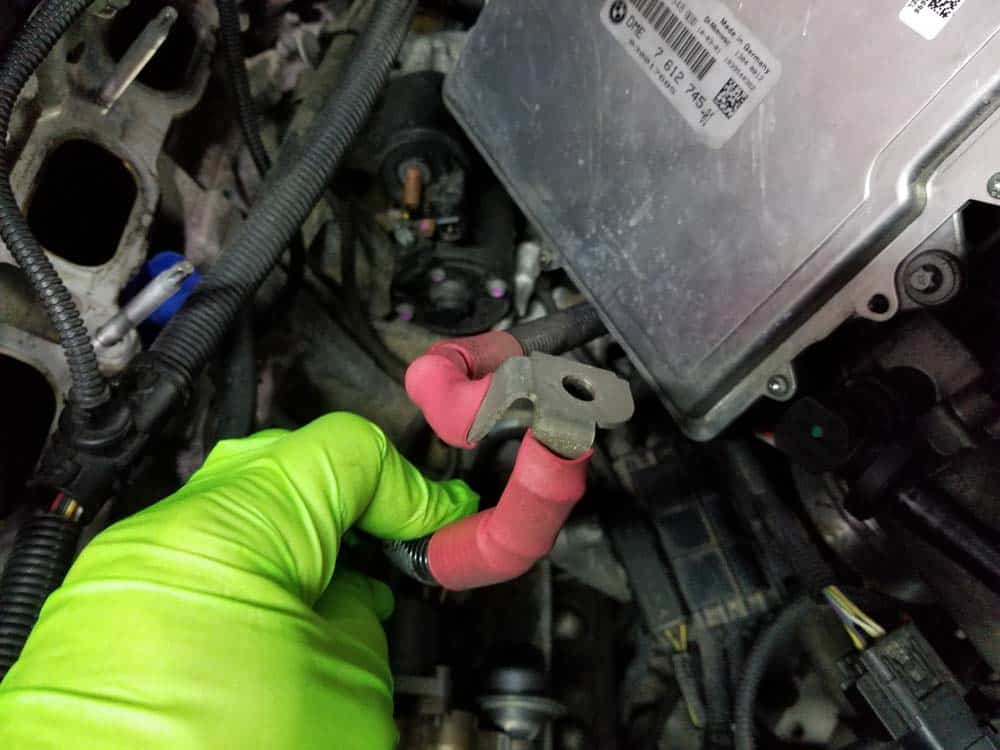
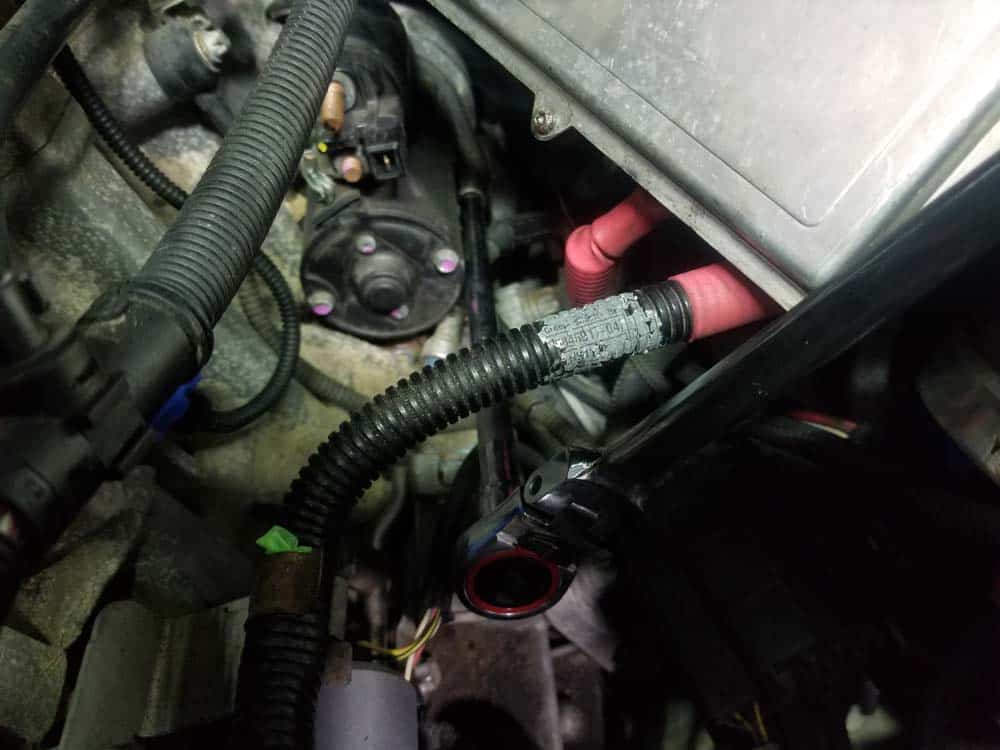
- Pull the main wiring harness free from its mounting bracket as shown below.
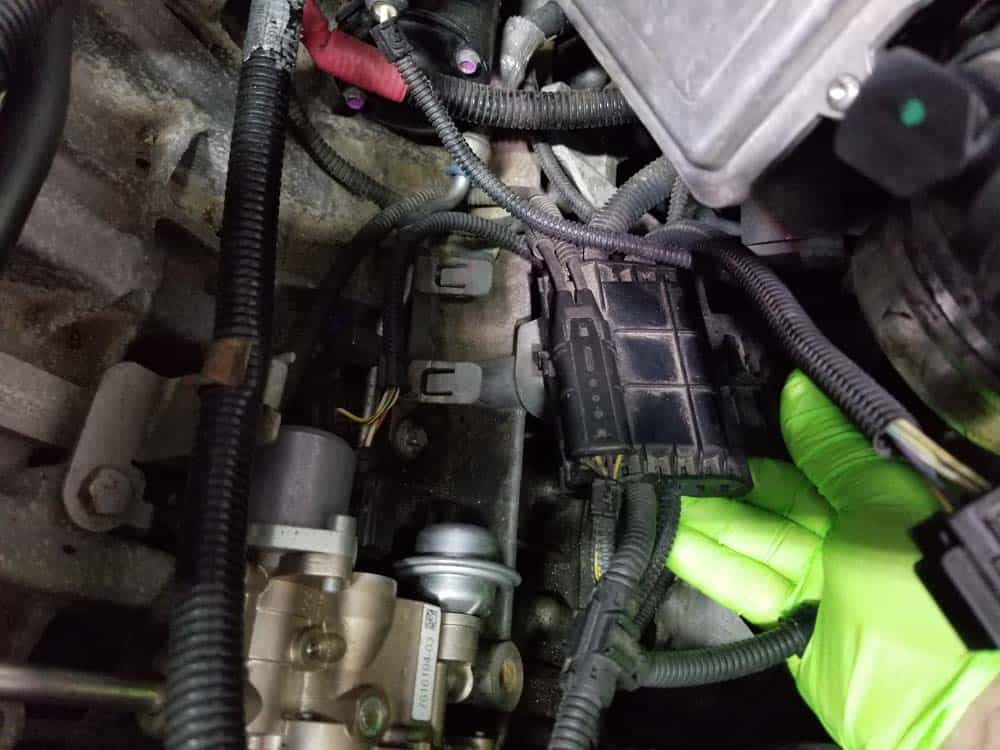
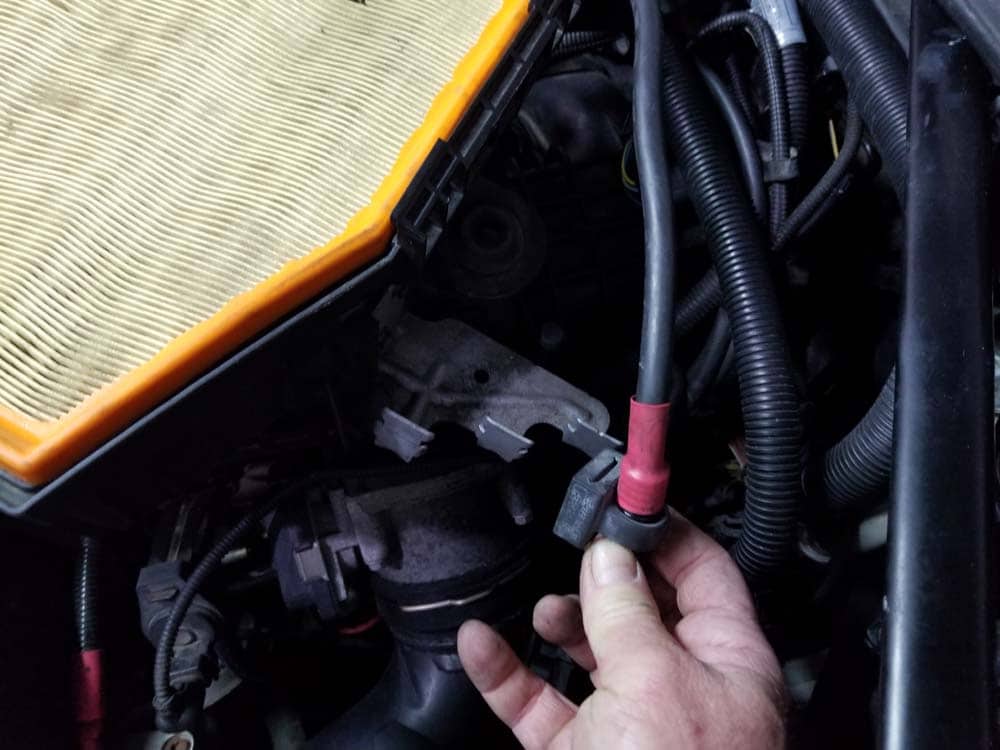
- Unplug the starter motor sensor by depressing its metal locking clip and pulling it free.
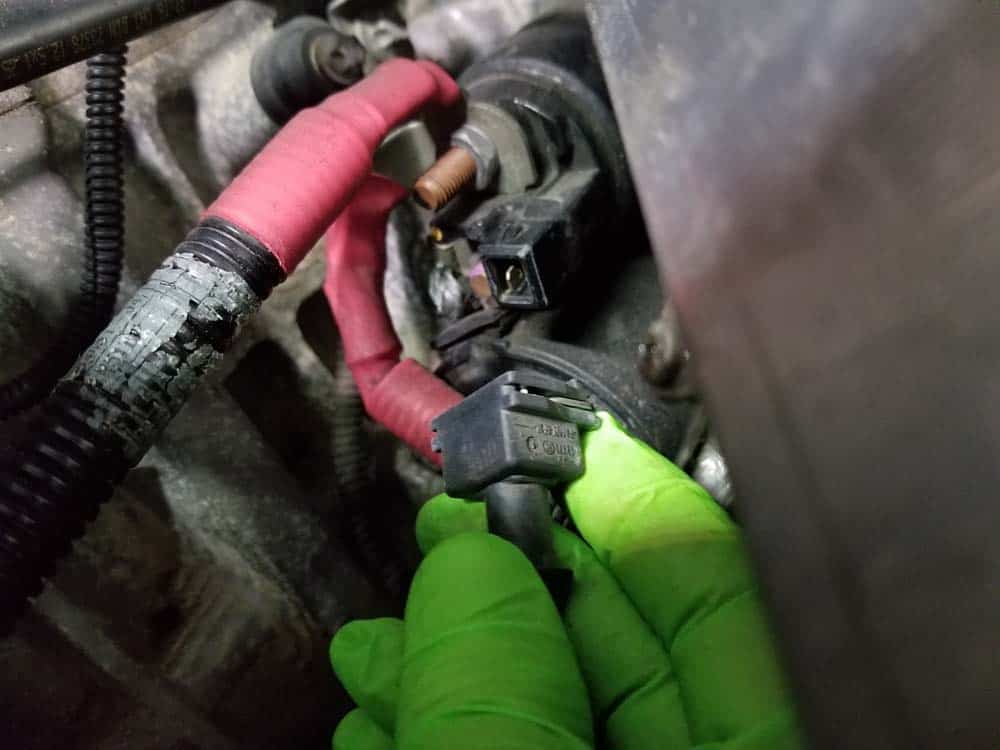
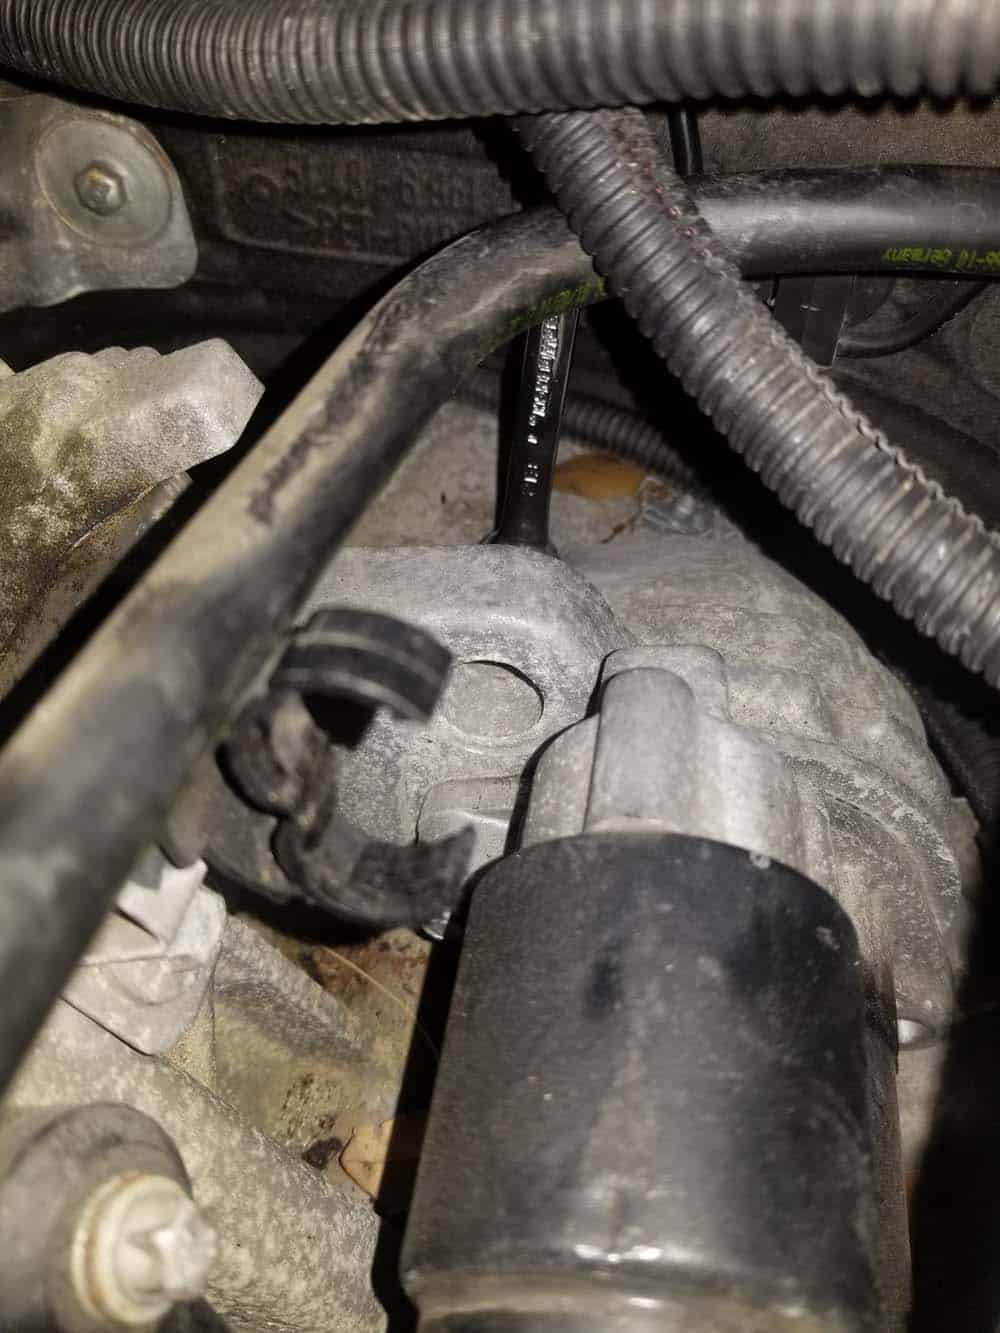
- Use a 12mm socket to remove the positive battery cable from the starter.
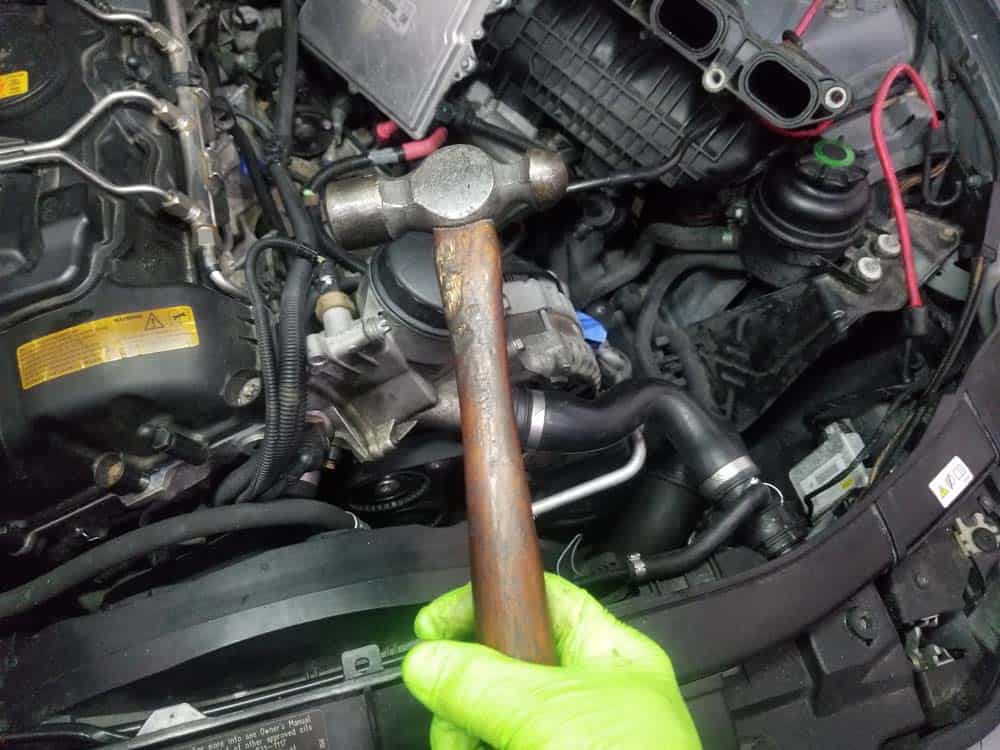
- We strongly recommend giving the starter about 20 small taps with a ball peen hammer. This will help break free the mounting bolts which are most likely seized up. We find the mounting bolts come out much easier after completing this step.
- Starting with the lower mounting bolt, use an E12 external torx socket to carefully remove it. It is important to remove the lower bolt first...this will alleviate some of the stress on the starter and make it the upper bolt easier to remove.
- We used an E12 ratcheting box end wrench to remove the upper mounting bolt. It is much easier than trying to get a socket on it.
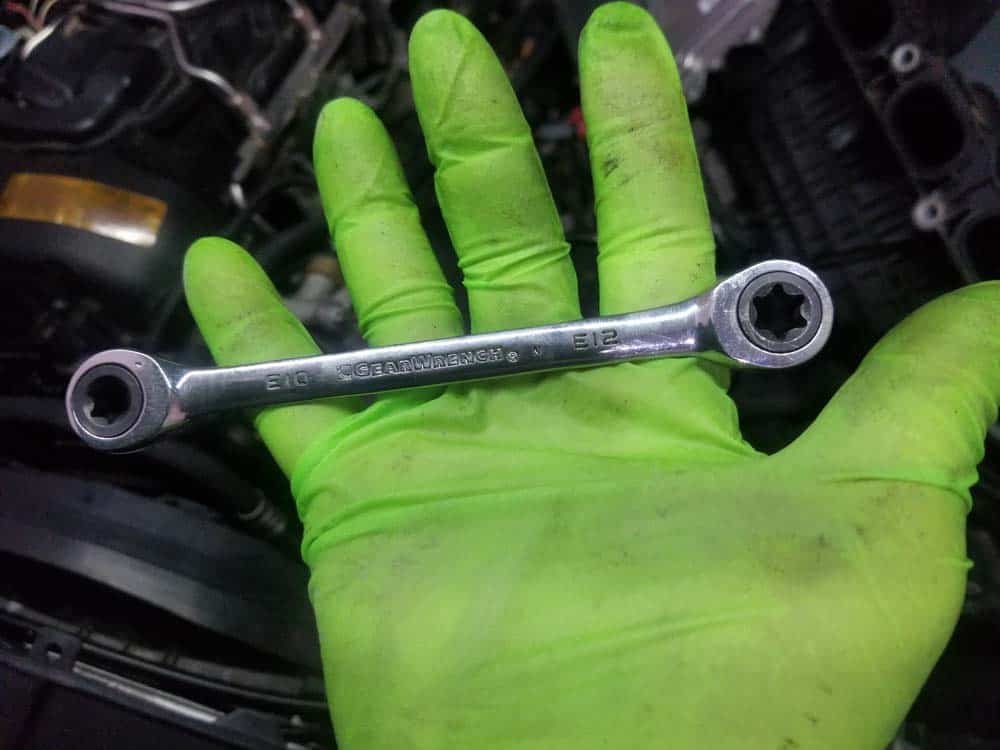
- Using an E12 ratcheting wrench, reach behind the starter and remove the upper mounting bolt. If the bolt is stuck, give the starter a few more taps with the hammer. USE PATIENCE...the bolt is long and it takes some time to get it out.

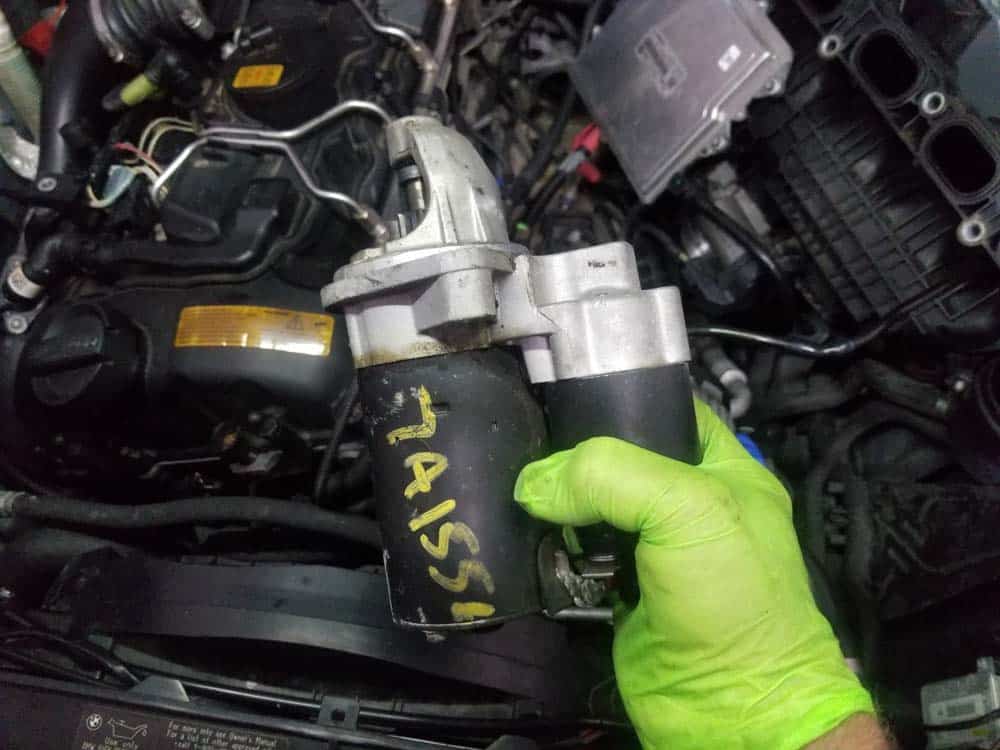
- Grasp the starter and carefully remove it from the vehicle.
Section 3 - Installing the New N55 Starter Motor
Installing the new starter motor is very straightforward with no special steps. We have provided a handy reassembly checklist below that has every installation step along with important torque values. Remember...you will not be able to get a torque wrench on the upper mounting bolt...there is simply not enough clearance. Use good judgment when tightening the upper mounting bolt being careful not to strip its head.BMW N55 Starter Installation Checklist
***The following steps were performed on a 2011 335i...other models may vary.- Install the new starter into the engine.
- Reinstall the mounting bolts and hand tighten them.
- Torque the lower starter bolt (turbo engines only) to 38 Nm (28 ft-lb).
- As discussed earlier in this article, you will not be able to get a torque wrench on the upper mounting bolt. We use the following process to "estimate" the torque needed: apply just enough pressure to the lower mounting bolt with the ratcheting E12 wrench until it barely moves. Apply the same amount of pressure on the upper mounting bolt with the E12 wrench as used to barely move the lower bolt. This will put it close enough to the required torque value.
- Reinstall the positive battery cable on the starter and torque its mounting nut to 13 Nm (10 ft-lb).
- Plug the sensor wire back into the starter.
- Attach the wiring harness back onto its mounting bracket on the engine block.
- Carefully position the intake manifold back on its mounting studs being careful not to pinch any of the gaskets. It is strongly recommended that new gaskets are installed whenever the intake manifold is removed. Please see our parts list above for more information.
- Reinstall the intake manifold mounting nuts and bolt and torque them to 15 Nm (11 ft-lb).
- Plug the fuel rail pressure sensor back in.
- Plug the vacuum tube back into the valve cover.
- Attach the vacuum line and plug the sensor wire back into the fuel vent valve.
- Plug the sensor back into the charge induction pipe. Reinstall the charge induction pipe back into the engine.
- Reinstall the intake muffler.
- Plug the mass air flow sensor back in.
- Reinstall the engine cover.
- Reinstall the intake duct.
- Install the lower microfilter housing.
- Install the right and left electrical connections.
- Install the upper microfilter housing.
- Snap the right and left covers back on each side of the microfilter housing.
- Reconnect the battery.
BMW N55 Starter Replacement Finished