
Affiliate link disclosure – The BMW Repair Guide uses affiliate links in their site. For more information on affiliate links, please click here.
Repair Summary
The following article gives detailed instructions on performing a fuel pressure test on a BMW E46 3 series car. Even though we have used a 2004 BMW 325ci to perform this test, this article can be applied to any BMW vehicle with minor modifications.
See all vehicles this article applies to
All BMW Models
If your BMW experiences a lack of power, hesitation during acceleration or poor fuel economy, you may be having an issue with your vehicle's fuel pressure. A BMW fuel pressure test is a standard diagnostic procedure that is both easy and inexpensive to perform.
As complex as our BMW fuel systems may sometimes seem, they actually operate using very straight forward principles. Fuel is pumped from the gas tank through a network of lines and hoses to the engine fuel rail, where it is fed into the cylinders via the fuel injectors. Much like a simple garden hose, the fuel injectors spray the pressurized fuel in a fine mist into the cylinders, ensuring a complete and efficient ignition process.
BMW has very strict specifications on the fuel pressure that is supplied to the fuel injectors. Any variations in fuel pressure can cause a variety of symptoms including lack of power, hesitation during acceleration and poor fuel economy. If your vehicle is experiencing any of these issues, do yourself a favor and perform a quick BMW fuel pressure test before running any other diagnostics.
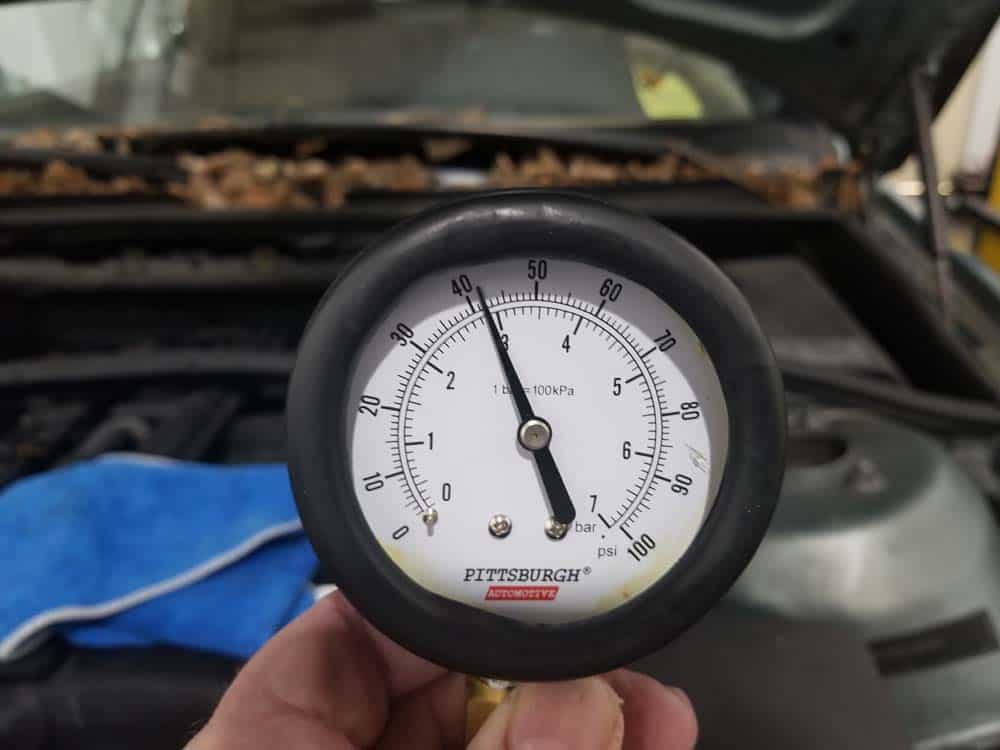
A BMW fuel pressure test requires attaching a simple fuel pressure gauge to the Schrader valve located on the engine's fuel rail. Starting the car (or turning the engine over several times if the vehicle is not running) will immediately pressurize the fuel rail and give you a reading on your gauge. Most BMW engines require a fuel pressure of 3.5 bars (51 psi), with a deviation of plus or minus .2 bars (3 psi) allowed. High-performance M engines require higher fuel pressures, usually, 5 bars (73 psi) with a deviation of plus or minus .2 bars (3 psi) allowed.


View the detailed parts diagram for this repair.
Includes detailed part diagrams, part numbers and links to purchase all of the required components needed to complete this repair.

Before starting this repair, you must have the following required parts.
All BMW Models
Keeping track of your fuel pressure is vital to your engine performance. If you have low fuel pressure, you will notice a decrease in engine performance and you might see an engine warning light on your dash. This Fuel Pressure Gauge will allow you to keep a close eye on your fuel pressure and is made of lightweight aluminum.
Section 1 - Installing and Using the BMW Fuel Pressure Test Gauge
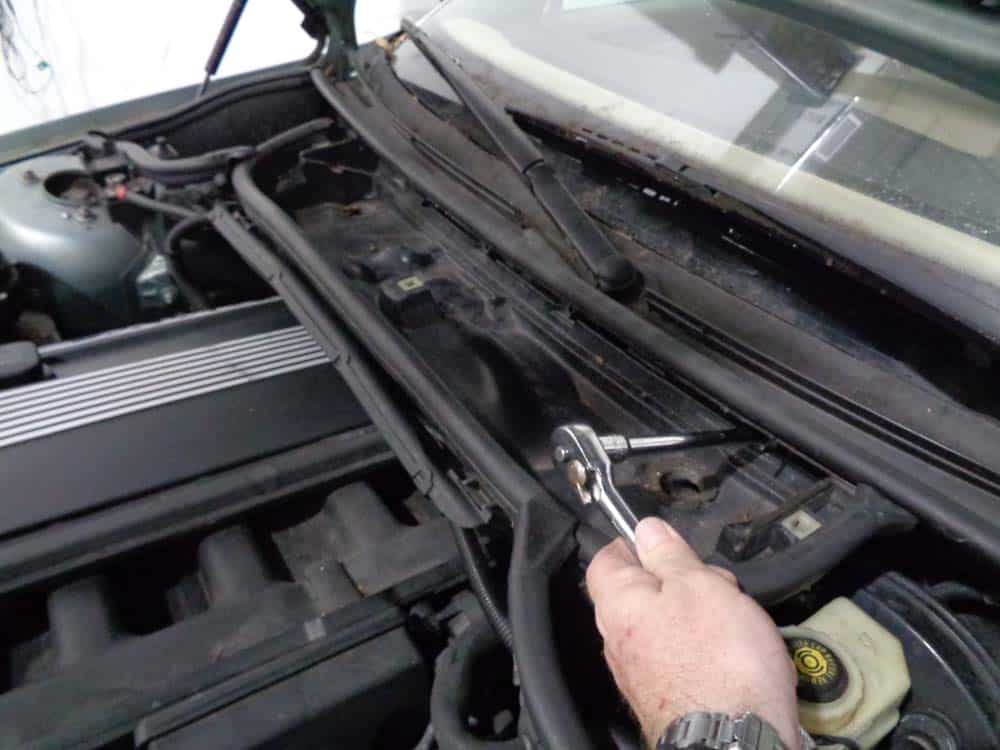
In the following repair steps, we use a 2003 BMW 325ci to demonstrate how to perform a simple fuel pressure test using the Schrader valve on the fuel rail. The test is the same on every model BMW...it just may be a slightly different procedure getting to the fuel rail than what we illustrate below. On just about every BMW produced, the fuel rail is located on the top of the engine below its protective cover. You will usually need to remove the cabin filter assembly to reach the engine cover mounting bolts.- Remove the cabin air filter housing at the back of the engine by detaching its cover and removing the four T27 torx screws that mount it to the firewall.

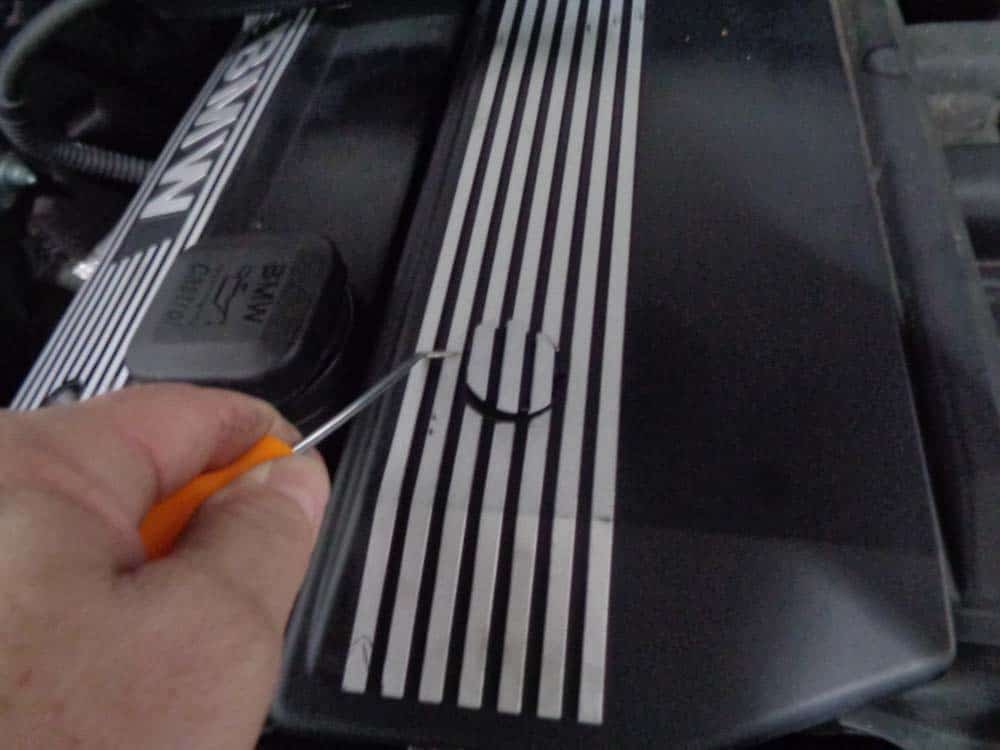
- Using a metal pick, remove the two small plastic tabs covering the mounting bolts on the right engine cover.
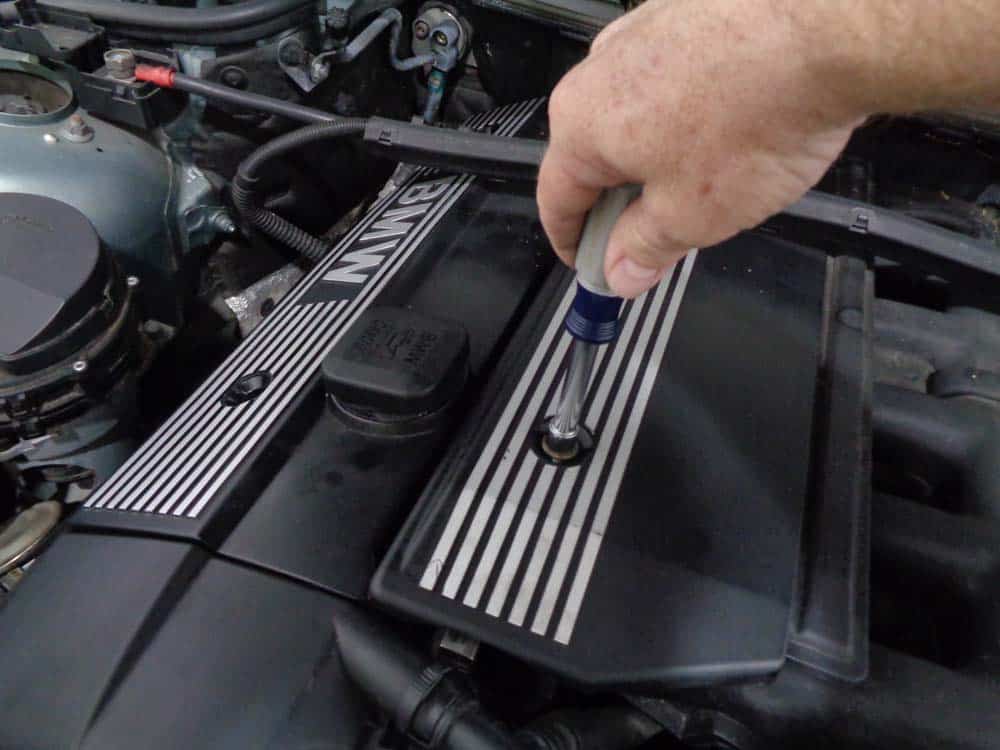
- Remove the two 10mm bolts securing the right engine cover exposing the engine's fuel rail and schrader valve.
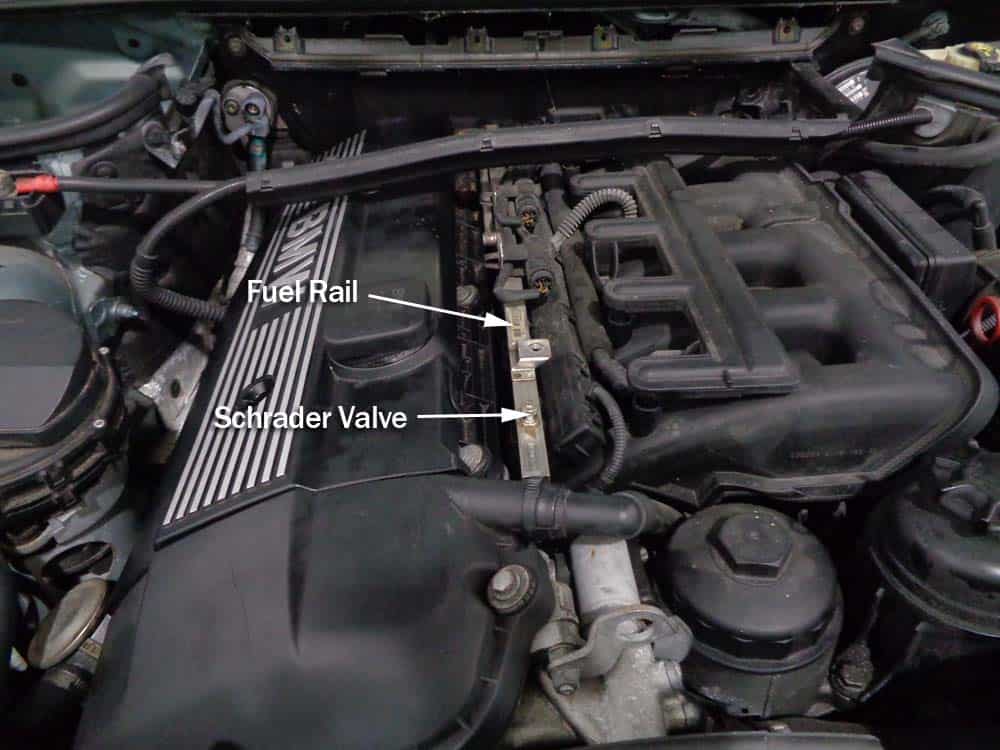
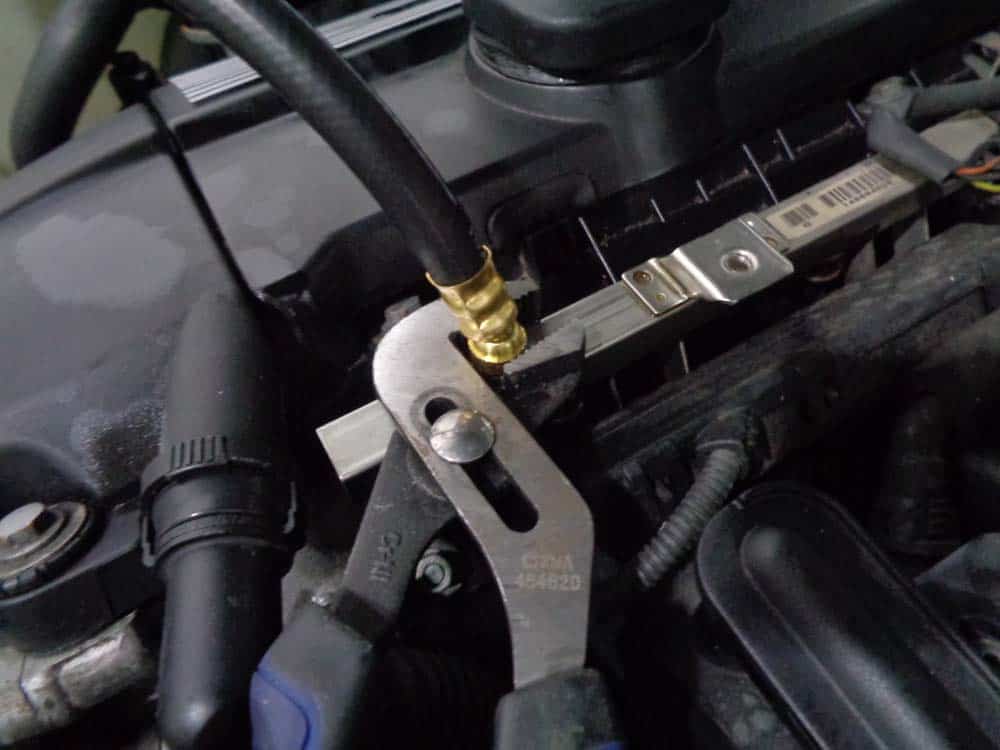
- Remove the cap off the schrader valve.
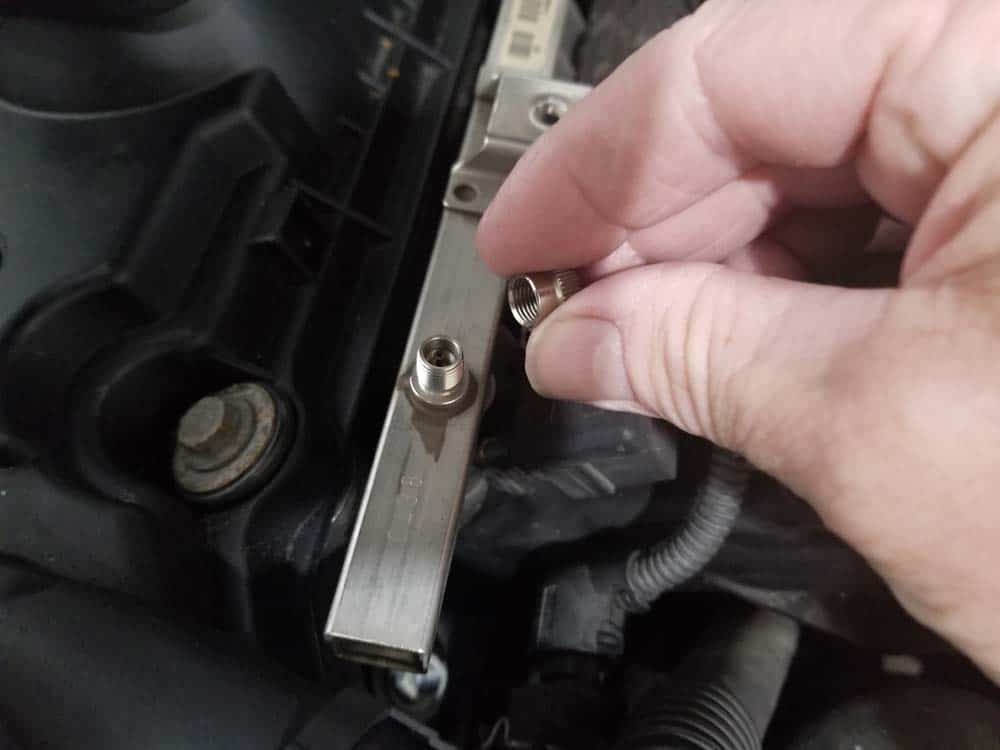
- The fuel pressure must be released from the fuel rail prior to attaching the fuel pressure gauge. The simplest way to do this is to use a small flat blade screwdriver to press down on the valve stem inside the schrader valve (the same way you would release air from the schrader valve on a bicycle tire). Use your other hand and wrap a large rag tightly around the valve when pressing down the stem to capture the fuel that will be sprayed out under pressure. No need to panic on this step...the fuel will only spray out for a couple seconds...just be sure to wipe up any that escapes your rag.
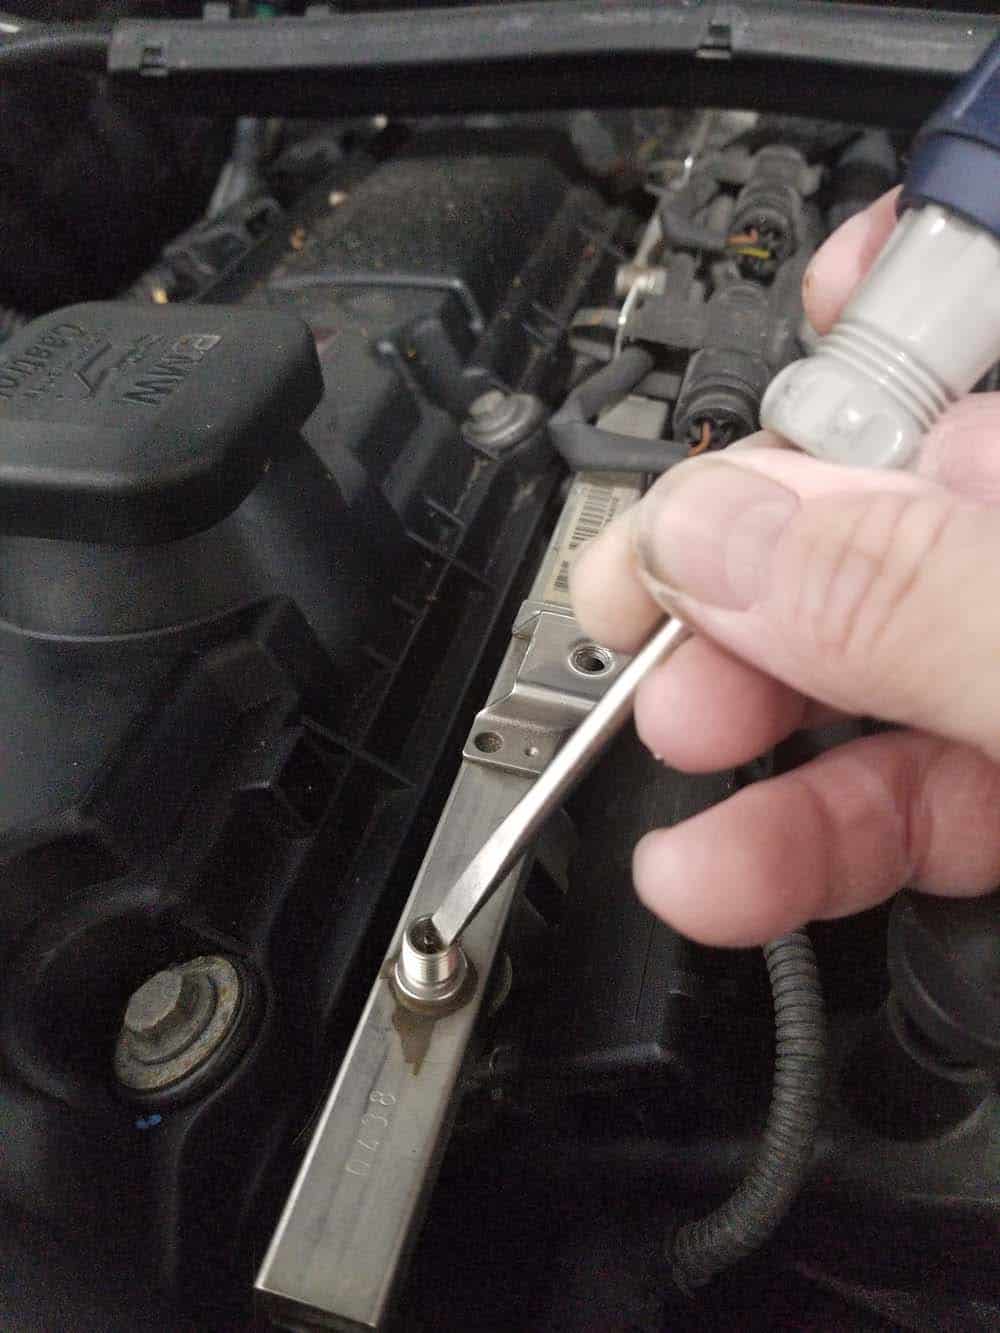
- Attach the fuel pressure gauge to the schrader valve. Use a pair of slip joint pliers to make sure the connection is tight.
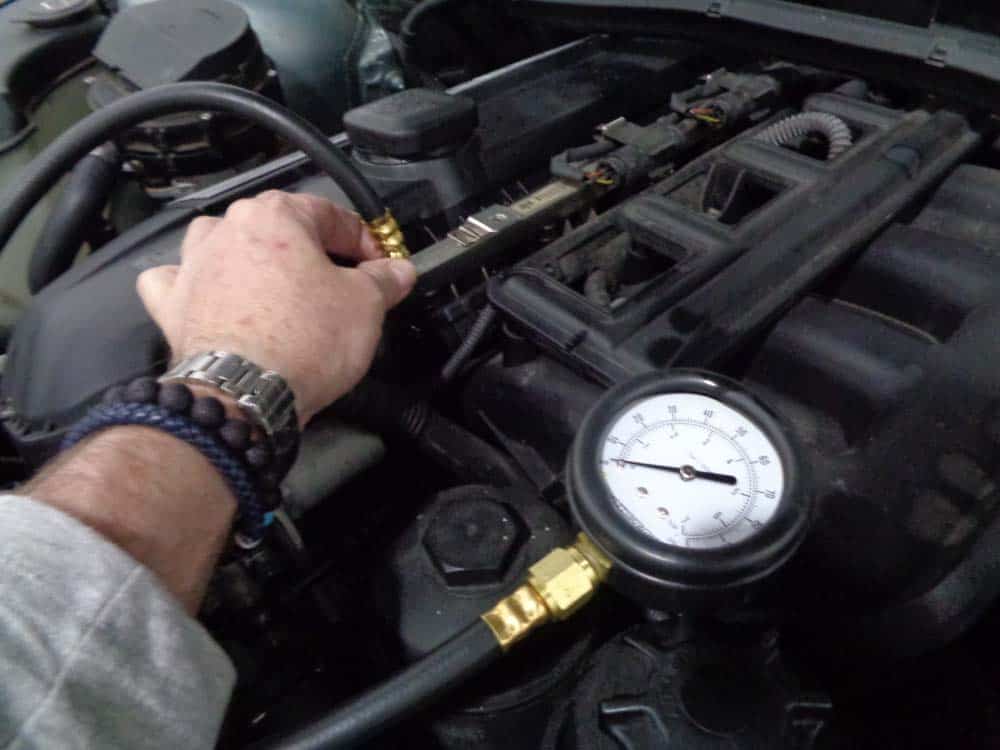
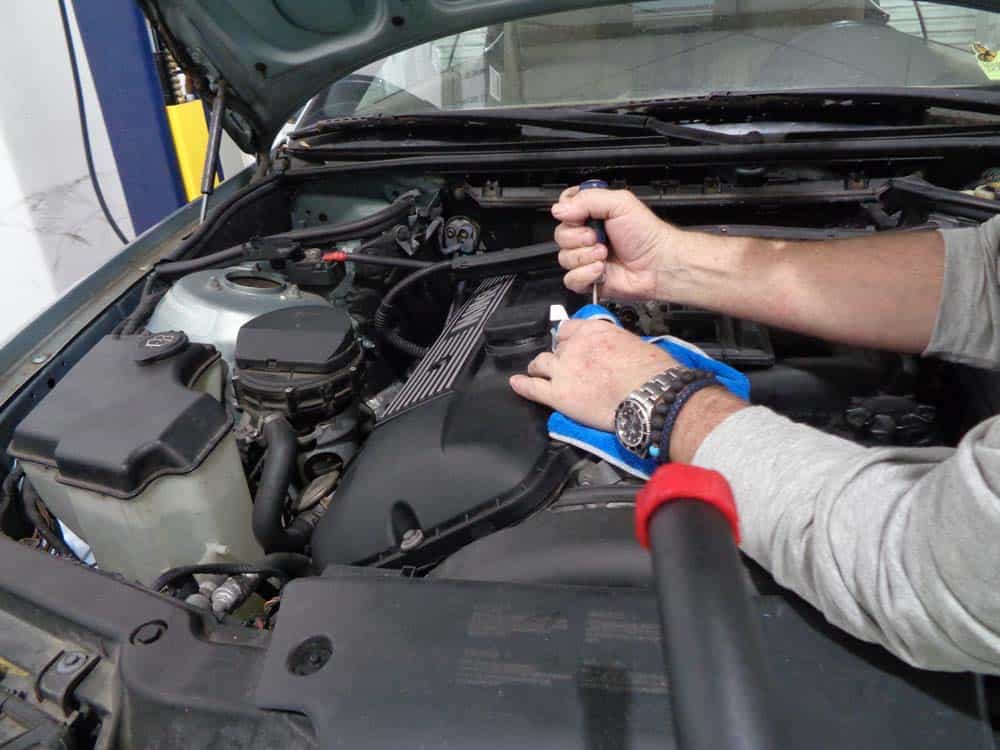
- Make sure the gauge is clear of any moving engine parts and start vehicle. Let idle for about 15 seconds, then turn vehicle off and check the reading on pressure gauge . As you can see, our reading for this 2003 325ci is a little low at 2.9 bars. We should be at 3.5 bars (plus or minus .2 bars). The most likely culprit is a dirty fuel filter/fuel pressure regulator.
- Release the pressure from the fuel rail by wrapping a towel around the slip joint pliers and slightly loosening connection.
- Remove fuel pressure gauge, replace schrader valve cap, and reassemble vehicle by following steps 1-3 in reverse.
BMW fuel pressure test completed