
High Pressure Fuel Pump Repair – BMW B46 Turbo 4 Cylinder Engine
Step 1 - Purchase Parts
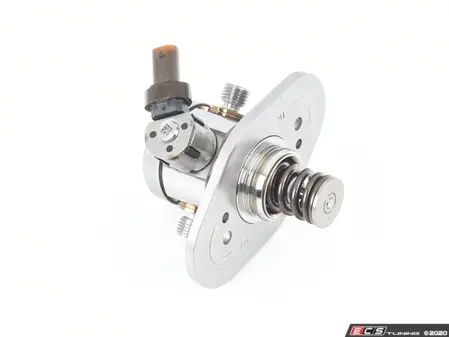
High Pressure Fuel Pump
Once again...we are going to preach about purchasing cheap fuel pumps from Amazon and Ebay with manufacturer names you cannot even pronounce. Yea...you get our point. Only...and we mean only install a Genuine BMW factory high pressure fuel pump in your vehicle. Cheap pumps will fail, and can seriously damage your engine. This is the same factory high pressure fuel pump that would be installed at the delaership.
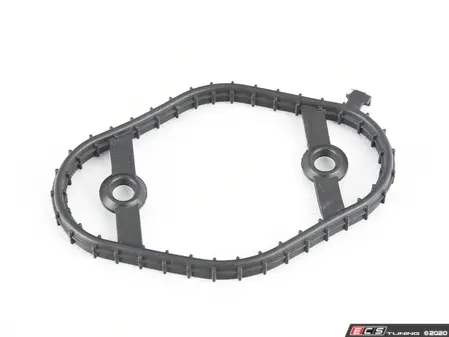
Fuel Pump Gasket
When installing a new high pressure fuel pump in your engine, always replace the profile gasket. This will ensure you are leak free after the repair.
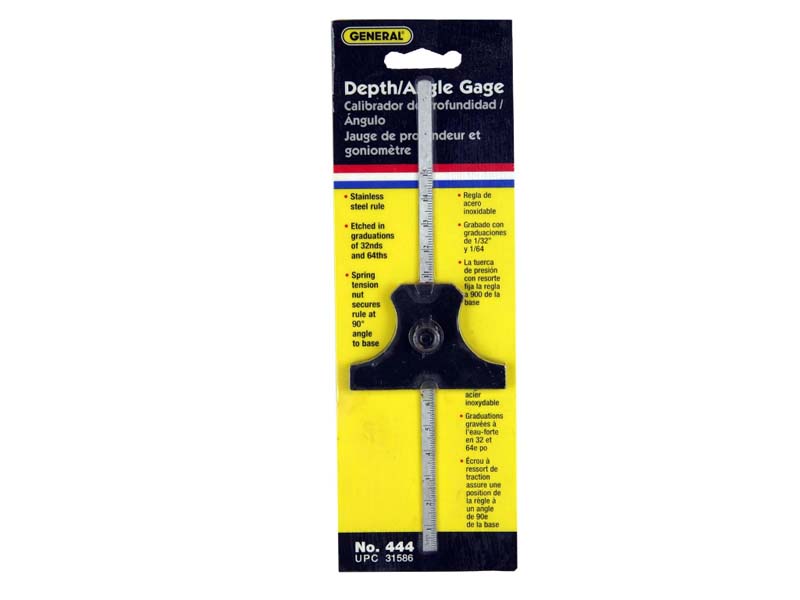
Depth Gauge
Excellent automotive depth gauge for measuring smaller holes and slots. Hardened steel base.
Step 2 - Repair Procedure
Disconnect battery.
- You must disconnect the battery before starting this repair. Not disconnecting the battery may cause catastrophic damage to the engine.
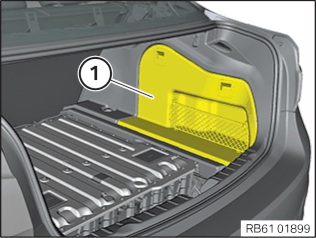
- Remove right trim panel from side of trunk (1).
Tape a rag around the intelligent battery sensor in the next step to protect it from being damaged. A damaged IBS will cause error codes and electrical malfunctions!
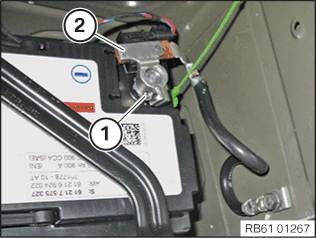
- Disconnect the negative (1) terminal.
- WARNING. Take extreme care not to damage the intelligent battery sensor (2) attached to the negative cable.

You must remove the ignition coils before continuing with this repair!
Please see our article Ignition Coil Replacement - B46 Turbo 4-Cylinder Engine for instructions on removing the ignition coils.

- Locate the fuel hose/fuel pump feed line quick disconnect (1).
- Remove the plastic safety clip.
- Push the release collar (2) in direction of arrow then pull the lines apart. Have a rag ready to catch any fuel that spills out.
- Loosen the mounting screw (3).
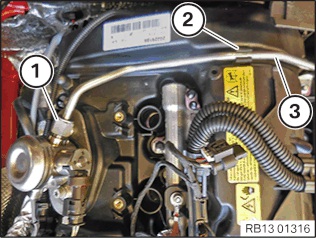
- Loosen the union nut that attached the fuel delivery line (2) to the high pressure fuel pump (1).
- Remove the fuel delivery line from the engine.
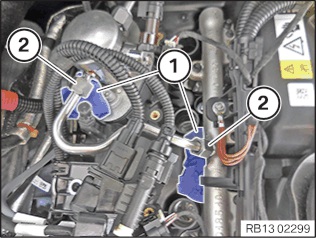
- Place rags under the high pressure fuel line to catch any fuel that escapes in the next step.
- Loosen union nuts (2) from fuel pump and fuel rail and allow fuel to drain out.
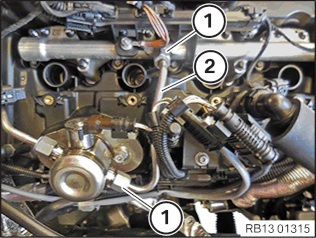
- Completely release the union nuts and remove the high pressure fuel line from the engine compartment.

- Unplug the high pressure fuel pump (1).
- Slowly remove torx mounting bolts (arrows), carefully alternating turns between the two.
- Grasp the fuel pump and remove from engine.
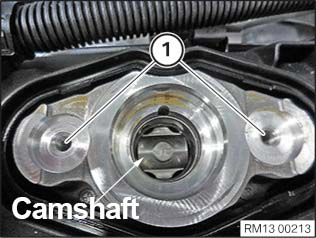
- It is important that the high pressure fuel pump camshaft is at its lowest point before installing a new fuel pump. The easiest way to achieve this is with a simple depth gauge (see tool list above).
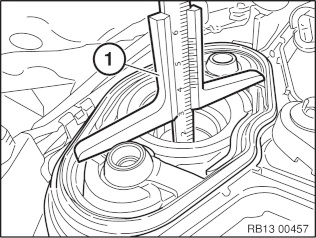
- Install the depth gauge into the high pressure pump cavity as shown in the image. The ruler must be positioned on top of the camshaft at the bottom of the cavity.
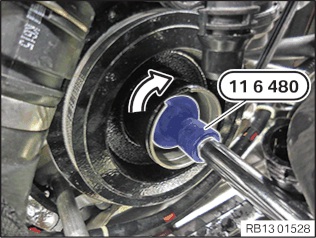
- Remove the cap from the vibration damper (harmonic balancer) on the lower front of the engine (see part diagram link below). Using a socket and long breaker bar, slowly turn the engine CLOCKWISE until the high pressure pump camshaft has reached its lowest position.
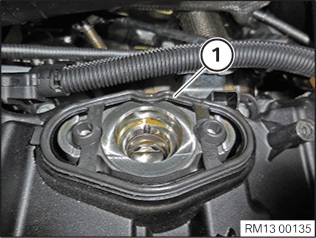
- Install a new fuel pump gasket.

- Install the new fuel pump.
- Tighten the mounting bolts (arrows) in 90 degree increments until snug. Torque bolts to 12 Nm (8.8 ft-lb).

- High pressure fuel line union nuts from pump to fuel rail: 33 Nm (24 ft-lb)
- Fuel delivery line union nut from pump to quick disconnect: 31 Nm (22.8 ft-lb)

