VANOS Valve Actuator Replacement – BMW B46/B48 Turbo 4 Cyl. Engine
Step 1 - Purchase Parts
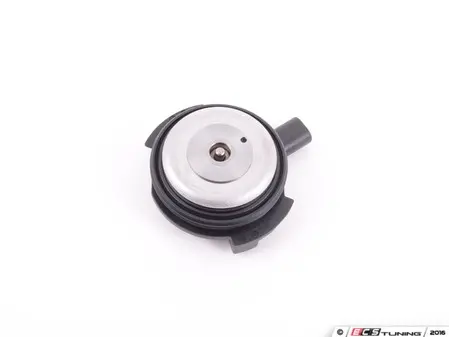
VANOS Valve Actuator
Like all mechanical engine parts in your BMW, the VANOS valve actuators have a definitive life span and will eventually fail leaving you with a rough running engine and a big frown on your face. The good news is they are relatively inexpensive. These Genuine BMW actuators are the same factory ones that would be installed at the BMW dealership.
Wiper Arm Puller Tool
Those pesky windshield wiper arms...they seem to always be in the way of some important engine repair on your BMW. This inexpensive tool quickly pulls the wiper arm safely of its motor without breaking it. NEVER try and pry a wiper arm off with a screwdriver prybar...you could seriously damage both the arm and the motor.

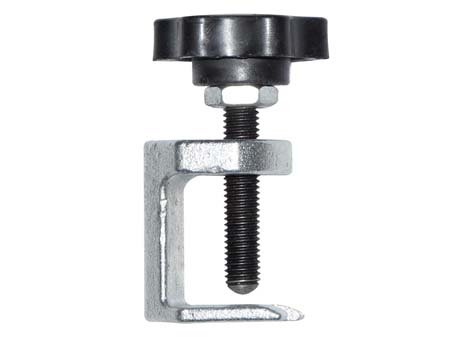
Pin Wrench
If you are removing and installing VANOS valve actuators in BMW engines, you must have this tool. The BMW pin wrench easily turns the actuator making removal and installation a snap.
Step 2 - Repair Procedure

- Remove the acoustic engine cover by pulling it up until it releases from its rubber grommets.

- Remove the right cover (2) from the engine compartment by removing the fasteners (1) and unlocking the latch mechanism (3).
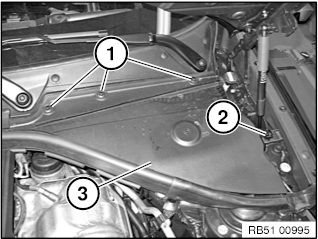
- Remove the left cover (3) from the engine compartment by removing the fasteners (1) and unlocking the latch mechanism (2).
- Remove the protective cap from the left and right wiper arms and remove the nut below it.
- Using a wiper arm puller tool, remove the wiper arms from the vehicle.
- If you need a wiper arm removal tool, please see our parts section above.

- Remove the rivets (1) from top of cowl panel. Loosen the snap fastners (2) by turning counterclockwise 90 degrees. Grasp the cowl cover (3) and remove from vehicle.
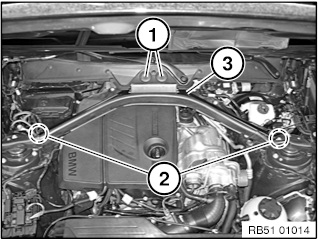
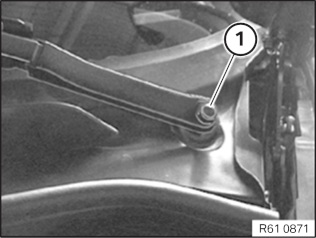
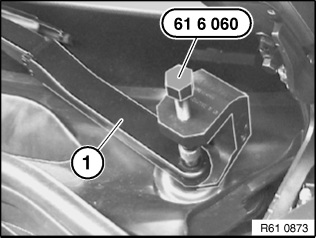
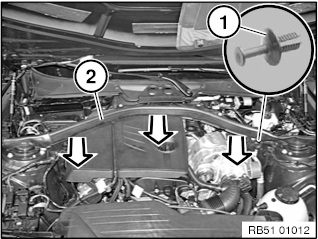
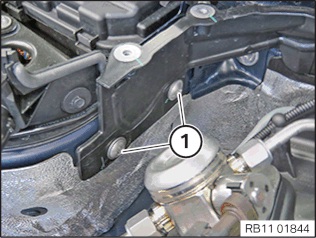
Remove the strut brace by first unsnapping the top bolt cover (1). Remove the two anchor bolts.
Next, remove the two bolts anchoring the strut to the body of the vehicle (2).
Remove the strut brace from the engine compartment.
- Detach the positive battery cable from the sealing gasket (2).
- Remove the anchor rivet (1).
- Remove the sealing gasket in the direction shown in image (2).
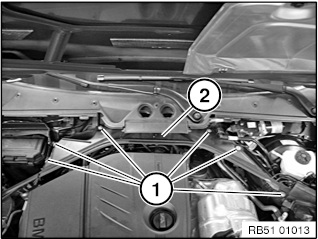
- Remove the upper firewall cover (2) by removing its screws (1).
- Remove the two torx bolts anchoring the right engine partition to the firewall.

- Remove the three nuts anchoring the left and right engine partitions to the firewall.
- Grasp the right engine partition and remove it from the engine compartment.
The VANOS valve actuators are located on the rear of the engine. The BMW Repair Guide strongly recommends using a BMW pin wrench (part #83302360895) to remove and install the actuators. If you need this tool, please see our parts block above.
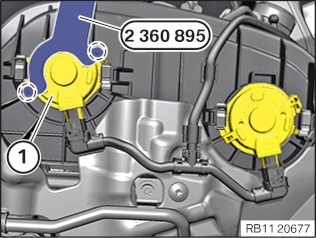
- Locate the two VANOS valve actuators on the rear of the engine.
- Starting with the intake actuator (1), postion the pin wrench tool on the front of the actuator as shown in the image.
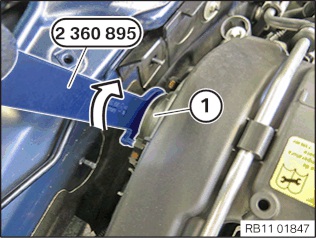
- Turn the intake actuator approximately 45 degrees counter-clockwise until it releases from the cylinder head cover.

- Next, position the pin wrench on the exhaust actuator (1).
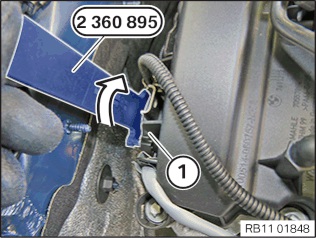
- Turn the exhaust actuator approximately 45 degrees counter-clockwise until it release from the cylinder head.
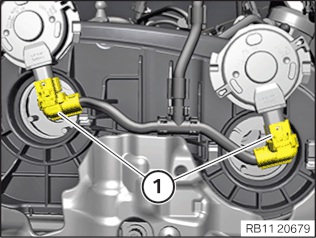
- Unplug both actuators (1) and remove from the cylinder head cover.

Follow the above steps in reverse to install the actuators and reassemble the vehicle.
- Strut brace mounting bolts torque to 56Nm (41 ft-lb).