
Affiliate link disclosure – The BMW Repair Guide uses affiliate links in their site. For more information on affiliate links, please click here.
Repair Summary
This article gives detailed instructions on replacing the convertible latch motor gear in a BMW E46 vehicle. Even though we used a 2004 325ci to perform this repair, this article can be applied to any BMW E46 convertible with minor modifications to the repair steps.
See all vehicles this article applies to
E46 3 Series 325ti
E46 3 Series 318td
E46 3 Series 320td
E46 3 Series 318ti
E46 3 Series 330xi
E46 3 Series 330i
E46 3 Series 330xd
E46 3 Series 330d
E46 3 Series 316ti
E46 3 Series 328i
E46 3 Series 325xi
E46 3 Series 325i
E46 3 Series 320i
E46 3 Series 323i
E46 3 Series 320d
E46 3 Series 318i
E46 3 Series 318d
E46 3 Series 316i
E46 3 Series M3 CSL
E46 3 Series M3
E46 3 Series 330Ci
E46 3 Series 330Cd
E46 3 Series 325Ci
E46 3 Series 323Ci
E46 3 Series 320Ci
E46 3 Series 320Cd
E46 3 Series 318Ci
E46 3 Series 328Ci
E46 3 Series 316Ci
E46 3 Series 323i 2.4
E46 3 Series 316i 1.9
E46 3 Series 316i 1.6
A BMW E46 convertible latch gear replacement may be necessary if your top will not not separate from the windshield when you are trying to retract it.
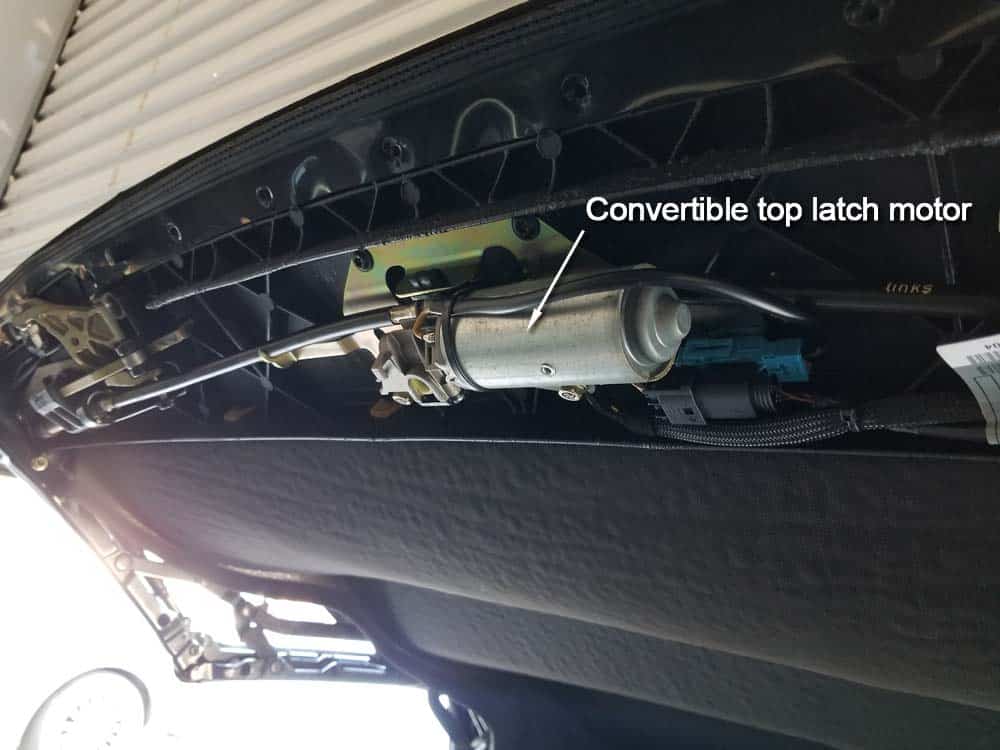
A common issue in higher mileage BMW E46 convertibles is a broken or stripped latch gear in the convertible top latch motor. The convertible latch motor gear, located in the roof at the center of the windshield, is activated by the convertible top control buttons in the center console. Its sole function is to release or engage the convertible top's windshield latches when the roof is raised or lowered.
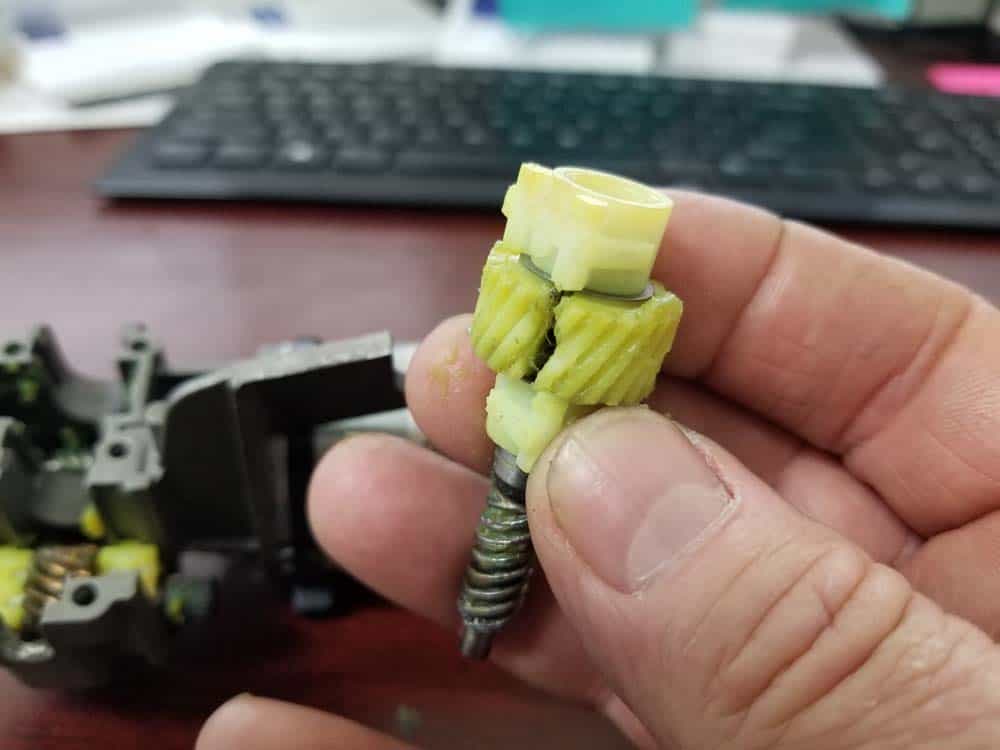
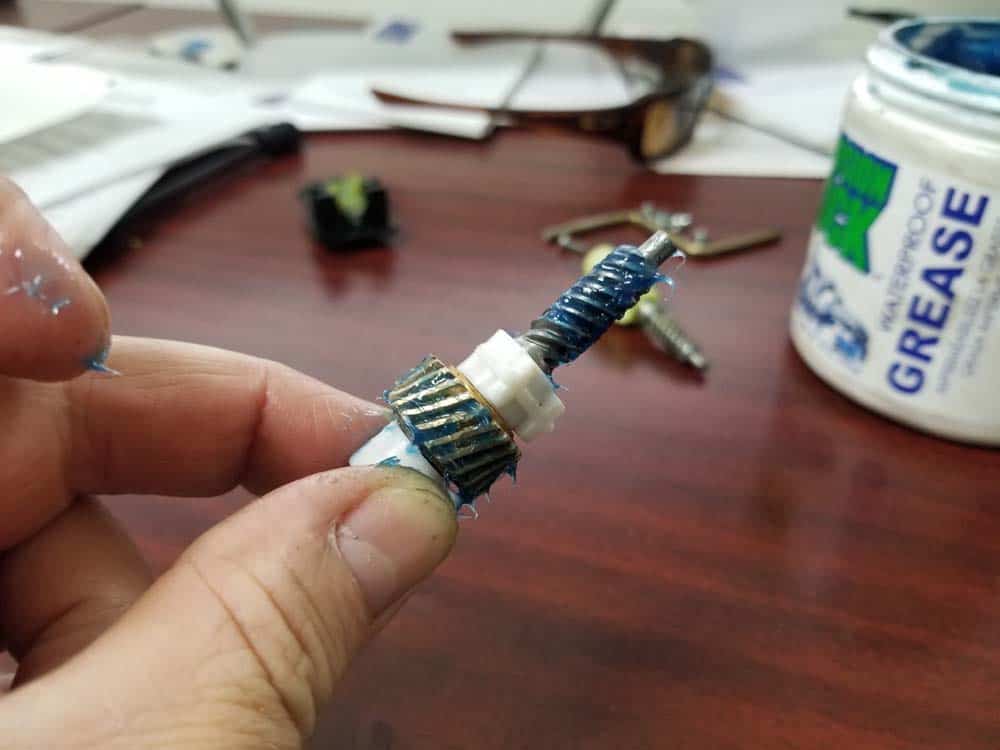
The original latch gear is made out of plastic, which fails after years of use. The following image shows the latch gear we removed from a 2004 325ci for this article...you can see the plastic has completely split rendering the motor inoperable.
The classic symptom of a failed BMW E46 convertible top latch gear is a whining noise coming from the latch motor without the top releasing from the windshield. This sound is also usually accompanied by a red light on the convertible top control buttons.
The BMW E46 convertible top latch can be easily replaced without having to install an expensive new motor. The motor is simply removed from the convertible top and the gear replaced. The BMW Repair Guide strongly recommends replacing your original plastic convertible top latch gear with an updated metal version. We sell them in our parts section below for your convenience.
Please note that if the BMW E46 convertible top latch gear fails with the top raised, the roof will not be able to be lowered...even manually. Trying to use a hex wrench to manually unlock the top from the windshield will only spin the damaged gear and will not release the top from the windshield. The only way to release the convertible top from the windshield with a failed gear is to follow our instructions below in Section 1 of this repair article.


Before starting this repair, you must have the following required parts.
All BMW E46 and E64 convertibles
The original convertible latch gear in your BMW is made of plastic and is prone to breaking after extended use. This replacement convertible top gear is made of high-strength steel and will withstand years of opening and closing your convertible top. Fits all BMW E46 3 series and E64 6 series convertibles.
All BMW E36, E46 and E64 convertibles
This is the same factory convertible latch motor that would be installed at the BMW dealership.
Section 1 - Removing the Convertible Latch Motor
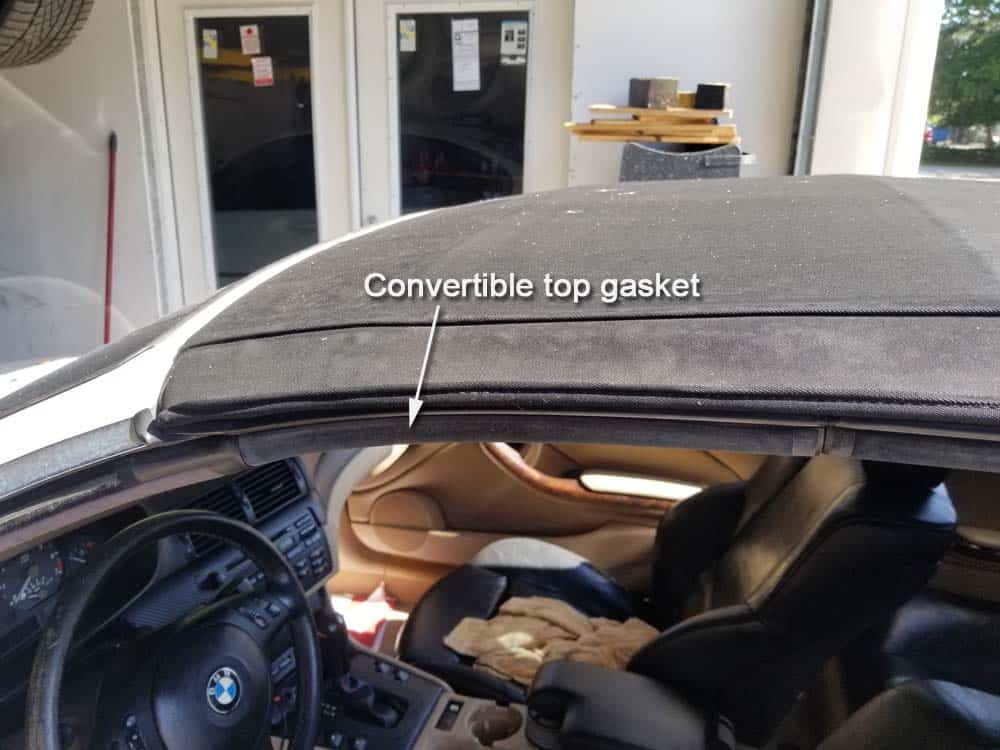
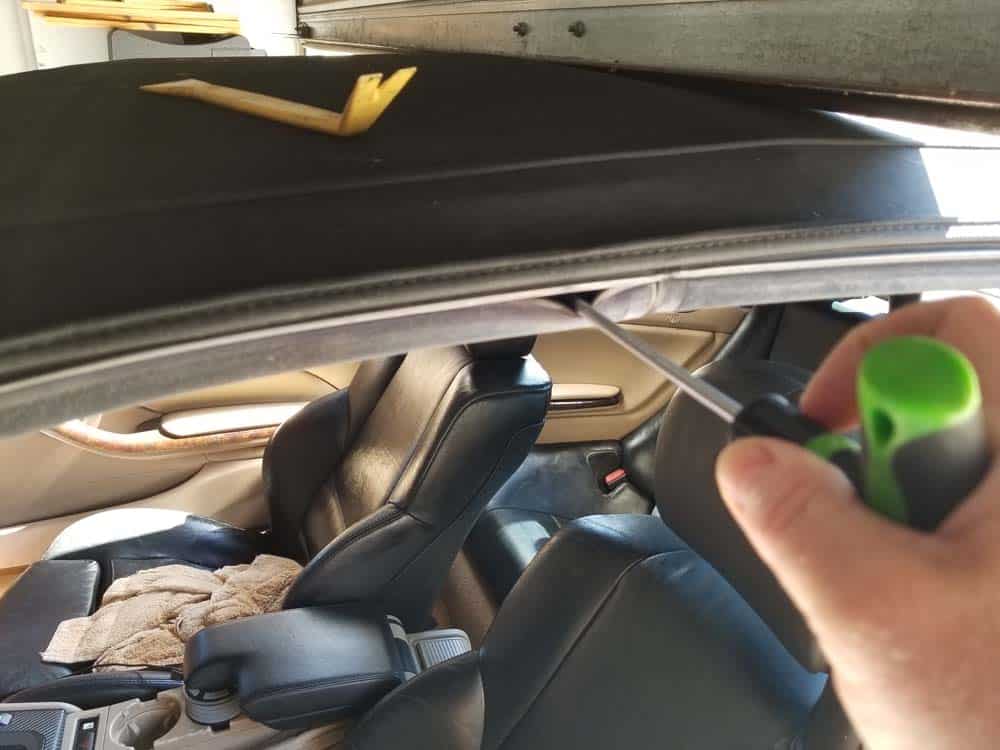
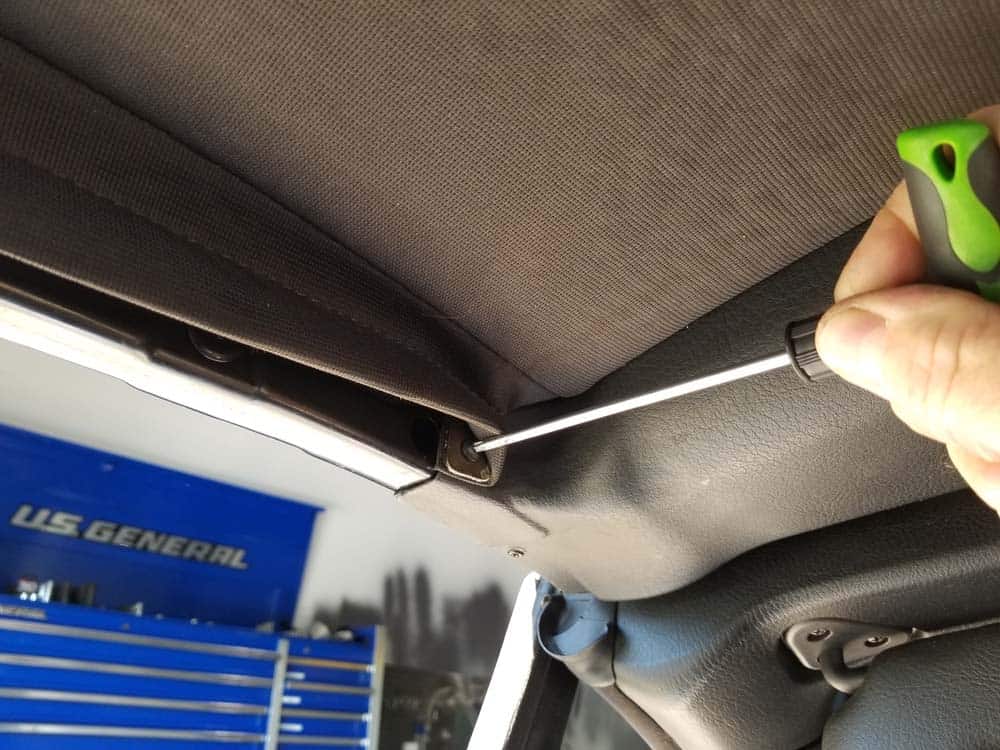
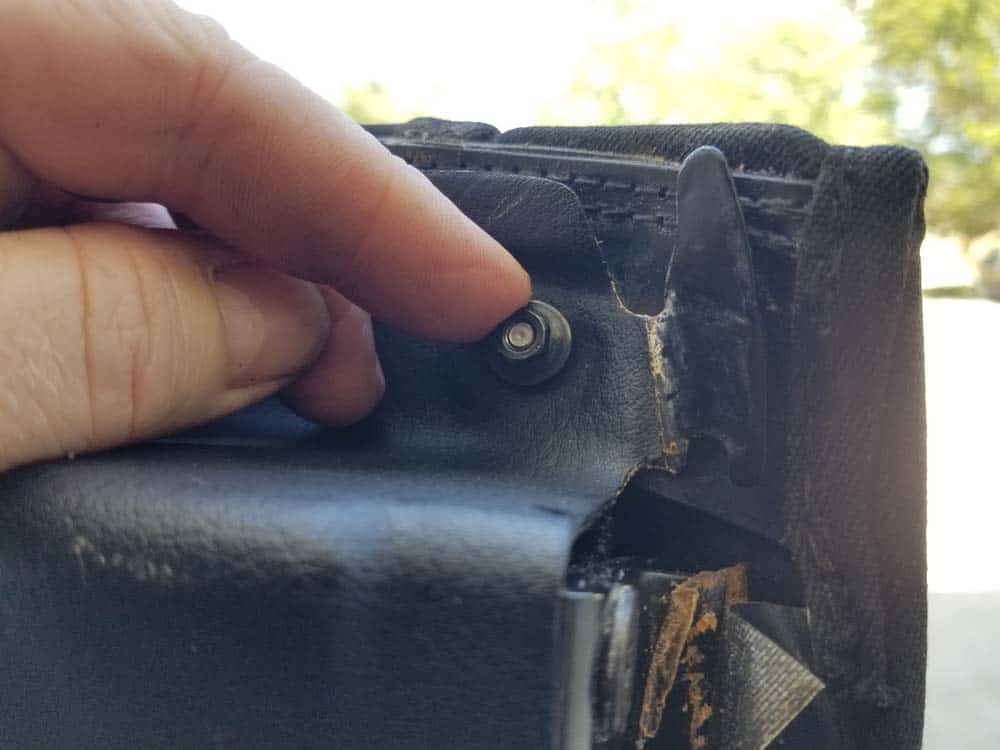
Just about every time a BMW E46 convertible latch gear fails, it is with the top up. This section will show you how to unlock the top from the windshield without using the latch gear so the motor can be accessed and removed.- In order to manually unlatch the top and remove the latch motor, the convertible top gasket must be removed. Be very careful when removing the convertible top gasket...it is an extremely expensive part to replace. Even though the sides are removed first, the gasket is removed in one piece in step 18 below.
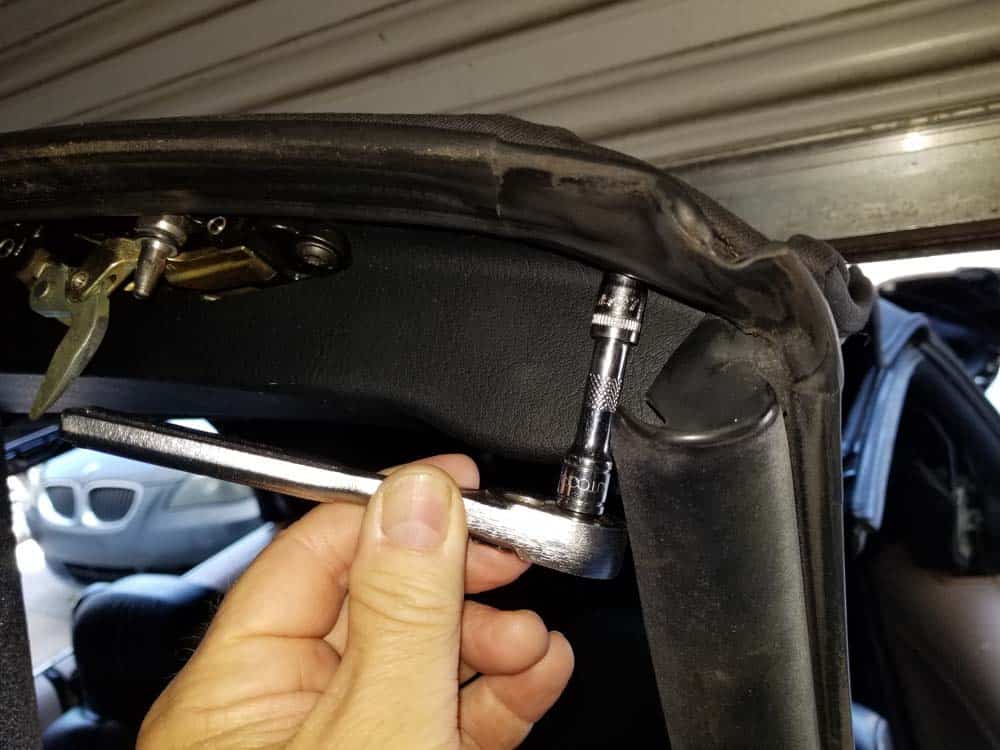
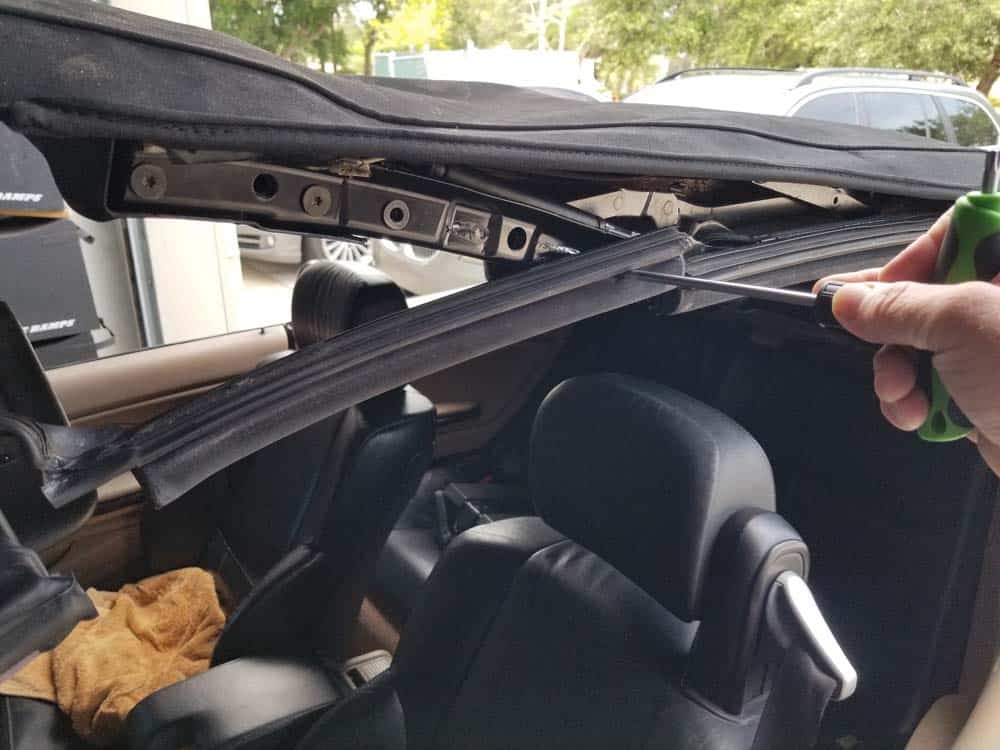
- Starting on the left side, use a plastic trim tool to carefully pry open the convertible top gasket so the rear T30 torx mounting bolt can be accessed.
- Use a T30 torx bit or T-handle to remove the rear bolt.
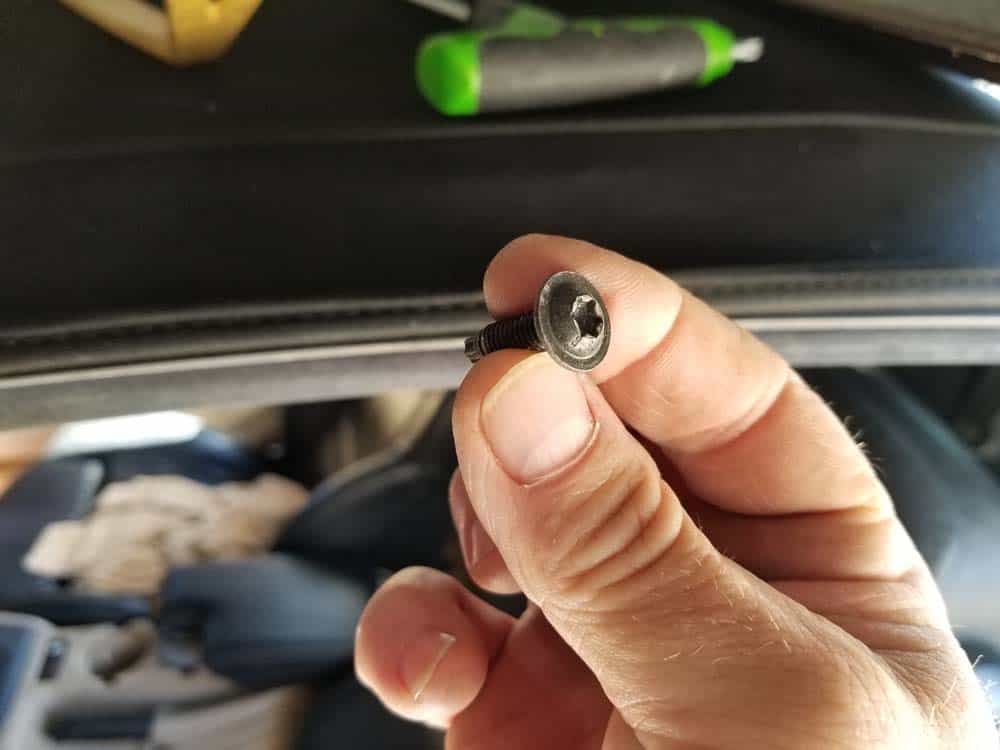
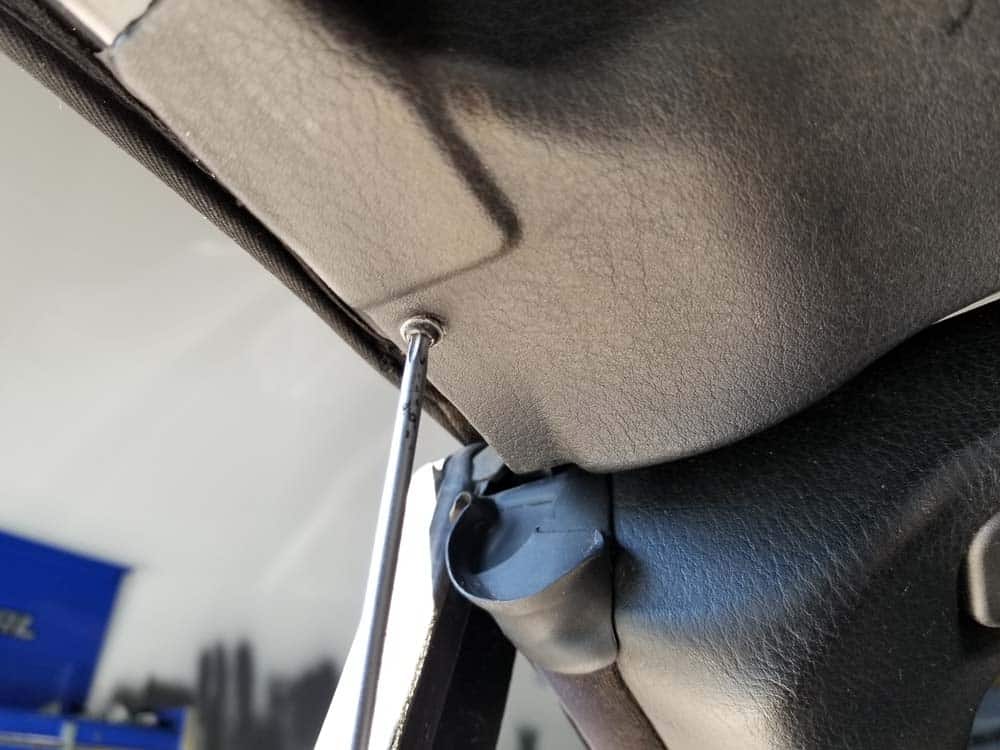
- Repeat the above two steps to remove the front T30 mounting bolt.
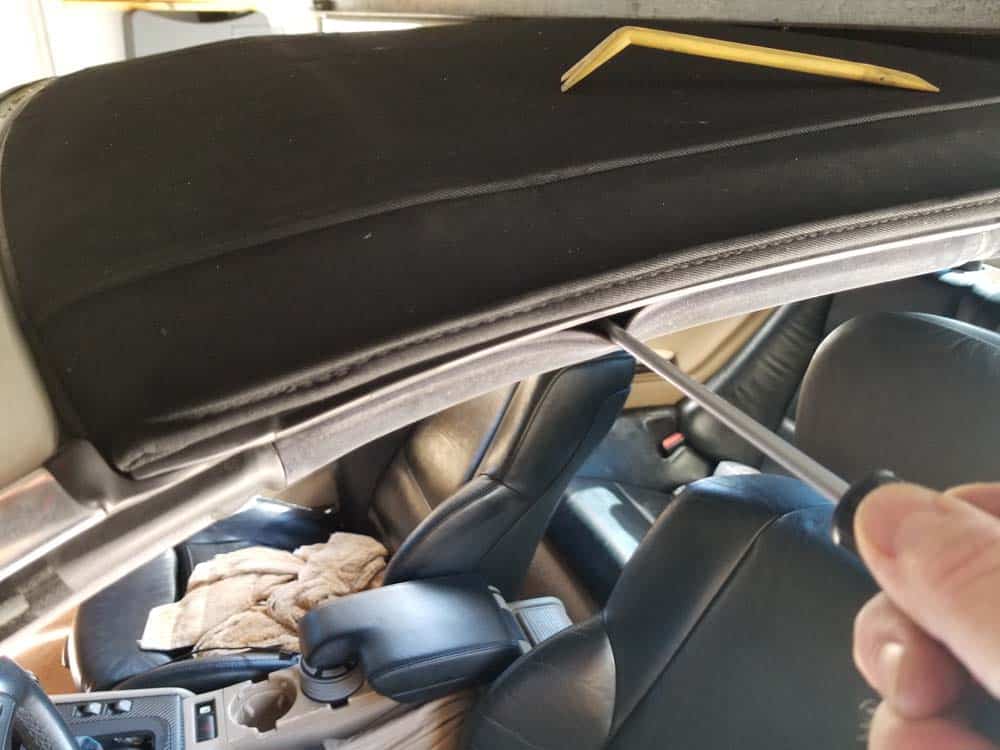
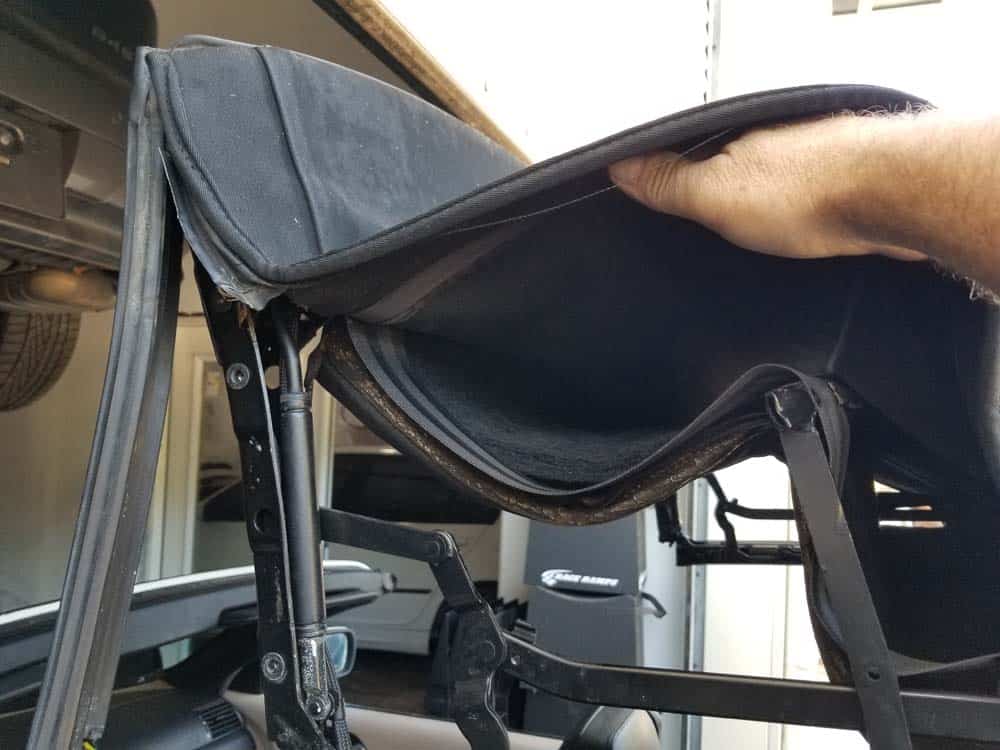
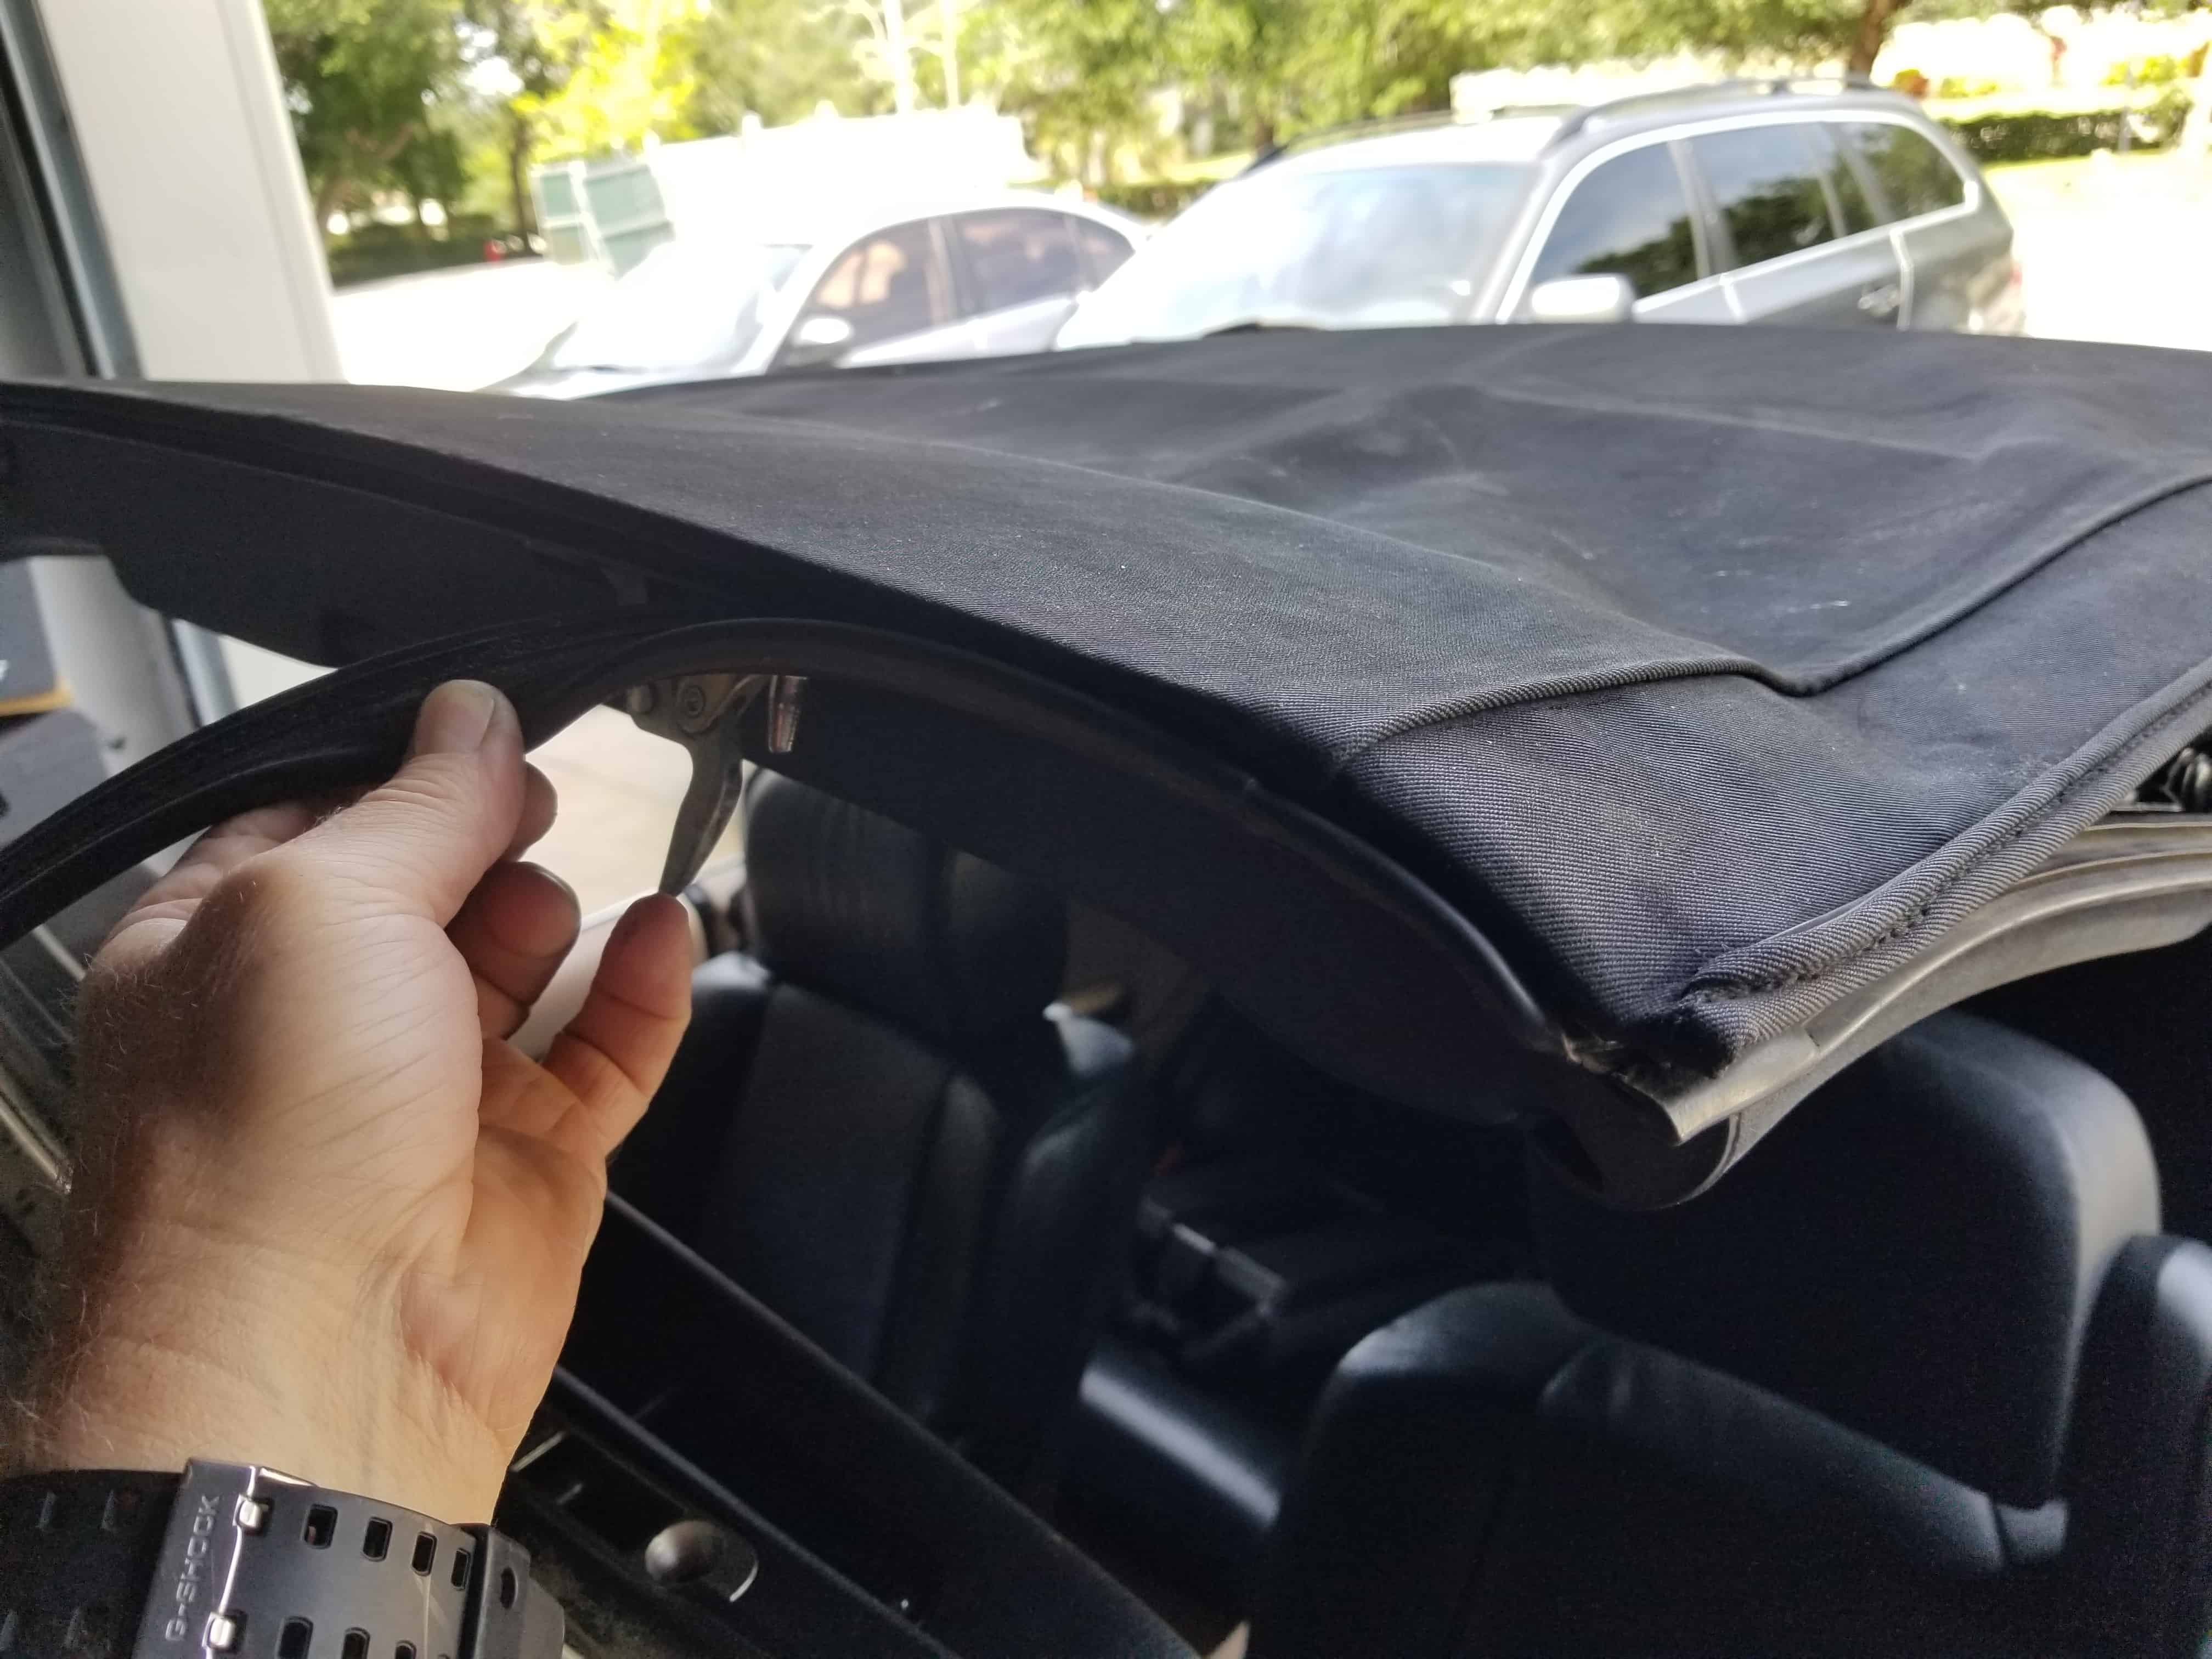
- Slowly lower the convertible top gasket being careful not to tear it. DO NOT pull on it. Remember that the gasket is one piece that wraps around the front of the roof to the other side and is removed in one piece.
- Repeat the above steps to remove the right side of the convertible top gasket.
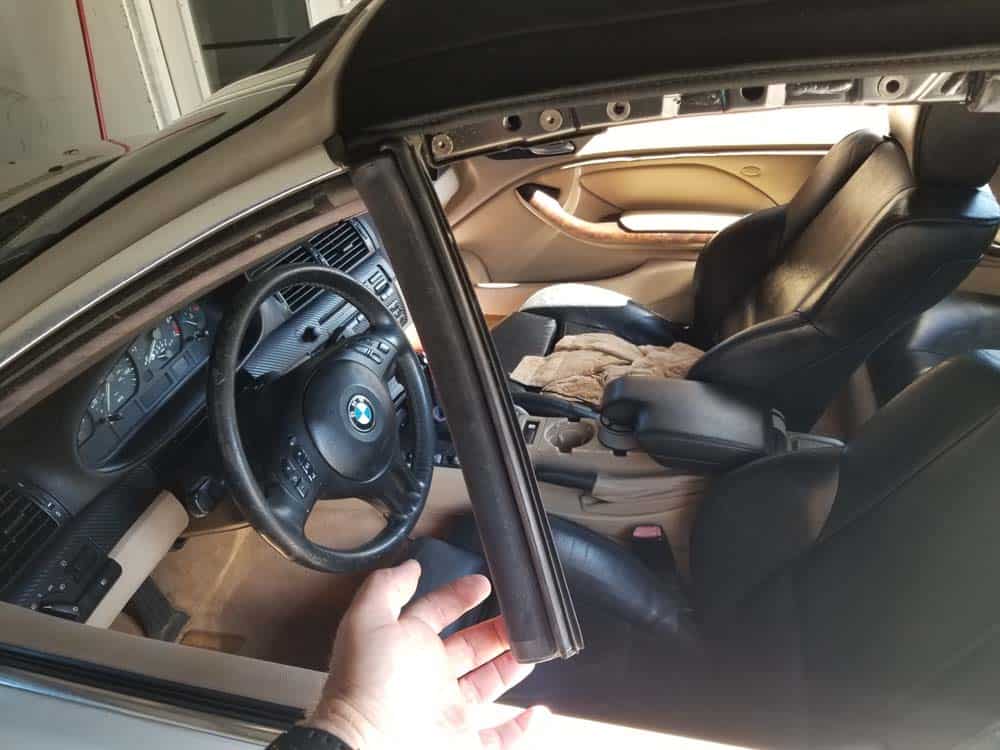
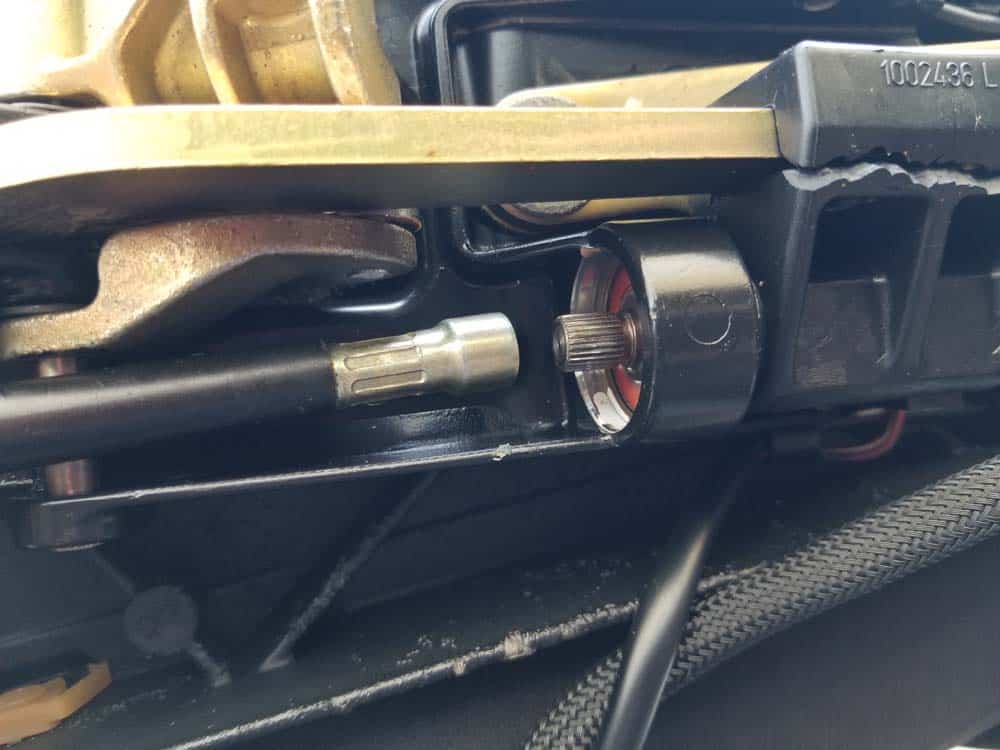
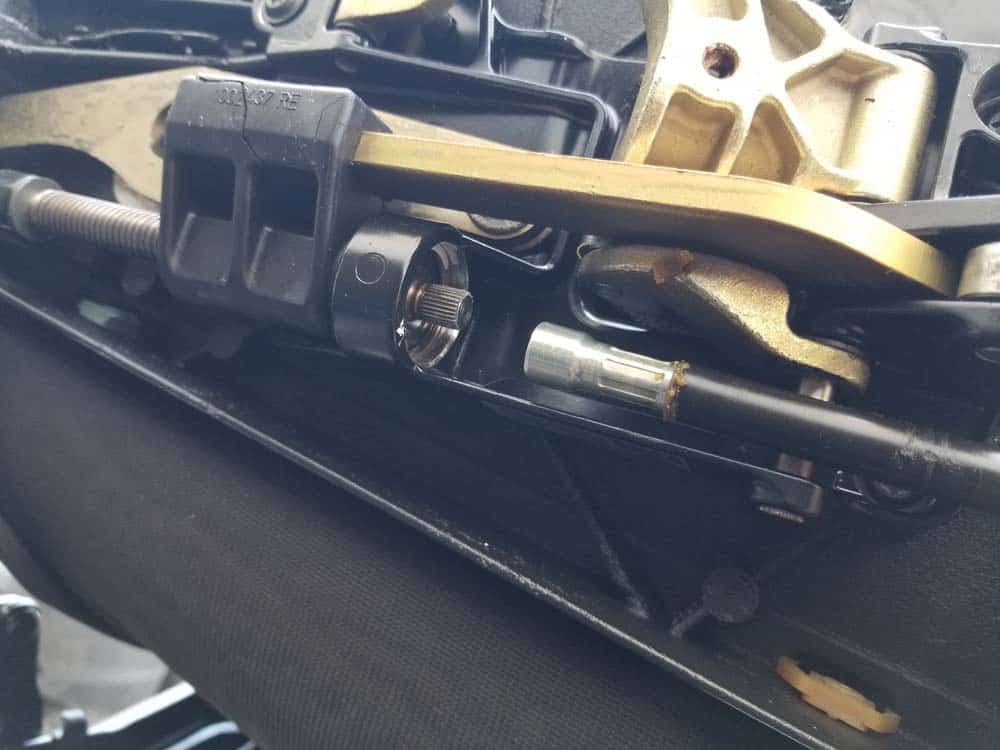
- To manually unlock the top from the windshield, you will need insert a long 5mm hex bit into the first open hole from the front of the top. If you do not have a long 5mm hex bit you can order one from our tool list above.
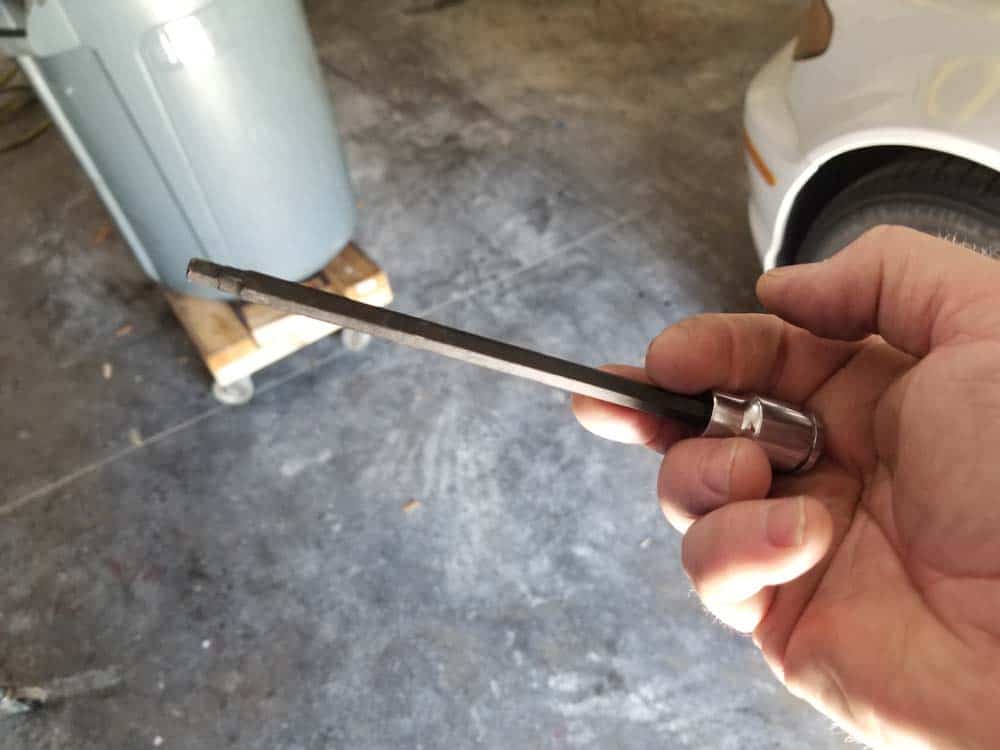
- Insert the long 5mm hex bit into the first open hole in the top until finds its way into the roof latch. You may have to wiggle it around a bit to get it properly seated.
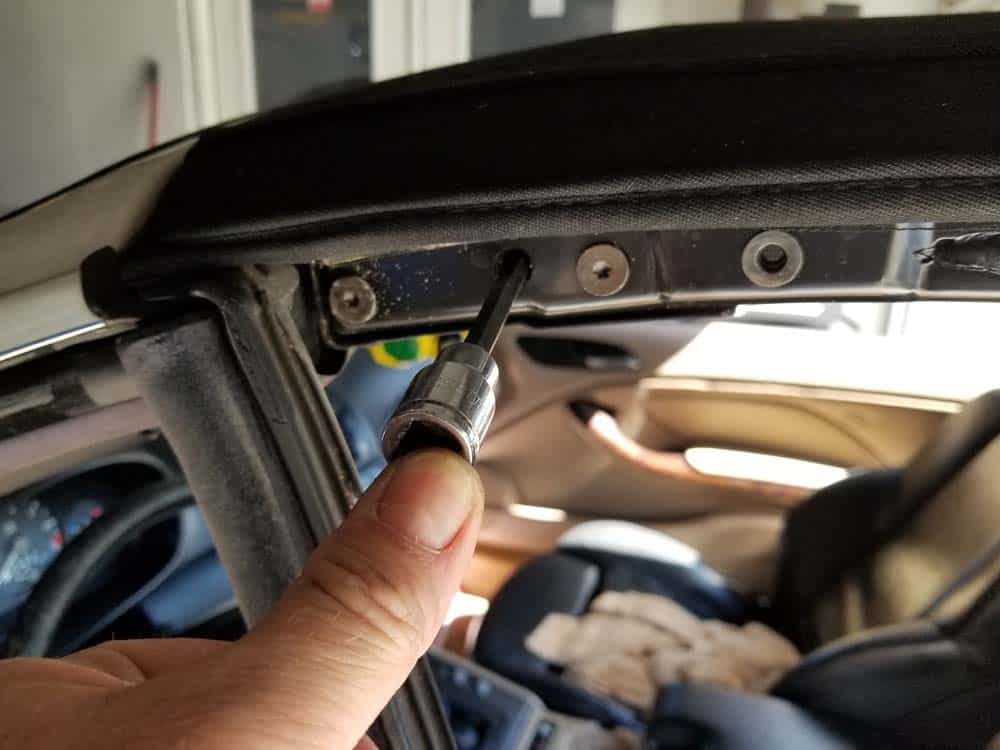
- Once the bit is properly seated in the latch, turn it counterclockwise with a ratchet to release the convertible top from the windshield.
- Continue to turn the latch counterclockwise until it stops. The latch must be turned until it stops to correctly separate the top from the windshield.
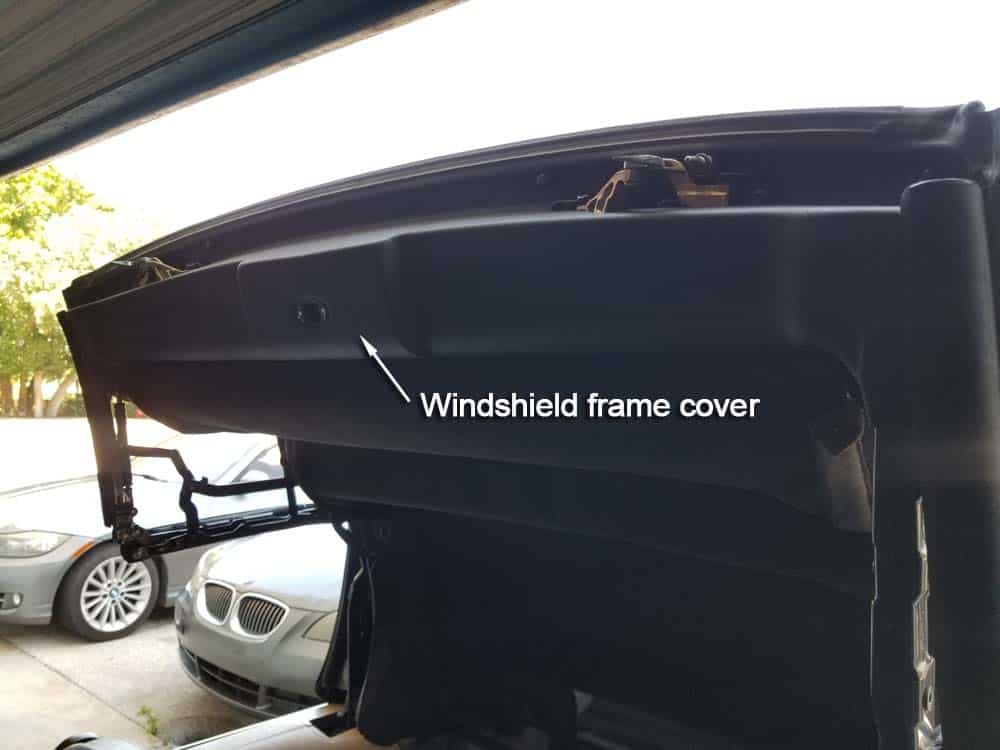
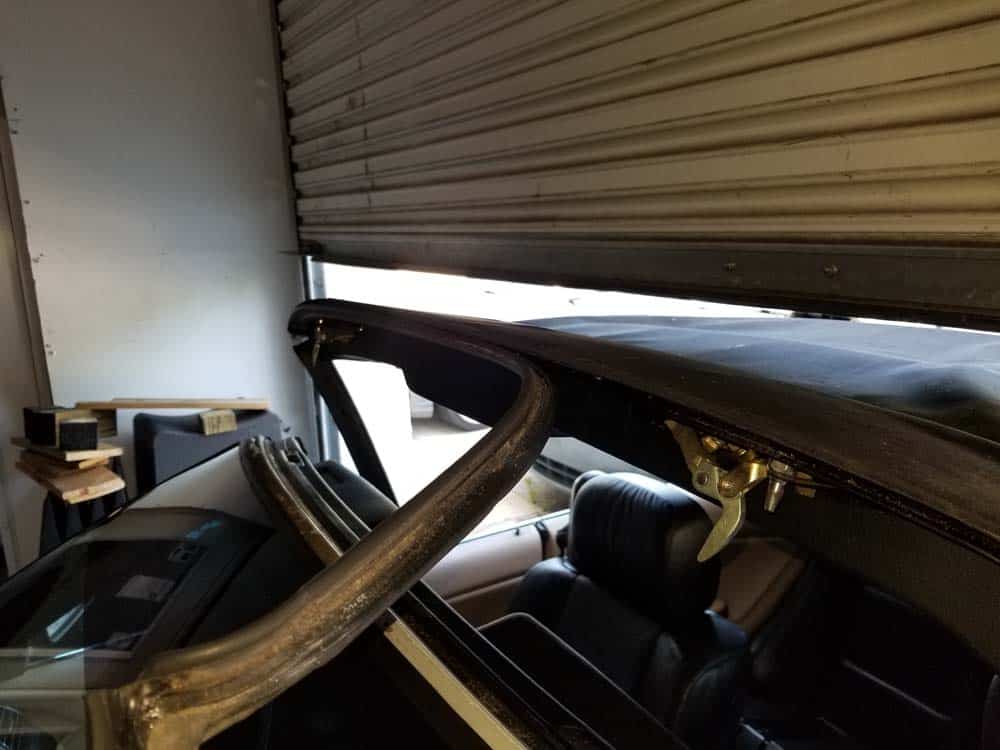
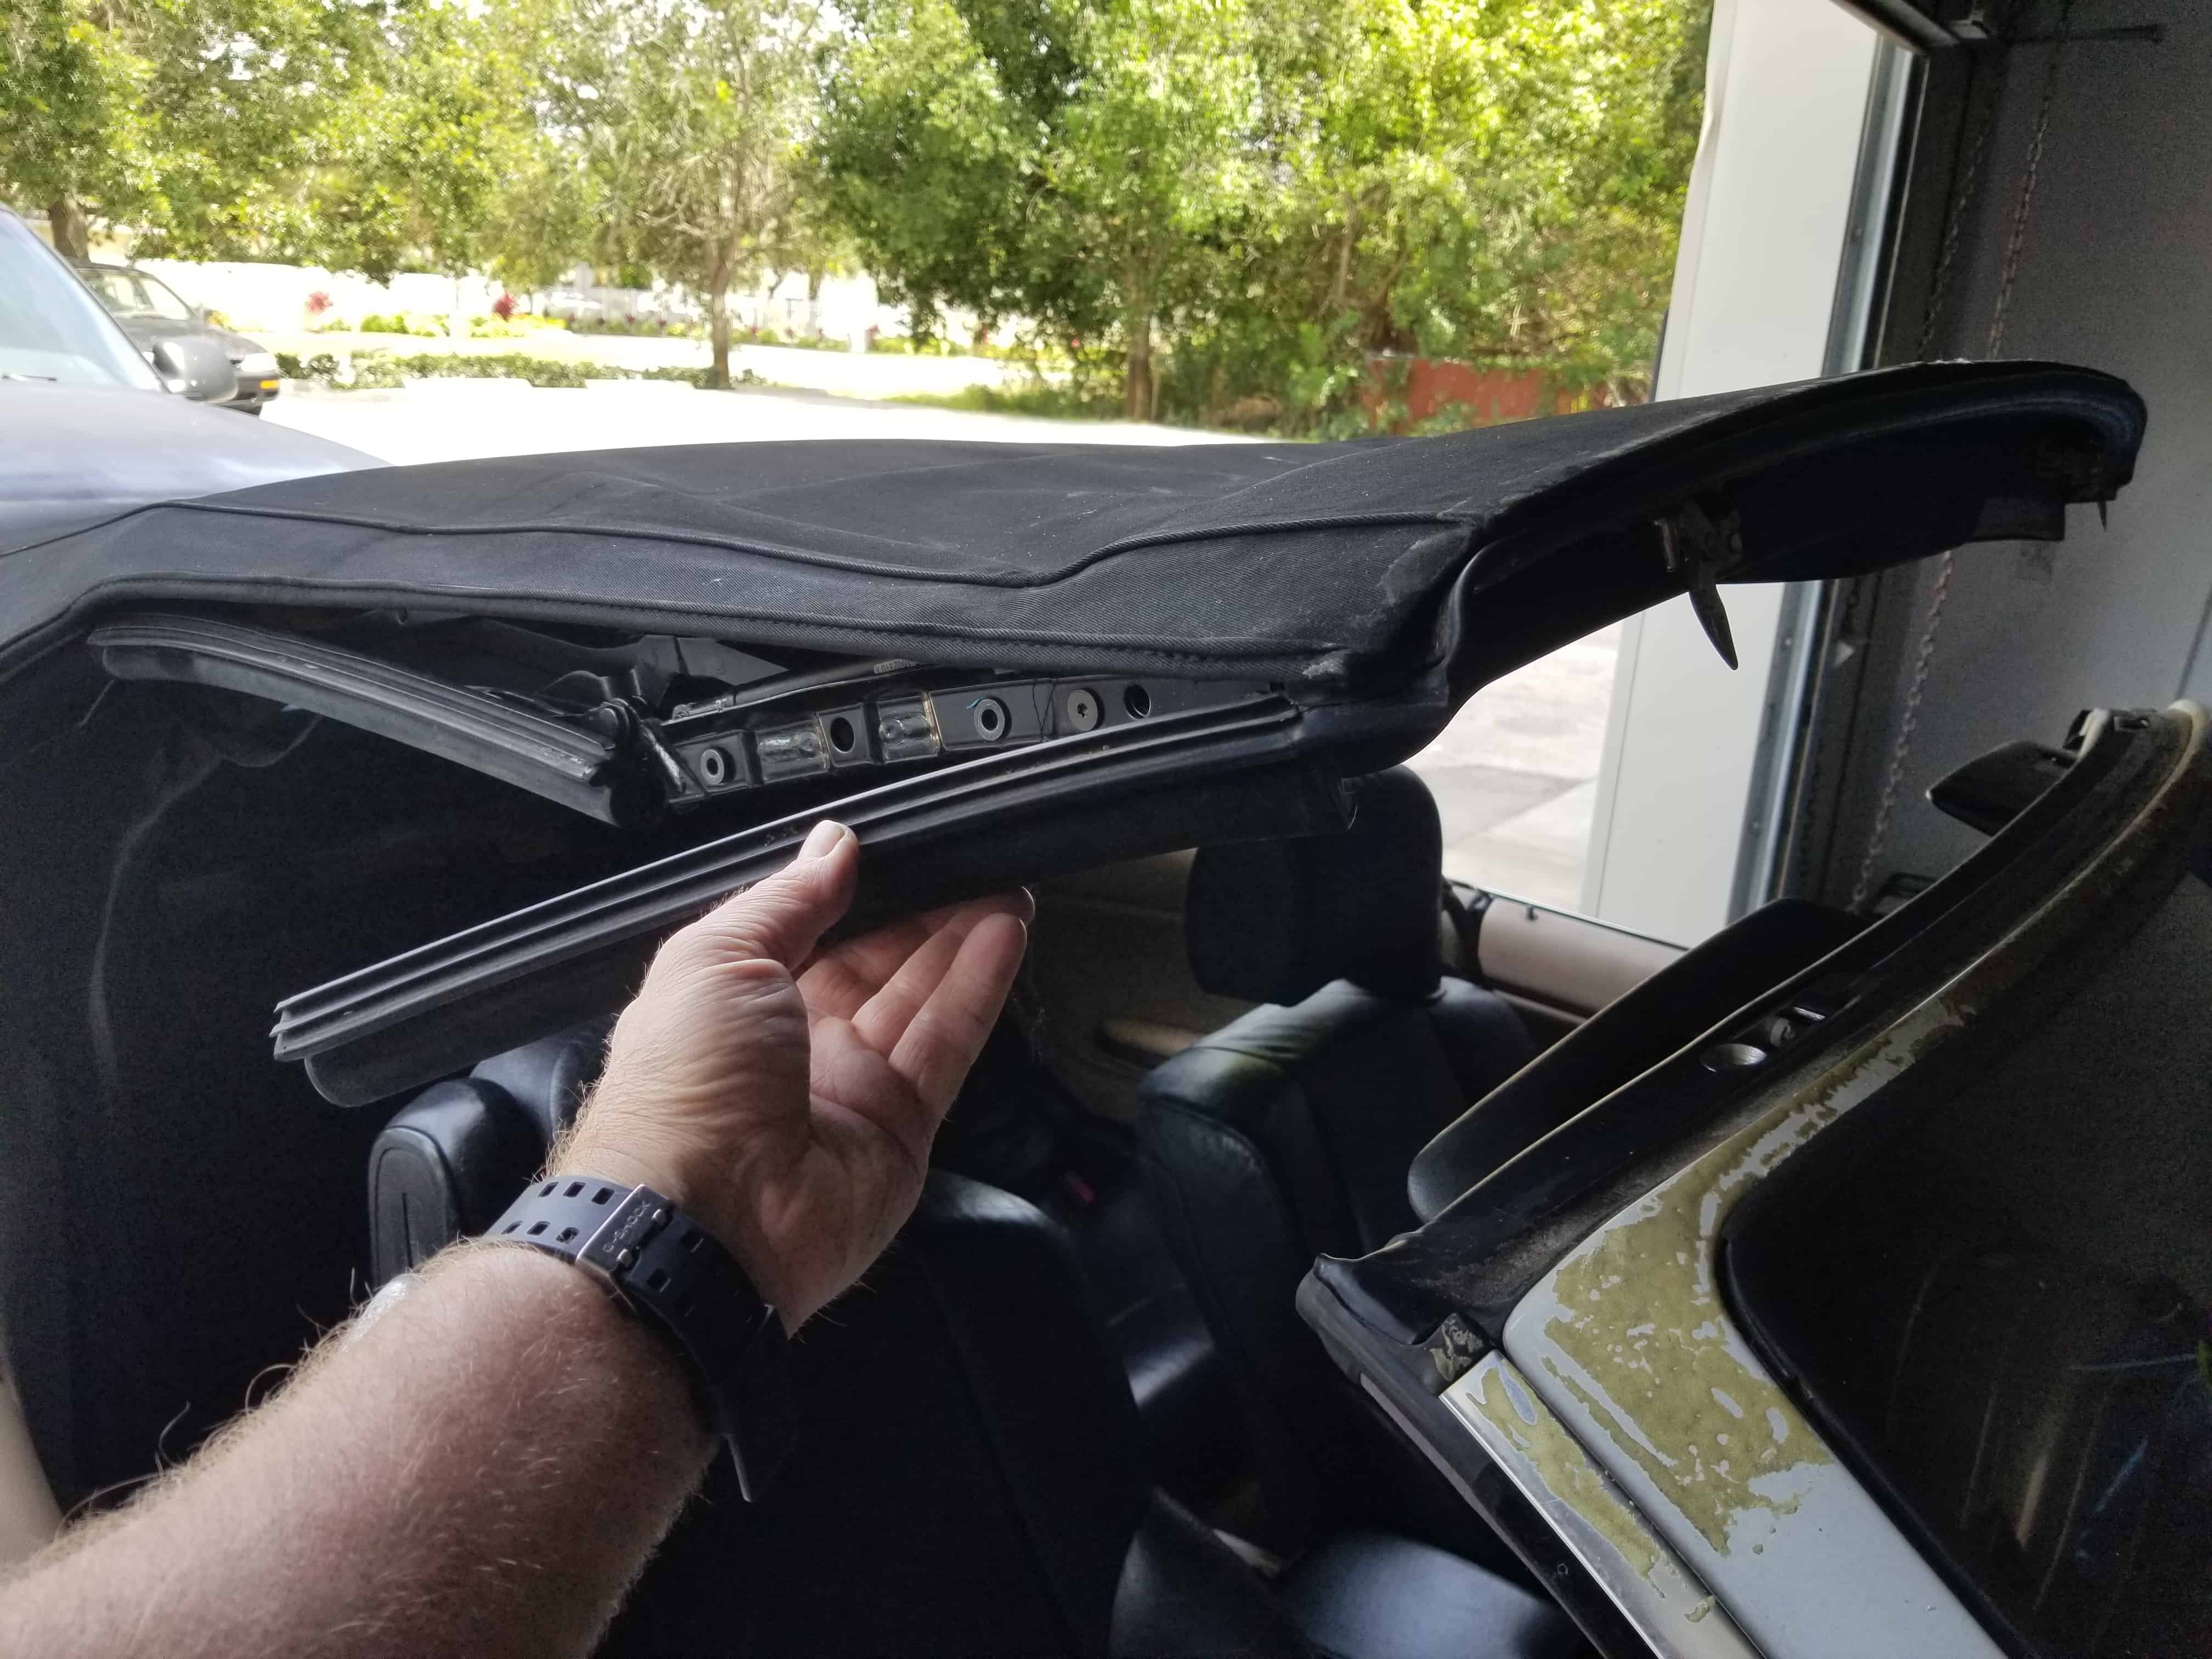
- You can now safely separate the top from the windshield. Retract the top so the windshield frame cover can be removed.
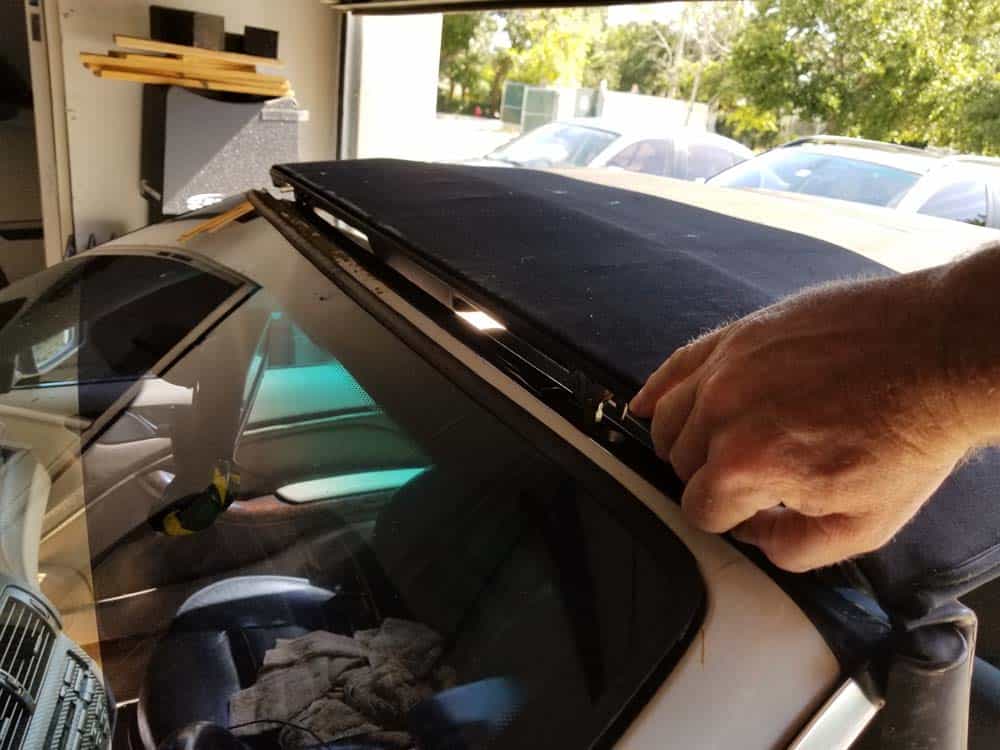
- Next, the windshield frame cover must be removed from the top. The cover is held in place with multiple screws around its perimeter.
- Starting on the left side of the windshield frame cover, remove the two T20 screws as shown below. Repeat on the right side of the cover.
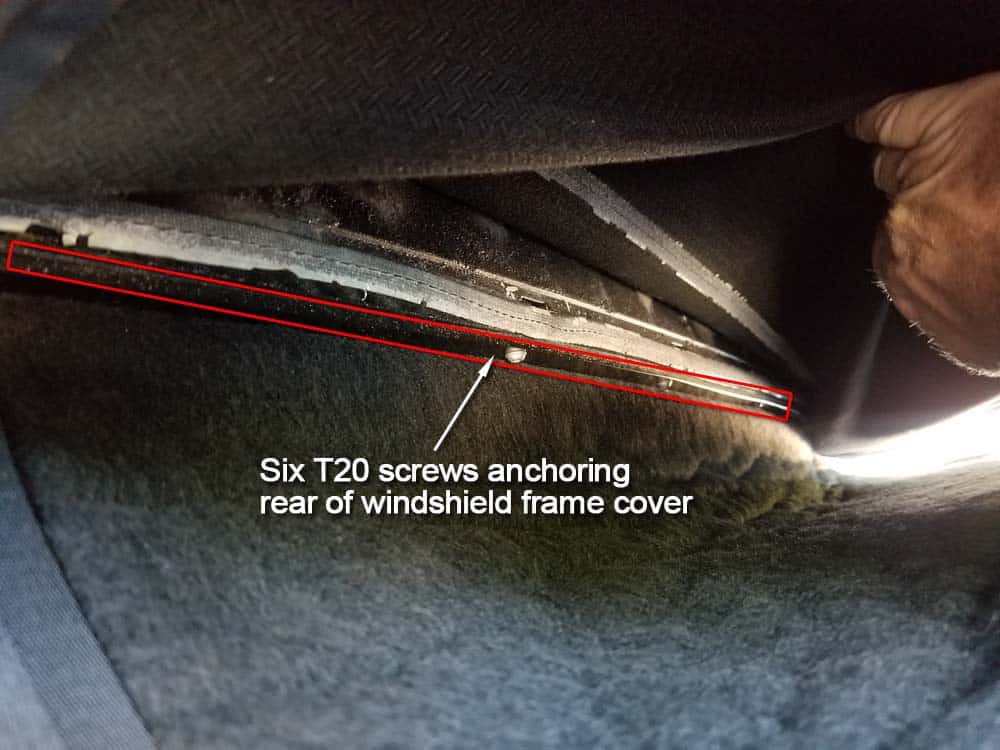
- Next, the six T20 torx screws on the back of the cover need to be loosened. DO NOT REMOVE THESE SCREWS...they only need to be loosened. They can be very difficult to replace if you completely remove them. Start by lifting the fabric top and identifying the six screws as shown below.
- Using a T20 torx bit, loosen each screw a few turns. DO NOT remove the screws...only loosen them. The cover will slide out from behind the rear screws after the front screws are removed in the following steps.
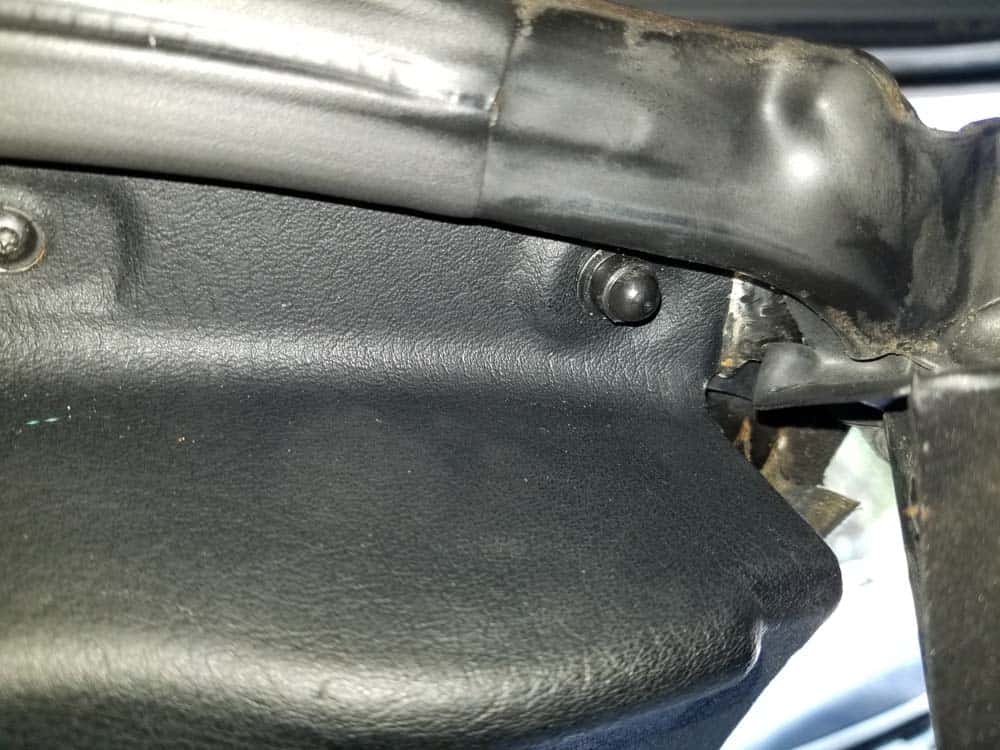
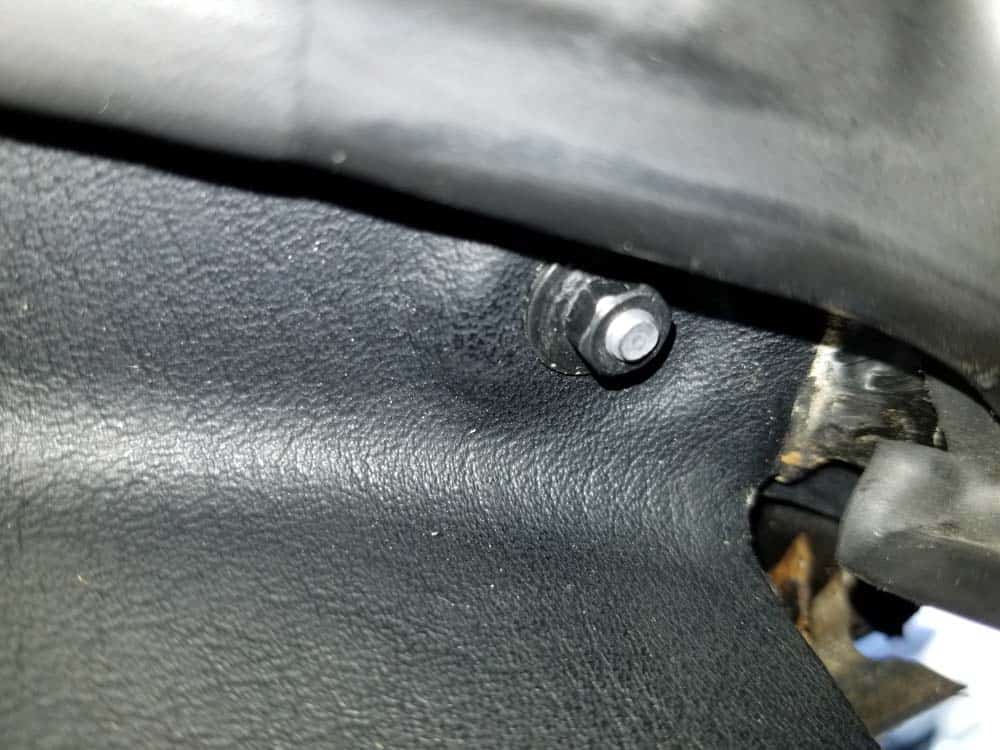
- Moving to the front of the windshield frame cover, locate the two outer nuts anchoring the cover to the top. They may have black plastic caps installed on them as shown below. Remove the black plastic caps, then remove the two nuts with a 7mm socket wrench.
- Remove the nine T10 screws anchoring the front of the windshield frame cover.

- Slowly and carefully pull the convertible top gasket off of the vehicle.
- The windshield frame cover will now pull off of the top. You may need a plastic trim tool to get it started on one of the sides.
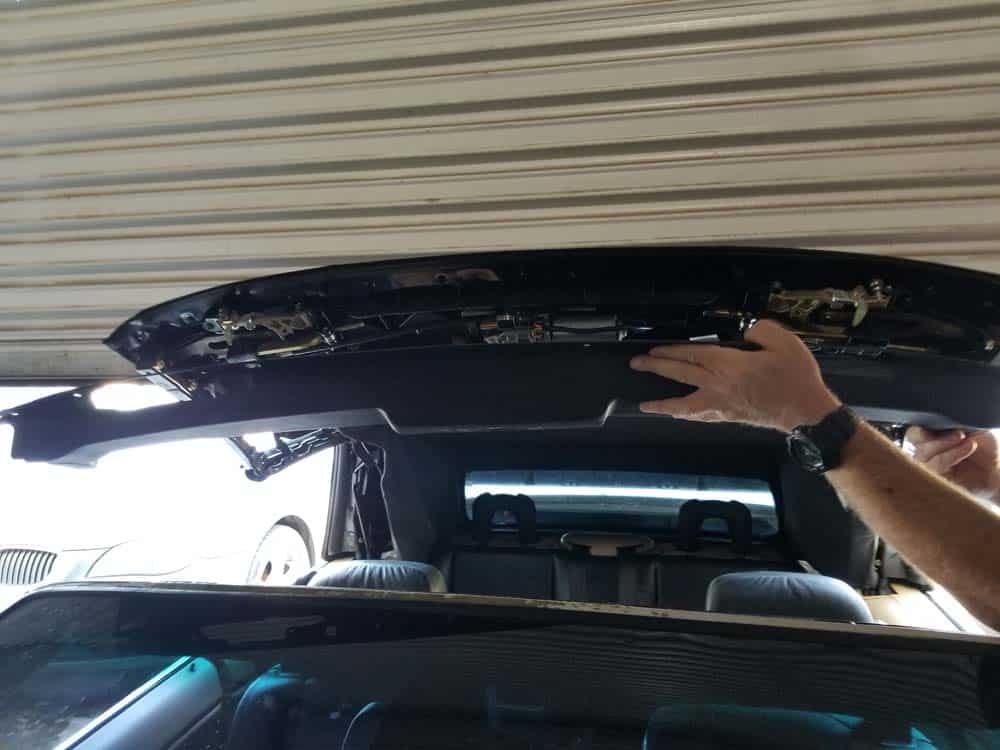
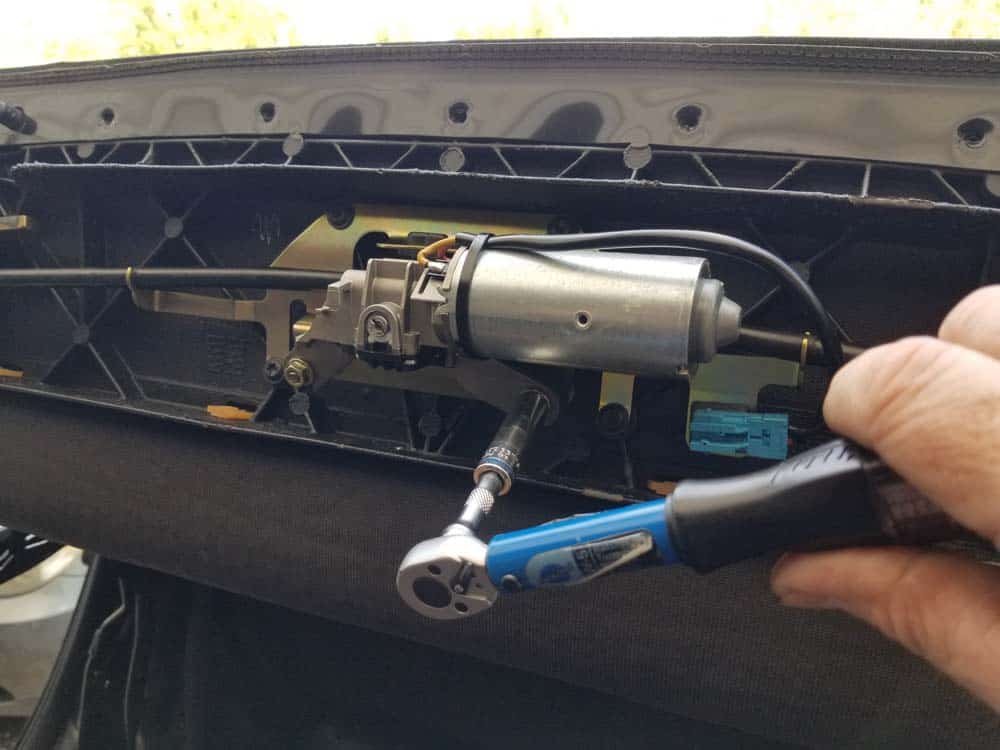
- You now have clear access to the latch motor.
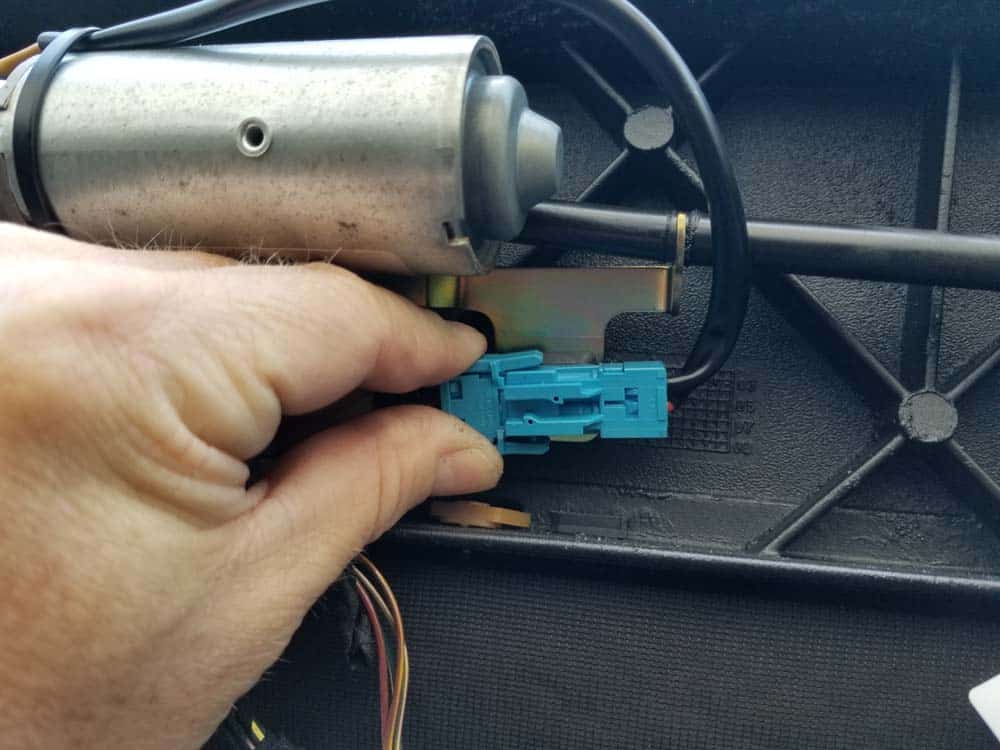
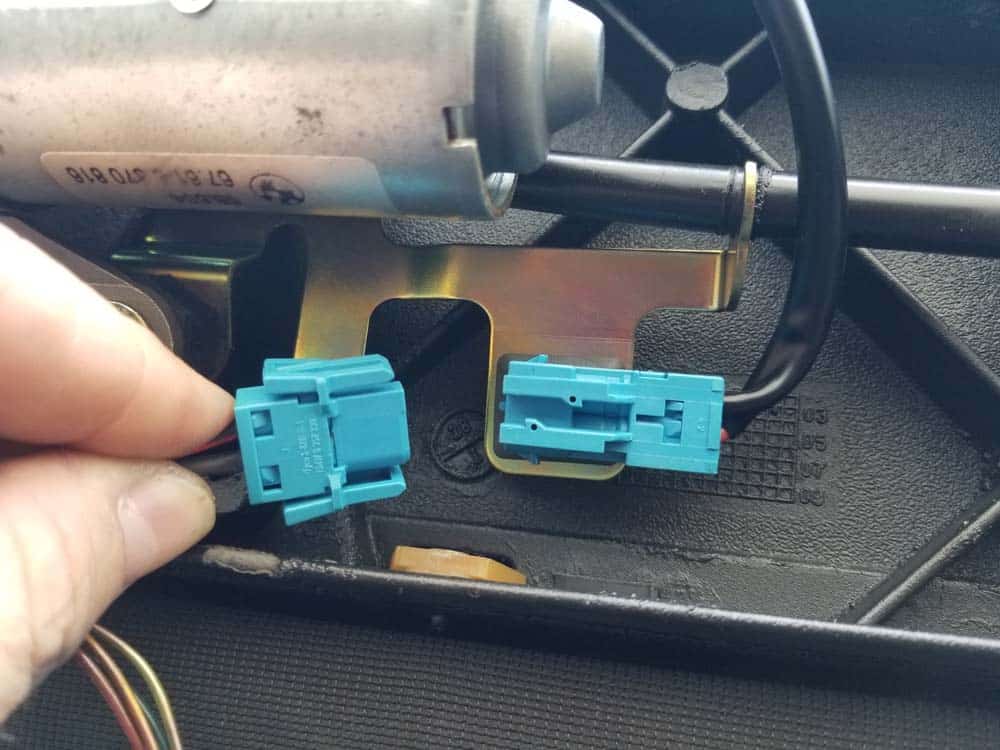
- Unplug the latch motor by squeezing its electrical connector and pulling it free from the wiring harness.
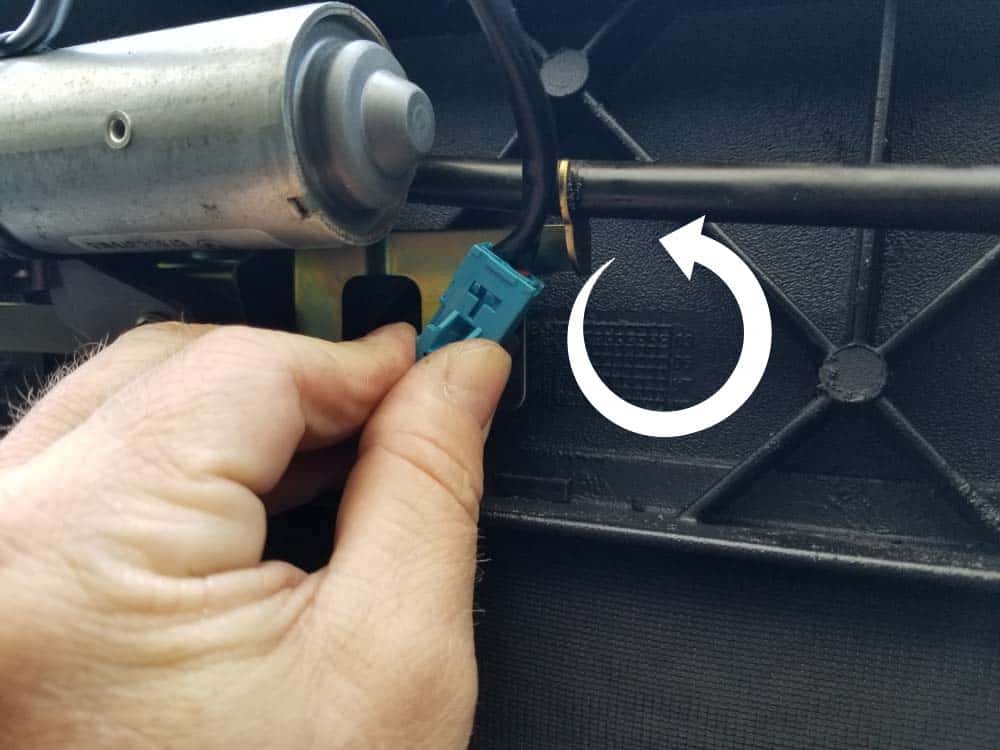
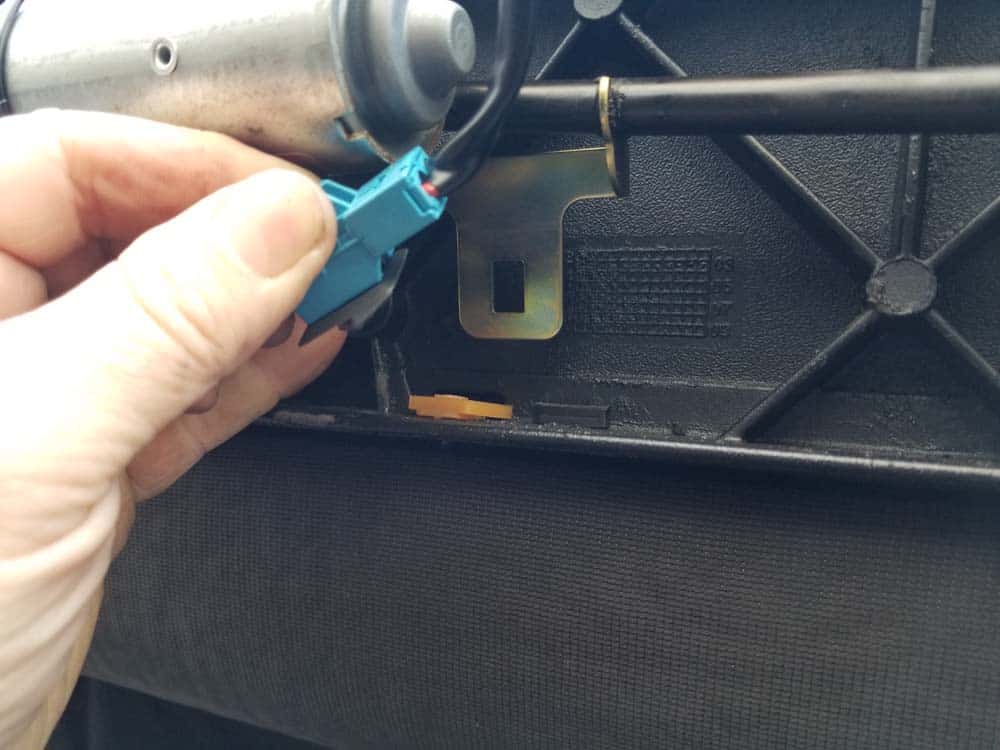
- Remove the motors wiring harness from the top by twisting the clip counterclockwise then pulling it free.
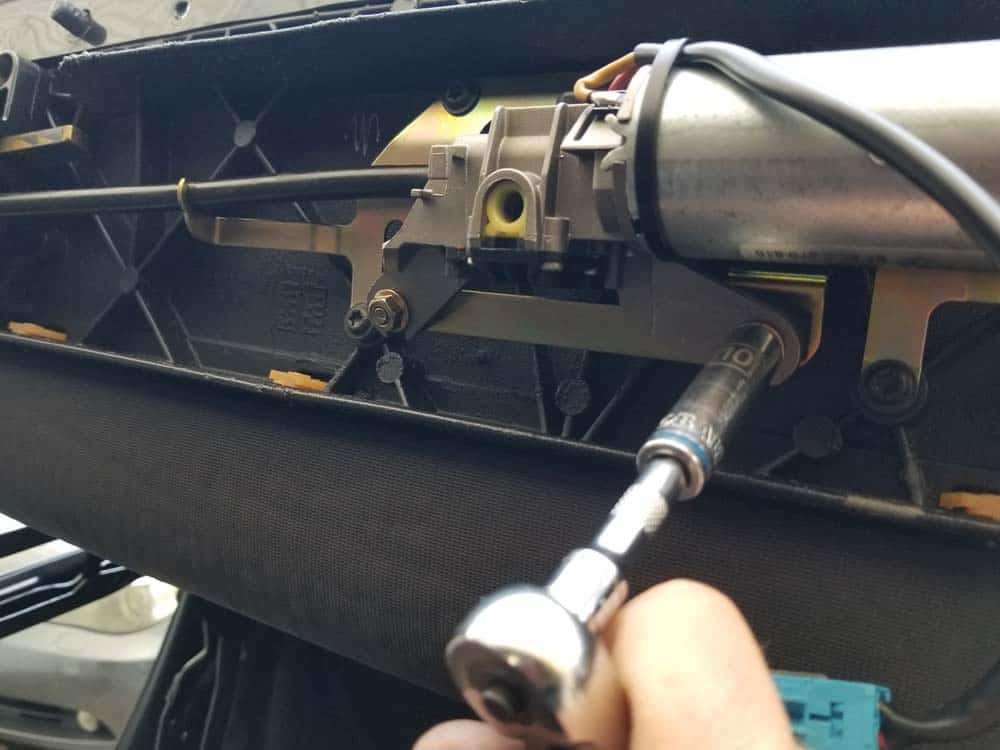
- Use a 10mm socket wrench to remove the two mounting nuts securing the motor to the top.
- Remove the left and right latch shafts by pulling them free from the latch assemblies.
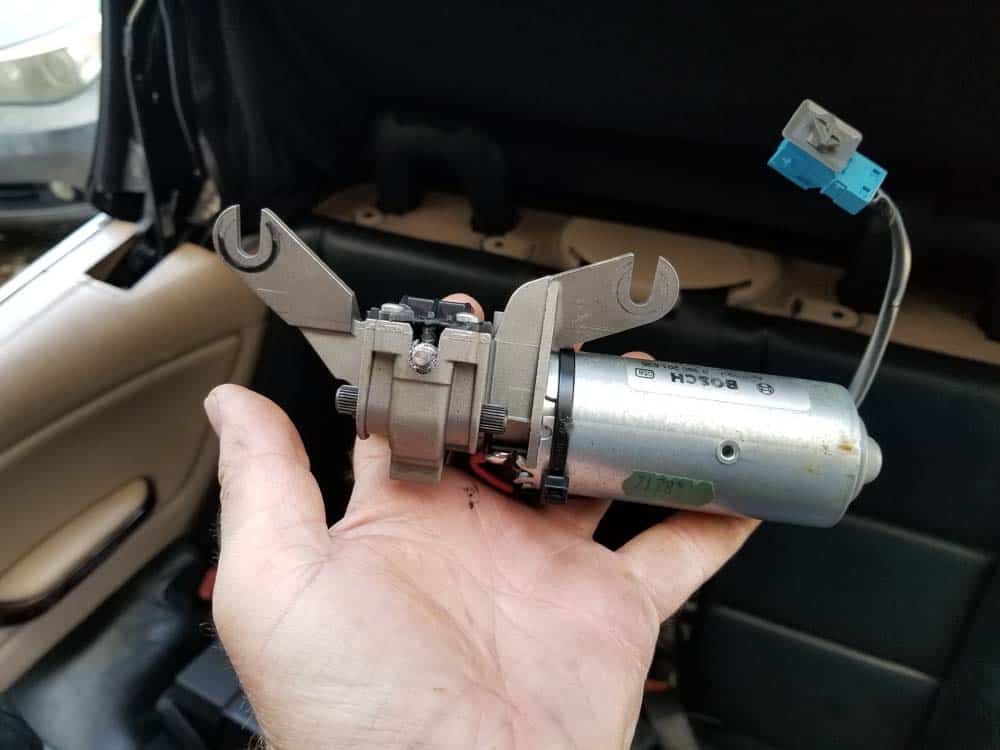
- You can now remove the latch motor from the top.
Section 2 - Replacing the BMW E46 Convertible Latch
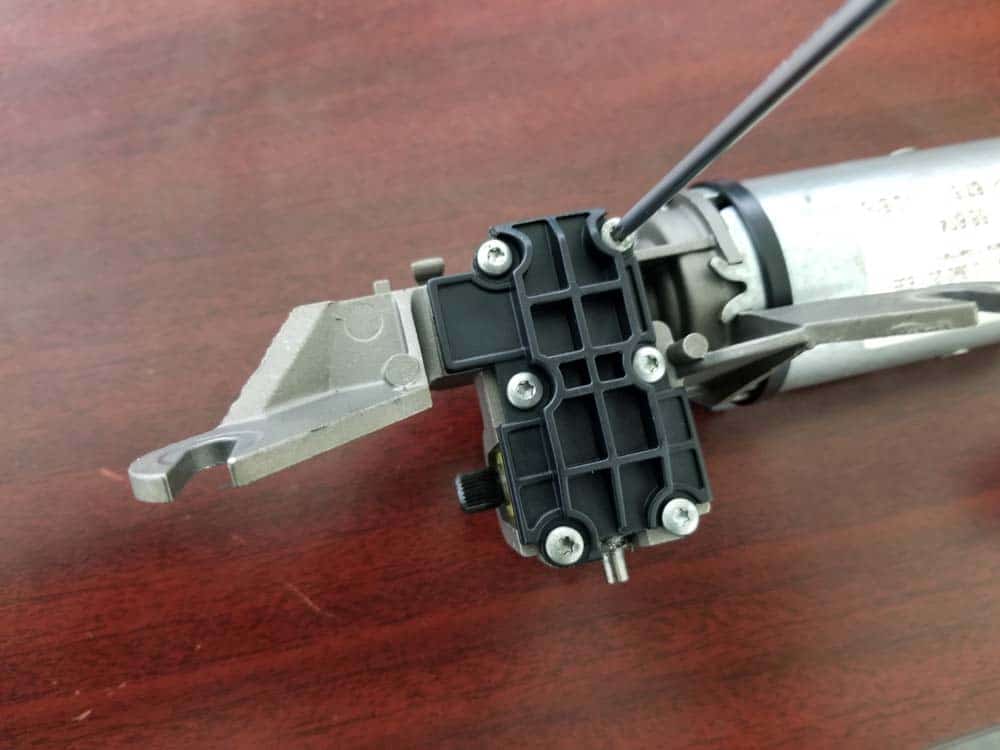
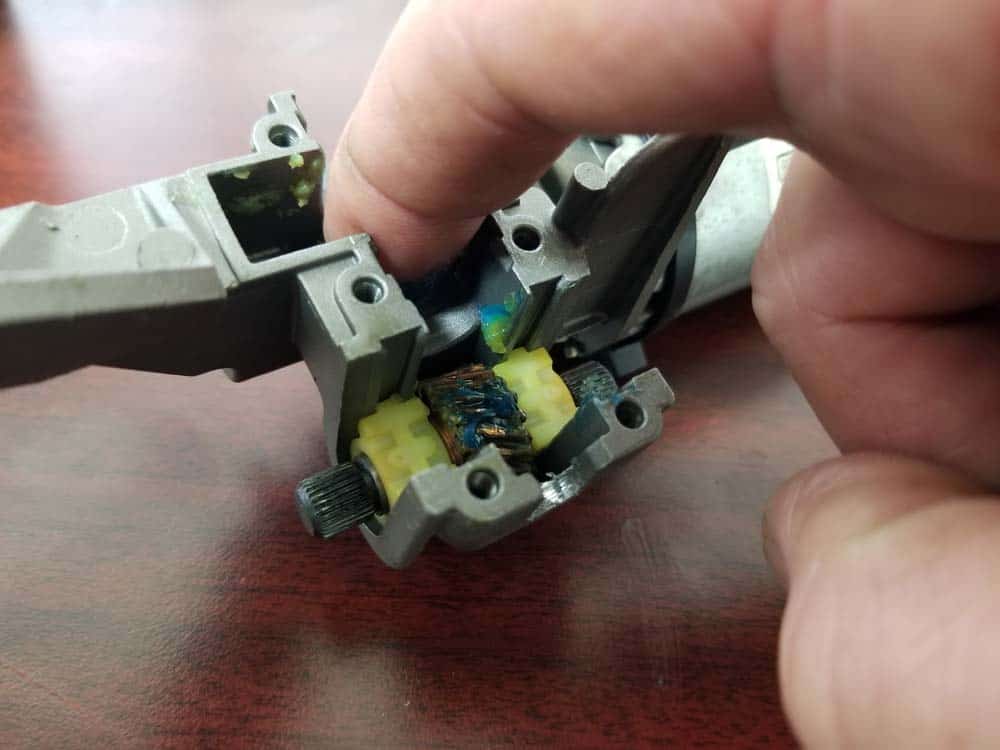
Replacing the convertible latch motor gear is actually a very simple process. Always use a high quality grease on the gears during reassembly.- The latch gear is located behind a black plastic cover that is attached with six T10 screws. Remove the screws and the cover from the motor.

- You can now see the convertible latch gear. You can see where ours has literally split in half.

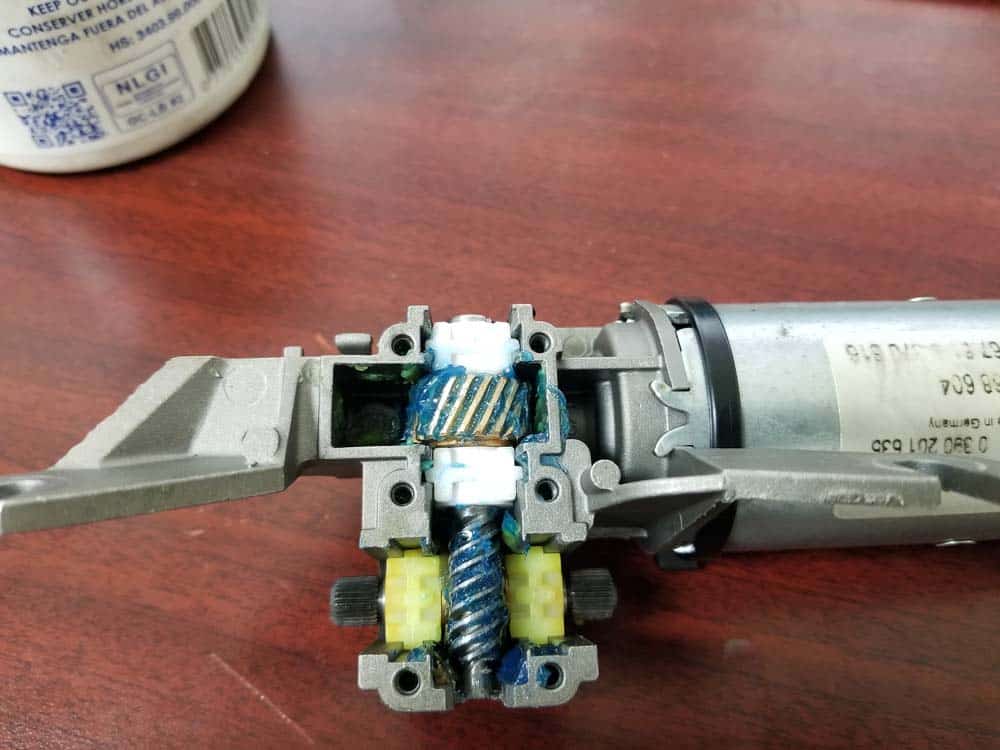
- Remove the old latch gear from the motor and apply some fresh grease inside the gear housing.
- Apply some fresh grease to the new latch gear and install it into the motor.
- Replace the protective cap and tighten the six T10 screws until snug.
Section 3 - Reassembling the Convertible Top
Reassembling the convertible top is simply following the above steps in reverse. Take your time when reinstalling the convertible top gasket to make sure it is lined up correctly on the top - we show you the best way to acheive that in the repair steps below.- Start by reinstalling the convertible top latch motor and the right and left latch drives back into the convertible top. Torque the two motor mounting nuts to 9 Nm (6.5 ft-lb).
- Reattach the electrical connector to the latch motor.
- Reinstall the metal windshield frame cover. Make sure it is seated correctly in the top.
- Hand tighten the two outer 7mm mounting nuts just enough to hold the top in place. DO NOT install any of the screws yet. This will be done after the convertible top gasket is reinstalled.
- Now it is time to reinstall the convertible top gasket. Always begin by loosely installing one of the sides of the gasket. This will ensure the gasket is in the correct position.
- Next, slowly install the gasket back onto the front of the top. Take your time making sure the corners are tucked in.
- Finally, install the other side of the gasket on the top. You can now tighten the side T30 bolts until snug.
- Reinstall all of the windshield frame cover front and side screws. Tighten the corner nuts, and the rear T20 screws.
BMW E46 Covertible Latch Motor Gear Replacement Finished