
Affiliate link disclosure – The BMW Repair Guide uses affiliate links in their site. For more information on affiliate links, please click here.
Repair Summary
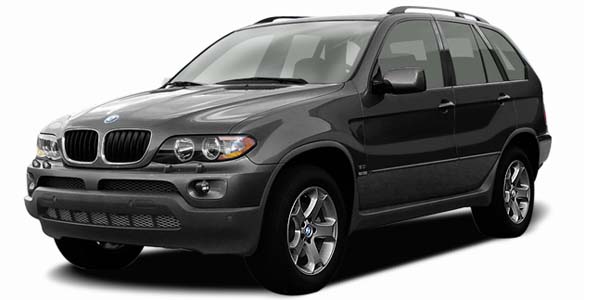
This article provides detailed instructions on replacing the fuel filter in a BMW E53 X5 vehicle. Even though we used a 2005 X5 3.0 to perform this repair, this article can be applied to all 2000-2006 X5 vehicles with minor modifications to the steps.
See all vehicles this article applies to
E53 X5 Series X5 4.8is
E53 X5 Series X5 4.6is
E53 X5 Series X5 4.4i
E53 X5 Series X5 3.0i
E53 X5 Series X5 3.0d
A clogged BMW E53 fuel filter can cause a rough idle in your 2000-2005 X5.
The fuel filter in 2000-2005 X5 vehicles is the last line of defense against dirt and other particulates from entering your engine's fuel rail and injectors. It is supplied fuel via a feed line from the X5's fuel pump. After the fuel travels through the filter, it travels directly to the engine fuel injectors. It is mounted underneath the X5 directly in front of the fuel tank behind a protective plastic cover.
Over time, the fuel filter can become clogged with contaminants. This is actually a good thing...it means the filter is doing its job. Removing particulates and debris from the fuel helps protect expensive engine parts and greatly extends the lifespan of the motor. The BMW Repair Guide recommends the fuel filter on your 2000-2005 X5 be replaced every 50,000 miles to keep your engine running smoothly.
Signs that the fuel filter in your BMW E53 is failing are rough idling engine, hard starts, fluctuations in RPMs, and cylinder misfires. The fuel filter should always be replaced if you perform a fuel pump/fuel level sensor replacement on your X5.
Replacing the fuel filter in 2000-2006 X5 vehicles can be challenging, especially for the home mechanic. The vehicle must be supported in the air so the rear wheels can be rotated in order to remove the protective fuel tank cover (see steps below). The protective fuel tank cover can also be difficult to remove due to hard-to-reach bolts. We give full instructions below along with a parts list for your convenience.


View the detailed parts diagram for this repair.
Includes detailed part diagrams, part numbers and links to purchase all of the required components needed to complete this repair.

Before starting this repair, you must have the following required parts.
Vehicles with production date up to 04/2002 E38,E30 and E53
The BMW Repair Guide recommends replacing your fuel filter every 50,000 miles to keep your engine running smoothly.
For vehicles with a production date from 04/2002 - All E53
The BMW Repair Guide recommends replacing your fuel filter every 50,000 miles to keep your engine running smoothly.
Section 1 - Removing the BMW E53 fuel filter
As discussed at the beginning of this article, replacing the fuel filter in 2000-2006 X5 vehicles can be challenging. It is located under the rear of the vehicle in front of the fuel tank. The protective plastic cover that conceals the fuel filter is held in place with an assortment of nuts and bolts, one of which is tough to remove unless the driveshaft can be moved by rotating the rear wheels. We strongly suggest leaving the vehicle in neutral with the rear wheels suspended so this can be accomplished (see step 6 below).- Jack and support the vehicle so the rear wheels can be rotated. Put the transmission in neutral.
- Locate and identify the fuel tank cover at the rear of the vehicle.

- Begin by removing the 10mm trim screws down the left side of the plastic cover.
- Remove the 10mm trim screws around the rear of the cover.
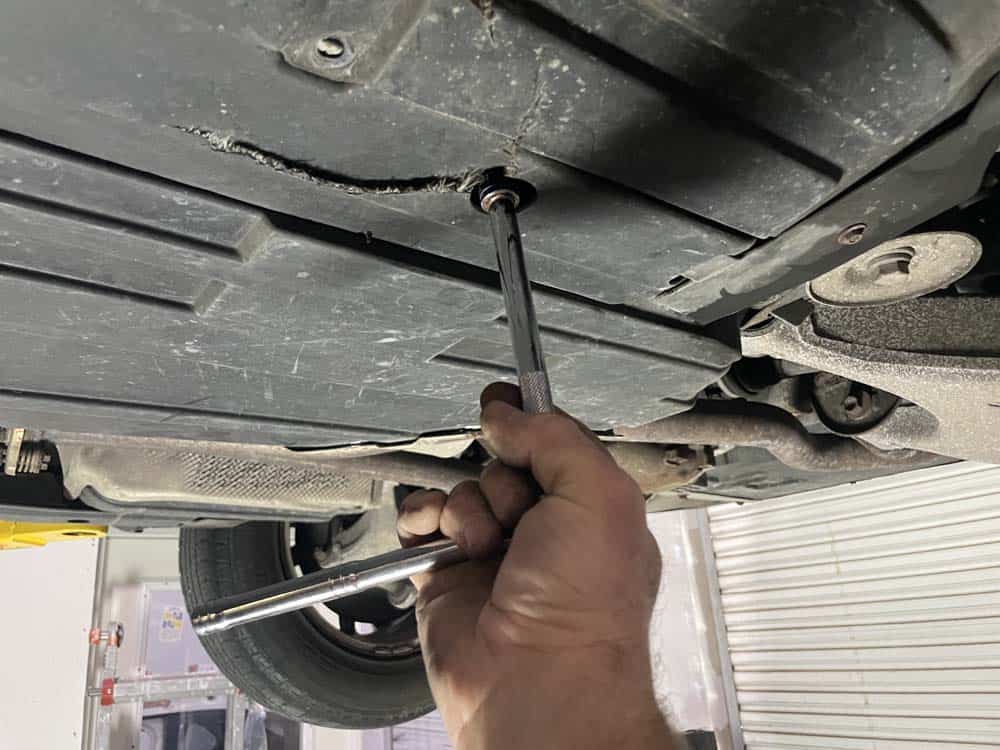
- Remove the front 13mm mounting bolts.
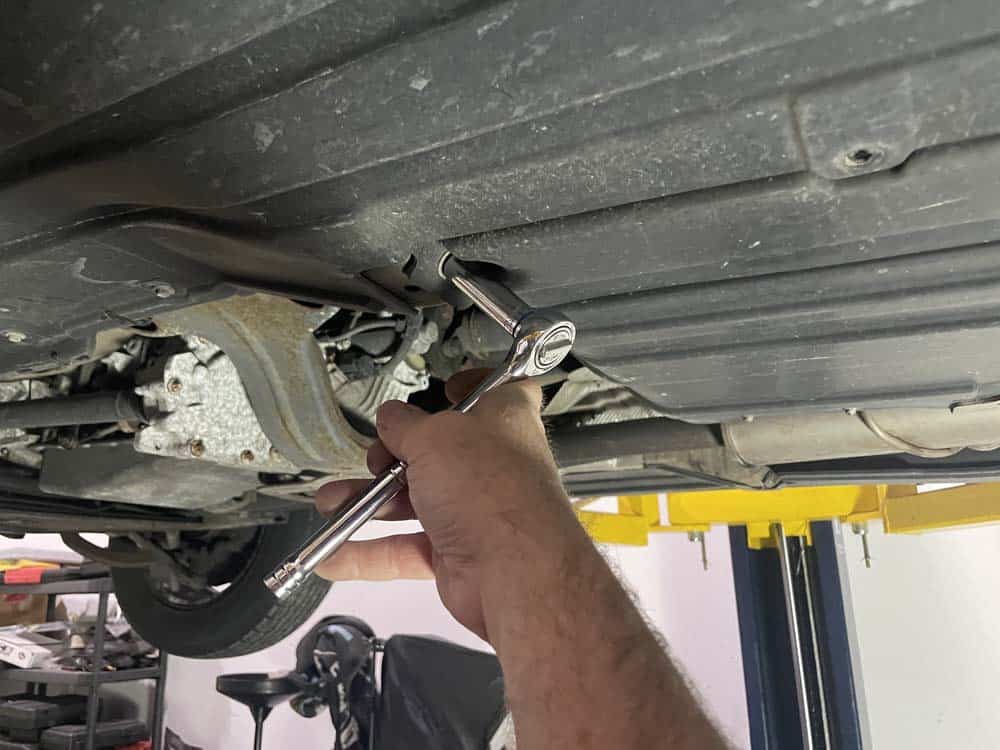
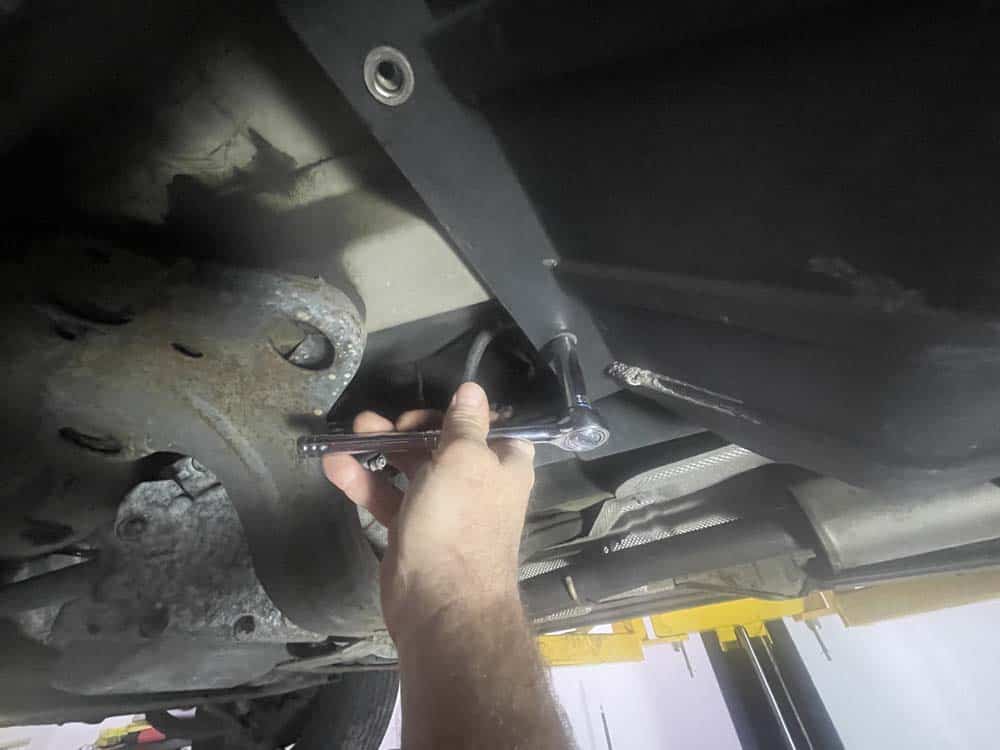
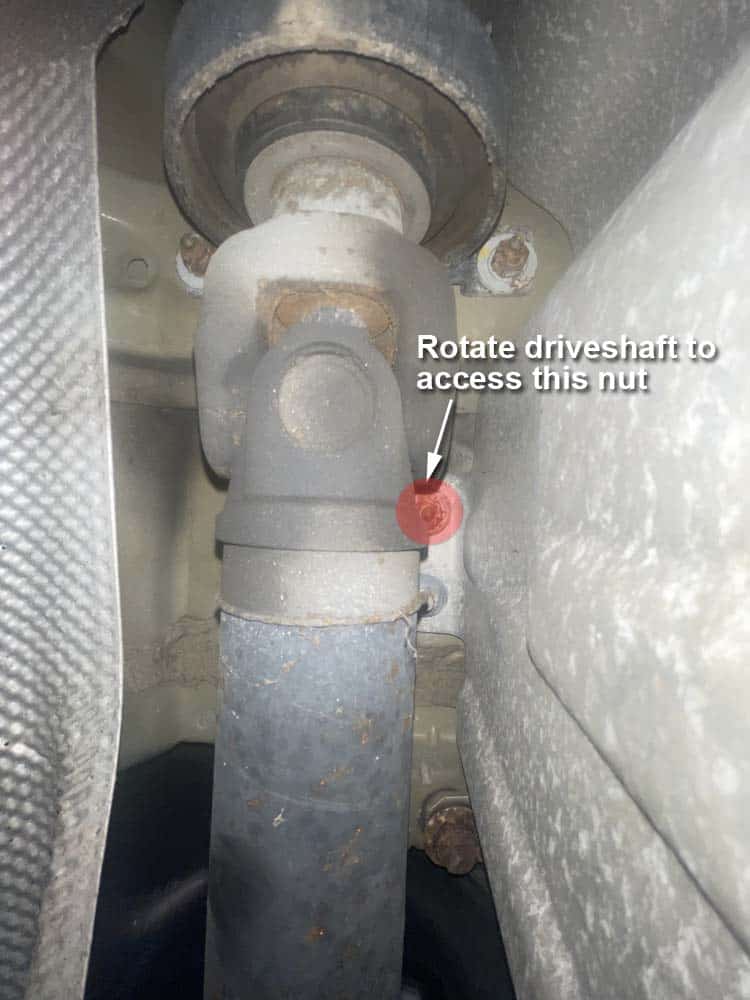
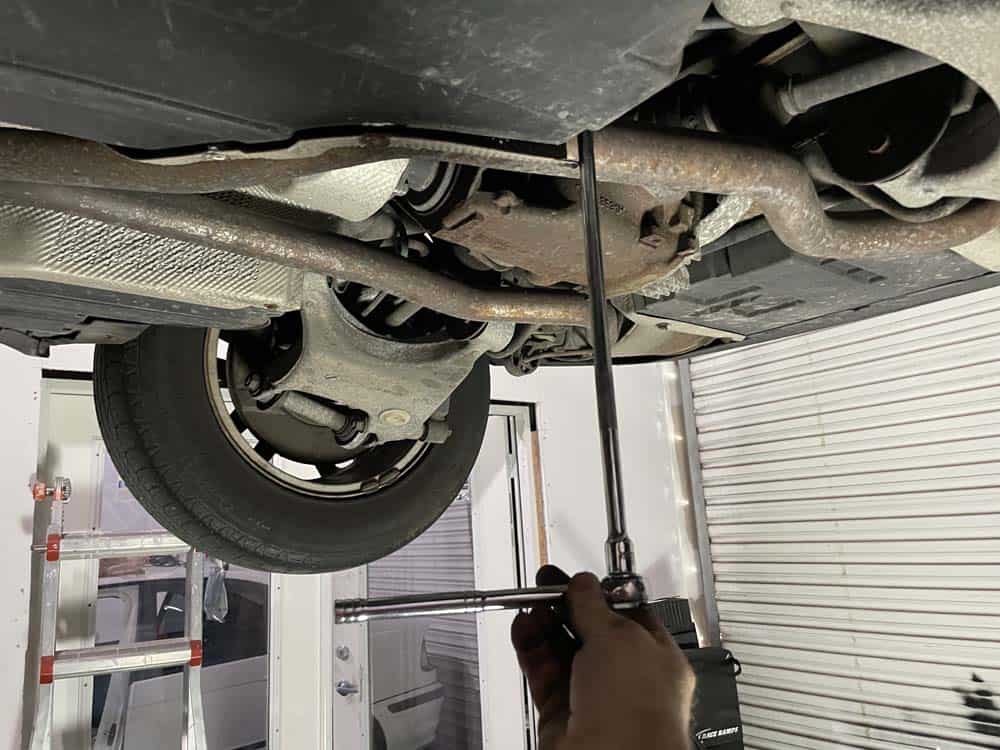
- Moving to the right side of the cover, remove the 13mm bolts and nuts anchoring the cover's steel bracket to the body of the vehicle. Note that one of the nuts is located above the driveshaft universal joint. If you cannot get a socket on it, rotate the wheels until the universal joint turns into a position that allows the nut to be removed.
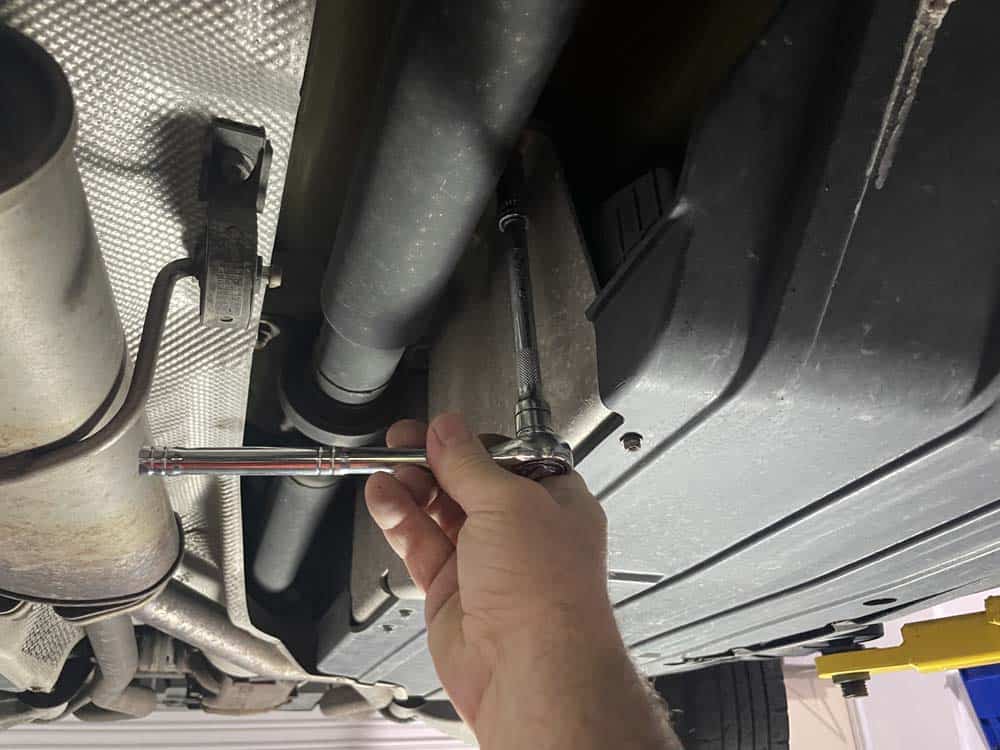
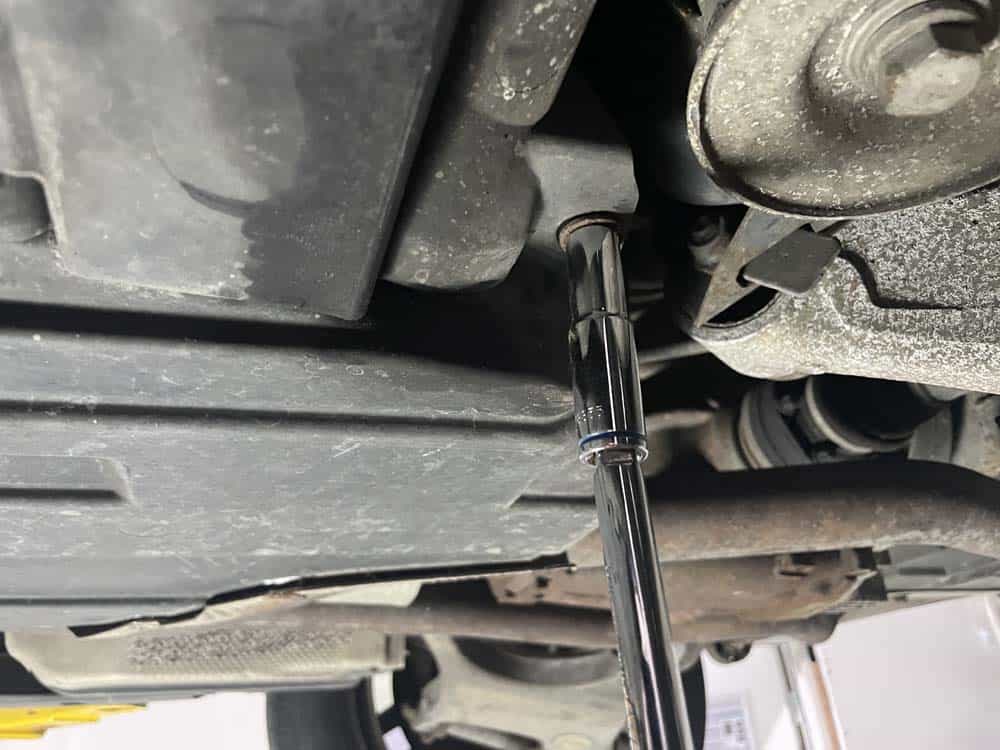
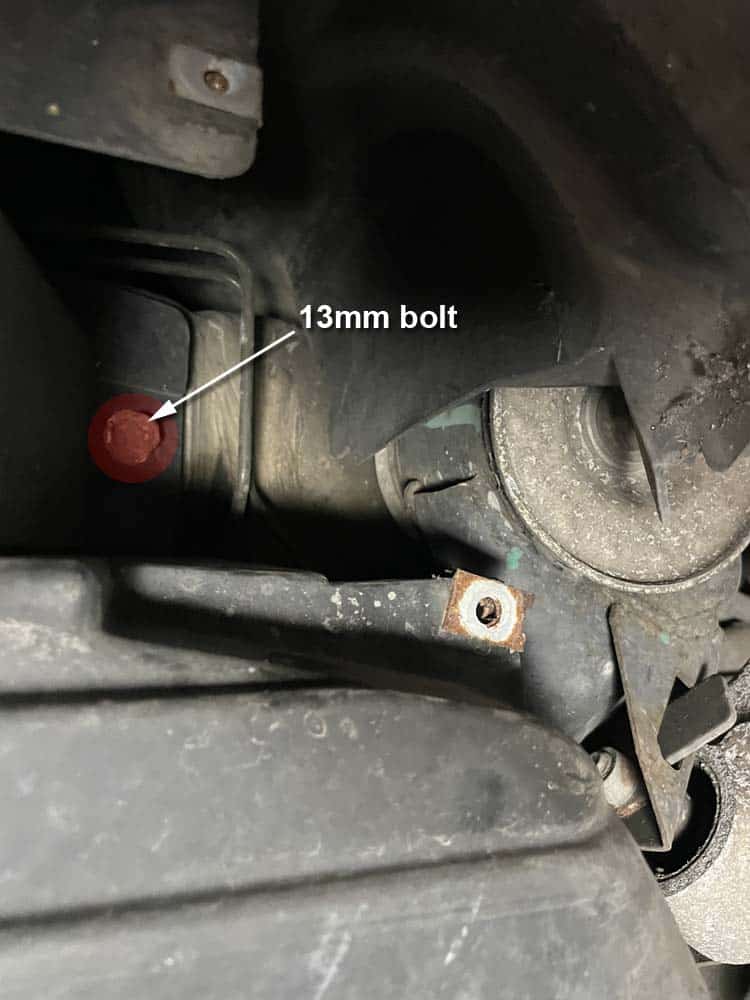
- Moving back to the left side of the cover, use the access holes to remove the two 13mm mounting bolts.
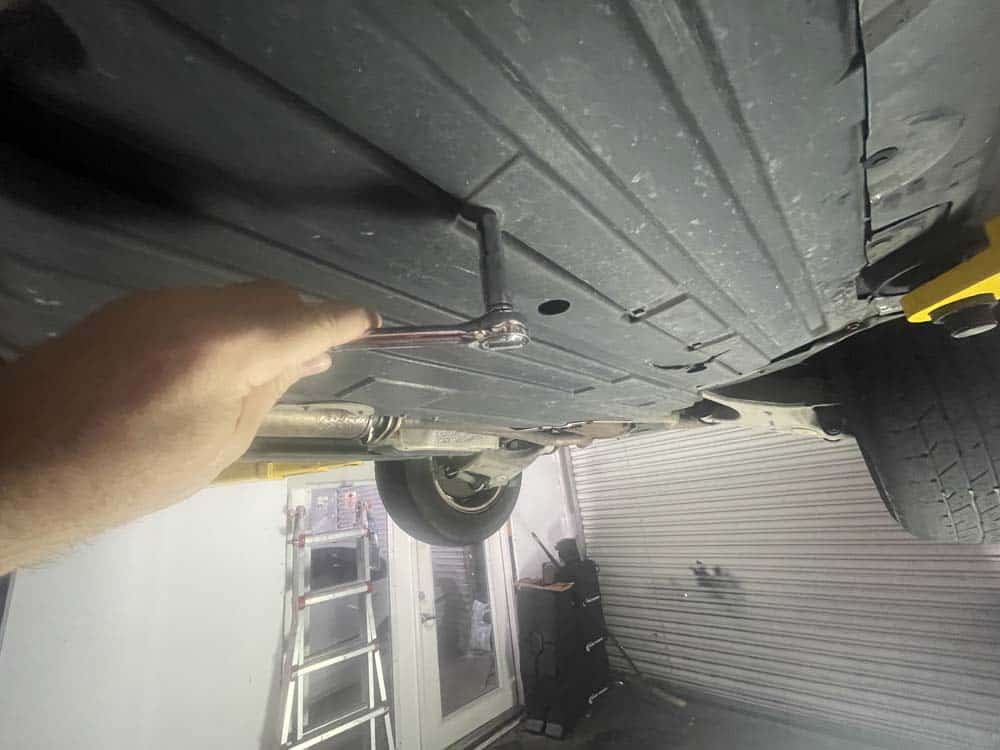
- The last mounting screw and bolts are located at the rear of the cover.
- Start by removing the 10mm trim screw at the rear of the cover.
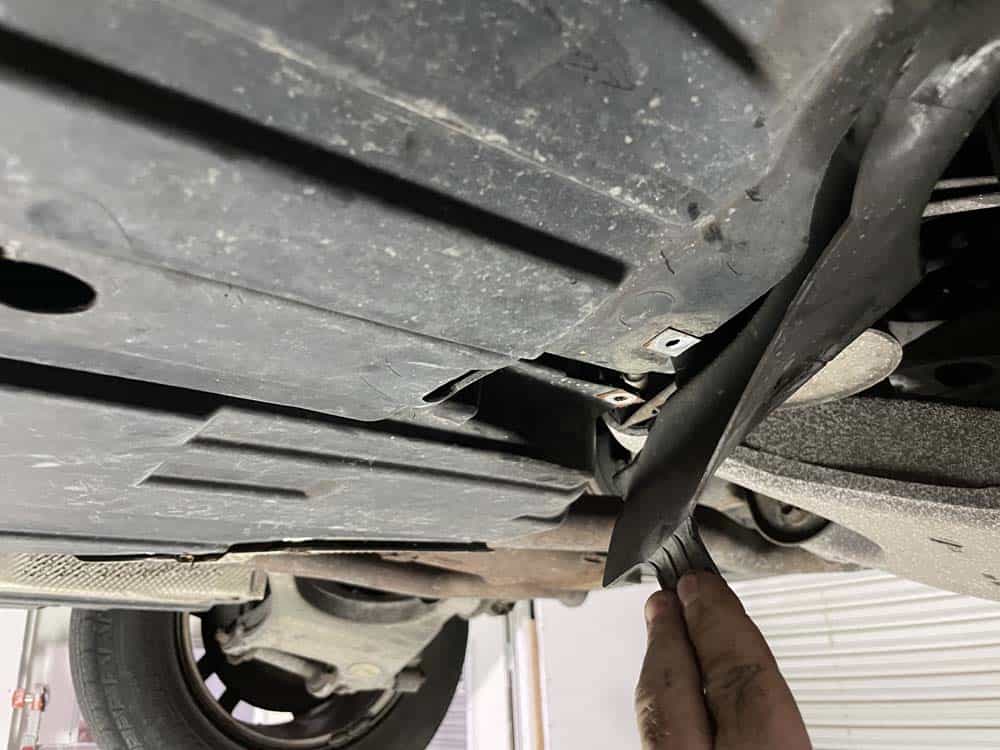
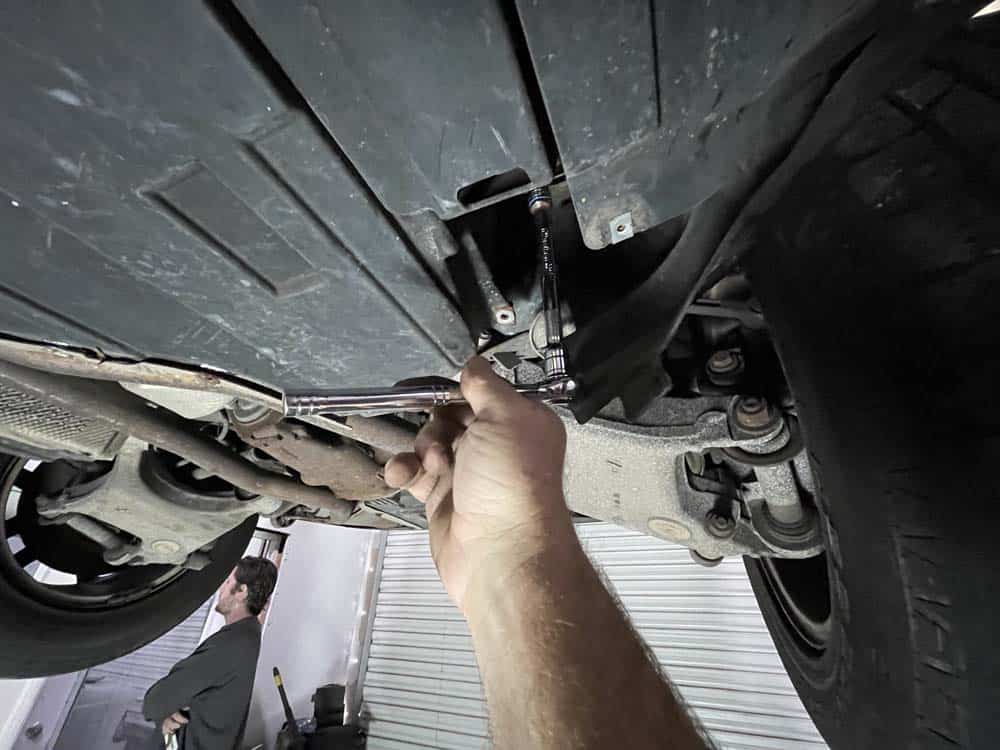
- The last two bolts are hidden. Begin by removing the 8mm trim screw at the rear of the cover and folding the plastic trim back as shown below.
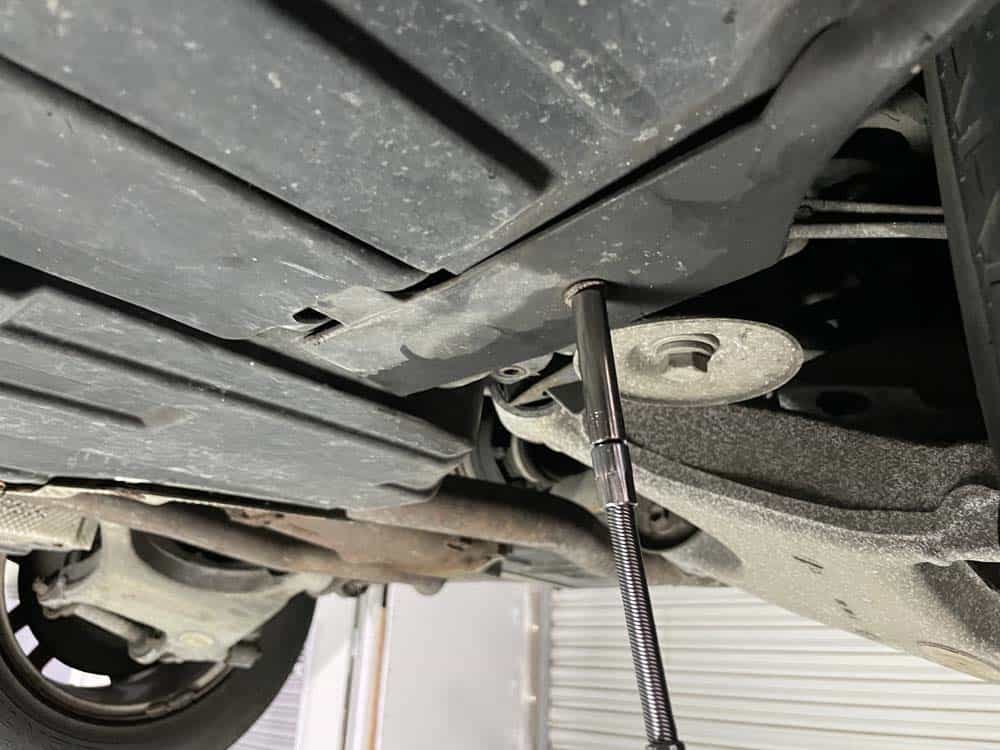
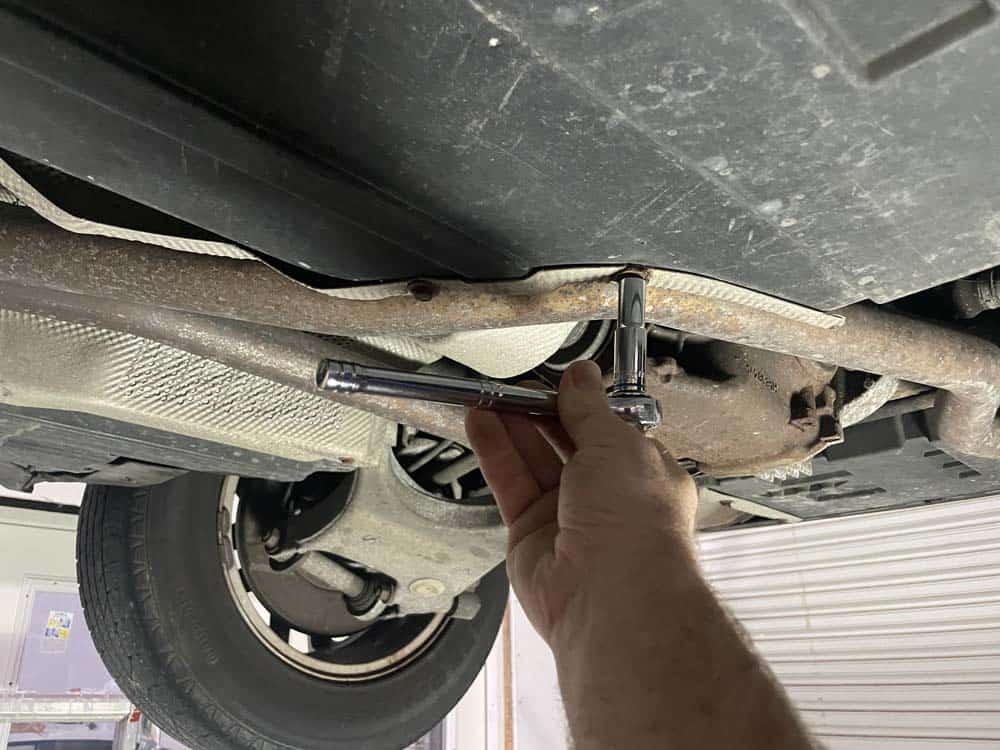
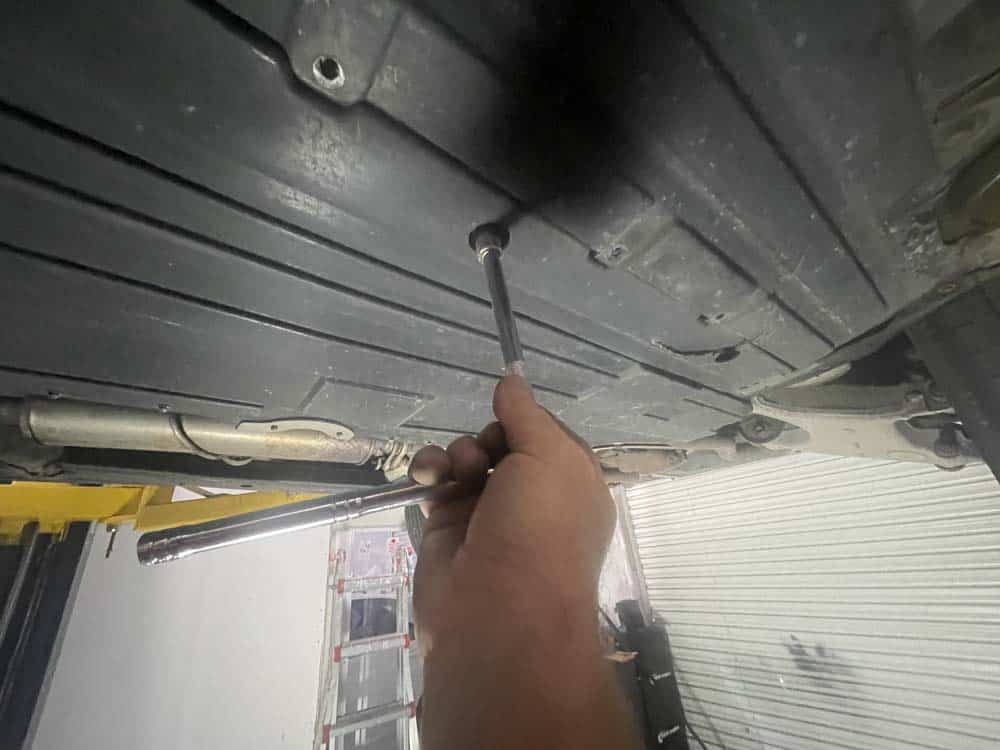
- Remove the 13mm mounting bolt hidden behind the trim panel.
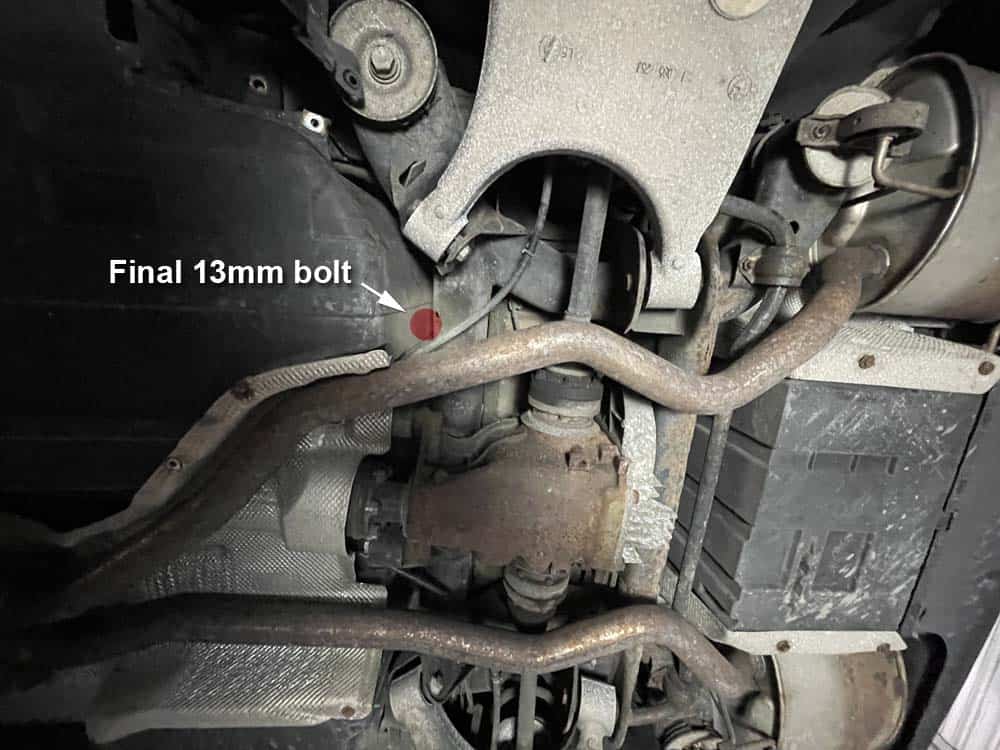
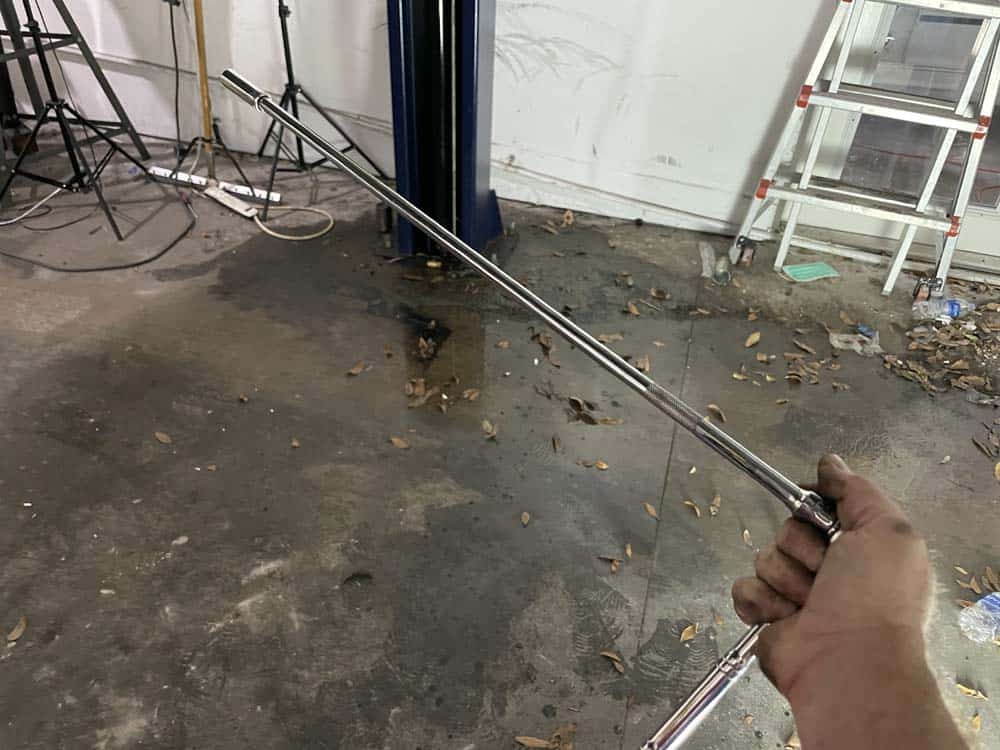
- The final 13mm bolt is tricky to access. It requires a long extension to reach. It is located at the rear of the panel as shown below.
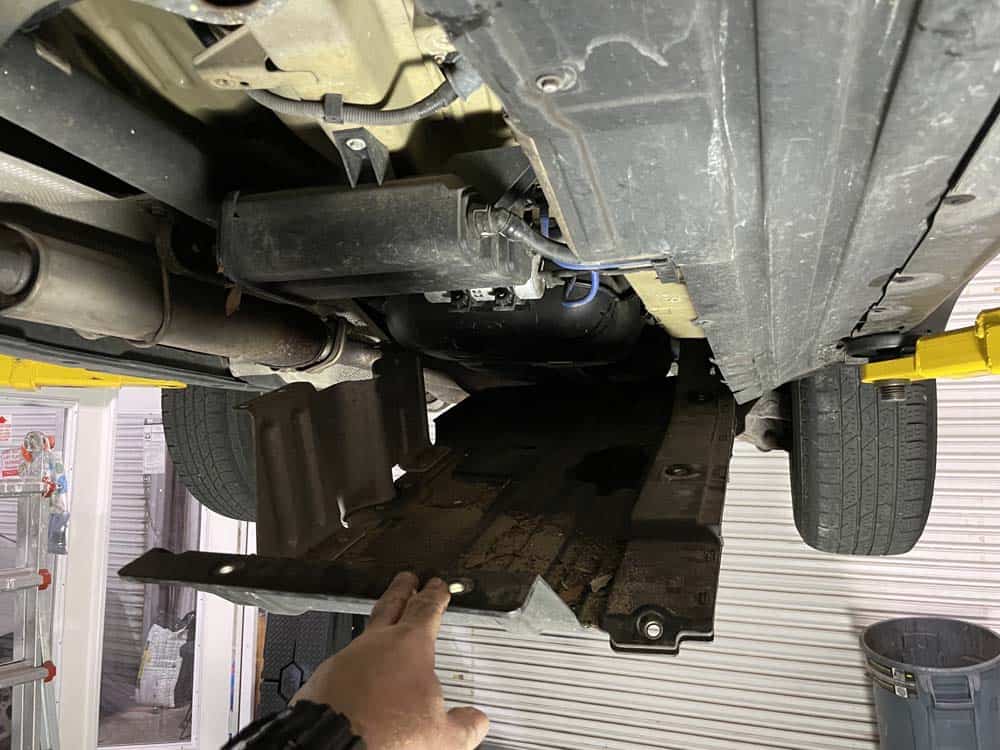
- The fuel tank cover can now be lowered. Grasp it firmly and pull it down until the fuel filter can be accessed.
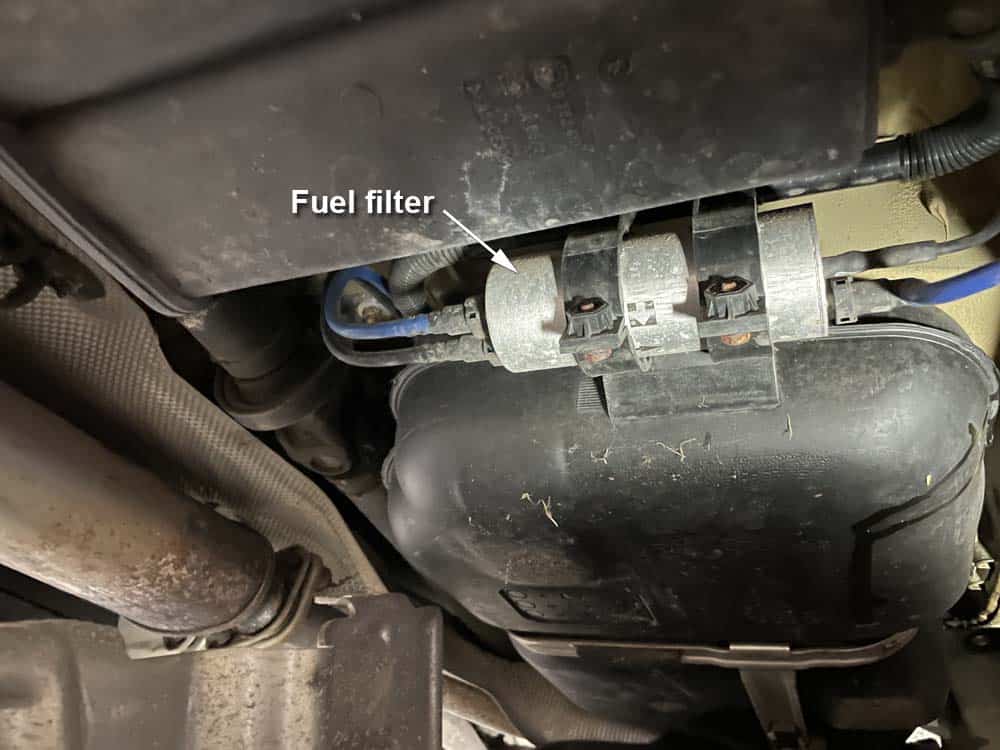
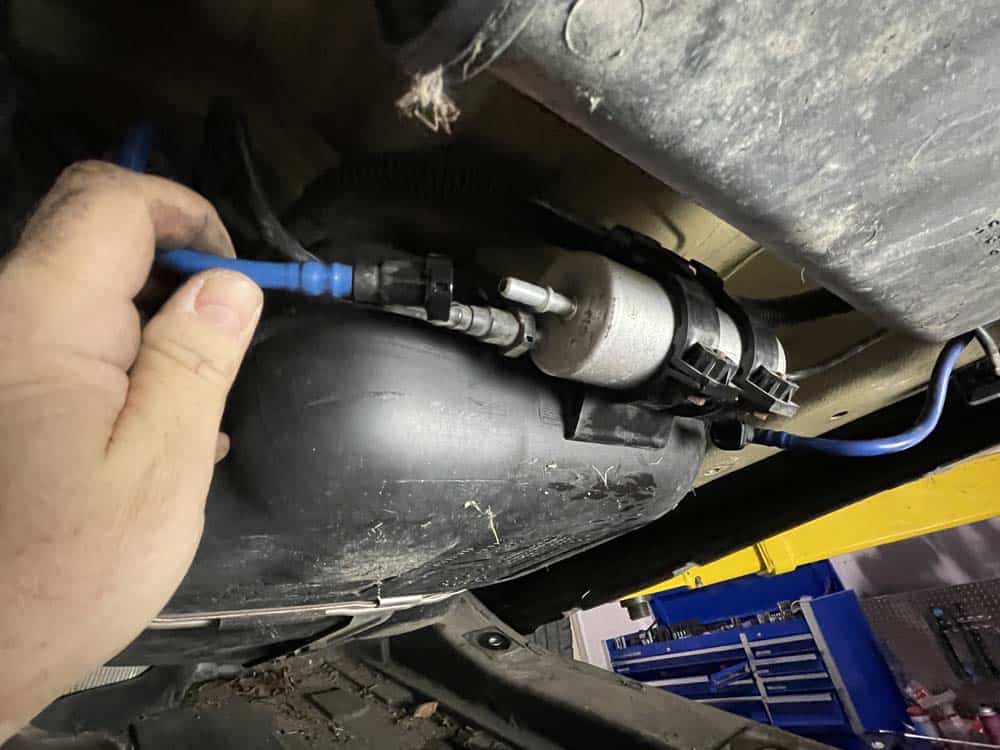
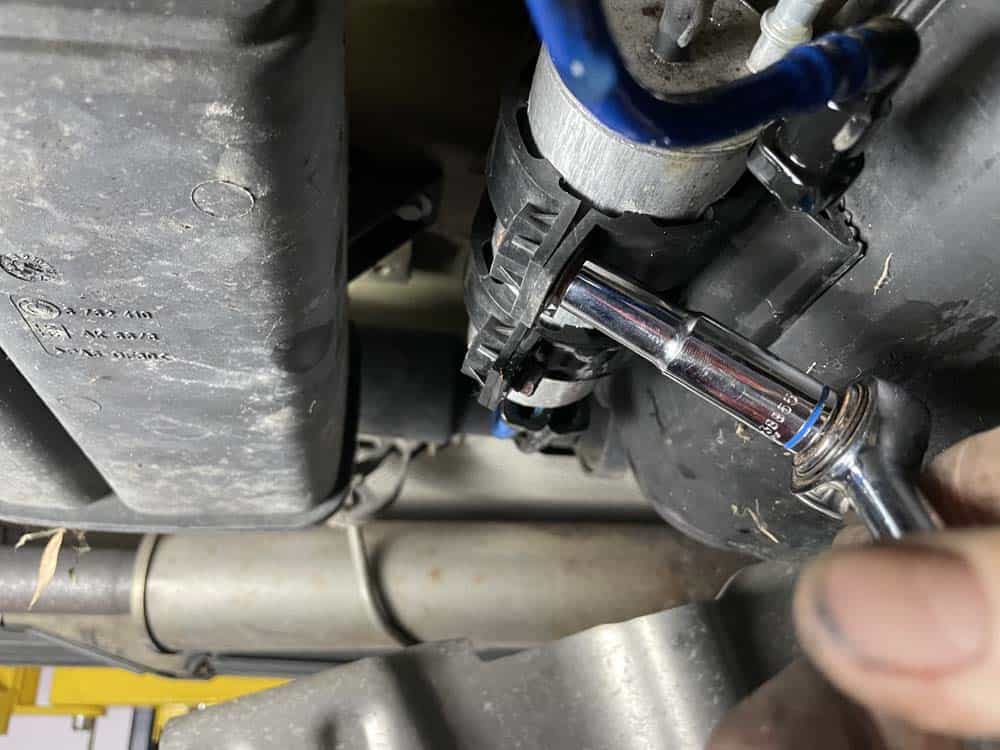
- Use a steel pick to depress the plastic release on the fuel lines as shown below. Pull the lines free of the fuel filter.
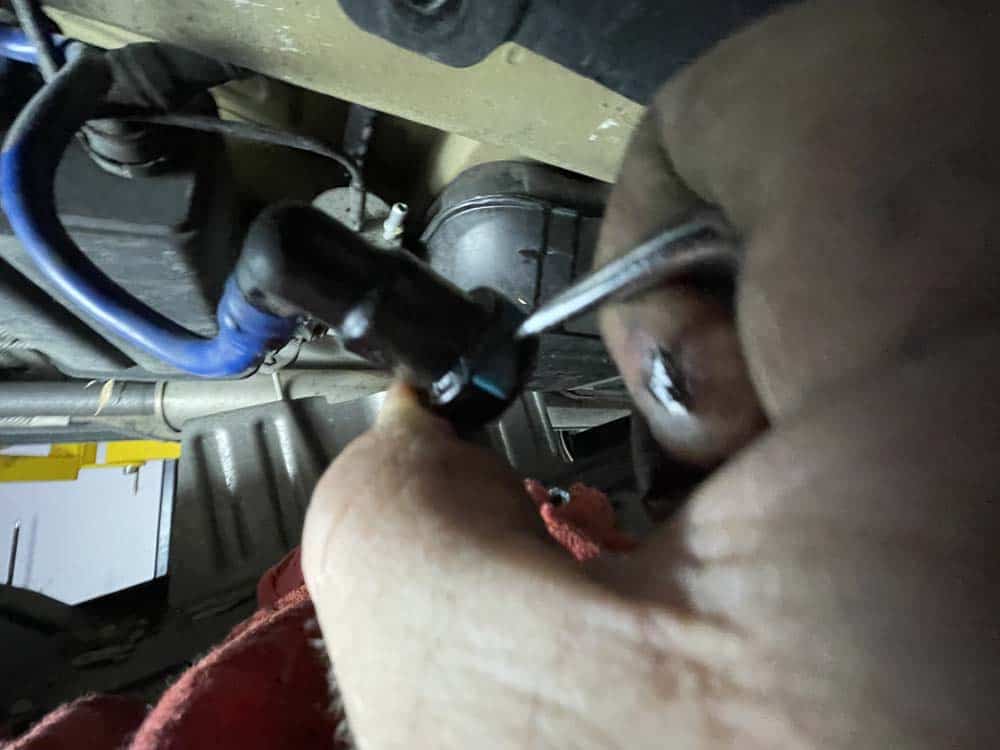
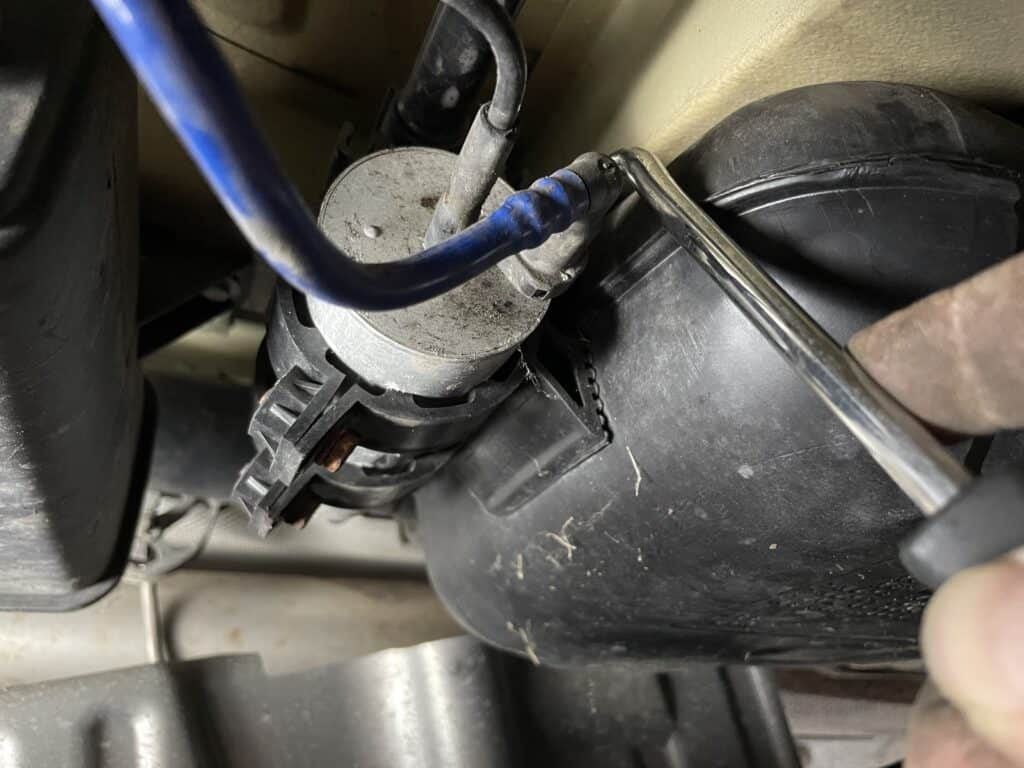
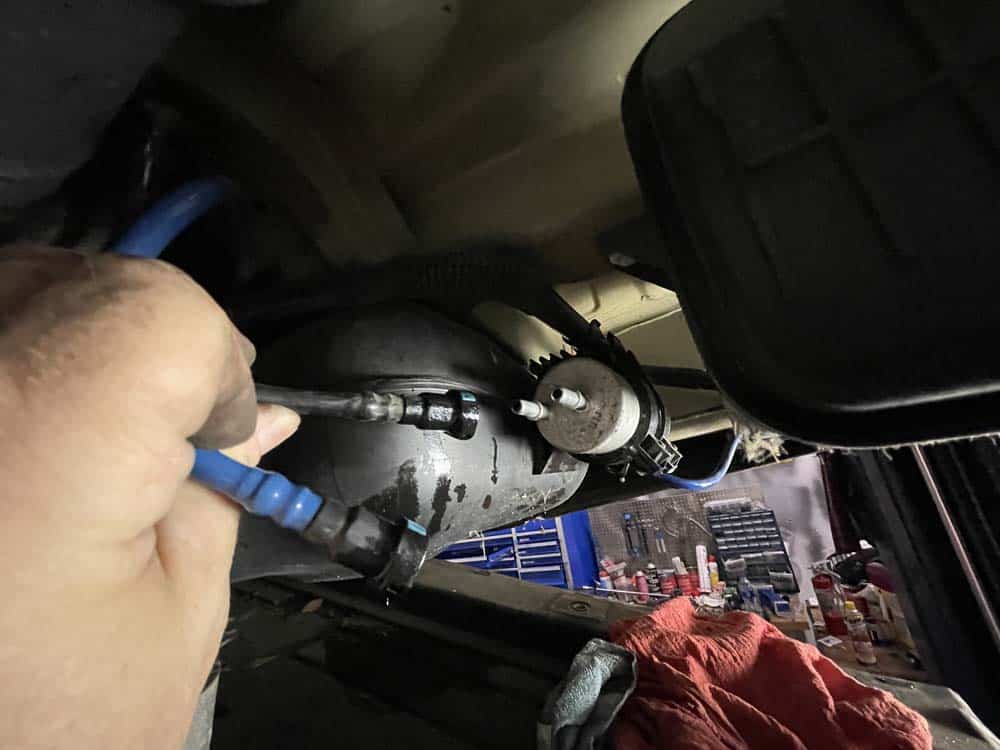
- Use a flat blade screwdriver to remove the rubber vent line from the fuel filter.
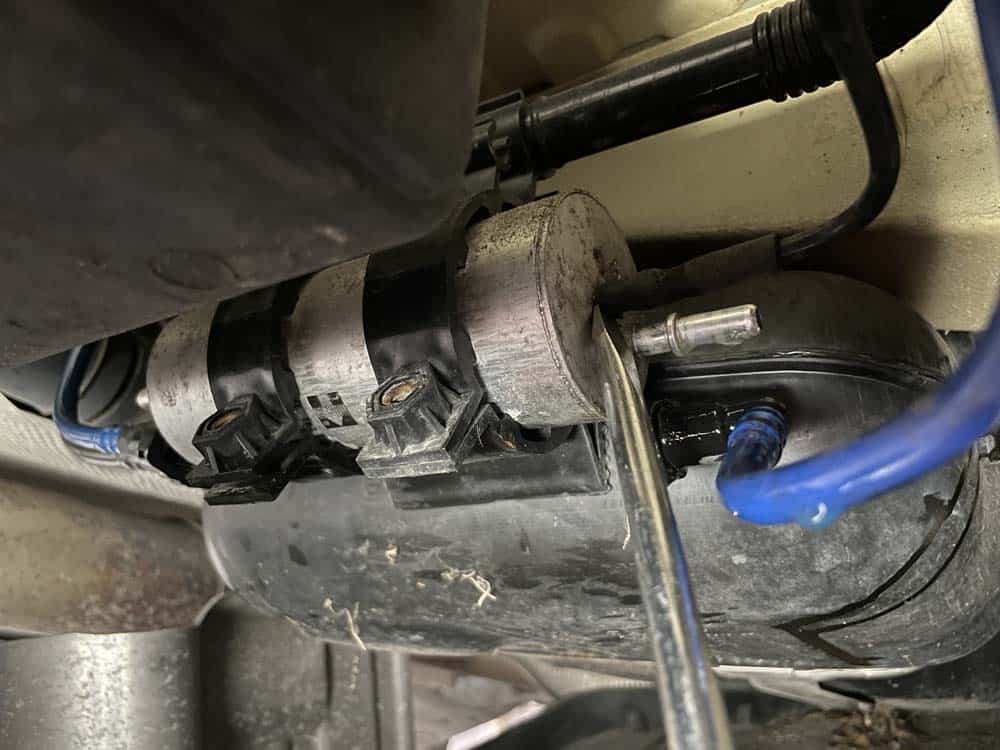
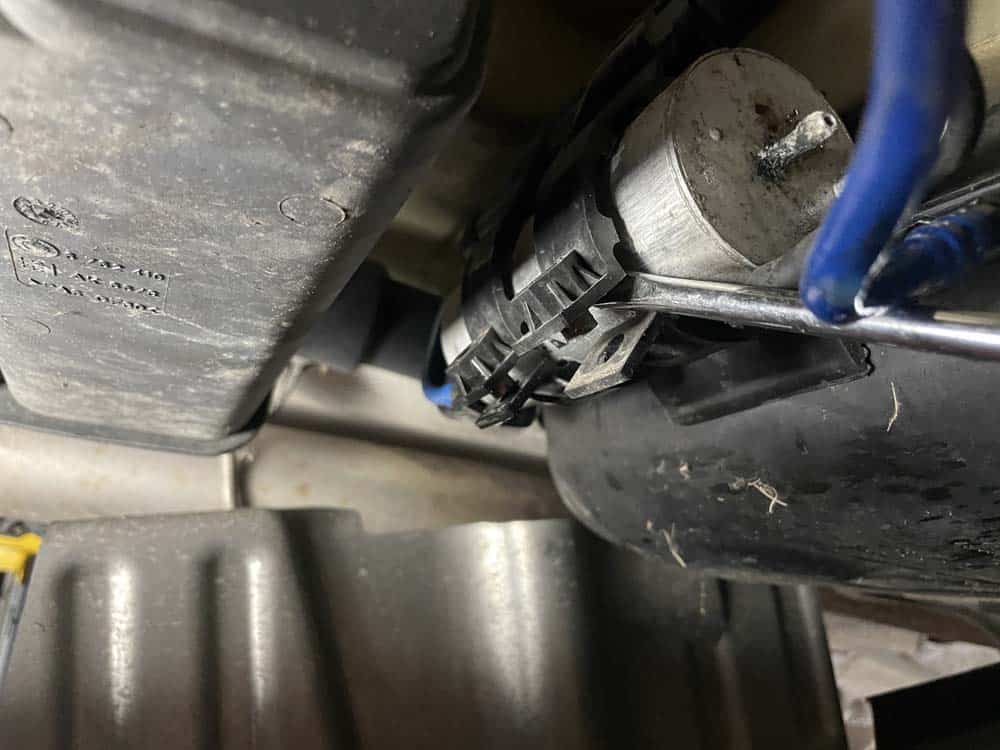
- Remove the two 10mm mounting clamp bolts. Use a flat blade screwdriver to spread the clamps open.
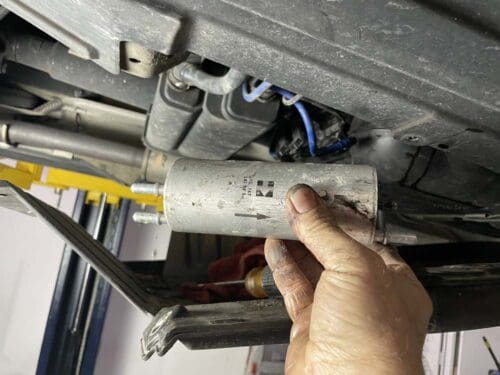
- Remove the fuel filter.
- Reassemble following the above steps in reverse.
BMW E53 fuel filter replacement finished