Affiliate link disclosure – The BMW Repair Guide uses affiliate links in their site. For more information on affiliate links, please click here.
Repair Summary
This article provides detailed instructions on replacing the fuel pump and fuel level sensor in a BMW E53 X5 vehicle. Even though we used a 2005 X5 3.0 to perform this repair, this article can be applied to all 2000-2006 X5 vehicles with minor modifications to the steps.
See all vehicles this article applies to
E53 X5 Series X5 4.8is
E53 X5 Series X5 4.6is
E53 X5 Series X5 4.4i
E53 X5 Series X5 3.0i
E53 X5 Series X5 3.0d
A BMW E53 fuel pump and fuel level sensor replacement is a relatively easy repair for the home mechanic.
The BMW E53 X5 was produced from 2000-2006 and is powered by either a fuel-injected six or eight-cylinder engine. The engine is supplied fuel from a jet pump located under the rear passenger seat. The jet pump is connected to a fuel level sensor, also under the rear seat, and a fuel filter/pressure regulator mounted under the vehicle.
Like all mechanical parts in your E53 X5, the fuel pump and fuel level sensor have a definitive lifespan and will eventually fail. Fuel pump failure can often be quick and without any prior symptoms, leaving the driver stranded with a vehicle that won't start. Early signs that your 2000-2006 X5 fuel pump is failing are hard starts, cylinder misfires, rough idling with large rpm fluctuations, and a general lack of power. If your fuel level gauge is displaying the wrong fuel amount or is completely inoperable, then your fuel level sensor is most likely the culprit.
Performing an E53 fuel pump and fuel level sensor replacement on your 2000-2006 X5 is a relatively easy procedure for the home mechanic with average abilities. Both units are conveniently located under the rear seat and can be replaced in less than an hour. We cannot stress enough replacing both the fuel pump and the level sensor together...even if one is malfunctioning. Both units operate under the same conditions; if one is failing, the other is probably not far behind. We also strongly recommend replacing the fuel filter as when performing this repair. Please see our article BMW E52 fuel filter replacement for step-by-step instructions.


View the detailed parts diagram for this repair.
Includes detailed part diagrams, part numbers and links to purchase all of the required components needed to complete this repair.

Before starting this repair, you must have the following required parts.
Fits all 2000-2006 X5 vehicles
The fuel pump can go bad in your BMW with very little warning. Replace your old fuel pump with this high-quality replacement. The BMW Repair Guide recommends also replacing the fuel level sensor as well.
Fits all 2000-2006 X5 vehicles
If you are experiencing errors with your fuel gauge, it's most likely a faulty fuel level sensor. Always replace the fuel pump in your vehicle with the sensor...if one is failing the other is most likely not far behind.
Fits most BMW and Mini Vehicles
Easily remove the locking ring from your fuel pump and fuel level sensor with this handy tool.
Section 1 - Replacing the E53 fuel pump and fuel level sensor
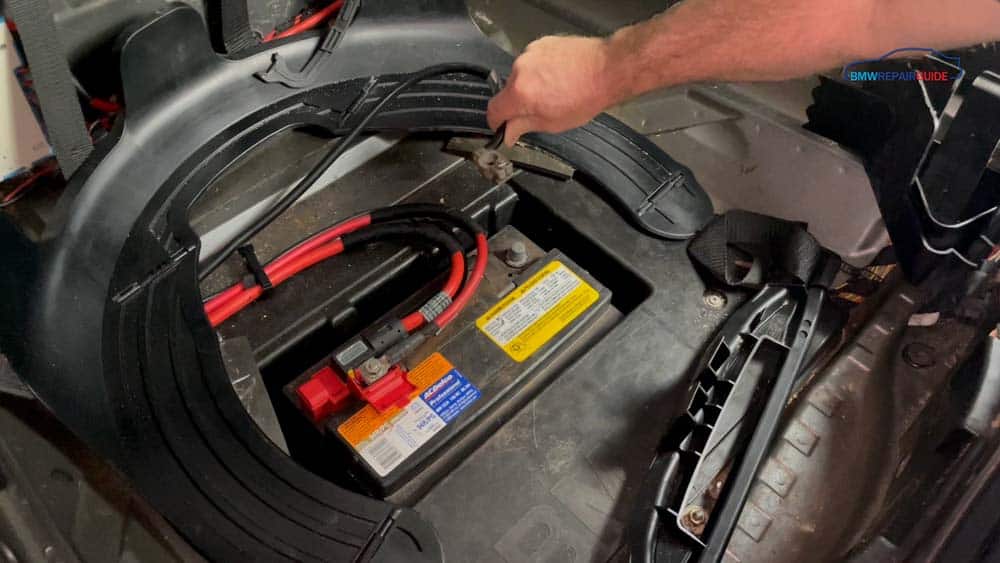
The fuel pump and fuel level sensor in 2000-2006 X5 vehicles are conveniently located underneath the rear seat. It is very important that the battery is disconnected before starting any repairs around the gas tank to avoid an accidental spark from igniting the fuel.- Disconnect the battery by removing the negative cable and wrapping a rag around it. Wrapping a rag around the end of the cable will prevent it from inadvertently touching the battery and causing a spark.
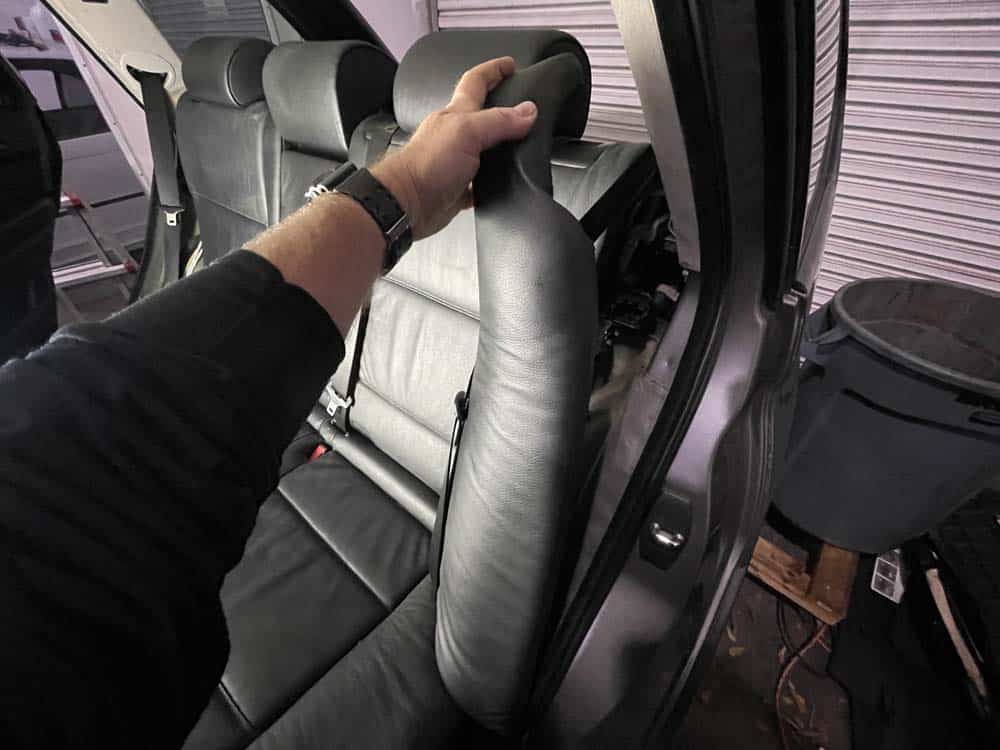
- Grasp the lateral seat cushions and pull them loose from the body of the vehicle.
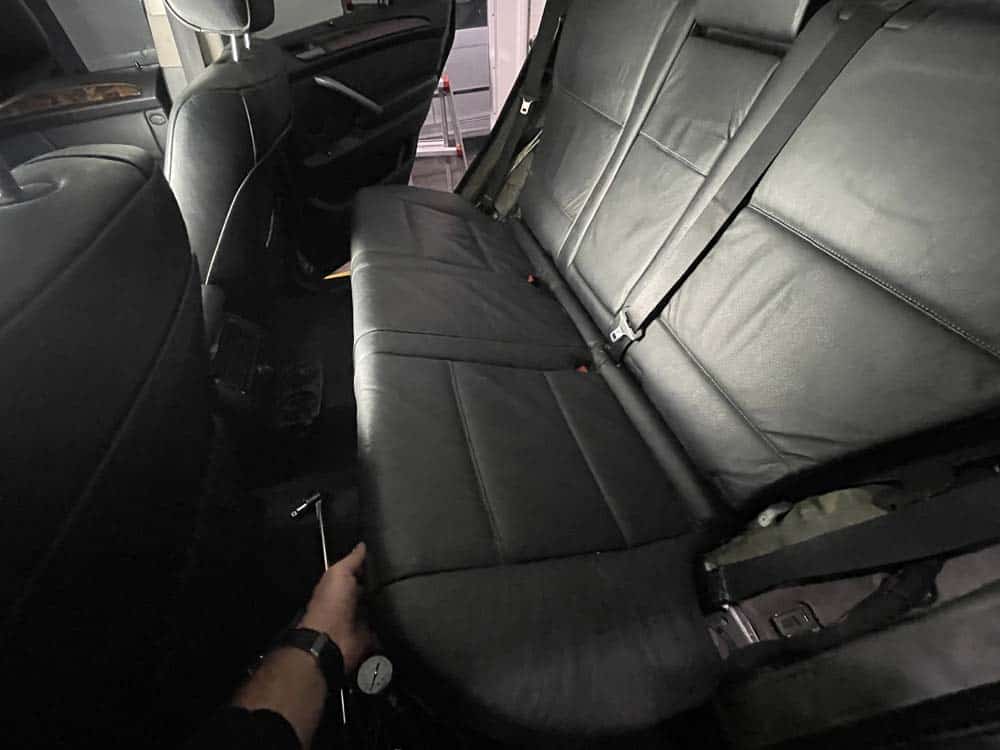
- Grasp the rear seat at the front and pull it loose from the floor of the vehicle. Roll it back and out of the work area.
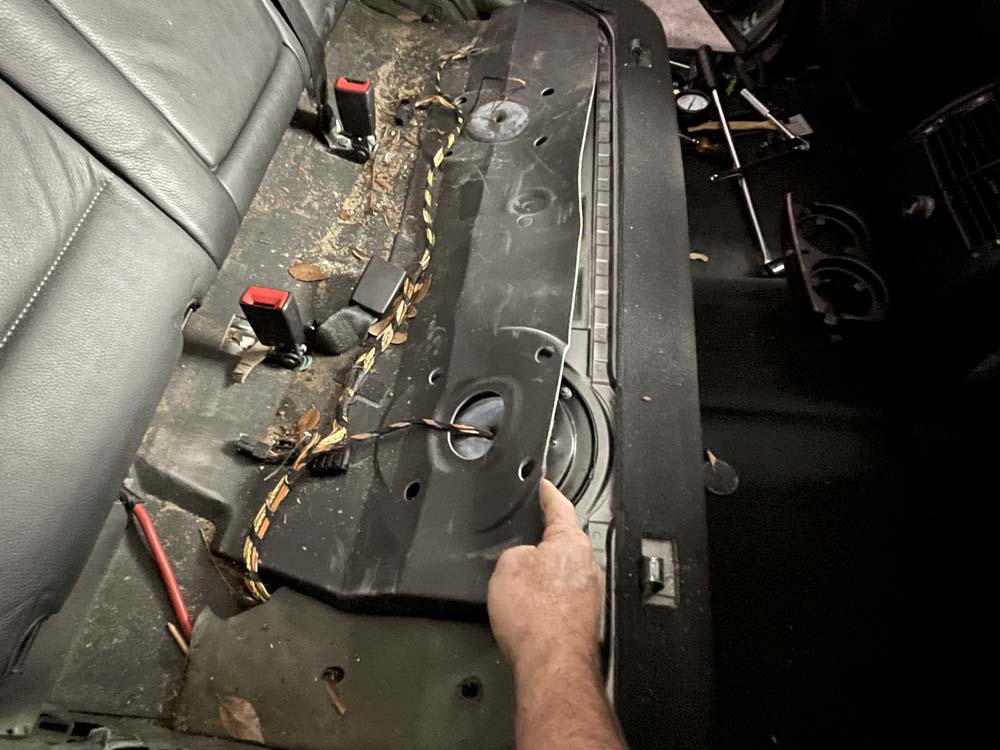
- Fold back the sound insulation.
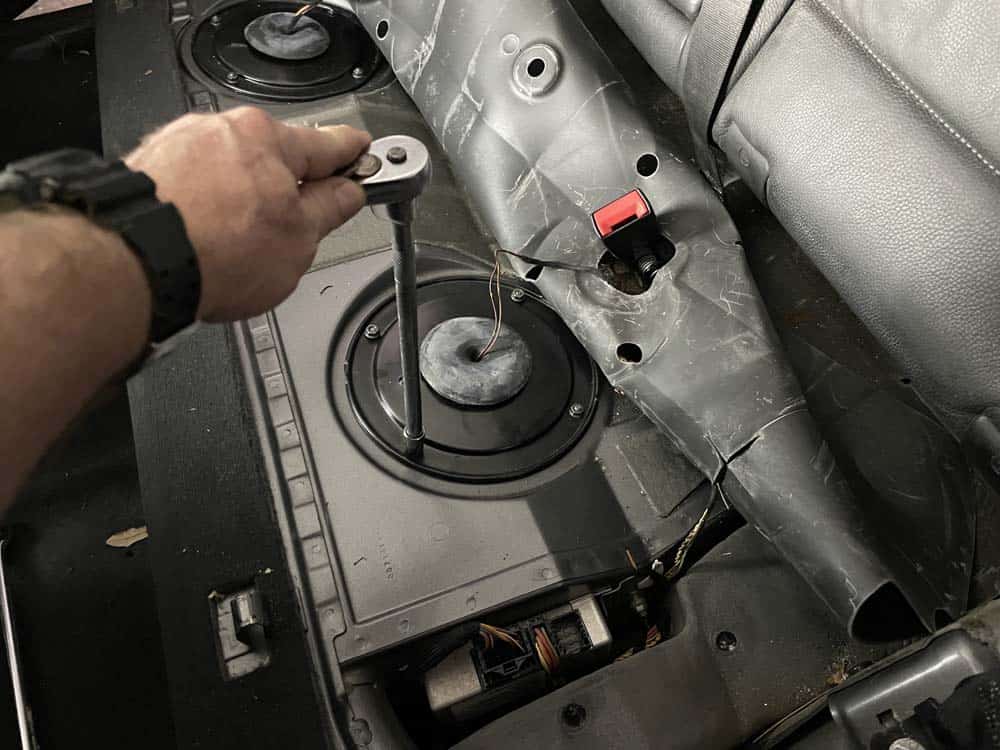
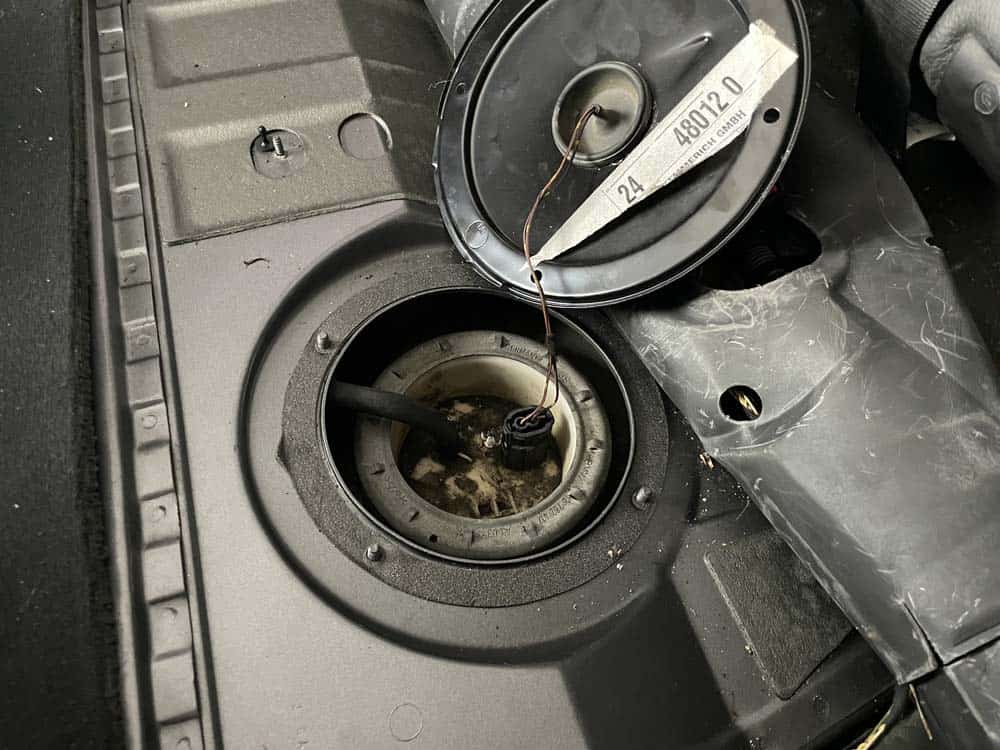
- Remove the cover off of the fuel pump. It is held in place with four
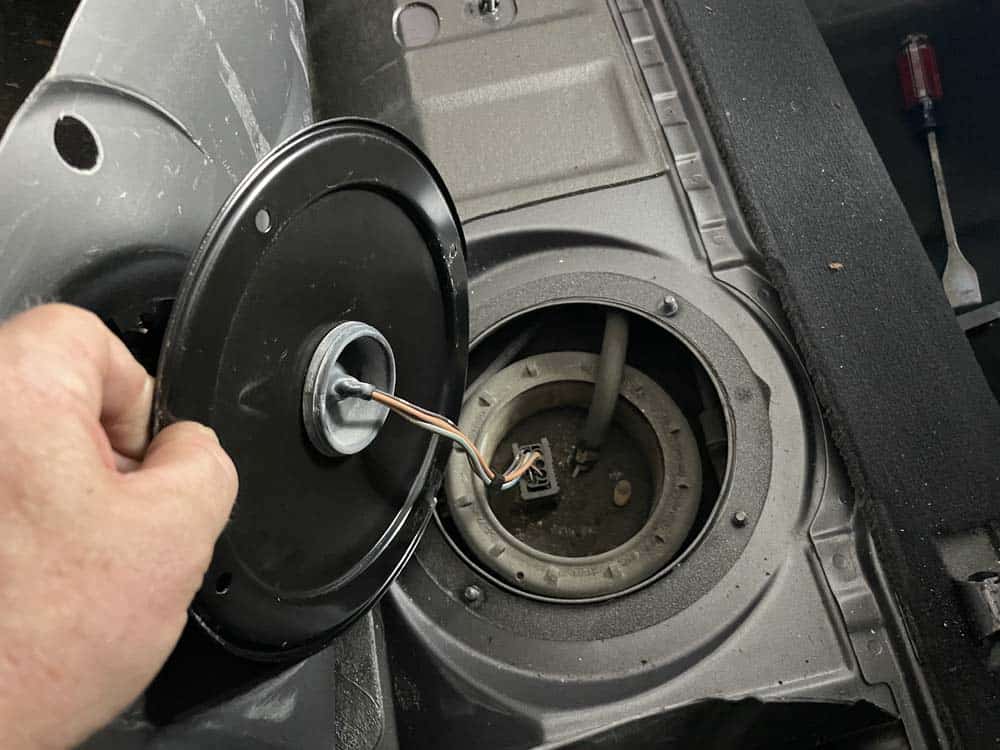
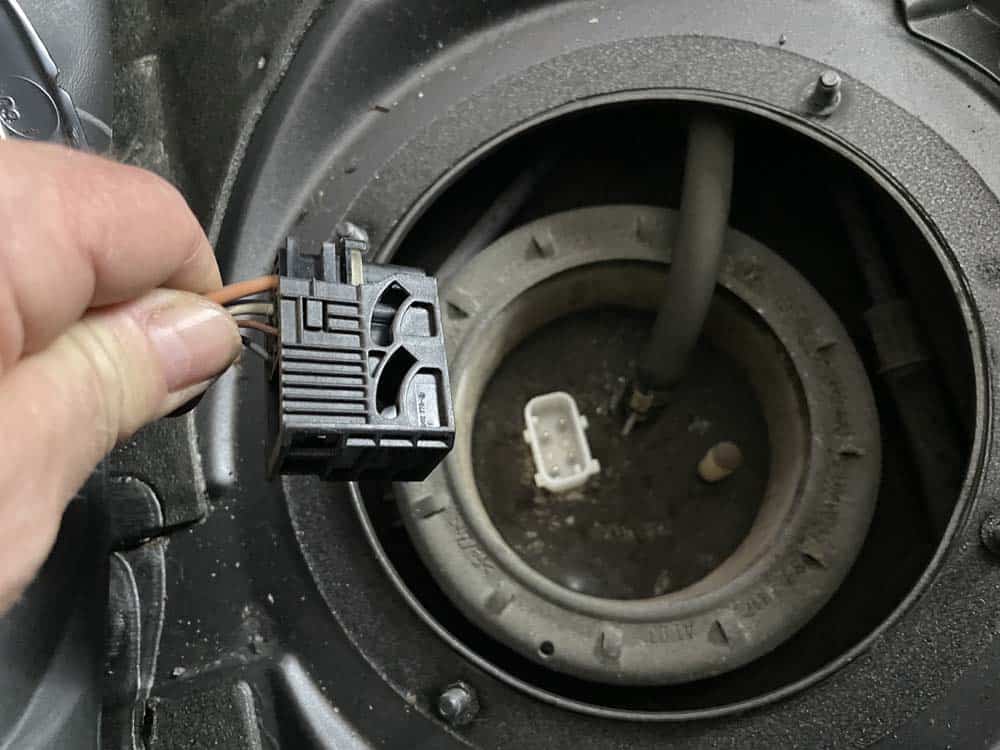
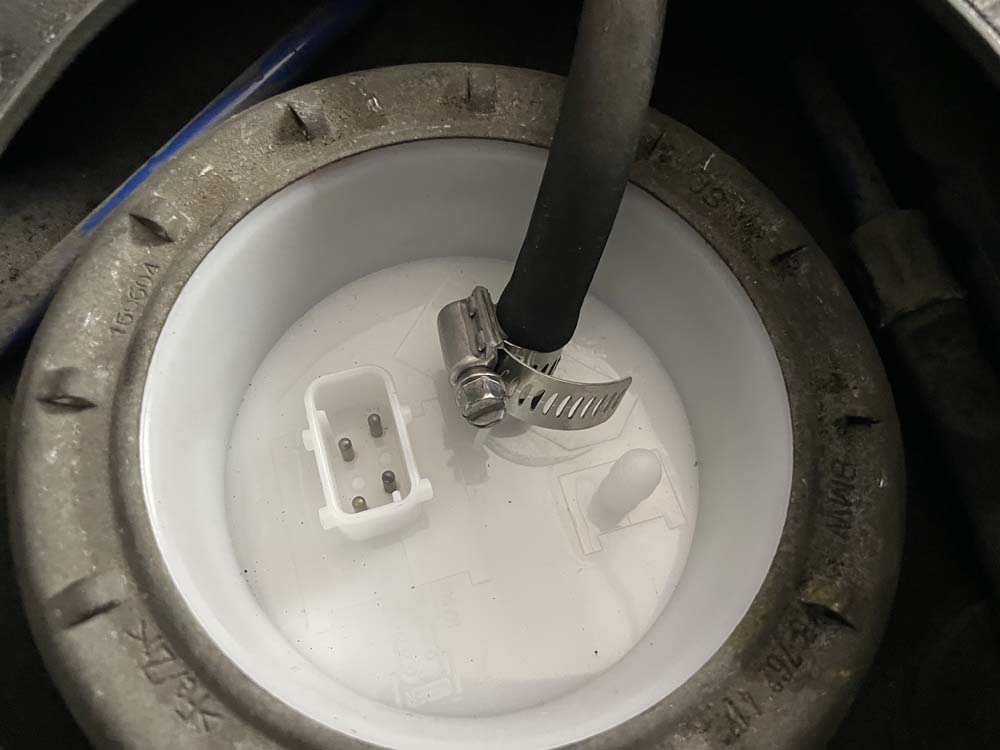
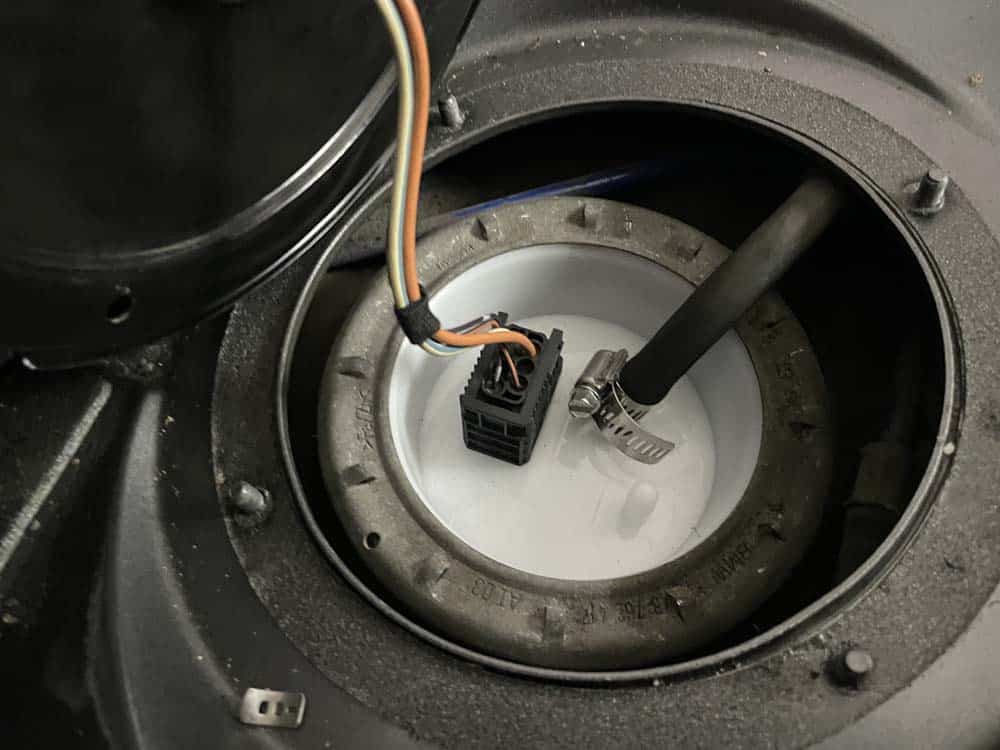
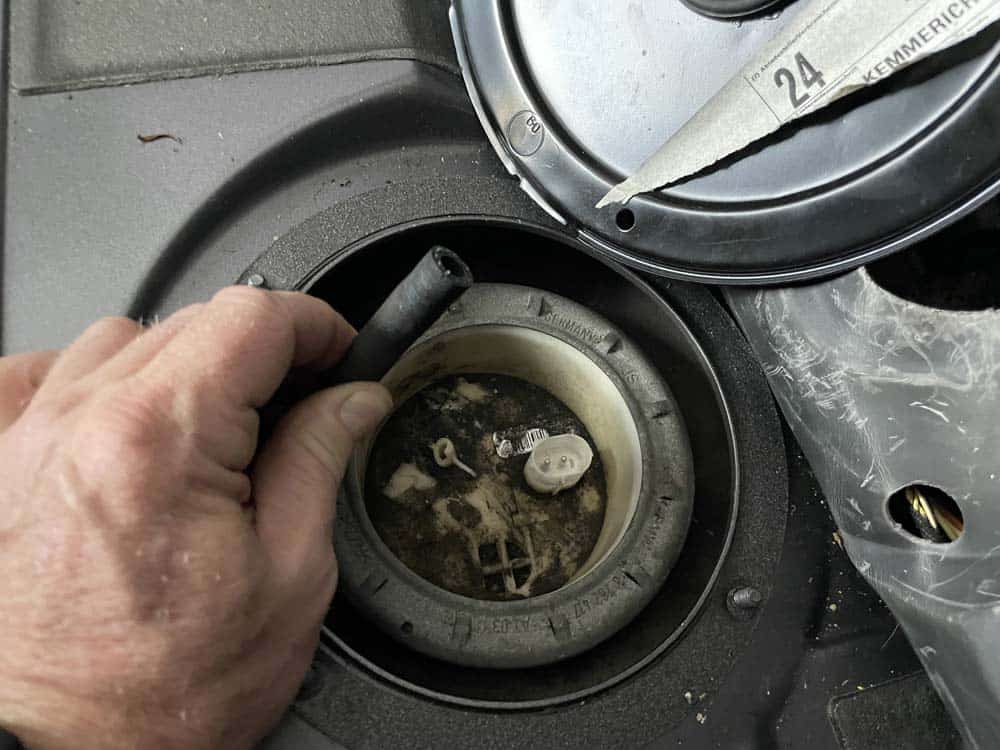
- Unplug the fuel pump by sliding back the plastic lock and pulling it free from the pump.
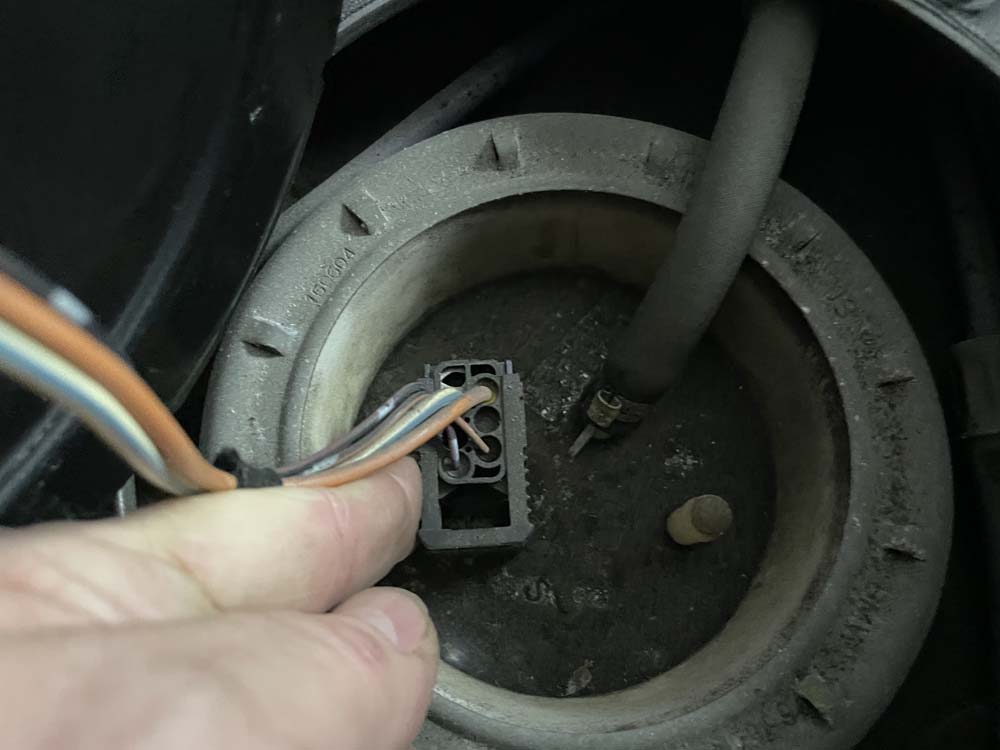
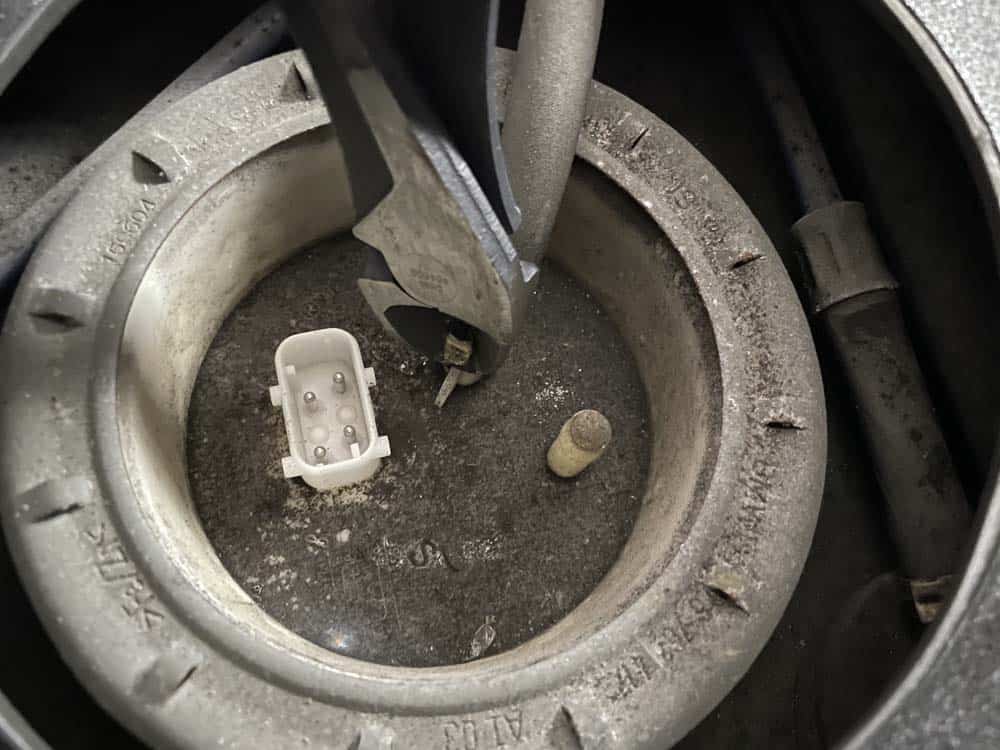
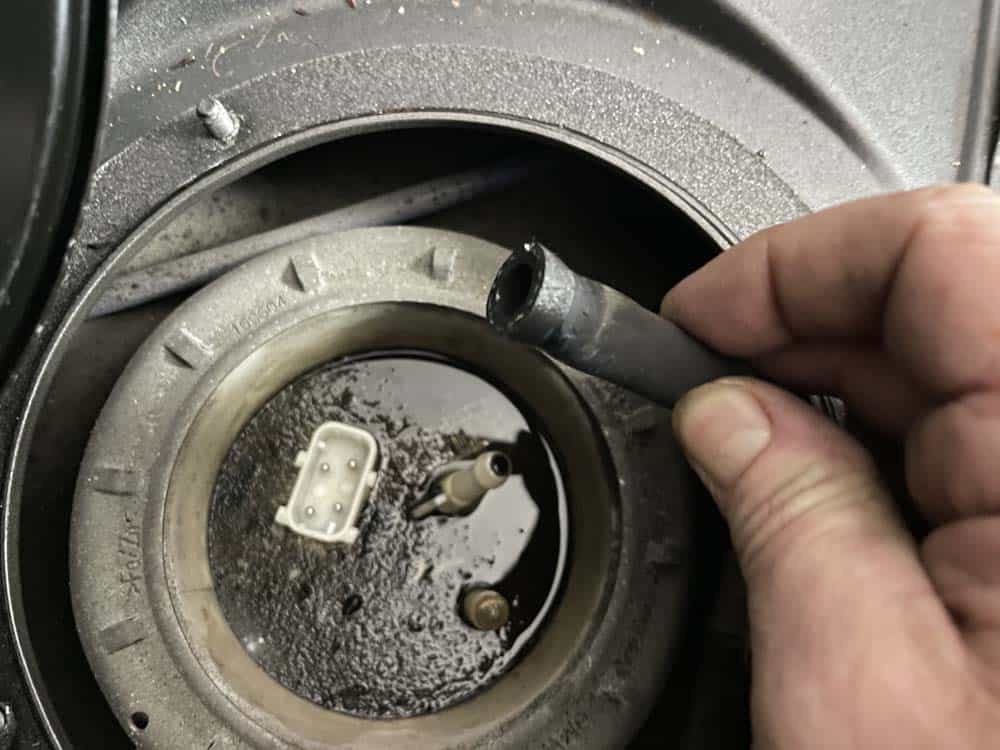
- Remove the fuel line from the top of the pump. If the original factory crimped hose clamp is still on the fuel line, cut it off with a pair of large wire cutters.
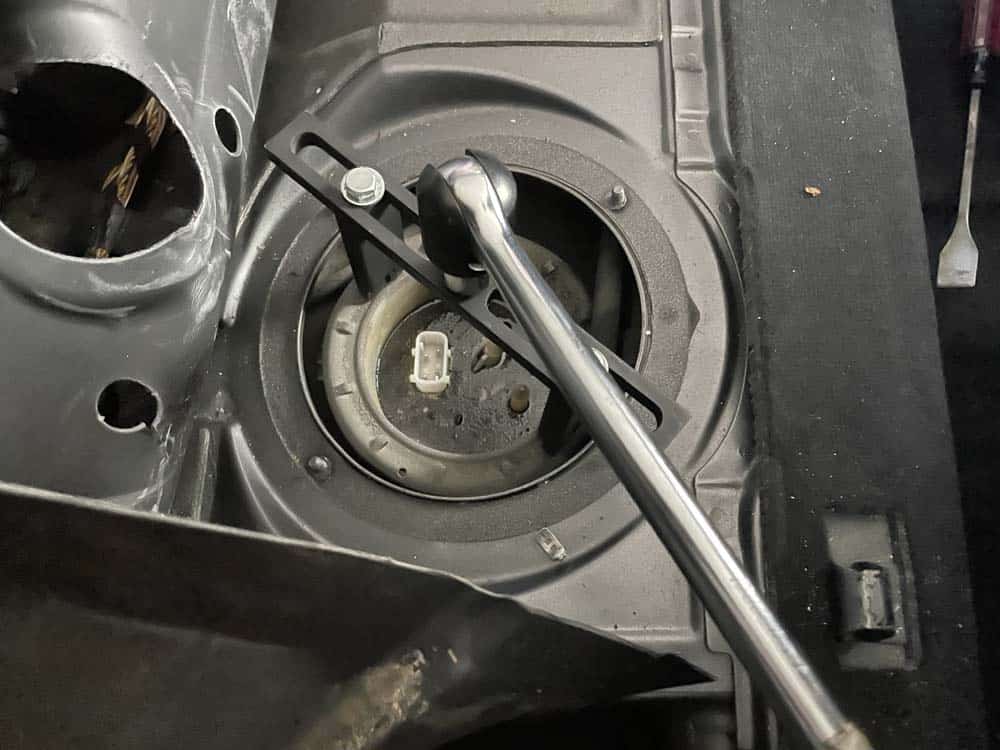
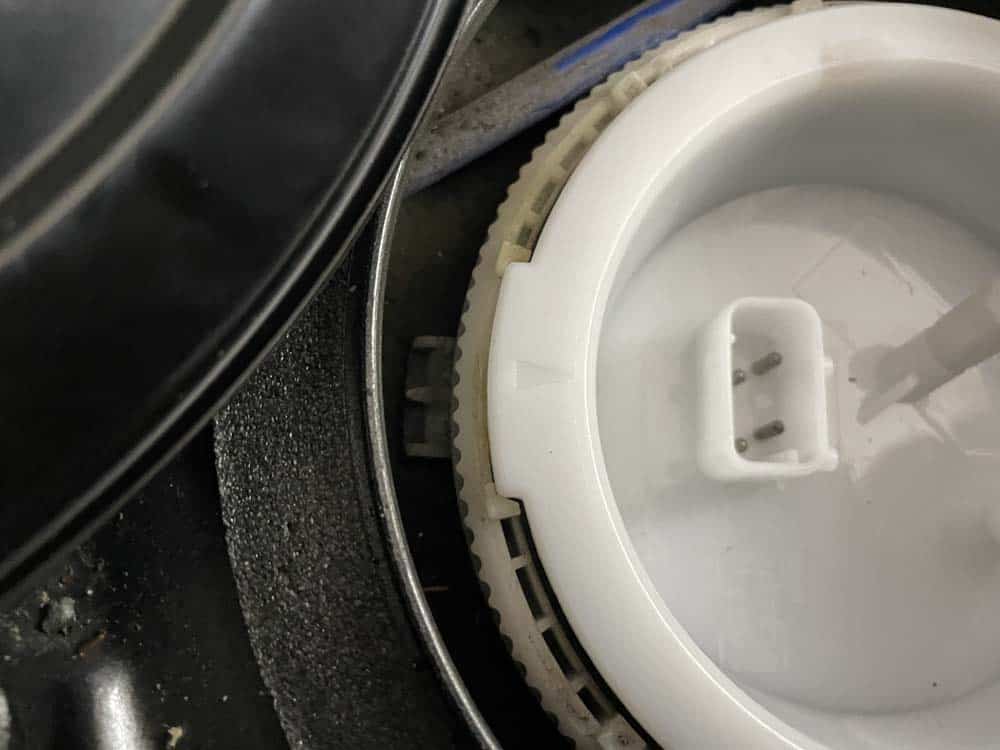
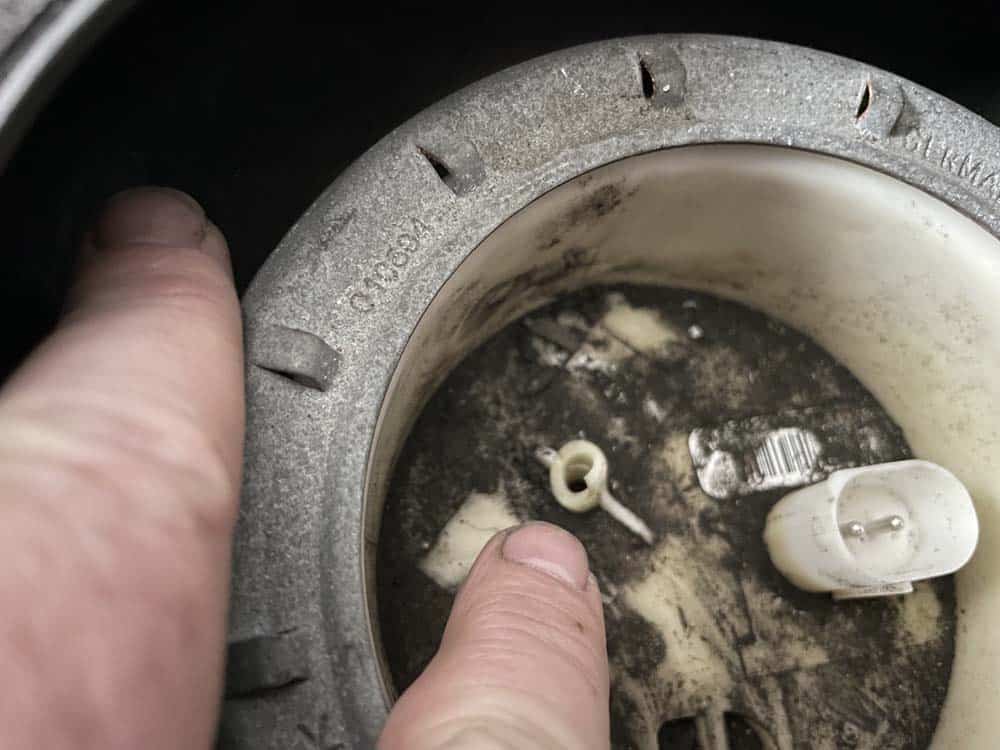
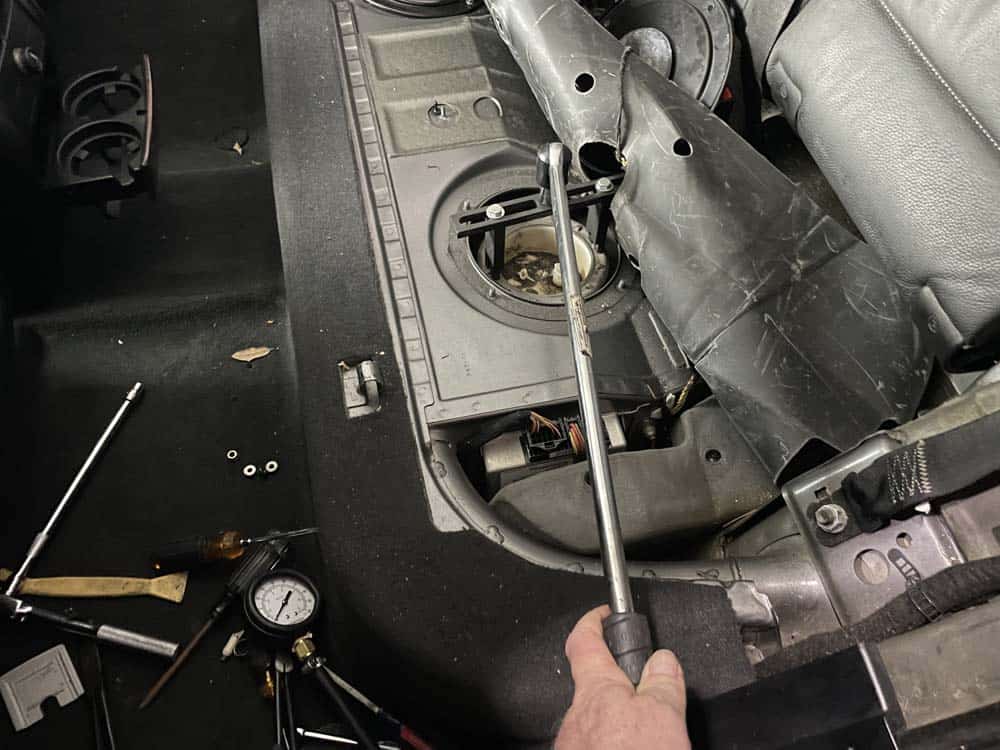
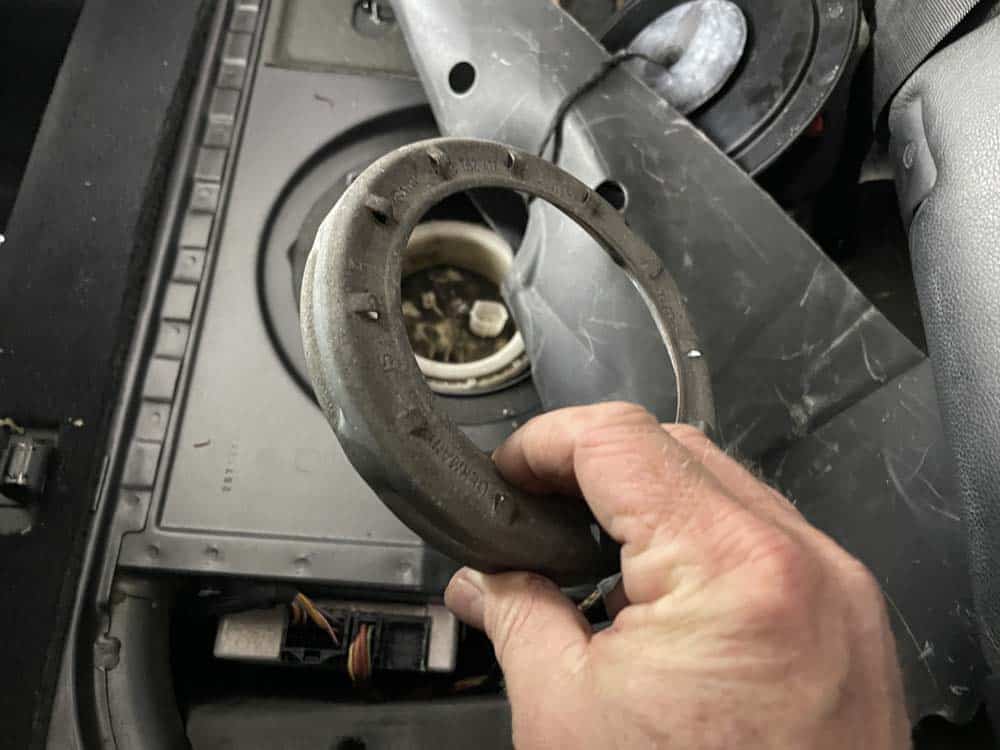
- Using a fuel pump removal tool (see our parts list above to order one) and a long breaker bar, loosen the locking ring. Once the ring is loose, use your fingers to turn and remove it from the pump.

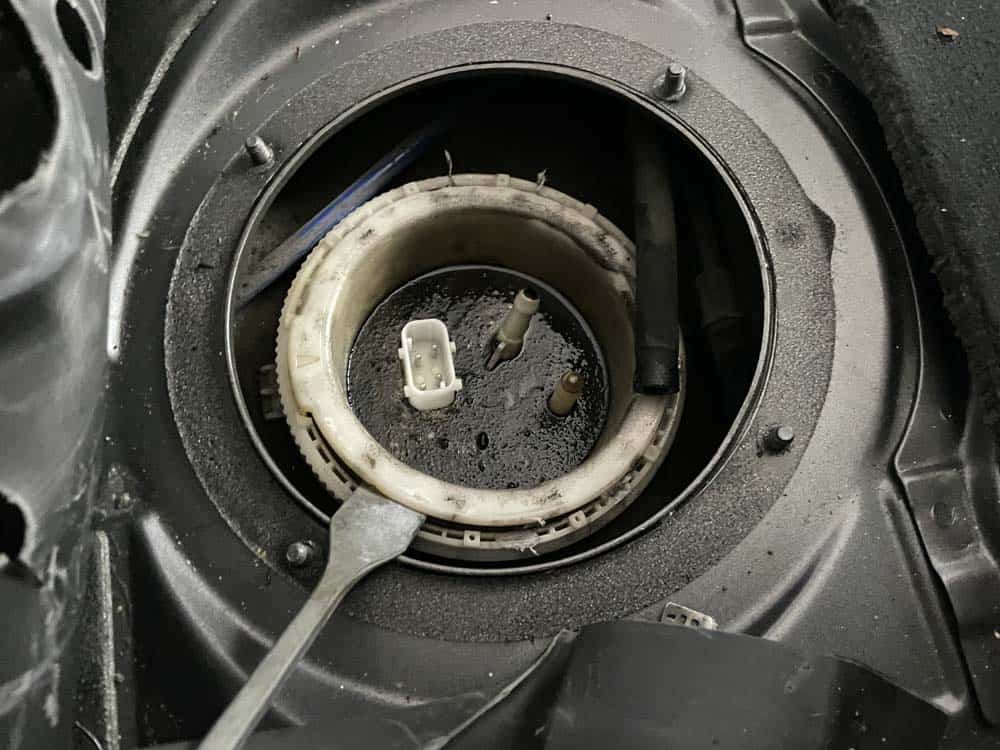
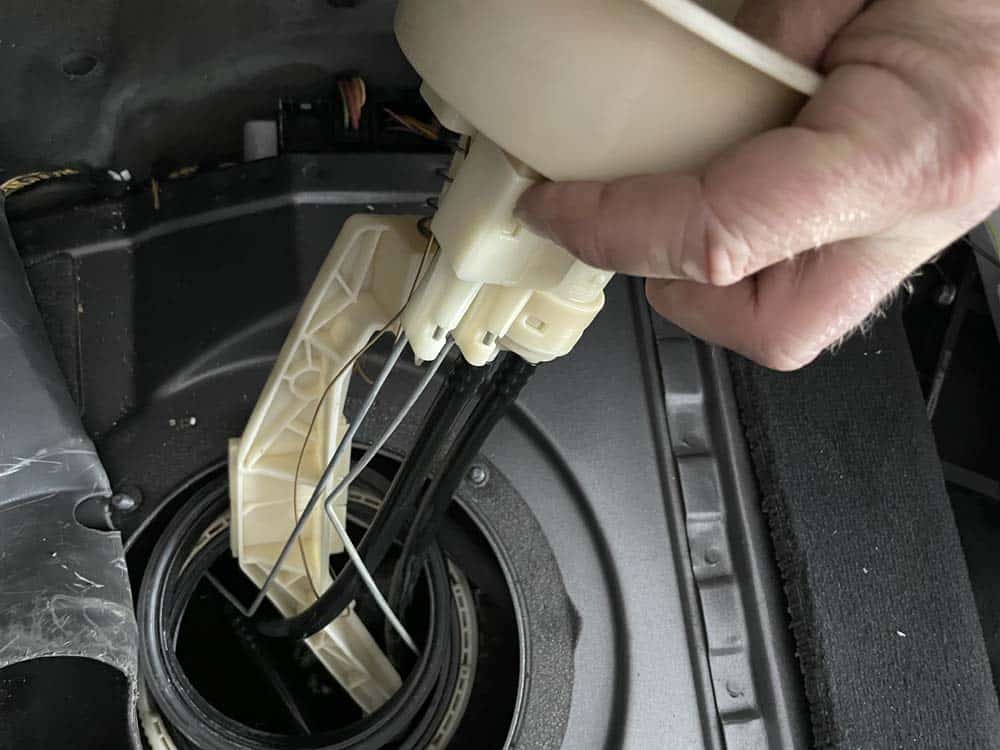
- Remove the fuel pump from the tank. You may need to use a flat blade screwdriver to gently pry it out.
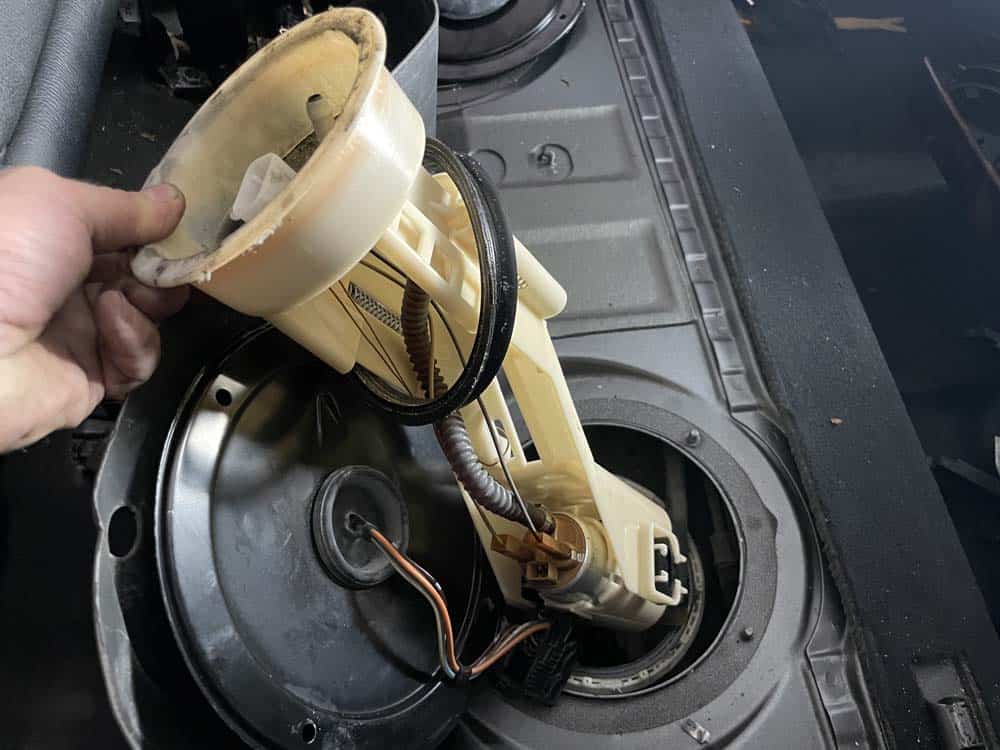
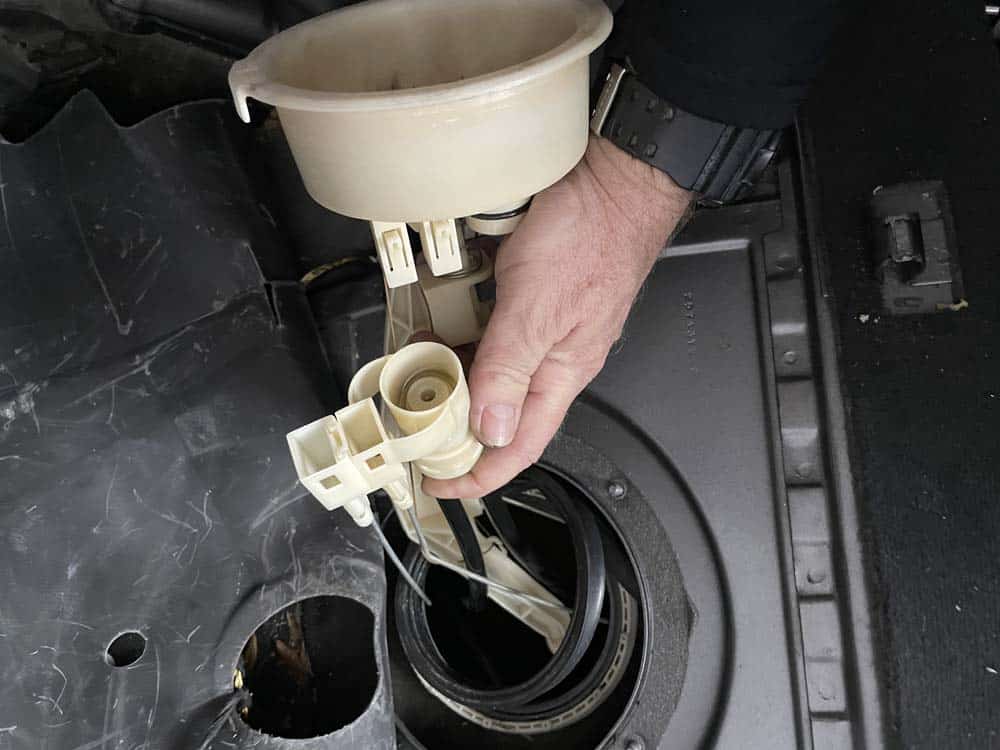
- Install the new fuel pump. We highly recommend changing out the pump's sealing gasket as well (most new pumps come with one). Make sure the notch in the tank lines up with the tab on the pump.
- Reinstall the locking ring. DO NOT overtighten...just make snug. Overtightening the ring could shatter the plastic pump. Reattach the fuel line using a fresh hose clamp and plug the electrical connector back in.
Section 2 - Fuel level sensor replacement
Replacing the fuel level sensor is basically the same steps as the fuel pump above. Be careful when installing the new sensor to prevent the float gauge from binding up.- Follow steps 1-4 from the fuel pump replacement in Section 1 above.
- Remove the cover from the level sensor on the left side of the vehicle. It is held in place with four 10mm nuts.
- Unplug the electrical connector and remove the fuel line from the top of the fuel level sensor. You can see below how brittle old sensors become after years of use...our fuel line literally snapped off before we could even remove the crimp clamp.
- Use a fuel pump tool to remove the sensor's locking ring.
- Grasp the sensor and remove it from the tank. You may need to use a flat blade screwdriver to pry it out of the tank.


- Remove the lower fuel lines from the sensor by depressing the plastic locking tabs and pulling the lines free as shown below.
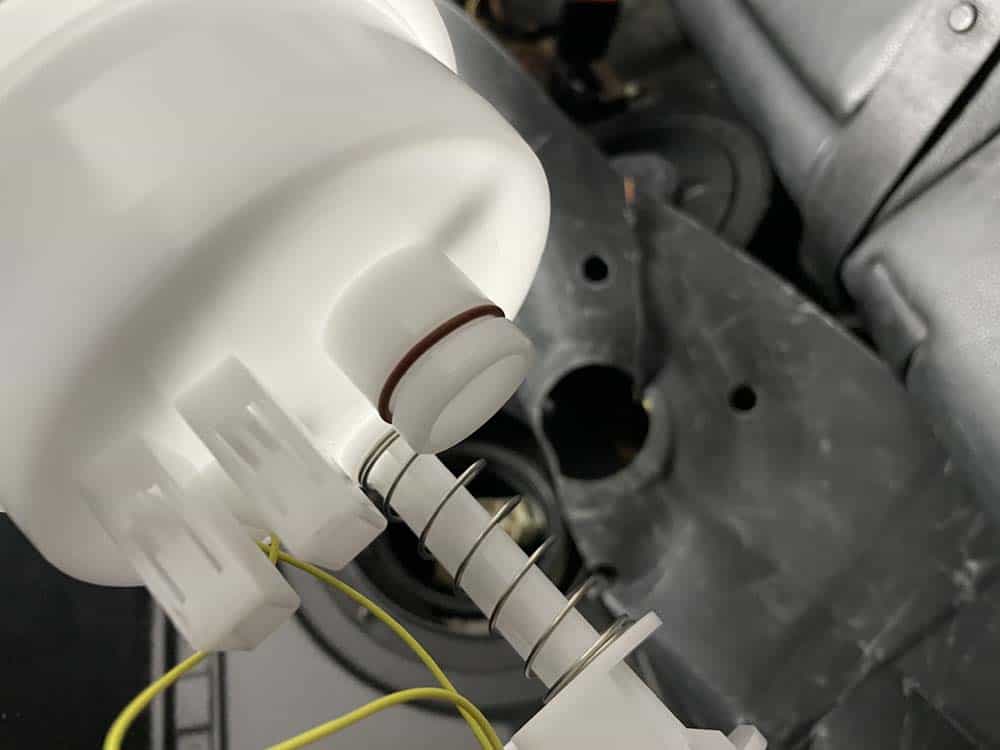
- Make sure there is an o-ring on the new fuel level sensor where the lower fuel lines connect.
- Install a new fuel level sensor. We recommend using a new sealing gasket (supplied with most sensors). Make sure to use a fresh hose clamp on the fuel line.
Section 3 - Testing the system
Before reinstalling the lids on the pump and sensor, it is very important to test the fuel system for leaks and proper functionality. Nothing is more irritating than having to disassemble the vehicle because something wasn't connected correctly when the new pump was installed. Start the vehicle and look for leaks around the pump and sensor, and verify the system is working correctly. If everything is functioning correctly without leaks, go ahead and finish reassembling the vehicle following the above steps in reverse.BMW E53 Fuel Pump Replacement Finished