Affiliate link disclosure – The BMW Repair Guide uses affiliate links in their site. For more information on affiliate links, please click here.
Repair Summary
This article gives detailed instructions on cleaning and repairing the leaking sunroof drains in an E53 X5. Even though we used a 2005 X5 3.0i to perform this repair, this article can be applied to any 2000-2006 X5 vehicle with minor modifications to the repair steps.
See all vehicles this article applies to
E53 X5 Series X5 4.8is
E53 X5 Series X5 4.6is
E53 X5 Series X5 4.4i
E53 X5 Series X5 3.0i
E53 X5 Series X5 3.0d
A leaking sunroof due to clogged drains can cause extensive damage in 2000-2006 X5 vehicles including a flooded interior and destruction to sensitive electronics.
The well-known "Achilles Heel" of 2000-2006 X5 models is the panoramic sunroof they were manufactured with. Contrary to popular belief, the sunroof in E53 X5 models is not water tight. It was actually manufactured with four drains....two in the front and two in the rear...that channel water out of the sunroof frame and onto the outside pavement. The front drains run down the A-pillars and disperse the water from under the front fenders. The rear drains empty their contents into an exterior channel surrounding the rear tailgate where it is quickly shed off the rear of the vehicle.
Overtime, the sunroof drains can be clogged with leaves and debris - especially in vehicles that are parked under trees or left with the sunroof open for extended periods of time. This debris becomes lodged in the drains, causing water to back up and overflow into the headliner. The result of this overflowing water can be catastrophic. Clogged front drains dump water down the A-pillars and into the dashboard causing saturated carpet and a host of electronics issues...most notorious being a short-circuited Light Control Module (LCM). When the rear drains overflow they tend to dump water down the C-pillars located behind the rear seats and the D-pillars next to the tailgate. The results can be disastrous - flooded rear carpets, spare tire well and storage compartments can destroy electronics. The most notable casualties from clogged rear sunroof drains are; short-circuited batteries, blown relays and fuses, destroyed amplifiers and control modules.
The good news is cleaning the sunroof drains on your 2000-2006 X5 is a relatively straightforward repair that is very "doable" by any home mechanic with average abilities. The front drains require the A-pilar trim to be removed so the drain lines can be "snaked out" and cleaned. The rear drains require partially lowering the rear of the headliner.
The BMW Repair Guide strongly recommends cleaning all four of your 2000-2006 X5 sunroof drains even if they are not all leaking. If one is stopped up, the others are most likely not far behind.
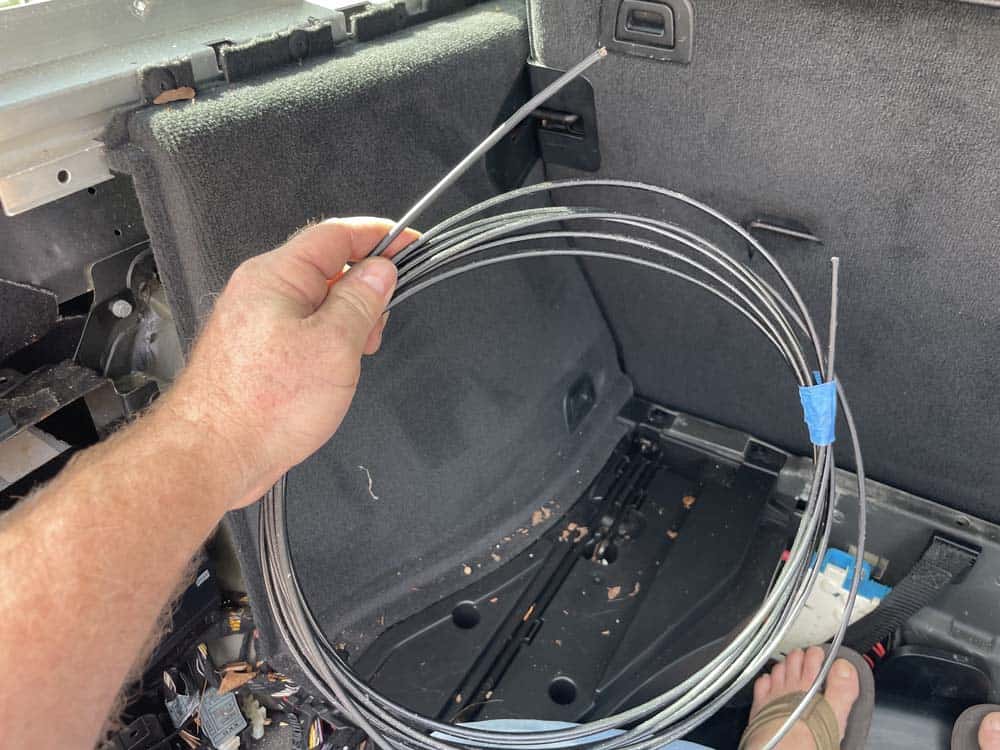
Please be aware that you will need a piece of coated cable to snake out the drain lines and clear them of any obstructions. We use bicycle gear shifting cable to achieve this - it is the perfect size and rigidity to quickly and efficiently clean out the rubber sunroof drain lines. We give a link below if you are interested in purchasing the same cable we used to make this article.


View the detailed parts diagram for this repair.
Includes detailed part diagrams, part numbers and links to purchase all of the required components needed to complete this repair.

Before starting this repair, you must have the following required parts.
Use for cleaning out roof drain pipes in all BMW vehicles
Material: Steel & rubber and PVC. Cable length: Approximately 3 meters/9.7ft. Cable diameter: Approximately 4 mm, Weight: Approximately 100 grams.
Clear vinyl hose for cleaning BMW roof drains
This is the same clear vinyl tubing used to make this article! The BMW Repair Guide highly recommends using clear tubing when flushing sunroof drains.
Multipurpose long stem funnel
Made of high quality material with smooth interior and exterior that prevents sediment accumulation and allows easy flow and flushing.
Section 1 - Preparing the rear sunroof drains for cleaning
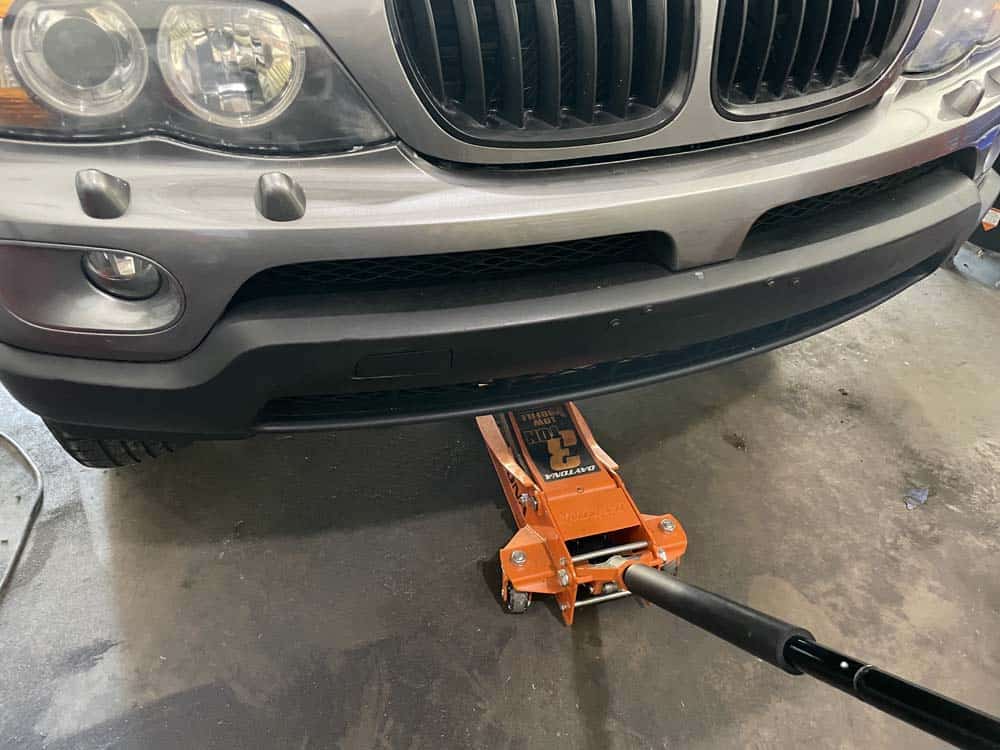
As discussed previously, the rear sunroof drains on 2000-2006 X5 vehicles release their contents above the tailgate. In order to properly clean them and their rubber discharge lines, the rear of the headliner must be dropped. Luckily, this is a relatively easy procedure. We cannot stress enough taking your time while removing plastic trim...it is prone to breaking, especially in older vehicles like the E53 X5.- Park the vehicle on an inclined surface like your driveway so the vehicle is tilted to the rear. If you are a professional mechanic, or if the vehicle is parked on a level surface and can't be moved, raise the front of the vehicle with a floor jack. The reason for this is so all of the water is directed towards the rear drains when we flush them in Section 2 below.
- In order to lower the rear of the headliner, the C and D-pillar trim must be removed. Do not try and lower the headliner without properly removing the trim pieces.
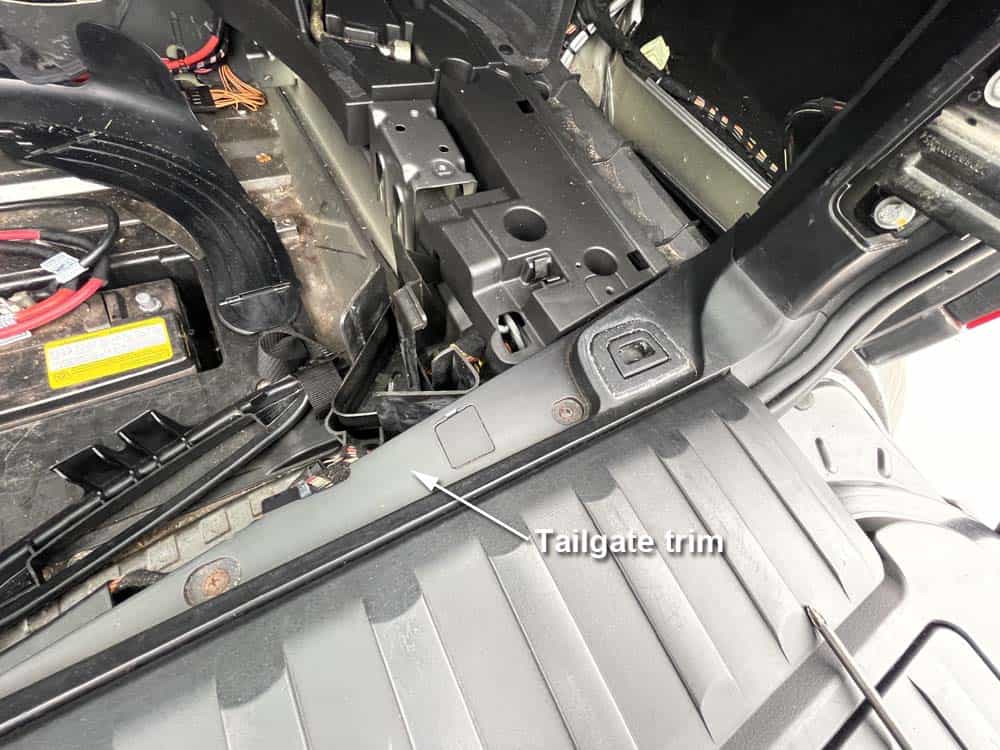
- Begin by removing the lower tailgate sill trim. Start by removing the top phillips screws anchoring it to the body of the vehicle.
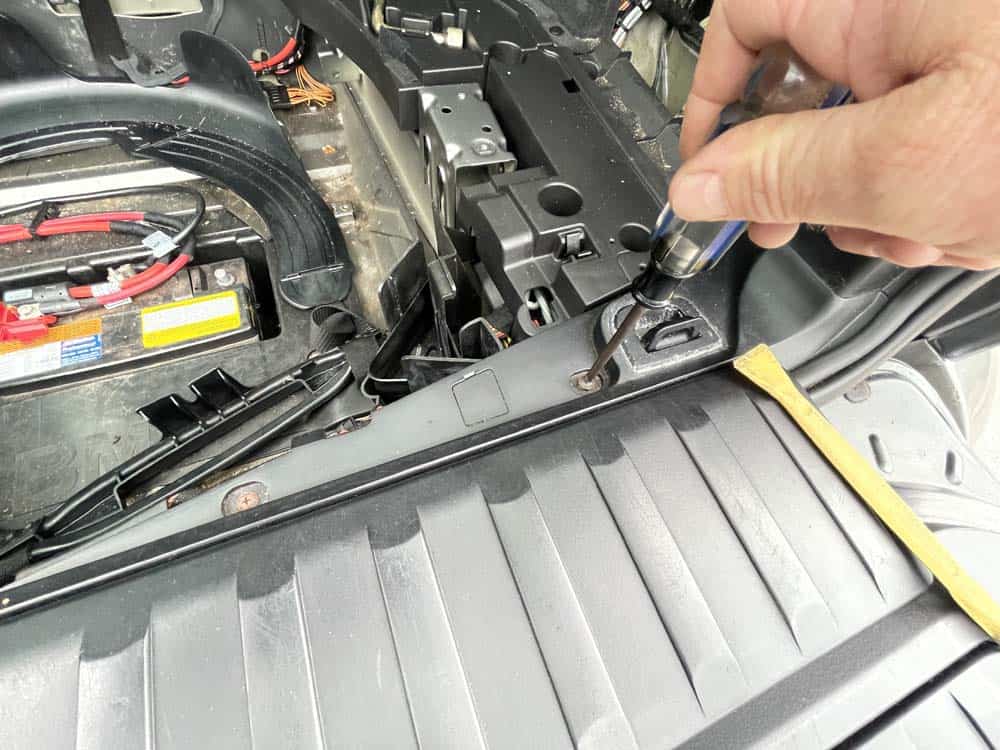
- Remove the two side plastic trim covers. They are held in place with plastic 10mm nuts.
- Remove the two cargo tie down rings. They are mounted to the frame by two phillips screws hidden under a small plastic cover.
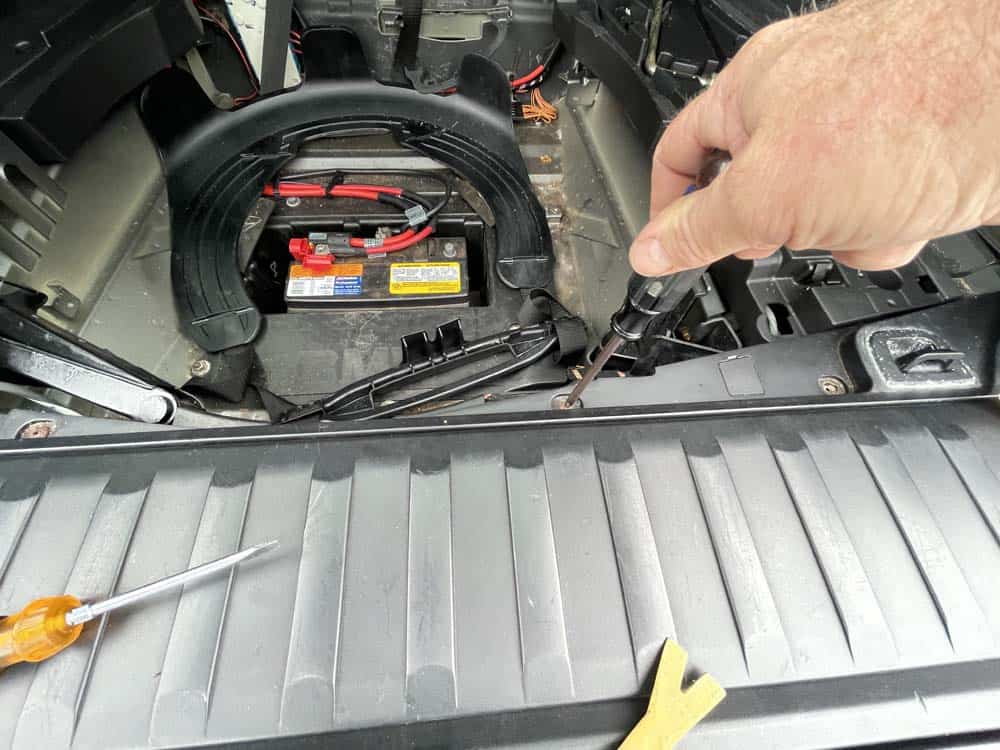
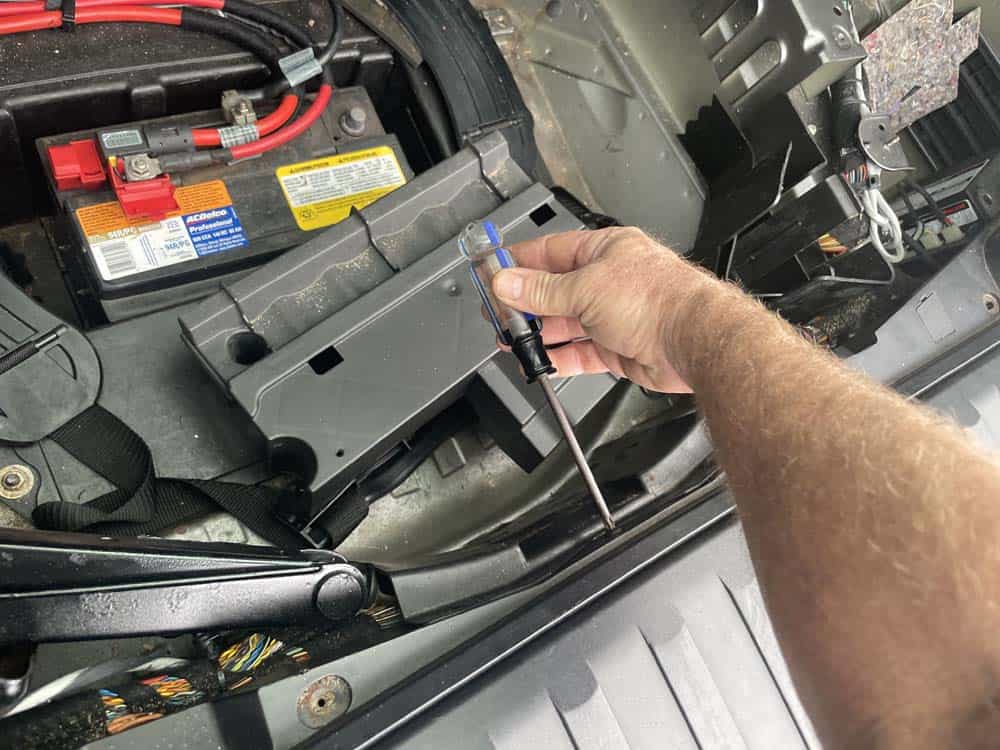
- Lift up the spring-loaded sill cover. Remove the rest of the phillips screws anchoring the sill trim.
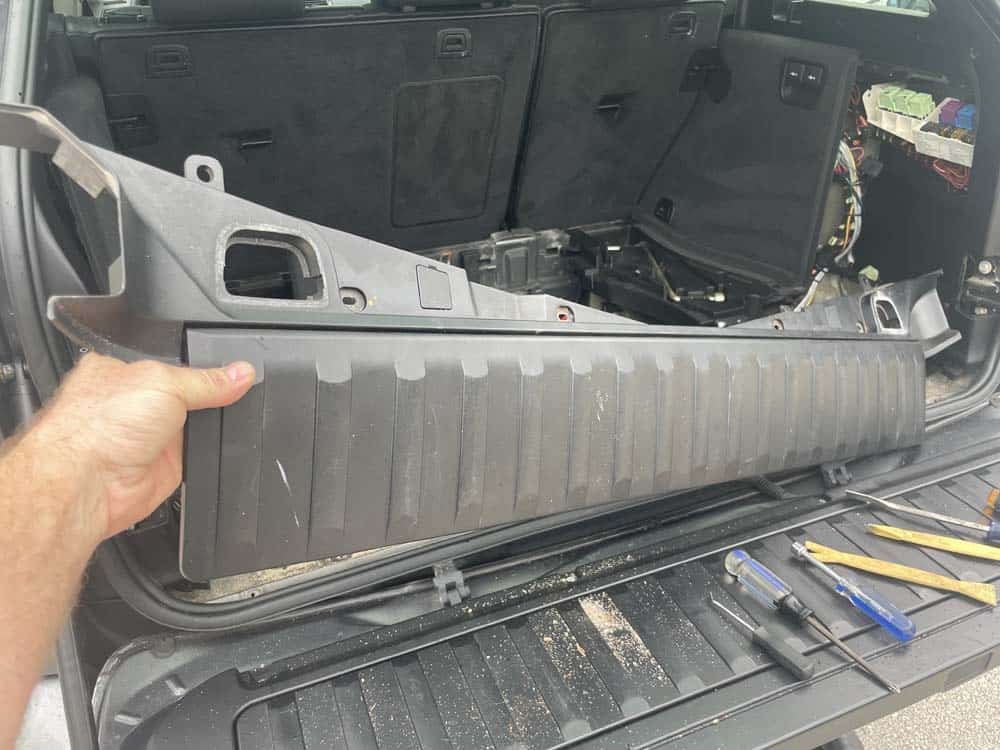
- Remove the final anchor screw on the front of the sill trim. Remove the sill trim from the vehicle.
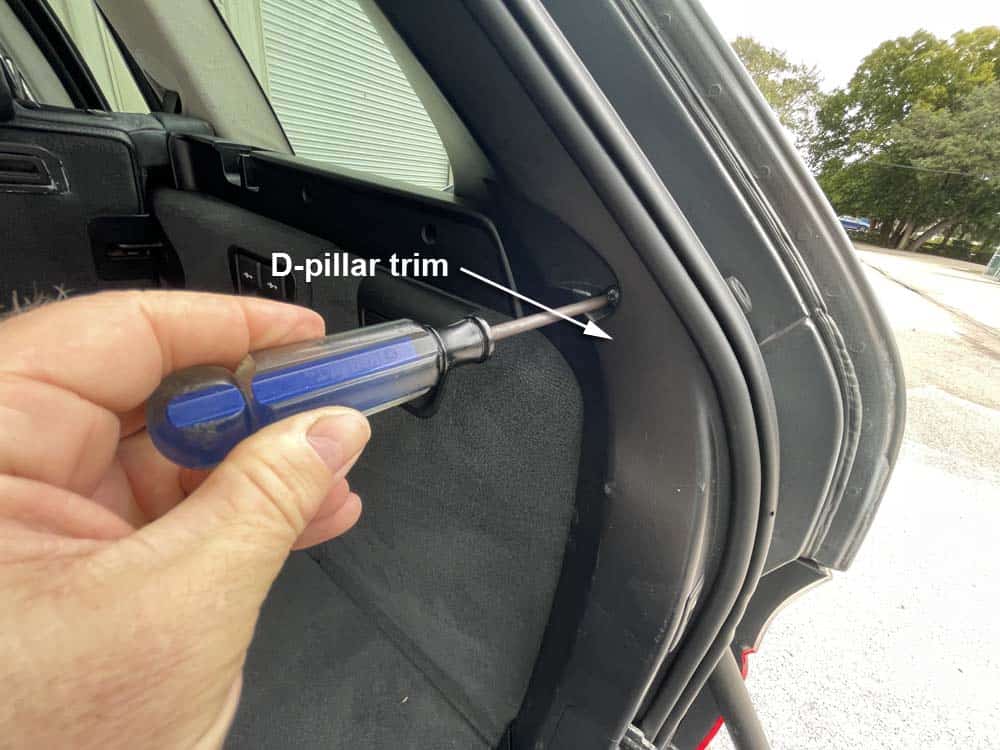
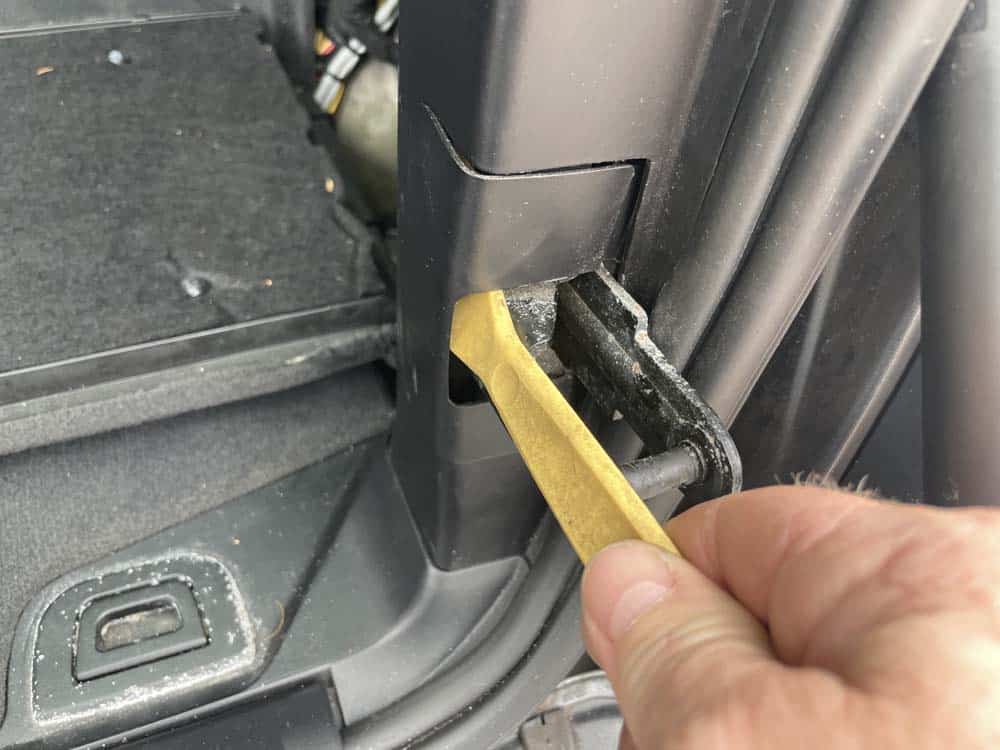
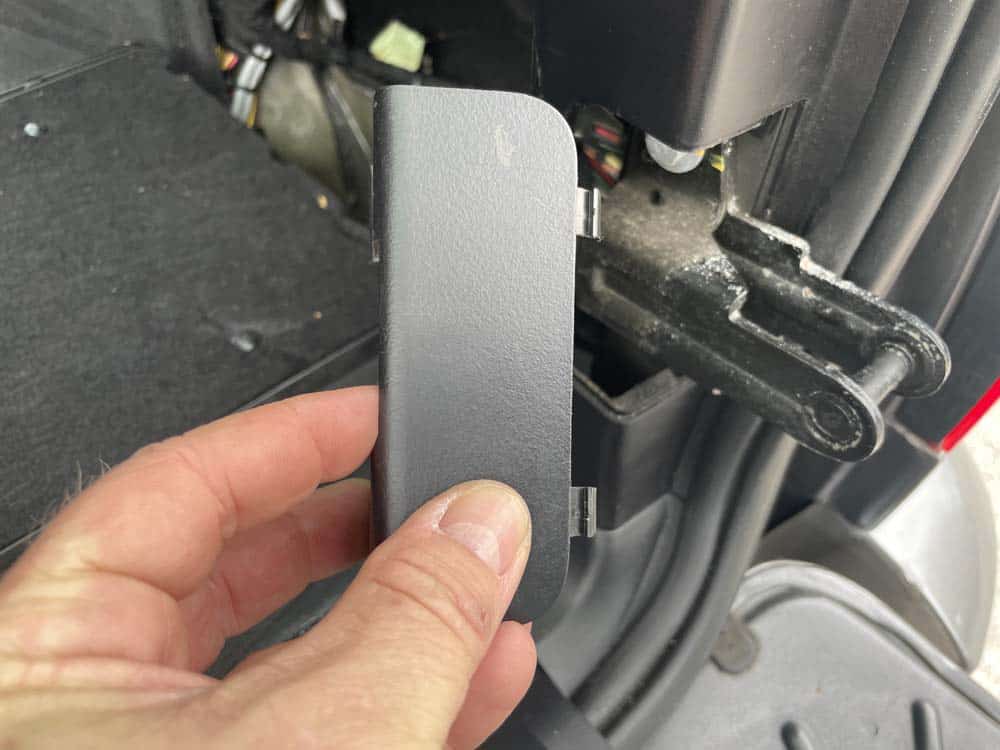
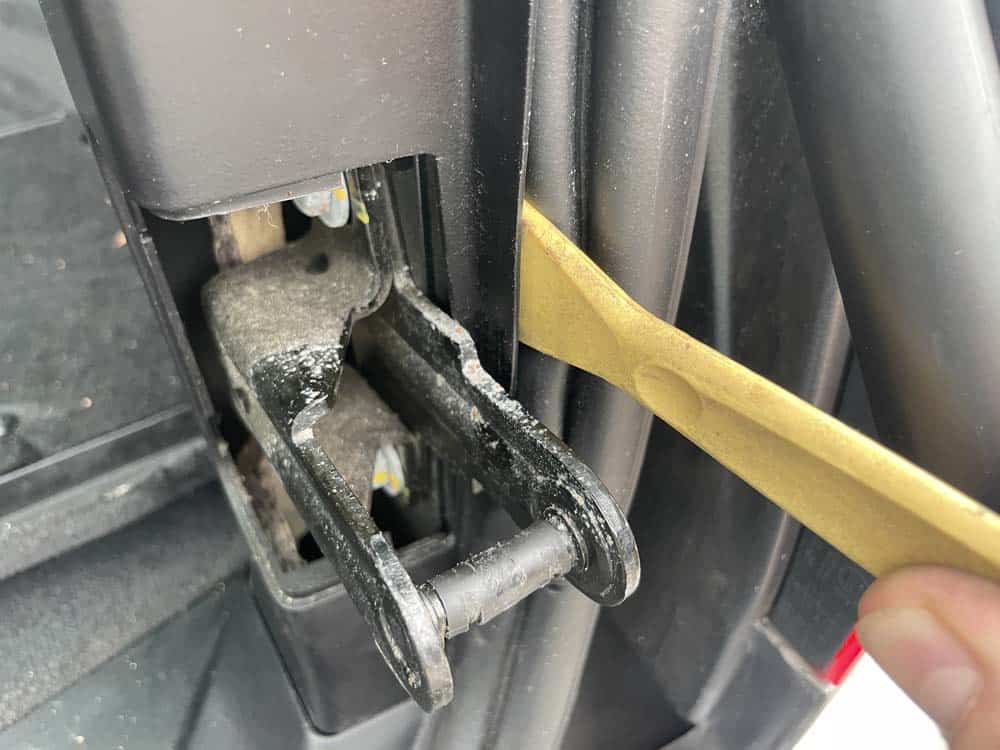
- Prepare the rear D-pillar trims by removing their phillips mounting screw. Use a plastic trim removal tool to remove the plastic latch cover.
- Grasp the D-pillar trims and gently pull until their two trim clips release. You may need to use a plastic trim tool to get them loose.
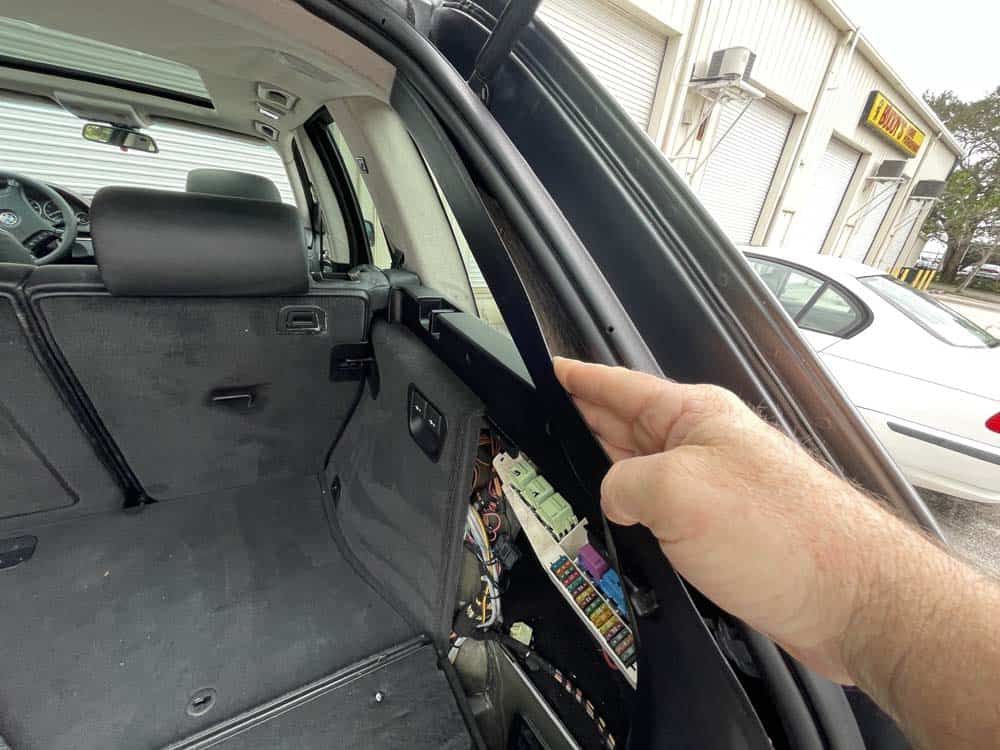
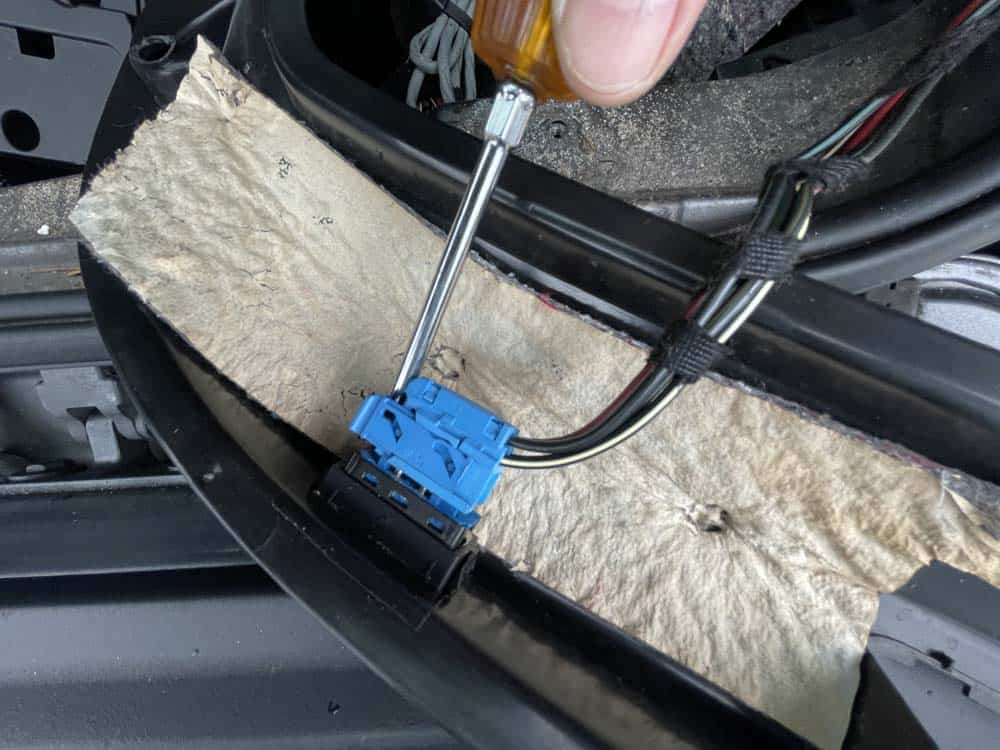
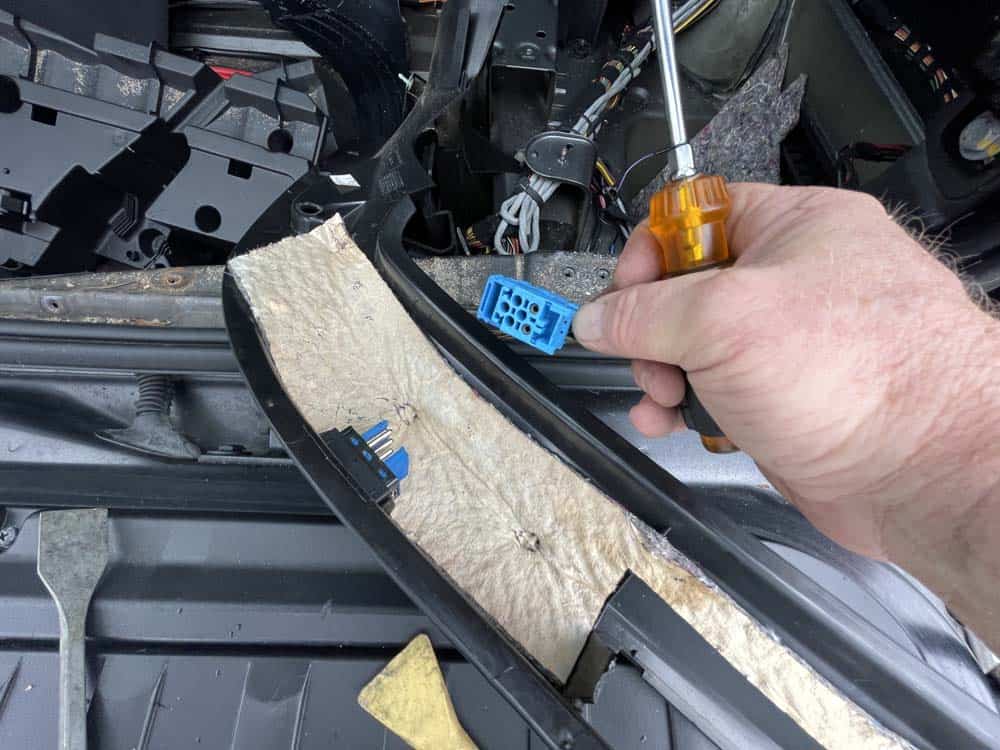
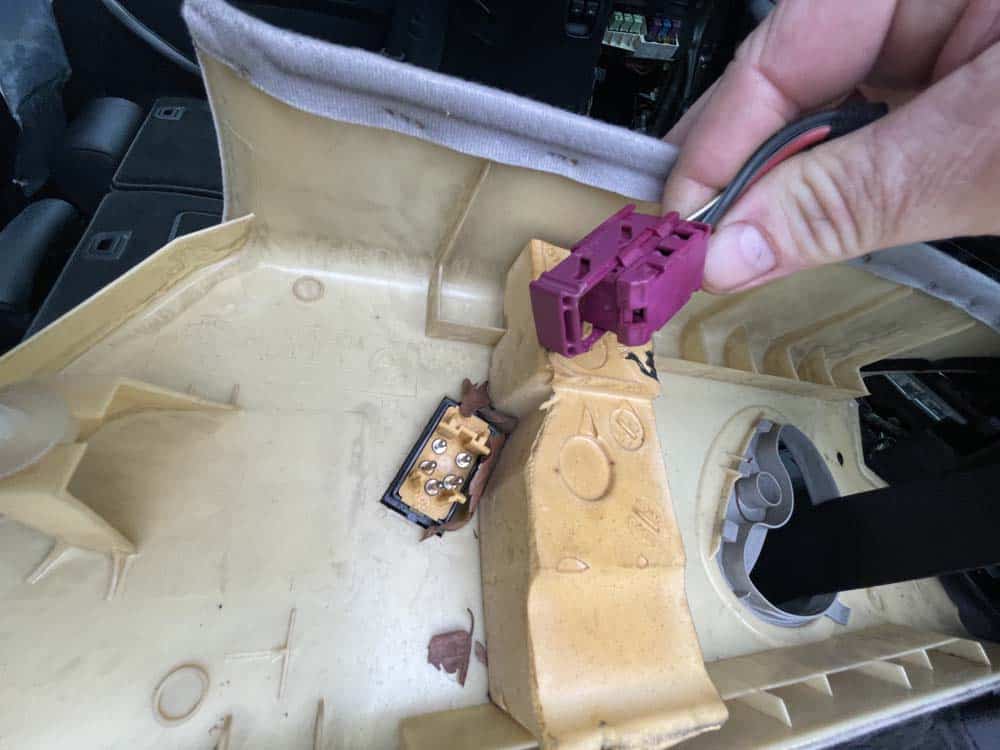
- Disconnect the switches on the rear of the D pillar trims. Remove the trims from the vehicle.
- Use a torx bit to remove the two rear plastic cargo hooks from the ceiling panel.
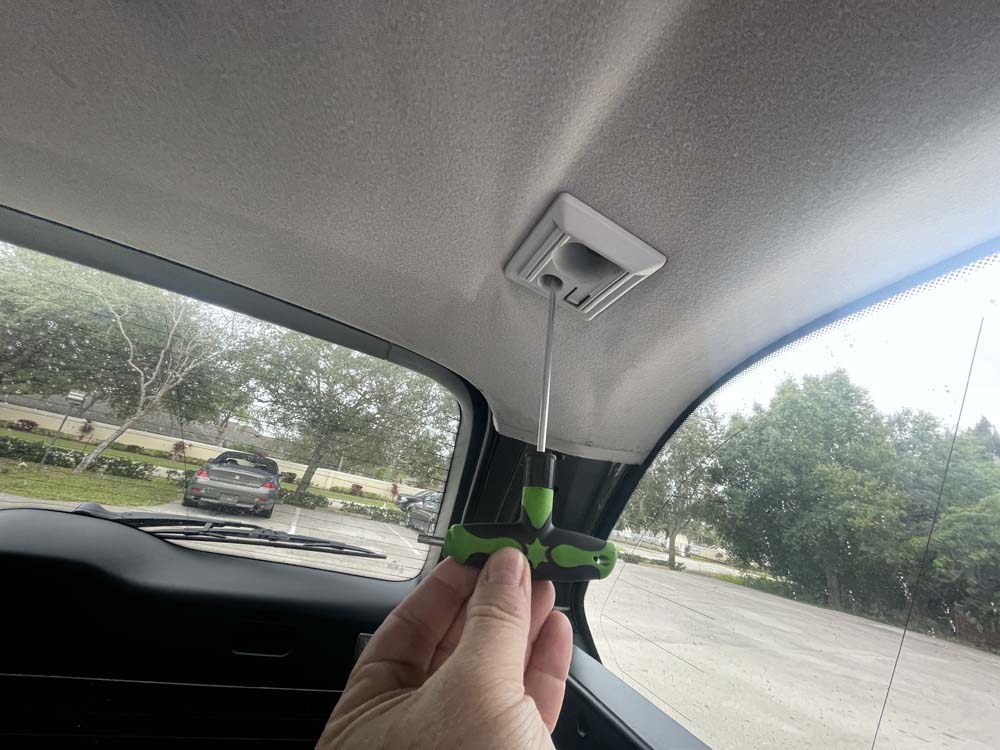
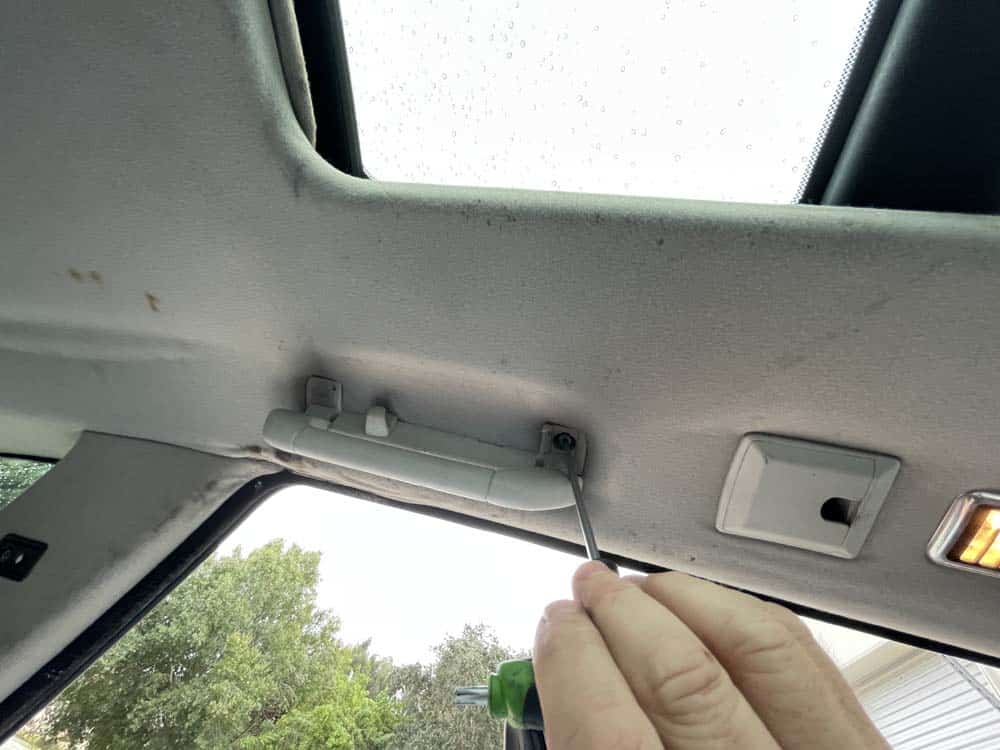
- Use a torx bit to remove the two rear ceiling handles.
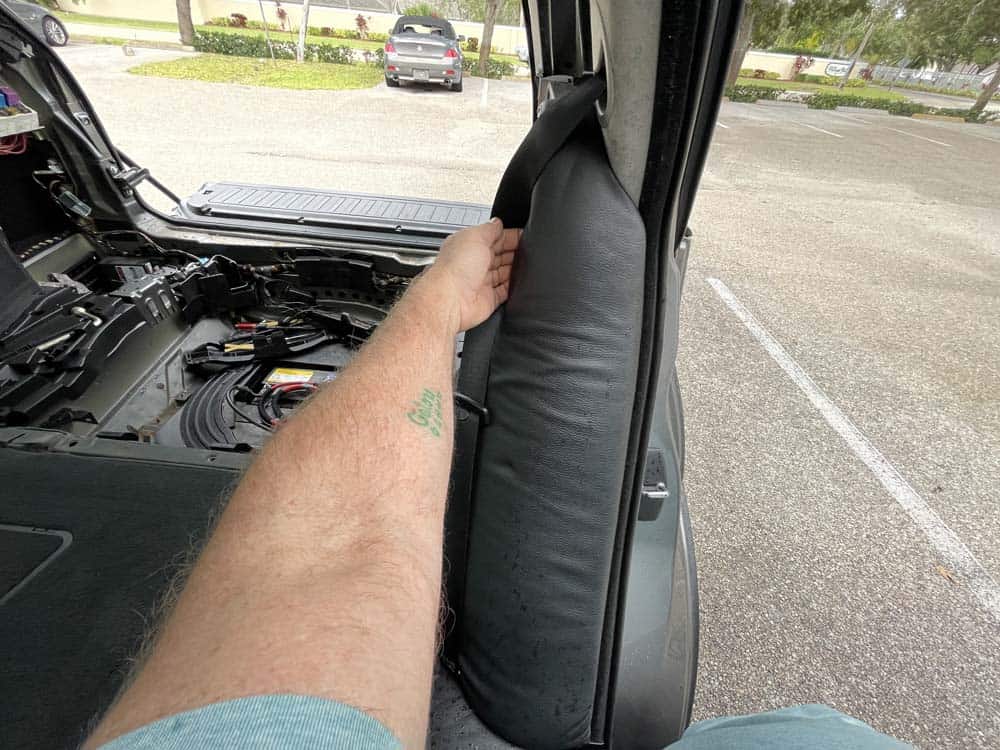
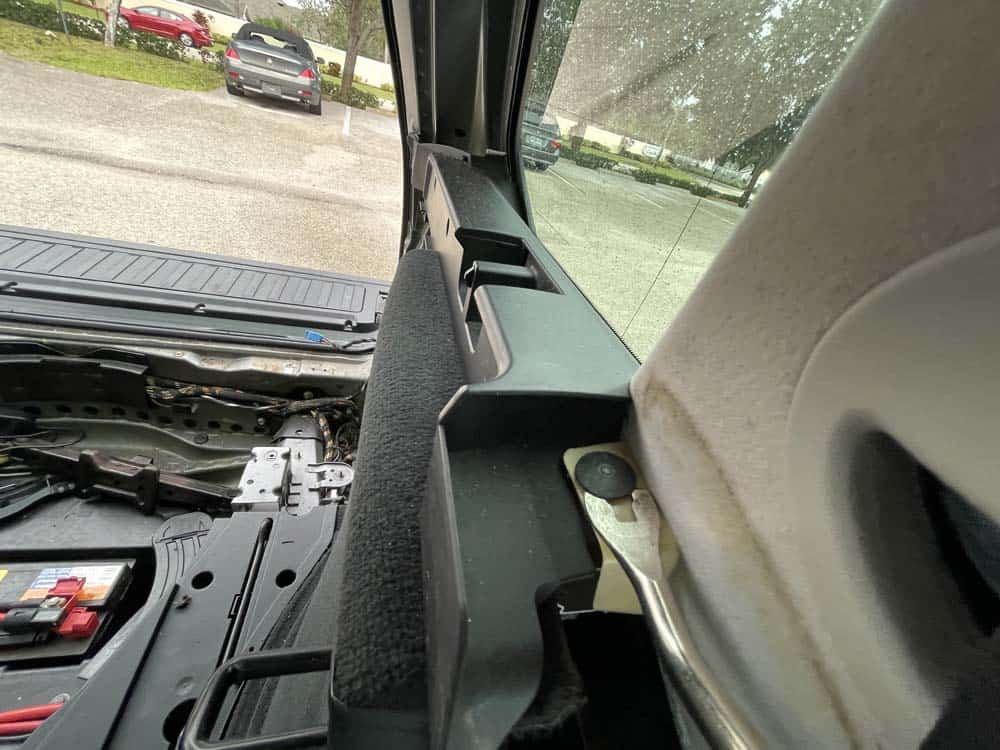
- Grasp the two rear-seat lateral trim panels and pull them loose from the body of the vehicle.
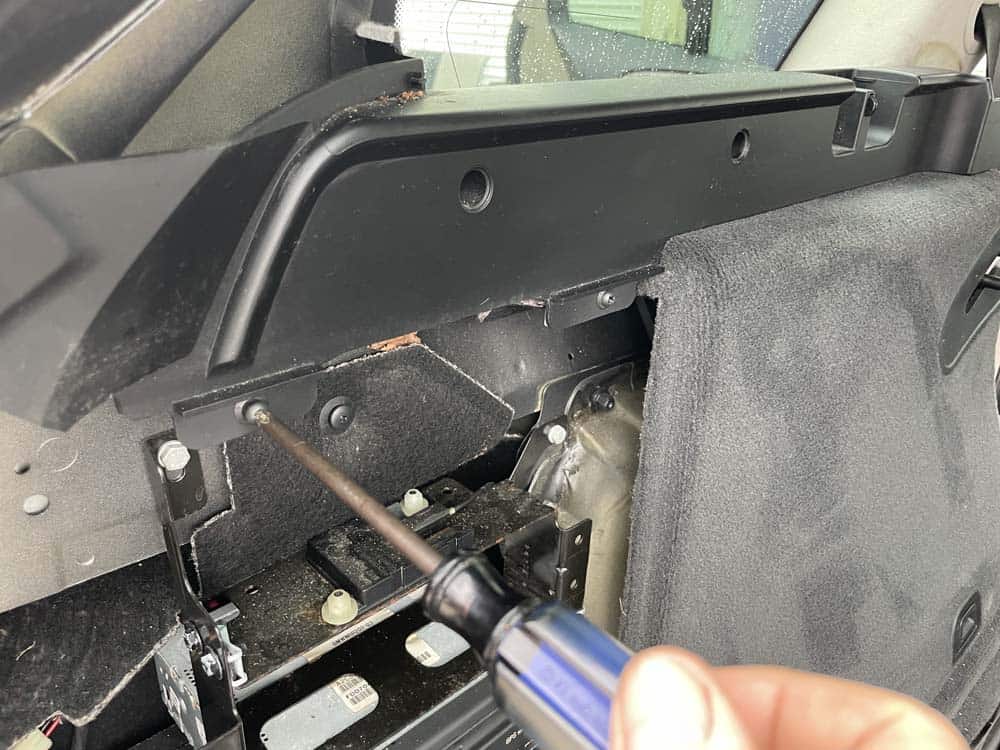
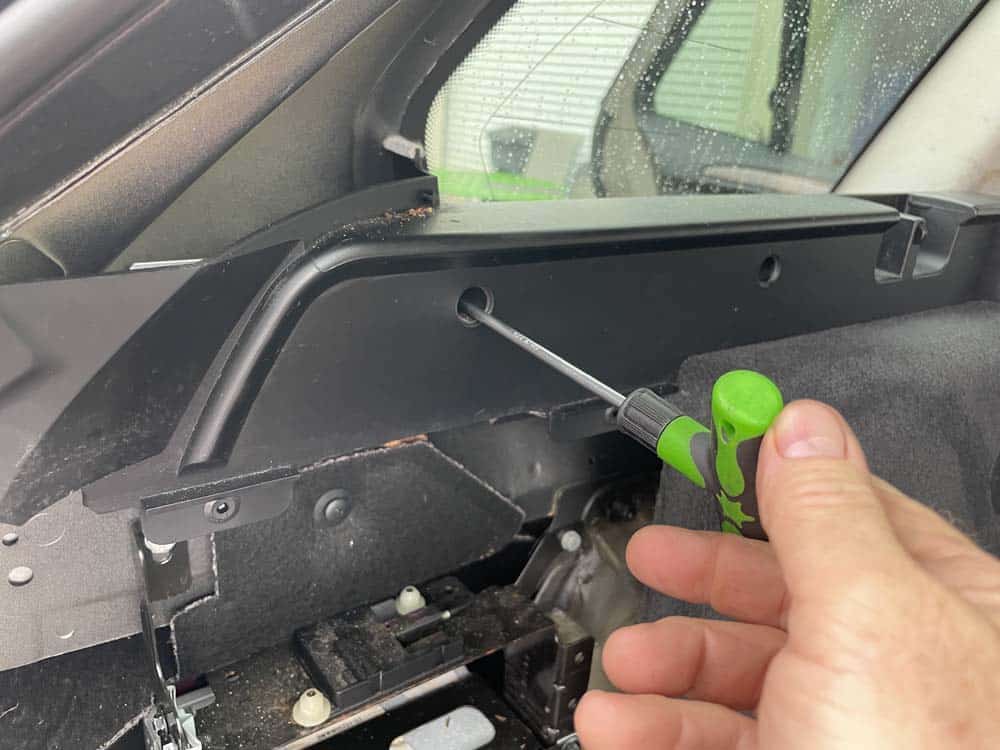
- Using a trim tool, remove the plastic rivet securing the C-pillar trim. Use a phillips screwdriver and a torx bit to remove the four screws anchoring the louvered vent trim.
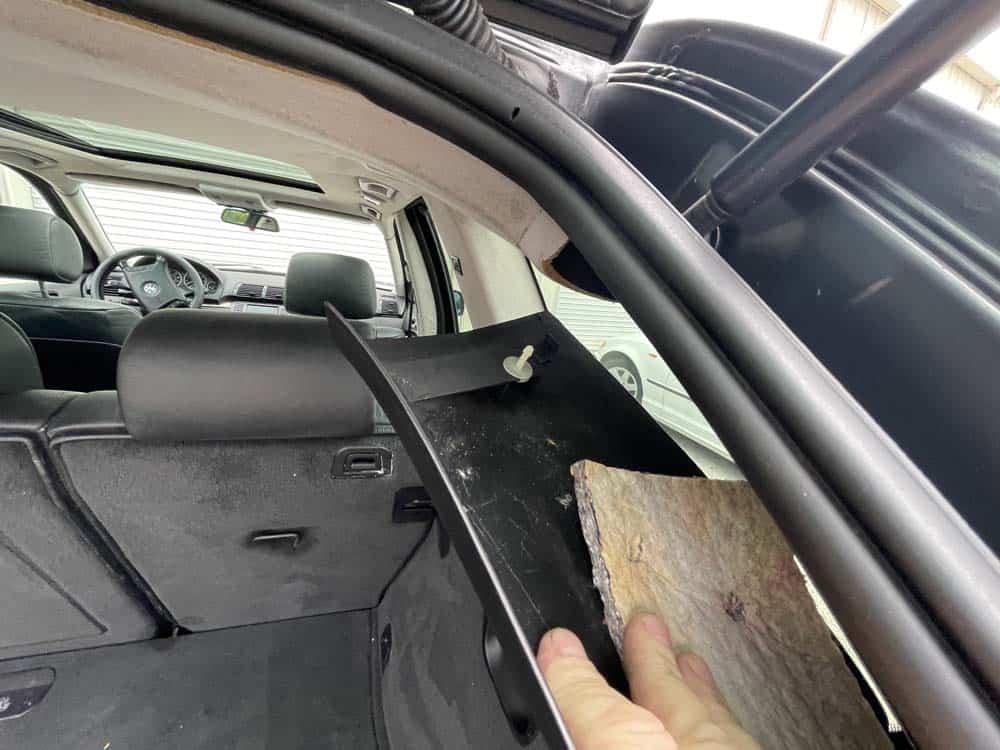
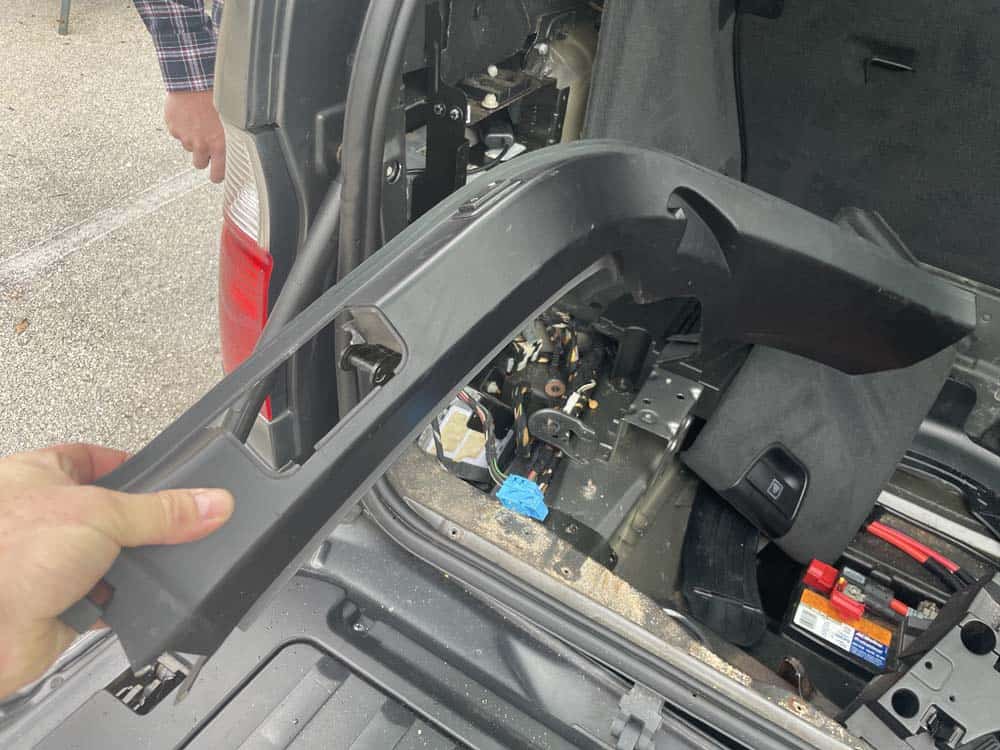
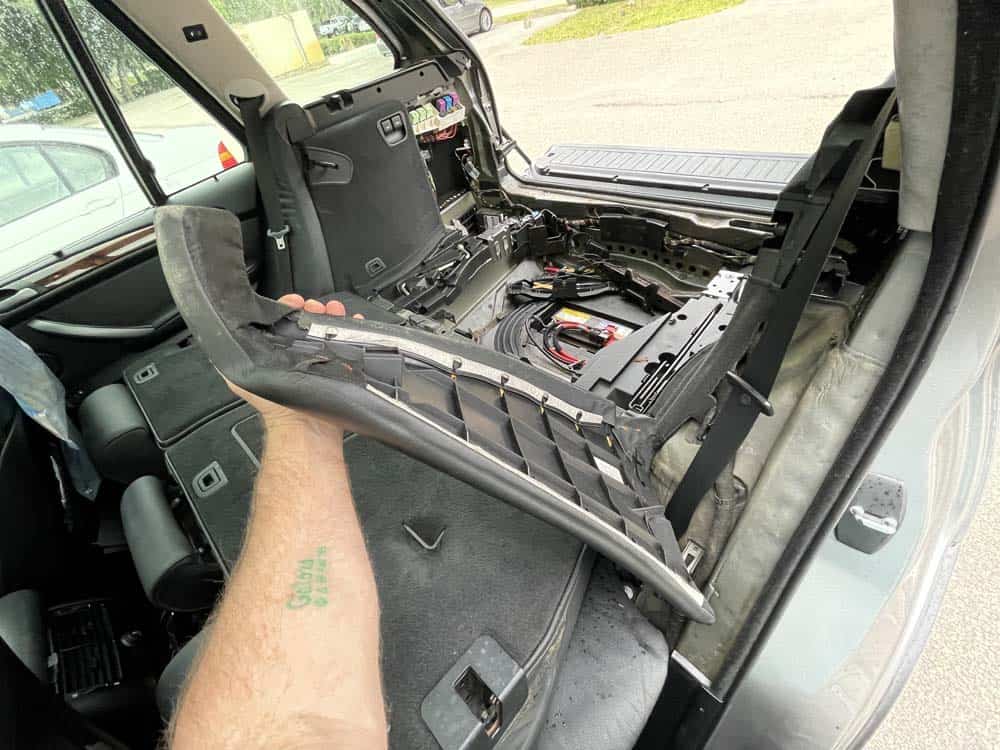
- The C-pillar trim MUST BE REMOVED FIRST before removing the louvered vent trim! Grasp the top of the C-pillar trim and pull it loose from the body of the vehicle. Disconnect the plug at the rear of the C-pillar trim. Remove the C-pillar trim and louvered vent trim from the vehicle.


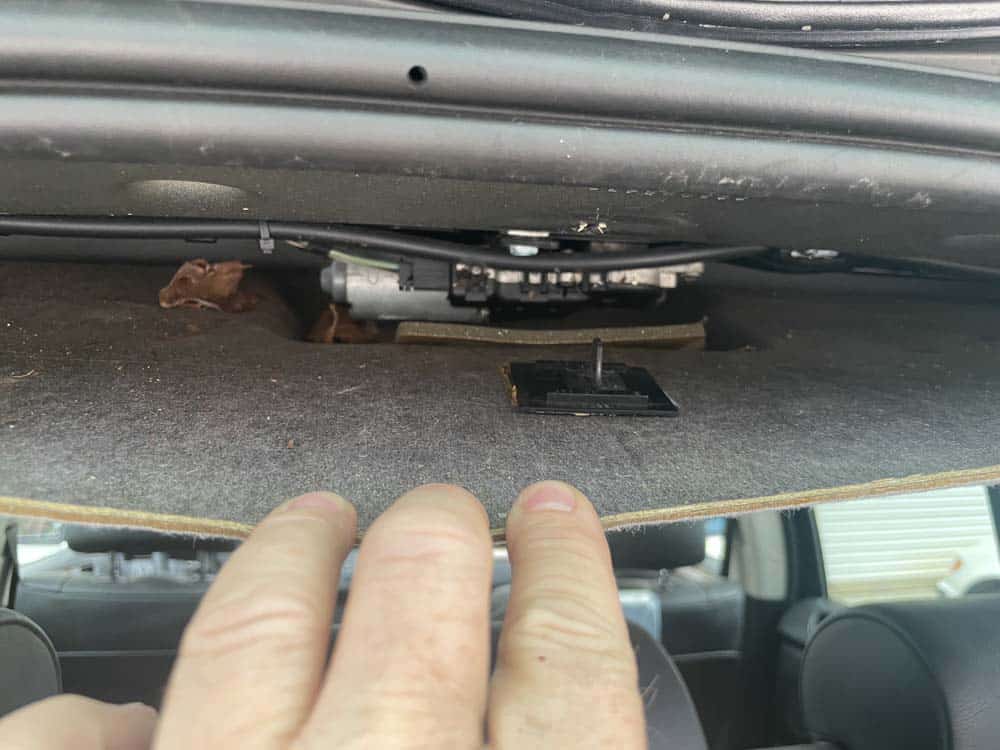
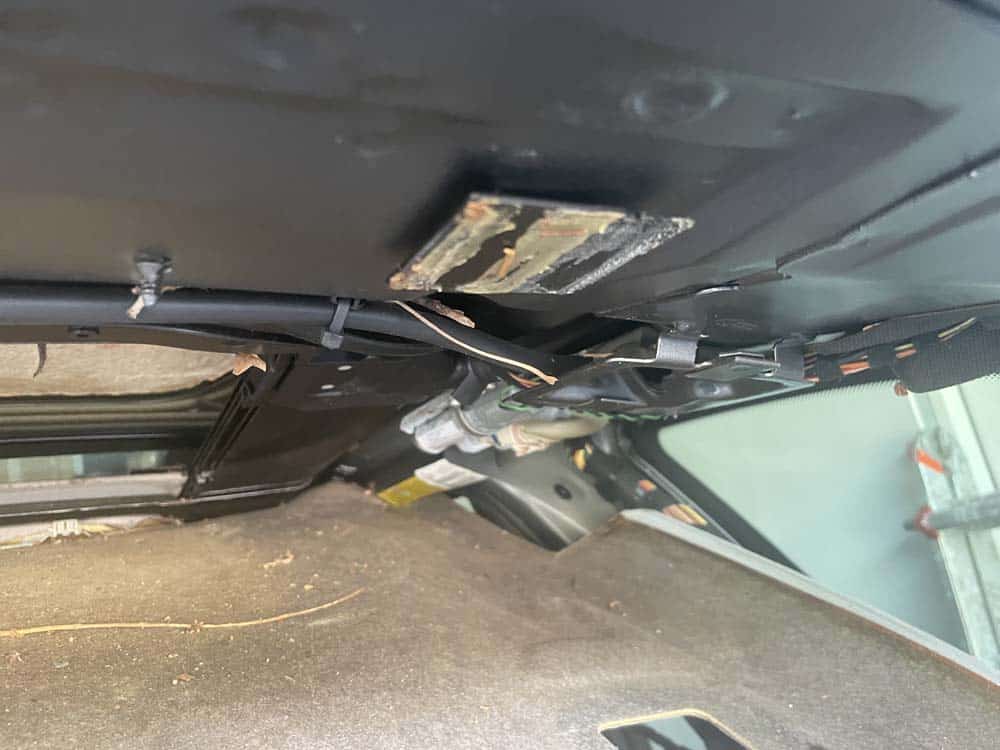
- The ceiling panel can now be dropped down in the luggage compartment. GENTLY pull down the rear of the panel until it releases from the three plastic roof clips. Slowly work your way forward pulling the panel loose until you reach the rear of the sunroof. It is not uncommon for the rear roof clips to have pulled off of the headliner (see images below)...especially in vehicles that have had the rear headliner soaked from a leaking sunroof drain.
Section 2 - Cleaning the rear sunroof drains
The sunroof drains on 2000-2006 X5 vehicles have notoriously small openings. Even the smallest amount of dirt or leaves can jamb the outlet hole causing them to overflow into the luggage compartment.- If not already, close the sunroof completely, including the retractable headliner (sunshade). The rear drains cannot be cleaned with the sunroof and sunshade open.
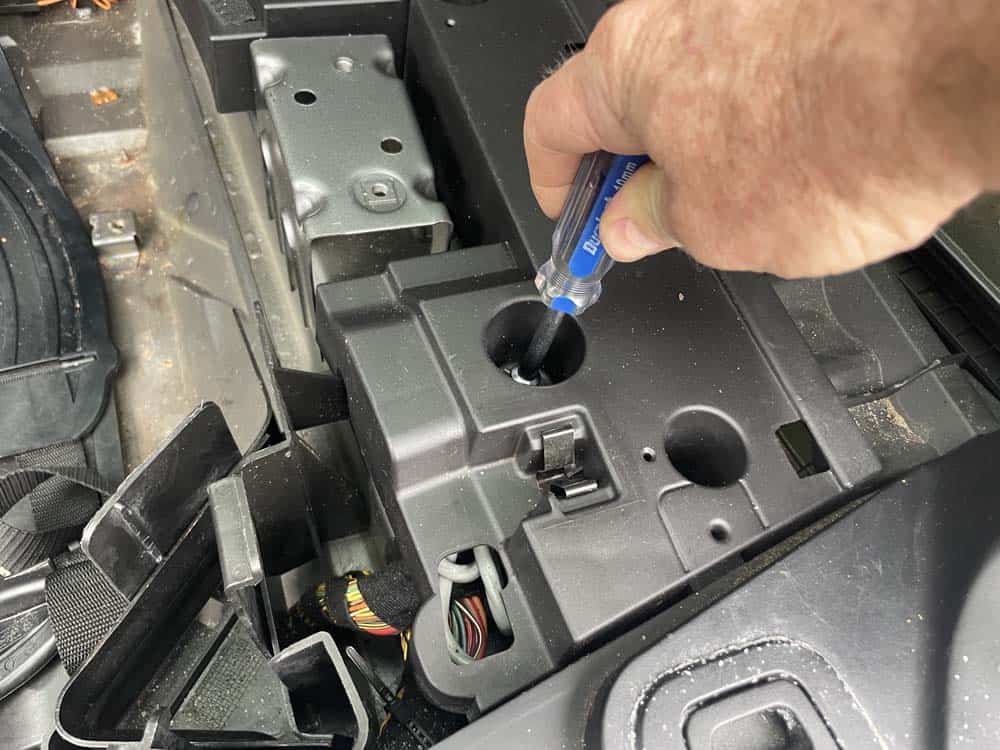
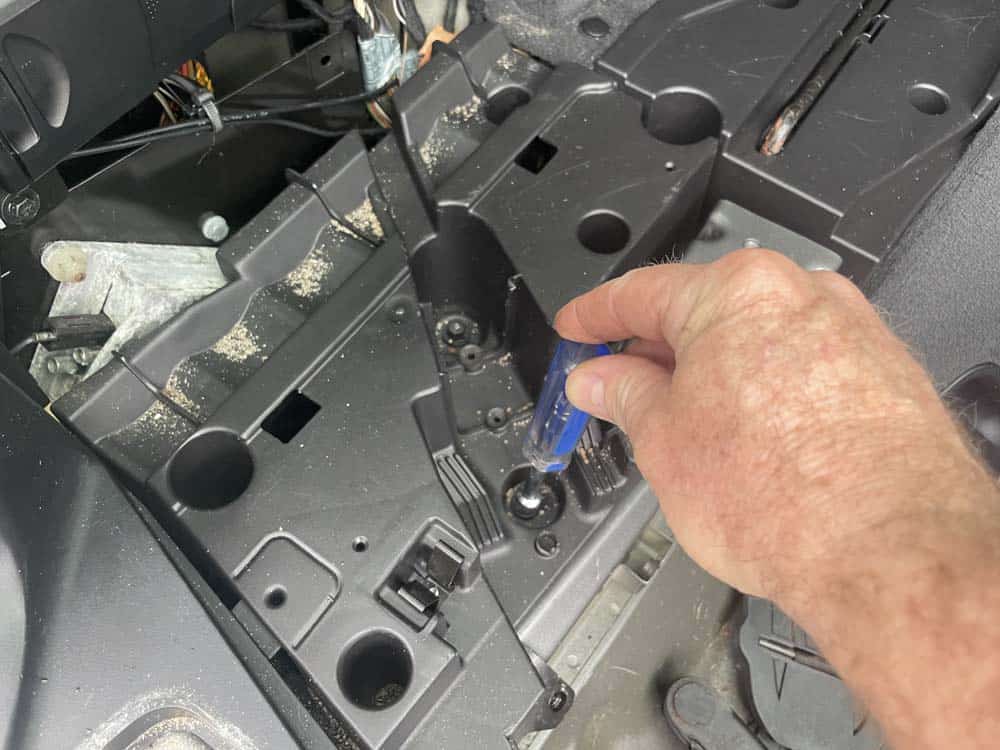
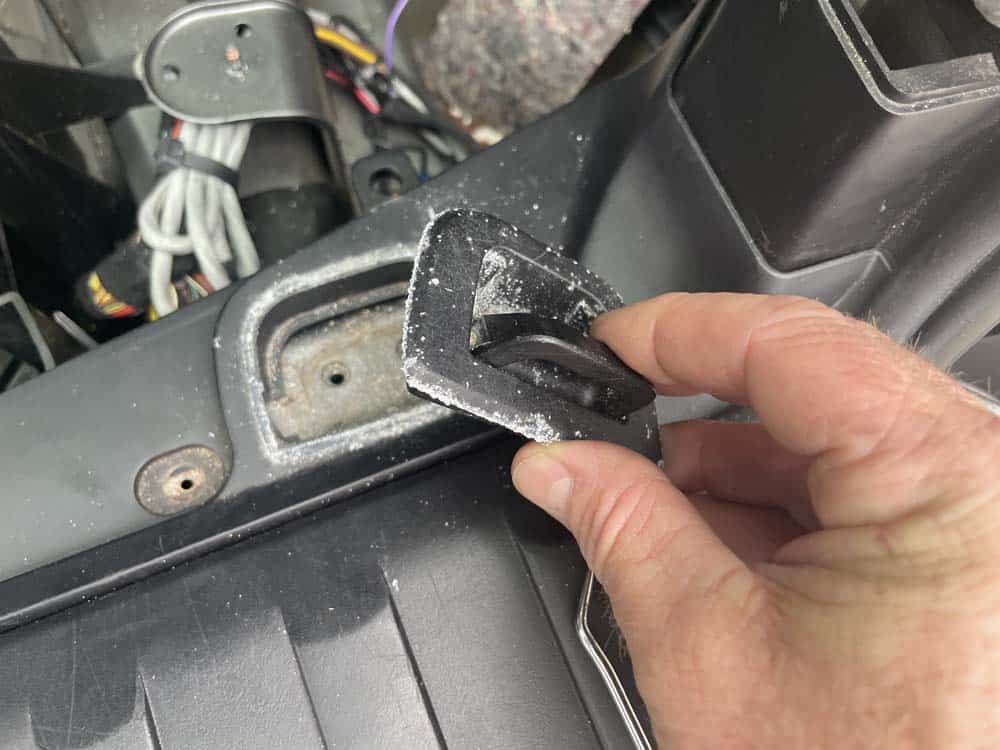
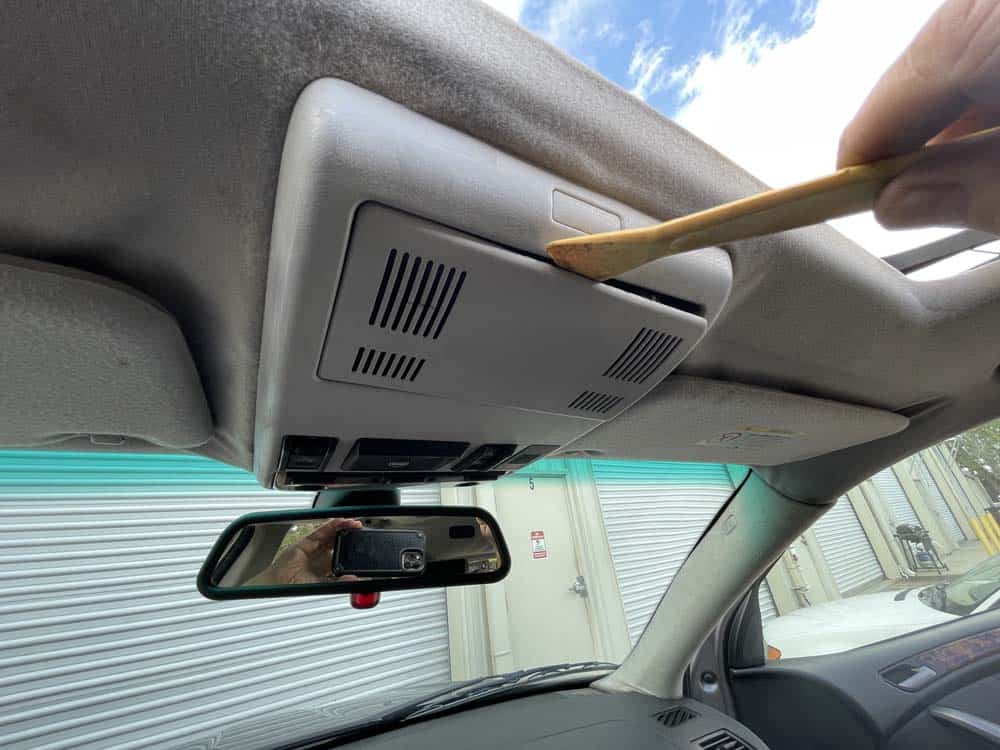
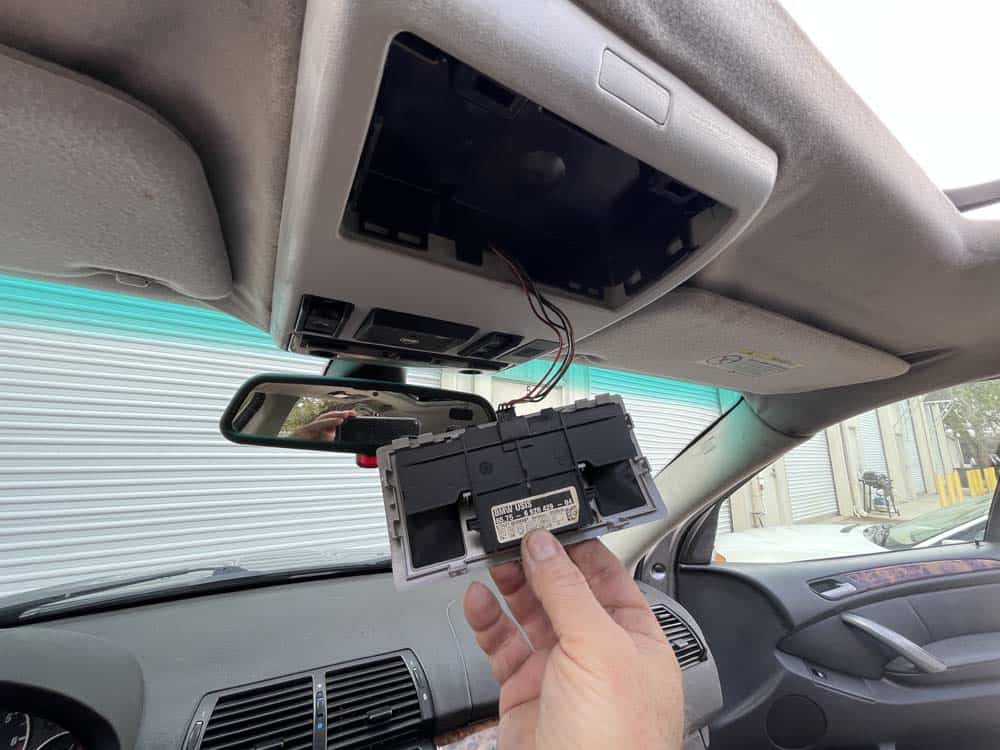
- The sunroof must be manually opened a few inches so water can be poured down the drain to flush it in step 7 below. To manually open the sunroof, use a plastic trim tool to remove the ultrasonic alarm module as shown below.
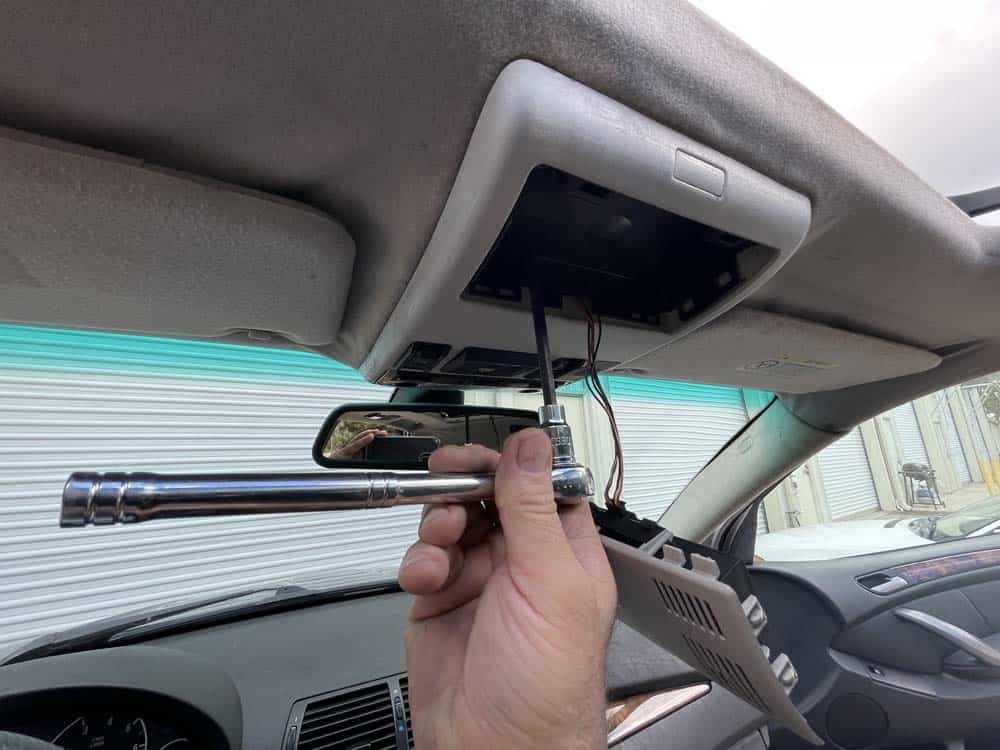
- Using a 4mm allen wrench or hex bit, manually open the sunroof just enough so water can be poured into the drain track.
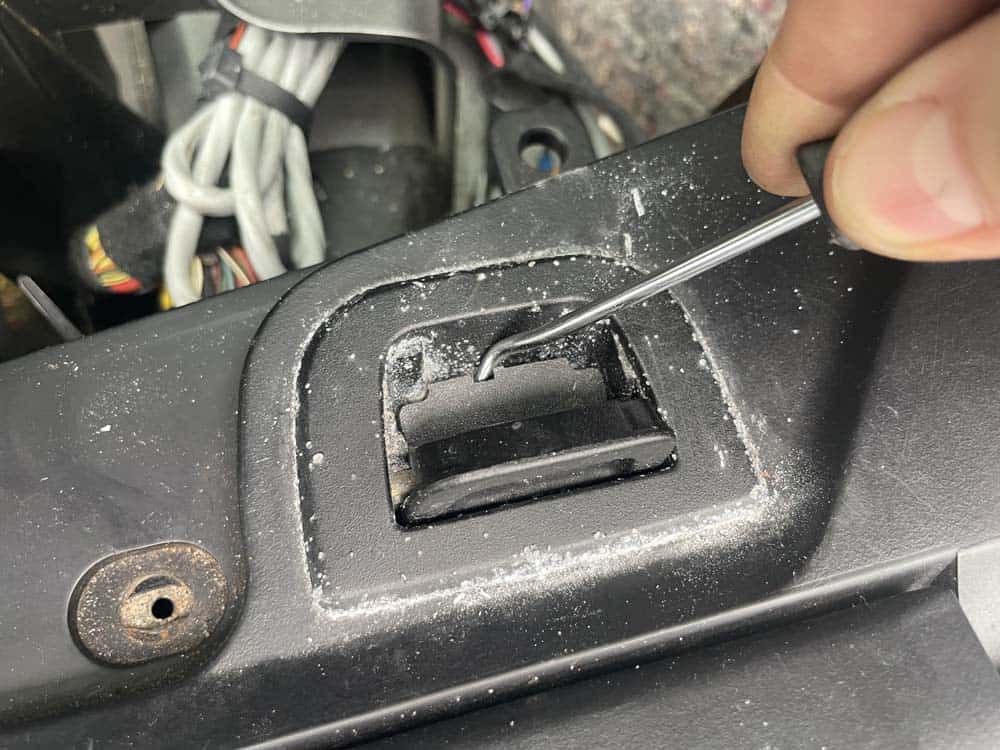
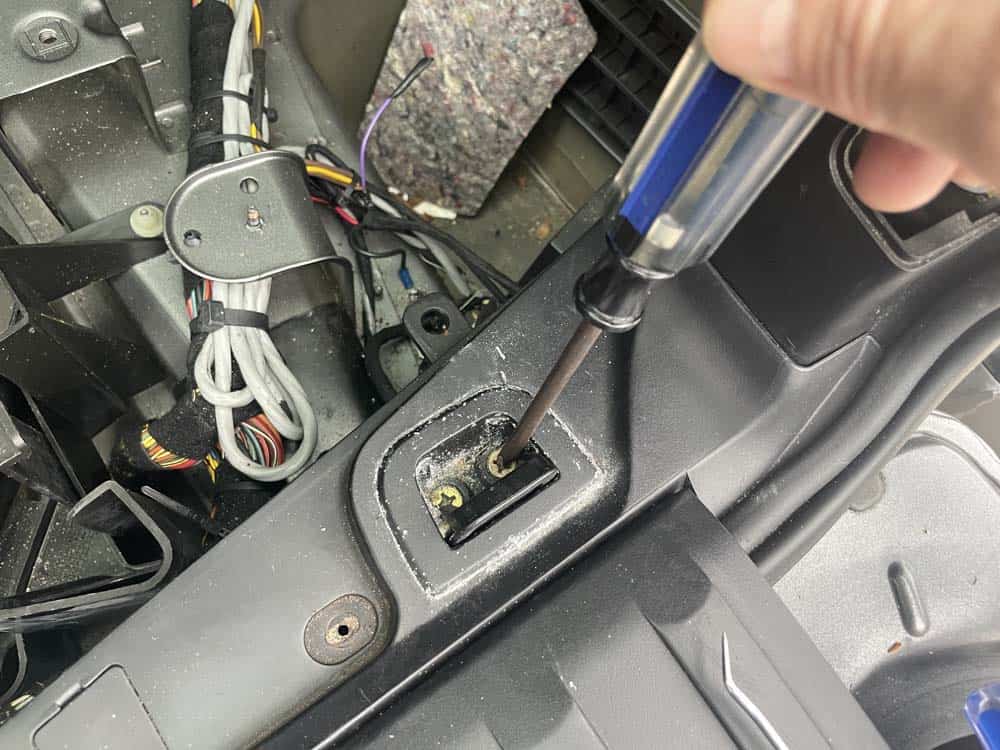
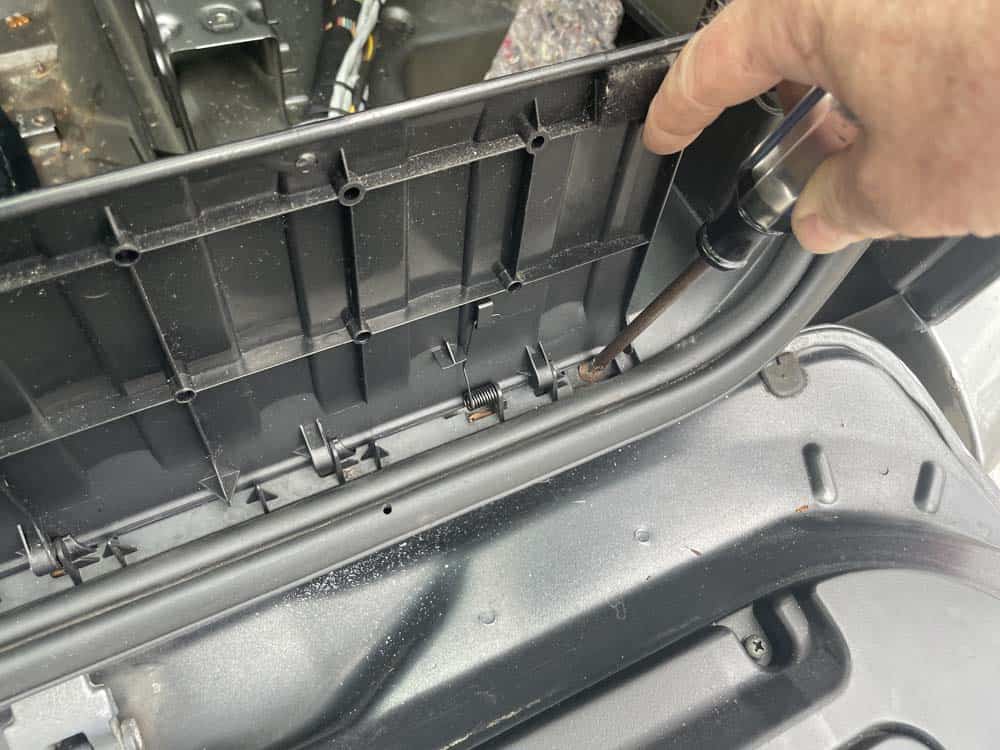
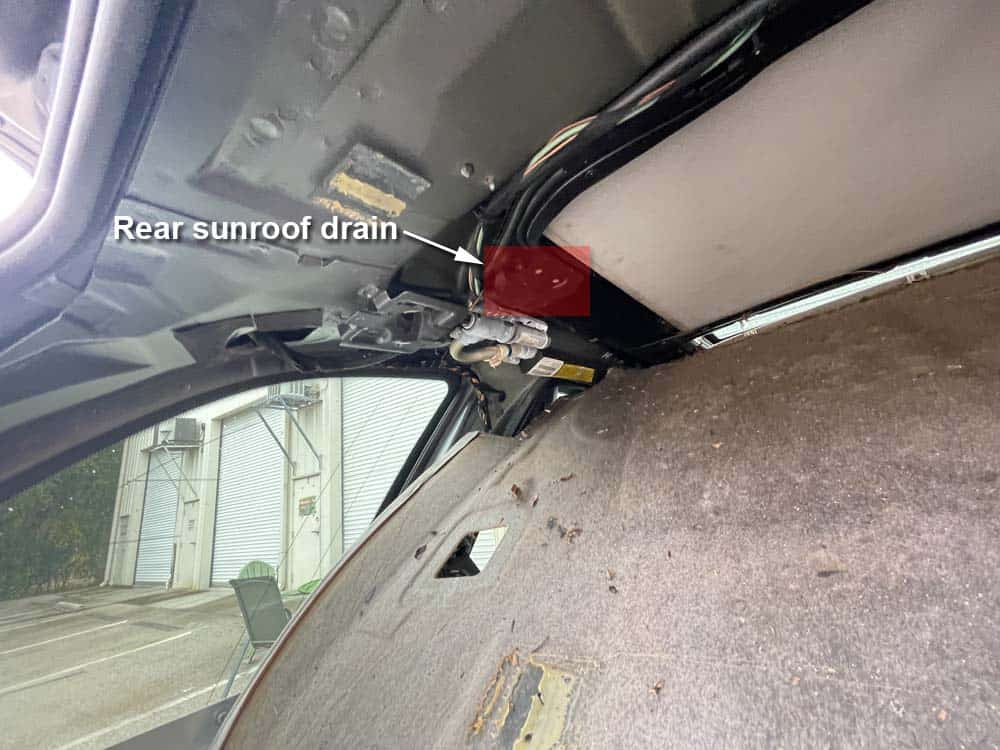
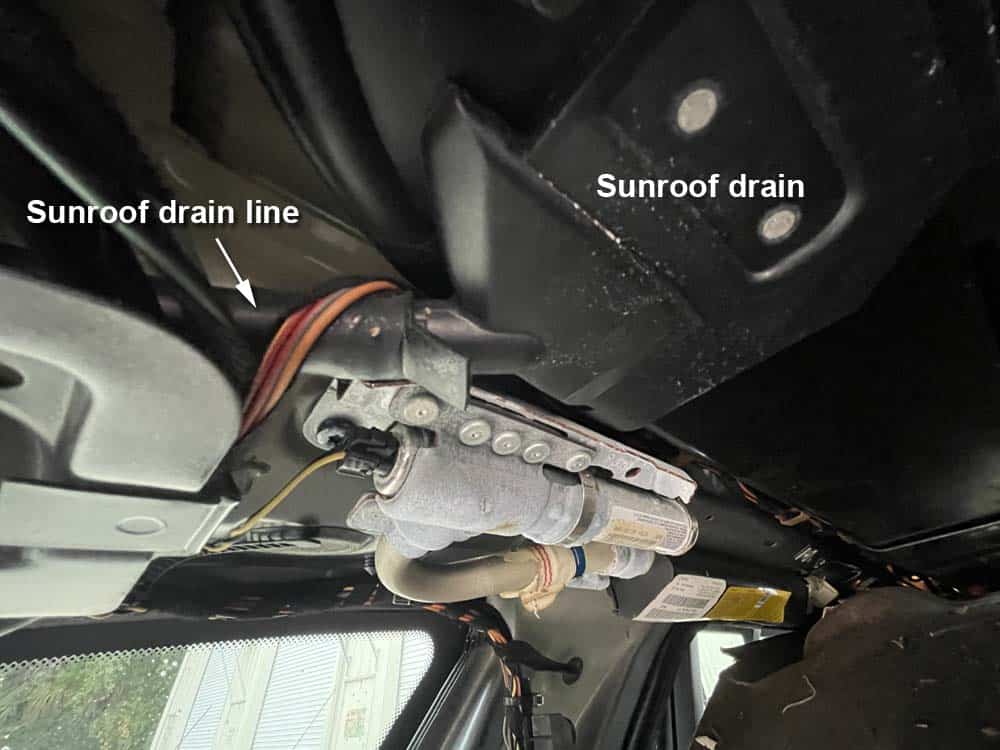
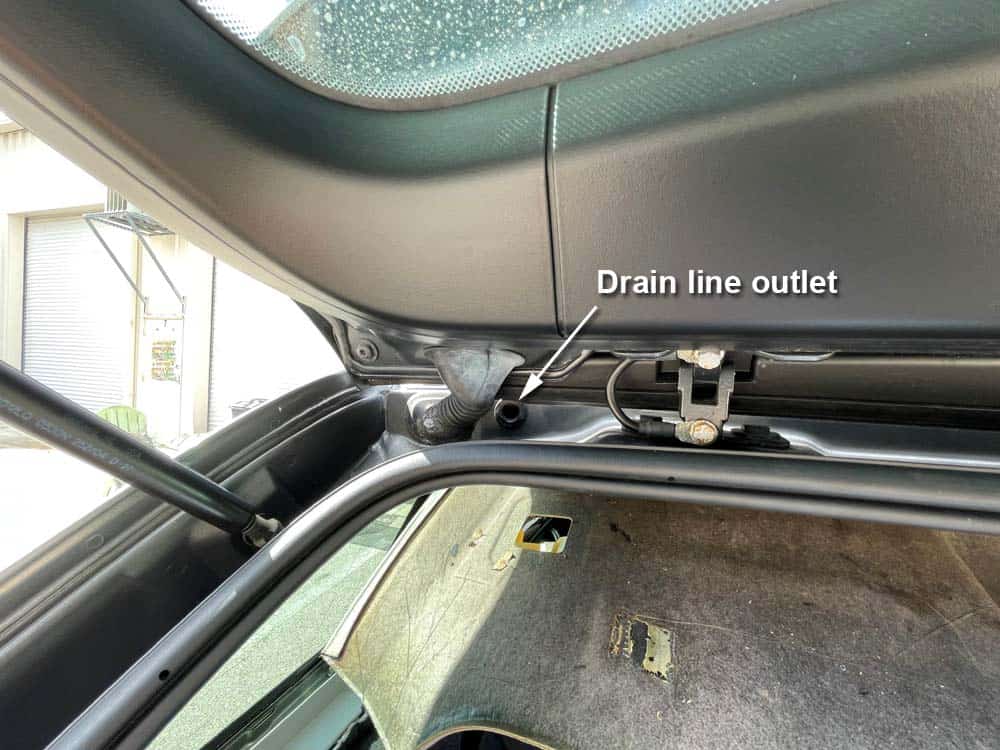
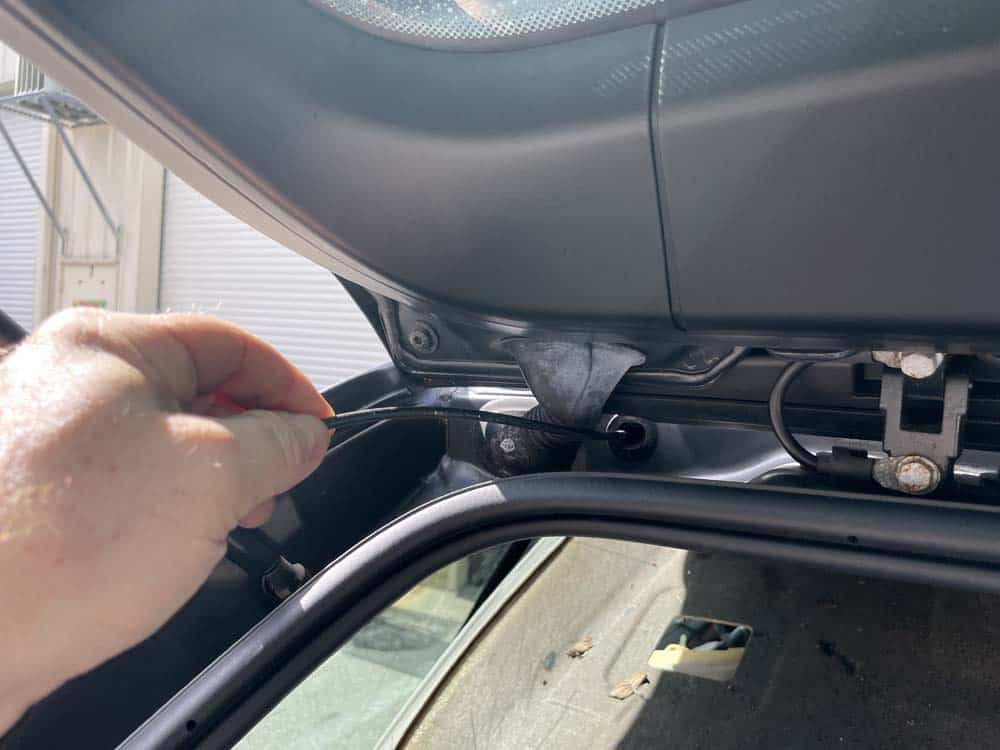
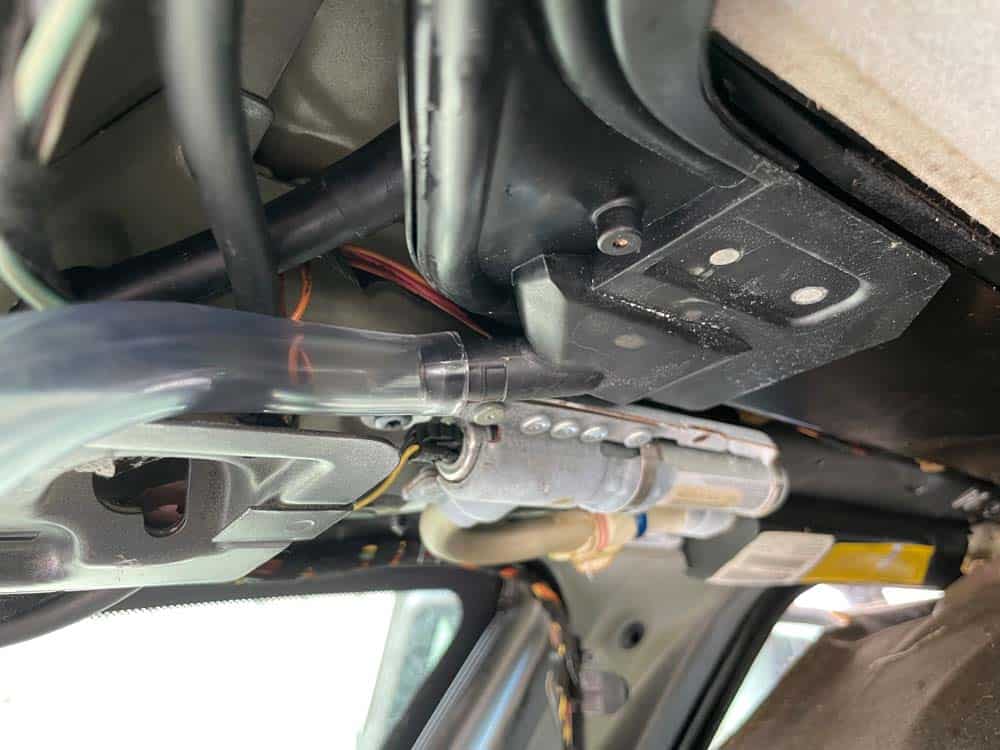
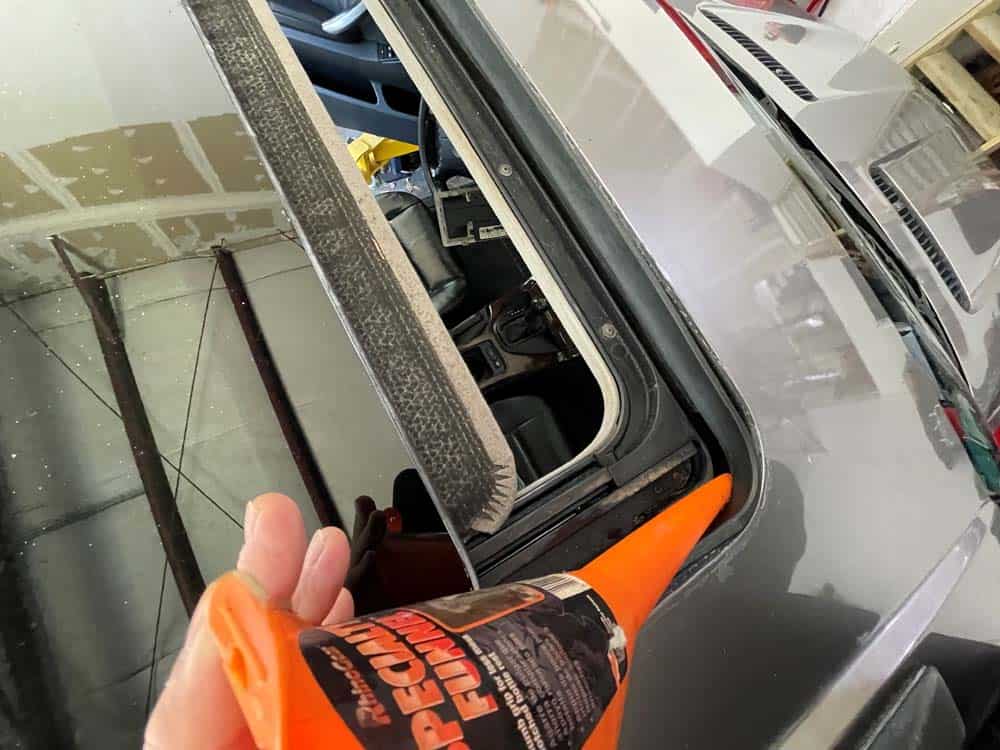
- Moving back to the rear of the vehicle, locate the two rear sunroof drains and drain lines. The drain lines empty their contents at the top of the rear hatch as shown below. The sunroof drains are notorious for becoming clogged with dirt and leaves, causing the water to overflow out of the drain and into the trunk of the X5.
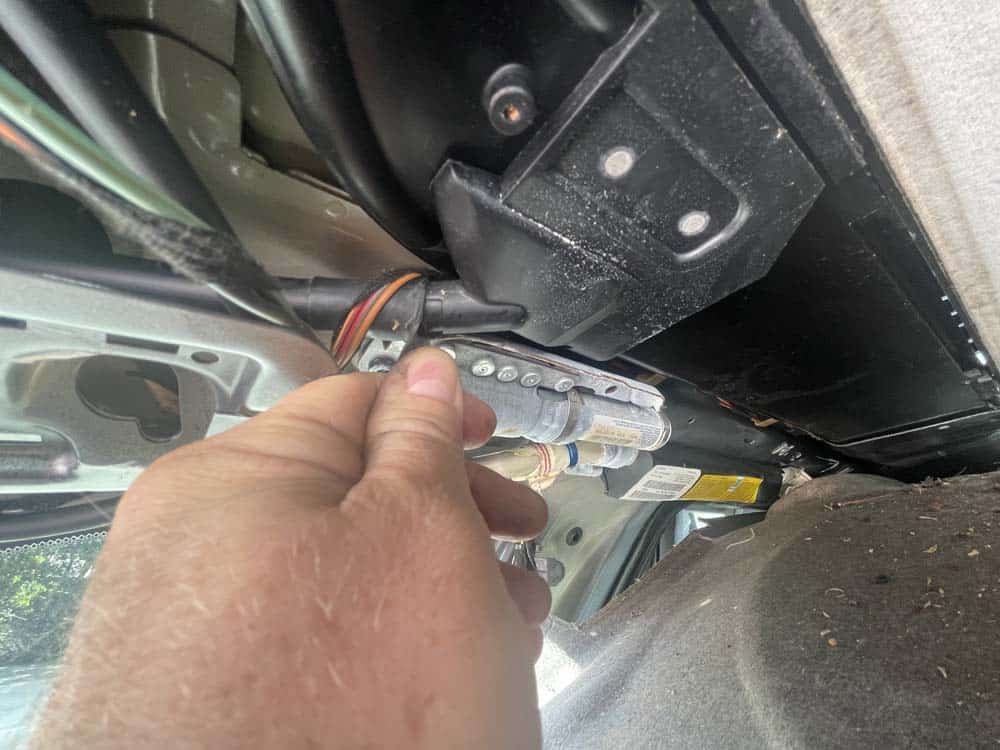
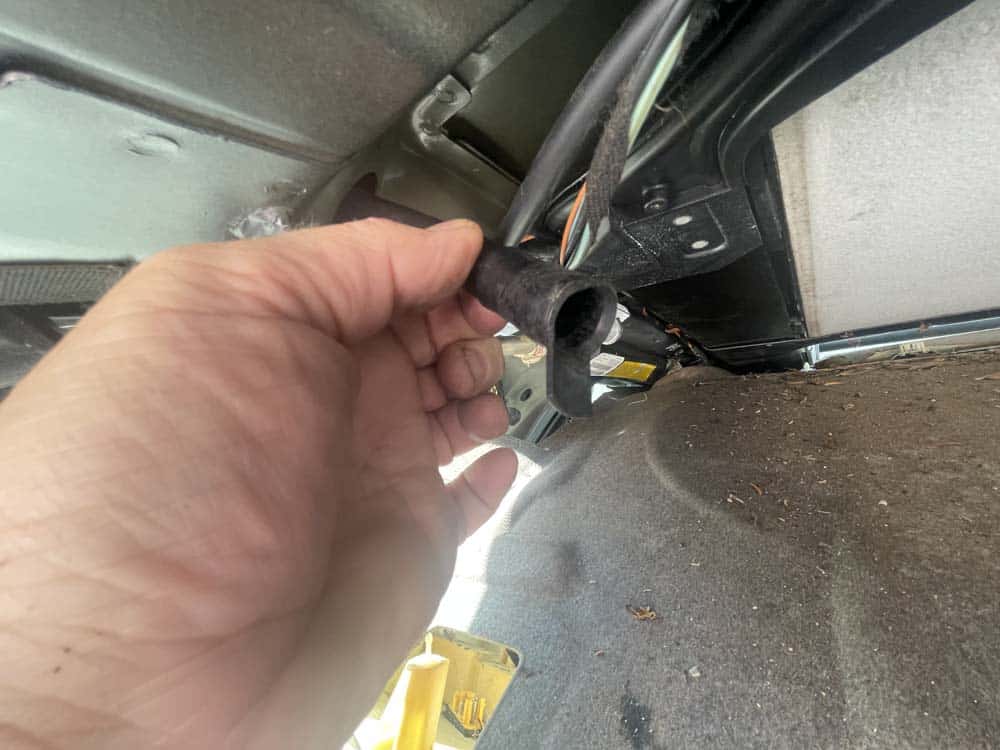
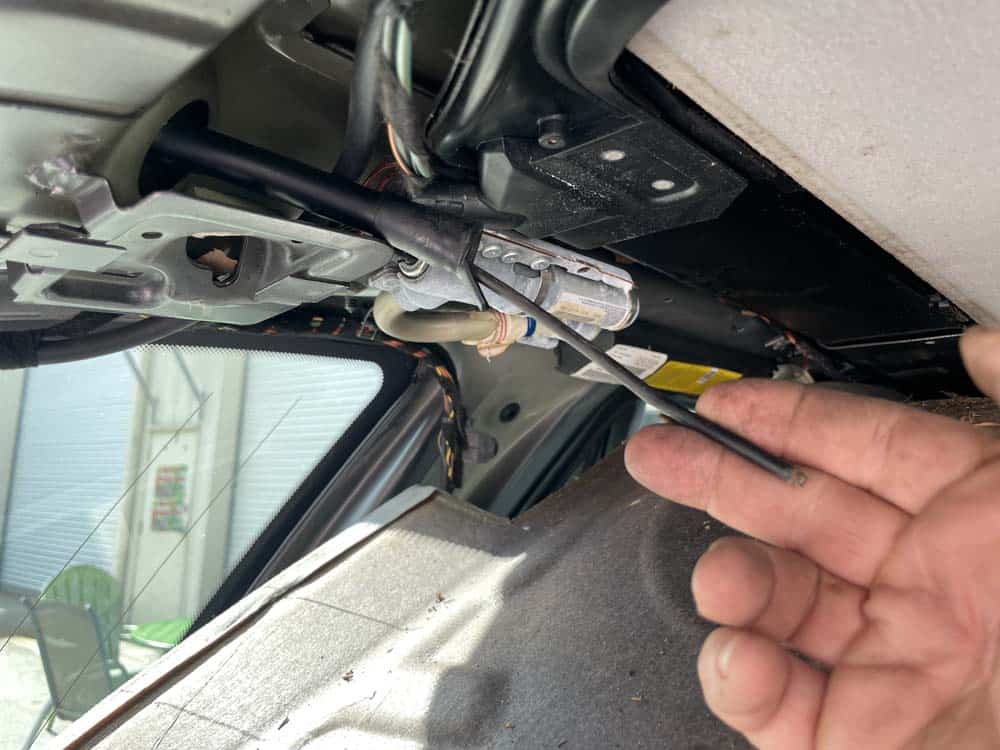
- Remove the rubber drain line from the sunroof drain as shown below. Using a bicycle shifter cable (you can also quickly order one from our "Required Parts" section above), snake out the rubber drain line.
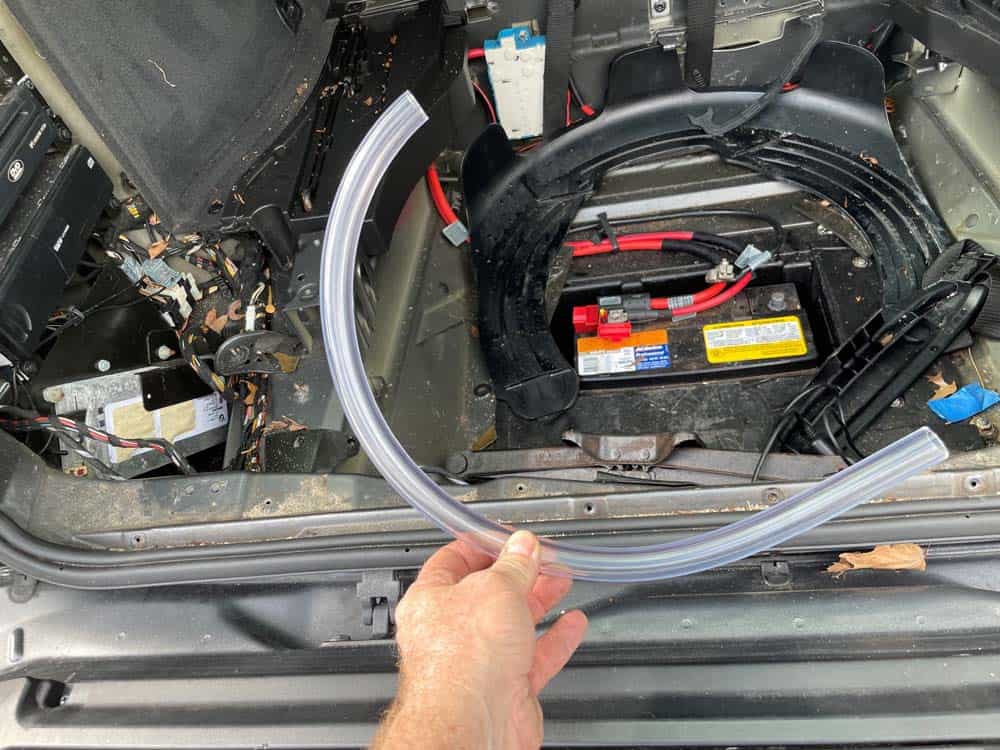
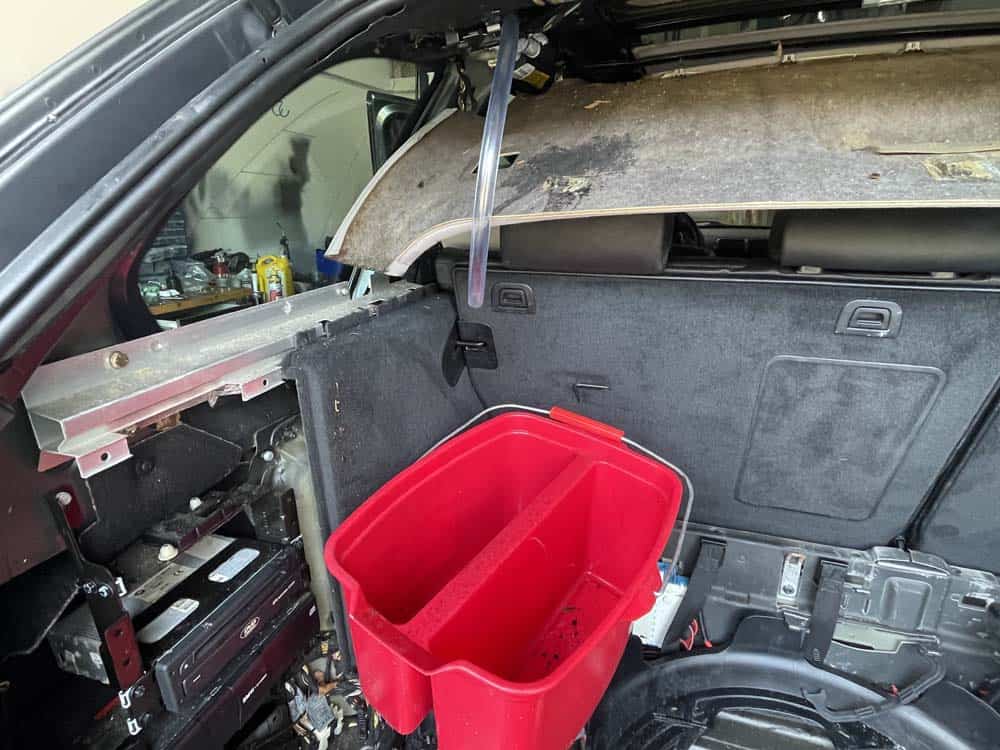
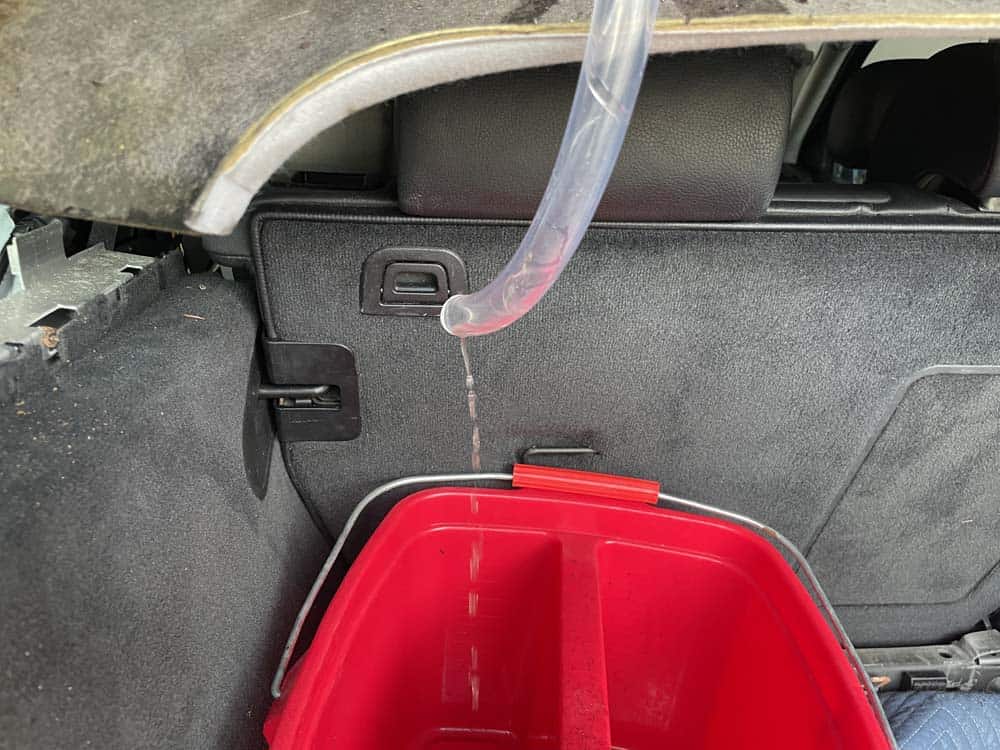
- Although not necessary, we like to attach a piece of 1/2" clear plastic hose to the drain and position a bucket under the other end. This helps during the flushing process in step 7 below. Also, you will be able to monitor the amount of dirt being flushed out of the drain since the hose is clear.
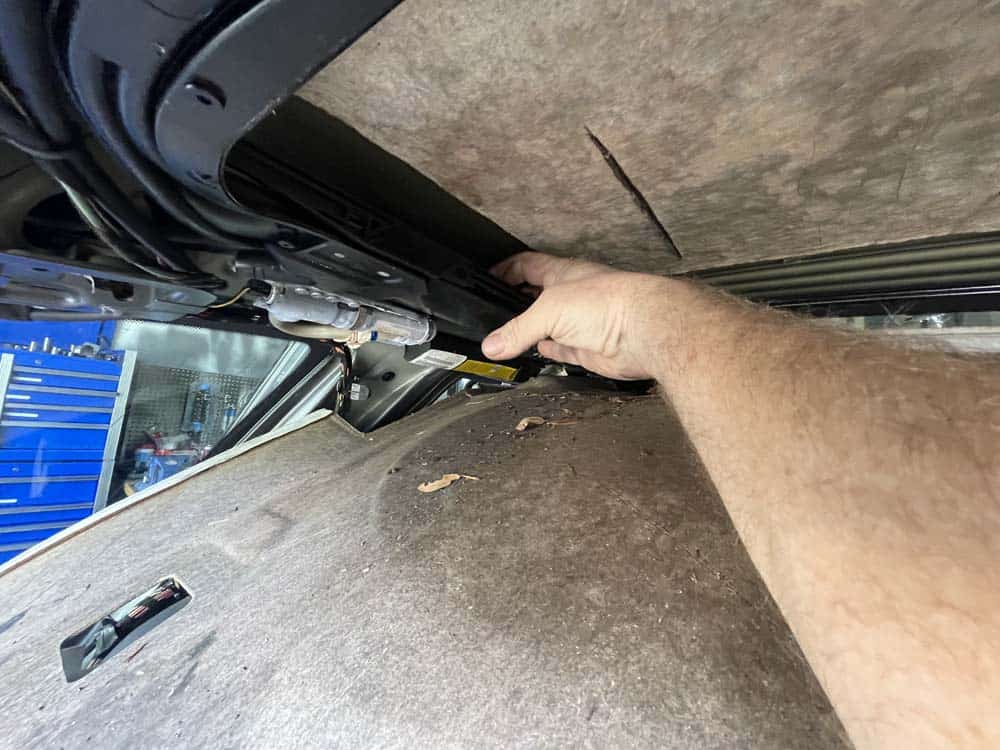
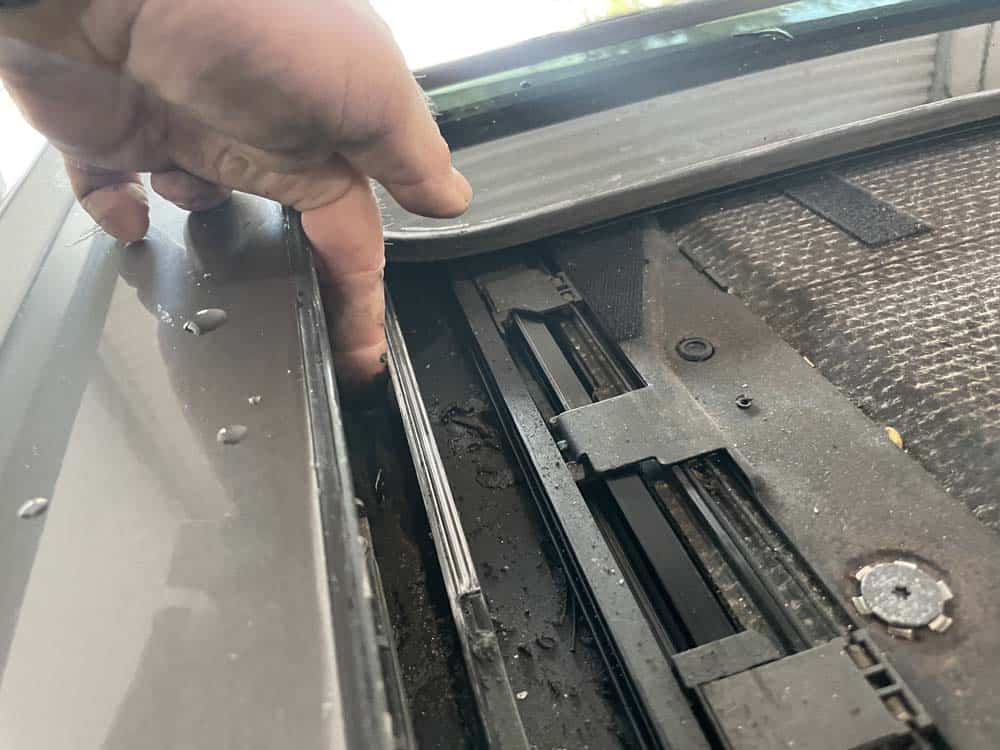
- In order to properly clean the drains and avoid future flooding of the vehicle, all of the debris will need to be removed. Start by reaching up with your hand and slowly removing all of the leaves and debris from the sunroof frame and drain. This can be a slow and tedious process...especially in vehicles like ours that are packed with leaves. Remember...even the smallest leaf or seed can clog the drain so everything must be removed.

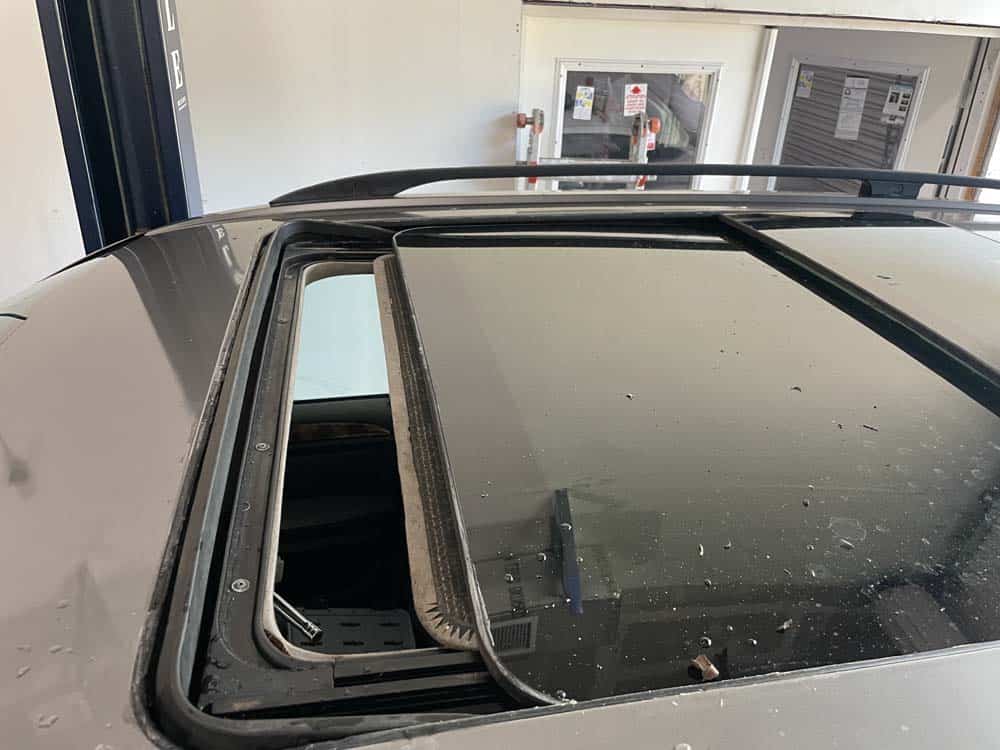
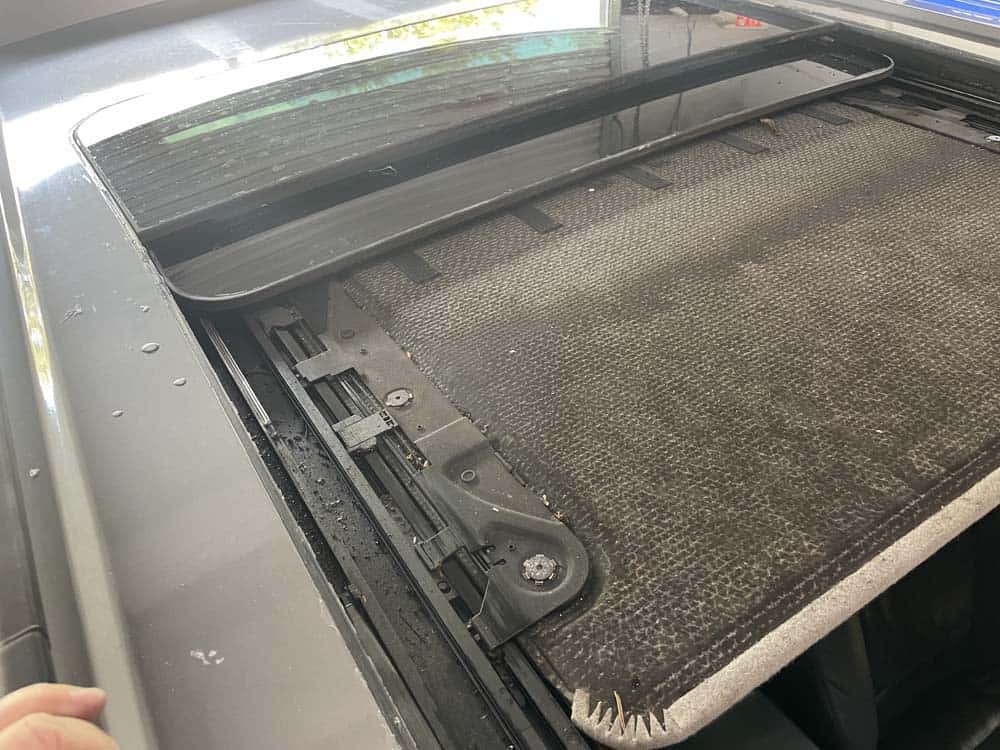
- Open the sunroof. Clean the sunroof drains of debris as far as you can reach back.
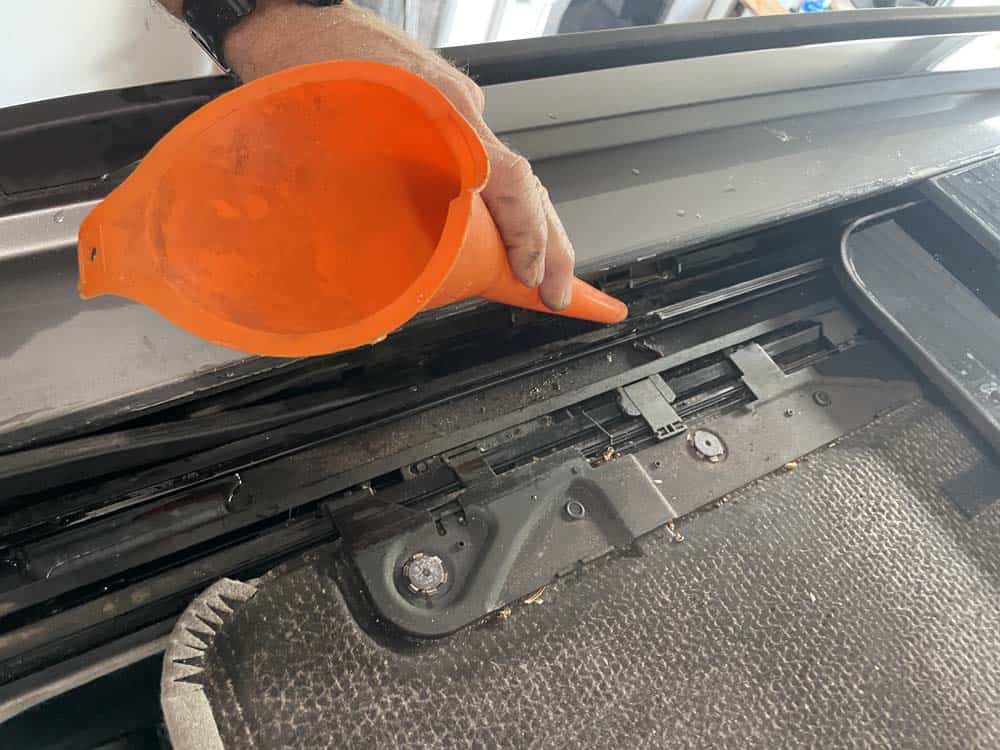
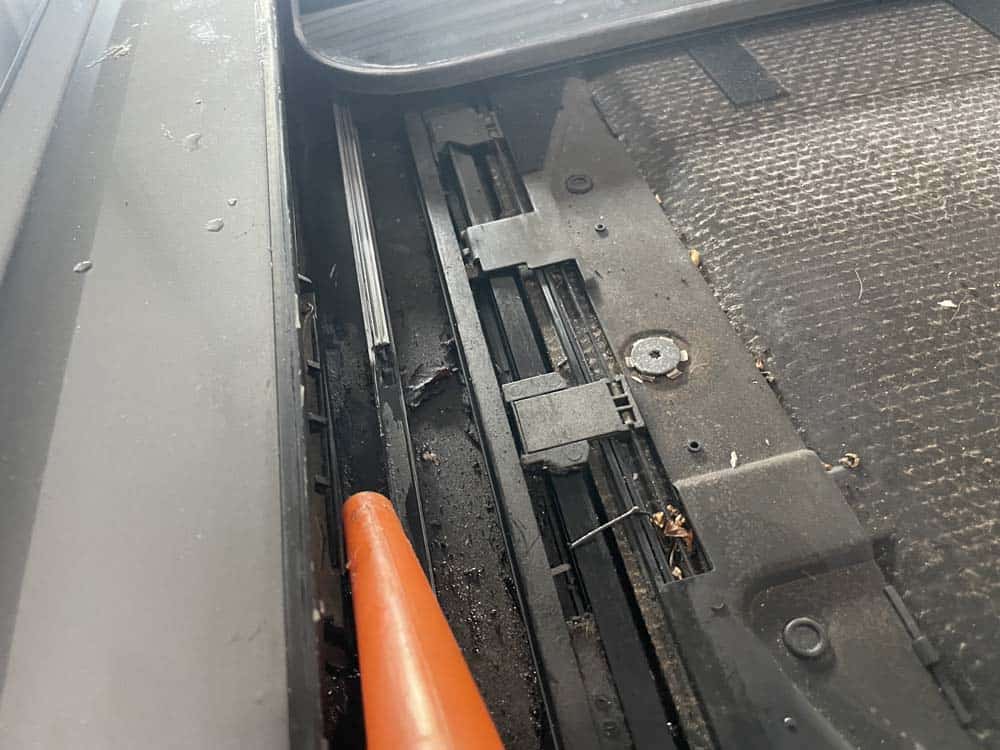
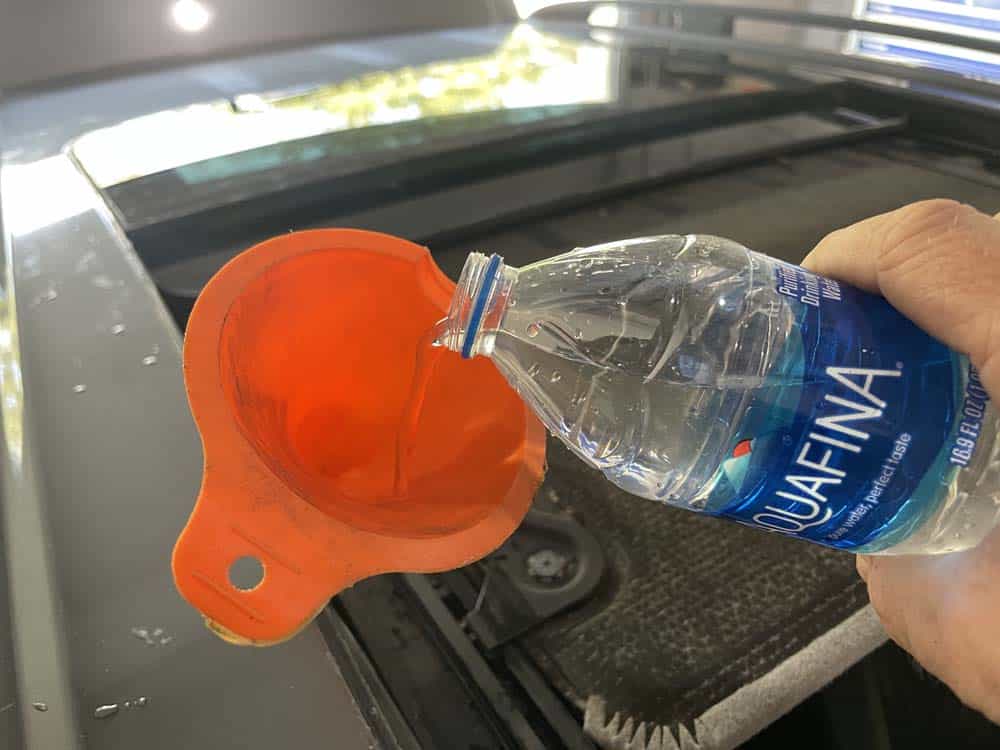
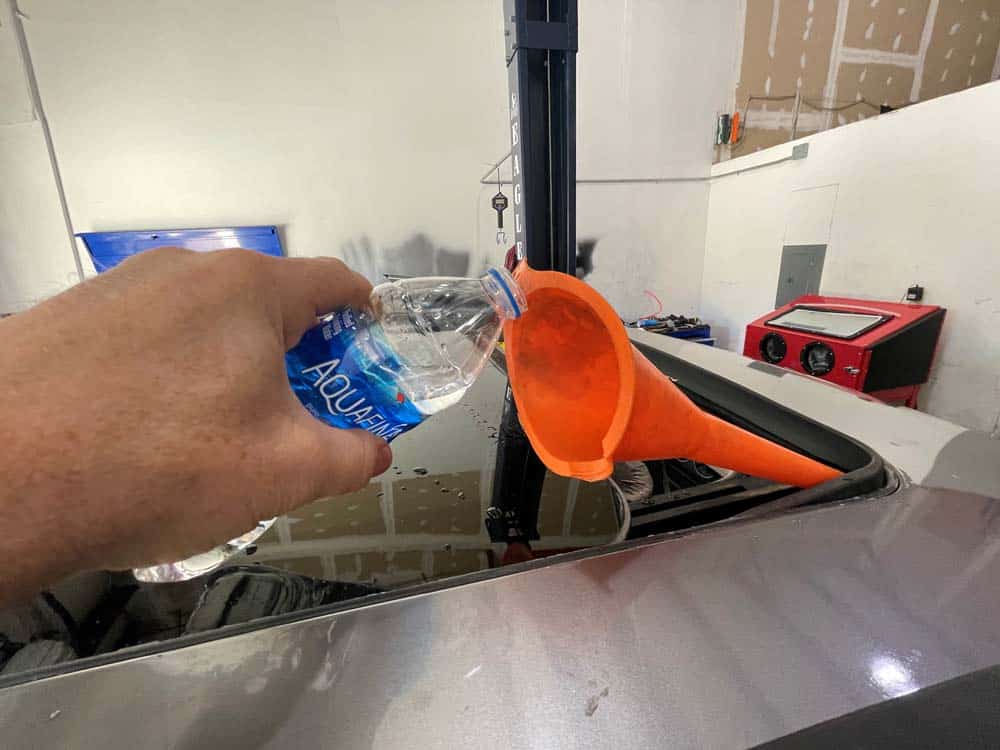
- Now its time to flush the drain. Fill a small plastic bottle with water. Insert a funnel into the drain at the front of the vehicle. MAKE SURE THE FUNNEL IS IN THE DRAIN...NOT THE SUNROOF'S FRAME! Please see the image below for the correct way to insert the funnel. With the funnel properly inserted, slowly pour the entire bottle of water into the drain.
- Quickly move to the rear of the vehicle and check to make sure the water is draining correctly out of the sunroof drain and into the bucket.
- Repeat steps 6 and 7 until the drain is completely clean and the water flows out freely. You may have to flush the drain multiple times to get all of the debris out
- Reattach the rubber drain line to the drain outlet and flush the drain again. Confirm the water runs freely out of the liftgate outlets.
- Repeat the procedure on the other side of the vehicle.
Section 3 - Cleaning the front drains
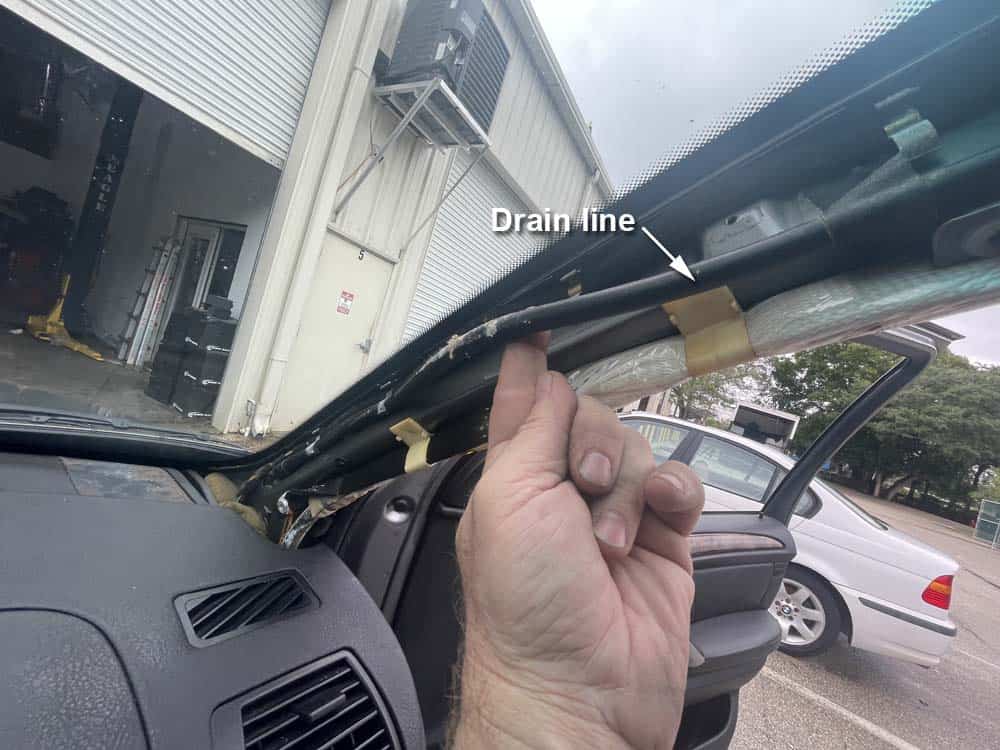
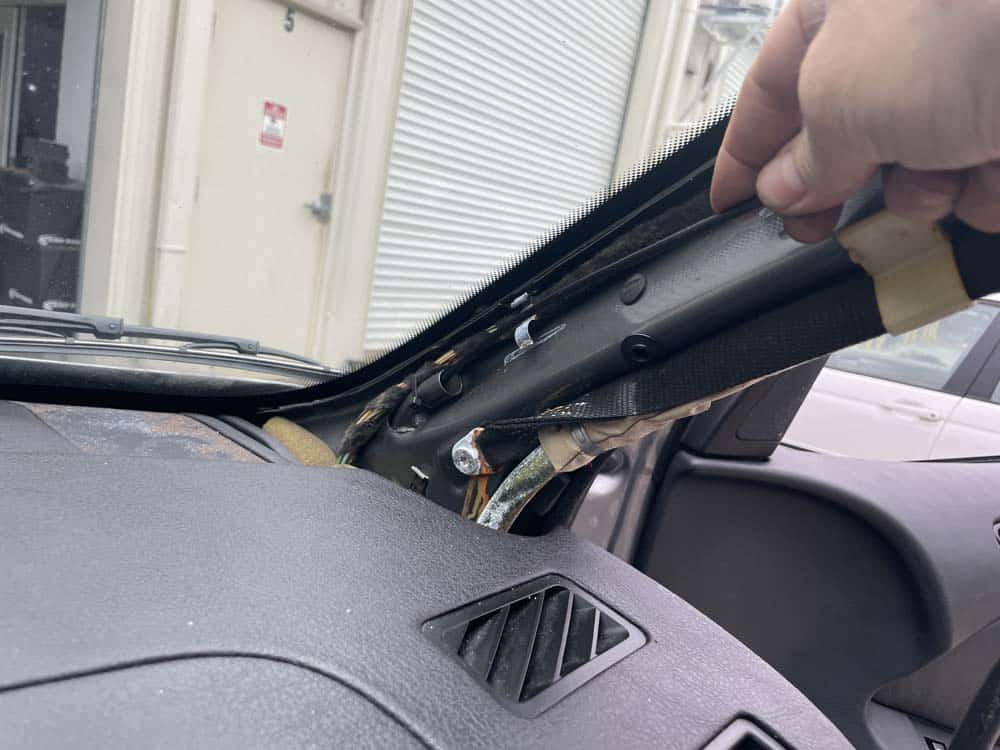
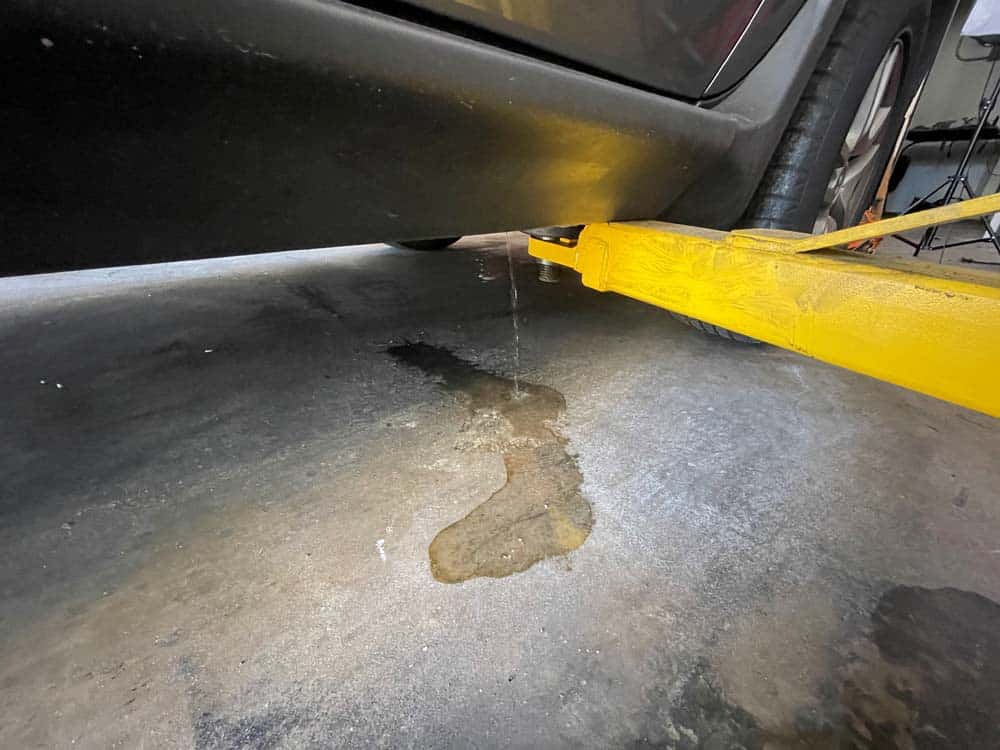
The front sunroof drains on 2000-2006 X5 models channel water from the front of the sunroof, down the A-pillars, and out behind the front wheels onto the pavement. They are easily cleaned by removing the A-pillar trims as shown below.- Remove the plastic screw cover from the A-pillar. Use a torx bit to remove the mounting screw.
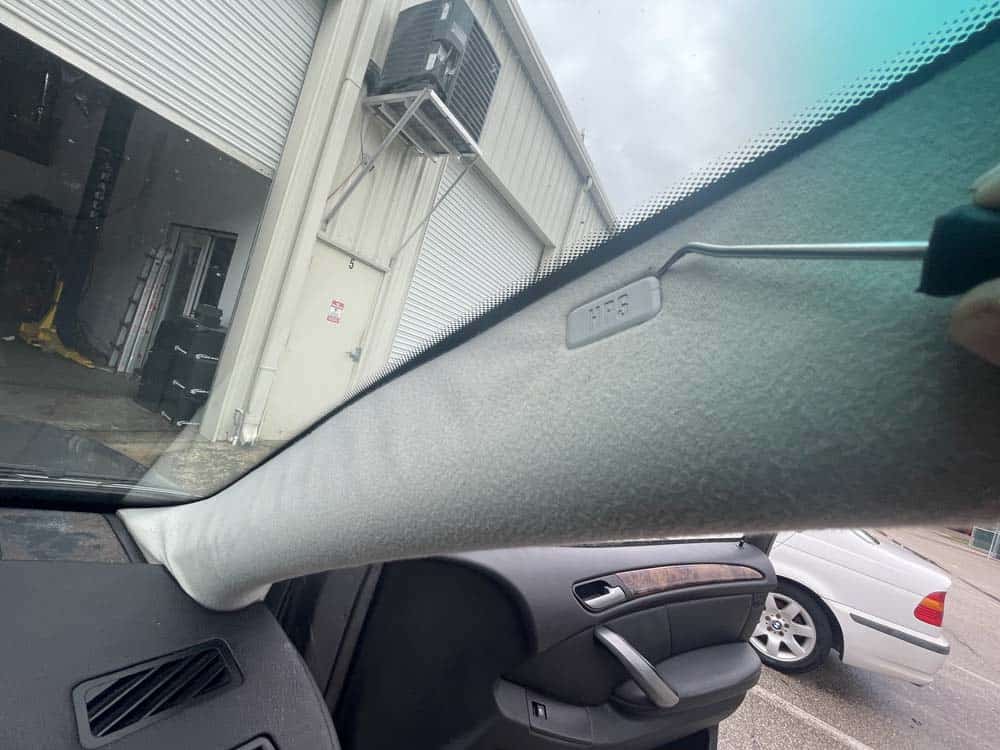
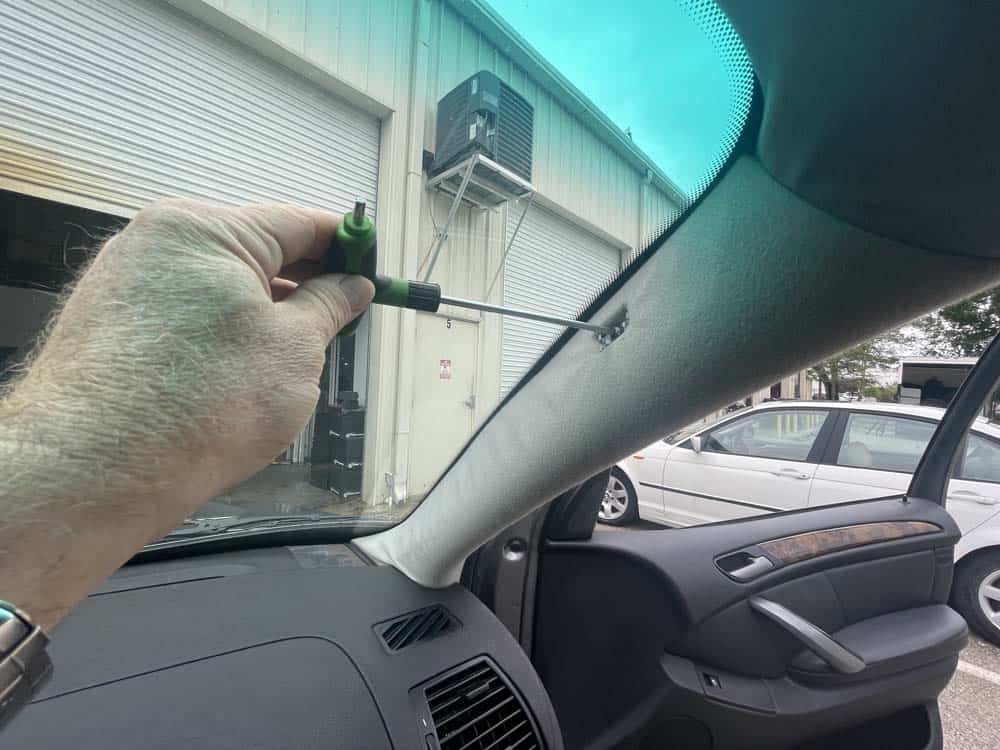
- CAREFULLY remove the A-pillar trim from the vehicle. These trim pieces are notorious for breaking so do not force them out.
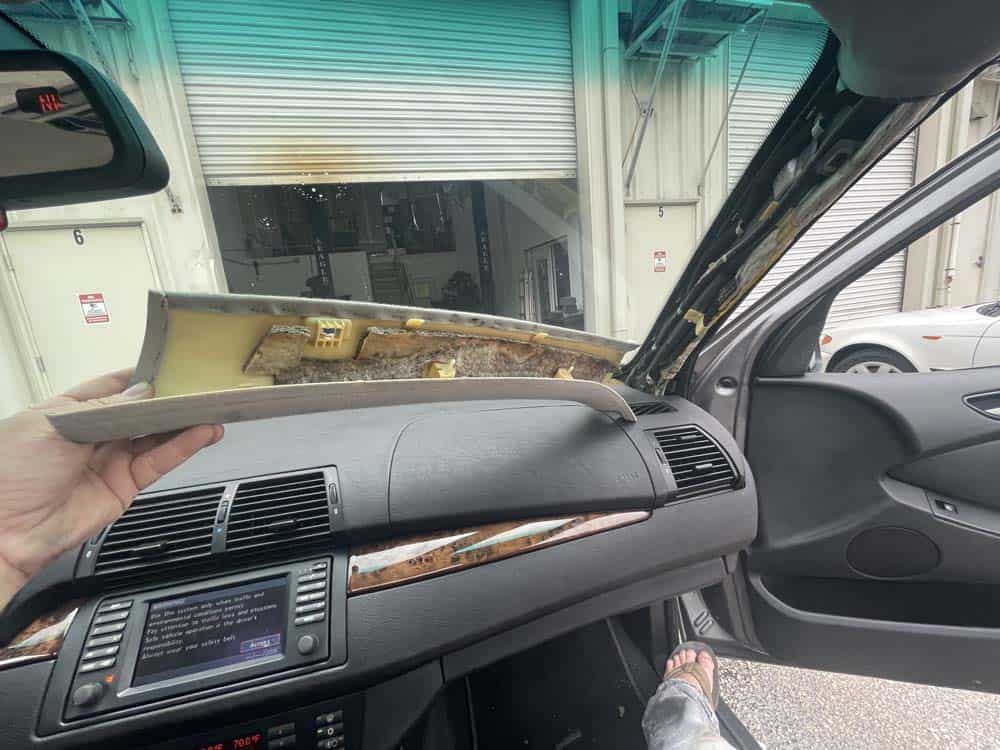
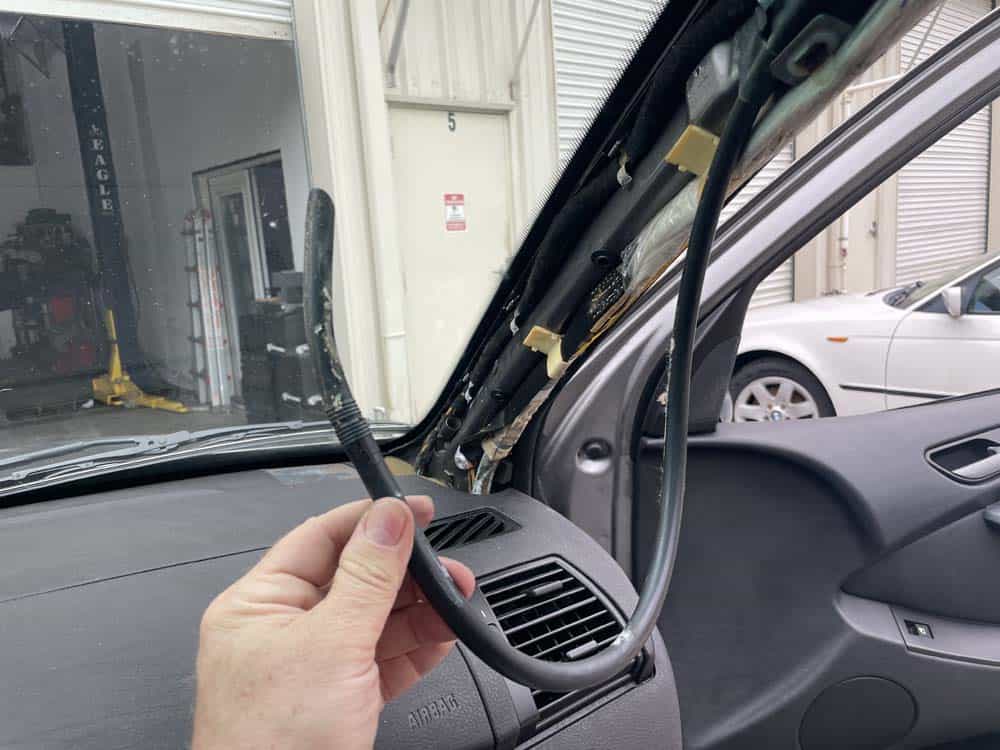
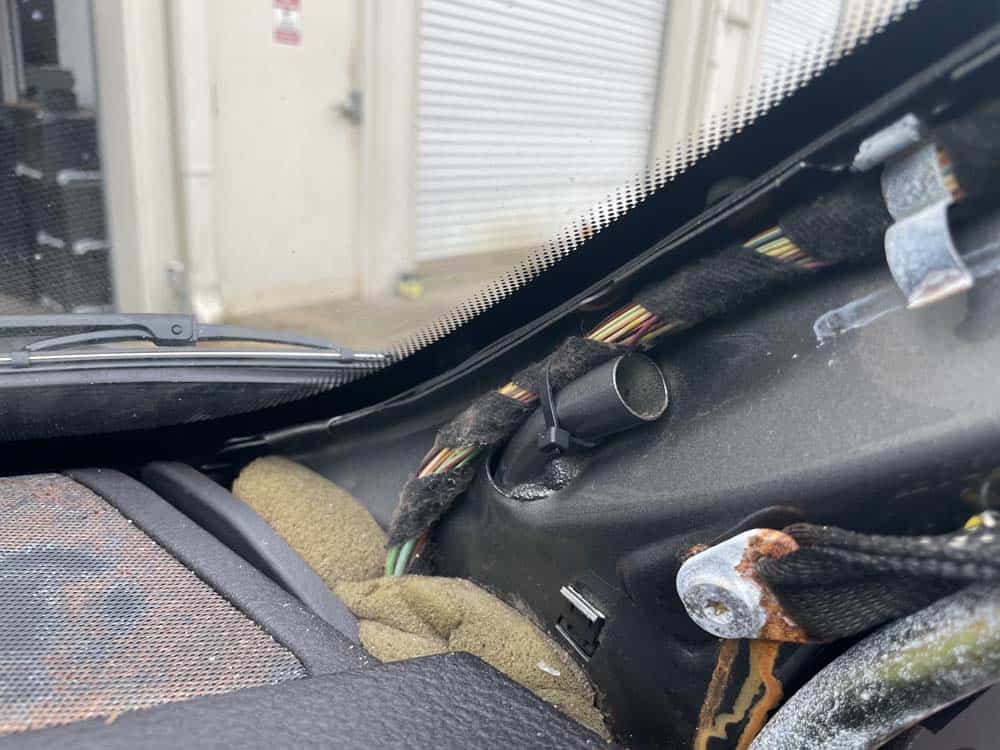
- Locate the rubber drain line. Remove the rubber drain line from the front drain tube.
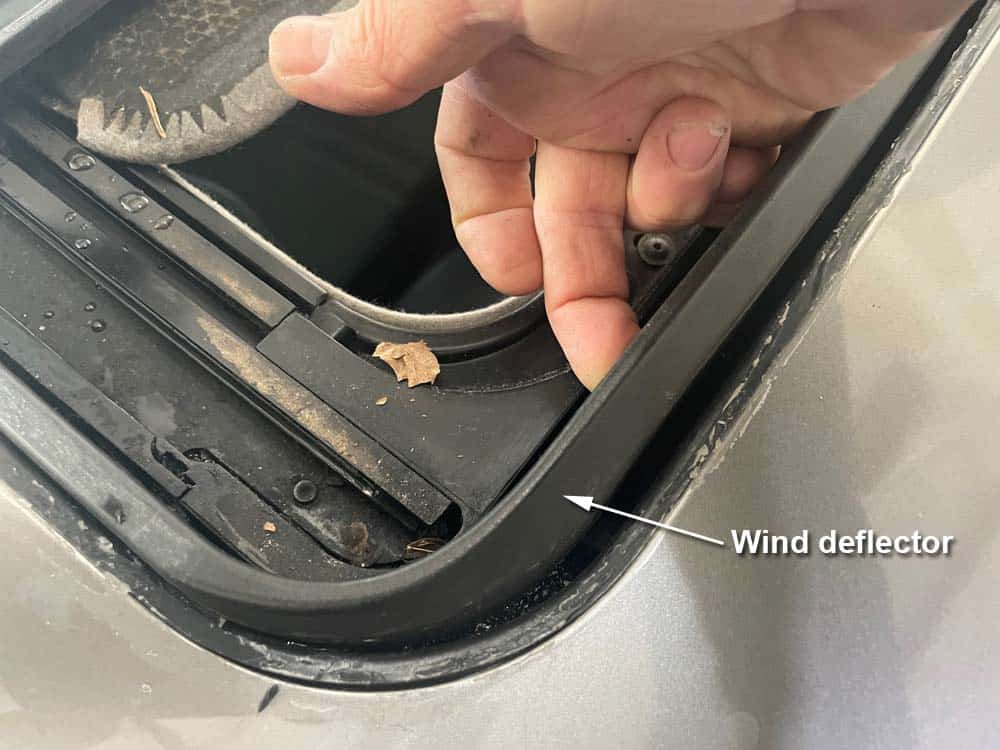
- Move to the top of the sunroof. Thoroughly clean any leaves, dirt, and debris out of the sunroof frame and drain. Space is limited due to the wind deflector, so take your time. Try using a toothbrush and vacuum to clean hard-to-reach places.

- Using a bicycle gear shifting cable (see 'Required Parts" above to order one quickly), snake out the rubber drain line up to the roof.
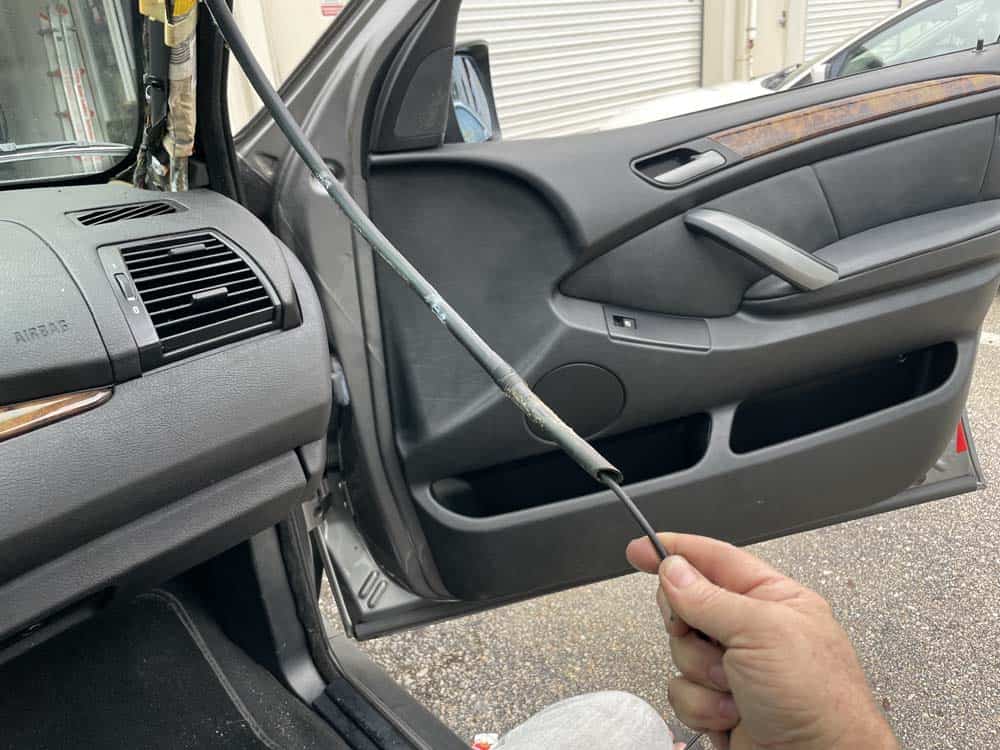
- Snake out the metal drain tube down to the bottom of the vehicle. Don't force the cable! If it gets stuck, gently twist it until it clears the obstruction.
- Reassemble the drain line.
- Now it's time to flush the drain. Fill a small plastic bottle with water. Insert a funnel into the drain at the front of the vehicle. MAKE SURE THE FUNNEL IS IN THE DRAIN...NOT THE SUNROOF'S FRAME! Please see the image below for the correct way to insert the funnel. With the funnel properly inserted, slowly pour the entire bottle of water into the drain.
- Verify the water is running freely out behind the front wheel. If it is not, repeat steps 5-8 until any obstructions are cleared.
- Reassemble the trim and repeat on the other side of the vehicle.
BMW E53 Sunroof Leak and Drain Cleaning Finished