Affiliate link disclosure – The BMW Repair Guide uses affiliate links in their site. For more information on affiliate links, please click here.
Repair Summary
This article gives detailed instructions on replacing the valley pan in a BMW vehicle with the M60/M62 V8 engine. Even though we used a 1995 840i to perform this repair, this article can be applied to any 1991-2003 5,7,8, or X5 with the M60/M62 V8 with minor modifications to the repair steps.
A BMW M60 valley pan replacement will cure the infamous coolant leak from the back of your V8 engine.
If you own a 1991-2003 BMW with the iconic M60 or M62 V8 engine, at some point in time you will experience a coolant leak emanating from the back of the engine. This leak is due to failure of the valley pan gasket that seals the flow of coolant through the center of the engine block.
What is a BMW valley pan and what does it do?
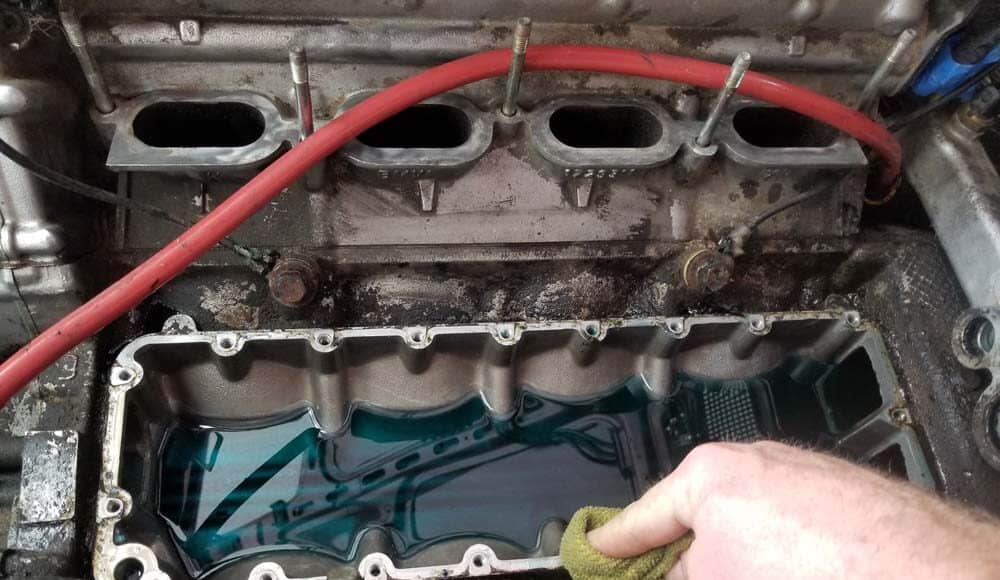
There is a lot of confusion as to what a BMW V8 valley pan does, probably due to its misleading shape. The valley pan is actually a "V" shaped sheet of metal that seals the top of the engine block between the two cylinder heads (also known as the "valley").
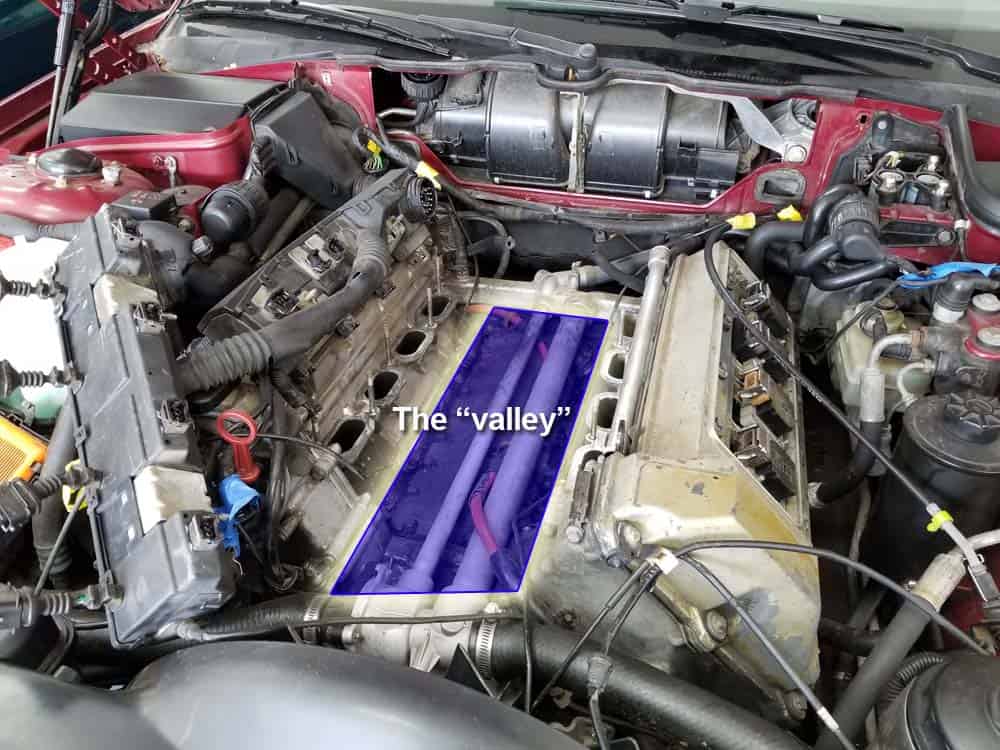
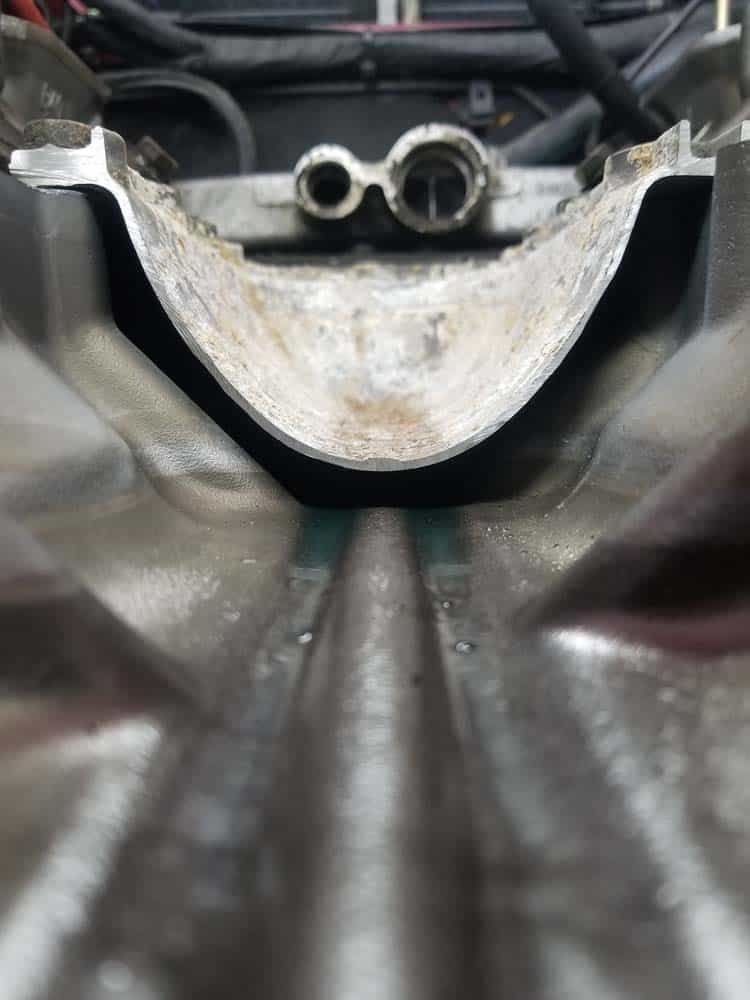
The valley on a BMW V8 is actually a large rectangular canal in the center of the engine that allows coolant from the rear of the motor to flow to the radiator. The valley pan not only seals the top of this canal but also converts it into a set of ducts that channel coolant to the water pump. The valley pan is concave in shape not because it holds fluid, but rather so it can efficiently direct the flow of coolant through the center of the engine block while shedding weight from the engine.
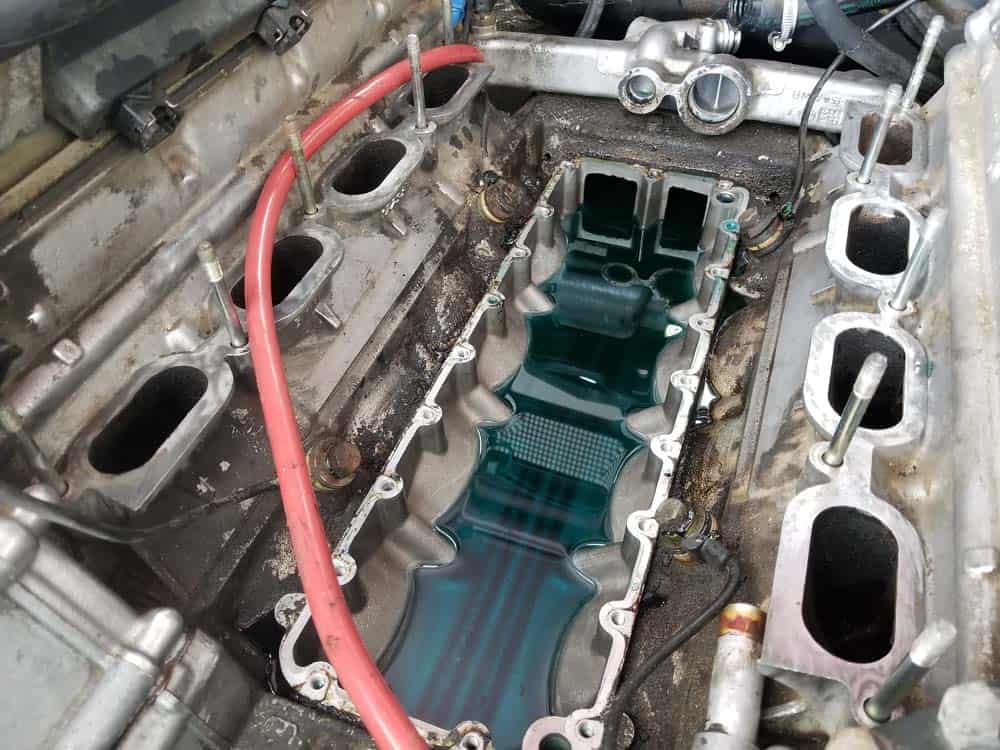
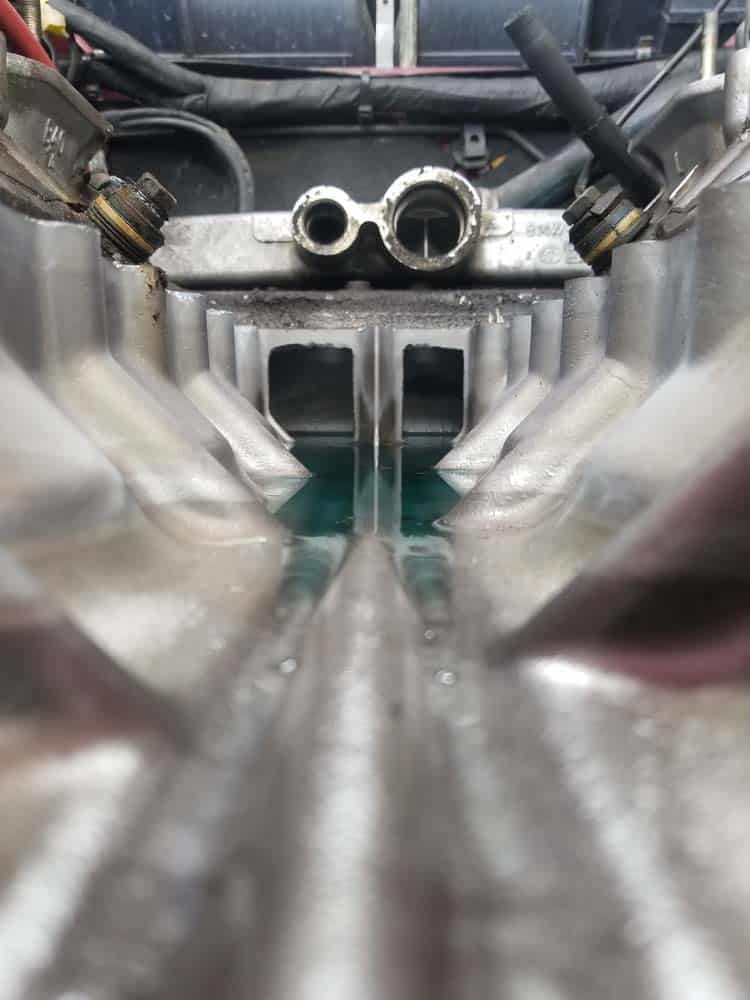
In the following images, we cut a section out of an old valley pan to show the canal with and without the pan installed. As you can see, the lightweight valley pan actually changes the rectangular canal into an efficient coolant duct, eliminating the need for solid cast passages and decreasing the weight of the engine. If the engine block's valley had been cast solid with passageways instead of using a pan, the motor would have weighed approximately 50 pounds more. That is a huge amount of weight savings creating a more efficient engine.
Why does the valley pan have a plastic cover?
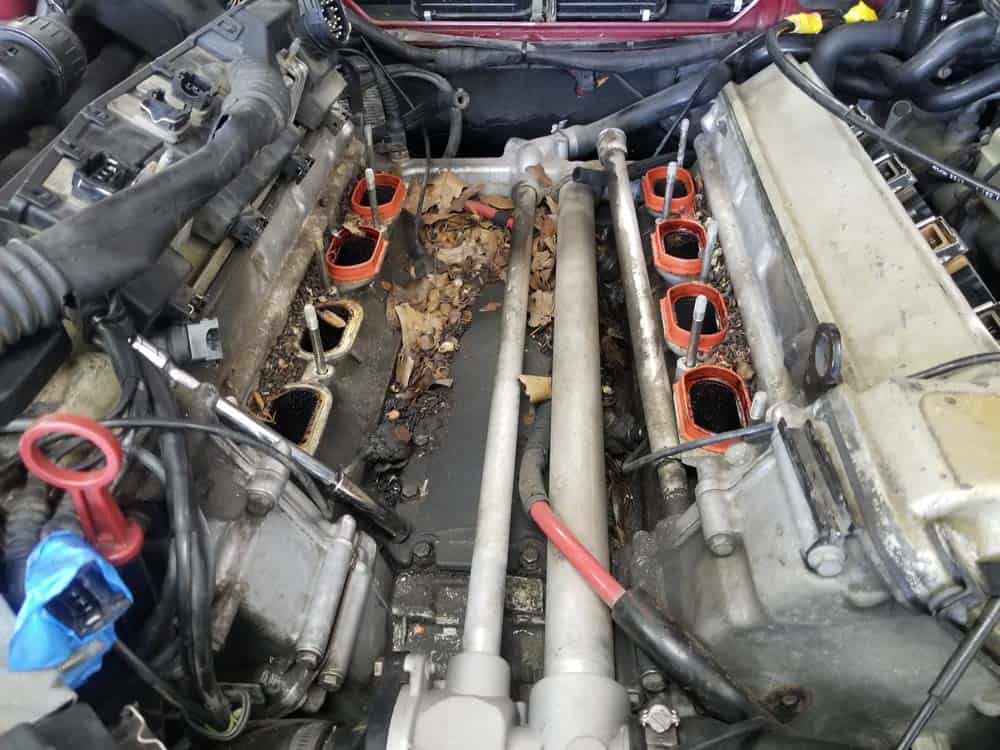
Another misunderstood component of the BMW valley pan is its black plastic cover. The valley in a BMW V8 is a dirty place - because it is located in the center of the engine it is a magnet for dirt, leaves, trash, spilled or leaking fluids, and (yes) animal droppings. Many BMW owners are shocked when they remove the intake manifold on older V8's that have not been properly serviced or have spent a long time sitting outside. Since the valley pan is basically a trough running down the center of the engine, its plastic cover simply keeps dirt and debris from accumulating inside of it.
Symptoms of a leaking valley pan
The valley pan is sealed to the top of the engine block by a gasket. Like most gaskets in the engine compartment of the BMW M60/M62 engines, heat and age cause the valley pan gasket to eventually dry out and fail. The most common symptom of a leaking valley pan gasket is coolant leaking mysteriously from the rear of the engine. A slow leak can also just puddle on the top of the valley causing smoke to emanate from the engine when it warms up.
Replacing the valley pan gasket on 1991-2003 5,7,8 and X5 series vehicles requires removing the intake manifold from the vehicle. Although not technically difficult, it does take about 4-5 hours to complete. The good news is replacing your own valley pan gasket can save you a huge amount of money by avoiding the repair shop - the parts are inexpensive and you can avoid about $500 in labor by doing it yourself. Since you will be removing the intake manifold, now is an excellent time to replace other components in your V8 engine prone to wear and tear including; manifold gaskets and spacer bushings, PCV valve, and gasket throttle body gasket, coolant temperature sensors, and knock sensors.



View the detailed parts diagram for this repair.
Includes detailed part diagrams, part numbers and links to purchase all of the required components needed to complete this repair.

Before starting this repair, you must have the following required parts.
M60/M62 engines
If your vehicle has started leaking coolant around the intake area and it is not the pipes, it is probably the valley pan.
M60/M62 engines
Purchase two gaskets. This is the same coolant accumulator gasket that would be installed at the BMW dealership.
Fits all BMW vehicles
This is the same Genuine BMW coolant you would buy from the dealership.
M60/M62 engines - for both the waterpump and accumulator
Used in many applications for many vehicles - most commonly used at the rear location of the water transfer pipe.
M60/M62 engines - for both the water pump and accumulator
Replace each time to work on your water pump.
Coolant sensor #1 for M60/M62 engines
Your vehicle is equipped with numerous gauges to allow you to have a better idea of what is going on under the hood. By monitoring these gauges, you can prevent premature engine damage due to low oil pressure or high coolant temperatures. If one isn't functional though, you are in the dark as far as that system goes. One of the most vital is coolant temperature.
Coolant sensor #2 for M60/M62 engines
Your vehicle is equipped with numerous gauges to allow you to have a better idea of what is going on under the hood. By monitoring these gauges, you can prevent premature engine damage due to low oil pressure or high coolant temperatures. If one isn't functional though, you are in the dark as far as that system goes. One of the most vital is coolant temperature.
BMW M60/M62 engine
Four gaskets are required. Faulty intake manifold gaskets can cause vacuum leaks and cause your engine to run poorly. Replaced every time you remove the intake manifold, it's important to know everything is sealed up and running good.
Section 1 - Removing the Intake Manifold
As discussed above, the intake manifold will need to be removed to access the valley pan. Removing the intake manifold from your BMW M60/M62 V8 engine is not difficult and should not be considered an obstacle to performing this repair - in fact, it should be considered an excellent opportunity to install fresh intake manifold, PCV, and throttle body gaskets.
For detailed instructions on removing the intake manifold from your BMW M60/M62 V8, please see our article: BMW M60 Intake Manifold Gasket Replacement – V8 5,7,8 SeriesSection 2 - Replacing the BMW M60 Valley Pan
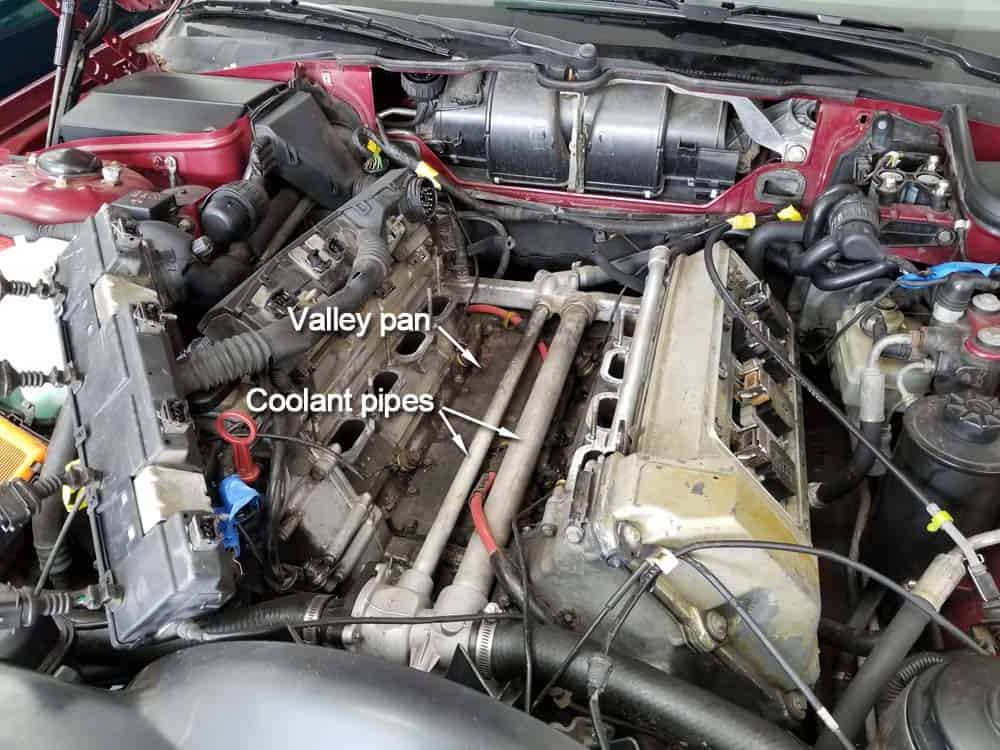
In order to remove the valley pan from the M60/M62 V8 engine, you will need to clear out the two coolant pipes that run above it. Be prepared for a bit of a mess...you will lose about 1/2 gallon of engine coolant in the process. It's also important to note that the original valley pan gasket has been updated by BMW to a high-temperature Viton rubber gasket. This gasket comes preinstalled in a new valley pan and cannot be purchased separately. We strongly urge our readers not to use the old-style valley pan gasket in this repair.- The valley pan is located underneath the coolant pipes that run down the center of the engine block. In order to remove it, the rear cooling system accumulator and the pipes must be cleared out of the way.
- Begin by locating the engine coolant and water temperature sensors mounted on the rear cooling system accumulator at the back of the engine.
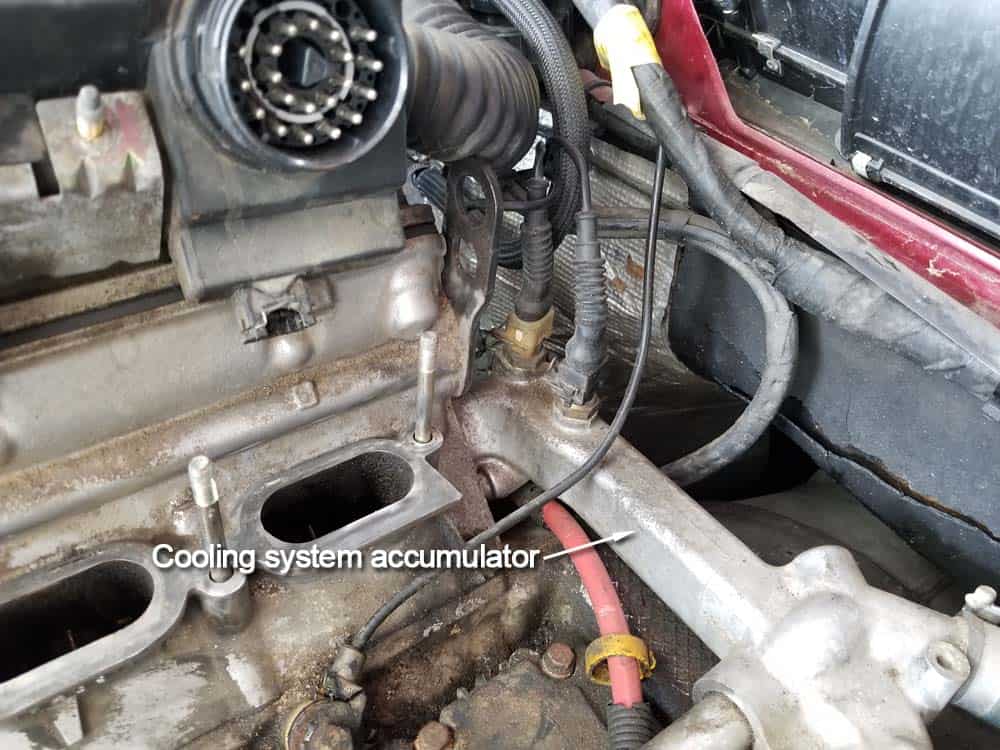
- Release the two sensor plugs by depressing their metal clips and pulling them free of the accumulator.
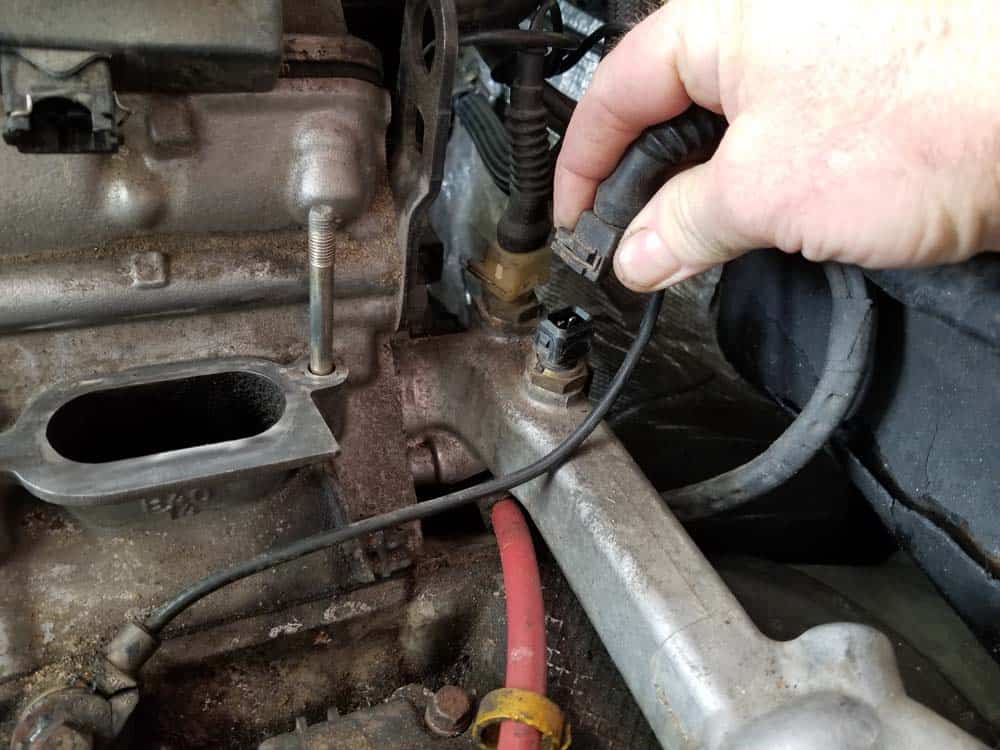
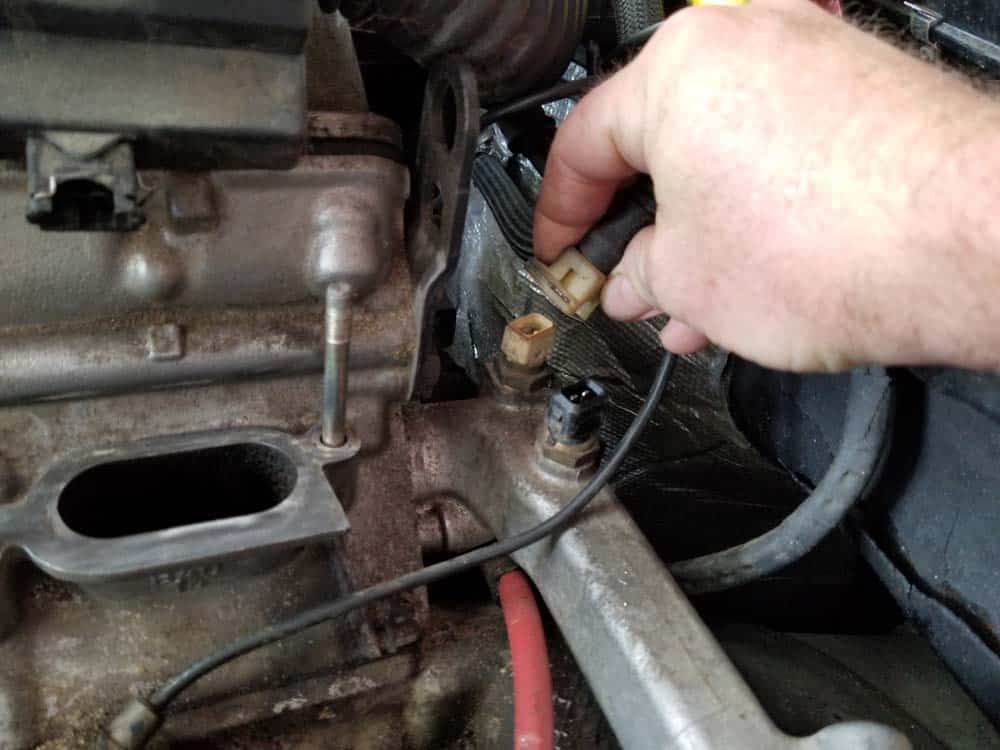
- Loosen the hose clamp and remove the return coolant hose from the accumulator. Have a rag ready to catch the small amount of coolant that will drain out.
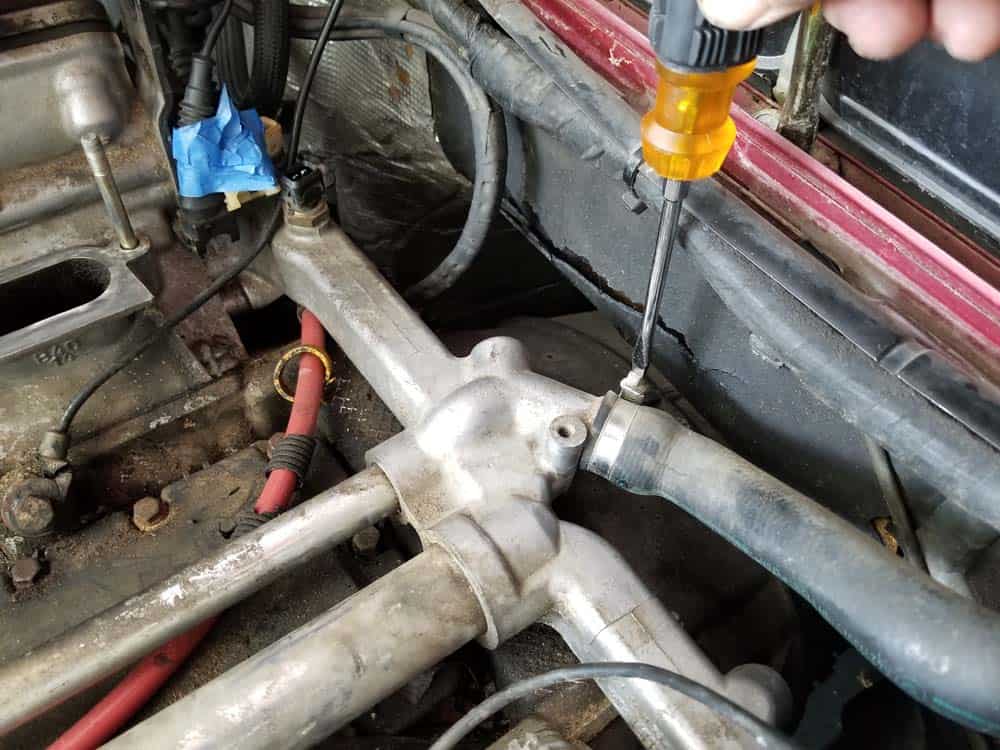
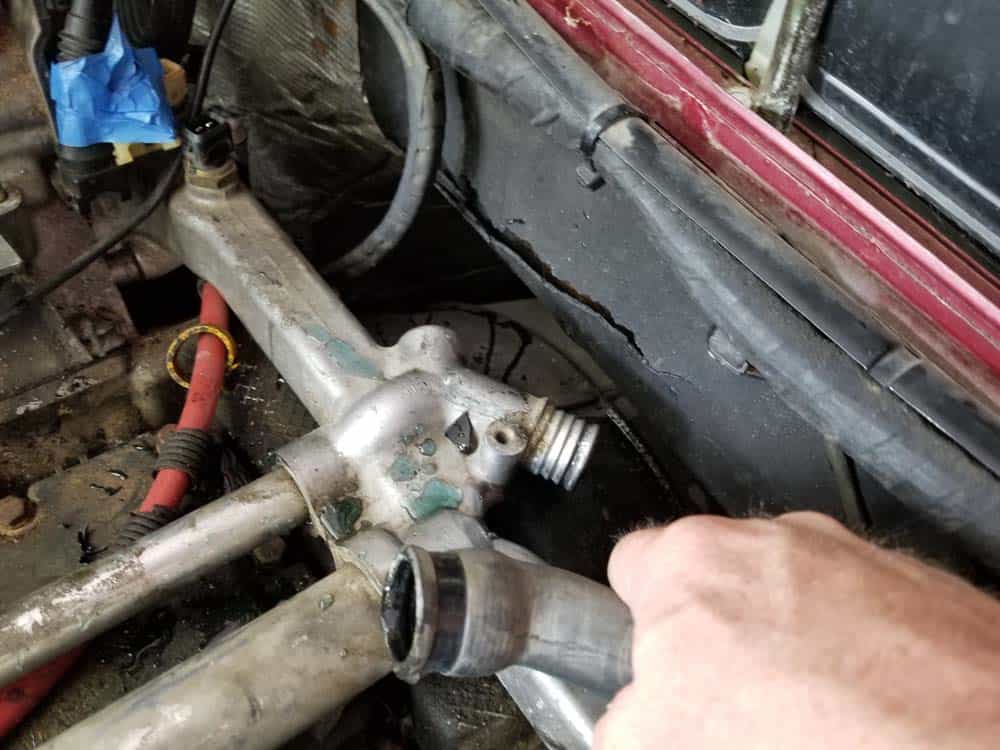
- The cooling system accumulator is anchored to the engine block by six bolts...three on each side. Remove all six bolts using a 10mm socket wrench. Use patience...these bolts are often corroded and the two lower bolts are notoriously hard to see and reach. Be prepared to partially crawl inside the engine to reach them. If you get frustrated...take a break.
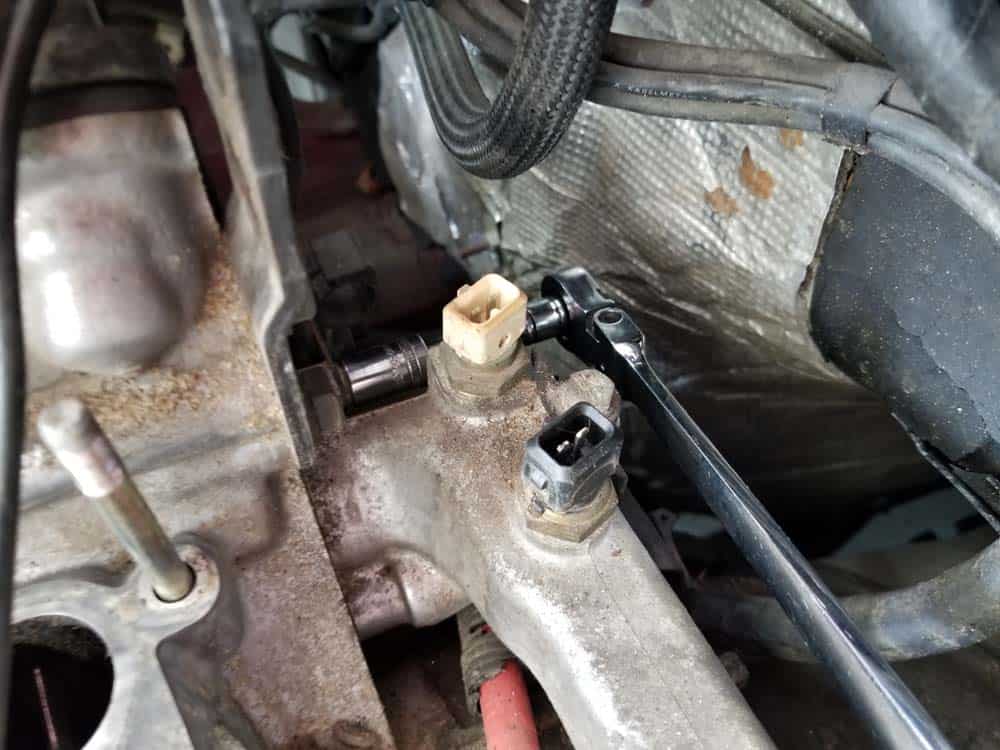
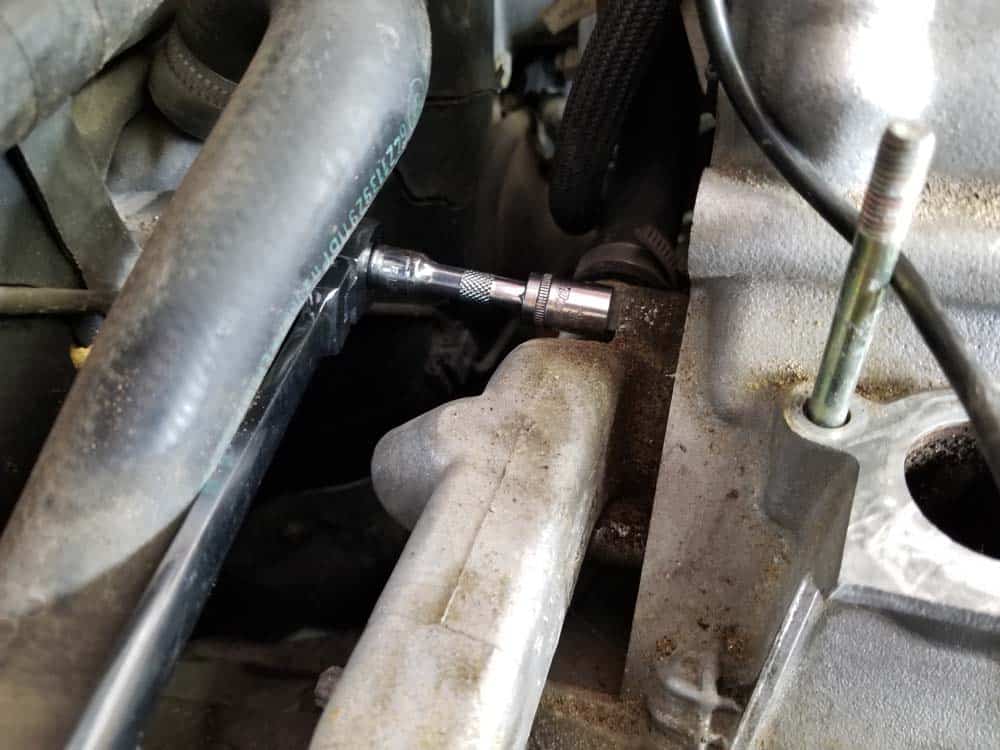
- The cooling system accumulator can now be removed. Have a drain pan ready...you will lose about ½ gallon of coolant when you remove the accumulator. If your car sits too close to the ground to use a drain pan and you don't have it jacked and supported, then have a mop and bucket ready. I found this fine fellow to clean up my mess.
- Grasp the accumulator and pull it loose from the vehicle.
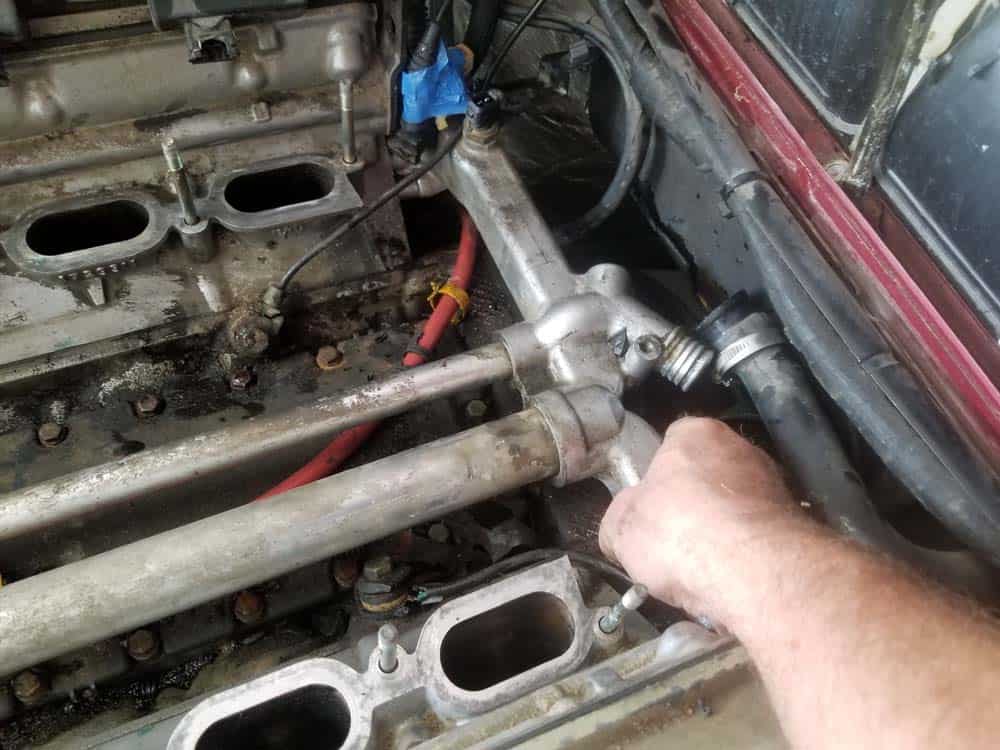
- Pull the water pipes free from the water pump and the accumulator. Remove them from the vehicle.
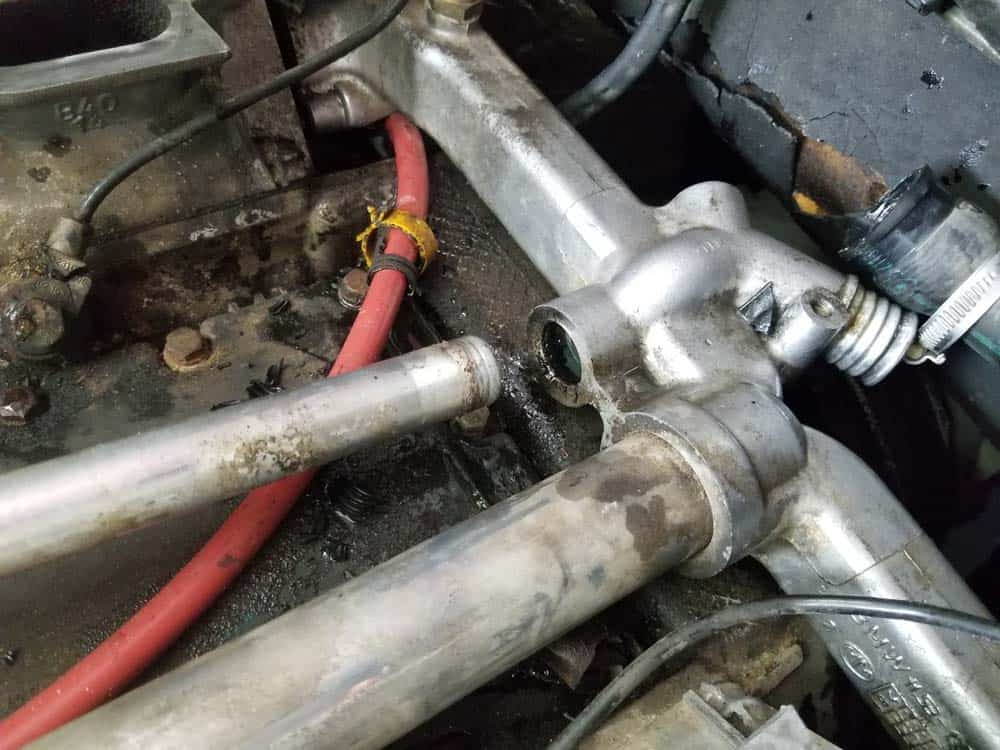
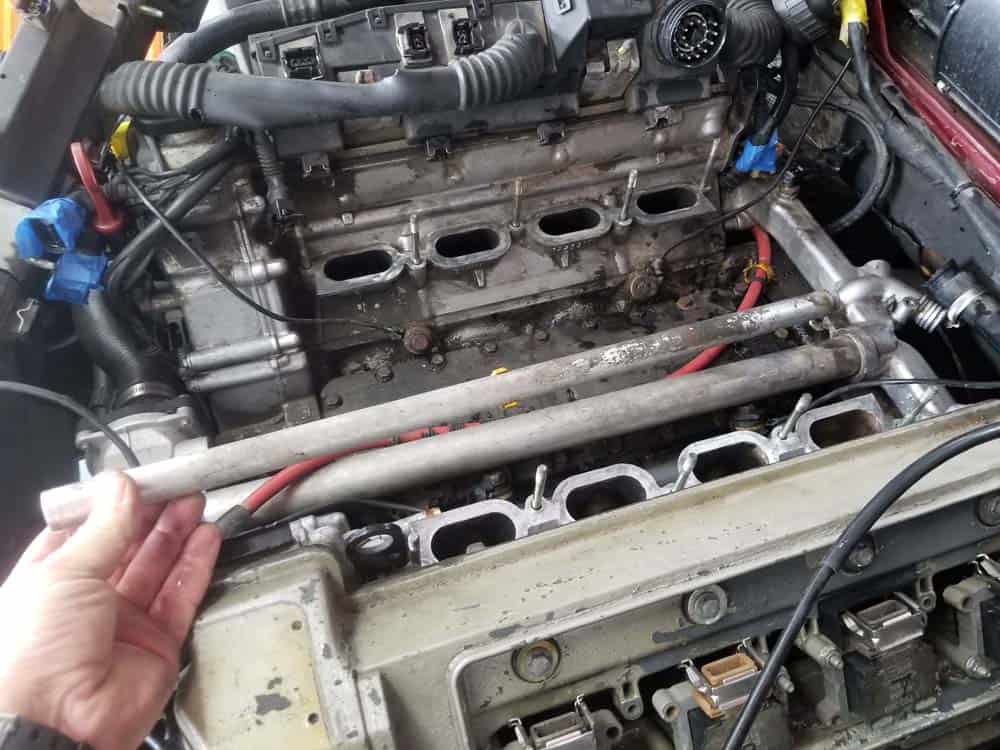
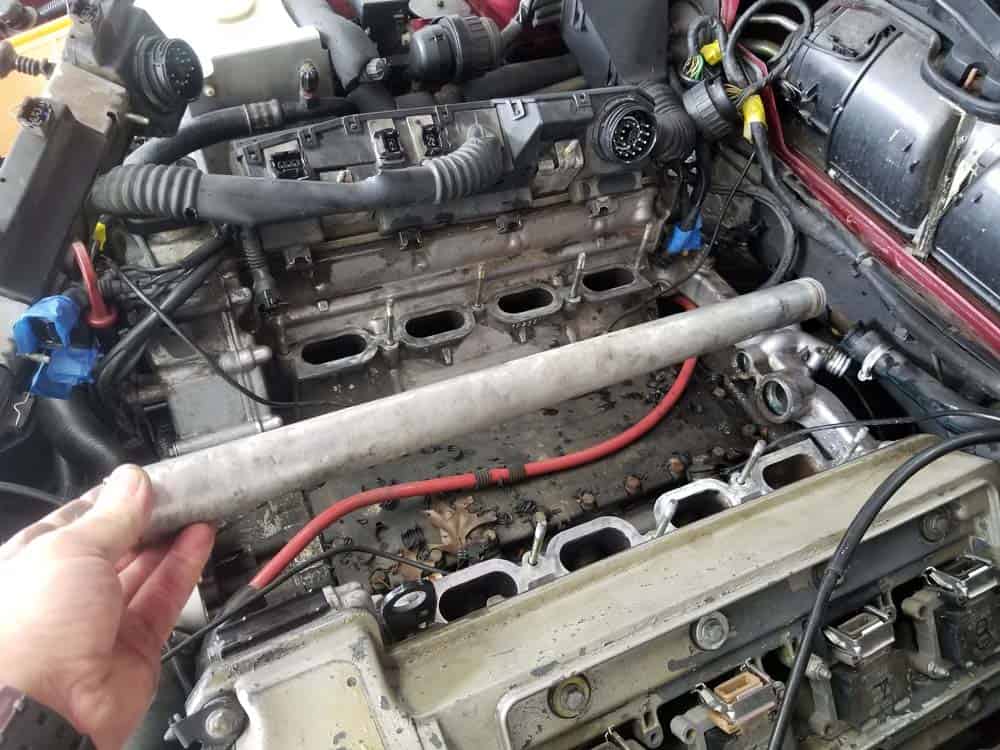
- You now have clear access to the valley pan. The valley pan has a plastic cover that seals the top of it. DO NOT attempt to remove the cover with the valley pan in the vehicle. The cover's plastic locking tabs break off easily...it is much easier to remove the cover with the valley pan out of the vehicle.
- The valley pan is anchored to the engine block by 20 bolts. Use a 10mm socket wrench to remove them.
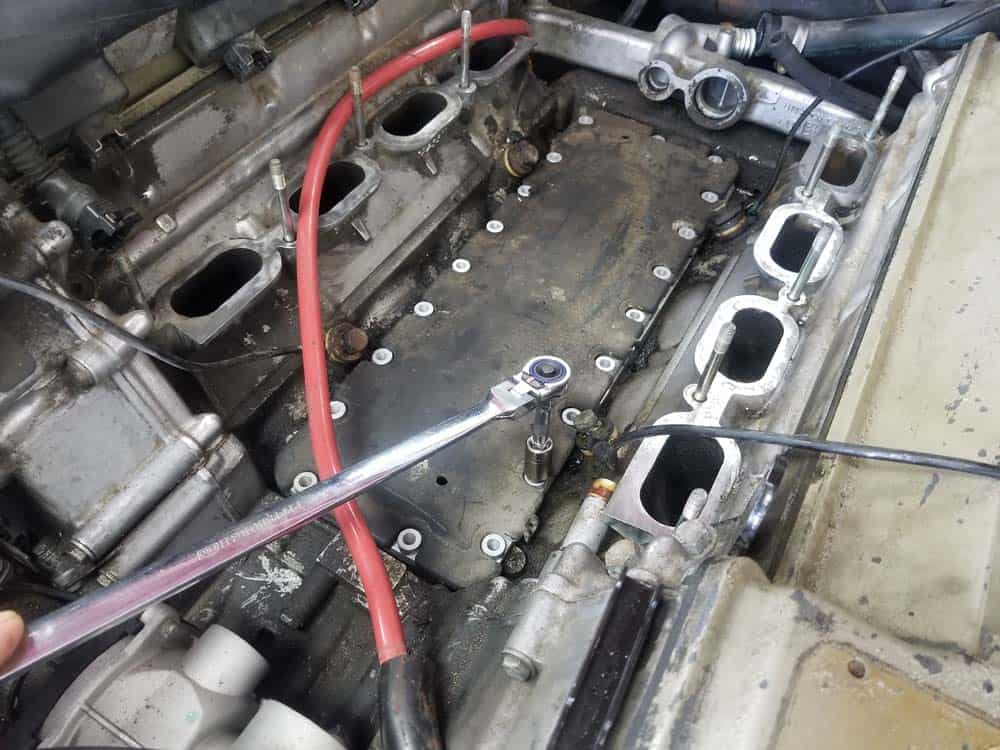
- Grasp the valley pan and remove it from the vehicle.
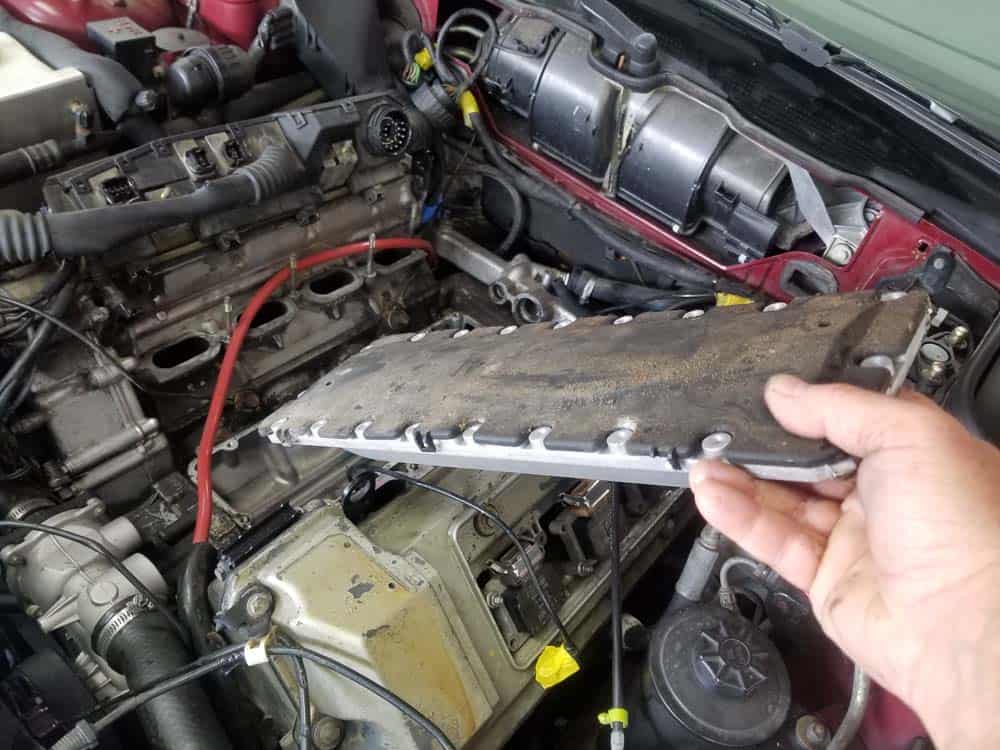
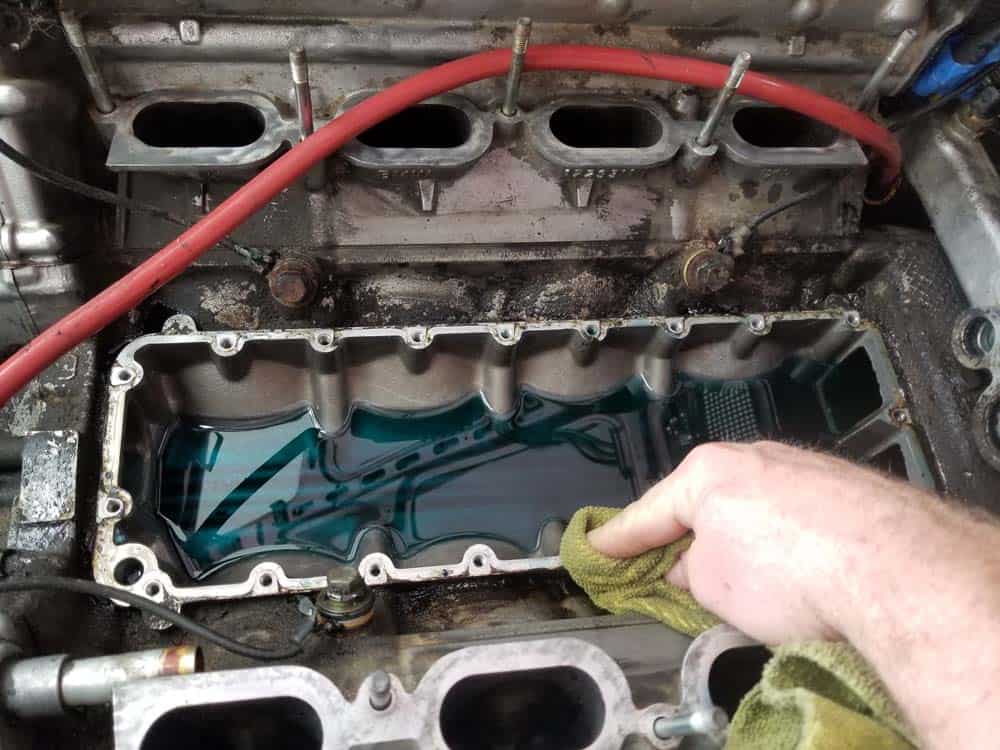
- Use a vacuum to thoroughly clean out the engine block. Apply CRC Brakleen liberally to a rag and clean the valley pan’s mounting area and the surrounding engine block.
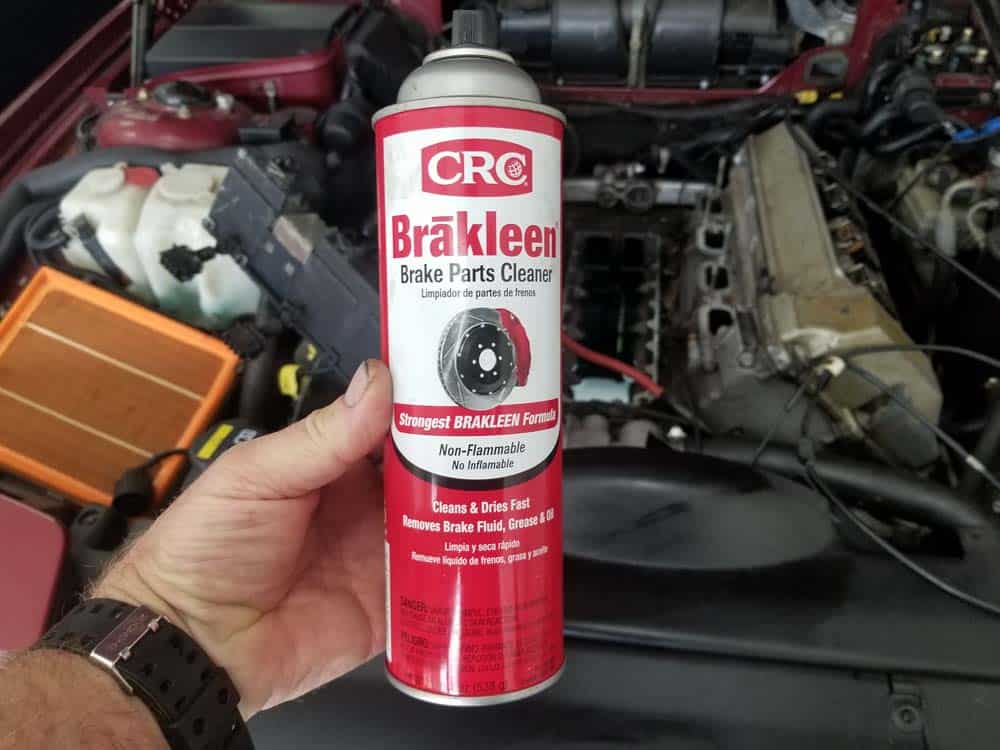
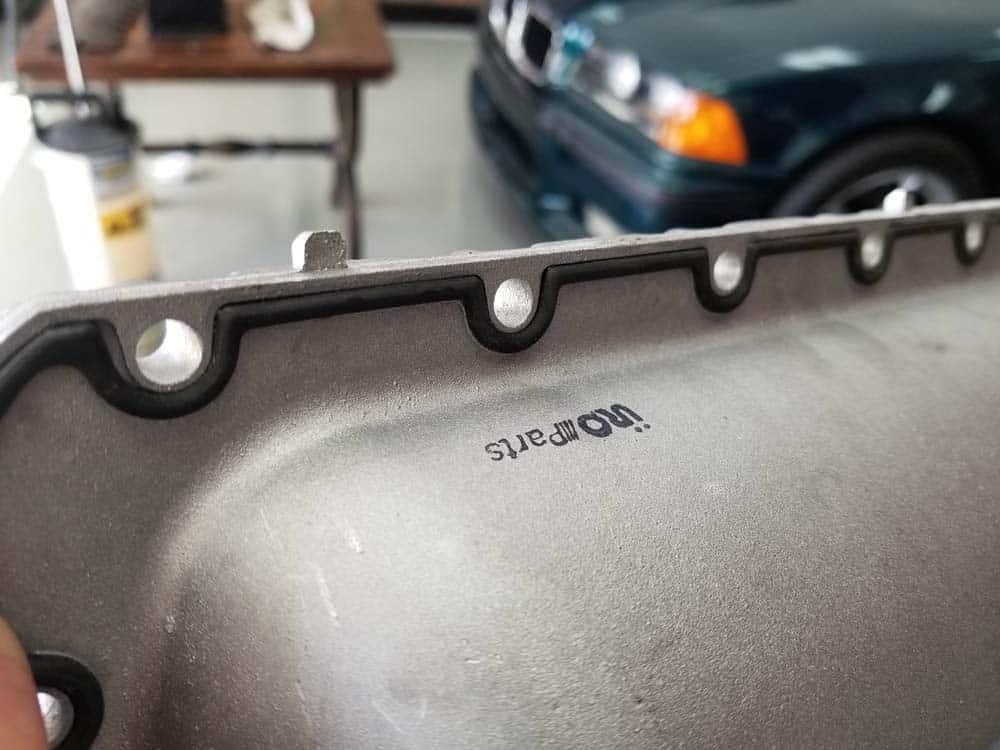
- As discussed at the beginning of this article, the new Viton rubber gasket comes preinstalled in your new valley pan. Snap the cover on the new valley pan and install back into the engine. Install all of the valley pan bolts and hand tighten.
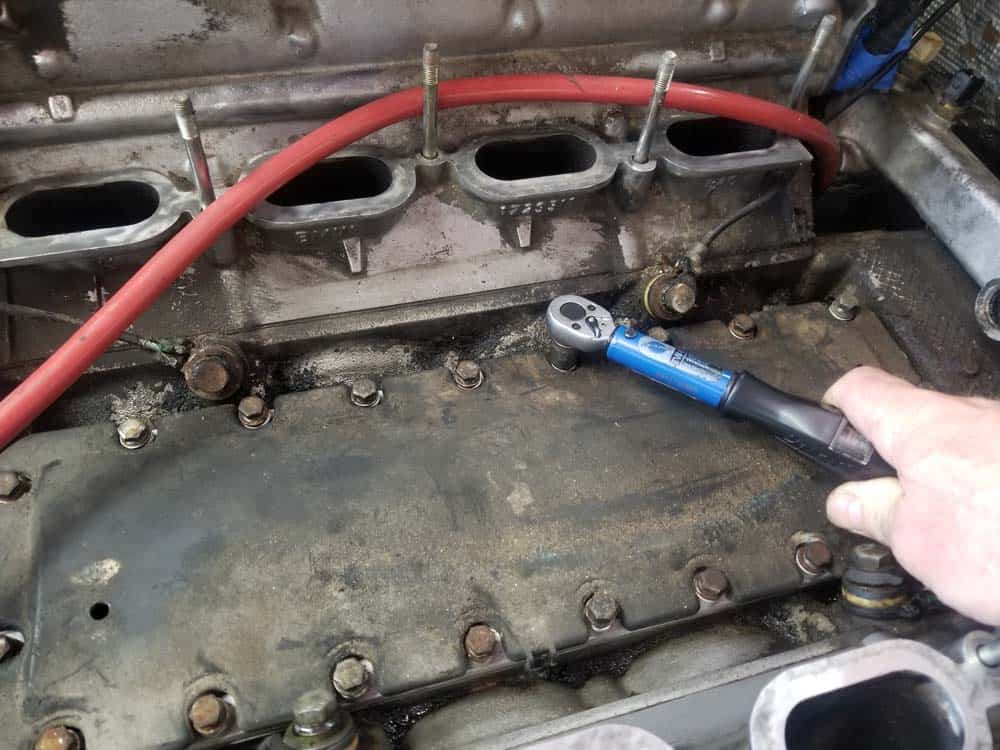
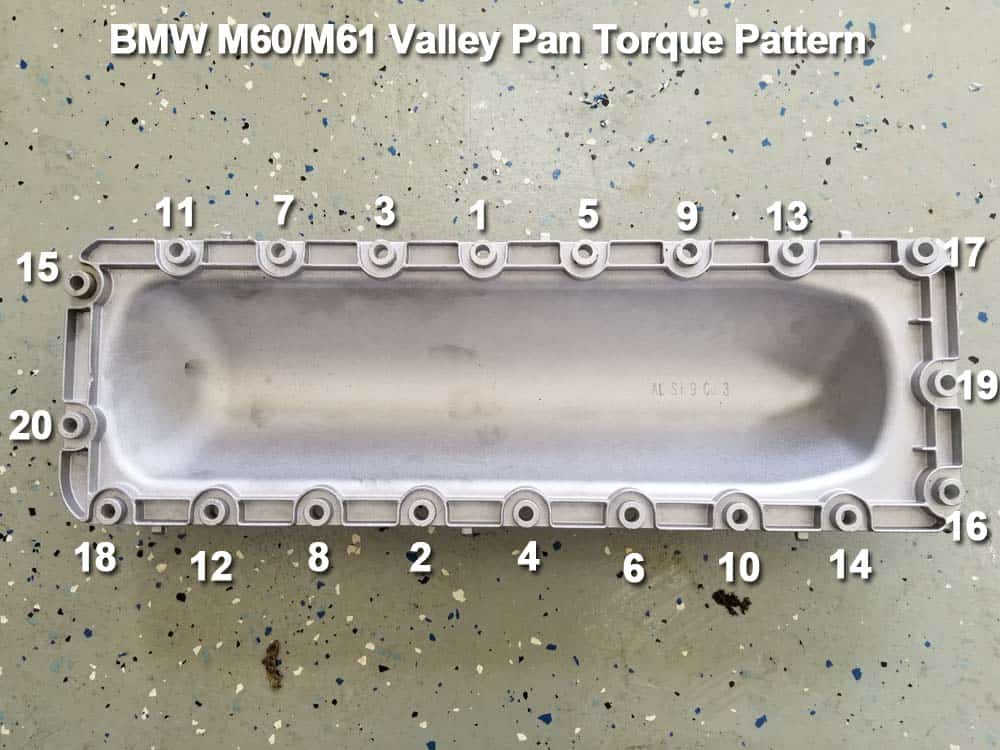
- Working from the inside out and using a cross-pattern, torque the valley pan bolts to 10 Nm (8 ft-lb).
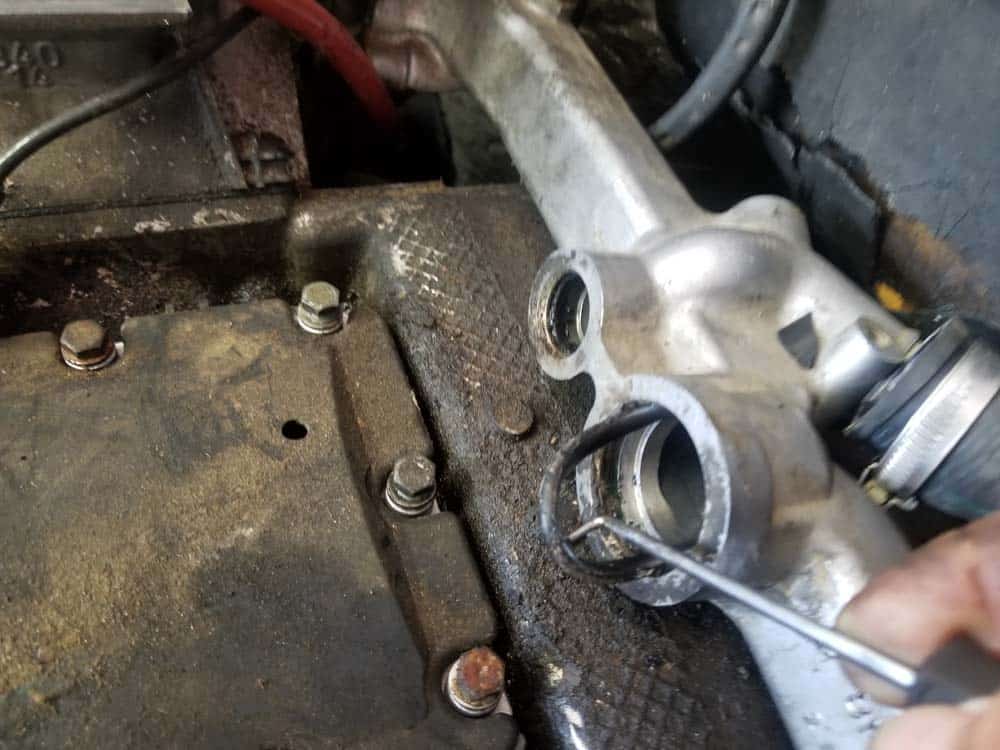
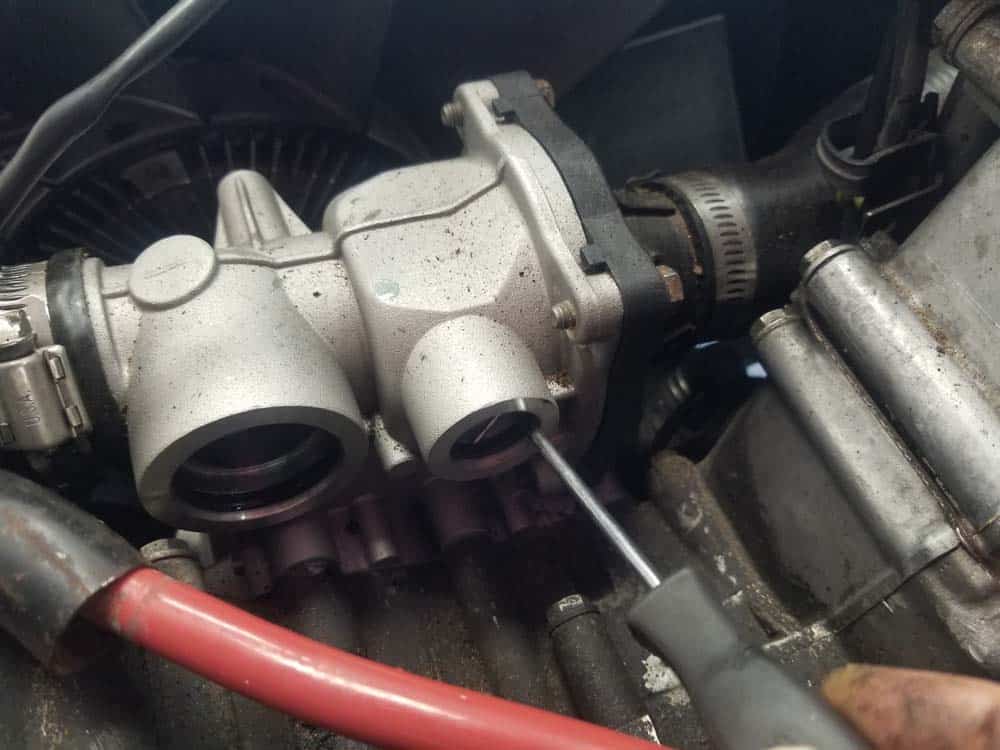
- It is strongly recommended that new o-rings are installed in both the coolant accumulator as well as the water pump. If you need to purchase new o-rings, please see our parts list now.
- Use a metal pick to remove the old o-rings from the accumulator and the water pump. Clean the inside of the openings with CRC Brakleen and install fresh o-rings.
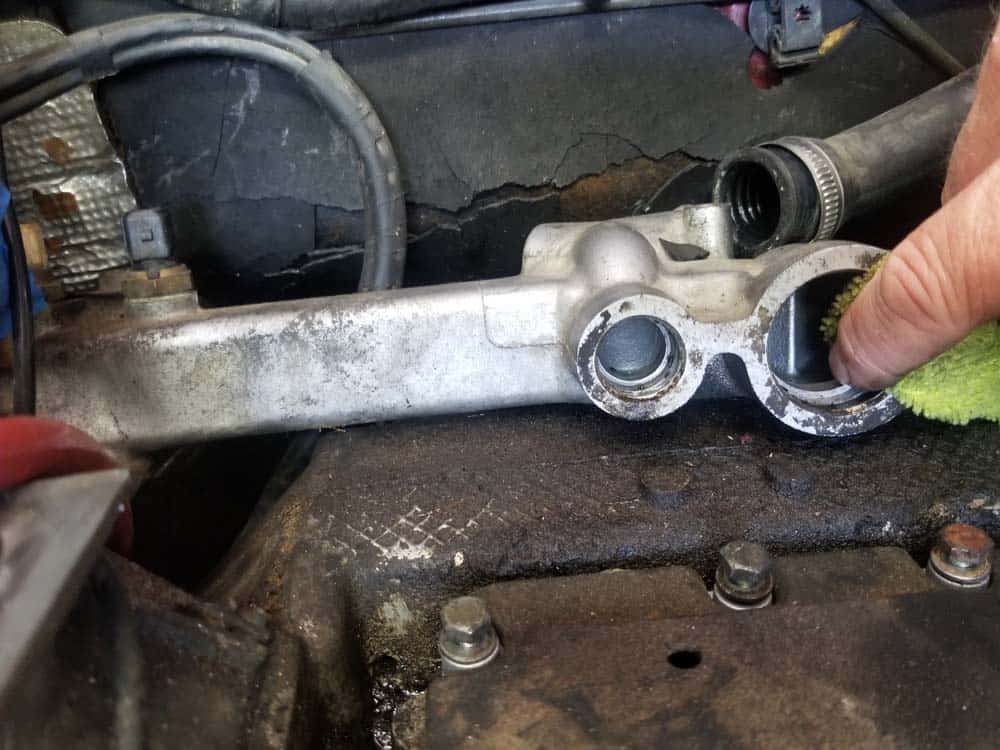
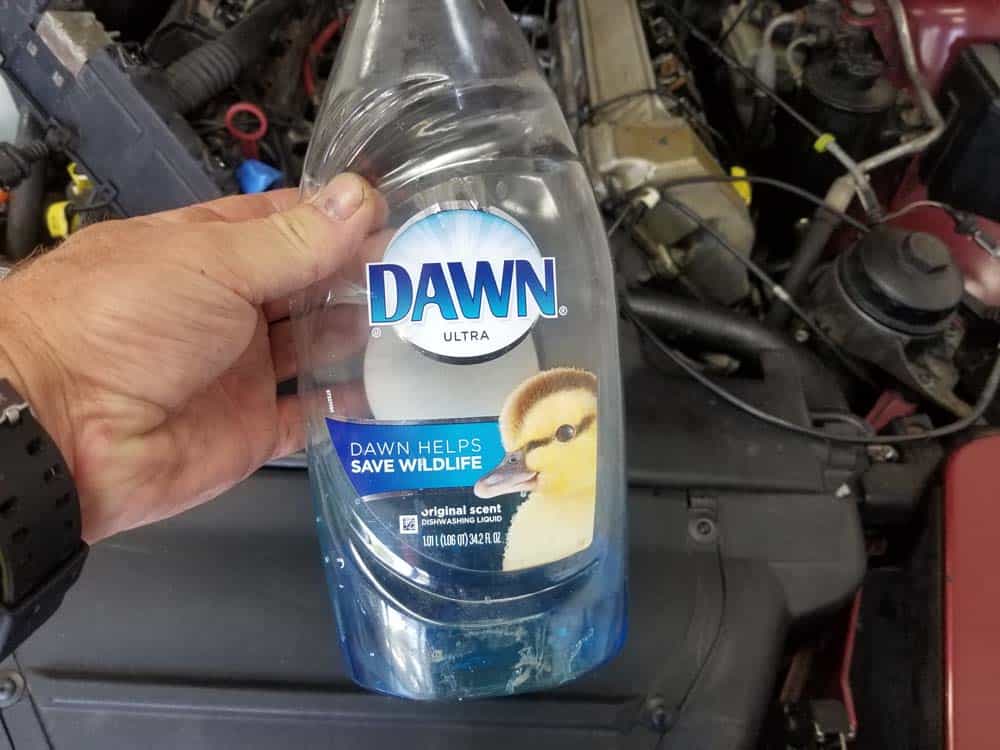
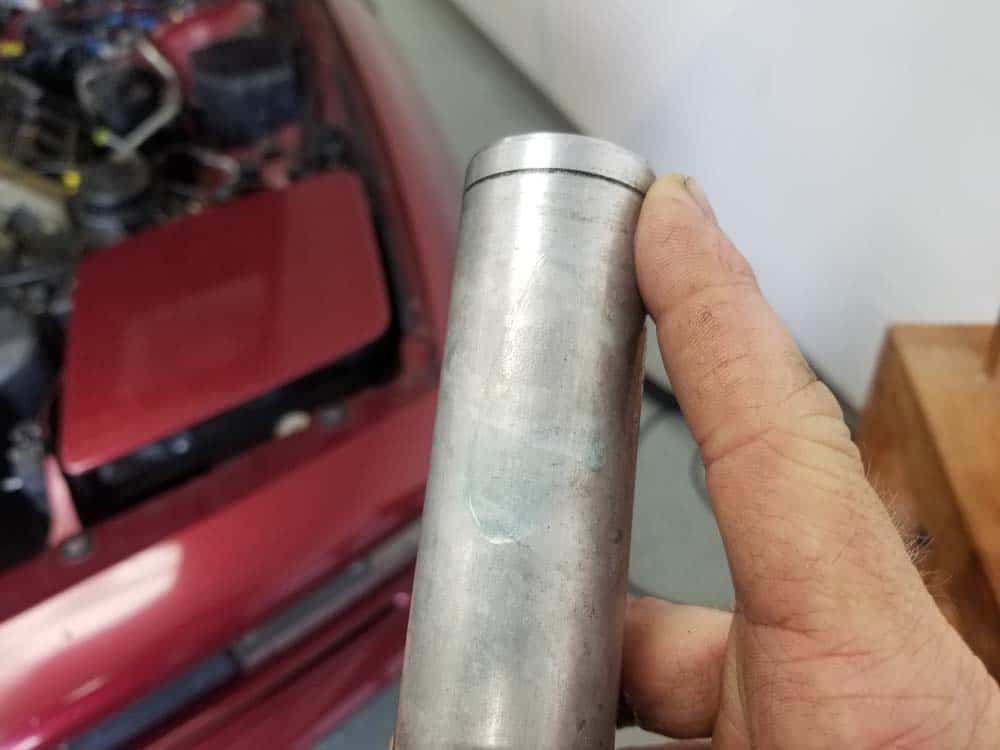
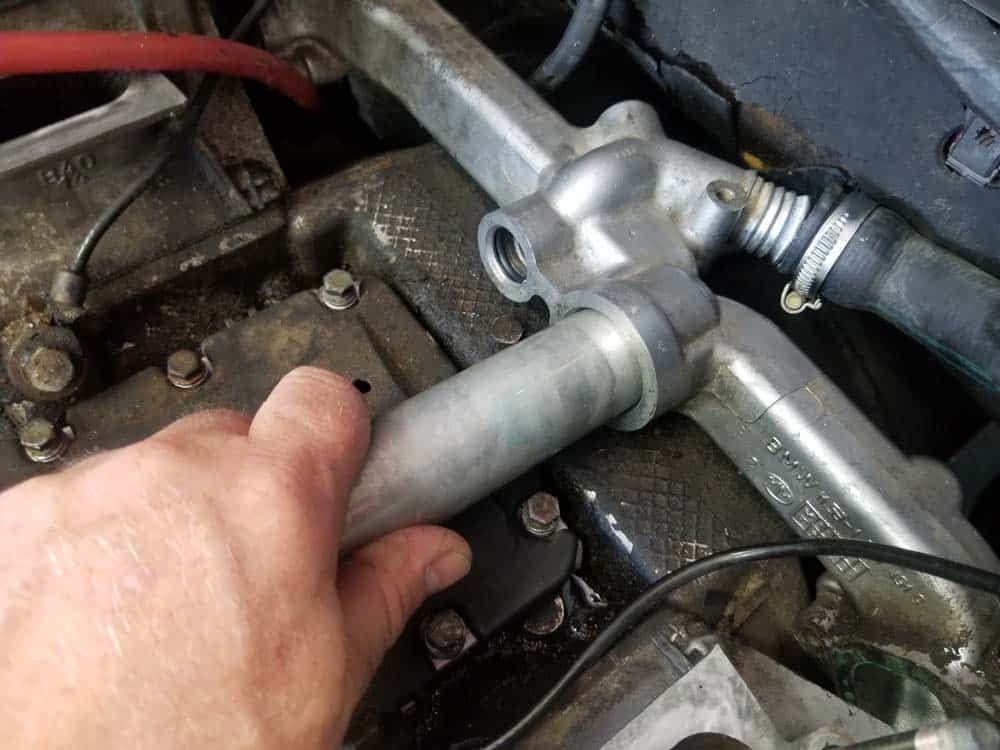
- Install the water pipes back into the accumulator and the water pump. Use a little liquid dish detergent to lubricate the end of the water pipe for installation (DO NOT use a petroleum based lubricant - it can damage the o-rings). Make sure to press the pipes firmly into both components until you hear them click into place.
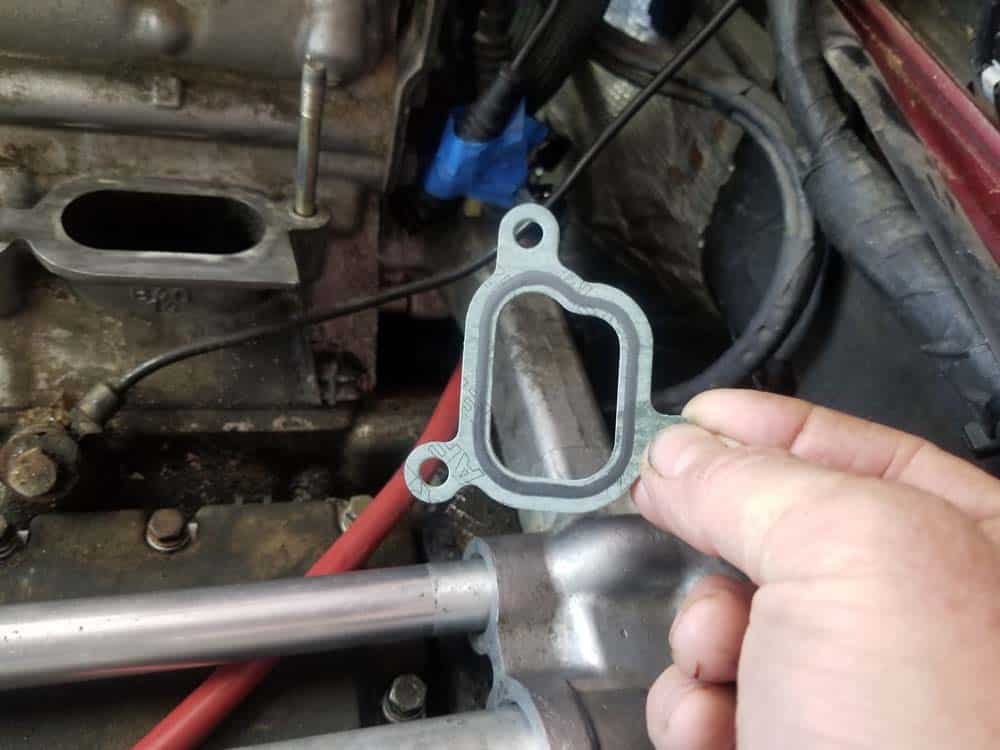
- Thoroughly clean the ends of the accumulator and the engine block where they attach being sure to remove any old gasket. Install new gaskets on the coolant accumulator and hand tighten its six mounting bolts. Torque the accumulator's mounting bolts to 10 Nm (8 ft-lb).
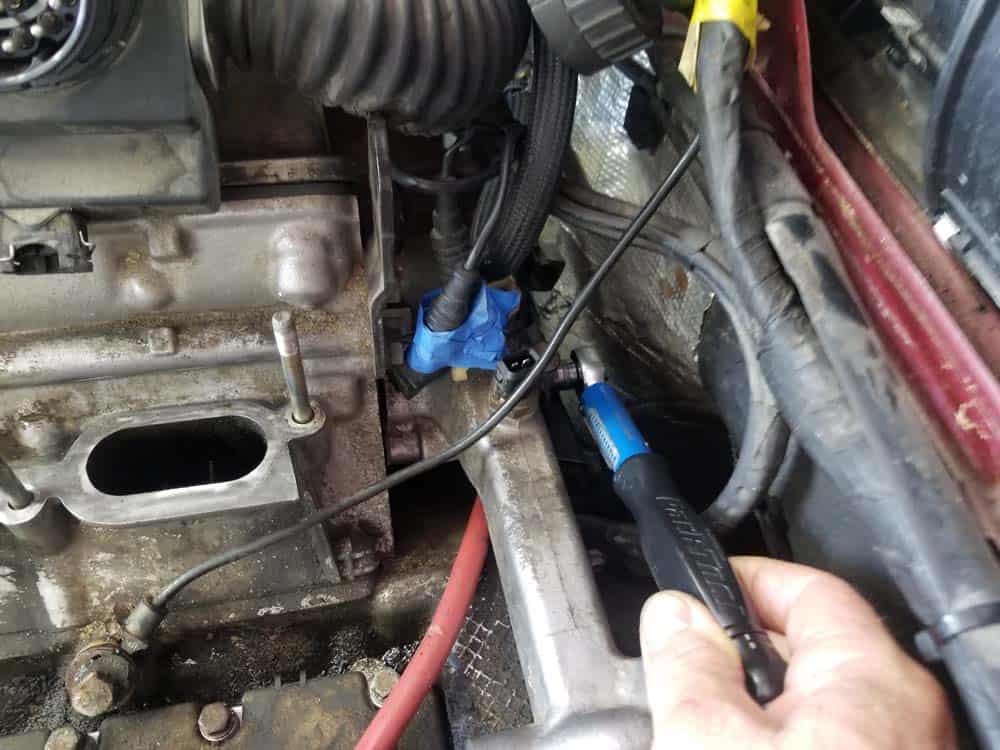
- Reinstall the return coolant hose and tighten its hose clamp.
- Plug the two coolant temperature sensors back in on the accumulator.
Section 3 - Reinstalling the Intake Manifold
For detailed instructions on reinstalling the intake manifold from your BMW M60/M62 V8, please refer back to our article: BMW M60 Intake Manifold Gasket Replacement – V8 5,7,8 SeriesSection 4 - Refilling the coolant system
The final step in performing a BMW M60 valley pan gasket replacement is topping off the coolant system. Since you will lose approximately 1/2 gallon of coolant during this repair, it is important that the system is refilled to avoid overheating your engine. Only use Genuine BMW Antifreeze/Coolant mixed 50/50 with distilled water (see our parts list for more information).- Remove the coolant expansion tank cap and loosen the bleeder screw a couple turns. Start slowly filling the expansion tank with the new coolant.
- Continue slowly filling the expansion tank until it is completely full.
- Replace the cap and tighten the bleeder screw.
- Turn on the ignition to position 2 (do not start car). Turn the driver’s side temperature control all the way up (as hot as it will go) and set the fan speed to its lowest position. This will cause the auxiliary water pump and auxiliary fan to kick on. You should be able to hear the auxiliary pump humming...it is located next to the firewall on the driver’s side of the car. Keep the ignition on until you complete step 4.
- Grasp the the top radiator hose (radiator to water pump hose) and squeeze it 5 or 6 times to force coolant into the auxiliary pump.
BMW M60 Valley Pan Gasket Replacement Finished

