
Affiliate link disclosure – The BMW Repair Guide uses affiliate links in their site. For more information on affiliate links, please click here.
Repair Summary
This article gives detailed instructions on replacing the main accessory and ac belts in a BMW E46 3 series vehicle. Even though we used a 2004 325ci to perform this repair, this article can be applied to any 1998-2006 E46 3 series vehicle with minor modifications to the repair steps.
See all vehicles this article applies to
E46 3 Series 325ti
E46 3 Series 318td
E46 3 Series 320td
E46 3 Series 318ti
E46 3 Series 330xi
E46 3 Series 330i
E46 3 Series 330xd
E46 3 Series 330d
E46 3 Series 316ti
E46 3 Series 328i
E46 3 Series 325xi
E46 3 Series 325i
E46 3 Series 320i
E46 3 Series 323i
E46 3 Series 320d
E46 3 Series 318i
E46 3 Series 318d
E46 3 Series 316i
E46 3 Series M3 CSL
E46 3 Series M3
E46 3 Series 330Ci
E46 3 Series 330Cd
E46 3 Series 325Ci
E46 3 Series 323Ci
E46 3 Series 320Ci
E46 3 Series 320Cd
E46 3 Series 318Ci
E46 3 Series 328Ci
E46 3 Series 316Ci
E46 3 Series 323i 2.4
E46 3 Series 316i 1.9
E46 3 Series 316i 1.6
A BMW E46 serpentine belt replacement is an easy repair for the DIY home mechanic who wants to save a few bucks, and help prevent biblical scale destruction to the engine of their car.
Well...maybe we are being a bit dramatic. But then again, a young man who recently shredded his accessory belt on a 2000 323i while traveling 80 miles an hour on I-95 may find us quite nontheatrical. Especially since his bimmer now sits behind our shop as a parts car with a blown cylinder head and his fingernail marks still fresh in the steering wheel.
This young man's experience is more the exception than the rule. Fortunately, most vehicle belt failures are more benign, resulting in a tow truck ride to the closest dealership and not to the scrap yard. But the risk is legitimate. Not changing your worn engine belts can cause damage to expensive engine parts including pumps, pulleys, ac compressors, and alternators. For less than 50 bucks you can ensure your BMW E46 from costly repairs.
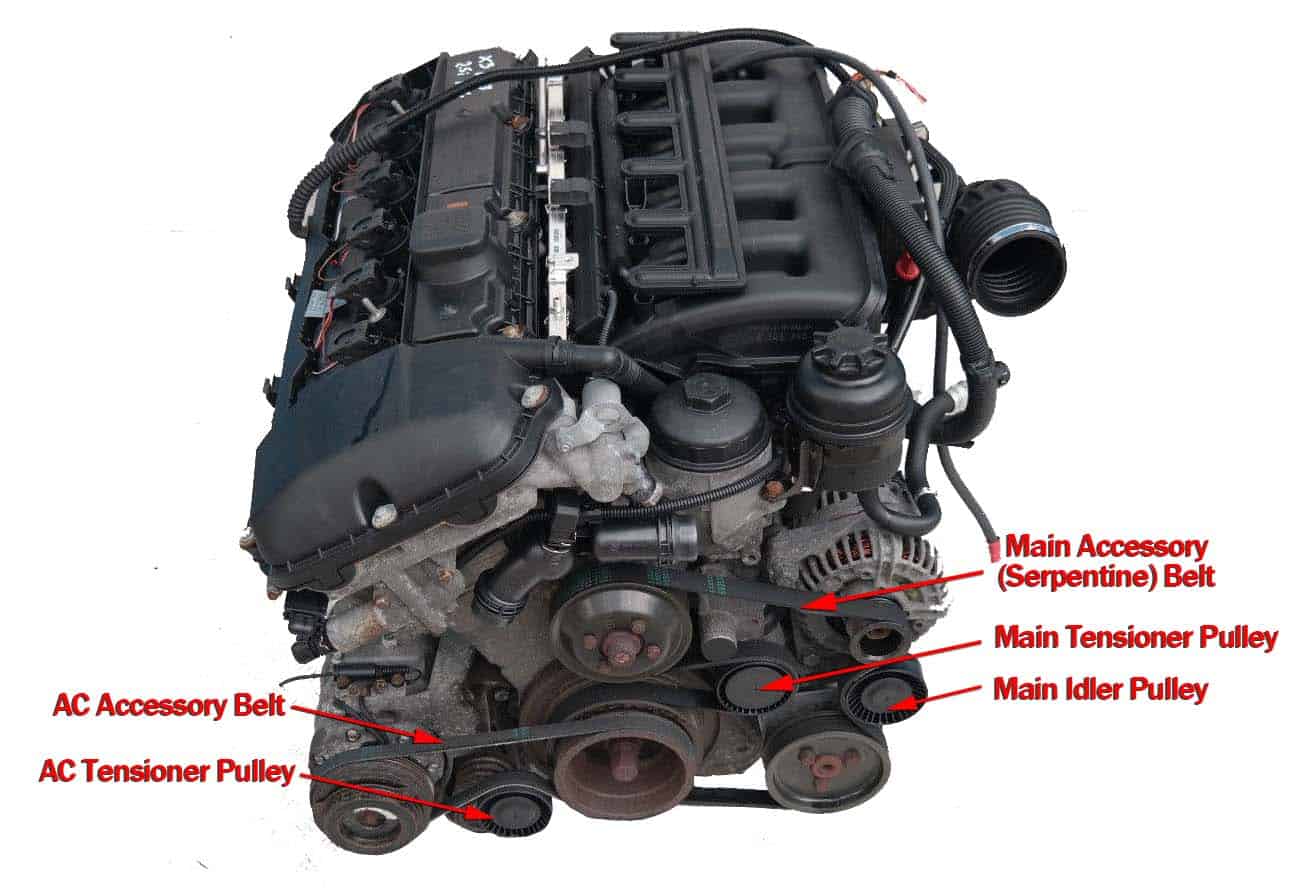
A BMW E46 3 series has two drive belts; the main accessory (or "serpentine") belt that operates the alternator/water pump/power steering pump, and the ac accessory belt that runs the air conditioning compressor. All of these vital components rely on two reinforced flexible rubber belts that are driven by a pulley attached to the engine's crankshaft. Even though the belts are extremely strong and durable, the extreme heat and stress from everyday driving take a toll on them. As the age of the belt, they become less flexible and can start to crack along their ribs. Worn belts will start to slip on the pulleys, and may cause annoying "squealing" sounds from the engine. Any belt showing signs of wear should be replaced immediately.
The two drive belts on your BMW E46 3 series should always be replaced together, even if only one of them is showing signs of age. Always use good-quality OEM belts. We have the correct part numbers and links listed below for your convenience.


View the detailed parts diagram for this repair.
Includes detailed part diagrams, part numbers and links to purchase all of the required components needed to complete this repair.

Before starting this repair, you must have the following required parts.
BMW E46 and E60
Accessory belts keep everything turning off of the crank pulley. Generator, fans, water pumps and AC compressors all rely on this belt to keep everything working properly. If your drive belt is getting old, cracking, glazing, or squeaking, replace it. It's easy to see when the belts are beginning to wear. Visually, the belt will begin to glaze on the underside, making it far less effective. Cracks can appear on the back of the belt from “dry rot” caused by exposure to engine heat or age. Squealing is common on worn belts which basically means that the belt is slipping on pulleys. In either case, your vehicle needs a new belt.
BMW E46
Accessory belts keep everything turning off of the crank pulley. AC compressors rely on this belt to keep everything working properly. If your drive belt is getting old, cracking, glazing, or squeaking, replace it. It's easy to see when the belts are beginning to wear. Visually, the belt will begin to glaze on the underside, making it far less effective. Cracks can appear on the back of the belt from “dry rot” caused by exposure to engine heat or age. Squealing is common on worn belts which basically means that the belt is slipping on pulleys. In either case, your vehicle needs a new belt.
All BMW E46 models
Accessory drive belts keep everything turning off of the crank pulley. Generator, fans, water pumps and AC compressors all rely on this belt to keep everything working properly. If your drive belt is getting old, cracking, glazing, or squeaking, replace it.
Section 1 - AC Accessory Belt Removal
- Jack and support the front of your vehicles shown in our article BMW Jacking and Supporting for Repairs and Maintenance.
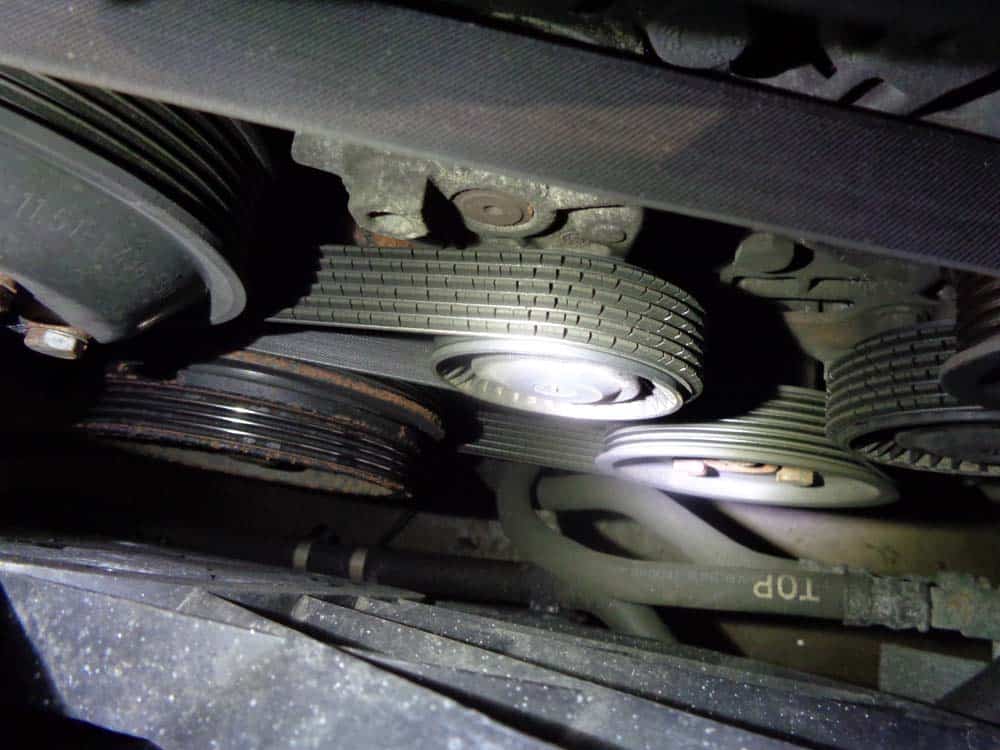
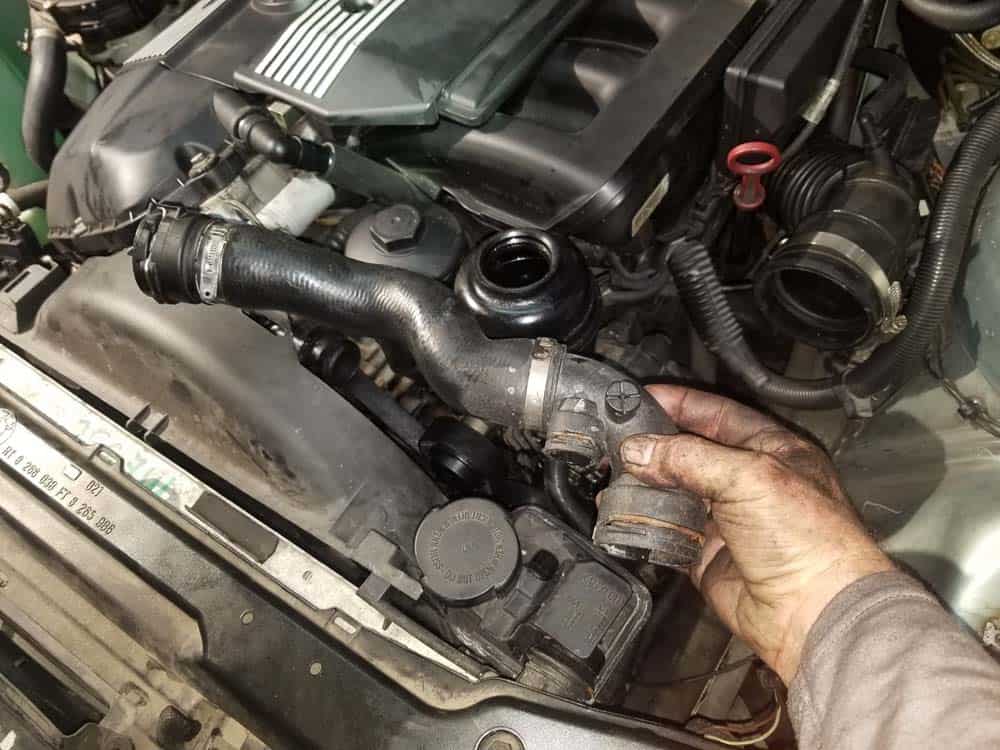
- Starting from the bottom of the engine, locate the ac belt. The ac belt must be removed first before the main accessory belt.

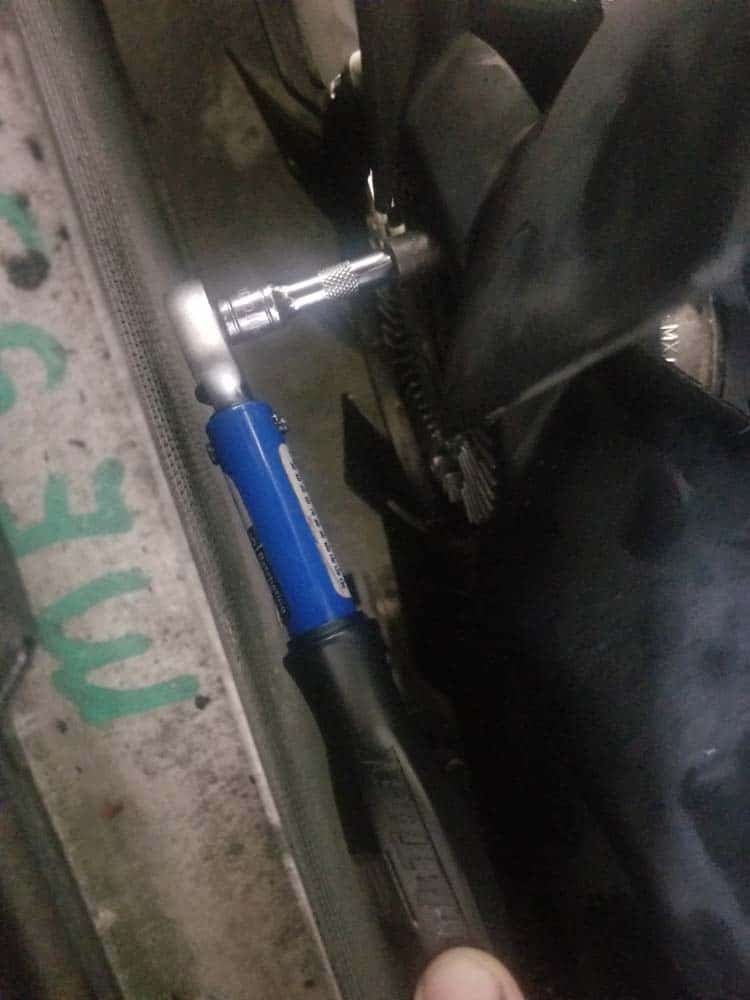
- Use a flat blade screwdriver to remove the cap off of the belt tensioner pulley.
- Using a T50 torx bit, turn the tensioner pulley clockwise until belt is loose. Remove belt from pulley. Remove belt from engine.


Section 2 - Main Accessory Belt Removal
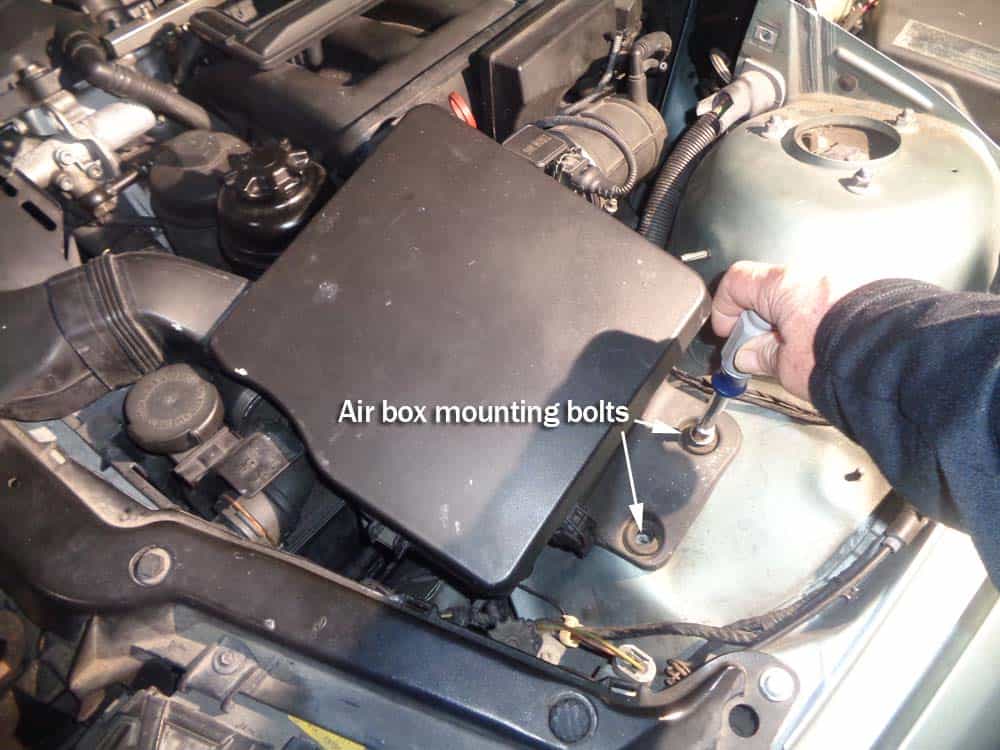
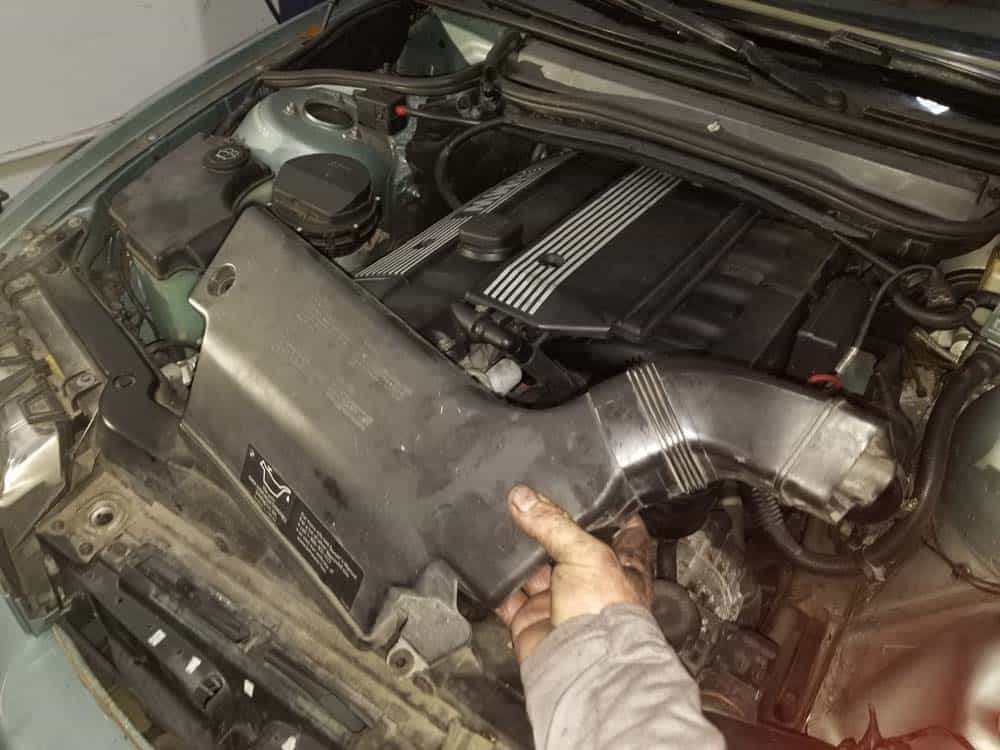
In order to properly remove and reinstall the main accessory belt, the vehicle’s cooling fan must be removed. It is very easy to remove and install the main accessory belt on a BMW E46 3 series from the top of the engine with the cooling fan removed. Trying to remove and reinstall the main accessory belt from the bottom of the engine is extremely difficult and we discourage our readers from attempting to do it this way.- Begin by removing the airbox assembly. Use a 10mm nut driver or socket wrench to remove the two air box mounting bolts on the left side of the engine compartment.
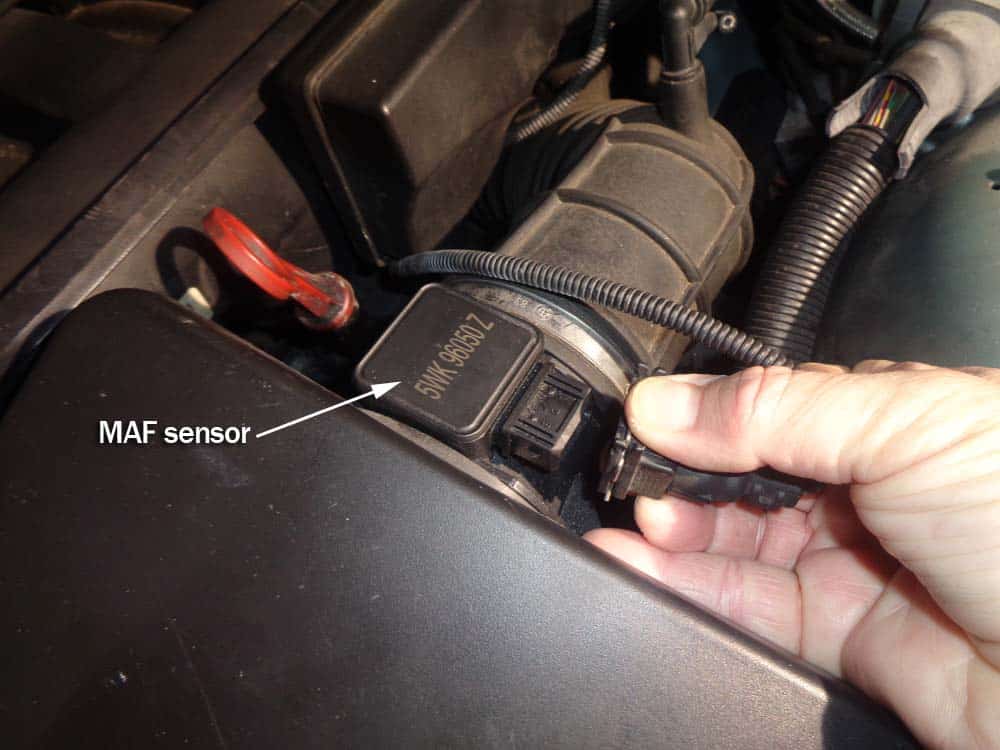
- Disconnect the Mass Air Flow (MAF) sensor.
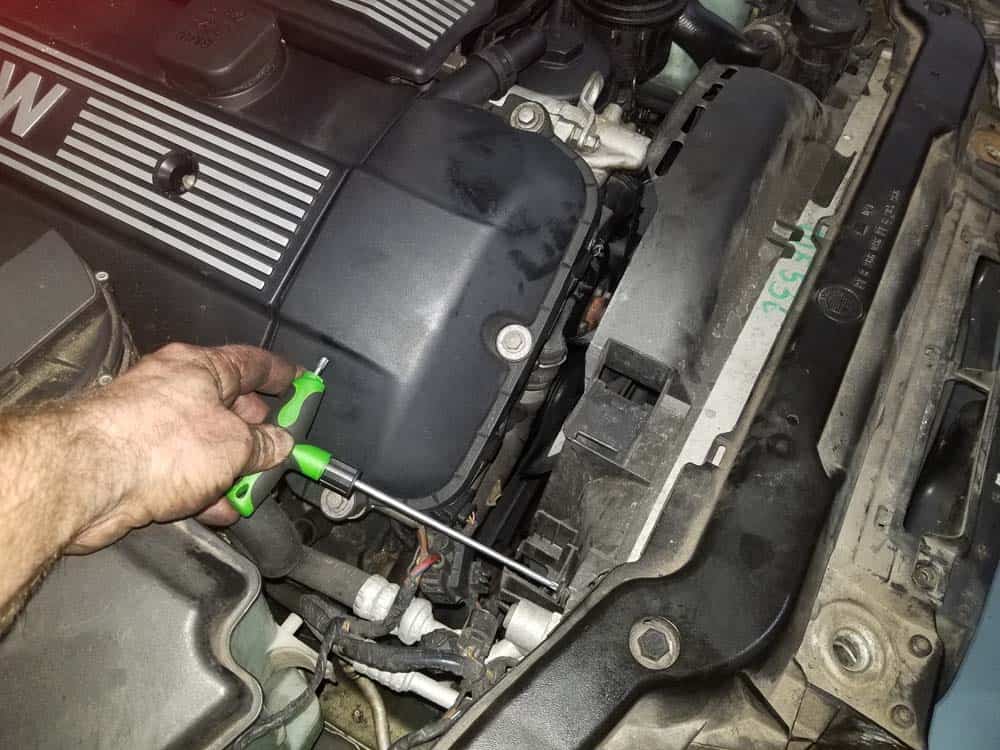
- Using a flat blade screwdriver, loosen the hose clamp connecting the air intake boot to the air box.
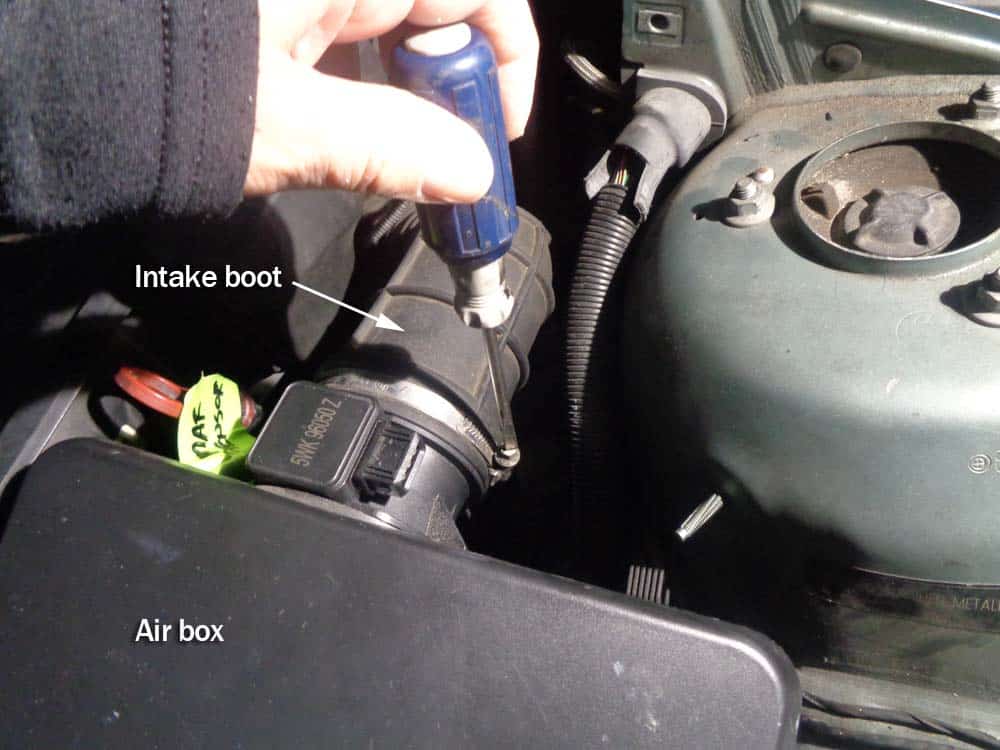
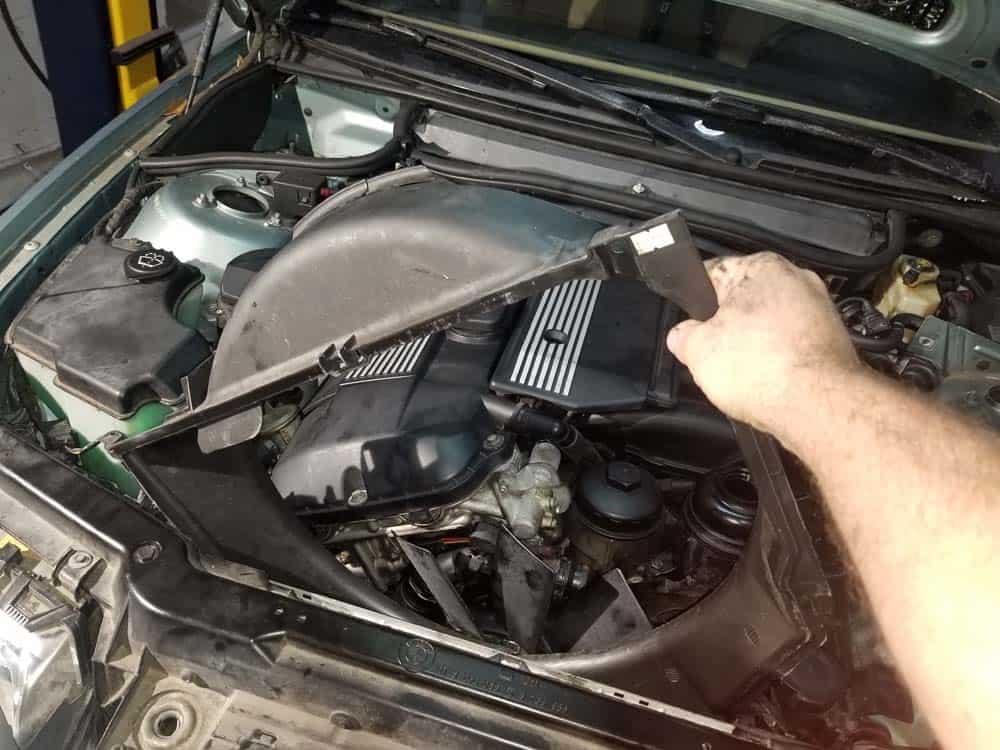
- Remove the air box from the engine compartment.
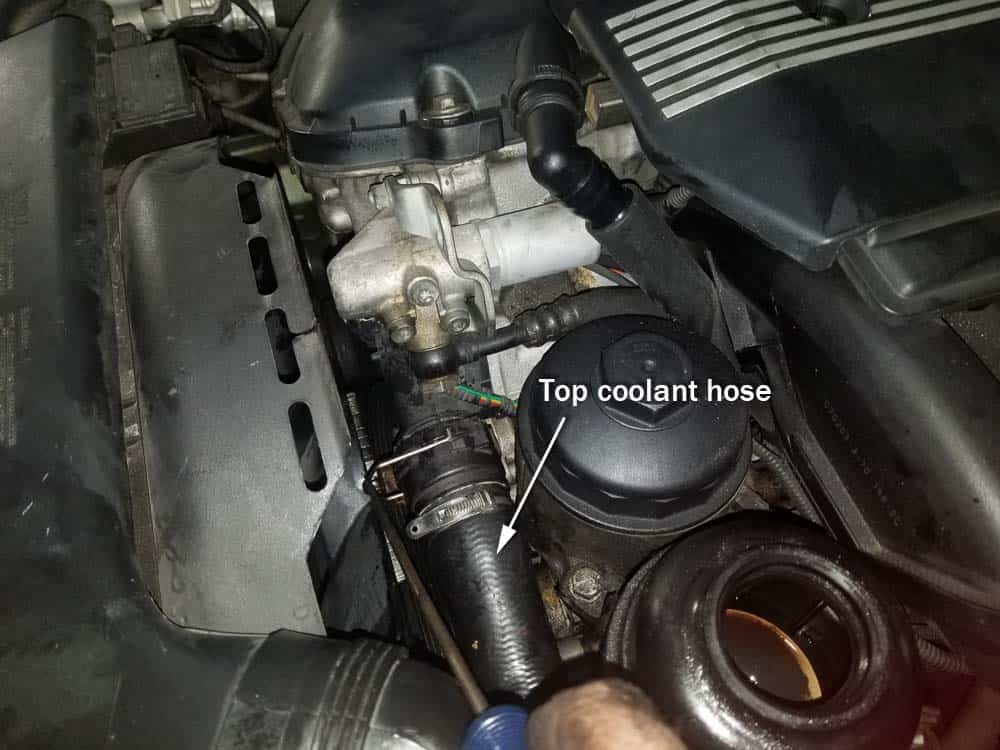
- Next, remove the upper coolant hose from the thermostat by releasing the snap clip with a flat blade screwdriver. Pull the hose off of the thermostat. Release the clips from the hose where it attaches to the coolant reservoir. Remove upper coolant hose from vehicle.

- Use a trim tool to remove the three plastic rivets attaching the air inlet assembly to the front of the vehicle.
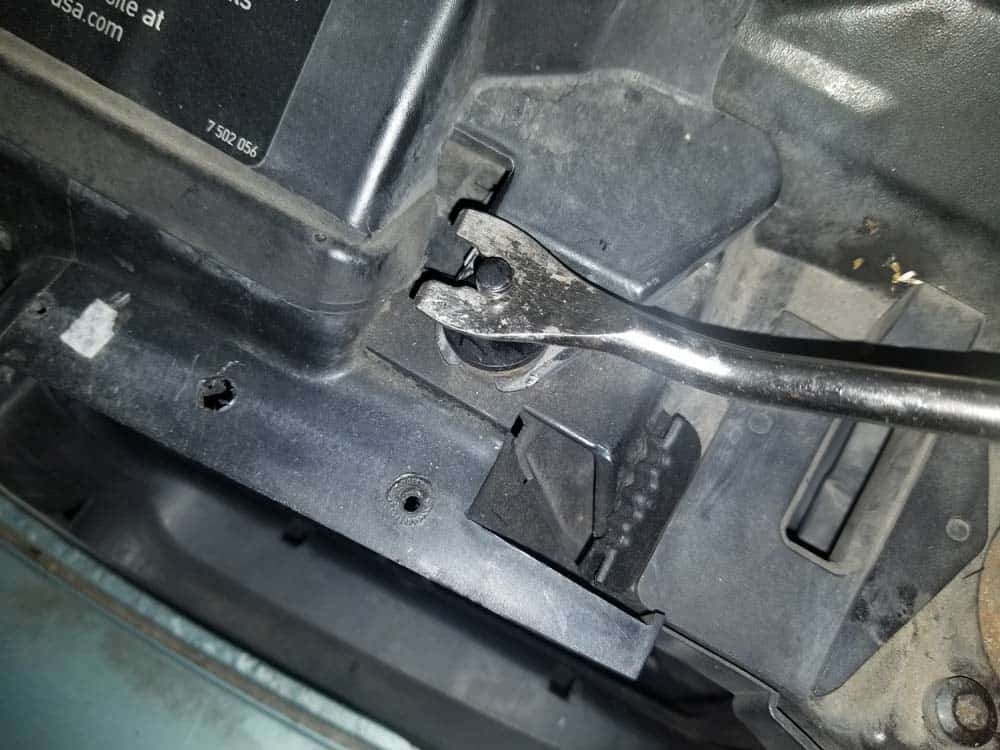
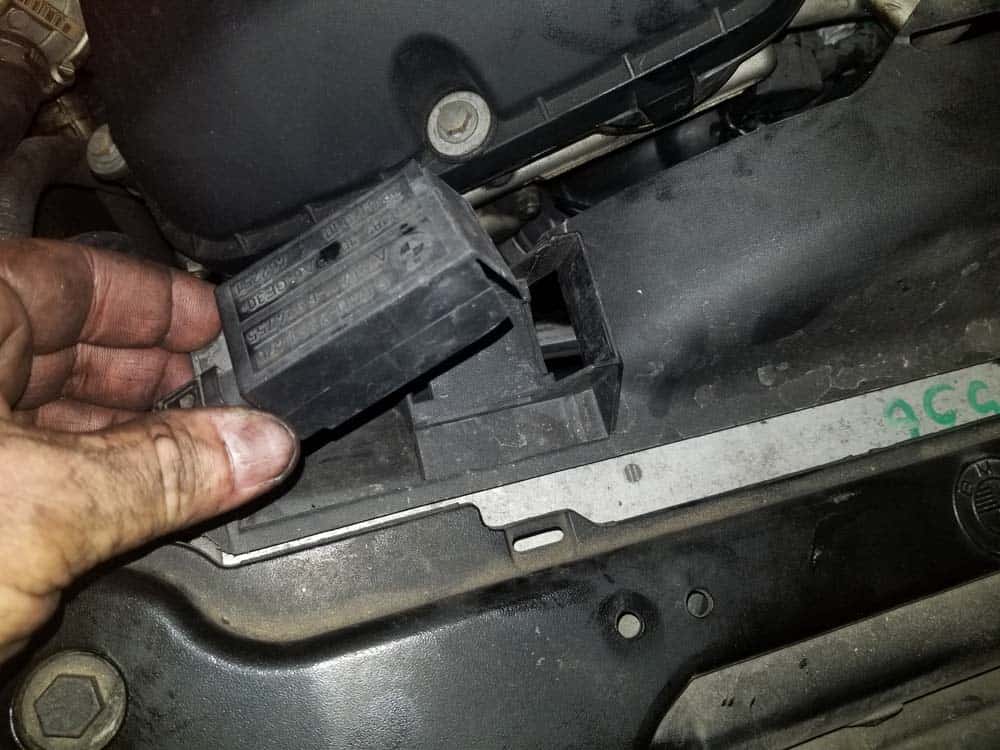
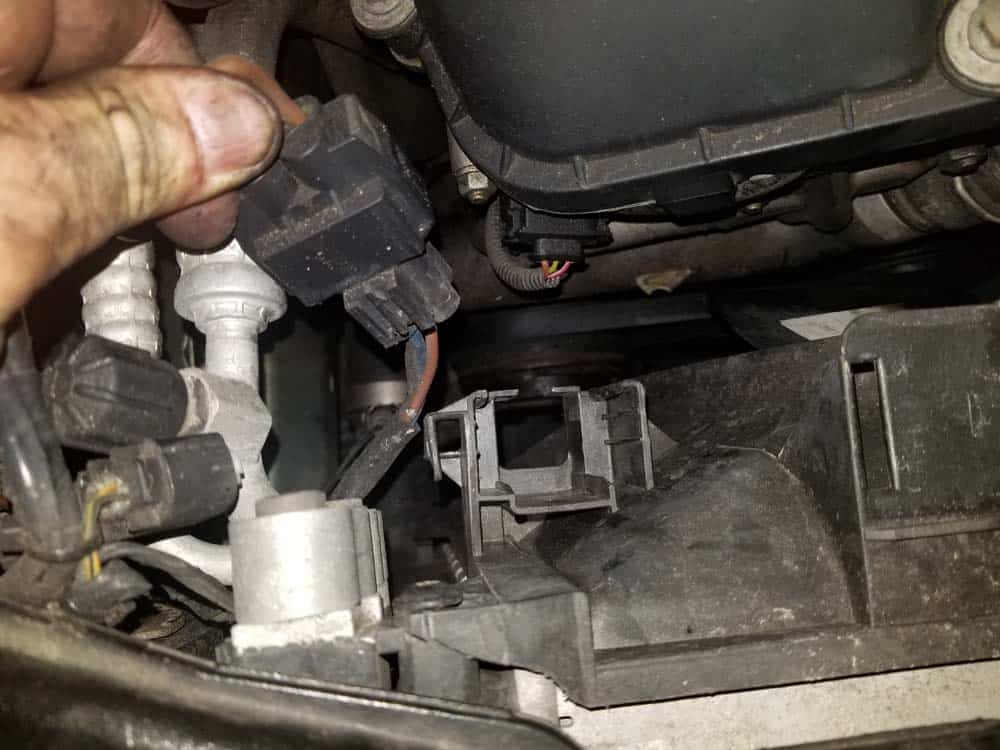
- Remove the air quality sensor and the wiring harness connection from the right side of the fan shroud.
- Remove the two fasteners anchoring the fan shroud to the front of the vehicle. These fasteners are often lost or changed over the years, so there may be screws holding the fan shroud...or it may be plastic rivets. We had both.
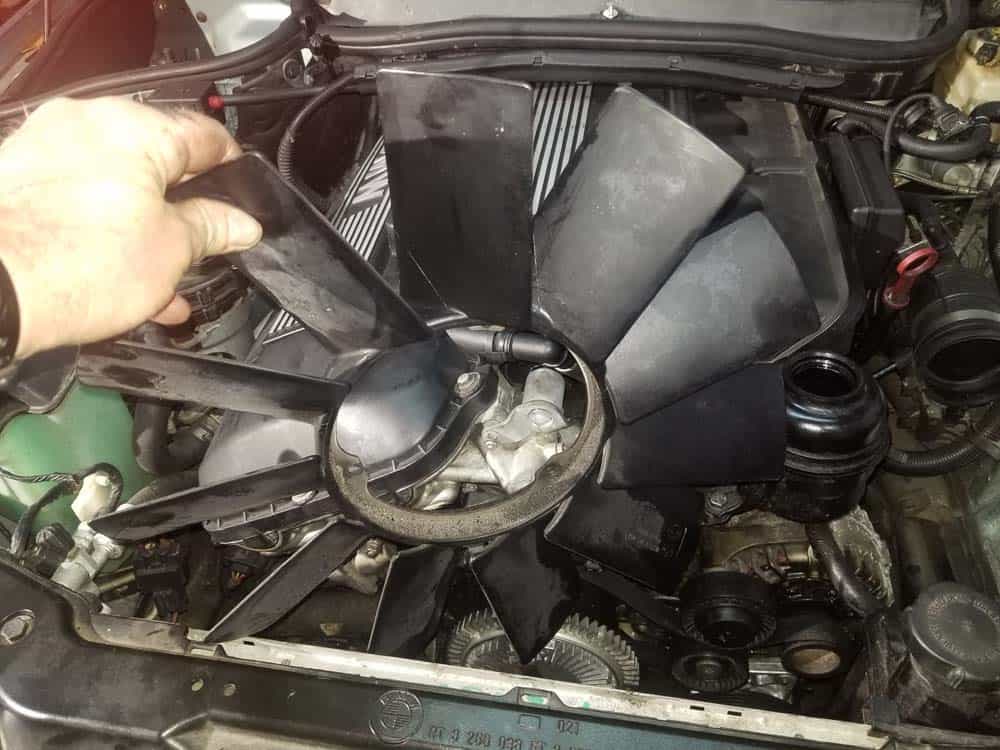
- Carefully remove the plastic fan shroud, paying attention to the fan blades during removal. It helps to have someone underneath vehicle pressing in on bottom of shroud so it clears the fan blades. Once bottom of shroud is clear of blades, it will pull out smoothly.
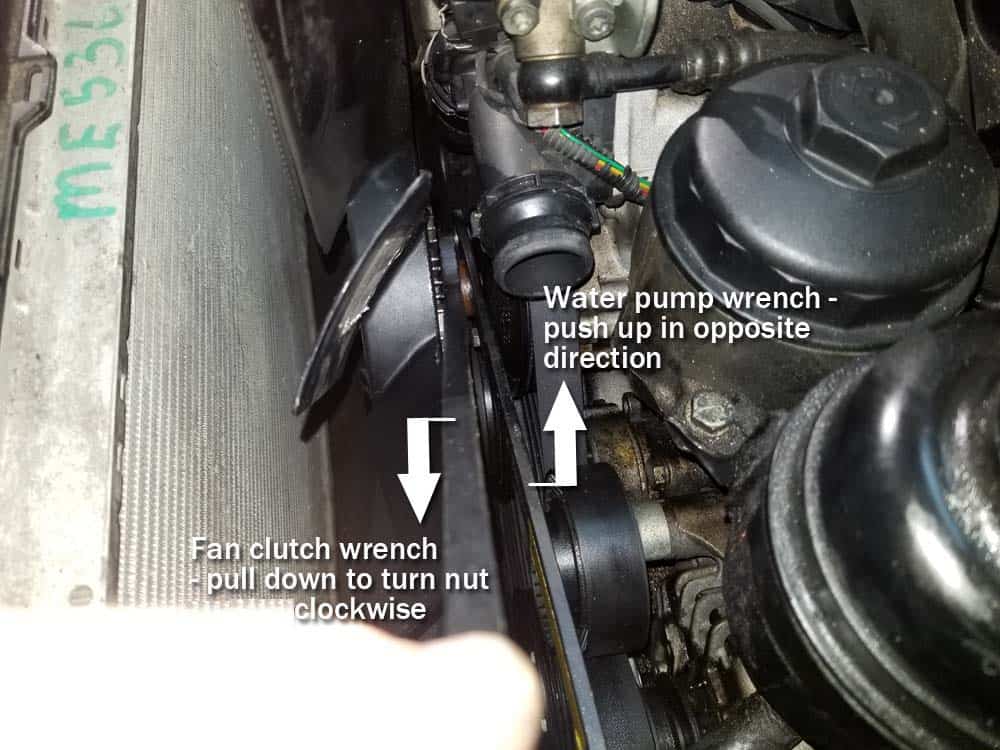
- With the fan shroud removed, you can now access the fan clutch nut. Use a BMW fan clutch tool to loosen the fan clutch nut. Remember...the fan clutch nut is a reverse thread! You must turn the nut clockwise (to the right) to loosen it. If you are able to loosen the nut with the tool, remove the fan and proceed to step 12. If you cannot loosen the nut with the tool, go to step 11.
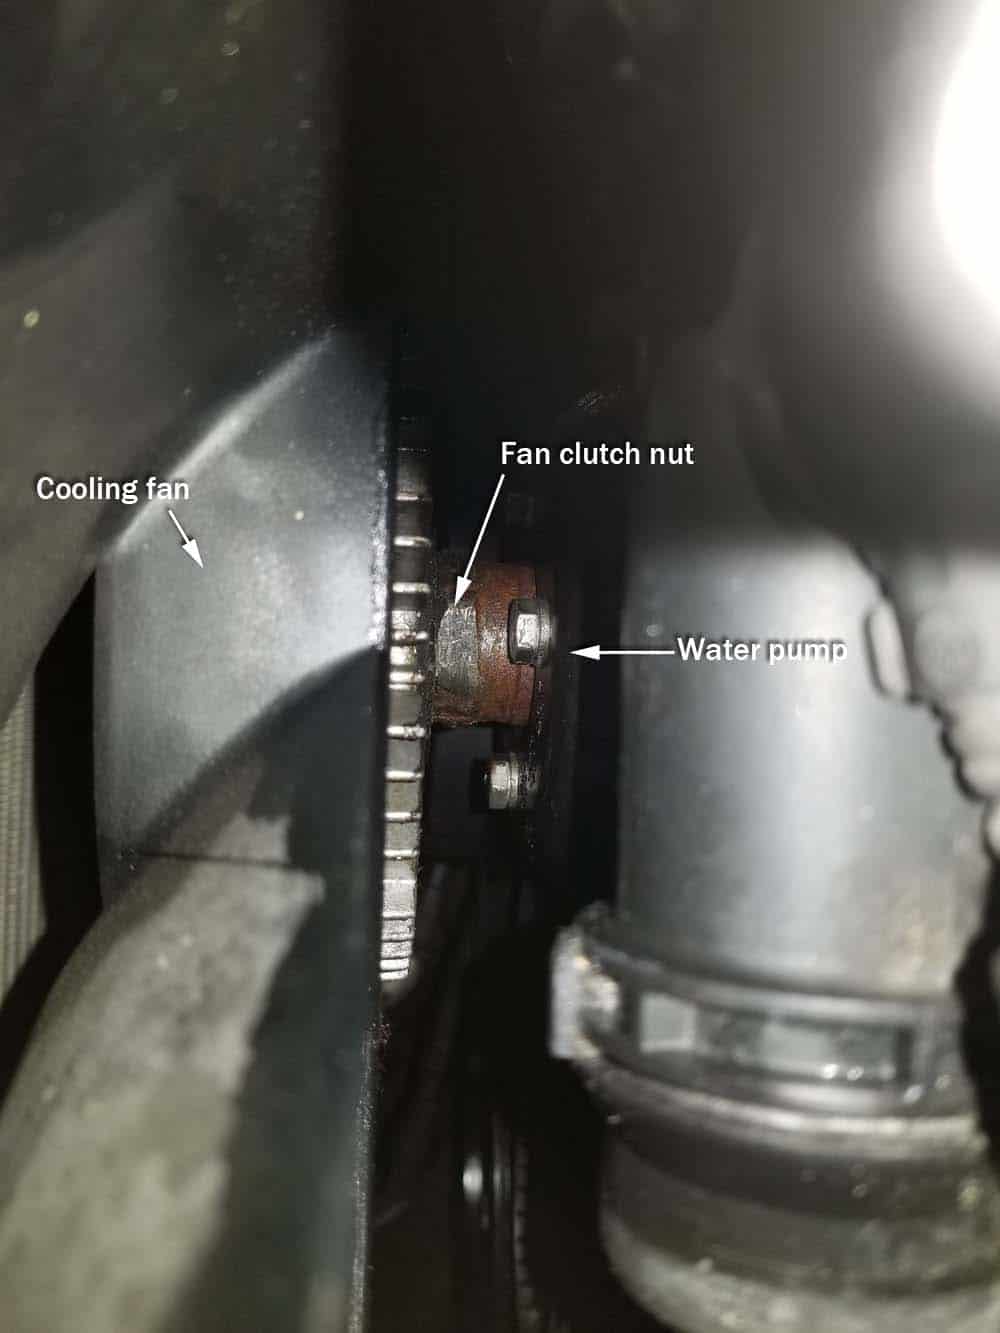
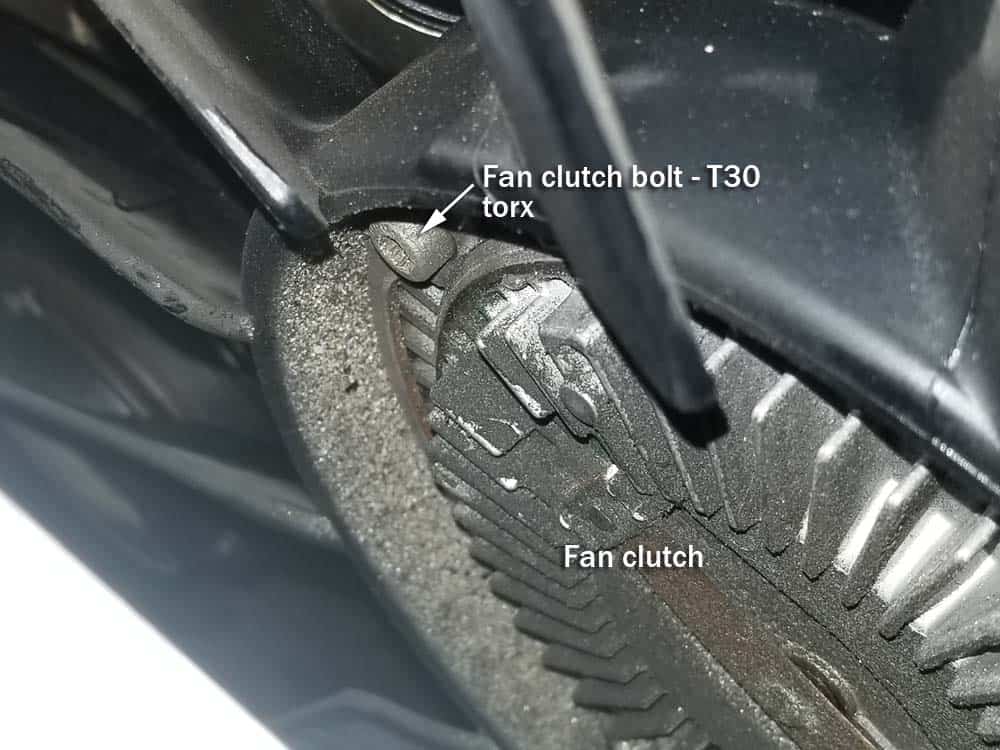
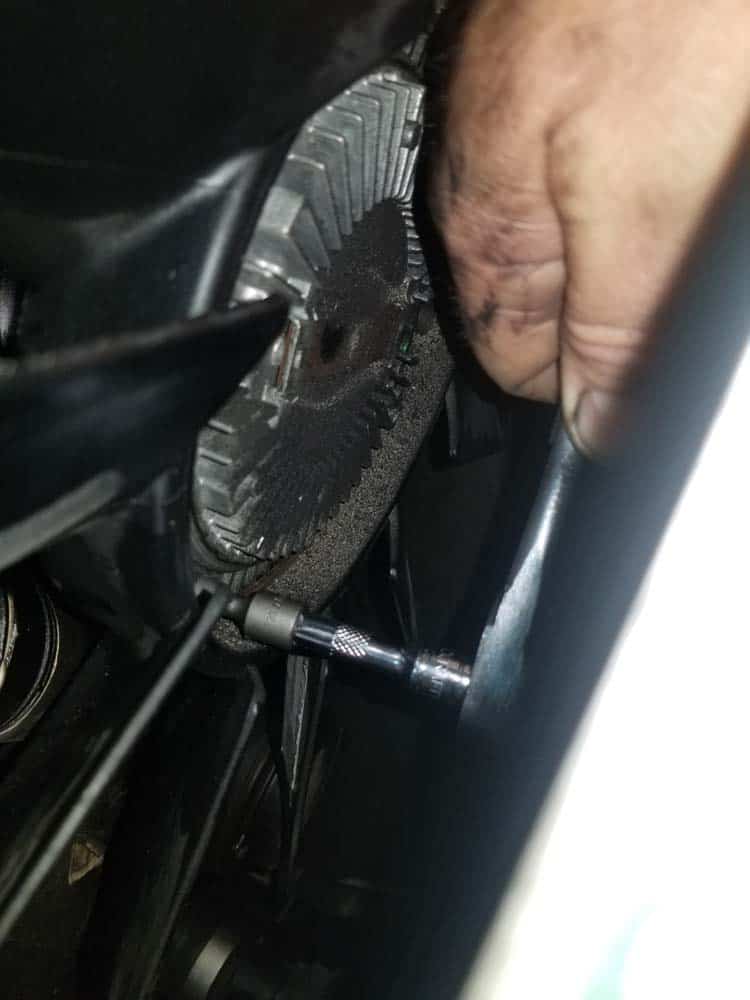
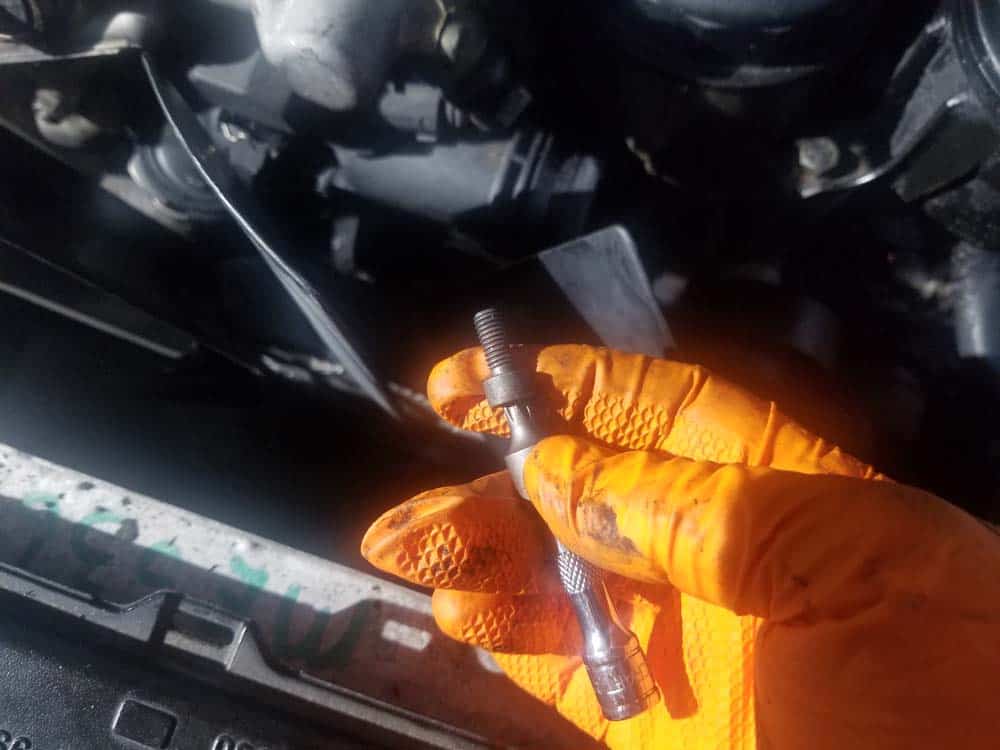
- It is very common for the fan clutch nut on BMW E46s to seize and not be removable with the fan clutch tool. Lack of maintenance and poor maintenance practices (not greasing nut during prior repairs) causes stripped and seized nuts, making them virtually impossible to remove. Many nuts will show the battle scars of mechanics attempting to remove them...a telltale sign that trouble lingers ahead. Your only option at this point is to remove the fan clutch bolts and remove the plastic cooling fan. Use a T30 torx bit to remove the three fan clutch mounting bolts. Remove the fan from the vehicle.
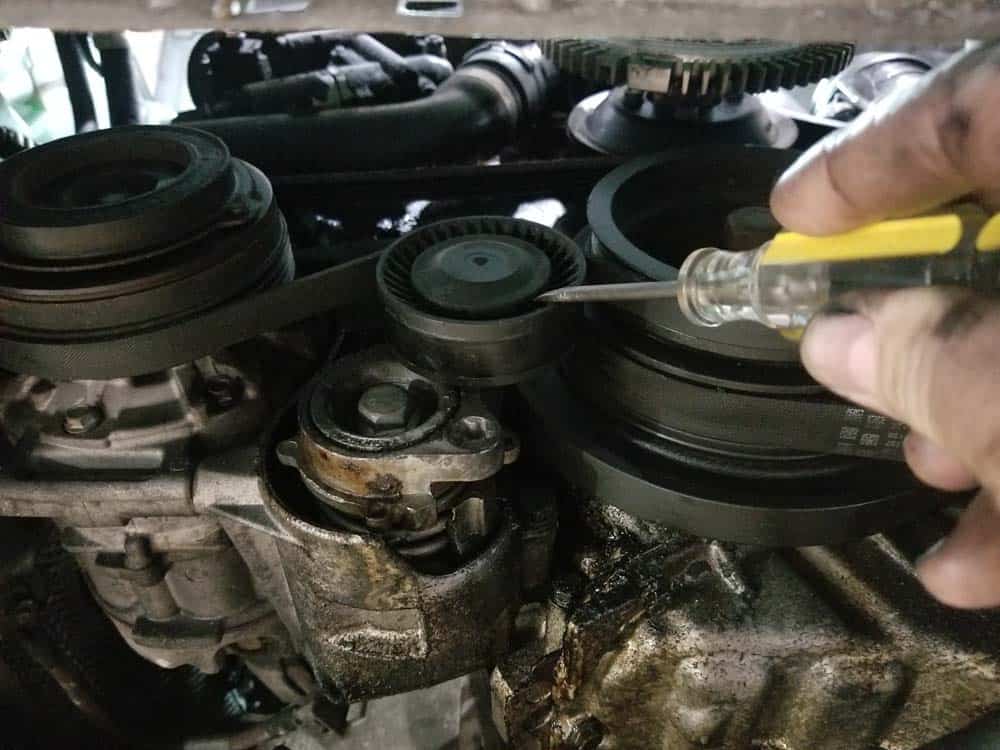
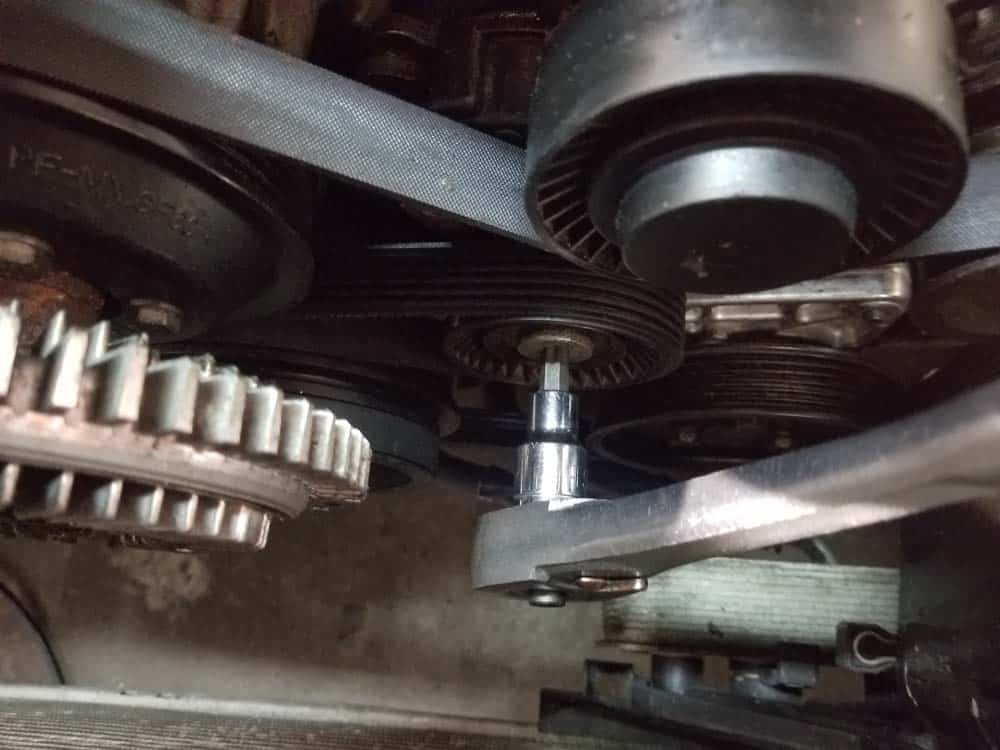
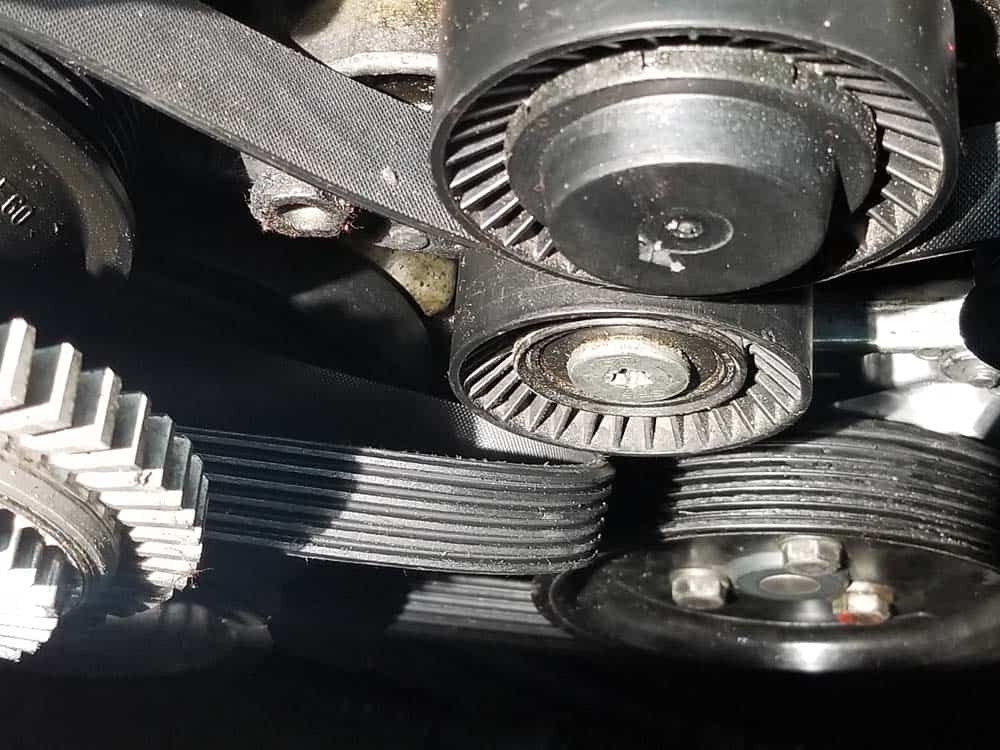
- Remove the plastic cover off of the tensioner pulley. The tensioner pulley is located near the middle of the engine above the power steering pump. Using a T50 torx bit, turn the pulley clockwise until the accessory belt loosens. Reach down and pull the main accessory belt off of the tensioner pulley. The belt can now be removed from the rest of the pulleys.
Section 3 - BMW E46 Serpentine Belt Replacement: Reinstalling New Drive Belts
Always use high-quality OEM parts when performing a BMW E46 belt replacement on your 3 series vehicle. Make sure to double-check the routing of your drive belts against the following e46 belt diagram to ensure you have installed them correctly. 
- Once your new belts are installed, reinstall the cooling fan. If you were able to remove the fan from the water pump with the fan clutch tool (section 1, step 10), apply a liberal amount of grease (not WD-40...but any thick paste grease) to the fan clutch nut; we do this so the fan can be easily removed in future repairs. Reinstall the fan. Remember...the plastic cooling fan has reverse threads! Turn the nut counterclockwise (left) to tighten.
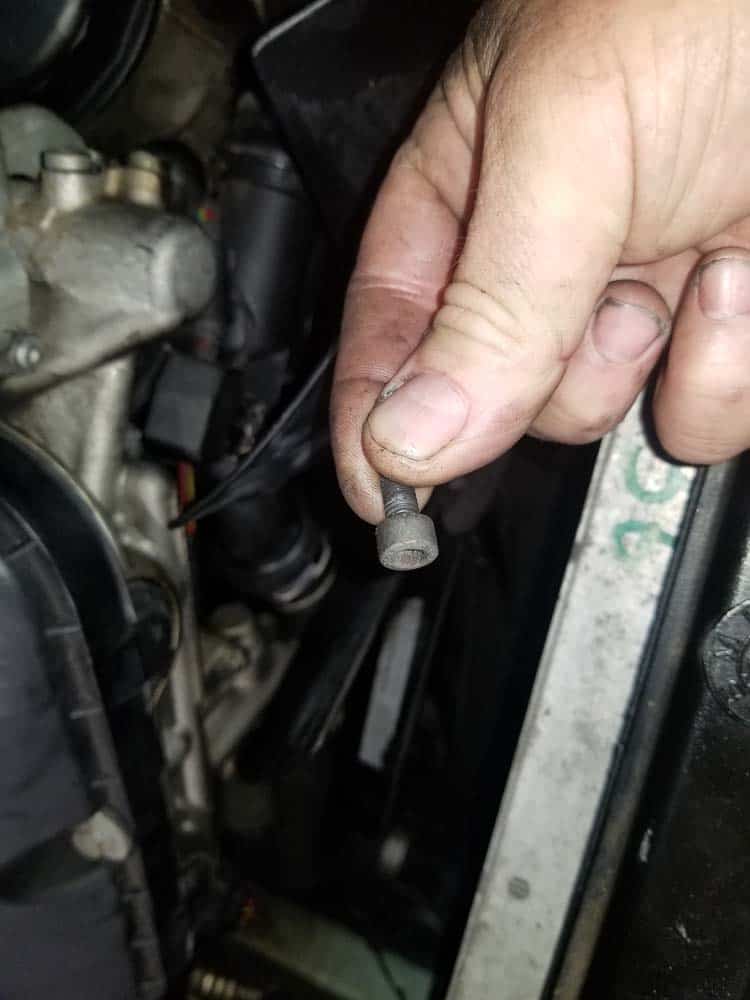
- If you had to remove the plastic cooling fan by removing the fan clutch bolts (section 1 step 11), you will need to reinstall the bolts. First...MAKE SURE PLASTIC FAN is installed in the right direction! If not you will be pulling air out of the engine instead of blowing it in. Reinstalling the bolts is a bit tricky...we advise looking for the threaded blocks on the fan clutch to guide you in. Putting the bolt on the torx bit and extension and then installing is a lot easier than trying to thread them in by hand. Be patient, once you figure out how to do them they go in easy. Use a low torque wrench to tighten the fan clutch bolts to 10Nm (7 ft-lb).
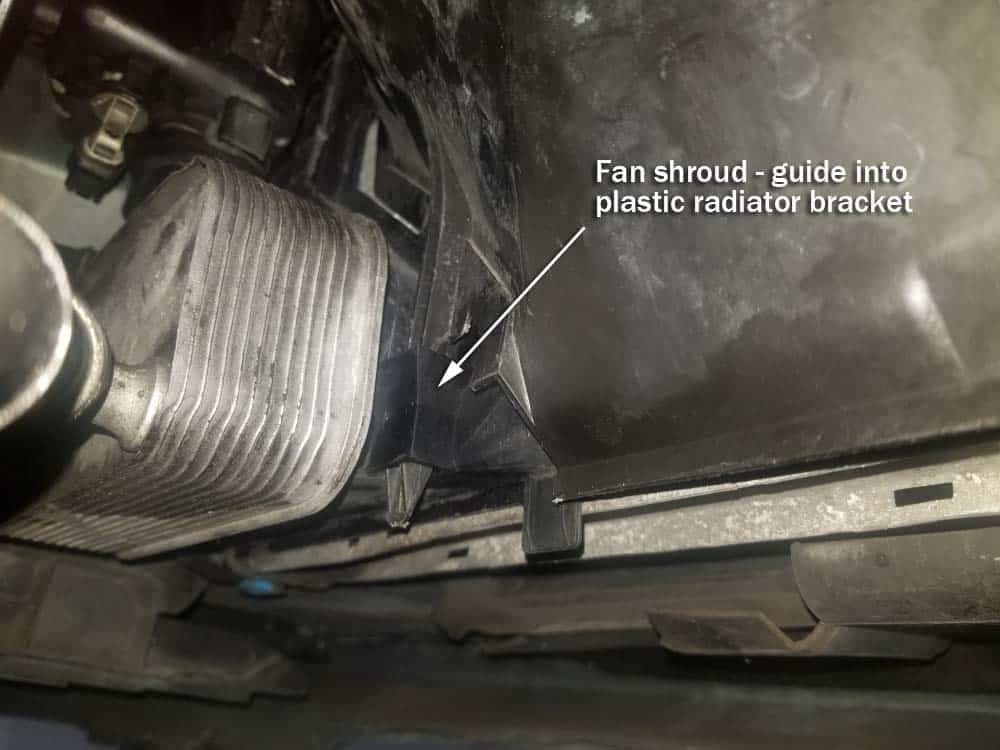
- Reinstall the fan shroud, being careful it doesn't get hung up on the plastic cooling fan. DO NOT force the fan shroud down. If the fan shroud is not installing properly, most likely the plastic tab on the bottom of the shroud is not lining up with with the plastic bracket on the bottom of the radiator (see following images). This step is best done with the aid of a helper who can guide the fan shroud into the bottom radiator bracket while someone pushes from the top.
- Reinstall the upper coolant hose by closing the clips and pushing them on to the thermostat and coolant reservoir until you hear them "click". You may have to put some muscle into them to get them to go on. MAKE SURE YOU HEAR THE METAL hose clips “click” when reinstalling the hose - this means the connections are secure and the clips are seated correctly. The connections to the fluid reservoir can be a pain...so use patience. This is very important...a hose that is improperly installed will leak coolant and quickly become a disaster. Since you have introduced air into the cooling system, you will need to quickly bleed the system. This is a very easy procedure and will be done below in section 4.

- Reassemble the rest of the vehicle.
Section 4 - Bleeding the Coolant Lines
- Start the vehicle. Leave it running through the next steps.
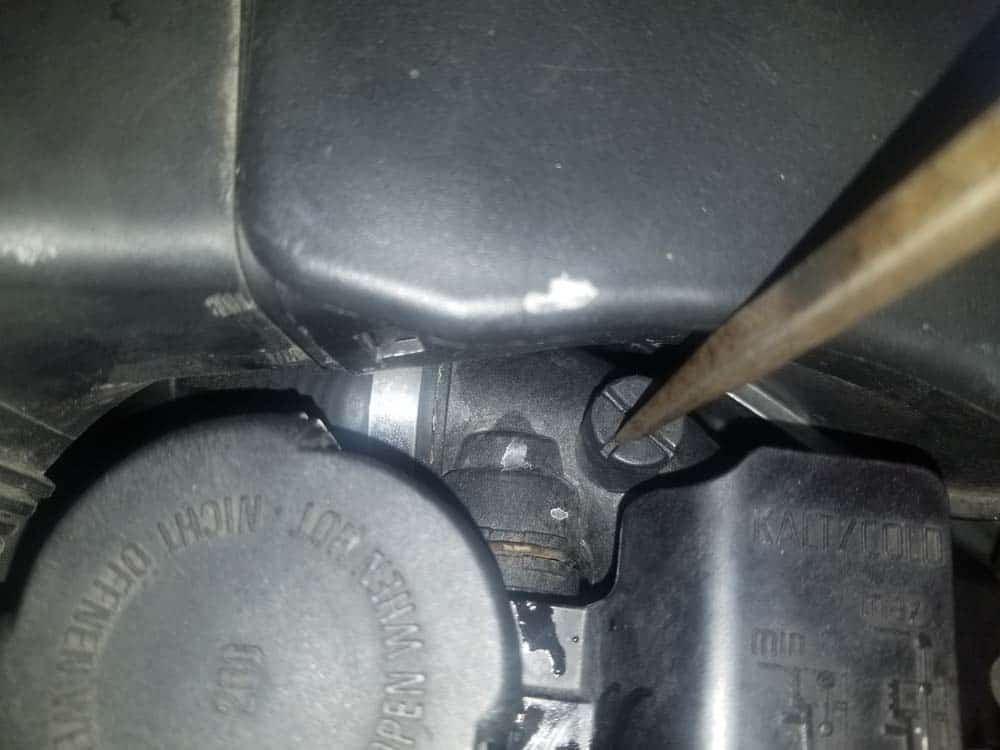
- When completing a BMW E46 belt replacement, you will need to bleed out any air that is trapped in the coolant lines caused by removing the top coolant hose. Loosen the bleeder screw on the top of the coolant reservoir to purge any trapped air out of the system. When a steady stream of coolant runs out of the bleeder screw, you can tighten. Be sure to check your coolant level just to make sure you didn’t lose any during the repair. Top off the coolant as necessary (use only a BMW approved coolant - the Repair Guide only uses Genuine BMW Coolant/Anti-freeze 67704 mixed 50/50 with distilled water.
BMW E46 Serpentine Belt Replacement Finished