
Affiliate link disclosure – The BMW Repair Guide uses affiliate links in their site. For more information on affiliate links, please click here.
Repair Summary
This article gives detailed instructions on replacing the front struts in a BMW E46 3 series vehicle. Even though we used a 2004 325ci to perform this repair, this article can be applied to any 1998-2006 3 series vehicle with minor modifications to the repair steps.
See all vehicles this article applies to
E46 3 Series 325ti
E46 3 Series 318td
E46 3 Series 320td
E46 3 Series 318ti
E46 3 Series 330xi
E46 3 Series 330i
E46 3 Series 330xd
E46 3 Series 330d
E46 3 Series 316ti
E46 3 Series 328i
E46 3 Series 325xi
E46 3 Series 325i
E46 3 Series 320i
E46 3 Series 323i
E46 3 Series 320d
E46 3 Series 318i
E46 3 Series 318d
E46 3 Series 316i
E46 3 Series M3 CSL
E46 3 Series M3
E46 3 Series 330Ci
E46 3 Series 330Cd
E46 3 Series 325Ci
E46 3 Series 323Ci
E46 3 Series 320Ci
E46 3 Series 320Cd
E46 3 Series 318Ci
E46 3 Series 328Ci
E46 3 Series 316Ci
E46 3 Series 323i 2.4
E46 3 Series 316i 1.9
E46 3 Series 316i 1.6
A BMW E46 strut replacement requires a few special tools, but is very "doable" for the home mechanic. The money you will save doing it yourself will greatly outweigh your tool purchases.
The BMW E46 is iconic...in both, its looks, incredible ride, and handling. And although its looks may never fade, years of driving take a toll on the E46's suspension...especially the front struts. The front struts take the bulk of the abuse from rough roads, potholes, and the occasional ricochet off of the parking lot curb stop (yes..we have done it too).
The front struts on a BMW E46 are actually part of the vehicle's suspension. In contrast to the shock absorbers on the back of the car, the front struts are considered a structural component of the vehicle. But unlike the rear shocks, whose sole purpose is to keep the car from bouncing down the highway, the front struts also keep the car balanced and are an integral part of the steering and alignment.
Signs that you are ready for a strut replacement are the front end bottoms out when driving on rough roads or potholes; abnormal front tire wear (known as "cupping"), abnormal handling characteristics, and poor front end alignment.
Preparing for a BMW E46 strut replacement
Before ordering all of your parts and disassembling your vehicle, it is important to understand that you will need several special tools to do the job correctly. Having the correct tools will make the job go very smoothly and save you from creating a mess that you can't put back together.
The first special tool you will need is the correct strut spring compressor. There are many spring compressors on the market, but most of them will not work for this repair. The popular "hook" style tool for example WILL NOT work on this repair due to its inability to compress the spring far enough to install the new strut.
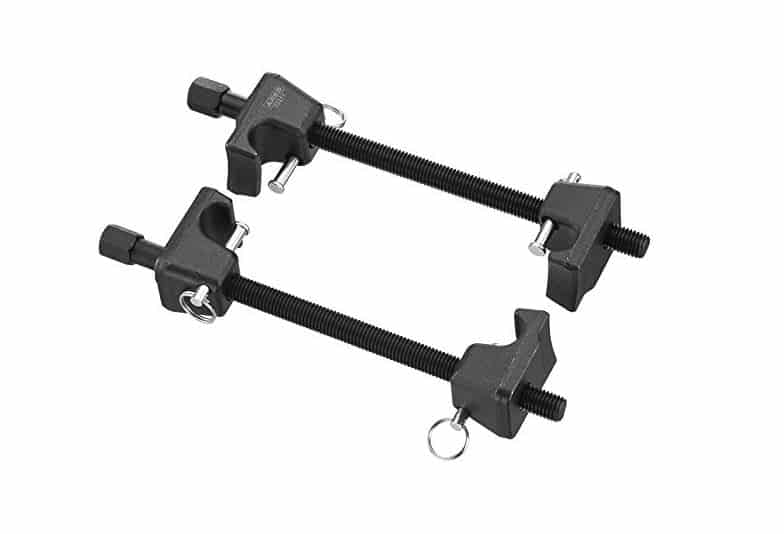
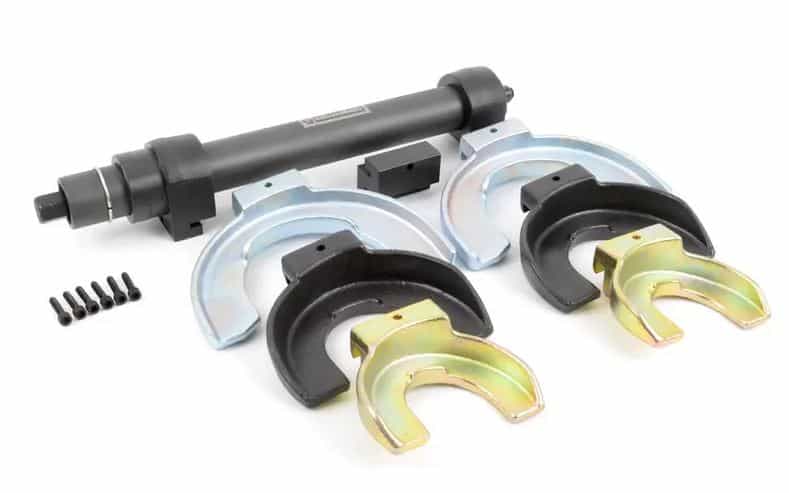
There is only one type of spring compressor tool that will work correctly on a BMW E46 strut replacement...and that's the plate (or fork) style compressor. The BMW Repair Guide recommends purchasing the Schwaben professional plate style compressor to do this repair. For more information on this topic, please read our article BMW Strut Spring Compression Tool - The Correct Choice for the Home Mechanic.
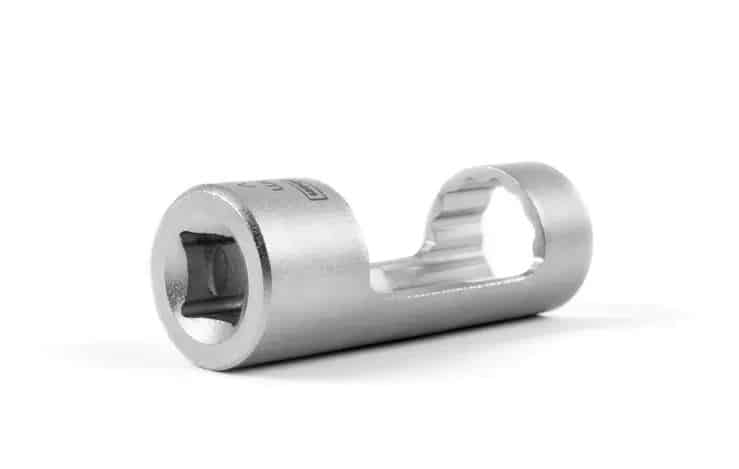
The other special tool you will need for this repair is a strut nut socket. In order to remove and correctly reinstall the strut lock nut, you will need a special socket that has a portion of its wall removed. Having a portion of its wall removed allows for the insertion of an Allen key into the center of the lock nut, which keeps the strut shaft from spinning during disassembly. It may all sound confusing now, but please trust us on this one. There is no way to reinstall the lock nut and properly torque it to spec without the socket. And an improperly torqued lock nut on your strut can cause a lot of issues, including strut failure.
To complicate matters, original factory strut lock nuts use a 21mm socket and most aftermarket strut lock nuts use a 22mm socket. Do yourself a favor and order both sizes now, before you start the repair. You'll find them below in the part section.


View the detailed parts diagram for this repair.
Includes detailed part diagrams, part numbers and links to purchase all of the required components needed to complete this repair.

Before starting this repair, you must have the following required parts.
All BMW E46 standard suspension vehicles
This is the same factory strut that would be installed at the BMW dealership.
All BMW E46 standard suspension vehicles
This is the same factory strut that would be installed at the BMW dealership.
All BMW E46 models
Bump stops provide a bottoming cushion on rough roads, limiting hydraulic damper travel to prevent suspension damage. They also improve ride quality, softening harsh impacts.
All BMW E46 models
Includes strut pivot bearing and attachment hardware. The strut mount is a metal reinforced rubber bushing that bolts to the shock absorber strut rod, and attaches the strut assembly to the chassis. Struts at steering wheels commonly include a pivot bearing to allow the strut to pivot left and right.
All BMW E46 models
Your struts go through all of the weather that the rest of your car experiences. Road salt, debris, and ice contact this rack mounted low in your engine compartment. Because it is such a sensitive piece of hydraulic equipment, you need to keep all of the exposed components clean to extend the life of this expensive piece. One way to do that is with a new strut boot.
Used to properly tighten strut nuts
To secure shocks and struts to their mounts, the retaining nut must be torqued to its proper specification using a torque wrench. Strut nut sockets allow for the use of an Allen wrench to hold the damper shaft while utilizing your 1/2
Used to properly tighten strut nuts.
To secure shocks and struts to their mounts, the retaining nut must be torqued to its proper specification using a torque wrench. Strut nut sockets allow for the use of an allen wrench to hold the damper shaft while utilizing your 1/2
Section 1 - Removing the Struts from the Vehicle
Removing the wheel struts from the vehicle is a relatively simple procedure. If your suspension is heavily corroded, we suggest spraying all of the bolts down with a penetrating lubricant like Blaster PB prior to removing.- If you do not have an impact wrench, use a 17mm socket and breaker bar to slightly loosen lug nuts on front wheels while car is on the ground. You cannot loosen the front wheel lug nuts with a socket wrench or breaker bar when car is in the air.
- Jack and support the front of your vehicle using the Jack Stand Method as shown in our article BMW Jacking and Supporting for Repairs and Maintenance.
- Finish removing lug nuts and remove front wheels from vehicle.
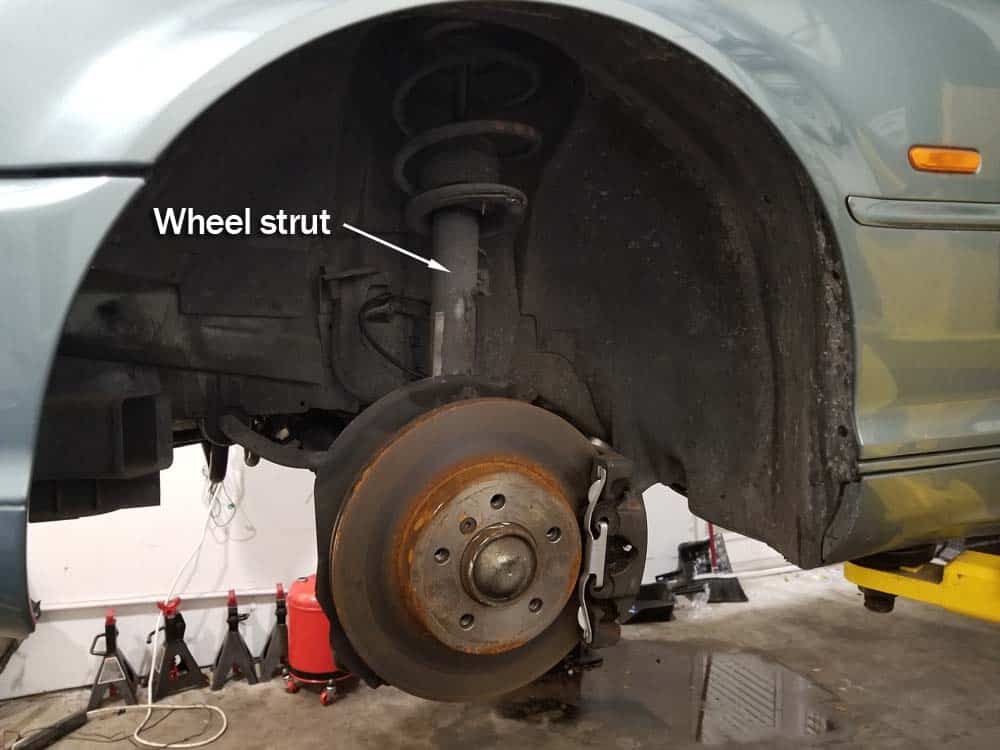
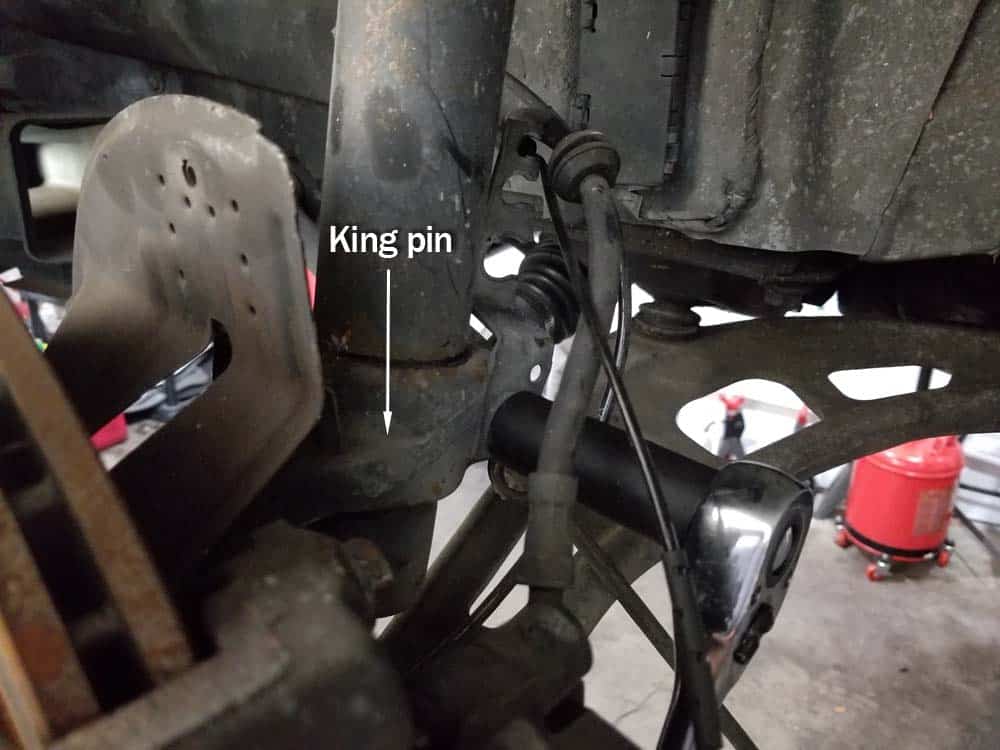
- Starting on the left side of the vehicle, locate and identify the wheel strut.
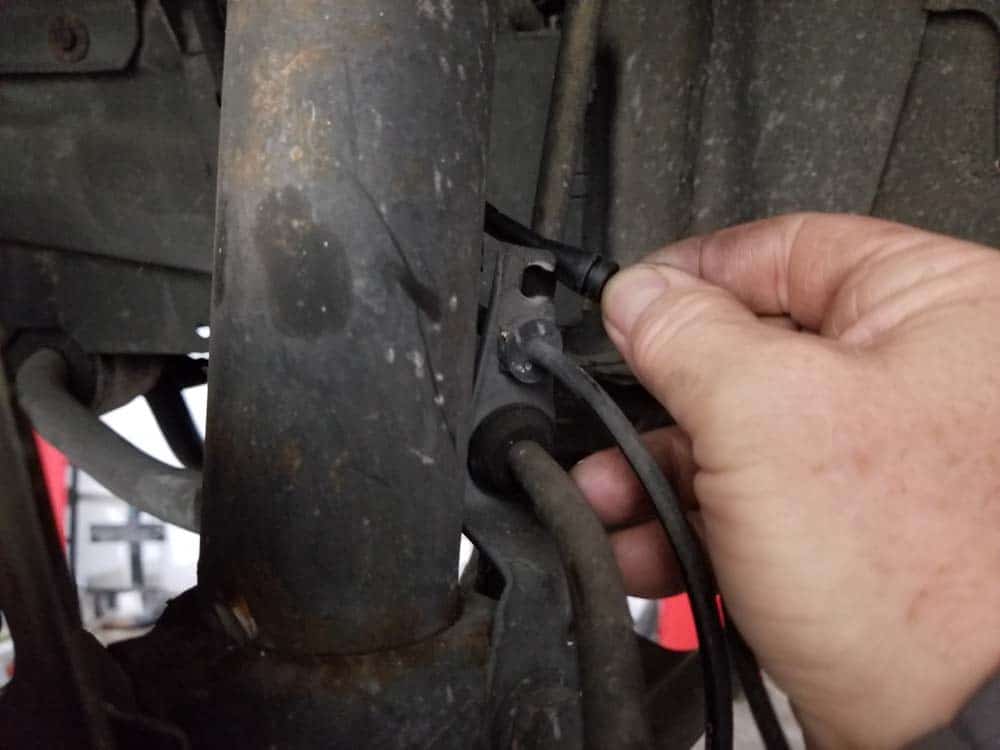
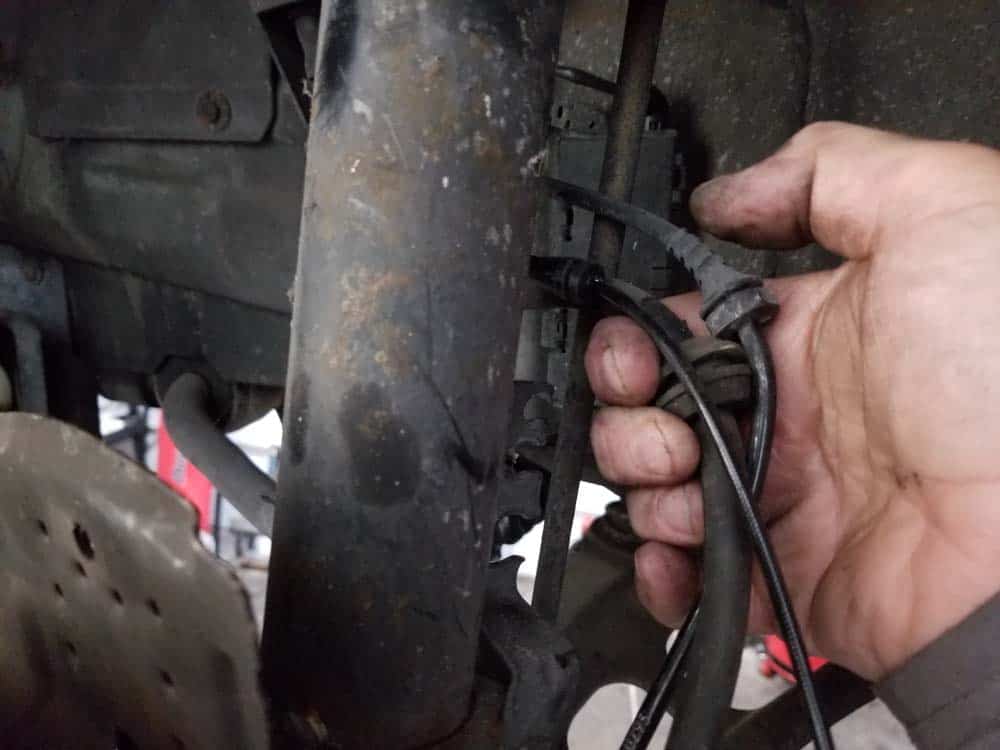
- Remove the brake caliper line, the wheel speed sensor wire, and the brake pad sensor wire from the bracket on the backside of the strut. These lines/wires should be removed so they are not in the way when removing the strut.
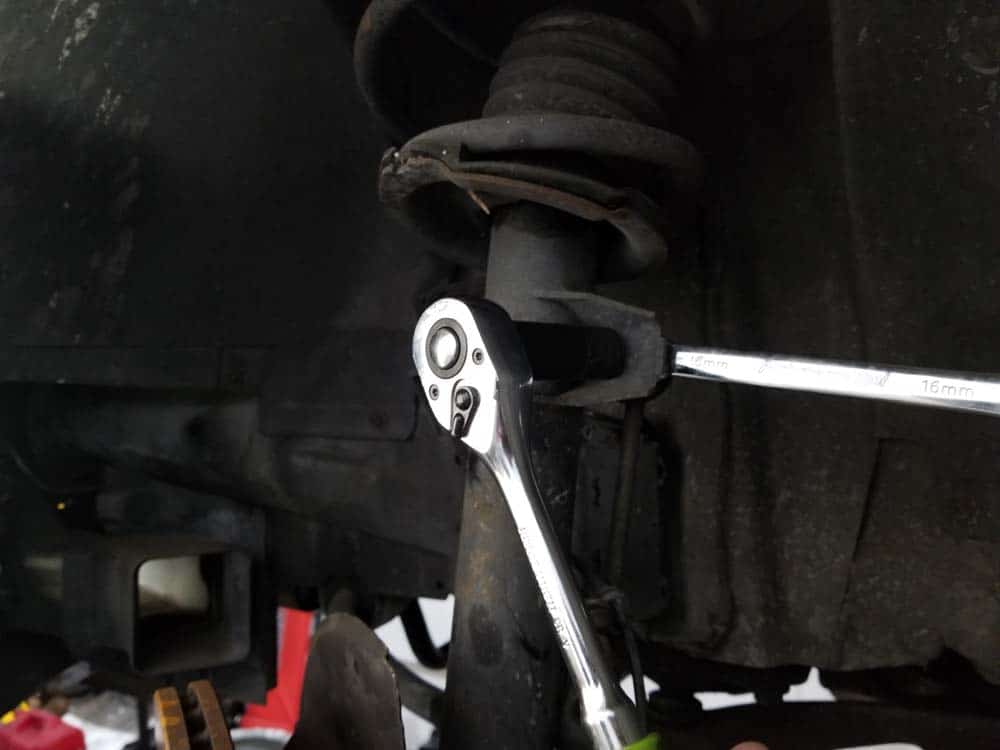
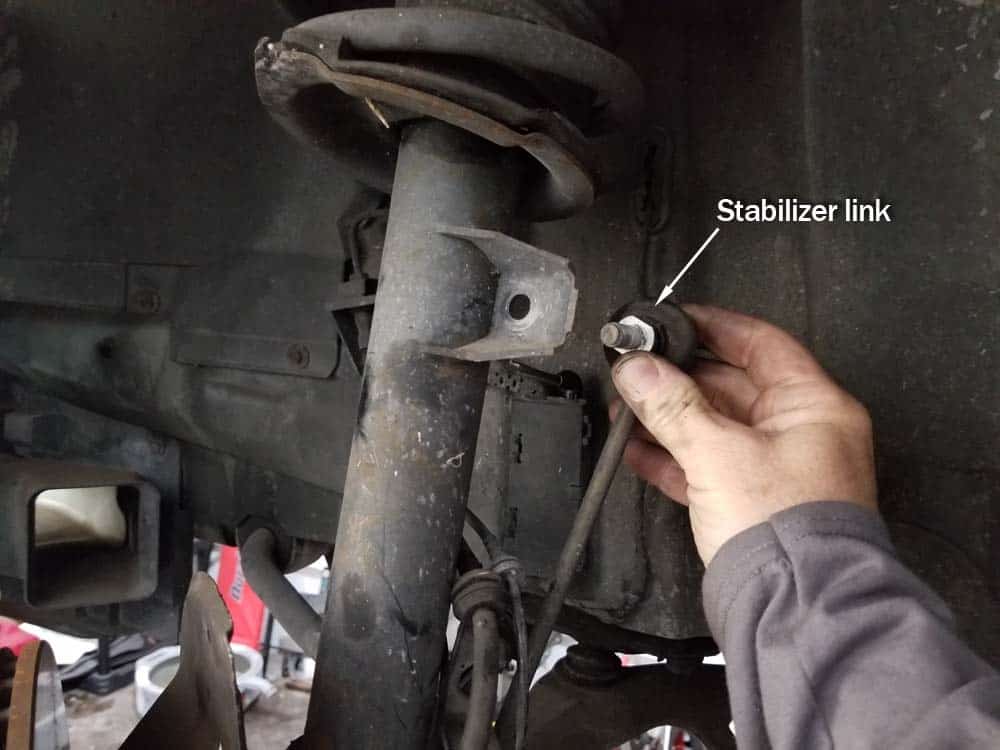
- Use a 16mm socket wrench and a 16mm open end wrench to remove the stabilizer link bolt. The 16mm open end wrench is needed to keep the bolt from spinning while trying to remove it. Remove the link from the strut.
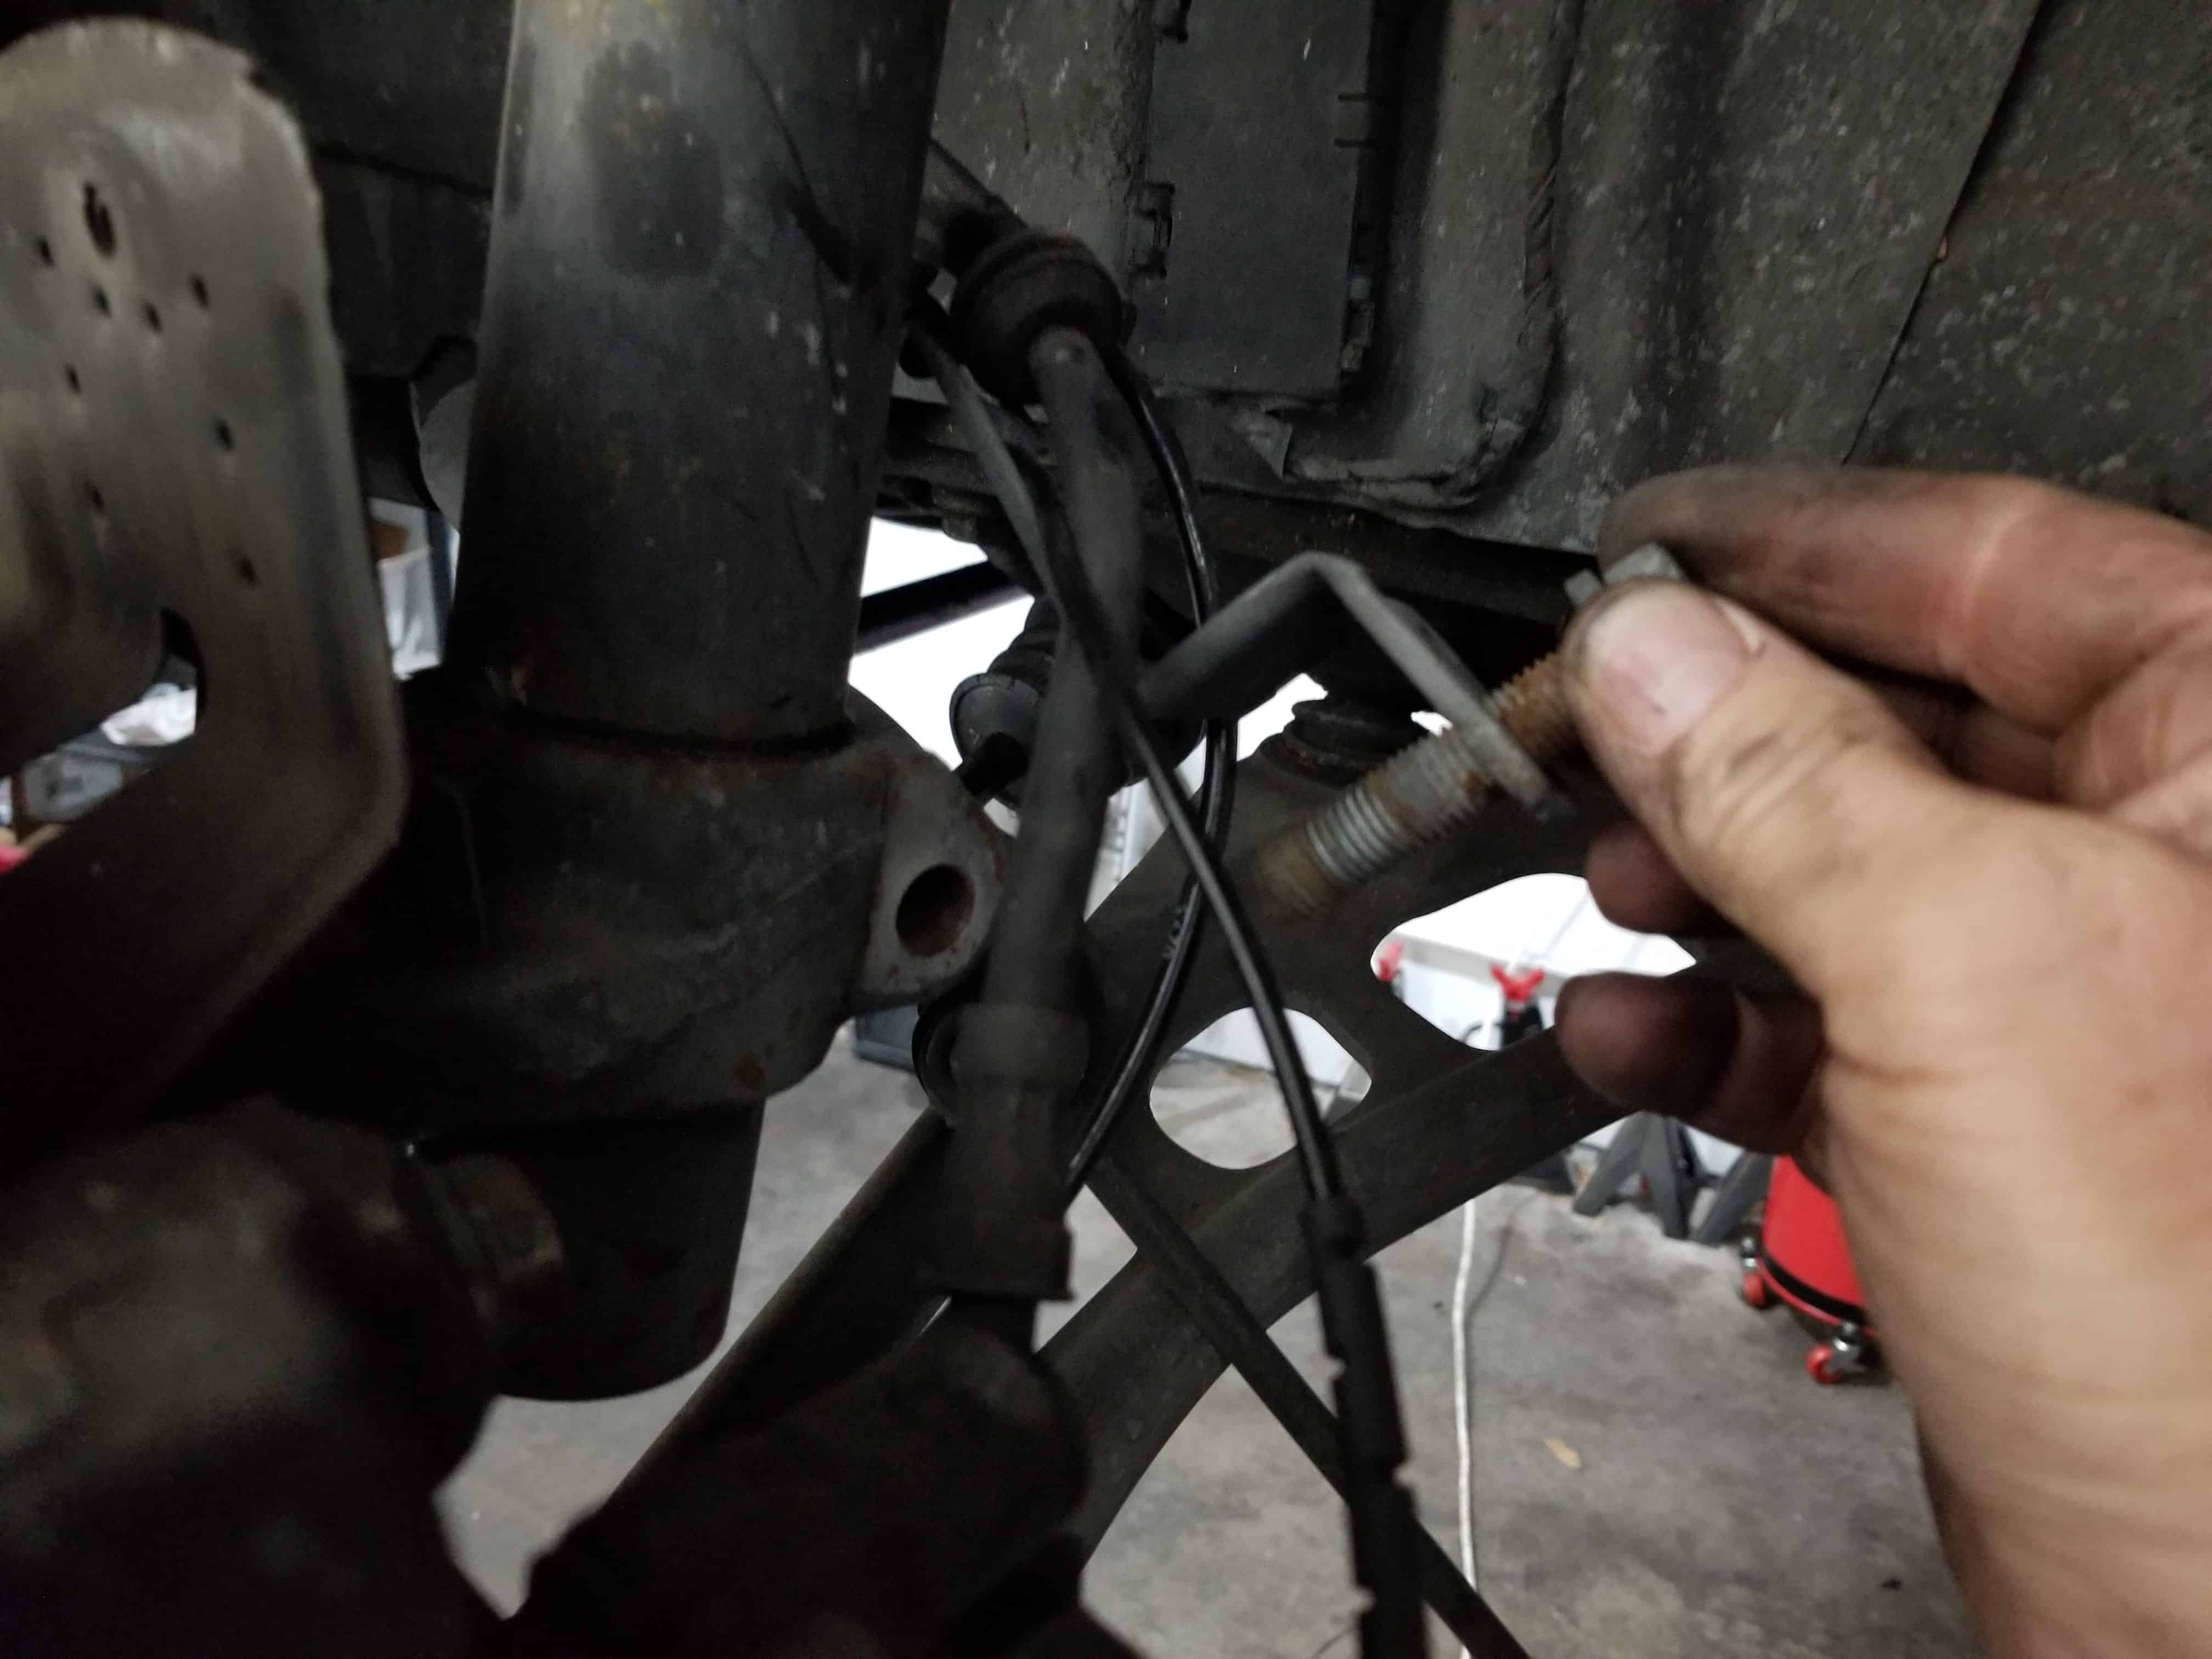
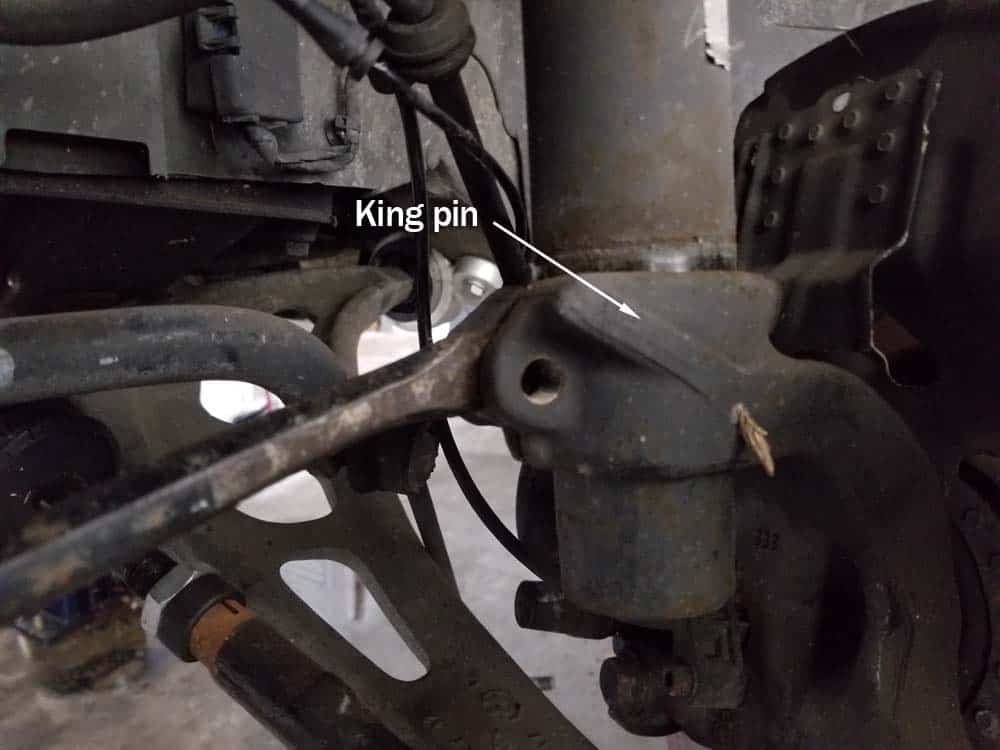
- Use an 18mm socket wrench to remove the hexbolt and bracket anchoring the king pin to the strut.
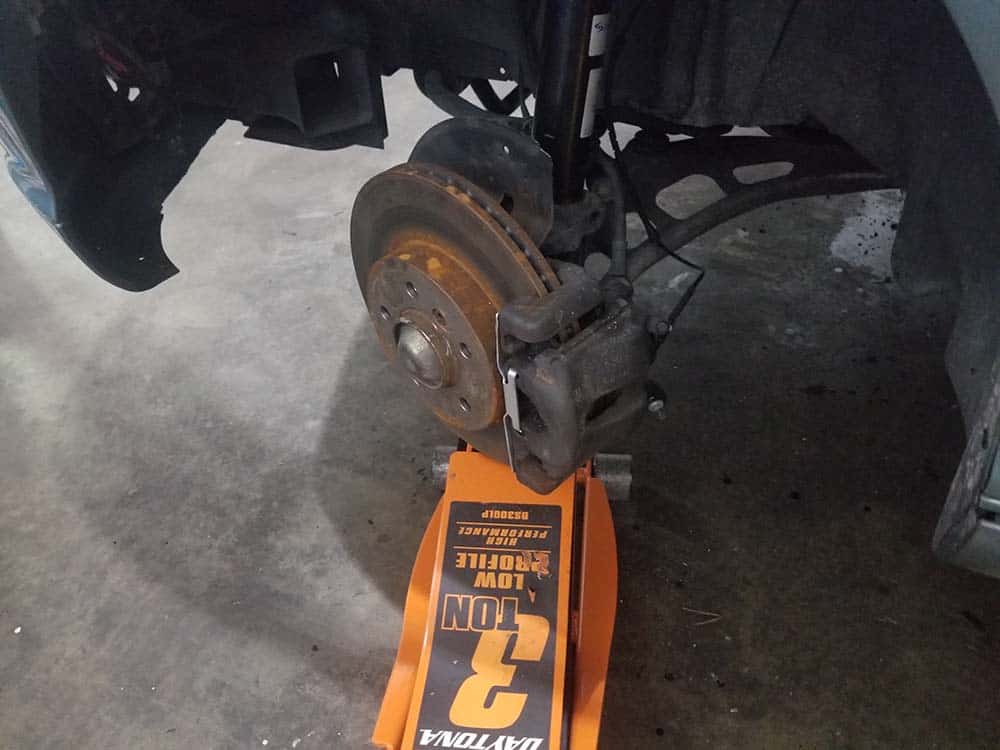
- Use a small pry bar to loosen the king pin clamp. The king pin and wheel brake assembly should easily slide off the end of the strut.
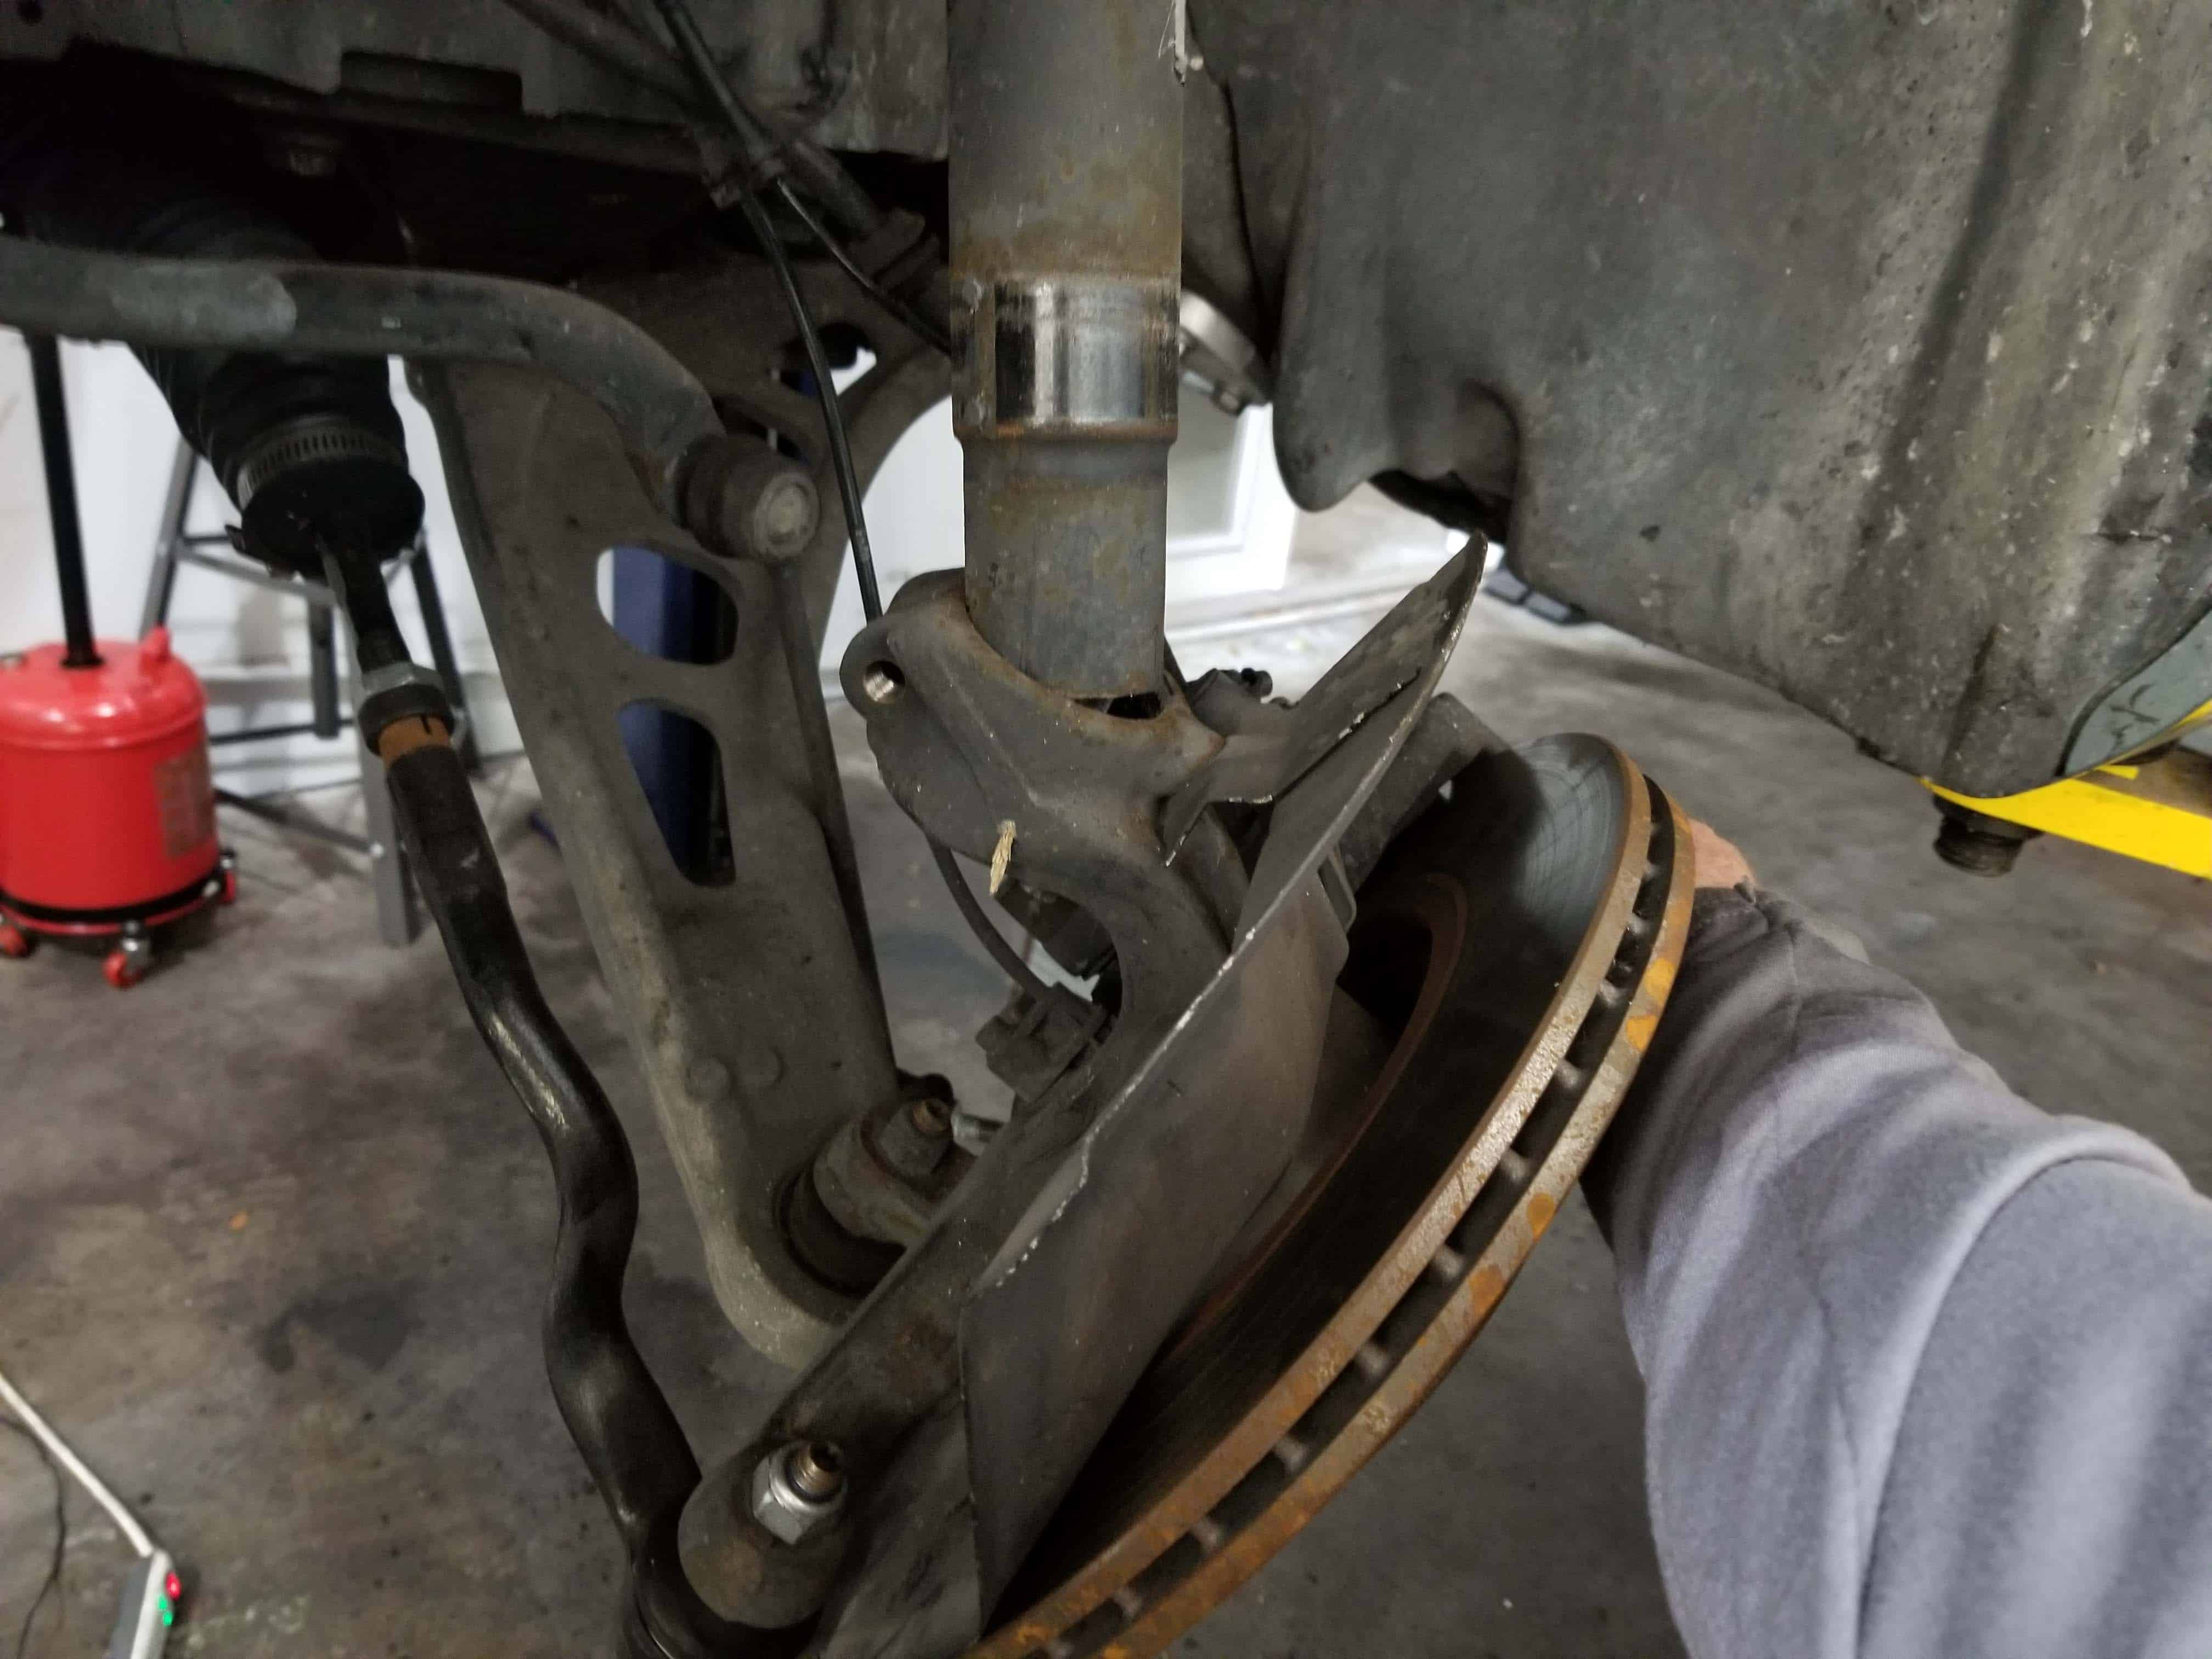
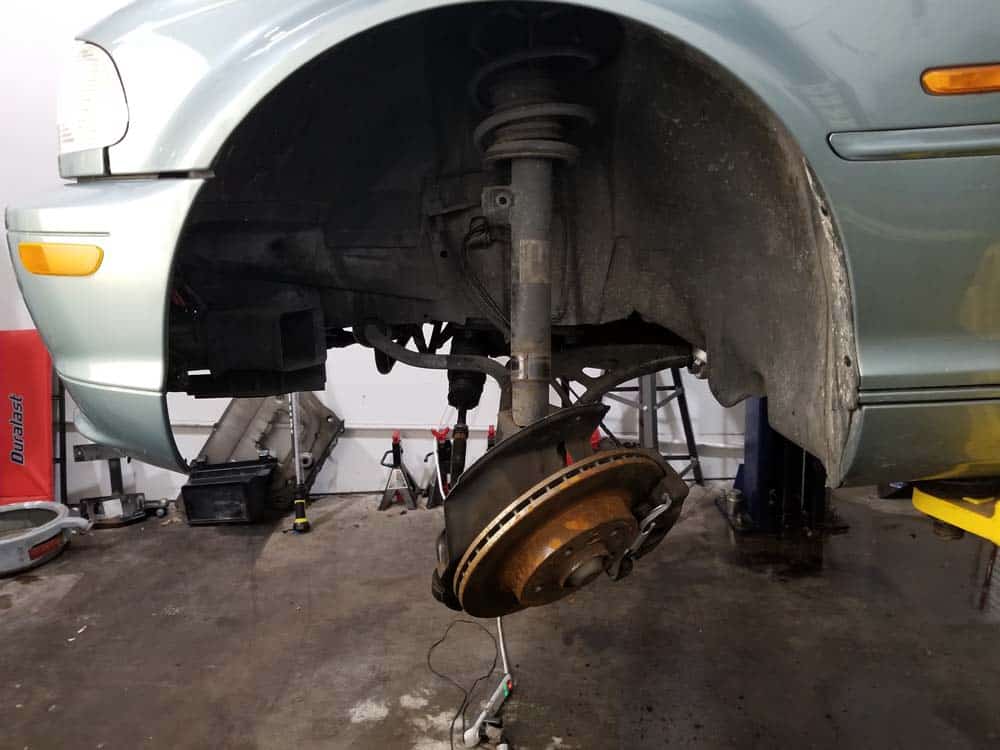
- Use a 13mm socket wrench to remove the three mounting bolts anchoring the strut to the inside of the engine compartment.
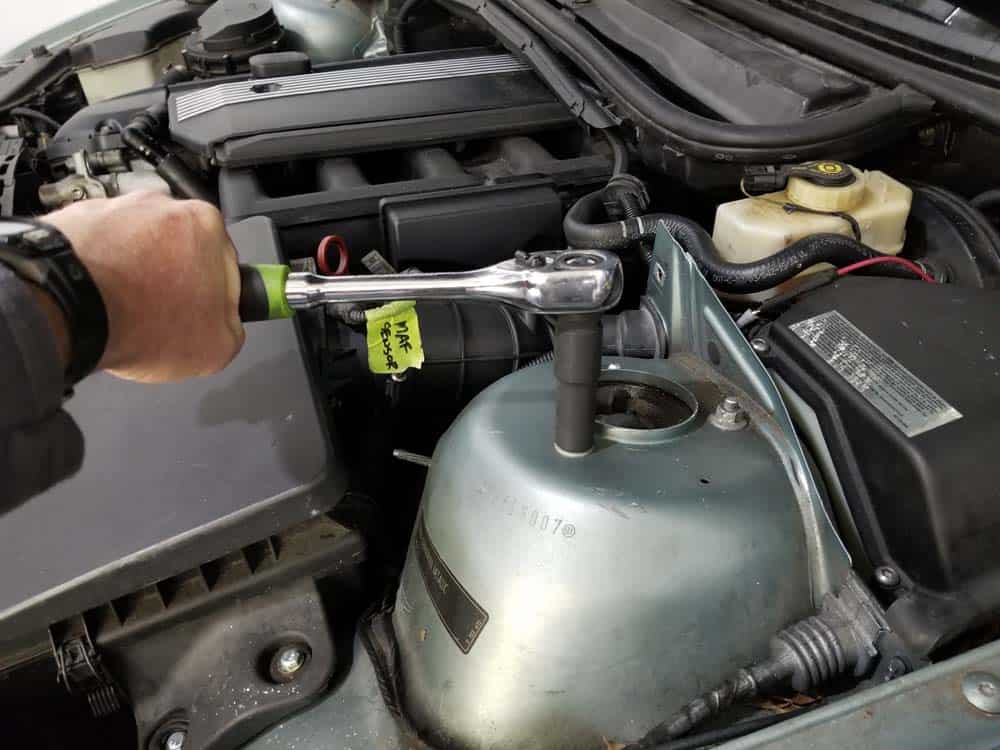
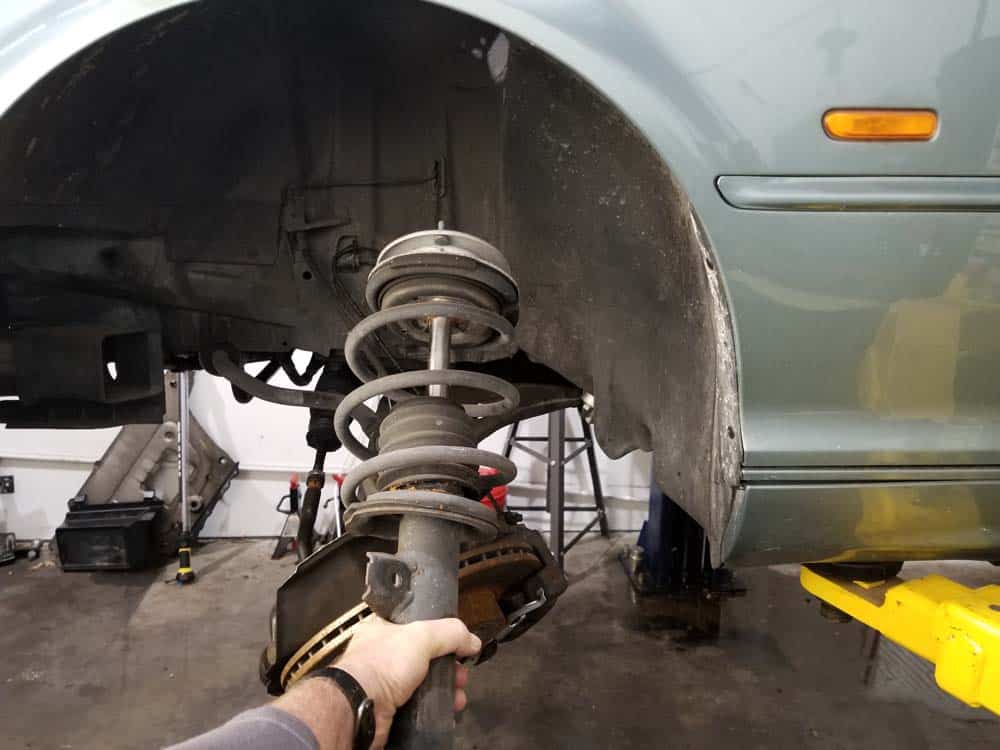
- Remove the strut assembly from the vehicle.
Section 2 - Disassembling the Old Strut
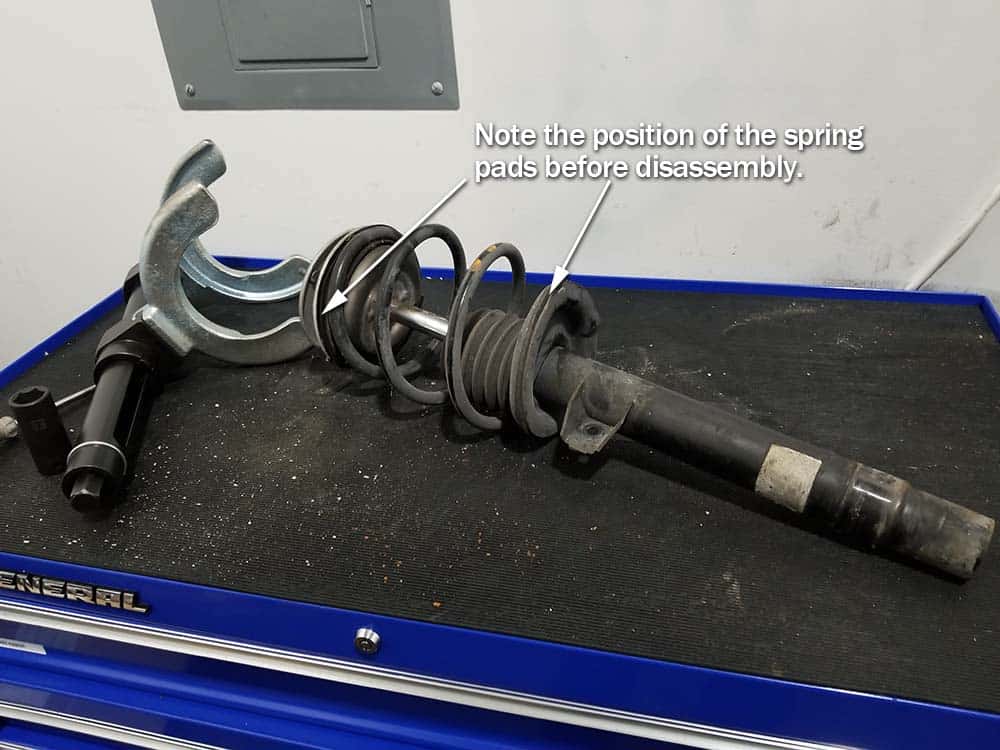
Disassembling the strut assembly requires compressing the spring so the lock nut on the strut mount can be removed.- Before disassembling, note the orientation of the spring on the spring pads. Take photos of the strut to aid during reassembly.
- The first step in disassembling the old strut is to compress the coil spring. Use a good plate (or “fork”) style spring compressor to do this. A hook style spring compressor will not work on a BMW E46 strut replacement. Please read our discussion on this at the beginning of this article...or read our article BMW Strut Spring Compression Tool – The Correct Choice for the Home Mechanic.
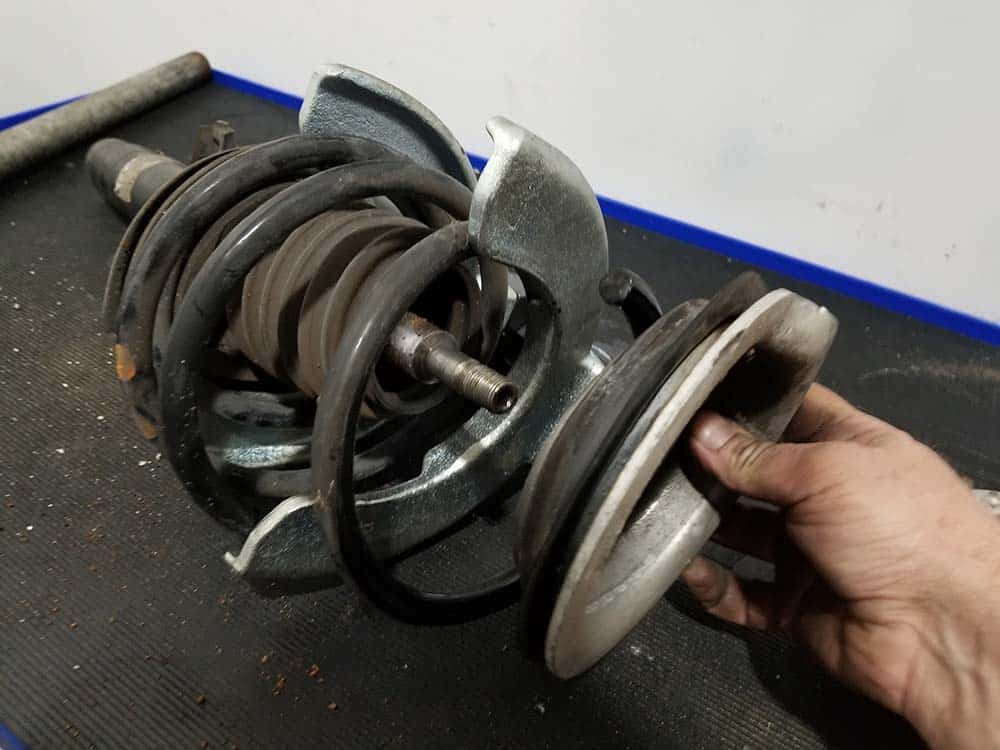
- Install the plate style spring compressor on the spring as shown in the following images. Make sure to always wear safety glasses and gloves while compressing springs.
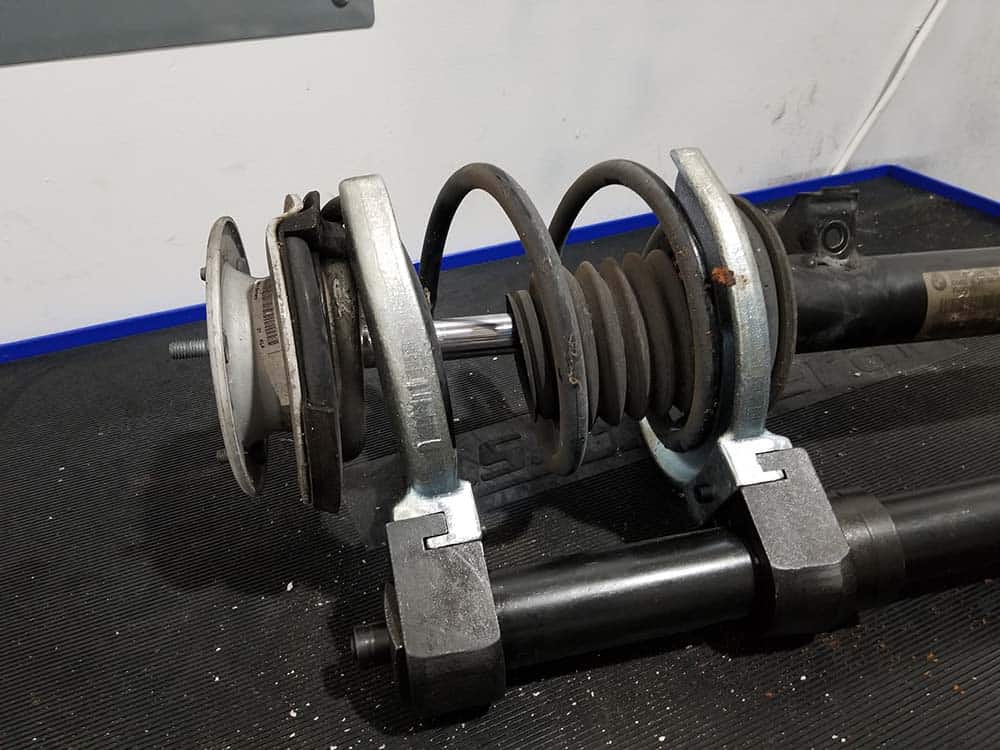
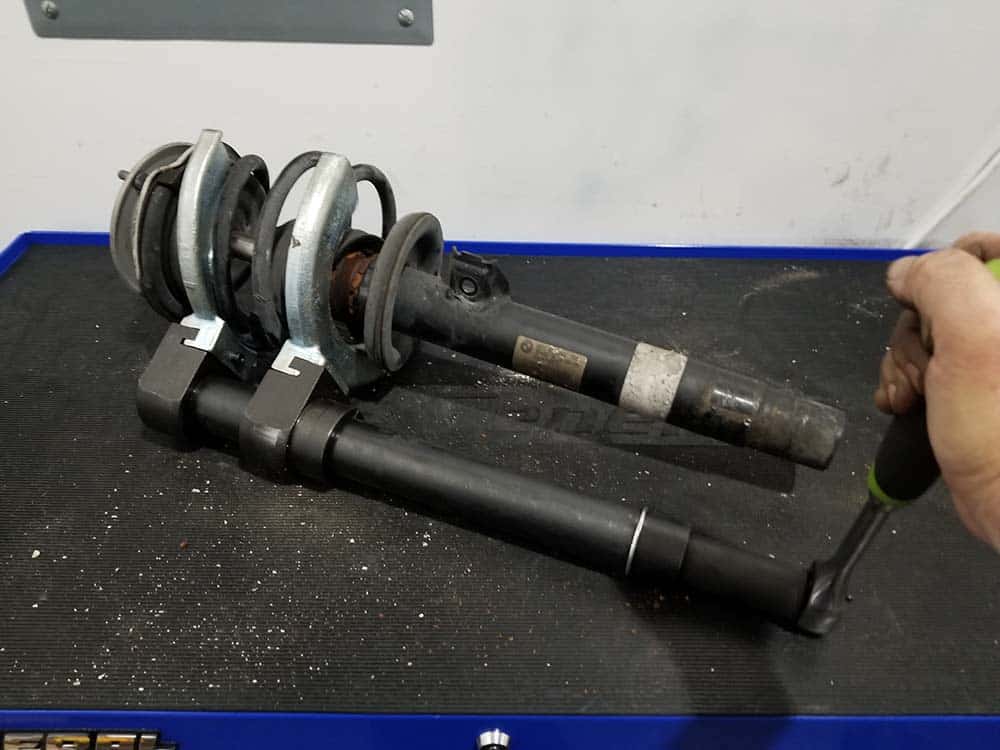
- Compress the spring as far as you can turn the tool (per manufacturer’s instructions).

- Remove the dust cap from the top of the strut.
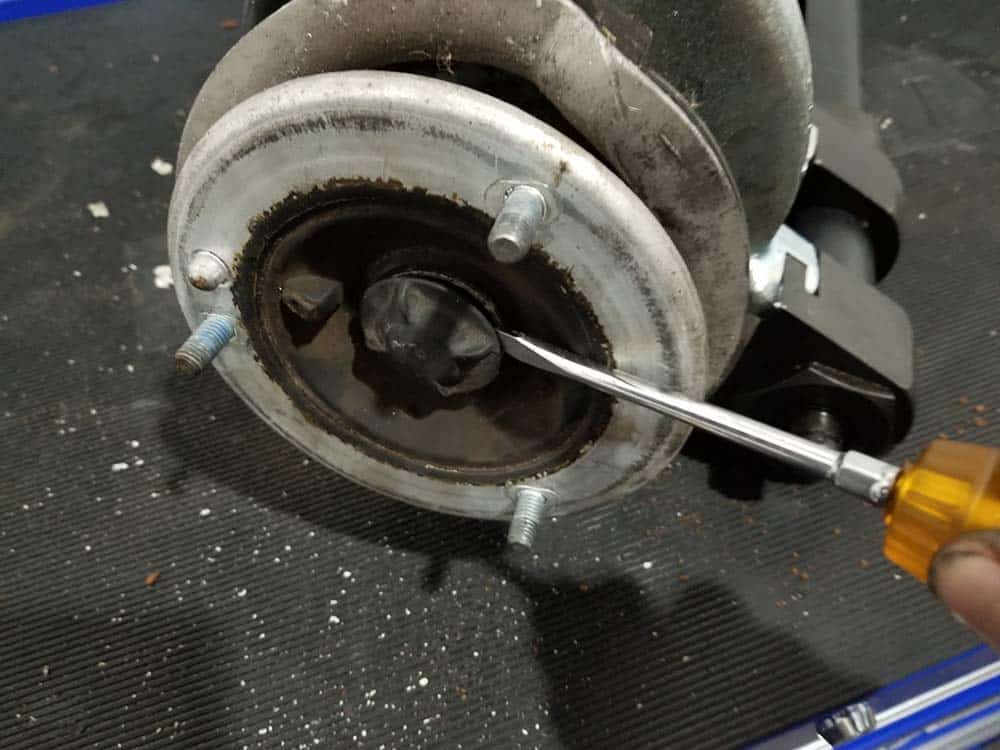
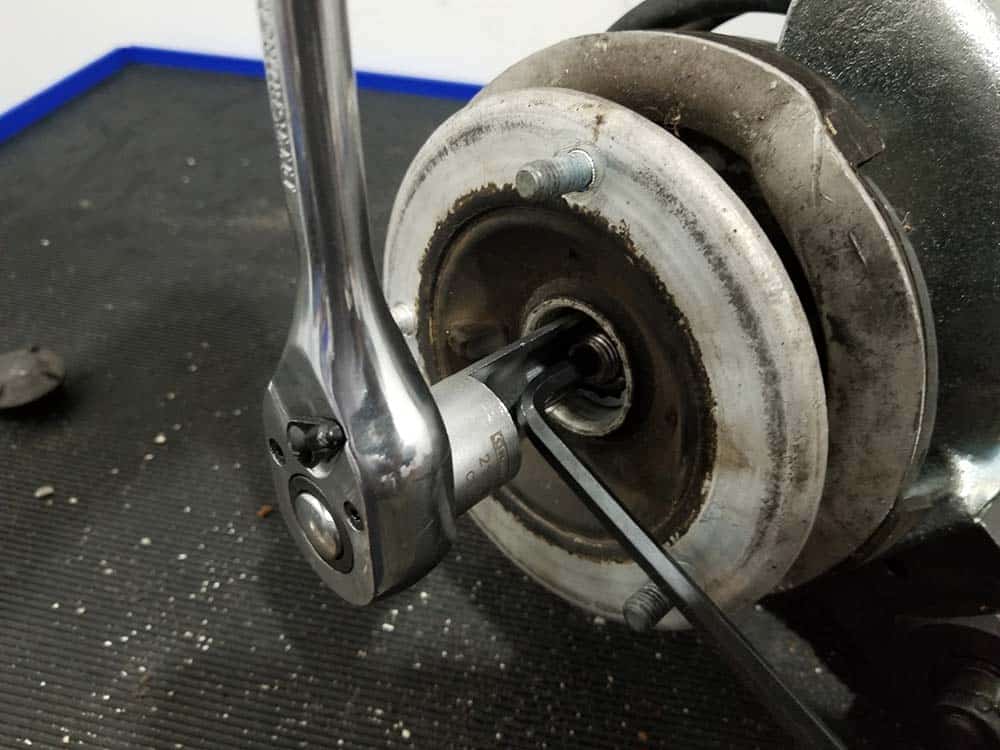
- The lock nut must now be removed from the top of the strut. To do this, you will need a special strut socket as discussed at the beginning of this article. Depending on the brand of strut you are removing, you will need either a 21mm (BMW “factory” struts) or 22mm (aftermarket struts) strut socket.
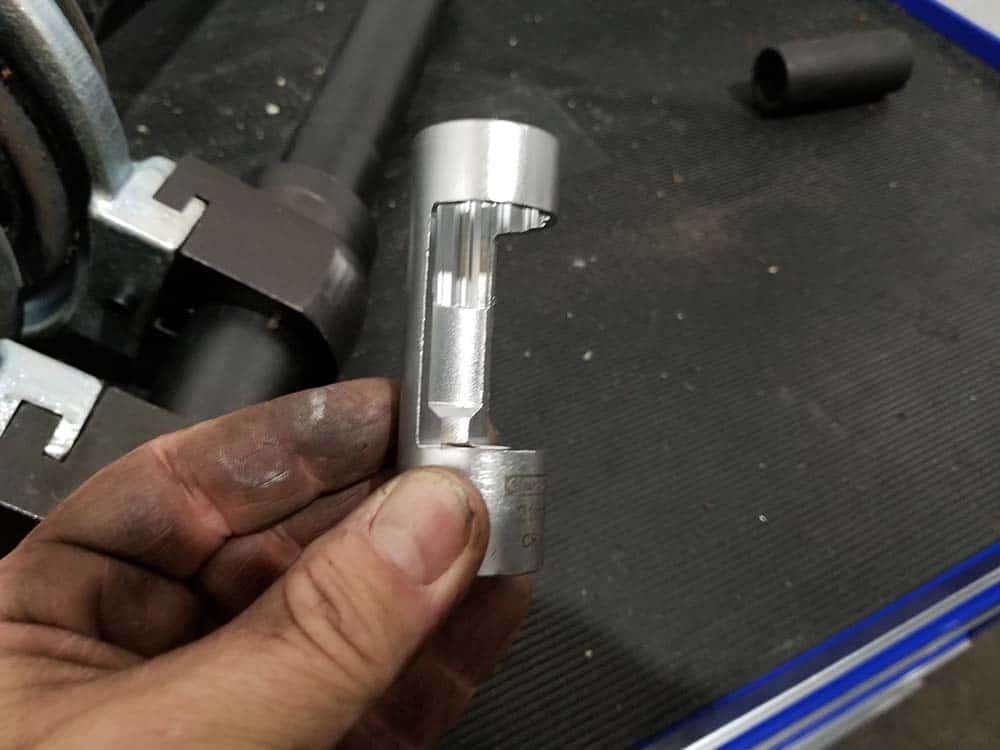
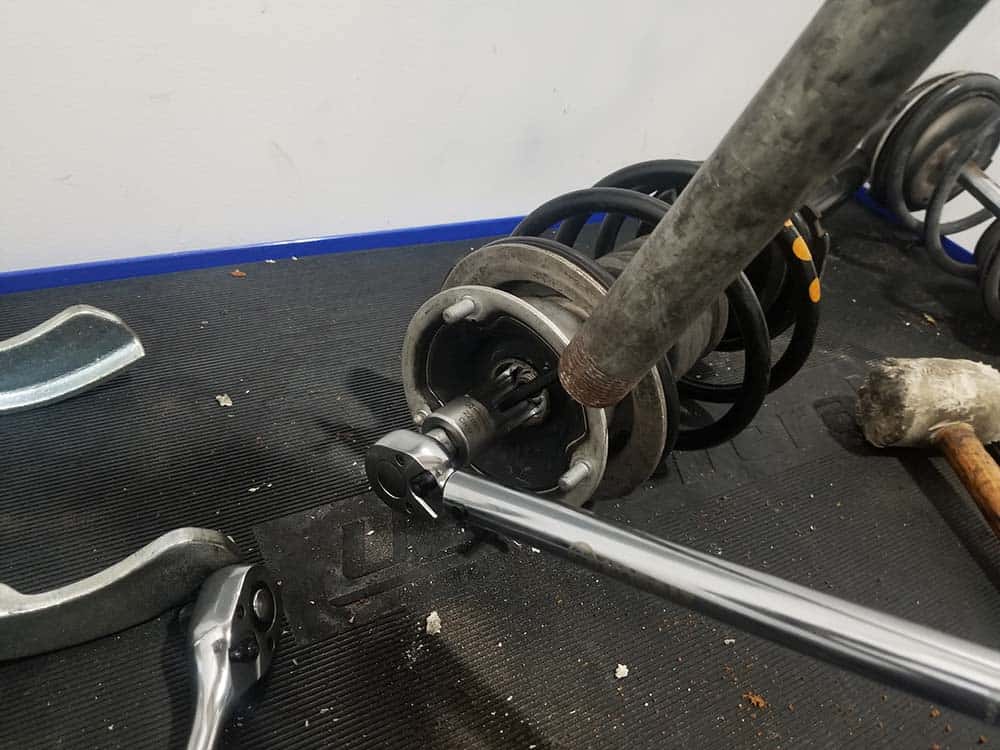
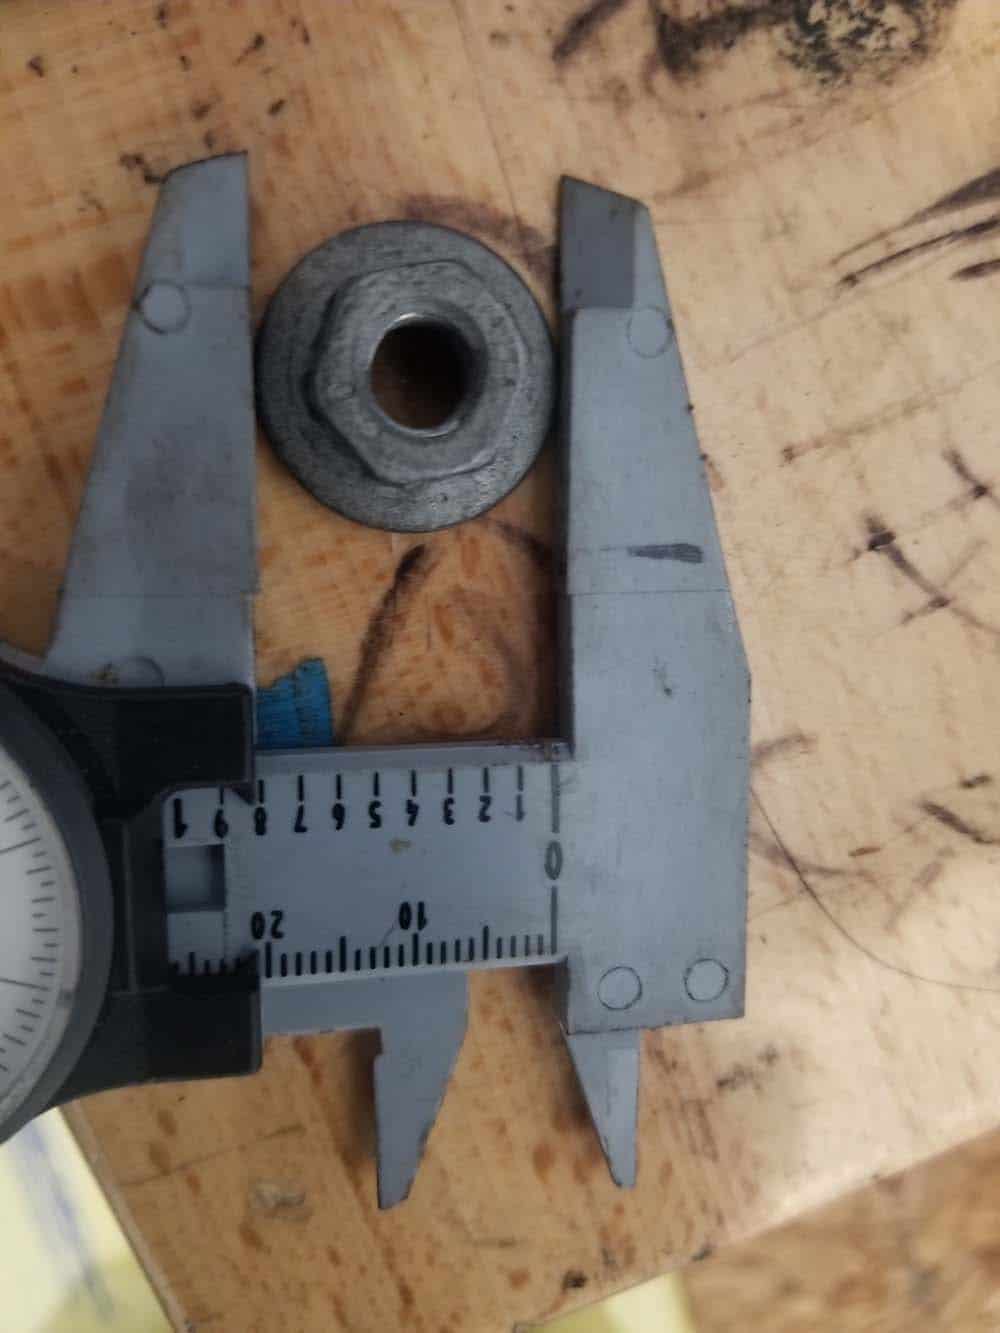
21mm strut socket. Note cut out in wall of socket so a hex key wrench can be inserted. - Place the appropriate strut socket on the lock nut. Insert a 6mm hex key wrench through the wall of the socket and into the top of the strut shaft (see image below). While holding the strut shaft with 6mm hex key, loosen the lock nut and remove. Depending on how seized the nut is, need to use a piece of pipe to hold the hex key and a breaker bar to turn the nut.
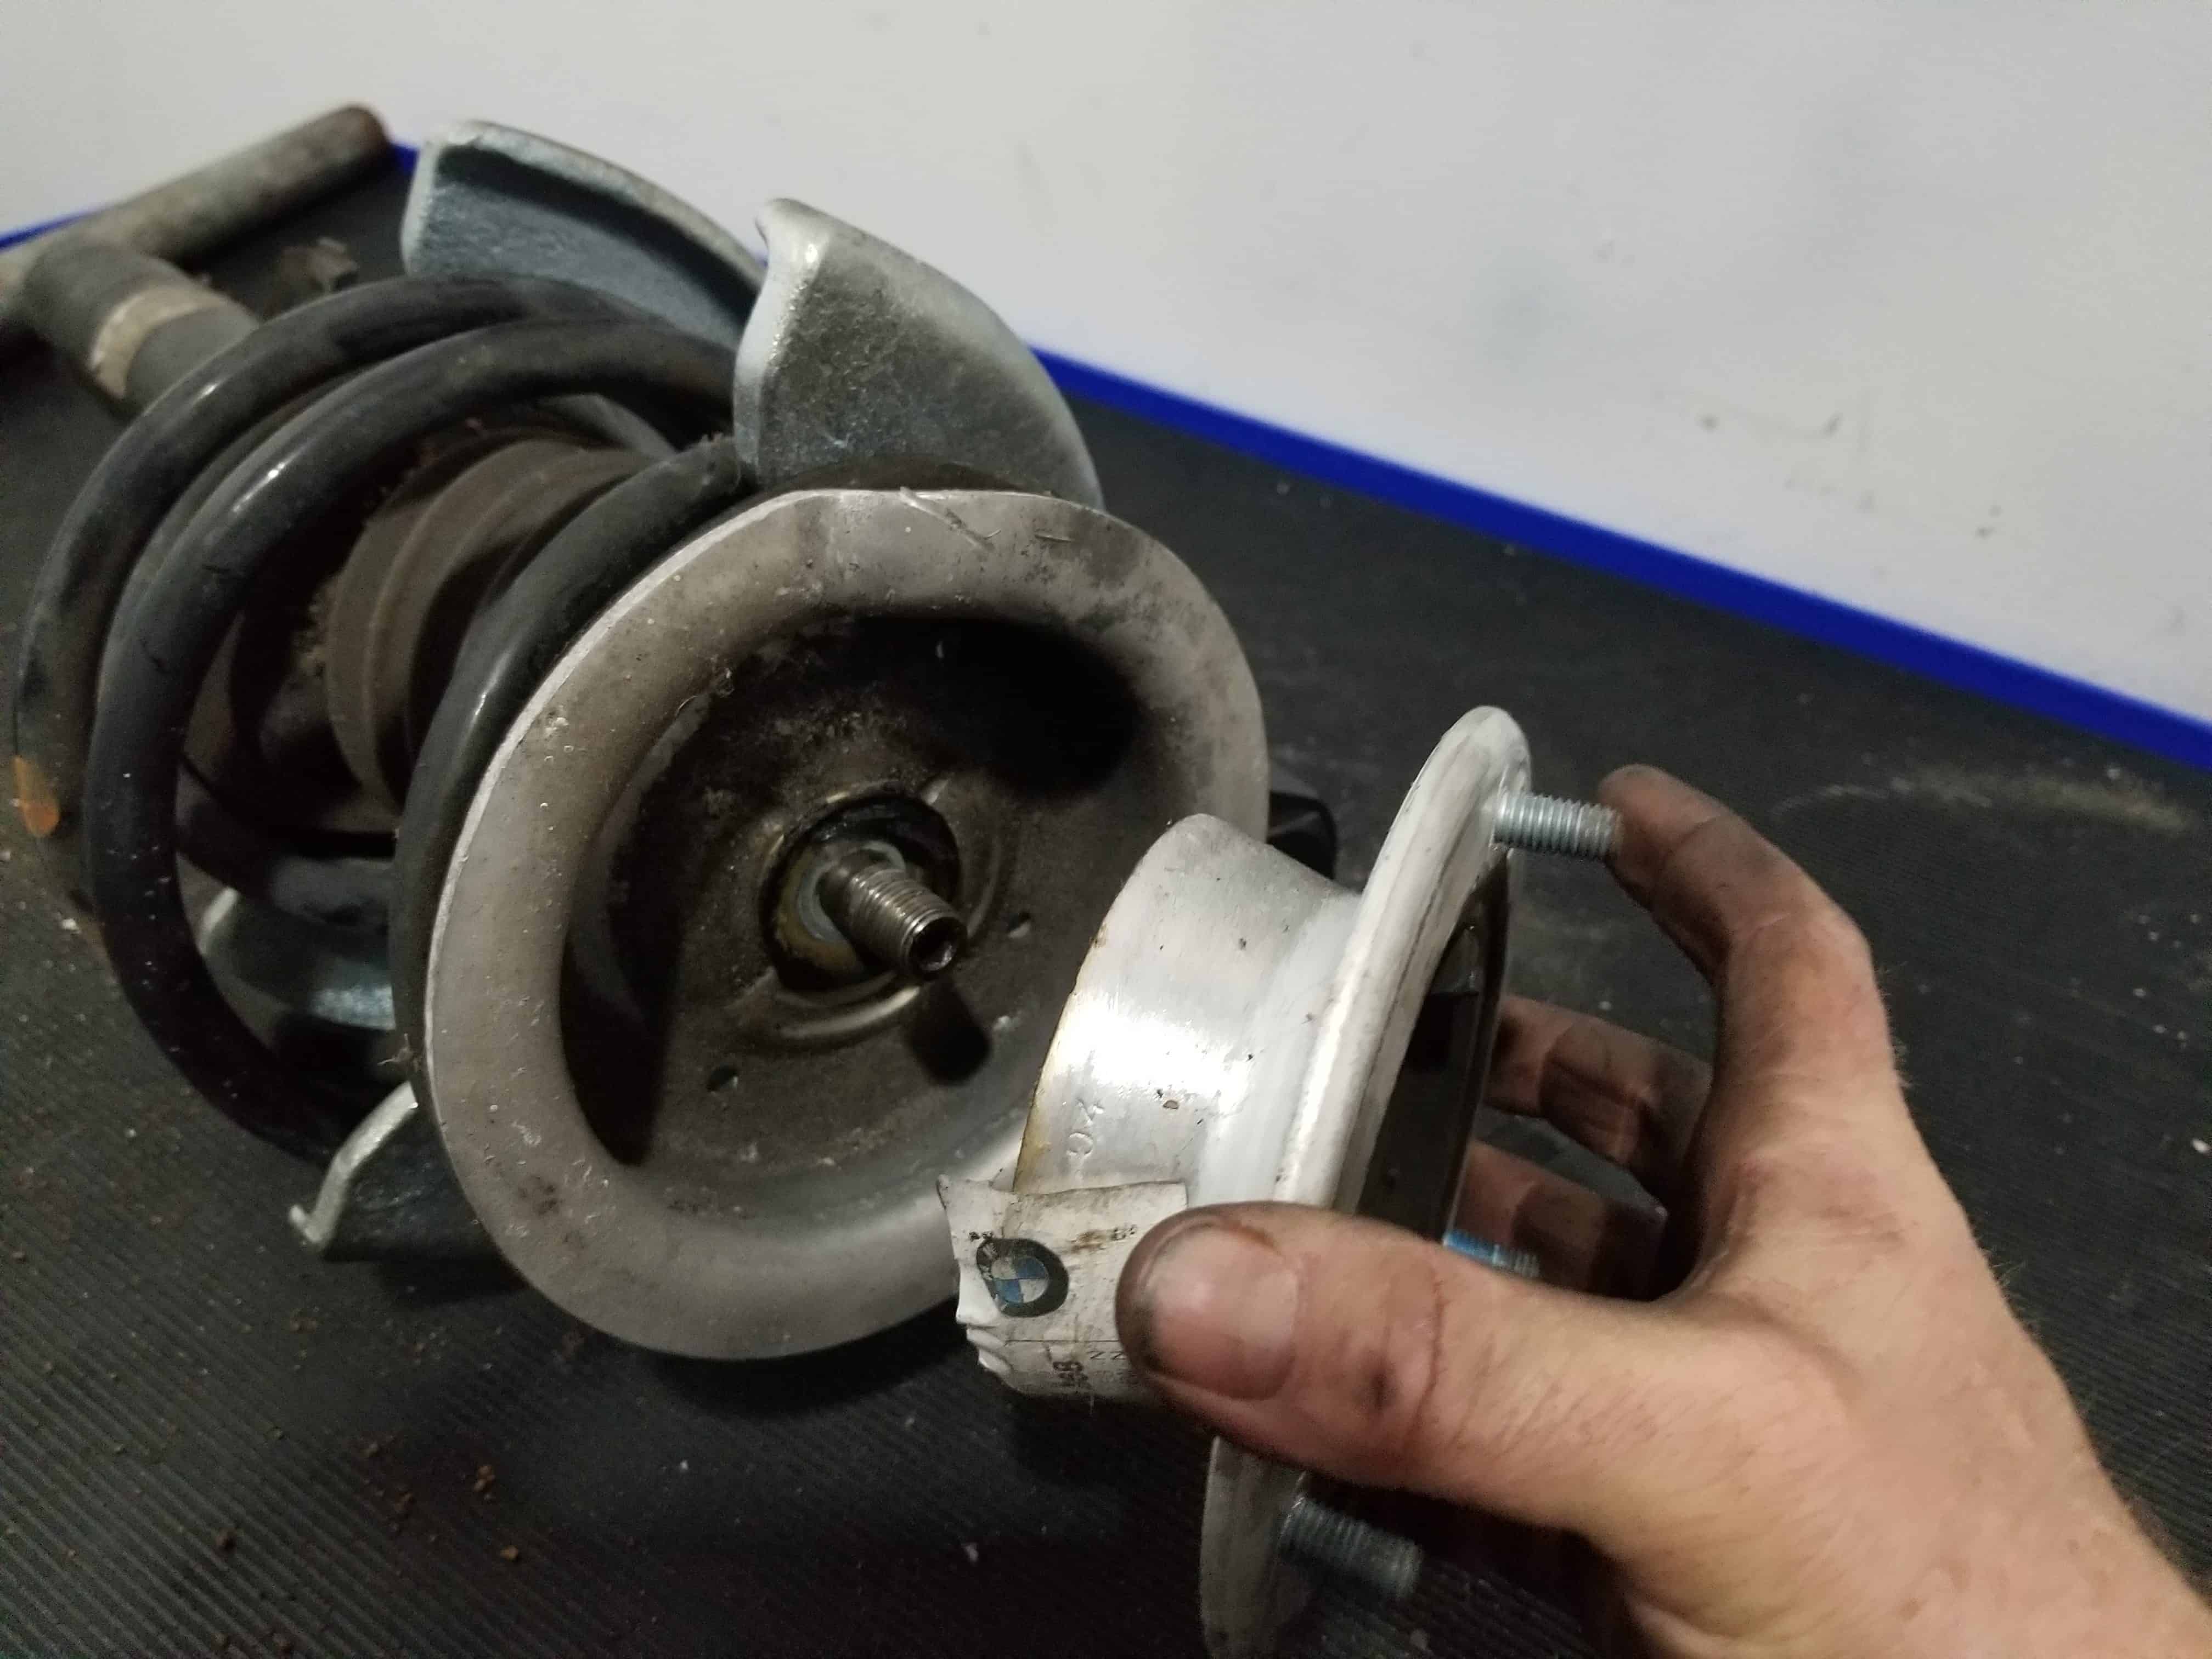
- Remove the front strut mount.
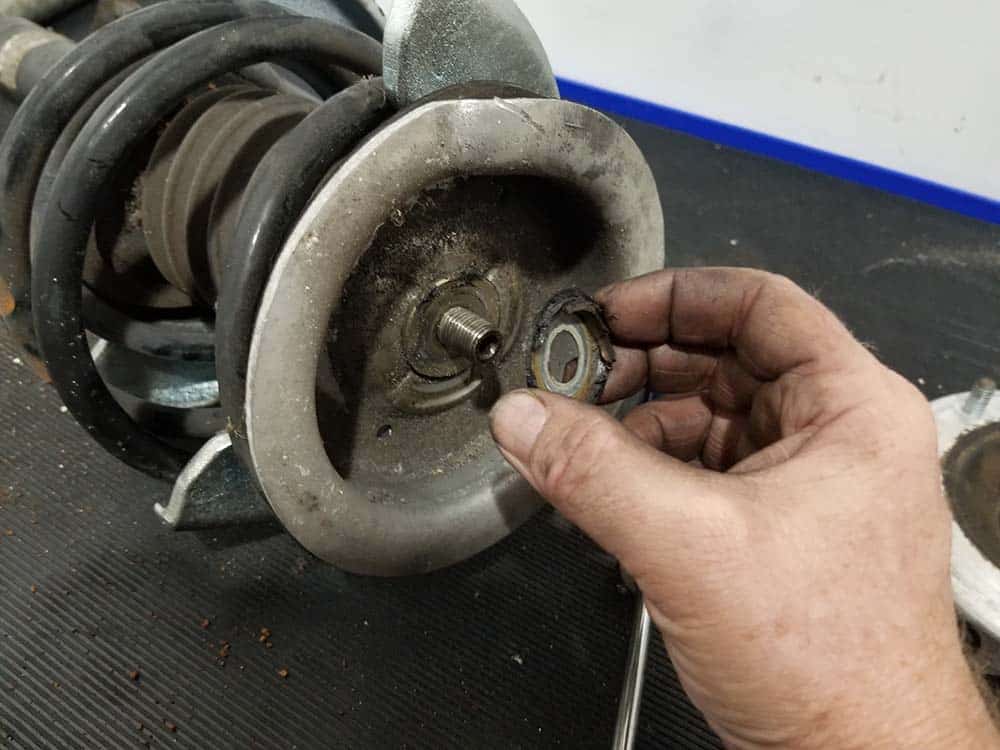
- Remove the dust sealing gasket.
- Remove the front flat washer.

- Carefully remove the front spring perch and upper spring pad.
- Very carefully remove the spring and put away in a safe place, Remember it is under a lot of tension...you do not want to kick it or have it drop off of a work bench.
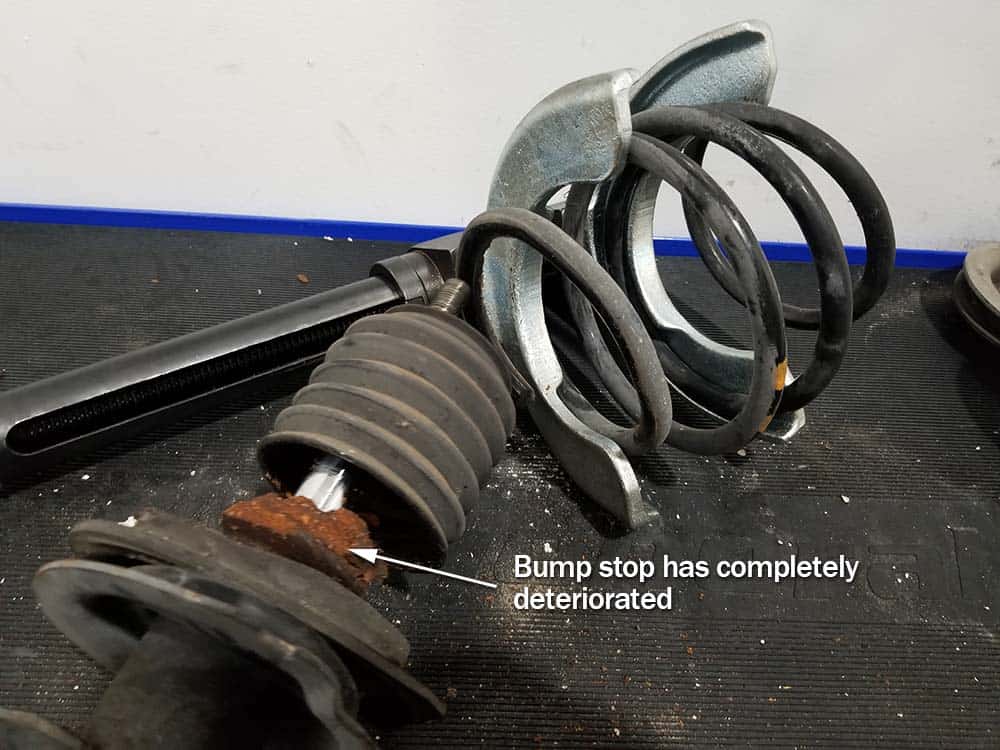
- Remove the bump stop, the dust boot and the lower spring pad. Note that the bump stop may be completely deteriorated on older vehicles, and in some cases may not even be left on the strut.
Section 3 - Assembling the New Strut
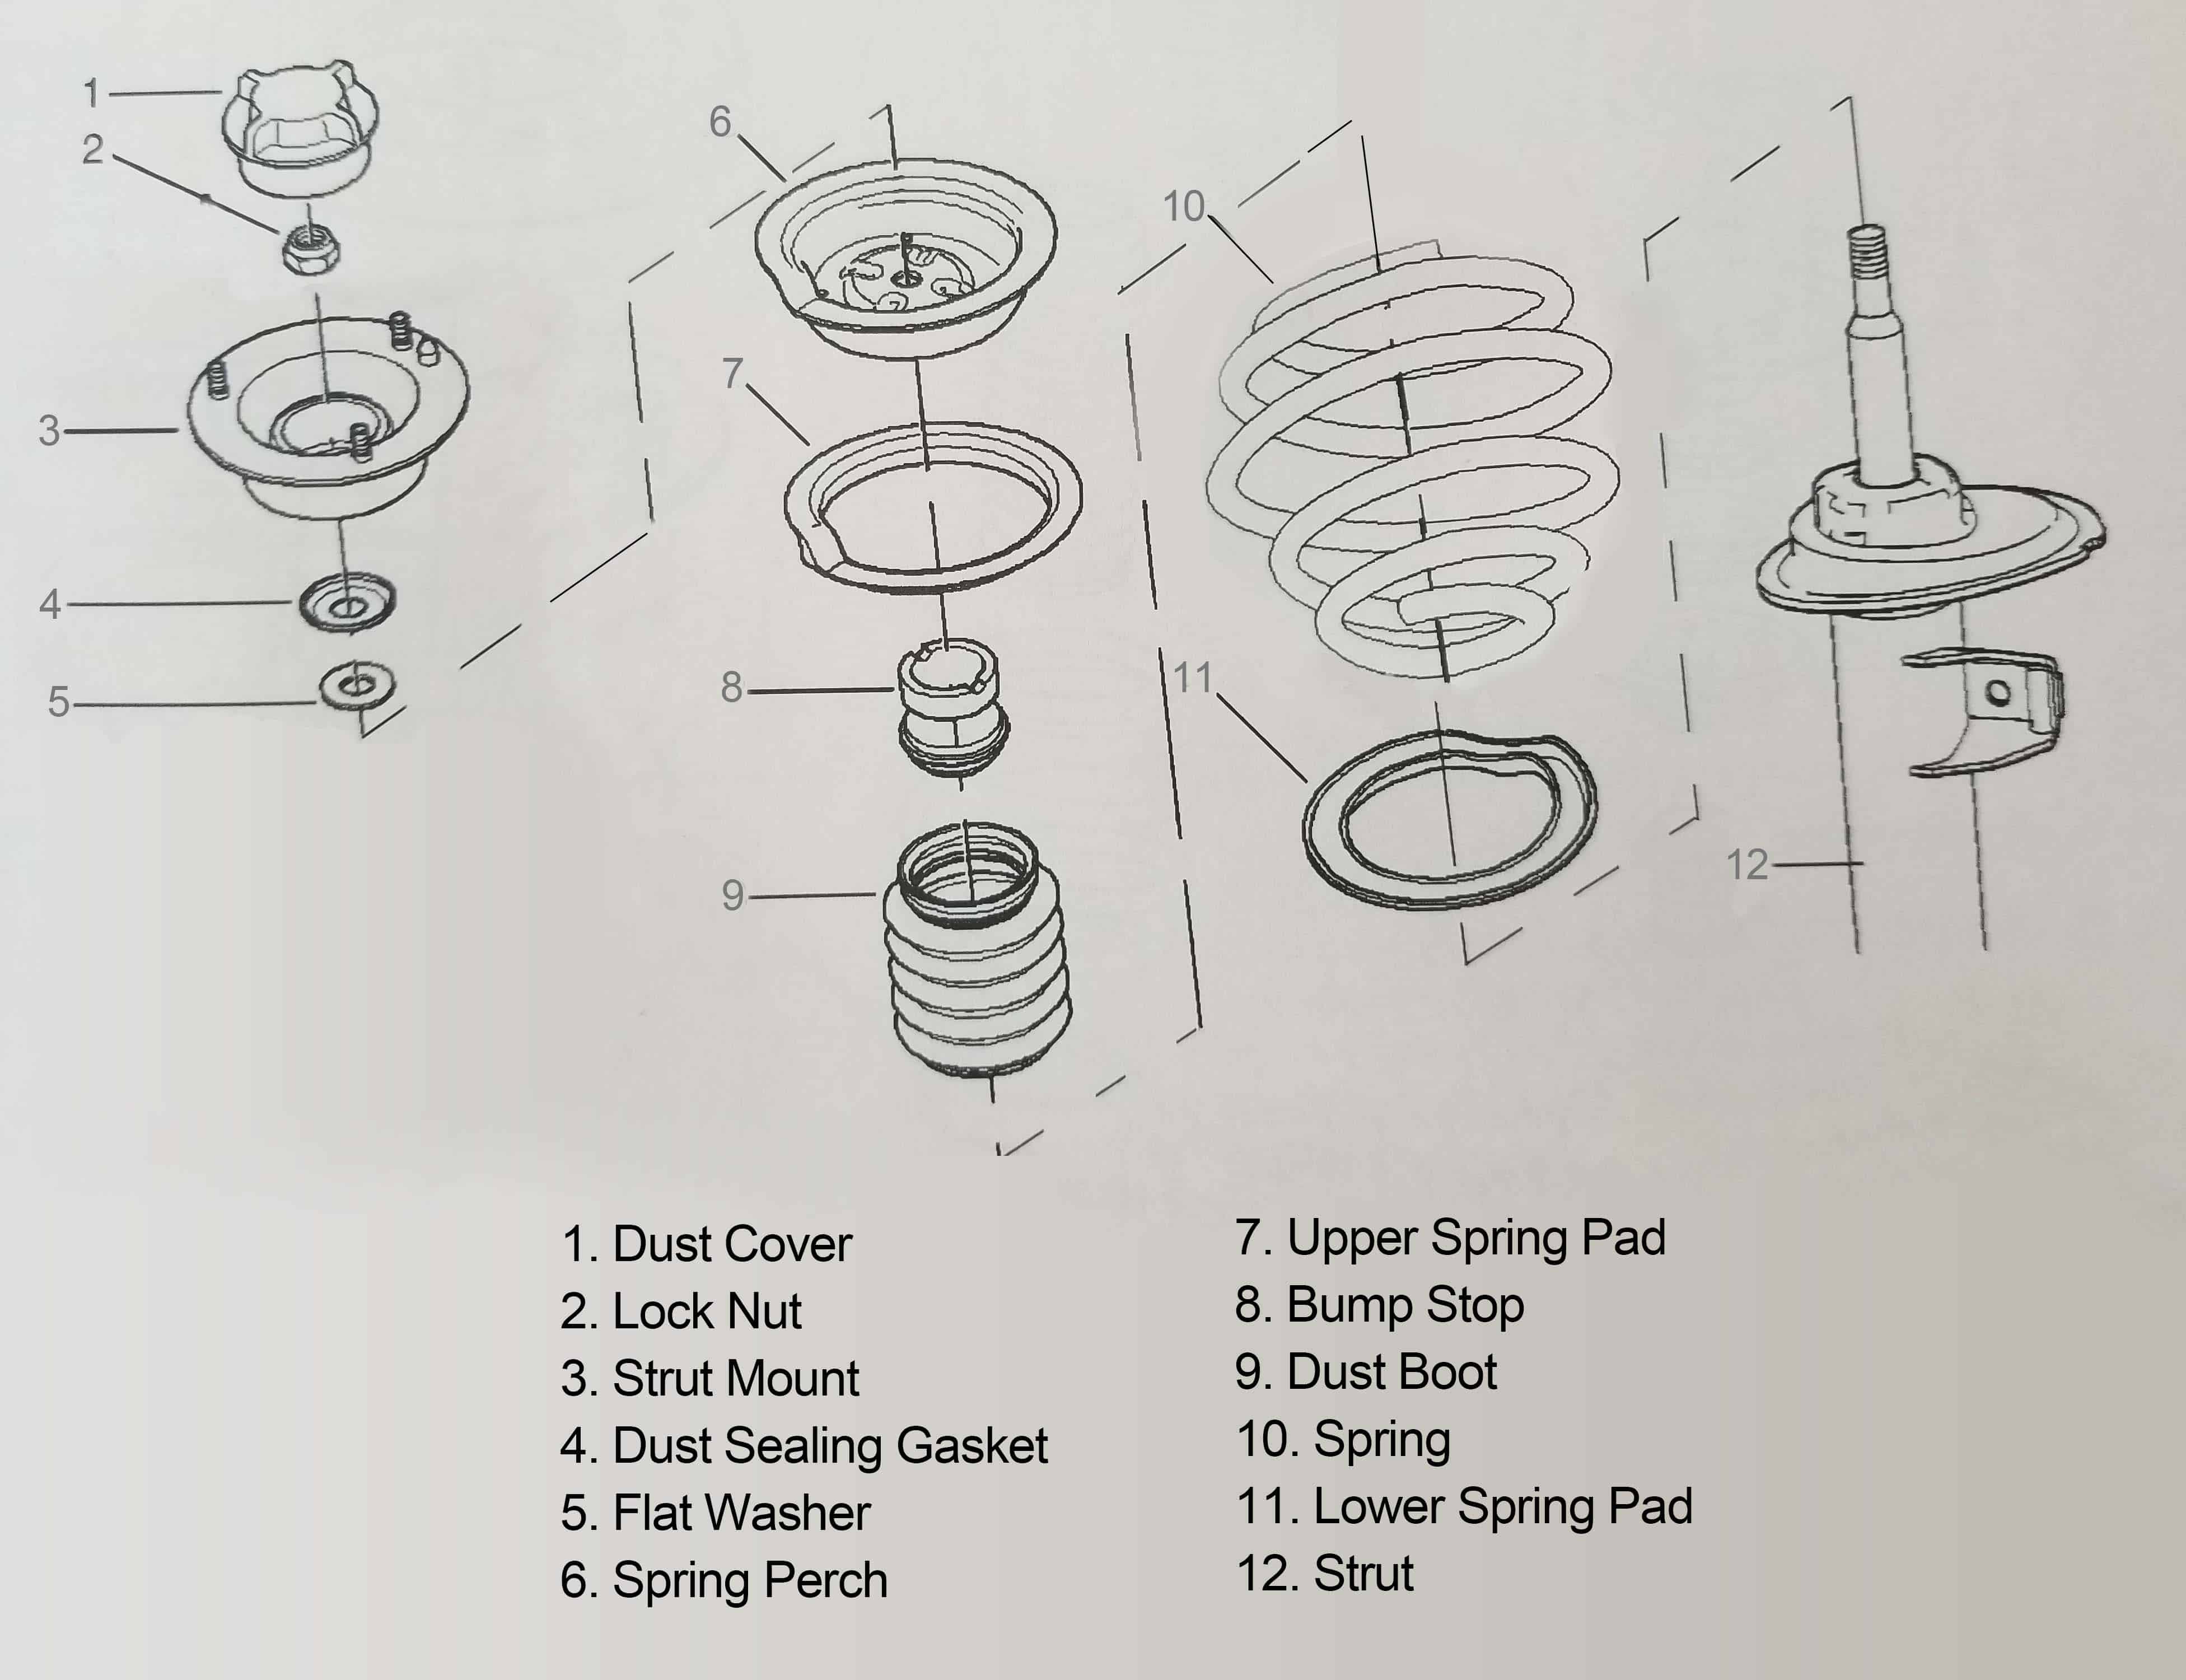
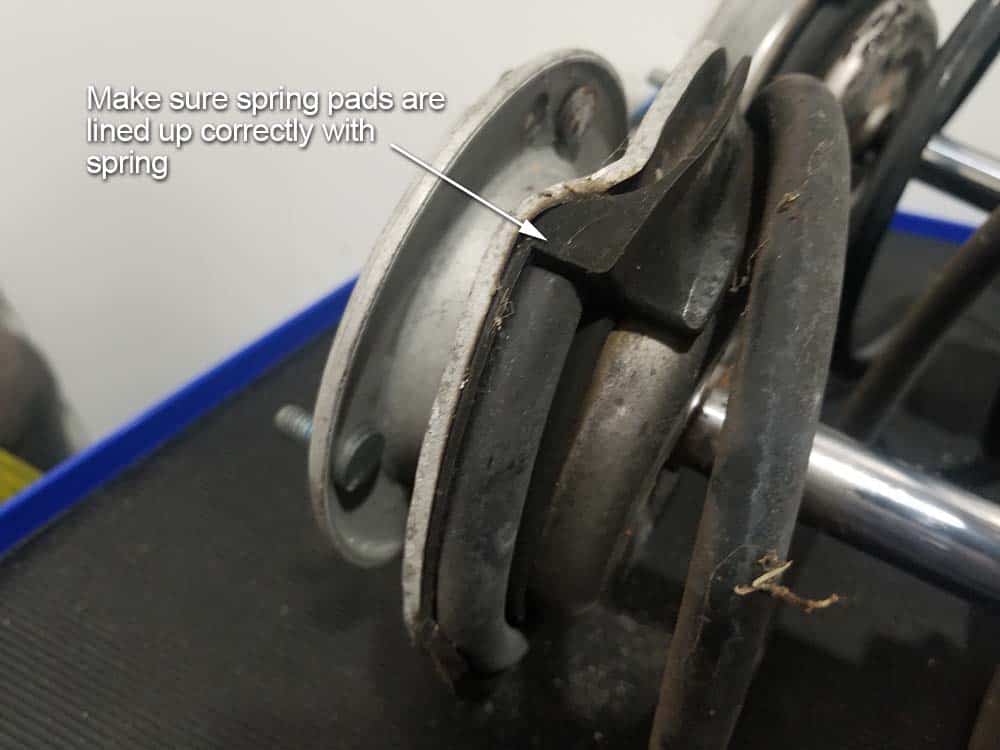
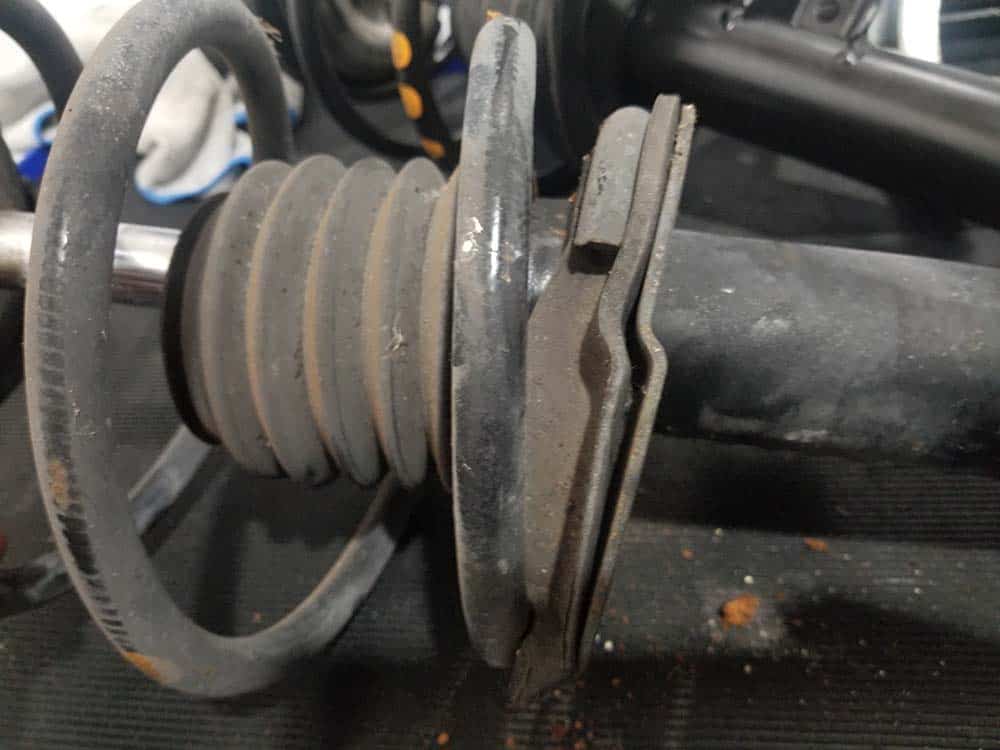
Unless you are using a commercial spring compressor, assembling the new strut can be challenging. Make sure to check the location of the spring pads to make sure they are lined up correctly with the end of the helix.- Reassemble the new strut in the exact opposite order discussed above. We have also included the following reference diagram for your use.
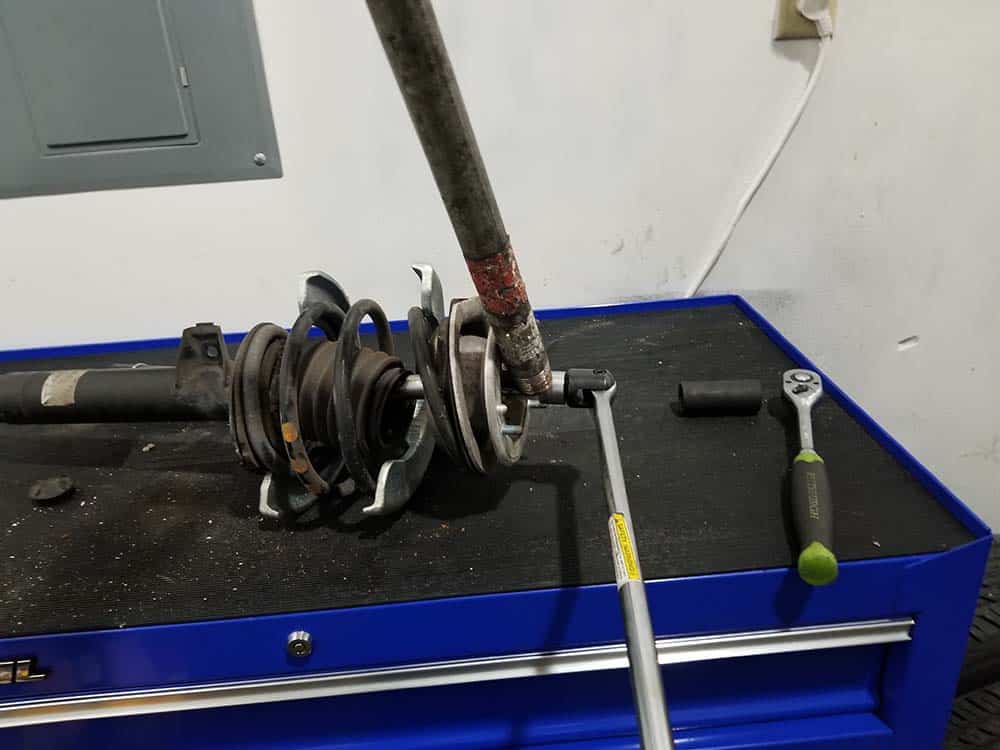
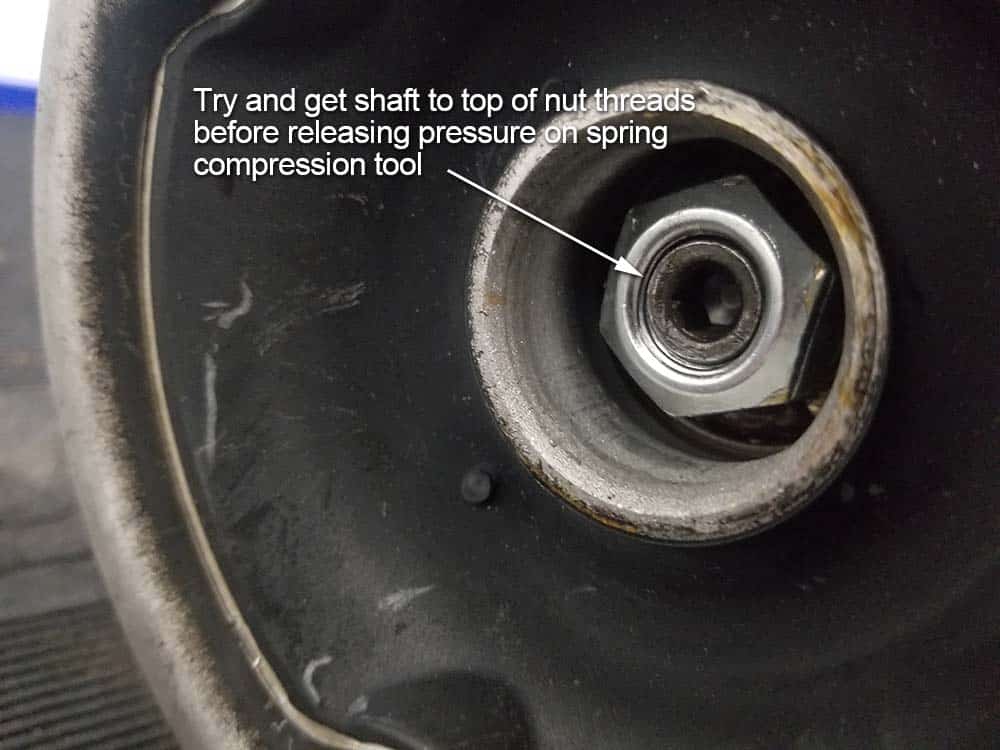
- Install the new lock nut. This may be a bit tricky...you may have to maneuver the new strut around until you can get enough thread through the strut mount to install the lock nut. Be patient...you can get it on with the plate style compressor. Use your strut socket to hand tighten the nut. The threads of the strut shaft should be at the top of the nut before you can release the pressure on the compressor tool (see image below).
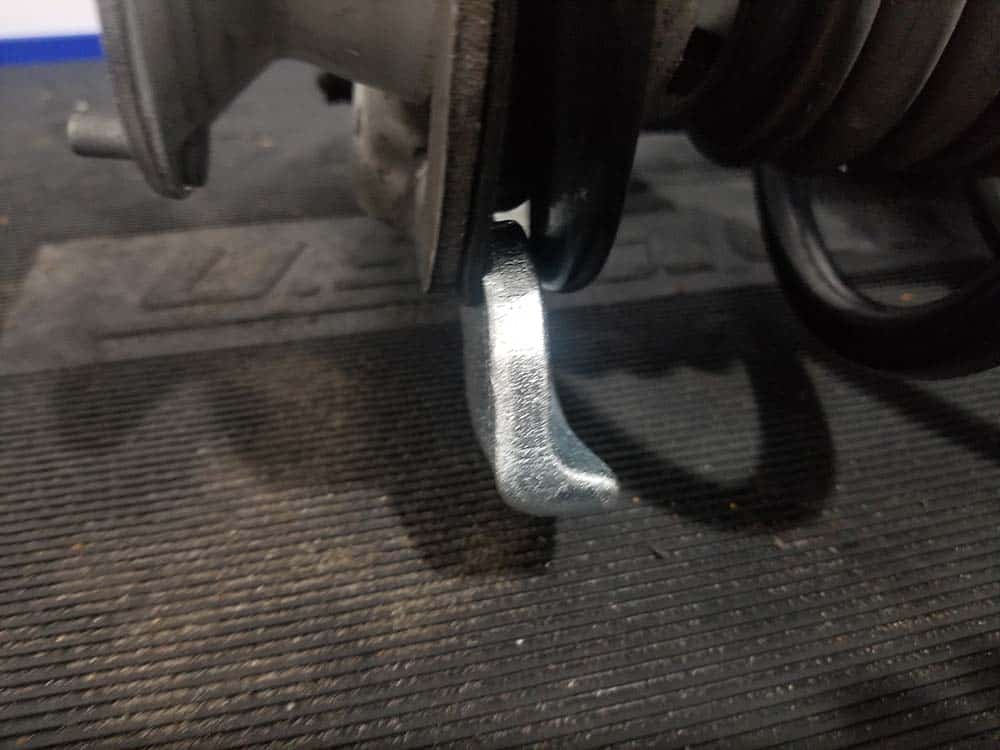
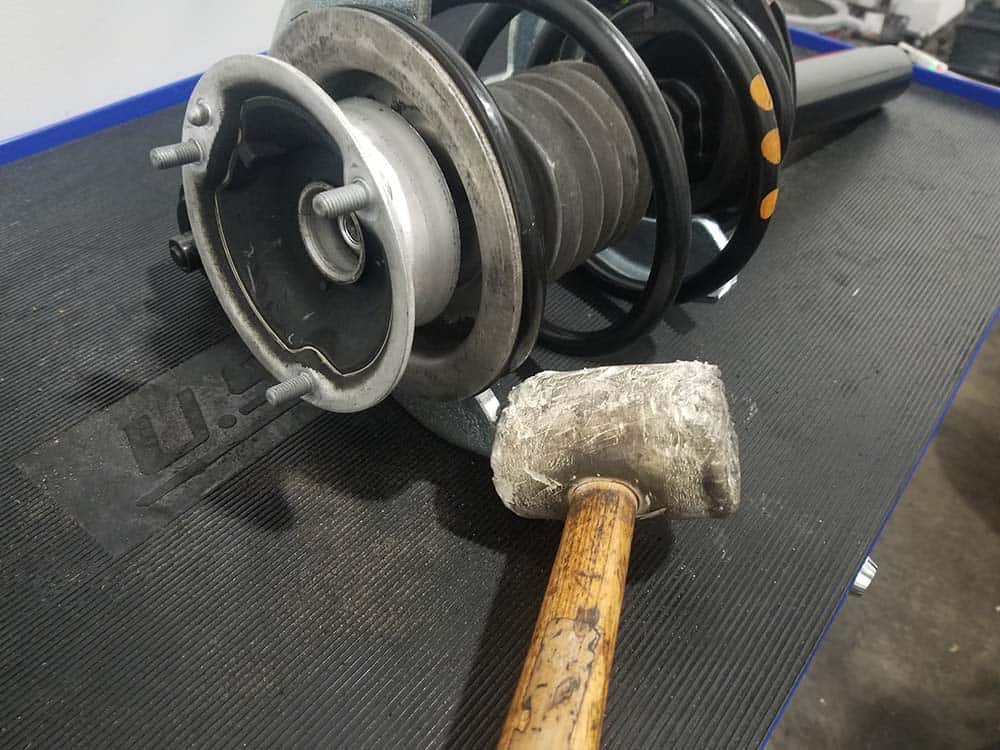
- Carefully release the pressure on the spring compressor tool. Remove tool from spring. Note that part of the plates may get stuck under the spring when the pressure is released. If this happens, use a rubber mallet to gently knock them loose.
- Make sure then spring pads are lined up correctly (as discussed in step 1 above). If they are not, recompress the spring and readjust strut.
- Use a torque wrench and 6mm hex key wrench to tighten the strut lock nut to 64 Nm (47 ft-lb). Since this is a relatively high torque, you may need to use a piece of pipe to hold the hex key while tightening.
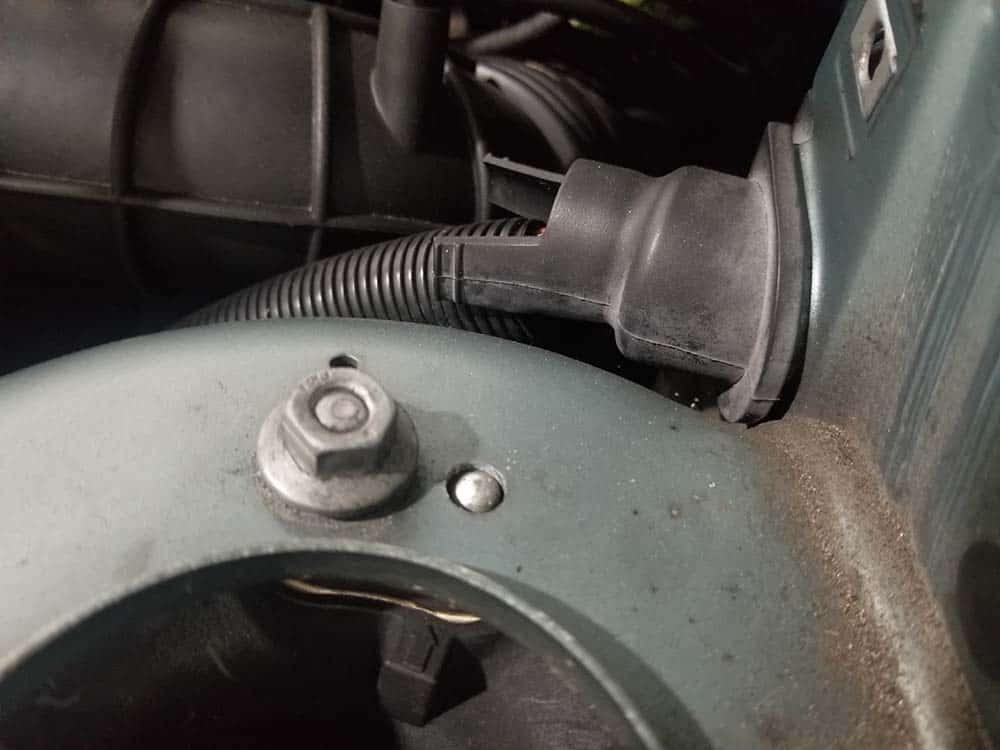
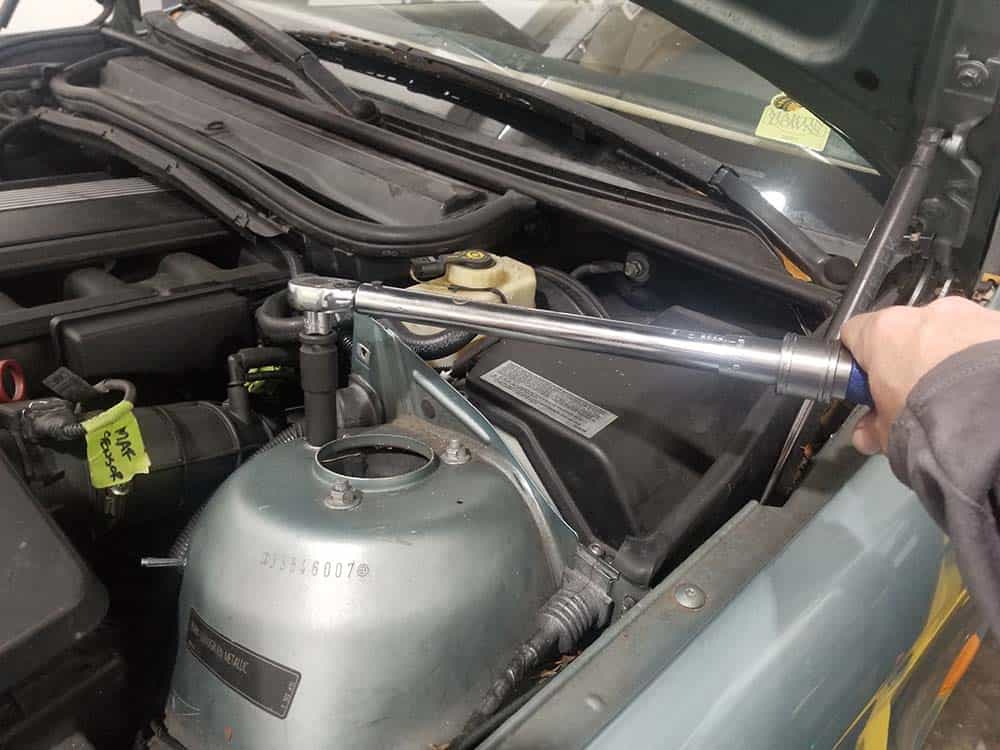
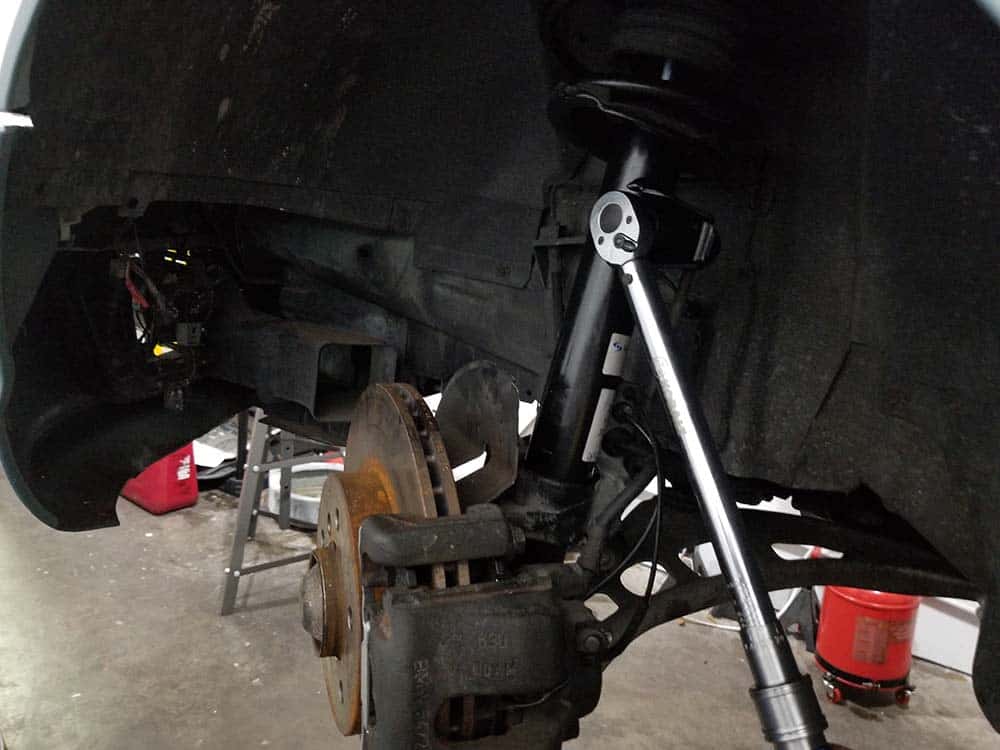
- Reinstall the strut back into the vehicle. Make sure the pin on the strut mount lines up with the hole in the strut tower. Measure the flange of the mounting nuts before torquing...the flange width will determine your final torque value: 18mm flange 24 Nm (18 ft-lb), 21mm flange 34 Nm (25 ft-lb). You can see in the following photo ours are 21mm.
- The strut has two pins on the back of it that line up with the slot in the king pin.
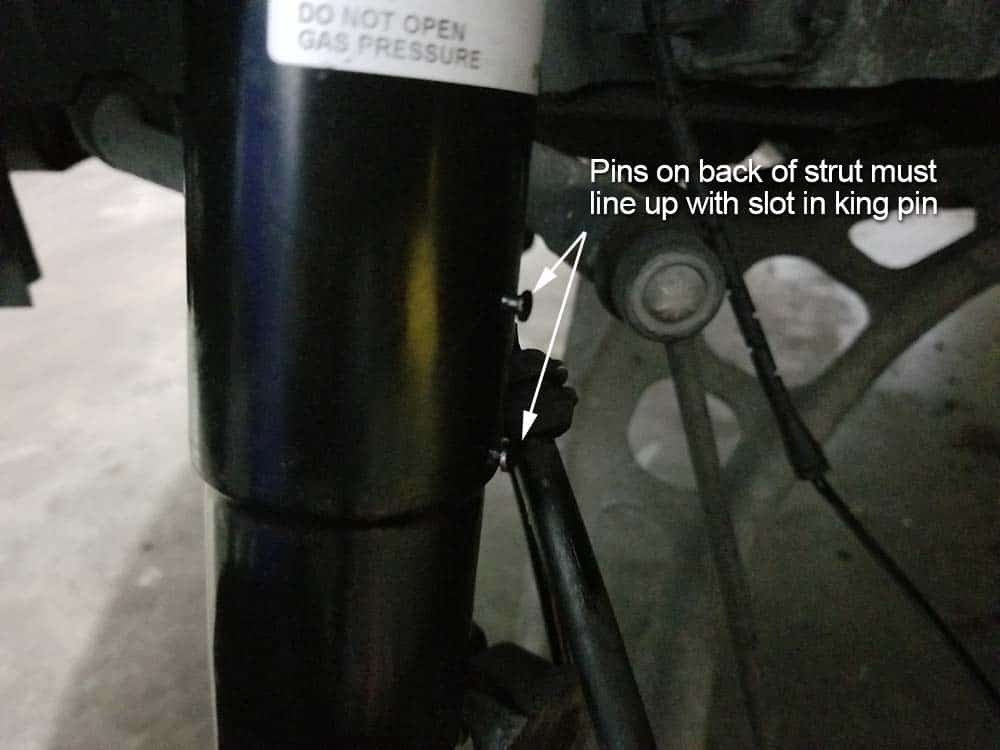
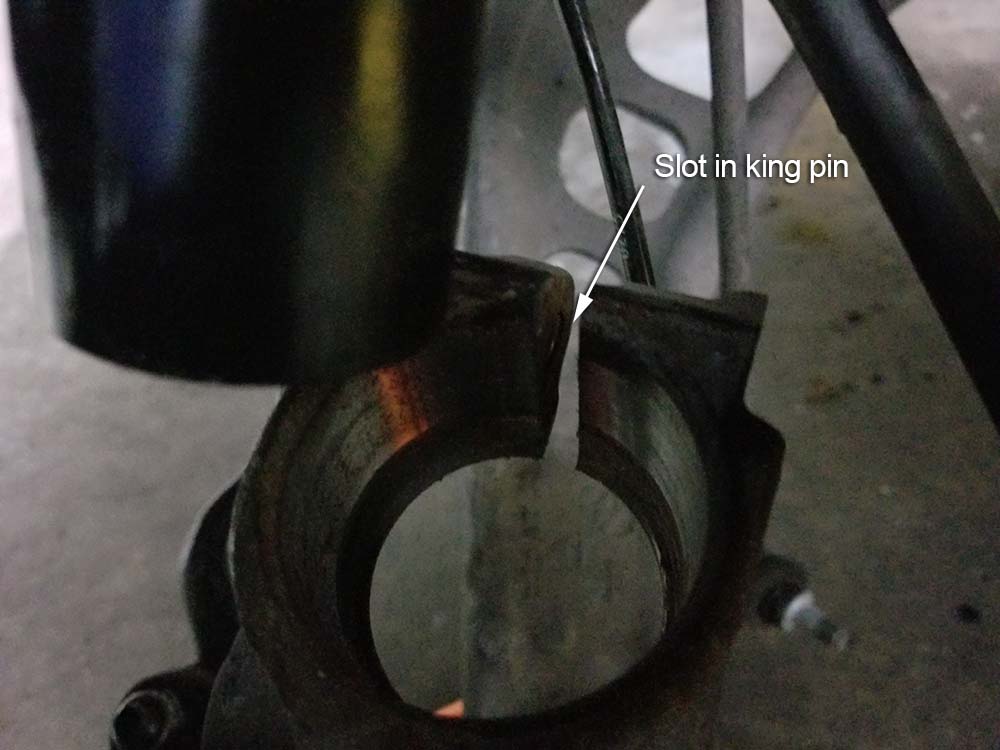
- Using a floor jack, slowly raise the king pin onto the strut. Guide the pins into the slot. Keep jacking the king pin until it stops and the strut starts to compress. At this point the strut is set in the king pin, and the mounting bolt can be installed.
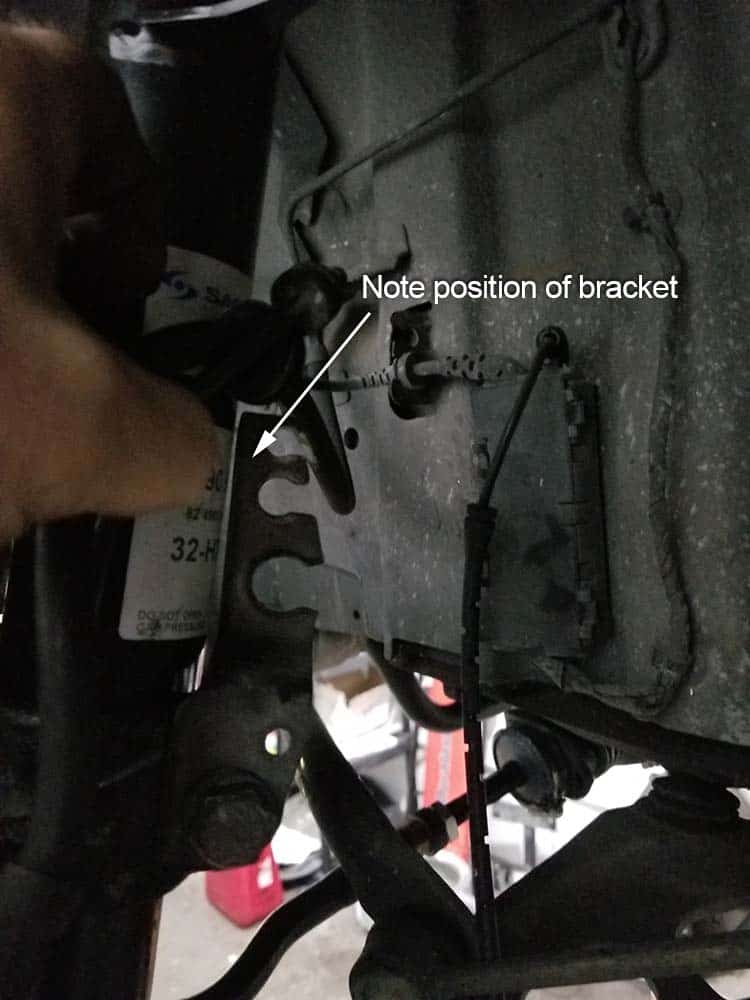
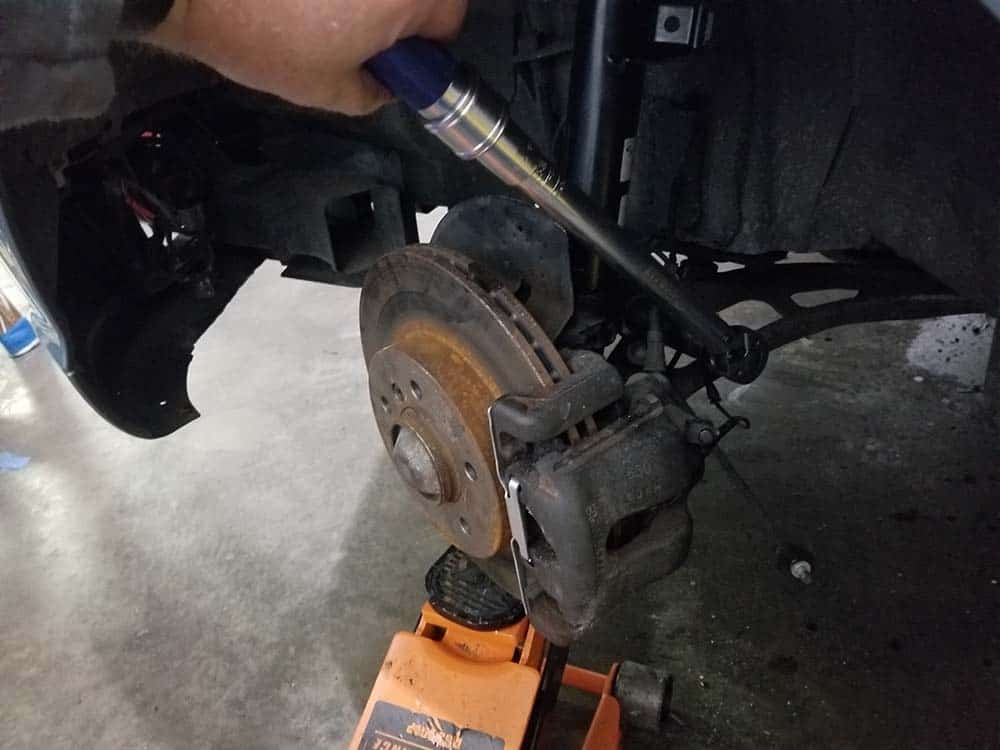
- The mounting bolt may be a bit corroded...spray with some PB Blaster or WD 40 to help reassembly. Make sure you have the right caliper line bracket...the left side has three slots/right side two! Torque the king pin mounting bolt to 81Nm (60 ft-lb).
- Lower the floor jack and remove.
- Replace the caliper/speed sensor/brake pad wear lines.
- Reinstall the stabilizer link and torque nut to 59Nm (44 ft-lb).
- Repeat on opposite wheel.
- Replace wheels and hand tighten lug nuts.
- Lower vehicle and torque lug nuts to 122 Nm (90 ft-lb).
BMW E46 Strut Replacement Finished