
Affiliate link disclosure – The BMW Repair Guide uses affiliate links in their site. For more information on affiliate links, please click here.
Repair Summary
This article gives detailed instructions on replacing the intake manifold gaskets in a BMW with the M60 8 cylinder engine. Even though we used a 1995 840i to perform this repair, this article can be applied to any vehicle with the BMW M60 V8 engine including the 5,7 and 8 series with minor modifications to the repair steps.
A BMW M60 intake manifold gasket replacement can help cure a rough idle and poorly performing engine.
We have said it in countless articles, but it is worth repeating again. As our beloved BMWs from the 1990s begin to reach the geriatric age of 30 years old their parts are beginning to rapidly fail...especially in the engine compartment. The components most susceptible to failure are the rubber gaskets, seals, hoses, and plugs that comprise the air intake/vacuum system in the M60 V8 engine. As these parts age, they dry out, causing them to crack. The cracks allow unmetered air to infiltrate the cylinder heads which plays havoc with the finely tuned fuel ratios being calculated by the engine control module (DME).
The BMW M60 manifold gaskets are a well-known source of vacuum leaks that affect all of the models they were manufactured in, most notably the E34 530i/540i, E31 840i, and the E32/E38 730i and 740i vehicles. The most common symptom is a very rough idling engine...especially during cold startups. In some models (like our 840i) the engine will visibly shake back and forth laterally as the motor struggles to adjust the fuel being delivered by the injectors. Other symptoms of failing BMW M60 intake manifold gaskets may include hesitations in acceleration, cylinder misfires, and overall poor engine performance.
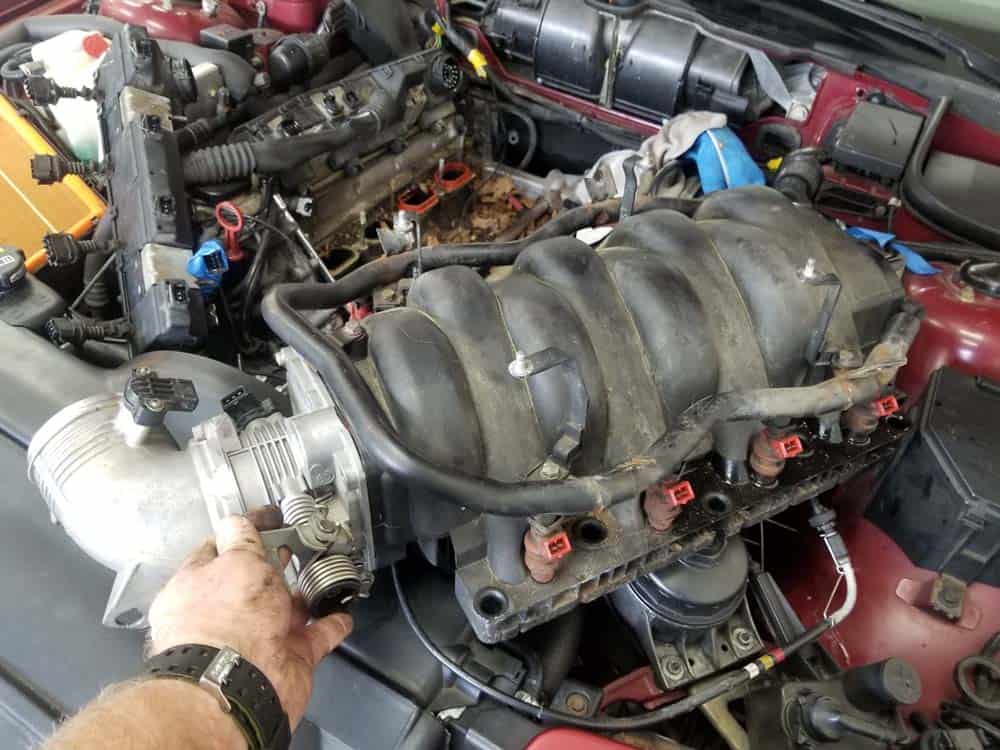
In order to perform a BMW M60 intake manifold gasket replacement, the intake manifold must be removed from the top of the engine. Relatively speaking, the BMW M60 V8 is a very straightforward engine to work on; the intake manifold is easily accessible with very few components that need to be cleared out of the way (as compared to smaller six-cylinder engines). It is very important that care is taken when removing the main wiring harness (also known as the "loom"). Like all other plastic engine parts, the main wiring harness becomes brittle with age and is susceptible to breaking during removal. It is also very important that new spacer bushings are installed when performing a BMW M60 valve cover gasket replacement. For more information on installing new spacer bushings, please see our parts section below.
A BMW M60 valve cover gasket replacement also creates an excellent opportunity to change out other important seals which are also prone to failure, including the throttle body and positive crankcase valve (PCV) gaskets. For more information on performing these repairs, please see our article BMW M60 Throttle Body Gasket Replacement – 5,7,8,X5 Series 8 Cylinder.


View the detailed parts diagram for this repair.
Includes detailed part diagrams, part numbers and links to purchase all of the required components needed to complete this repair.

Before starting this repair, you must have the following required parts.
BMW M60/M62 engine
Four gaskets are required. Faulty intake manifold gaskets can cause vacuum leaks and cause your engine to run poorly. Replaced every time you remove the intake manifold, it's important to know everything is sealed up and running good.
BMW M60/M62 engine
10 are required. These are high quality spacer bushings from an Original Equipment Supplier.
All BMW M60 engines. BMW M62 engines with production date to 09/1998
This is the same factory throttle body gasket that would be installed at the dealership.
BMW M60/M62 engine
An integral part of the emissions system, the PVC valve lets the crank case breathe. This allows proper intake and exhaust flow, resulting in proper running and operation. Often split from underhood heat and age, this vents excess oil into the engine compartment. Replace it now.
BMW M60/M62 engine
This is the same factory PCV gasket that would be installed at the BMW dealership.
Section 1 - Preparing the Engine for Intake Manifold Removal
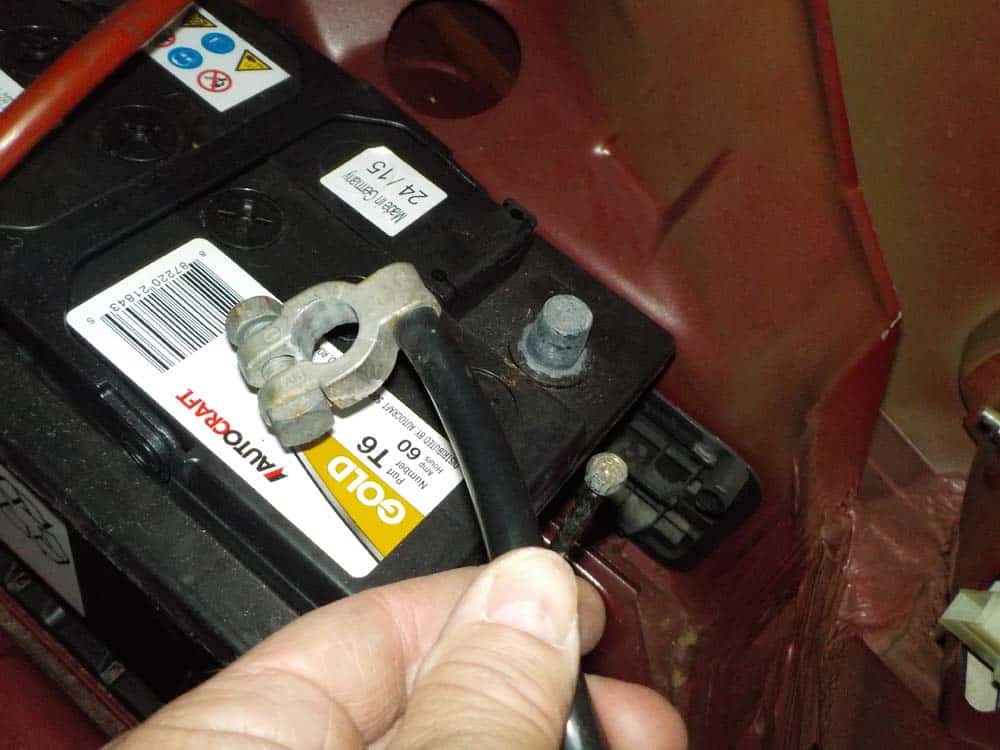
Preparing the M60 engine so the intake manifold can be removed is a very straightforward procedure and should be performed with very little difficulty. As we discussed at the beginning of this article, it is important to remember that you are working on an engine that is close to 30 years old. Use patience and care during disassembly...especially with plastic parts like the wiring harness ("loom"). Forcing the wiring harness connections apart can cause them to crack and break, turning your intake manifold replacement into a $1000 plus repair.- Use a socket wrench to disconnect the negative terminal from the battery before starting this repair. Always cover the terminal with a clean rag to avoid accidental contact during the repair. If working on a vehicle with 2 batteries (8 series), disconnect the negative terminal from both batteries. ALWAYS disconnect the battery(s) before performing any type of mechanical repair, especially in the engine compartment.
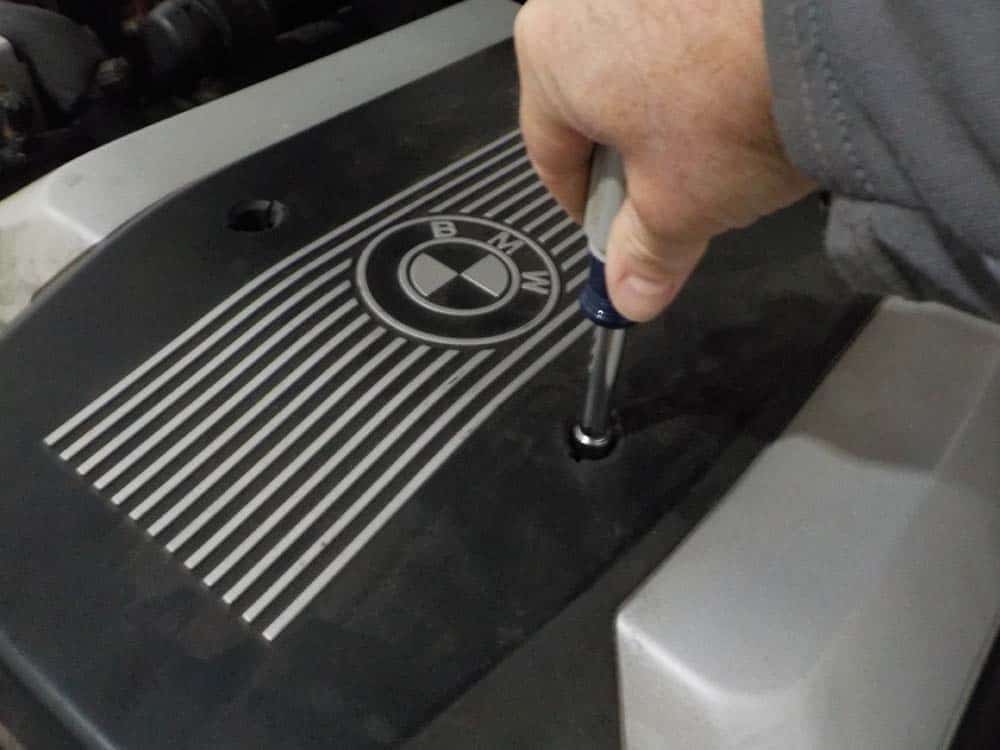
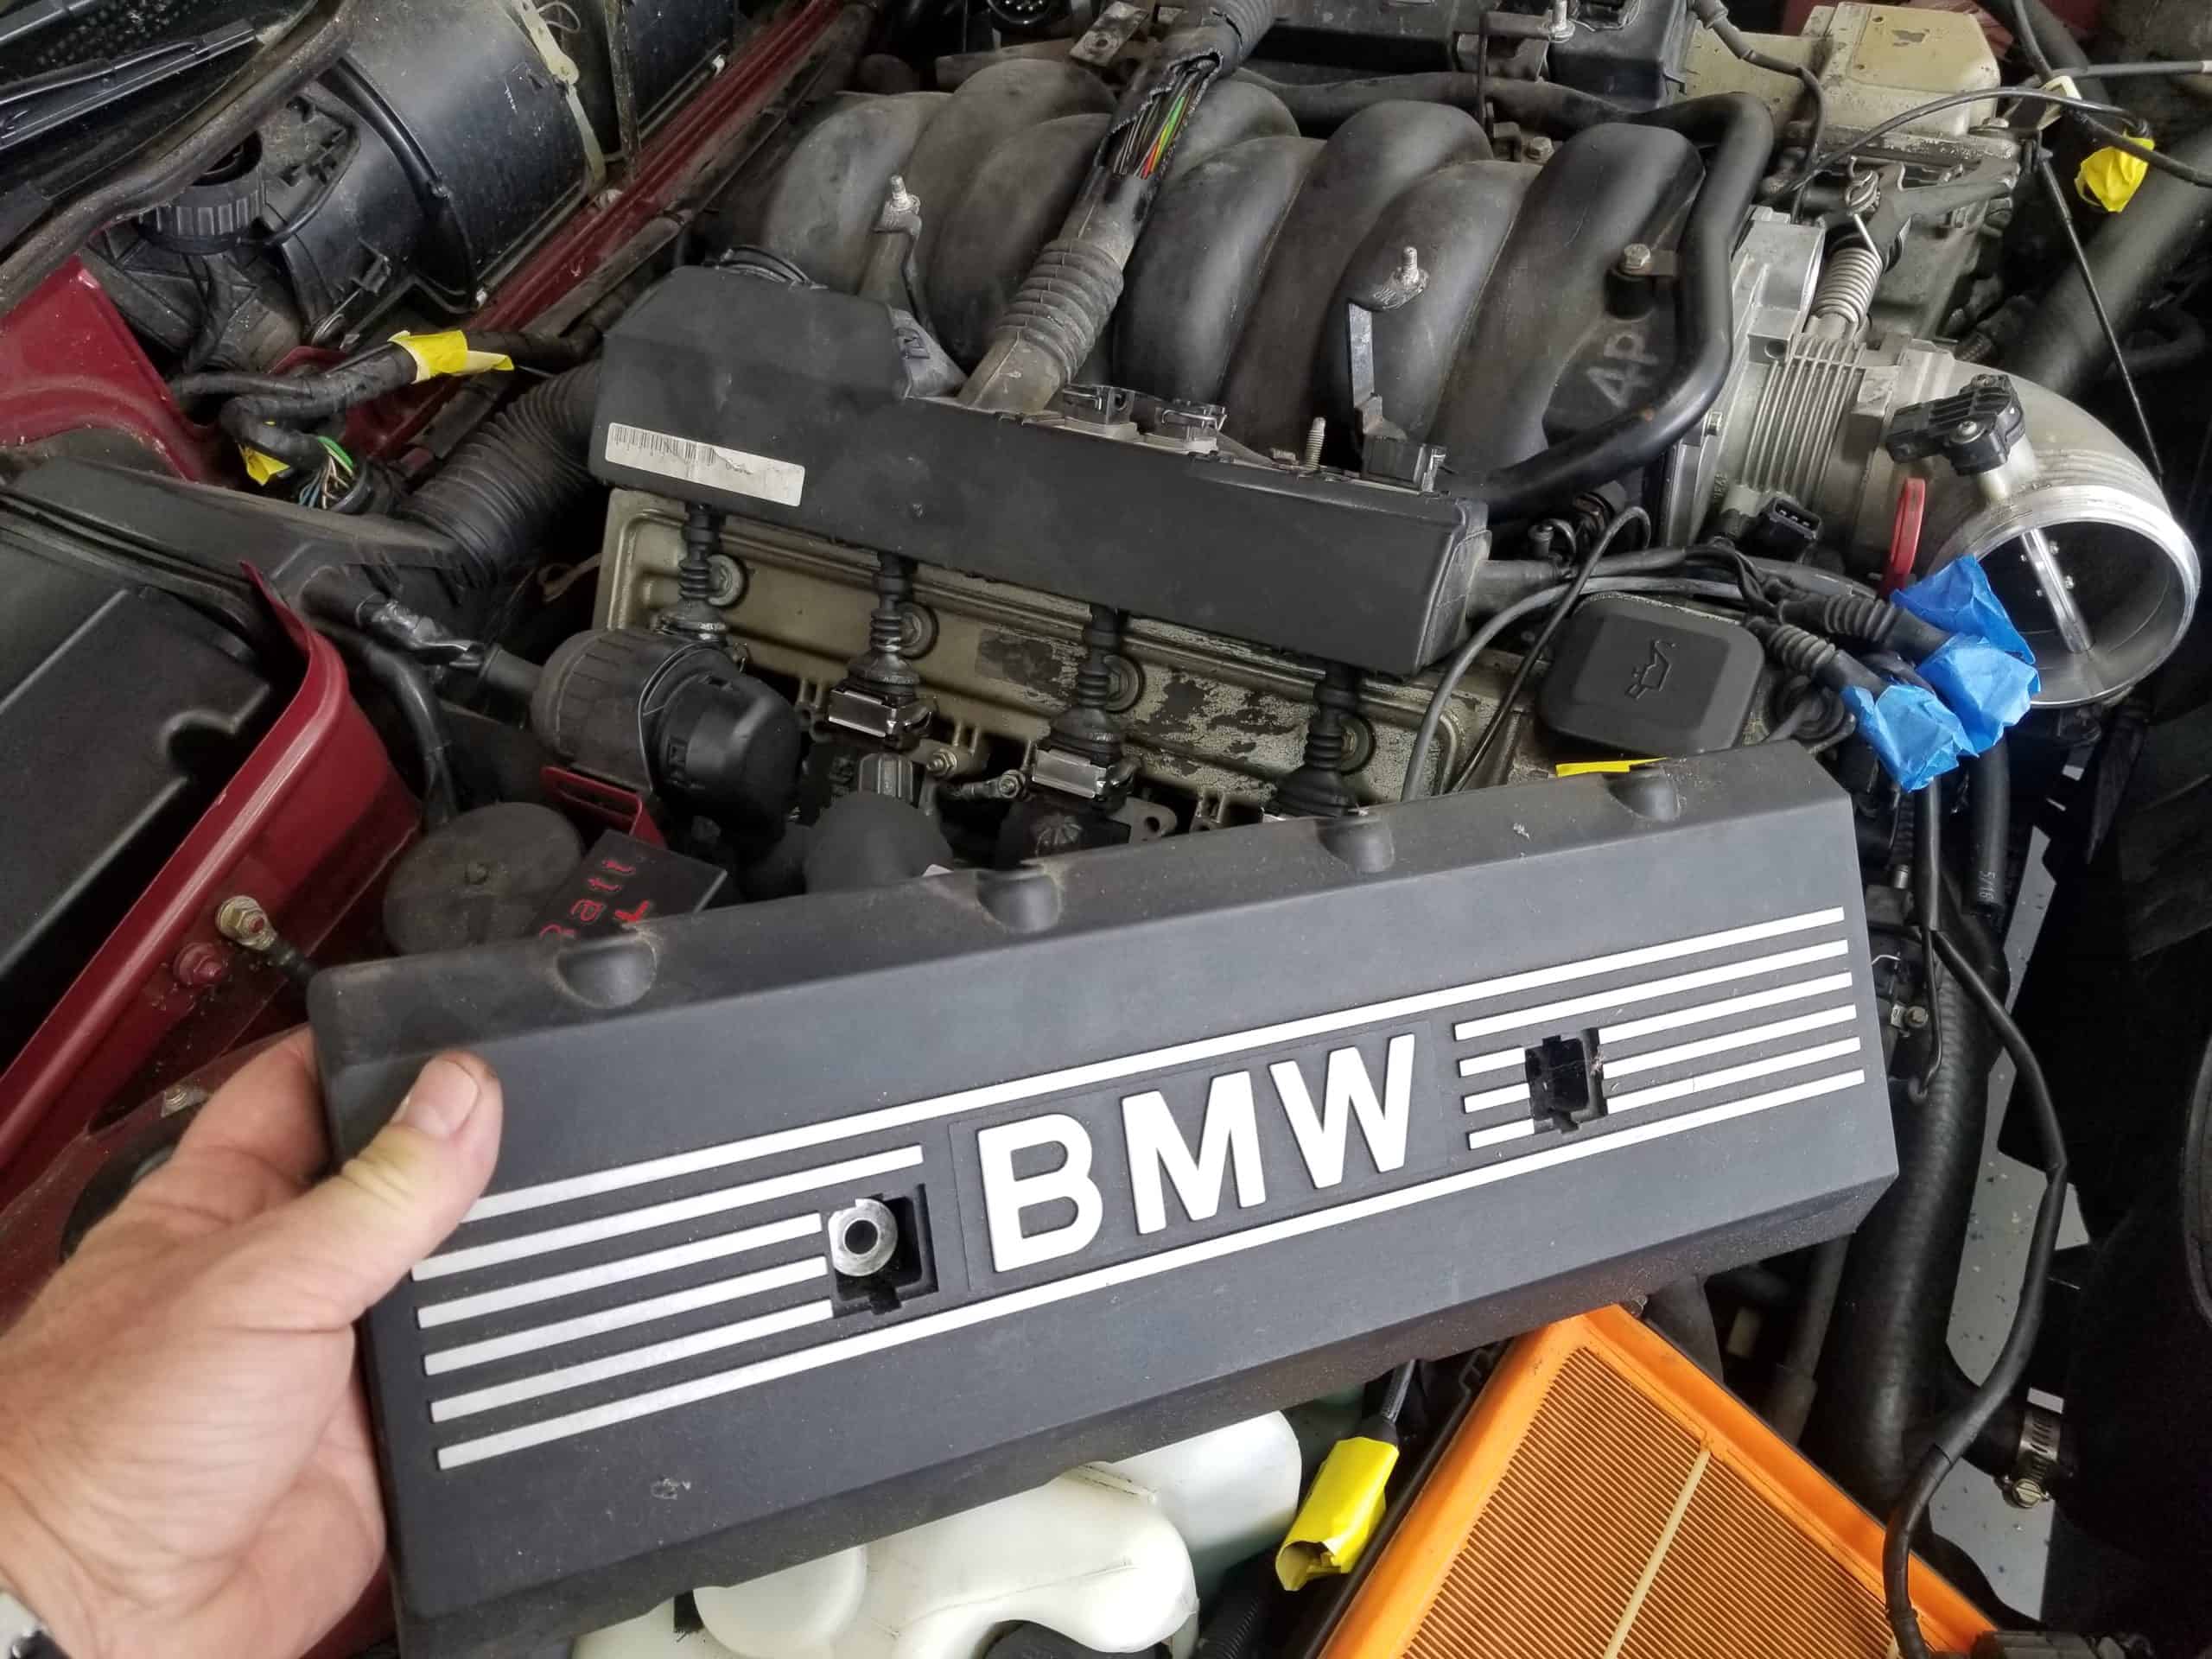
- Remove the four 10mm nuts anchoring the top engine cover. Remove cover from engine compartment.
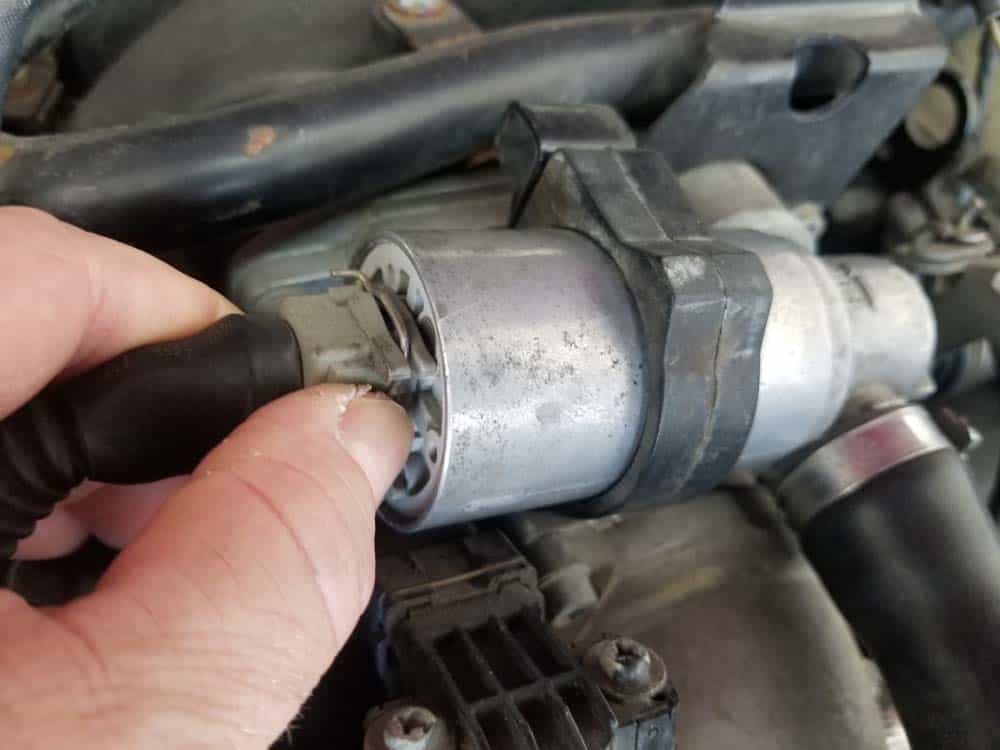
- Disconnect the idle control valve by pinching in the metal release clip and pulling the plug free.
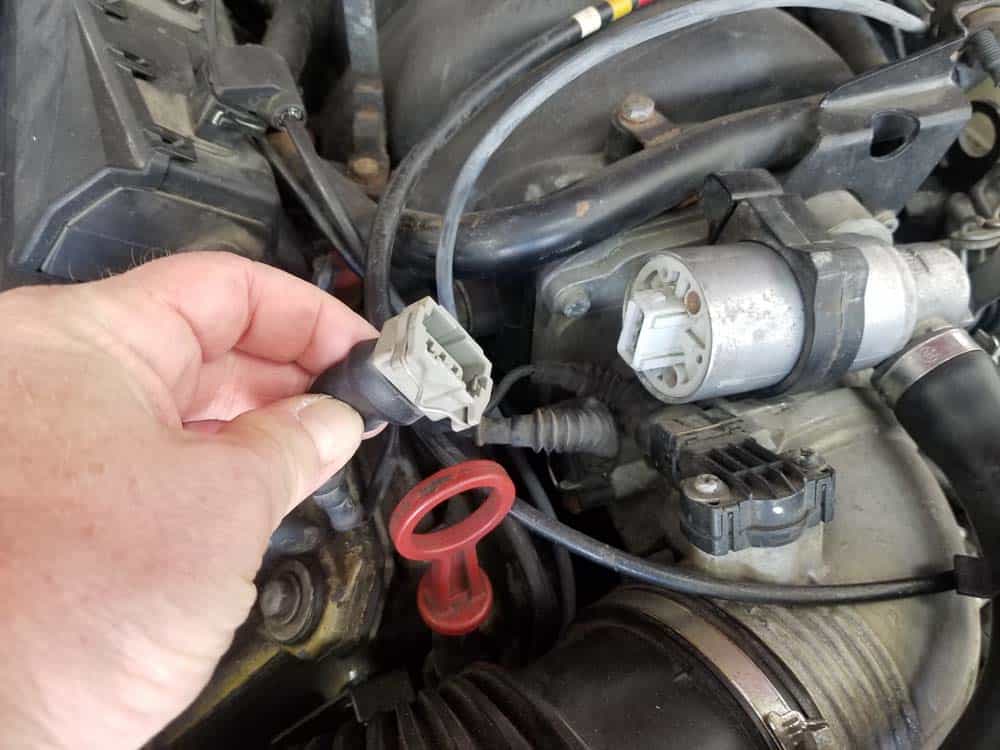
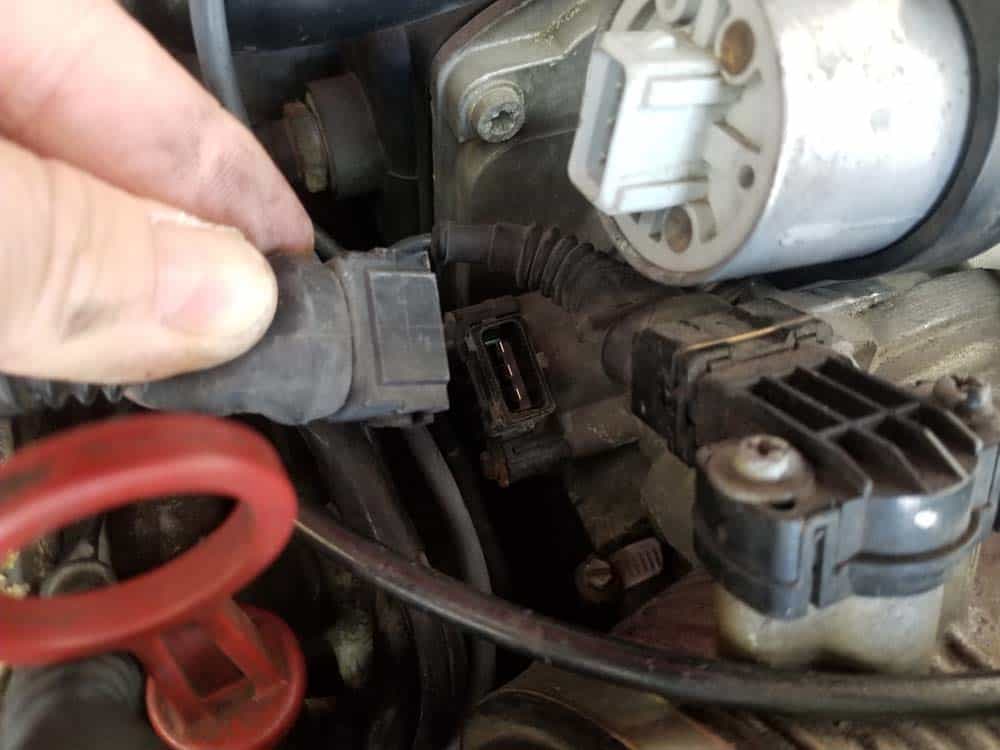
- Next, disconnect the throttle body.
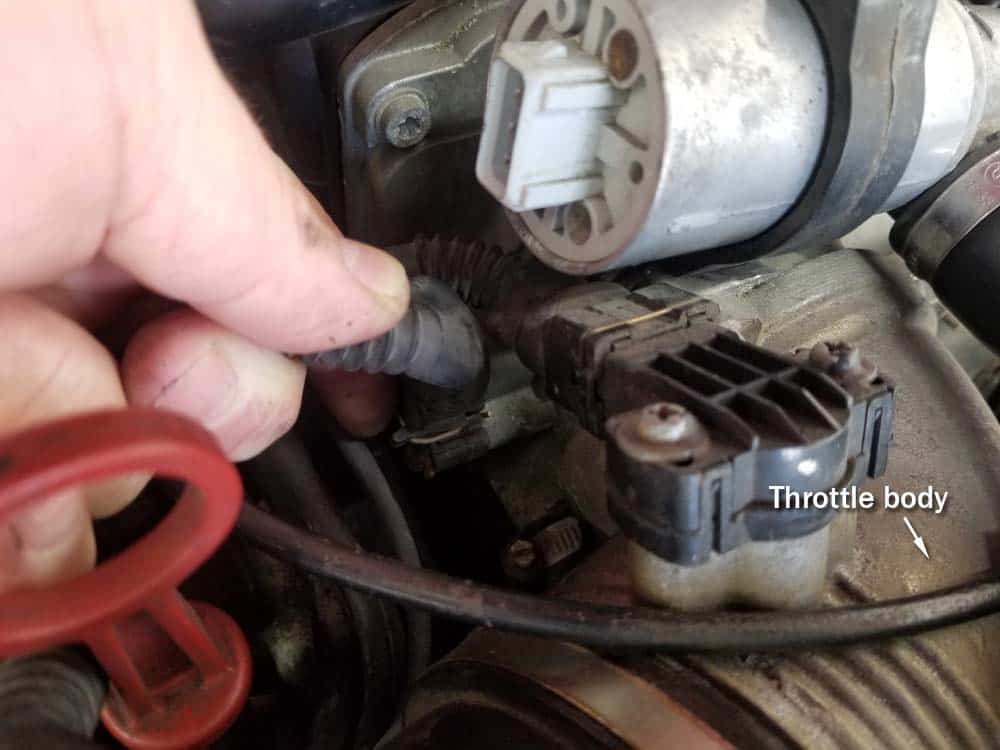
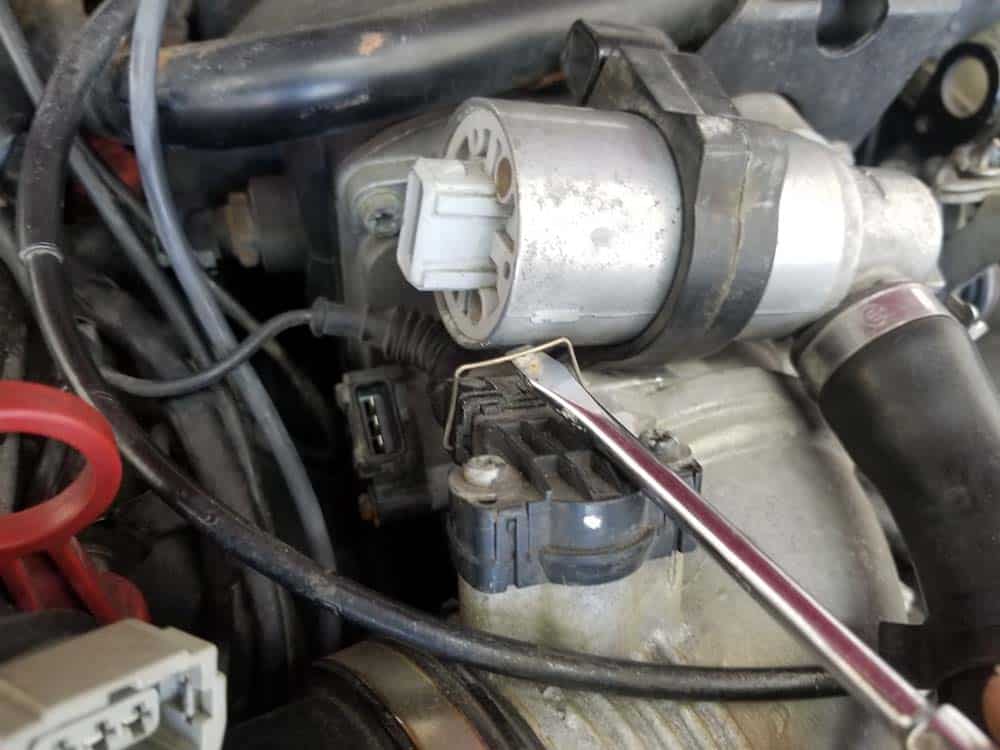
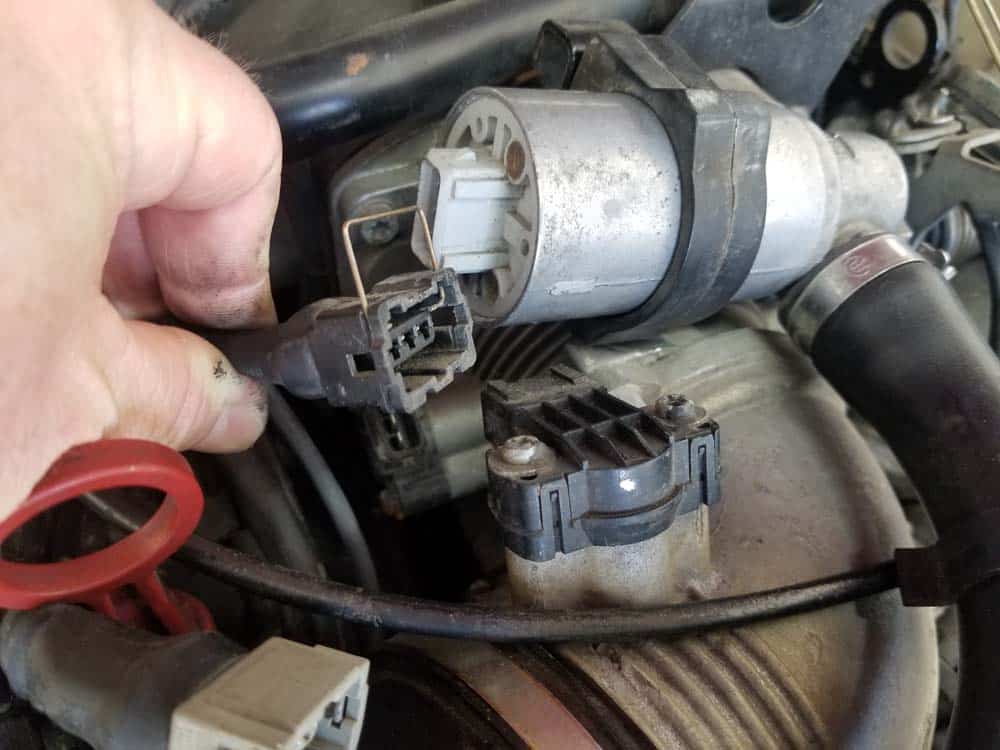
- Use a flatblade screwdriver to raise the metal locking clip on the throttle valve switch. Pull the plug free and gently stow out of the way.
- Disconnect the mass air flow sensor's (MAF) electrical connection.
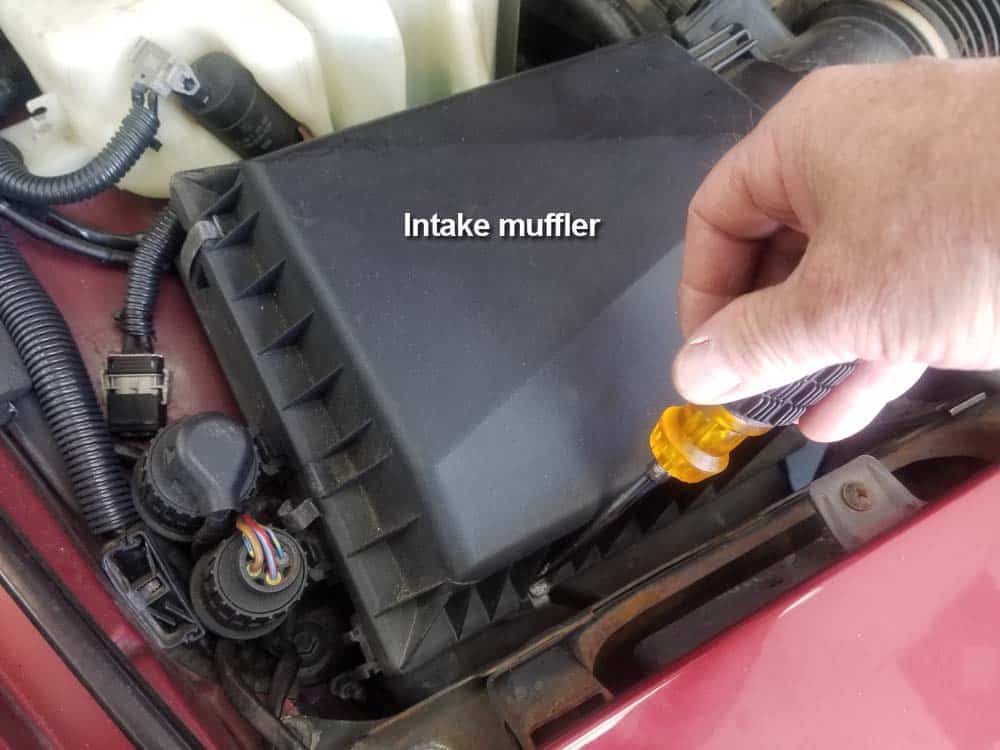
- Use a flatblade screwdriver to release the seven metal clips that secure the lid on the intake muffler.
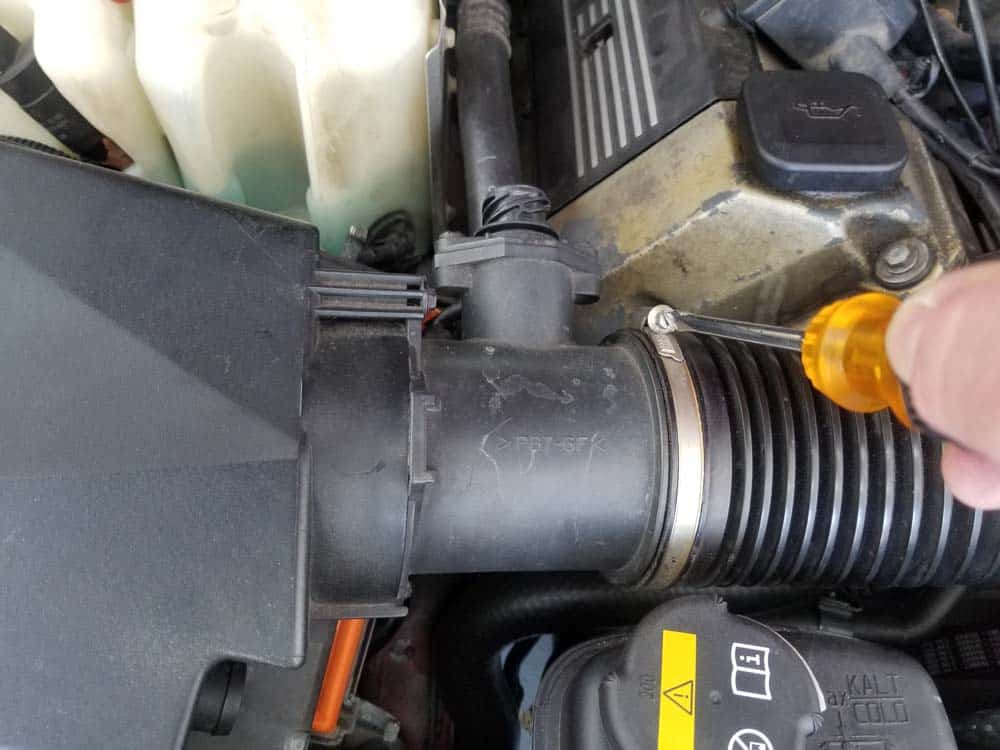
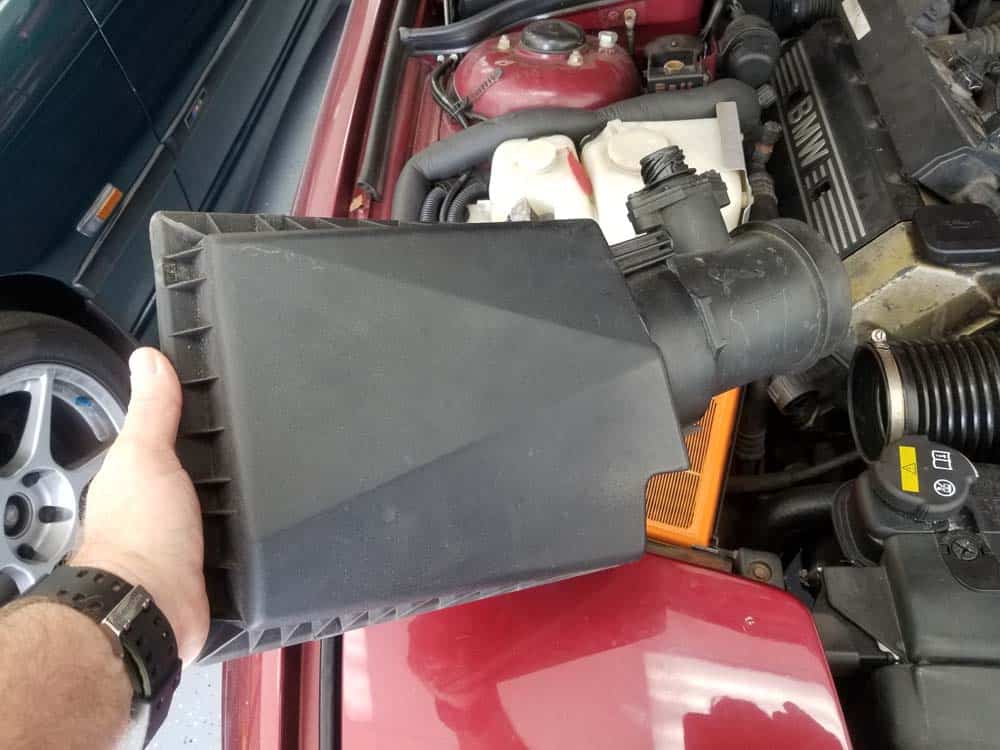
- Loosen the hose clamp connecting the intake muffler to the intake boot. Remove the intake muffler from the vehicle.
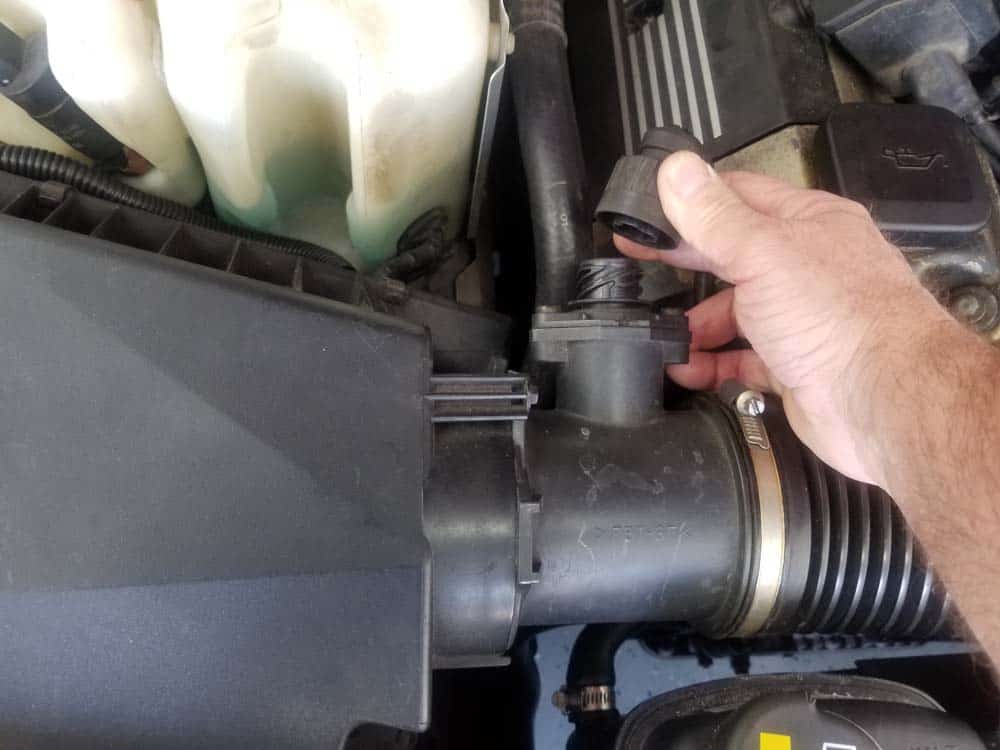
- Grasp the idle control valve and pull it free from the intake manifold. Disconnect the idle control valve hose from intake boot and remove from the vehicle.
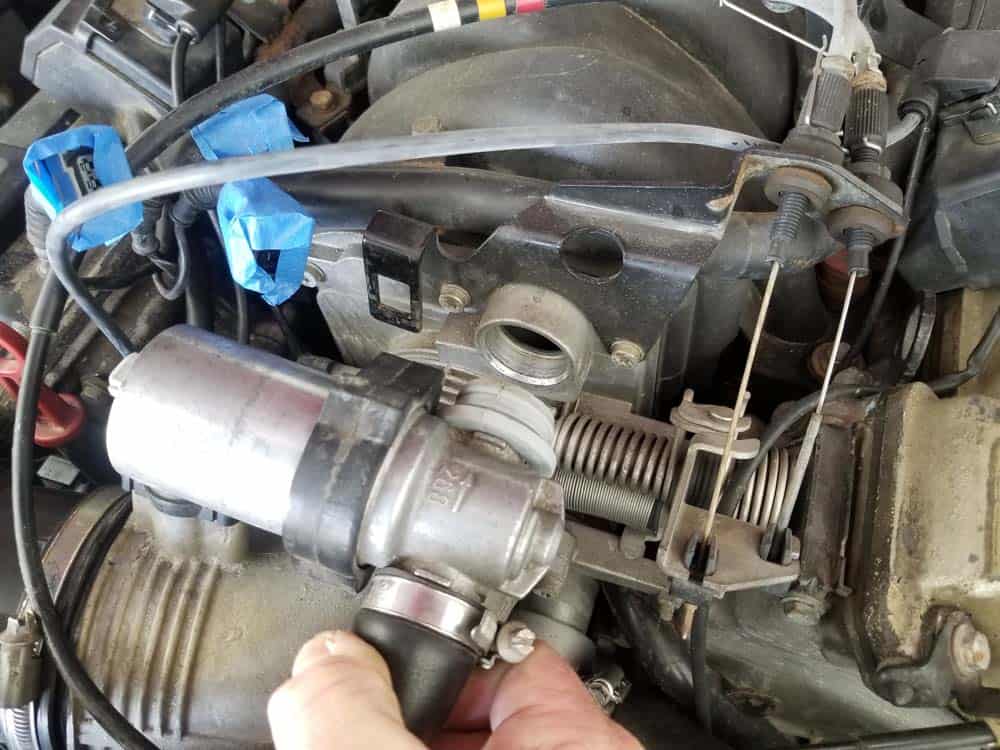
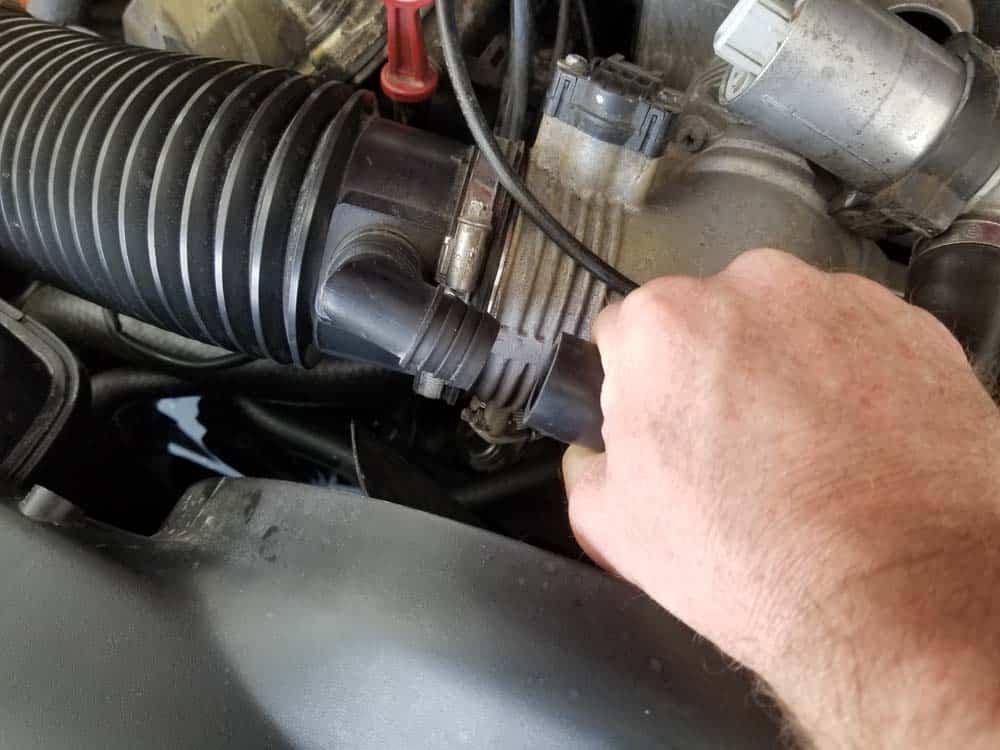
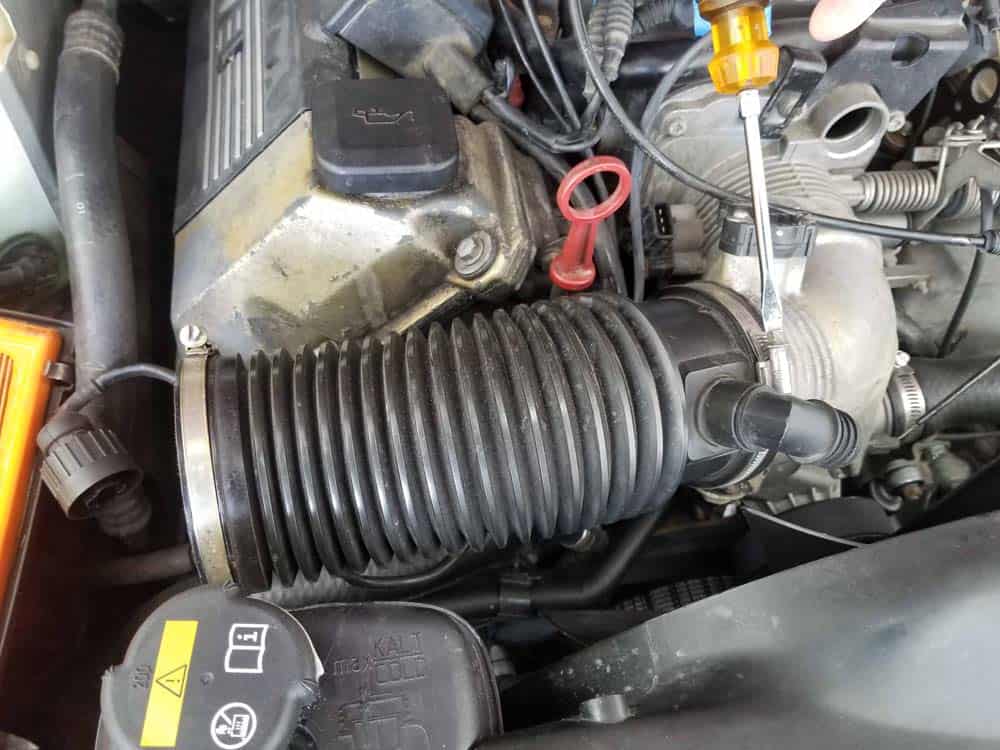
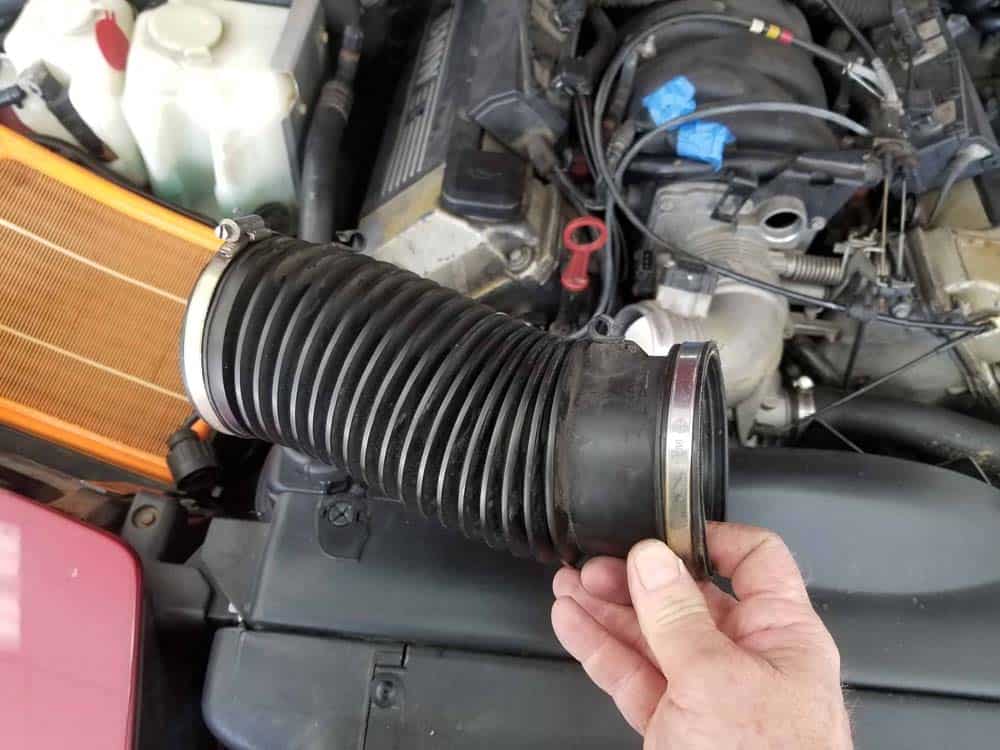
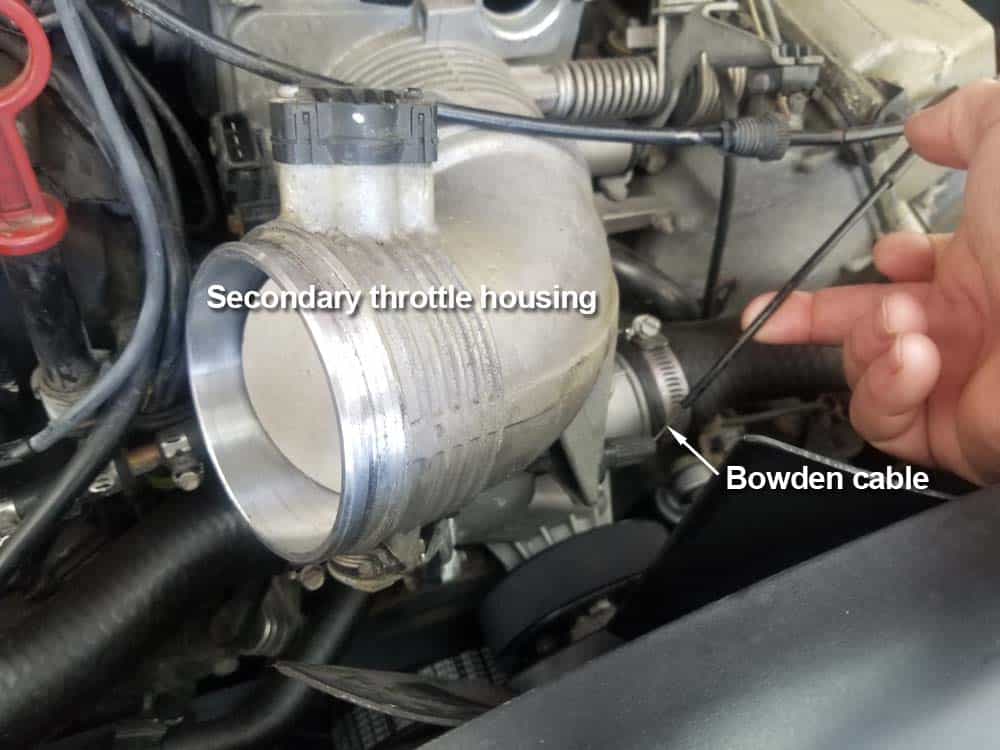
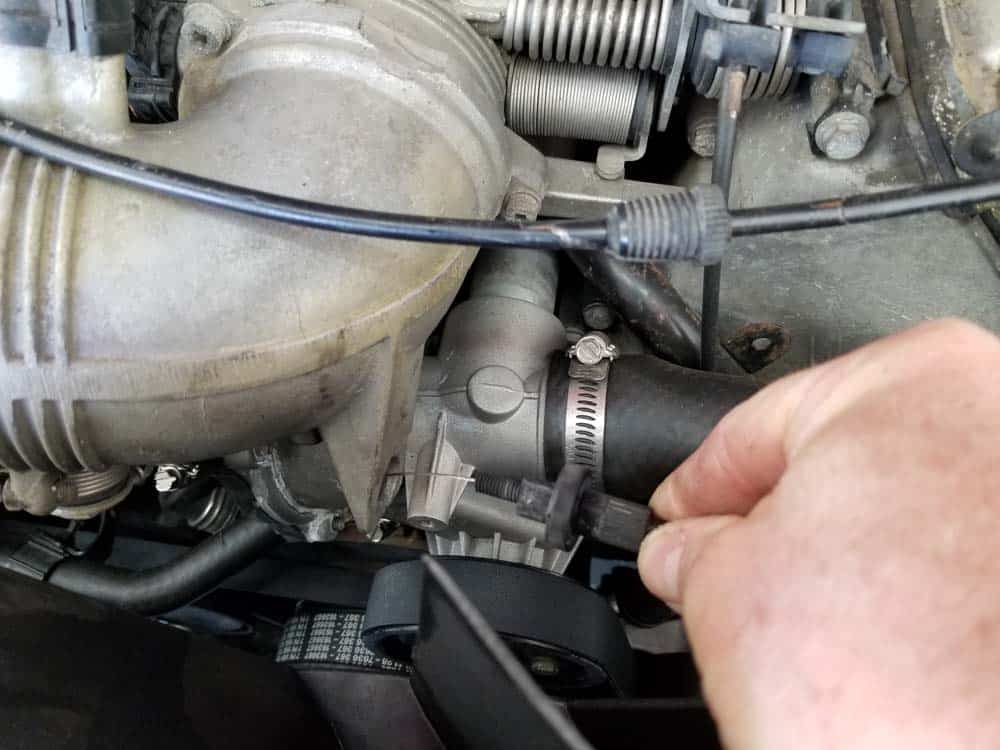
- Loosen the hose clamp that secures the intake boot to the secondary throttle housing (ASC+T unit). Remove the intake boot from the vehicle.
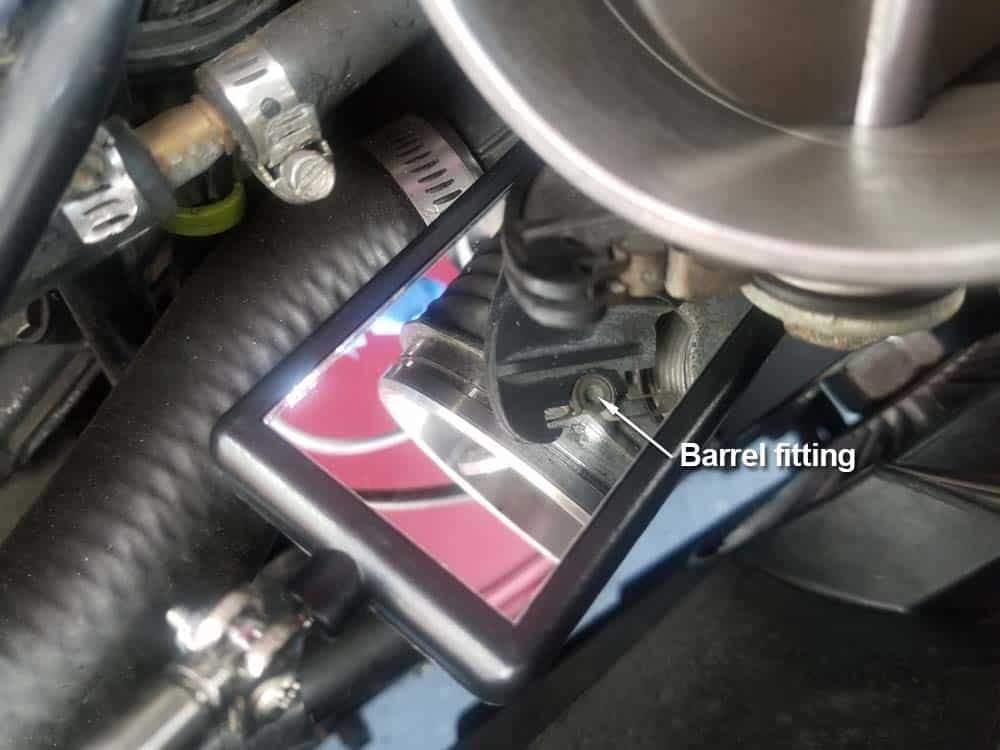
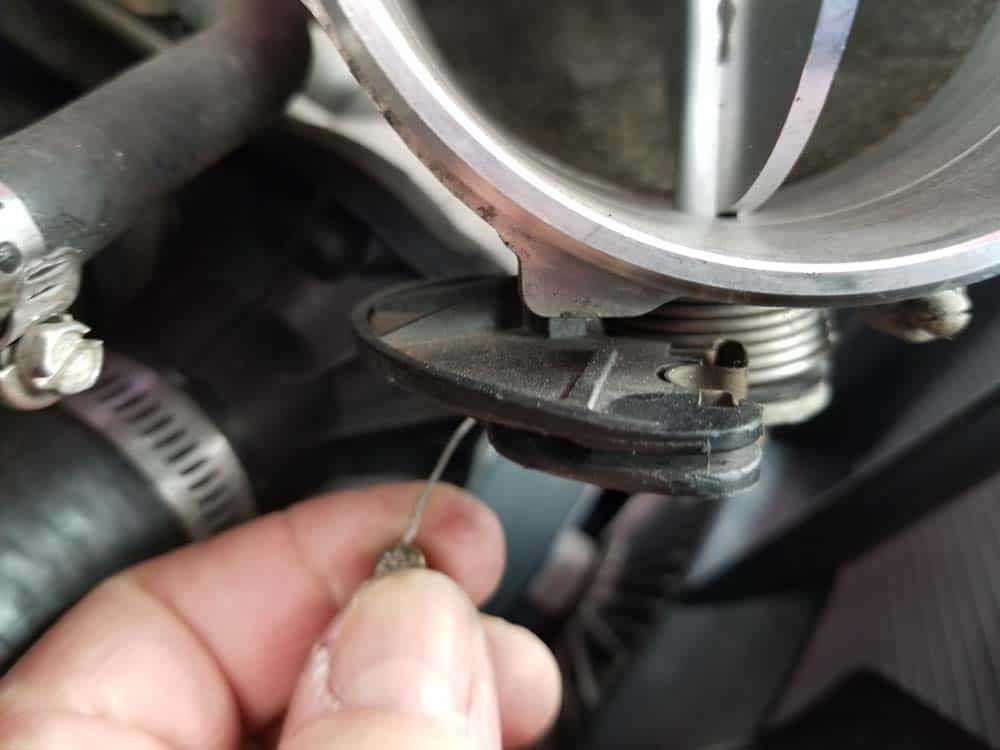
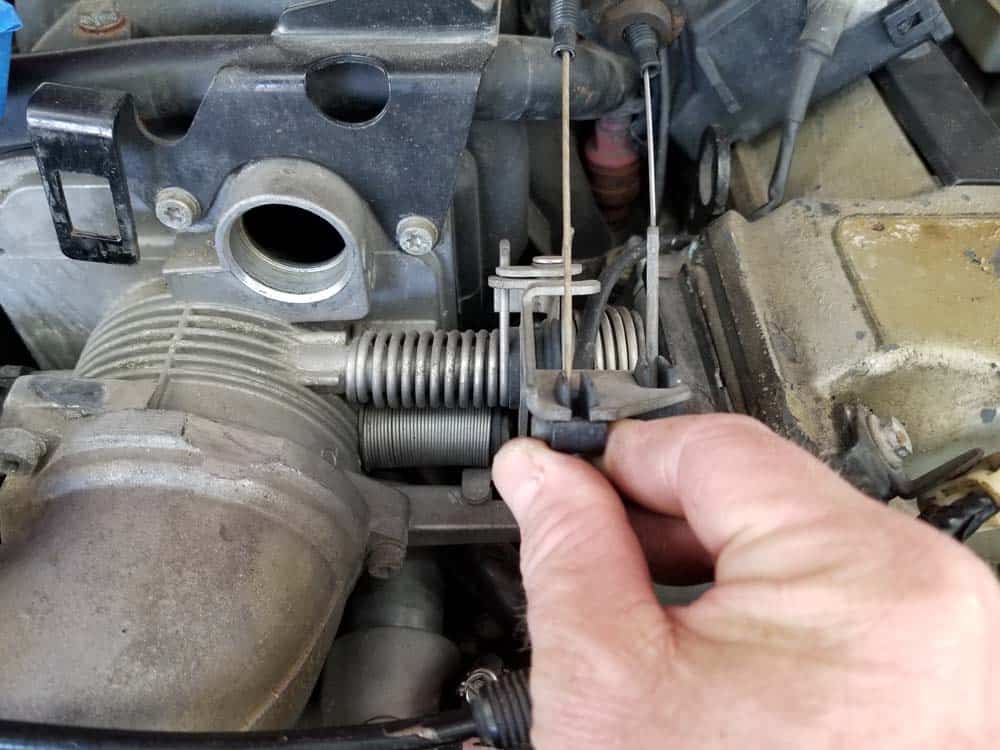
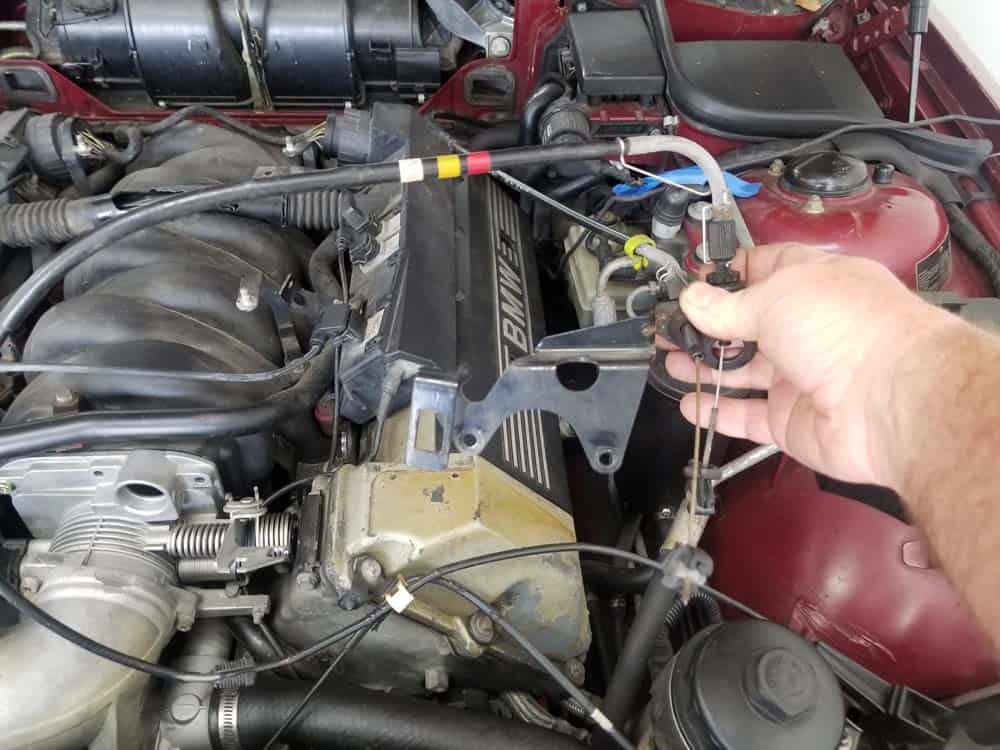
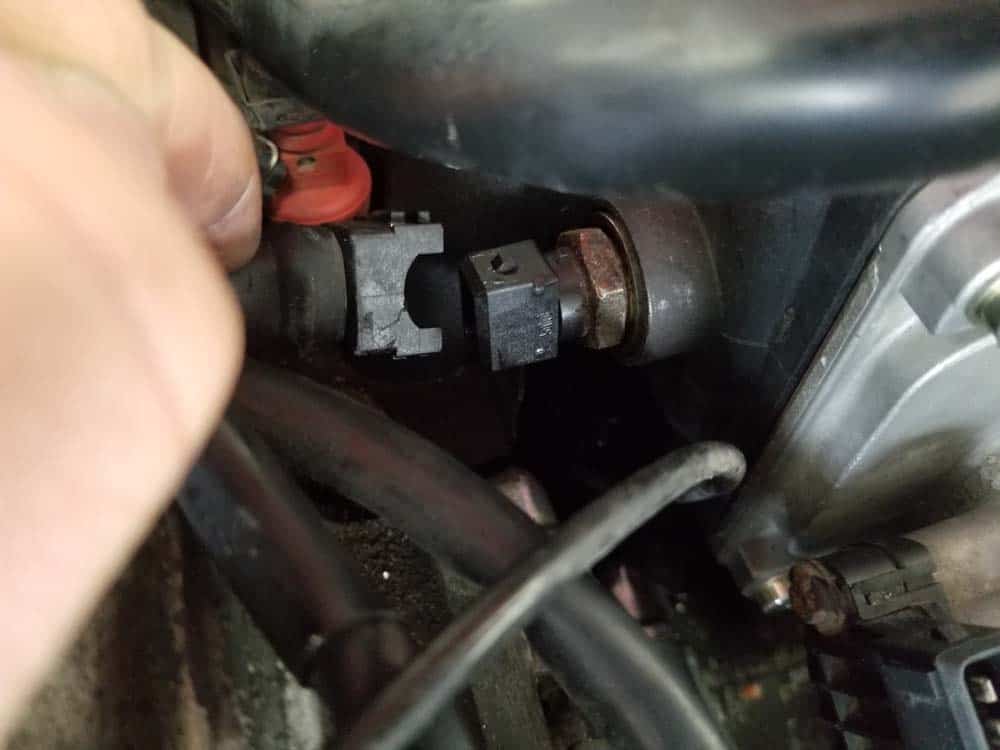
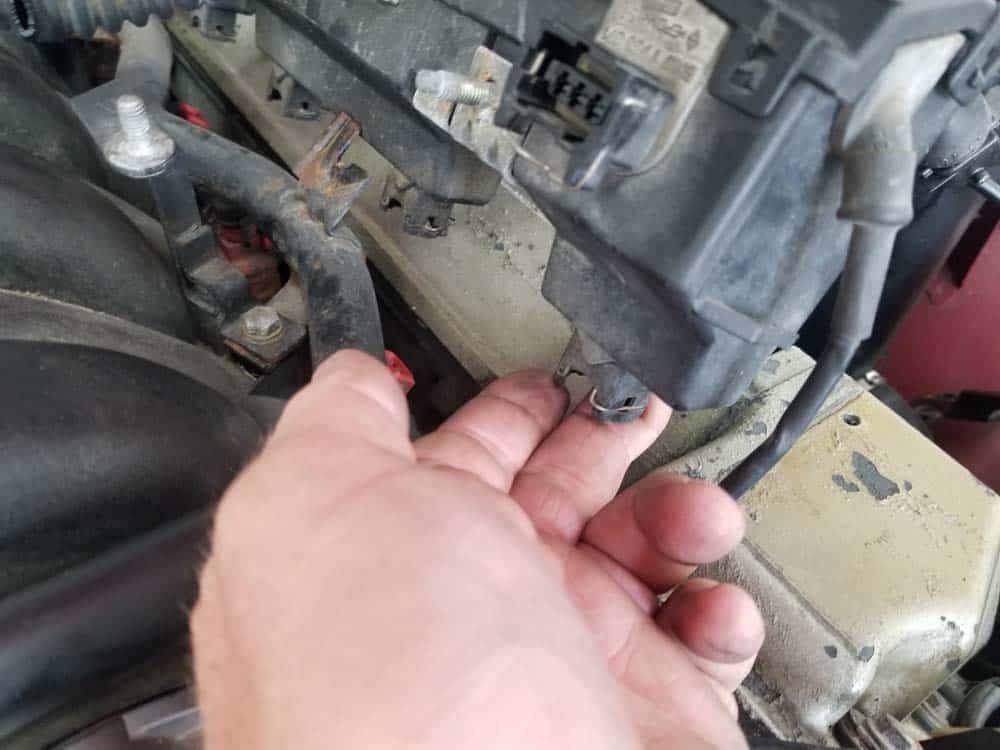
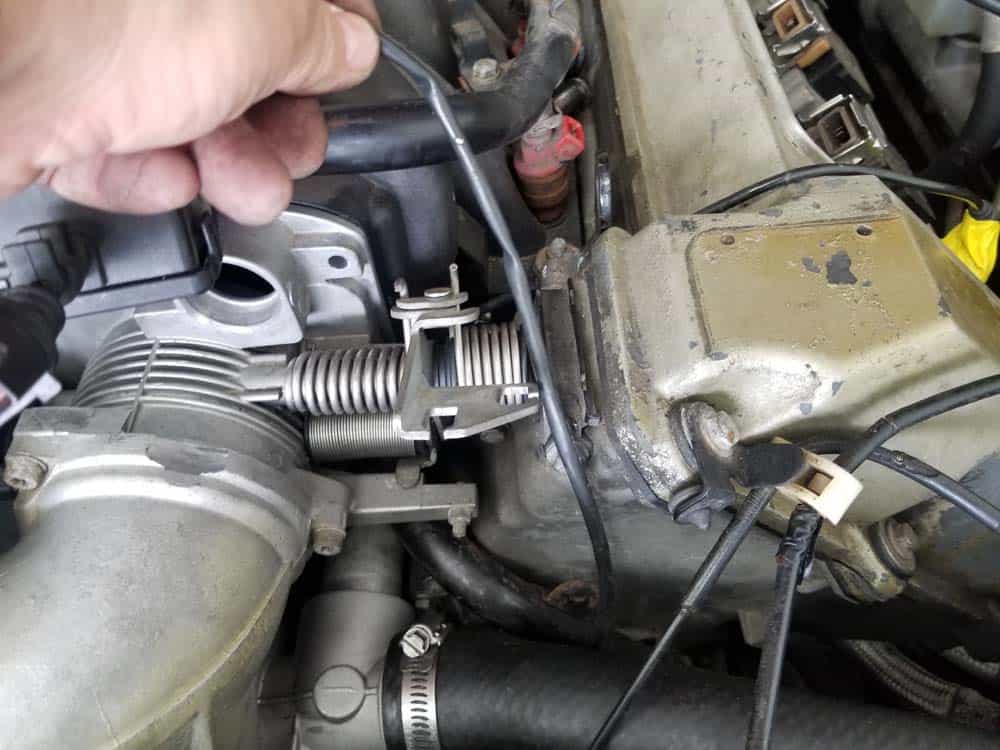
- Next, remove the Bowden cable from the bottom of the secondary throttle housing by pushing the spring mechanism back to release the tension on the cable. With the tension released, grab the cable’s barrel fitting and pull it off of the spring mechanism as shown below. Using an inspection mirror helps in locating the barrel fitting. Stow the cable safely out of the way.
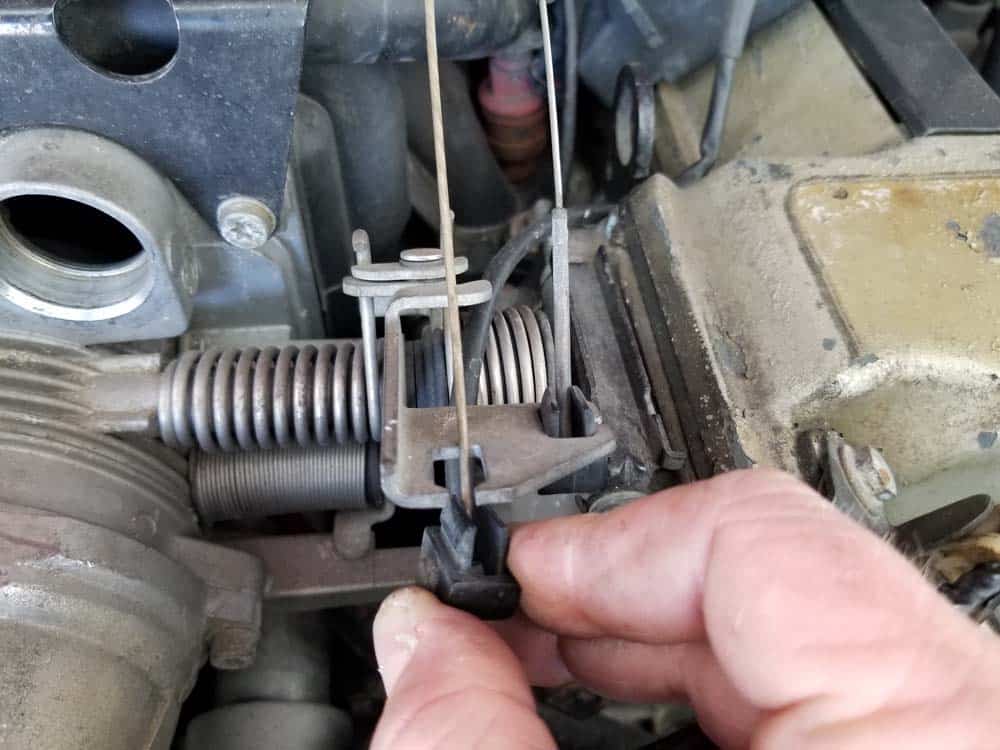
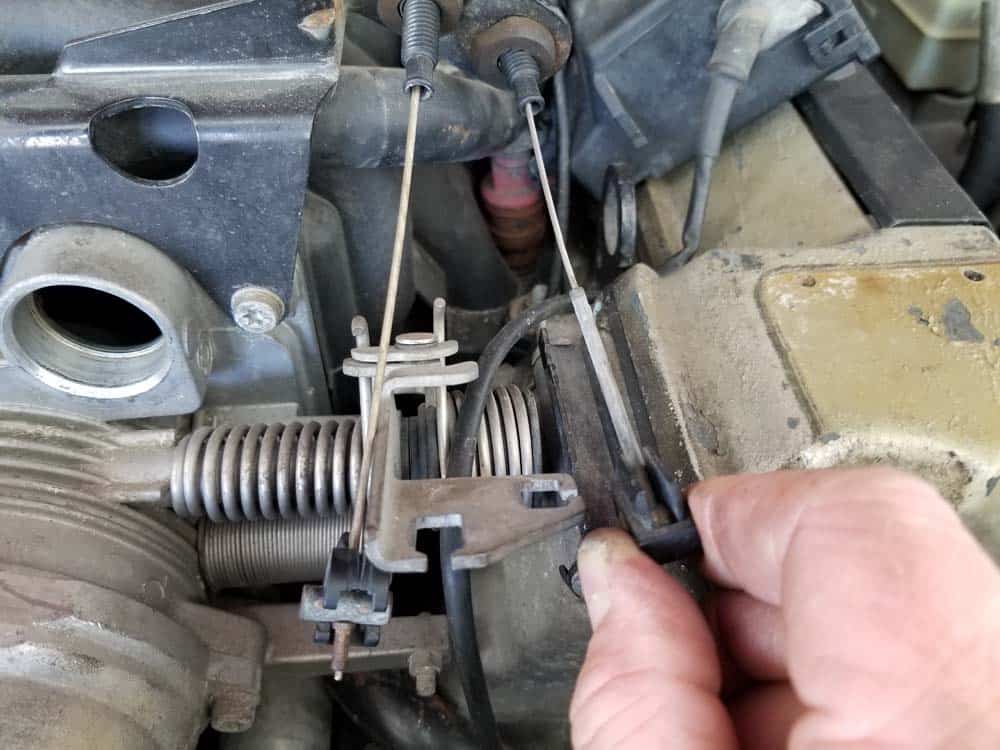
- Disconnect the accelerator and cruise control Bowden cables from the throttle body by grasping their black plastic cable stops and pulling them free of the spring mechanism.
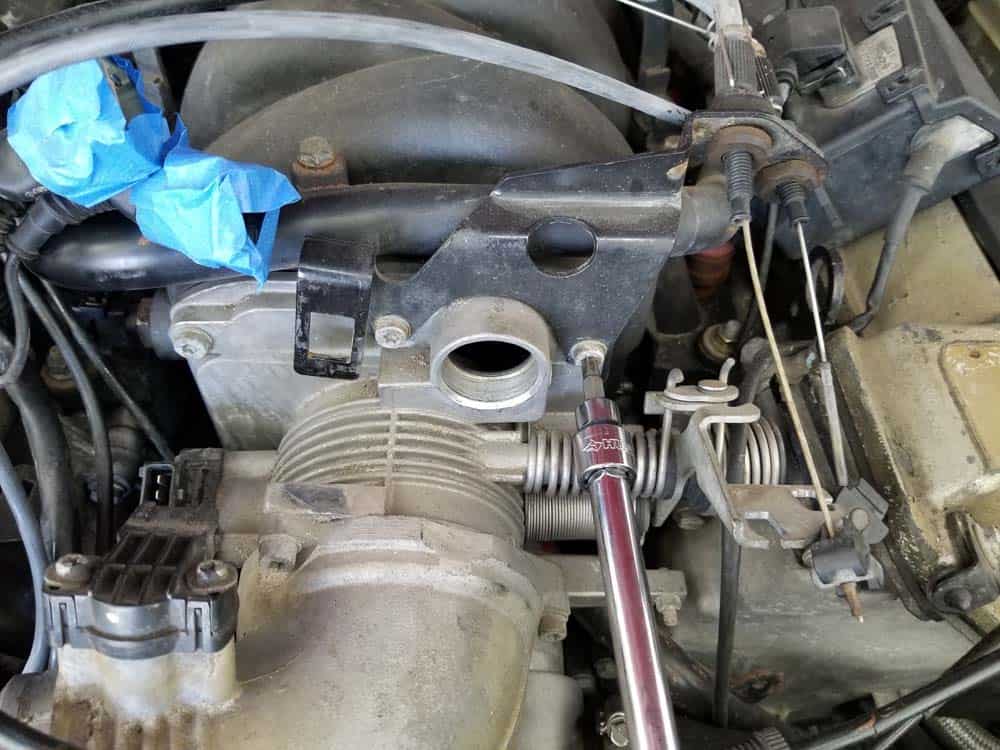
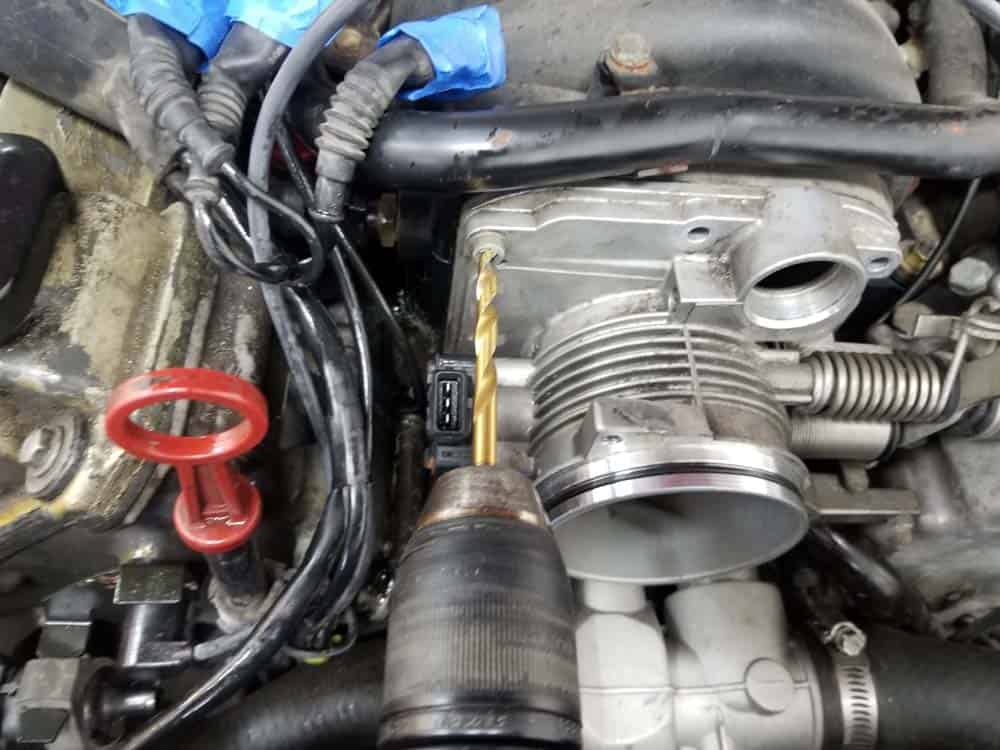
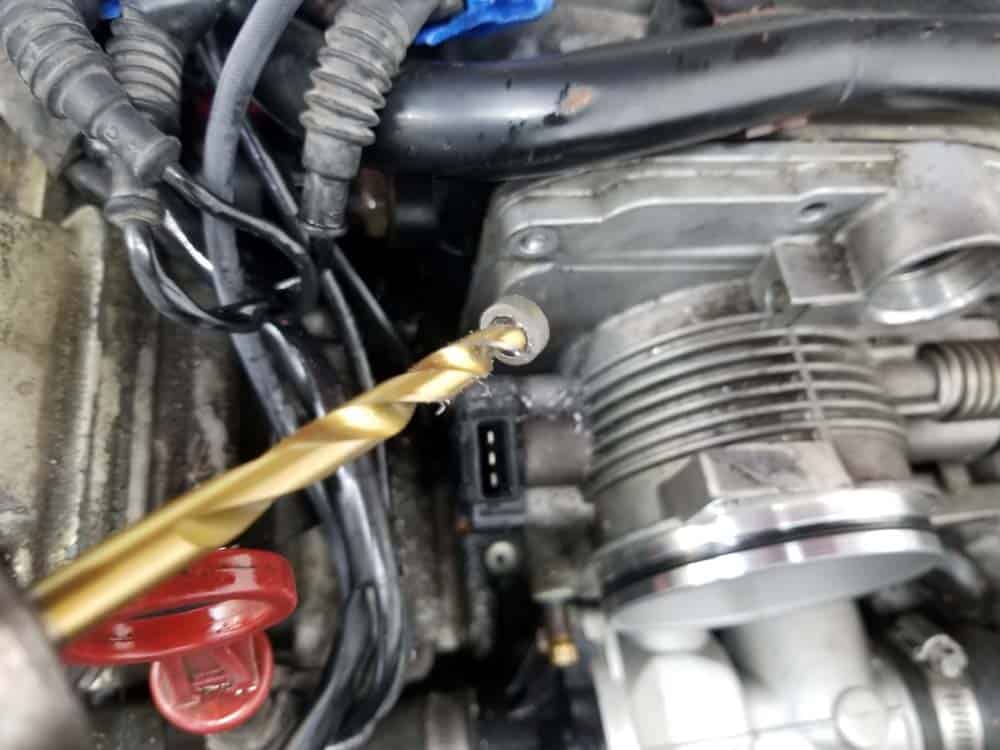
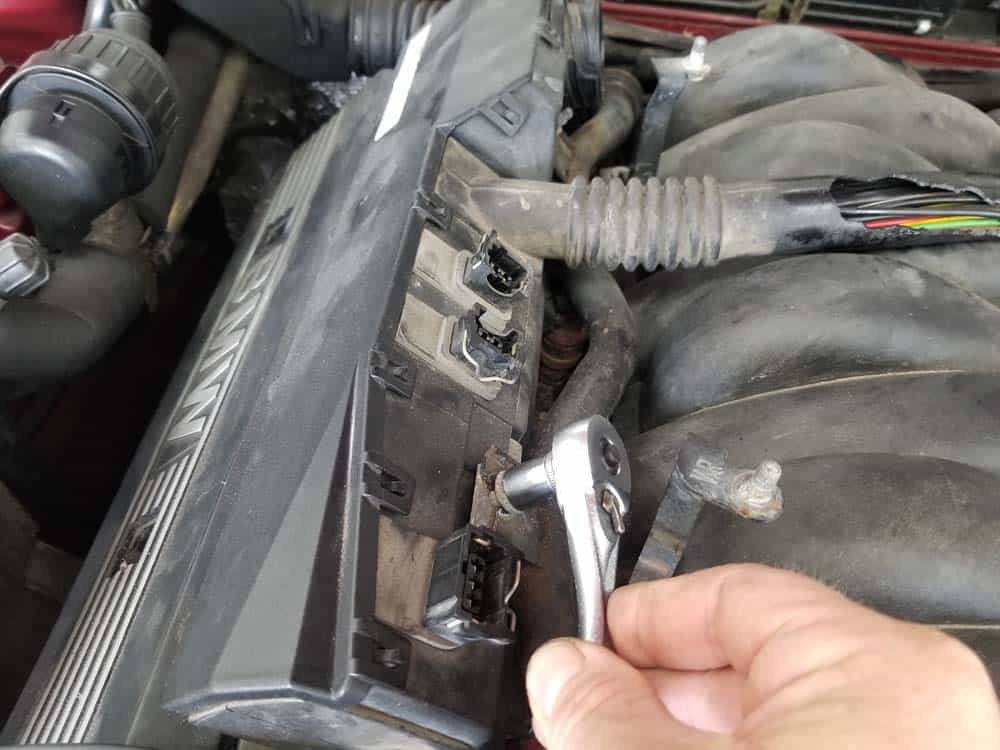
- Use a T30 torx bit to remove the two throttle body mounting bolts anchoring the cable bracket. These bolts are notoriously prone to stripping. If you strip the heads, use a 1/4" drill bit to snap the heads off as shown below. You can order new bolts by clicking here.
- Disconnect the plastic retaining clip anchoring the cable to the cover bracket. Lay the throttle cable bracket safely to the side away from the work area.
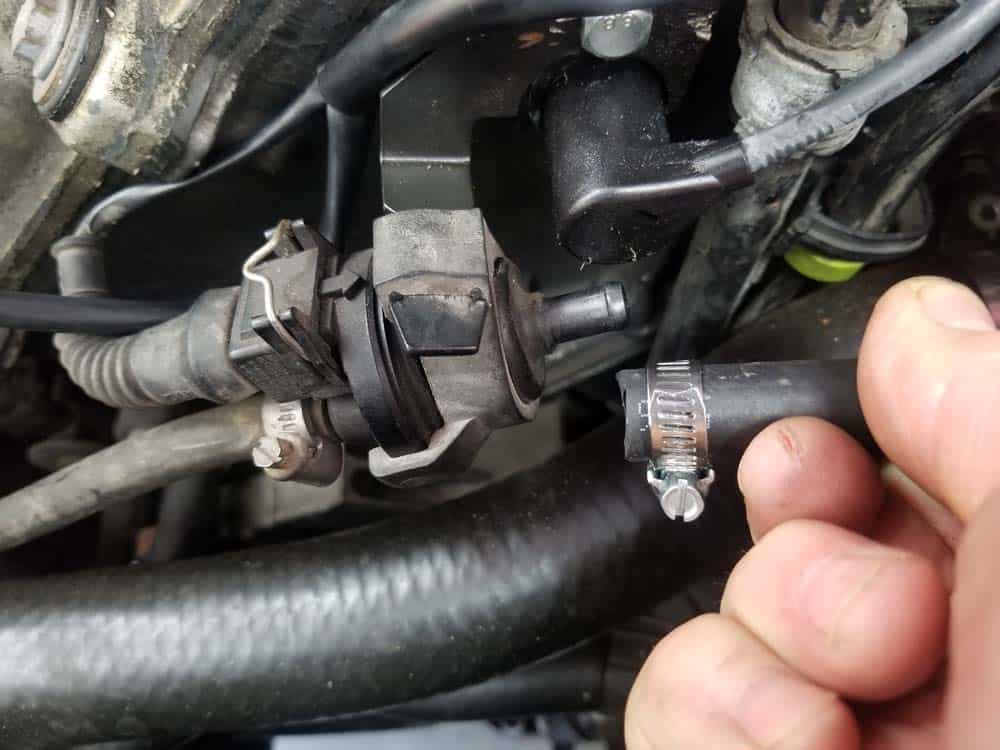
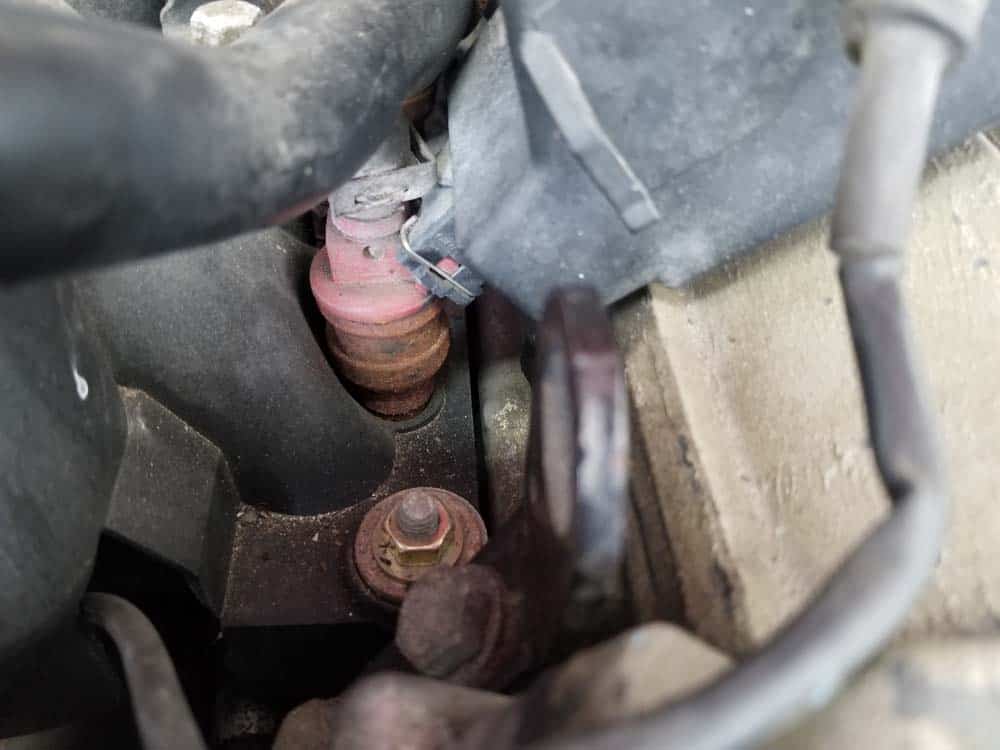
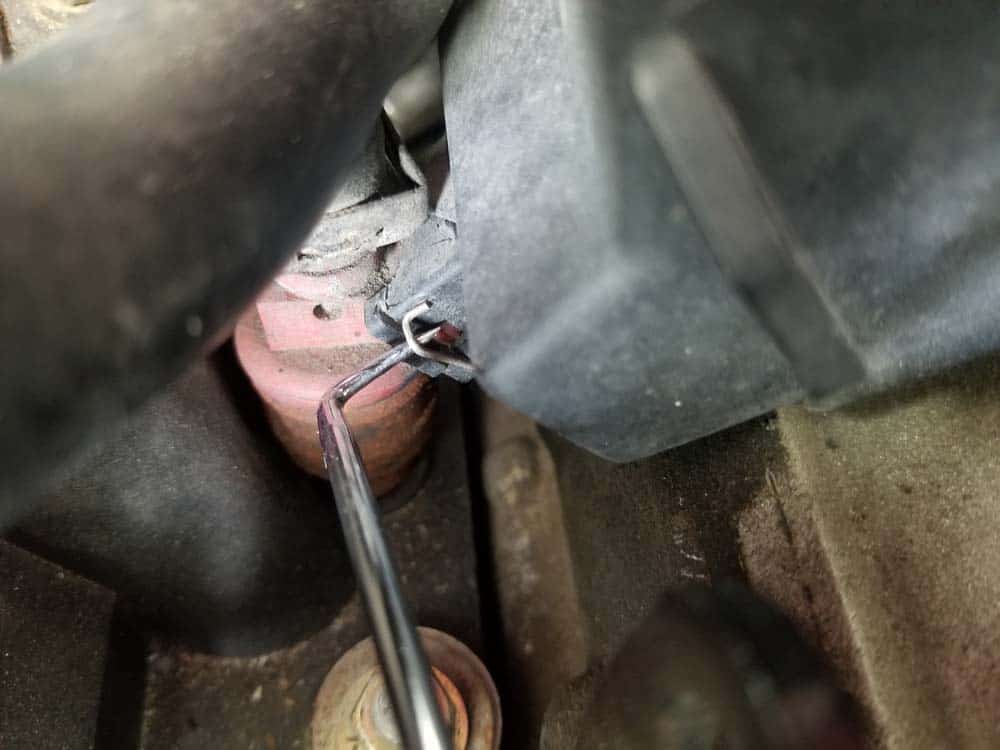
- Loosen the hose clamp on the vacuum line connecting the fuel vent valve to the throttle body. Pull the vacuum line free of the valve.
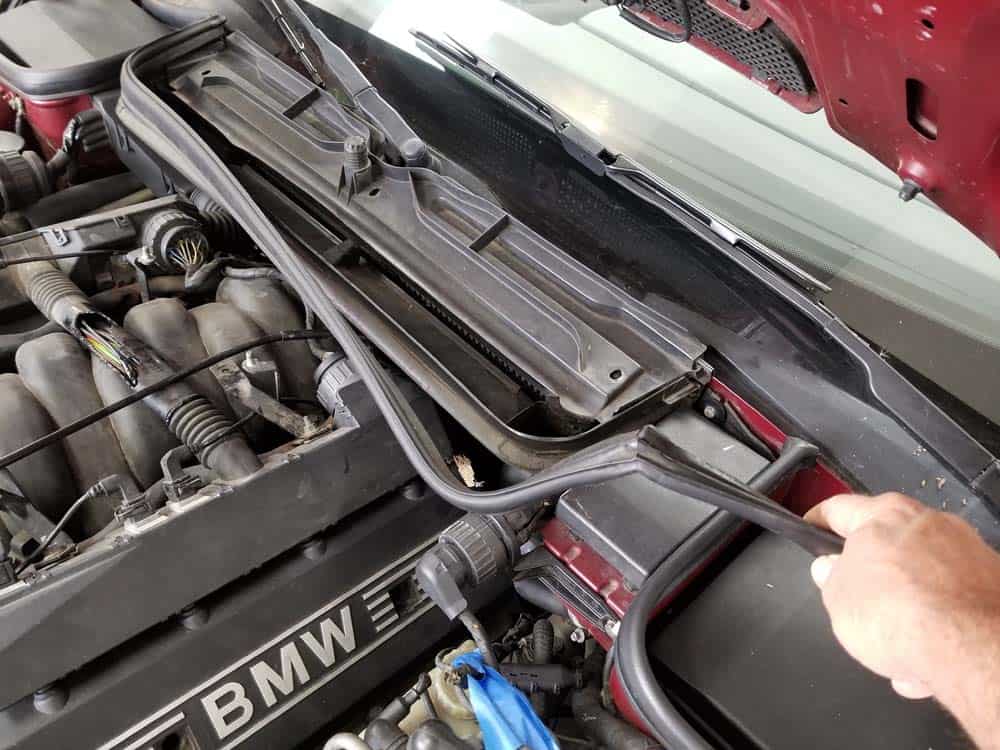
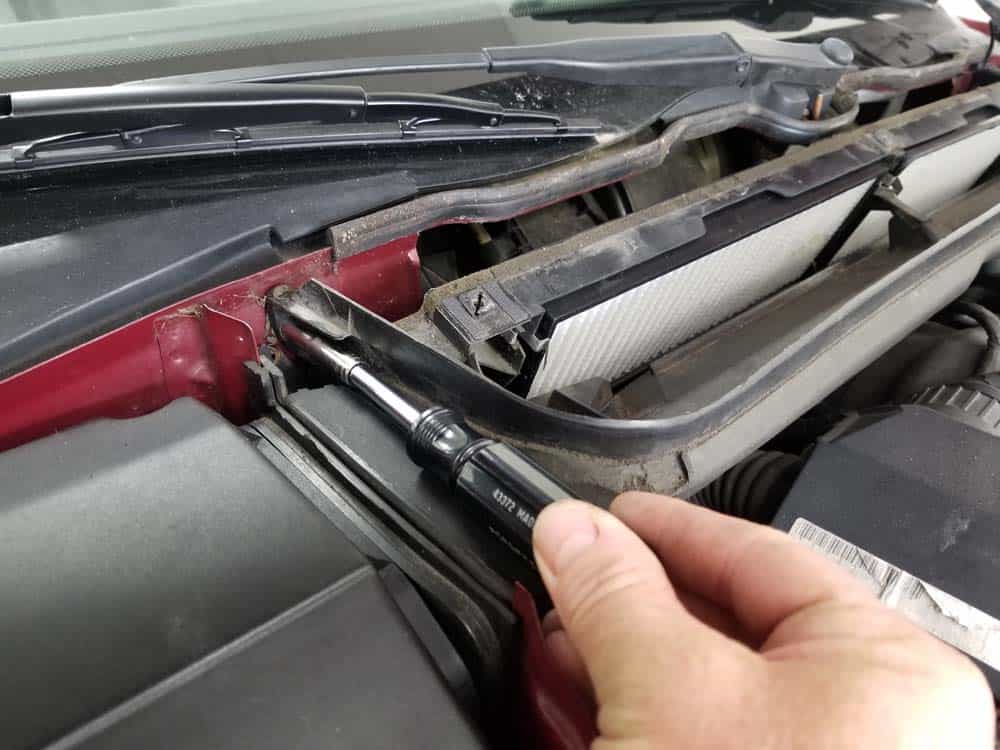
- Moving to the rear of the engine, remove the hood gasket from the heater closing panel and lay it safely outside the work area.
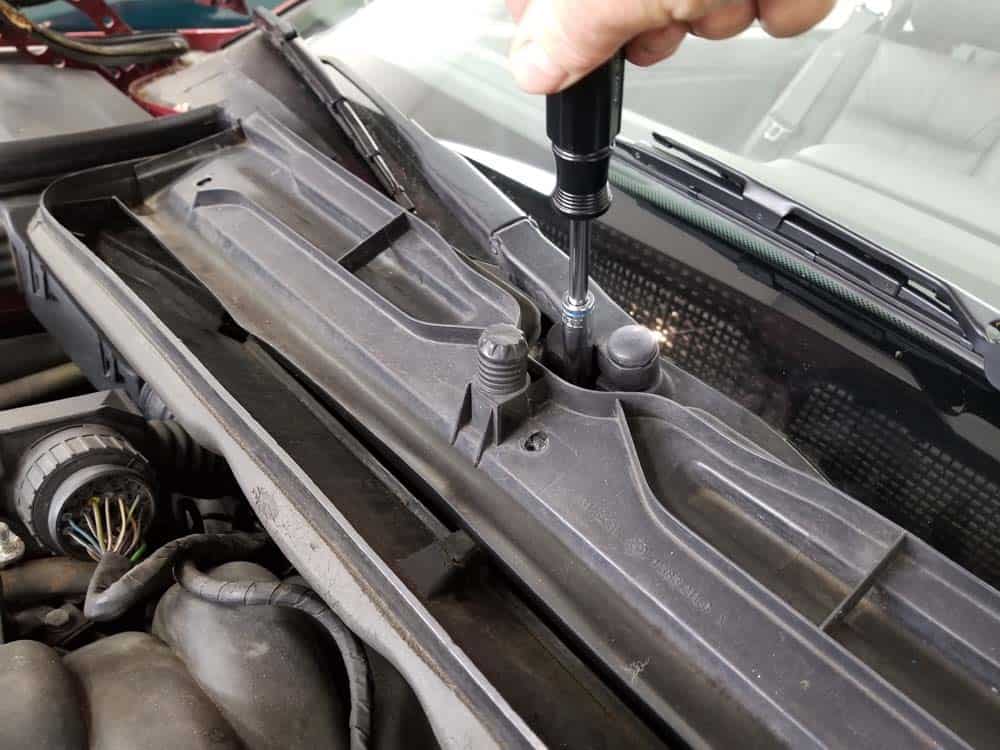
- Remove the three trim locks from the top of the microfilter (cabin filter) cover.
- Using a 10mm socket wrench, remove the plastic retaining nut at the top of the cover. Remove the microfilter cover from the vehicle.
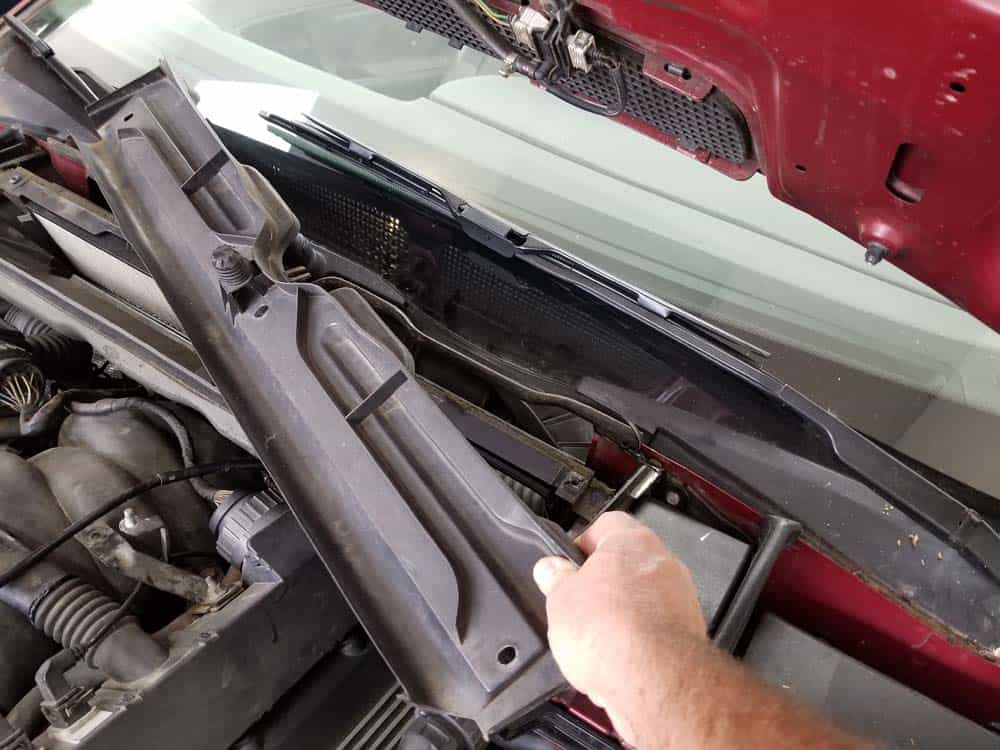
- Using a 7mm socket wrench, remove the two screws anchoring the heater closing panel to the body of the vehicle. Remove the panel from the vehicle.

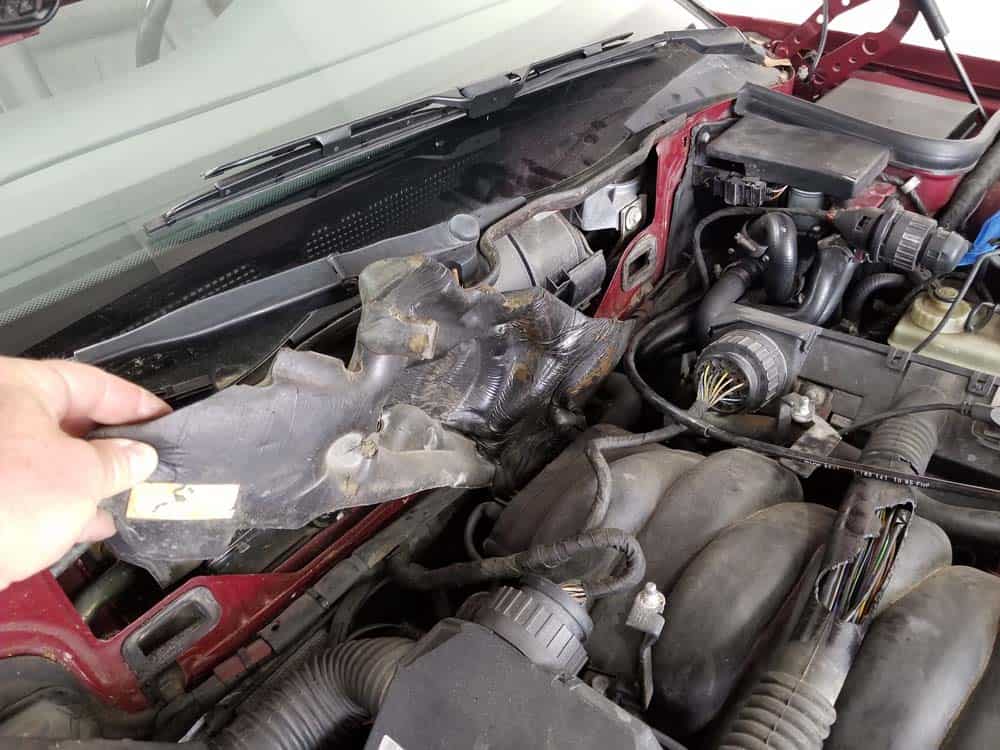
- Remove the sound insulation from the back of the intake manifold.
- Next, the main engine wiring harness (also known as "the loom") must be disconnected so it can be moved out of the work area. As previously discussed, it is critical that care is taken during these next steps to avoid breaking the harness.
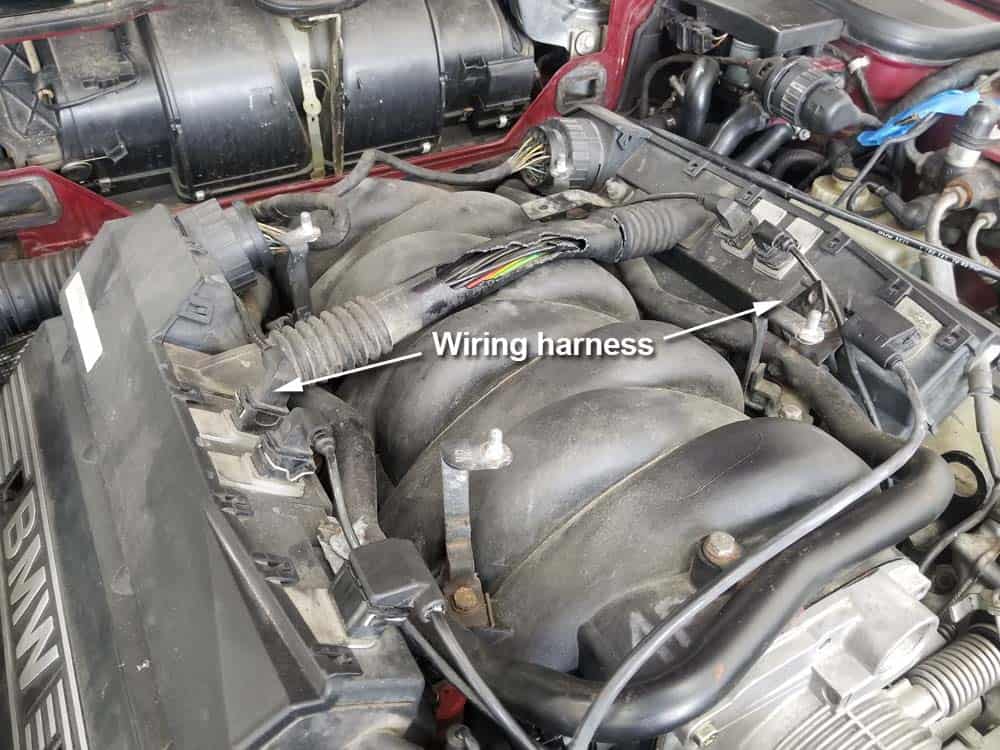
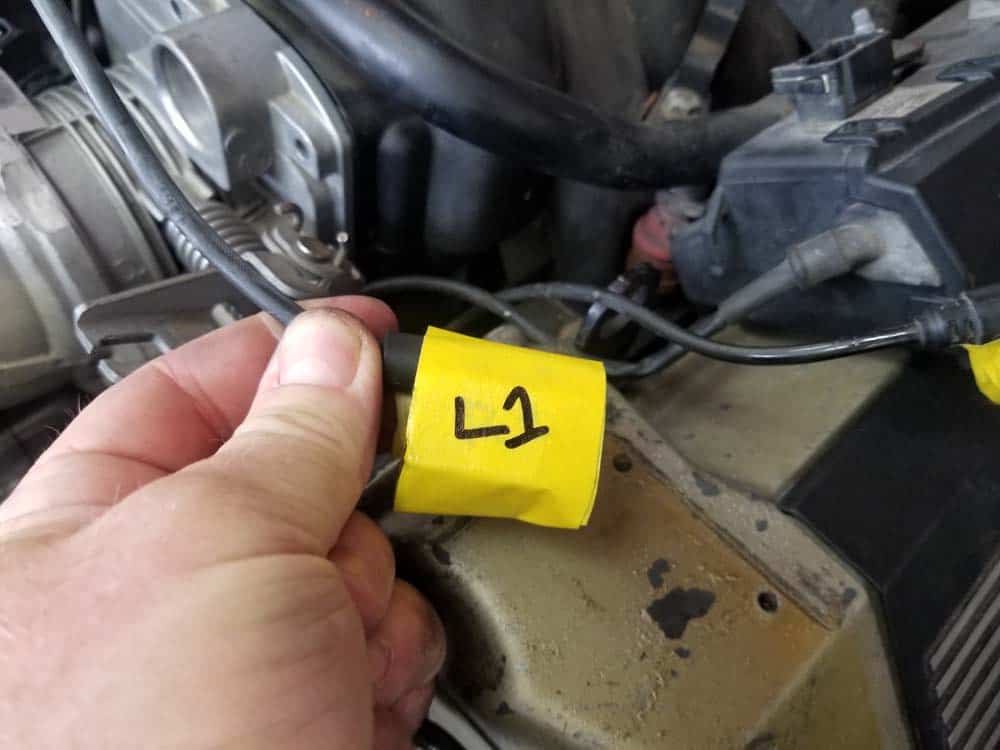
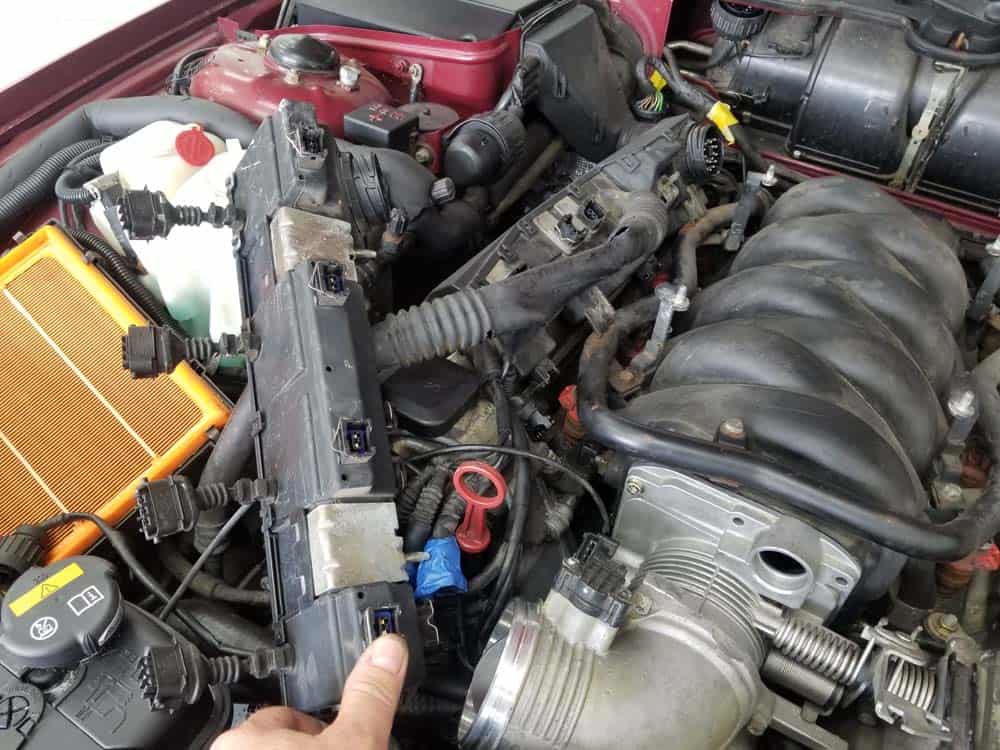
- Start by unplugging the connections on the left side of the engine as shown below. DO NOT force the plugs out. We strongly recommend marking and labeling each connection with tape to avoid confusion during reassembly.
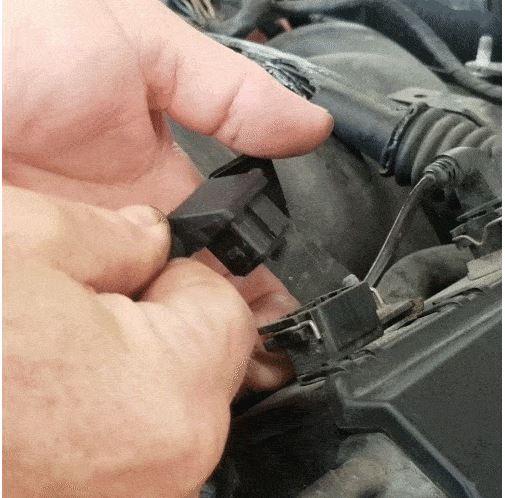
- Next, remove the right side connections.
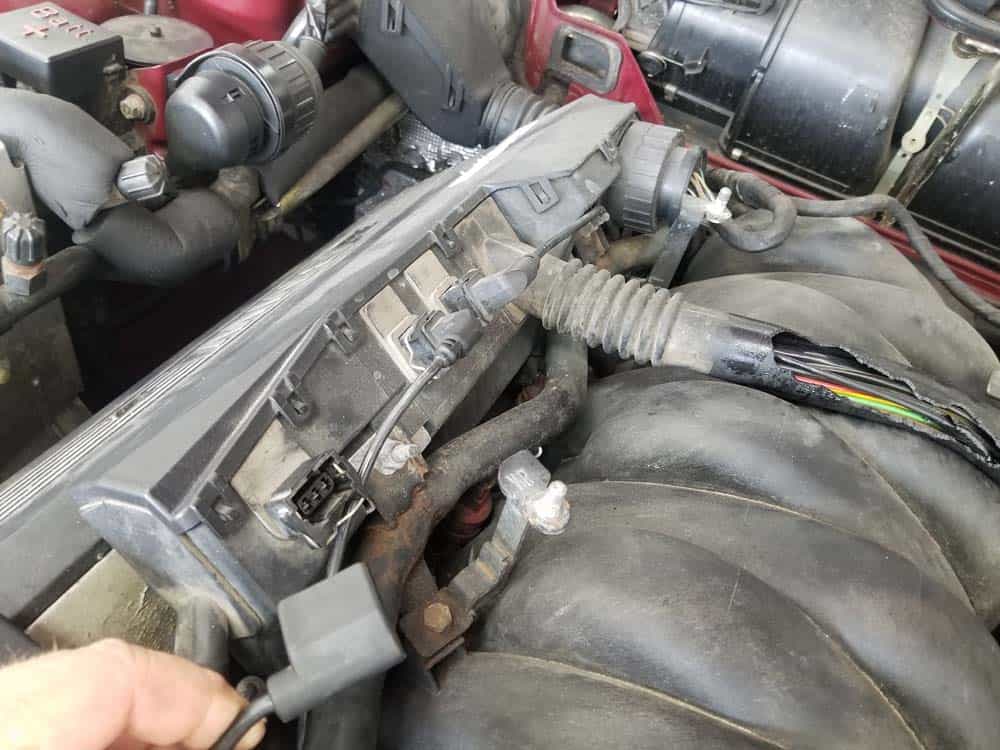
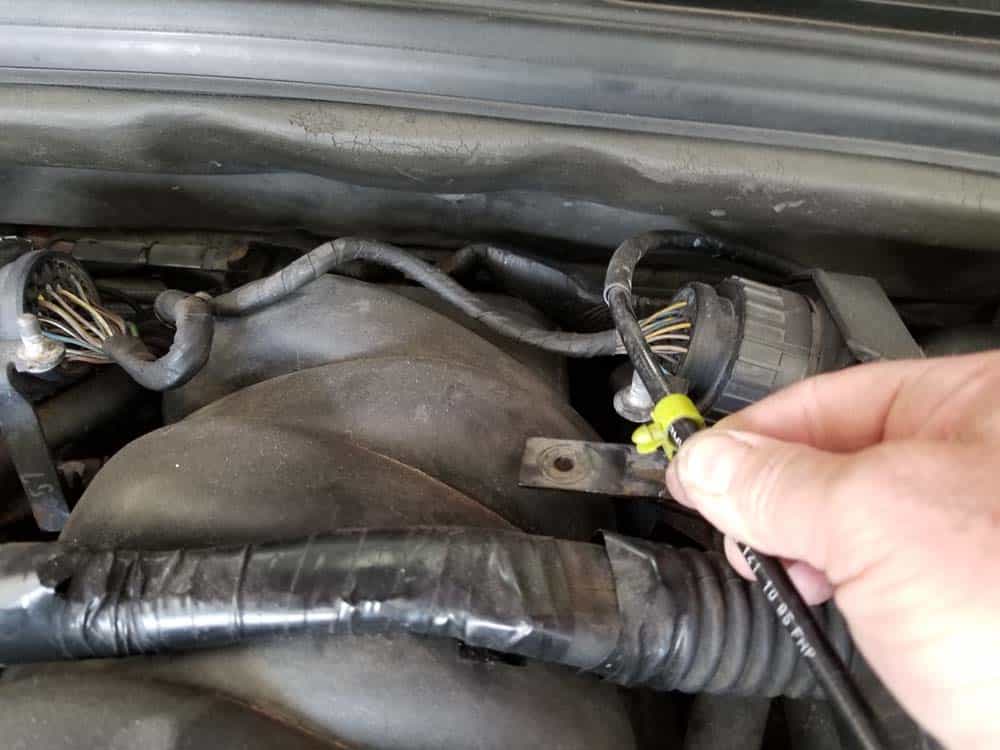
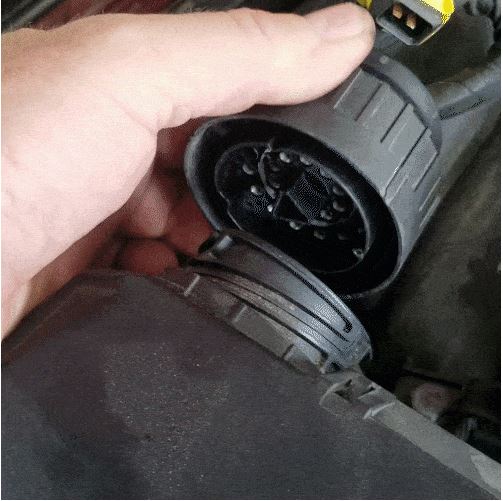
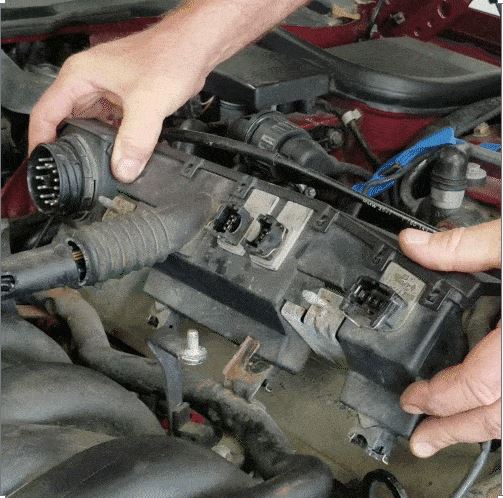
- Moving to the rear of the engine, remove the wiring harness' two main connectors by turning their locking rings counterclockwise until they release. DO NOT attempt to pry them off - simply turning the locking ring counterclockwise as far as it will go will release the plug from the harness without using any force.
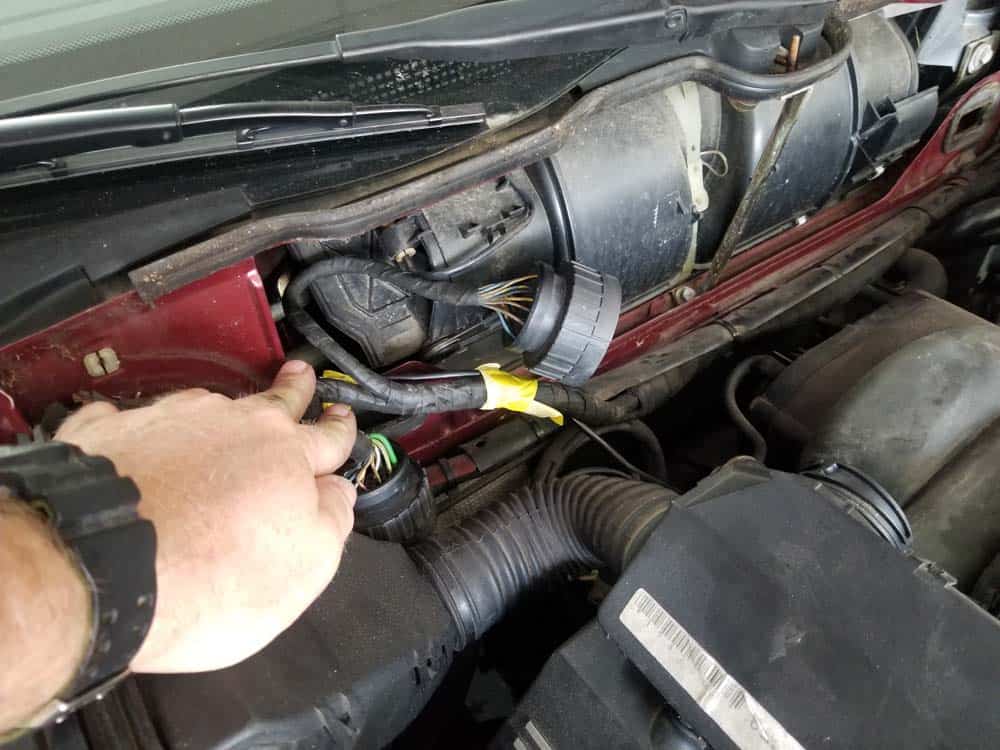
- Carefully store the main wiring harness connections safely out of the work area.
- Use a 10mm socket wrench to remove the bolts anchoring the side engine covers. Remove the covers from the vehicle.
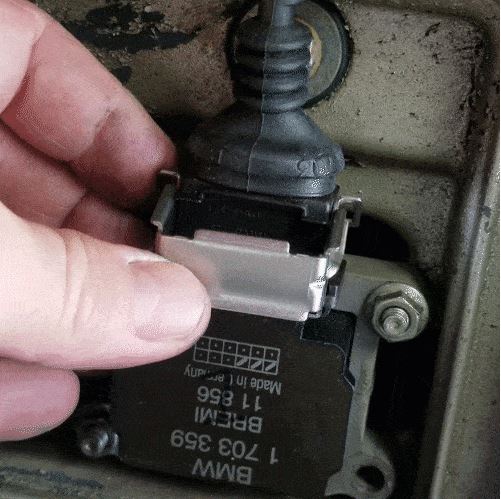
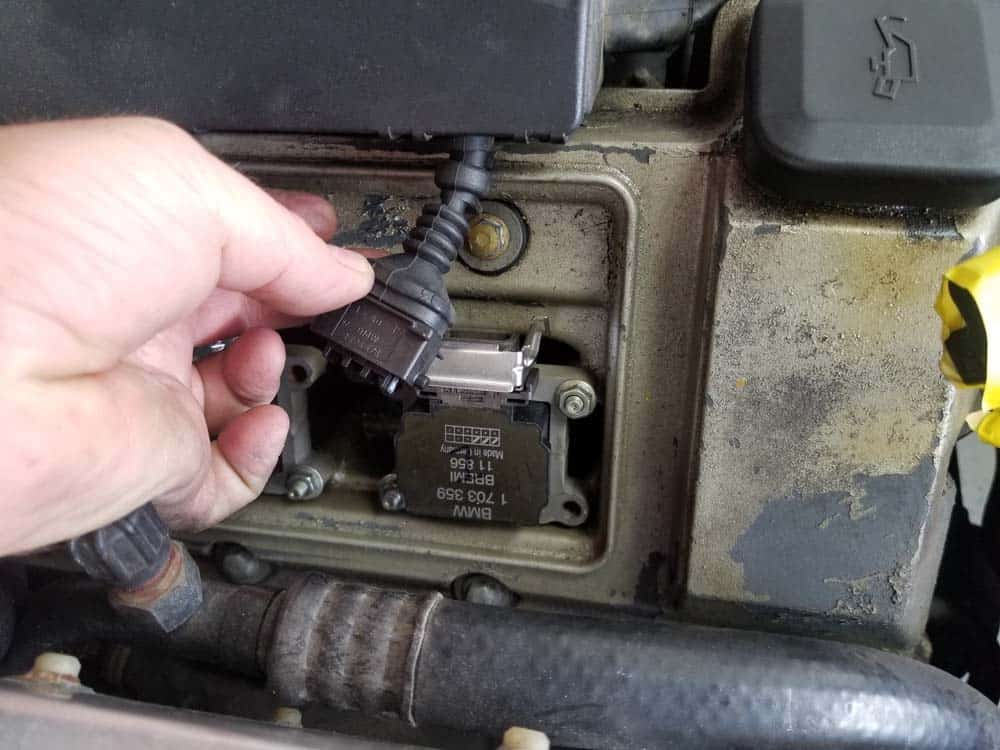
- Unclip the eight ignition coils by releasing their metal clips and pulling the plugs free.
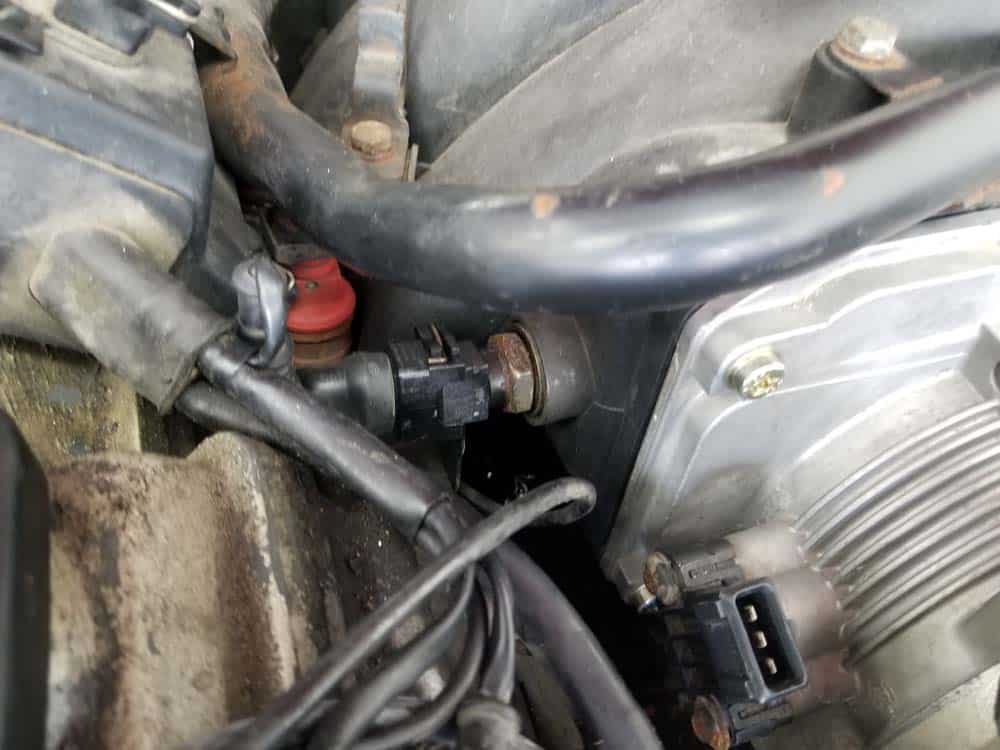
- Disconnect the intake air temperature sensor on the front right of the intake manifold.
- Use a 10mm socket wrench to remove the four nuts anchoring the wiring harness to the main fuel line.
- Next, locate the metal locking clips that anchor the wiring harness to fuel injectors.
- Starting on the left side, begin to unlock the clips. Note that you only have to pull one side of the clip loose. We suggest using a metal pick as shown below.
- Continue to unlock the rest of the fuel injector clips on the left side. The interior clips can be tricky. Take your time and use a bit of ingenuity to get to them. You may have to actually lay inside the engine compartment to get the rear ones.

- Once all of the clips have been released, grasp the left wiring harness and pull it free from the fuel injectors. DO NOT force it off. If the wiring harness will not come free you have not properly released a clip...you will need to go back and check them.
- With the wiring harness free, return the clips to their fully locked position...this will keep you from losing any of them and have them ready for reassembly.
- Repeat the above steps on the right wiring harness.
- GENTLY and CAREFULLY fold the left wiring harness over to the right side of the engine so it is clear of the intake manifold work area. You may have to "reroute" the alternator sensor wire so you have enough slack to fold over the harness.
Section 2 - Removing the BMW M60 Intake Manifold
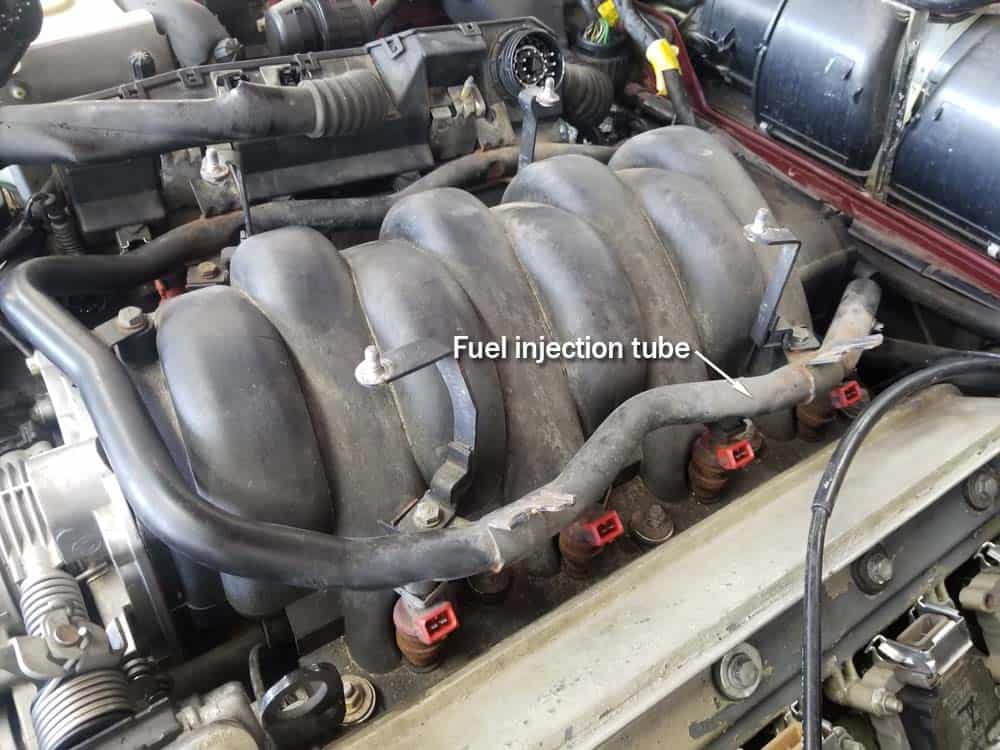
Removing the intake manifold from the vehicle is very simple at this point. The only steps left are to detach the two fuel lines from the rear of the manifold and the remove PCV vent pipe from underneath. Please note that the return fuel line on the right rear of the manifold is usually easier to detach after the manifold is lifted from the cylinder head - we discuss this in the following steps.- The fuel injection pipe does not have to be removed to perform a BMW M60 intake manifold replacement, but the fuel feed and return lines do need to be disconnected. Start by identifying the fuel injection pipe and the fuel feed line on the right rear of the intake manifold.
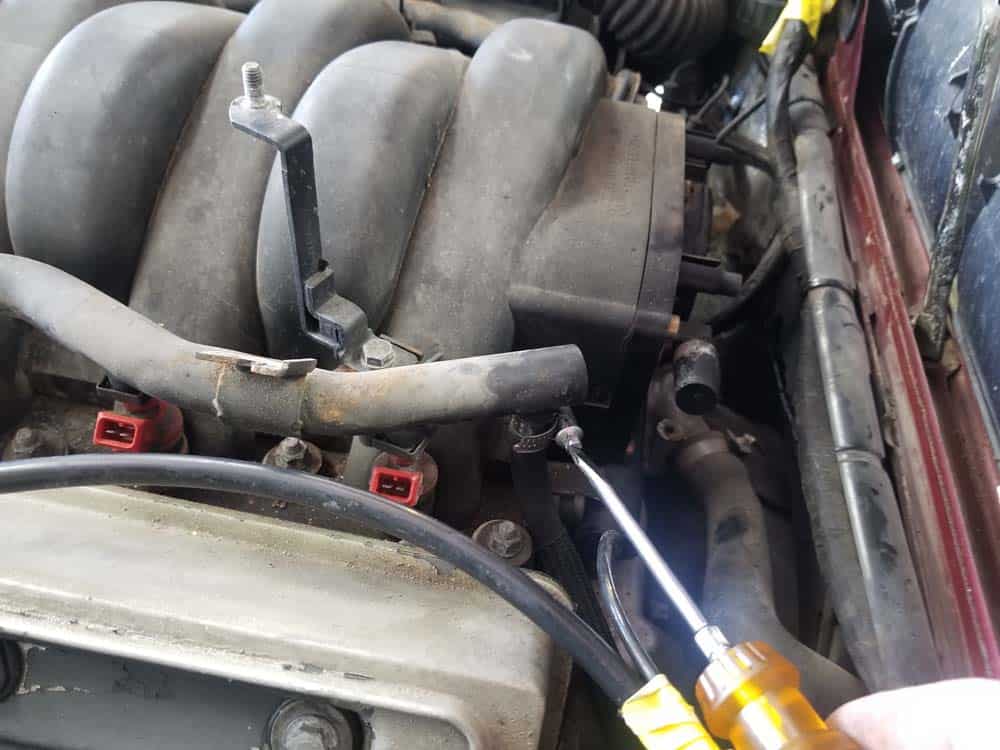
- Loosen the hose clamp on the fuel feed line and pull it free. Often these lines are very tight...use a flat blade screwdriver to assist removal if necessary.
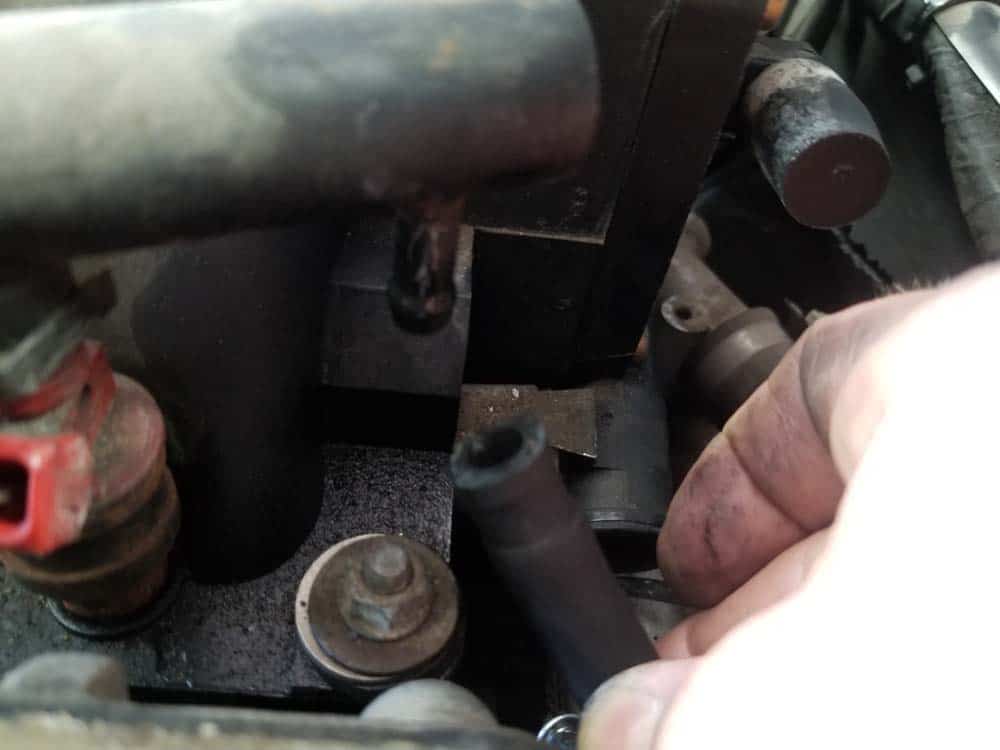
- Move to the other side of the manifold. The fuel return line is attached to the right rear of the fuel injection pipe. If you are able to remove it now that's fine...if you cannot get a firm grip on it without breaking the fuel line then wait until step 5 below.
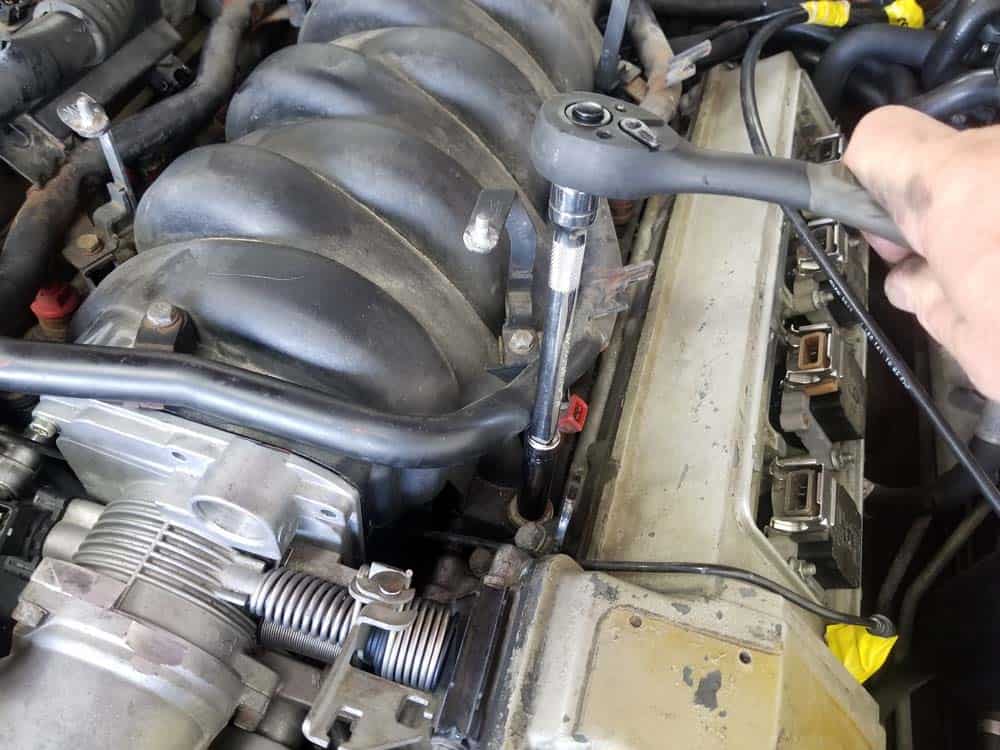
- Using an 11mm socket wrench, remove the ten intake manifold mounting nuts.
- Grasp the manifold and pull it loose from the cylinder head. If you were not able to remove the return fuel line in step 3 above then remove it now.
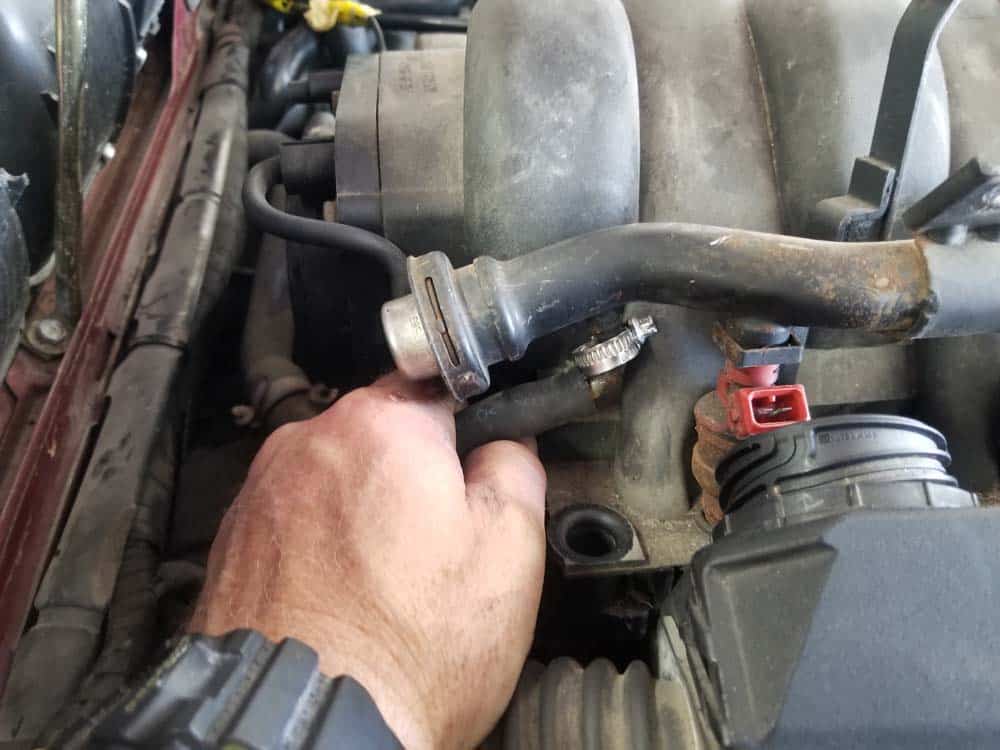
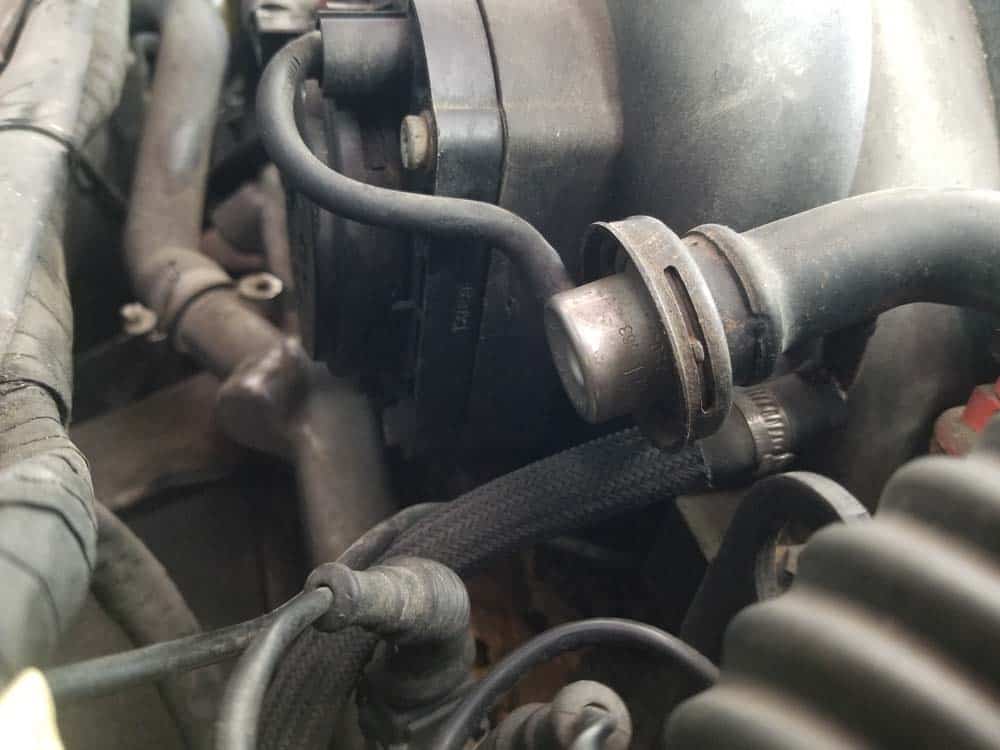
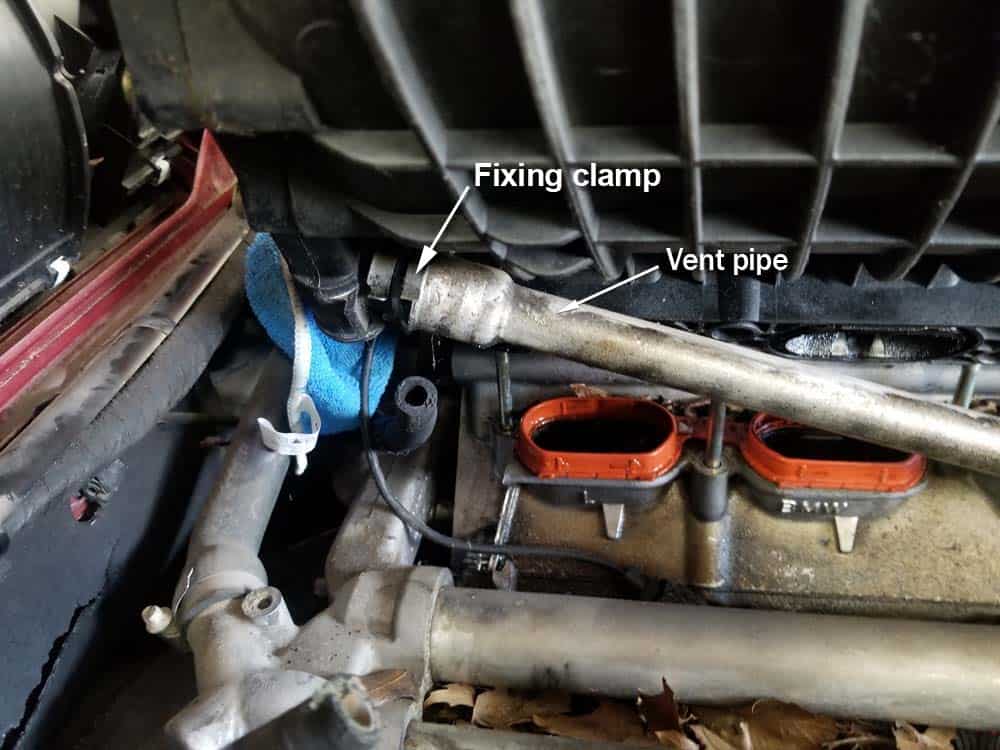
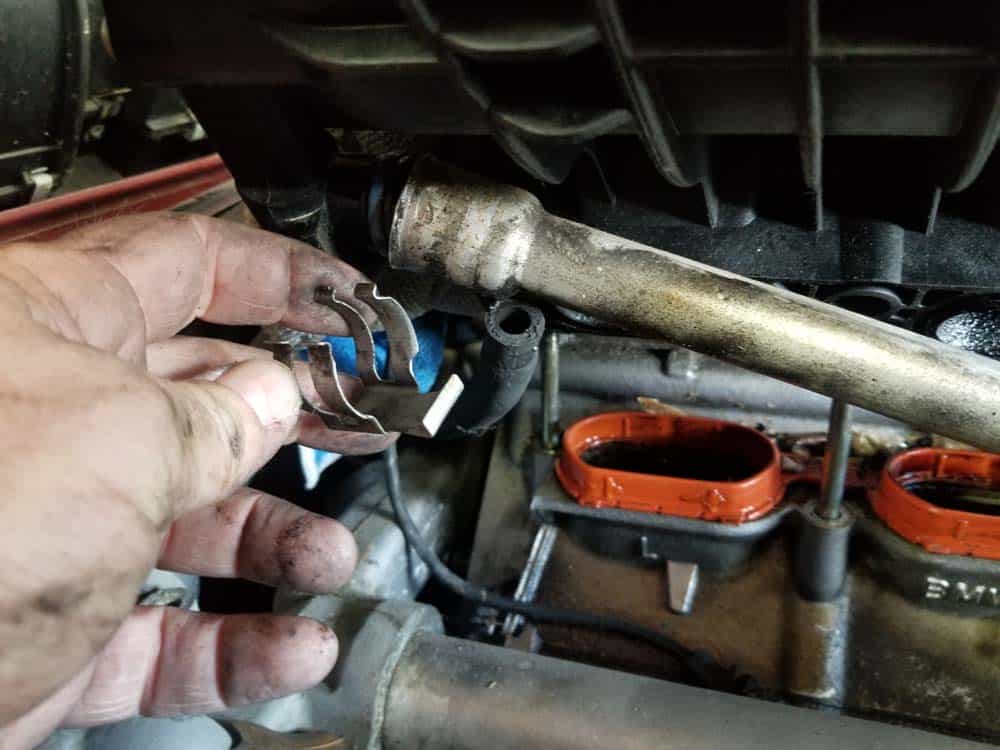
- Tilt the intake manifold on its side and locate the vent pipe where it attaches to the PCV valve. Grasp the fixing clamp and pull it free from the vent pipe connection. Pull the vent pipe free from the PCV valve.
- The intake manifold can now be removed from the vehicle.
- Place the intake manifold on a bench. Note that there is still a bit of fuel in the injector pipe..keep a rag under the feed inlet until all of the fuel as emptied out.
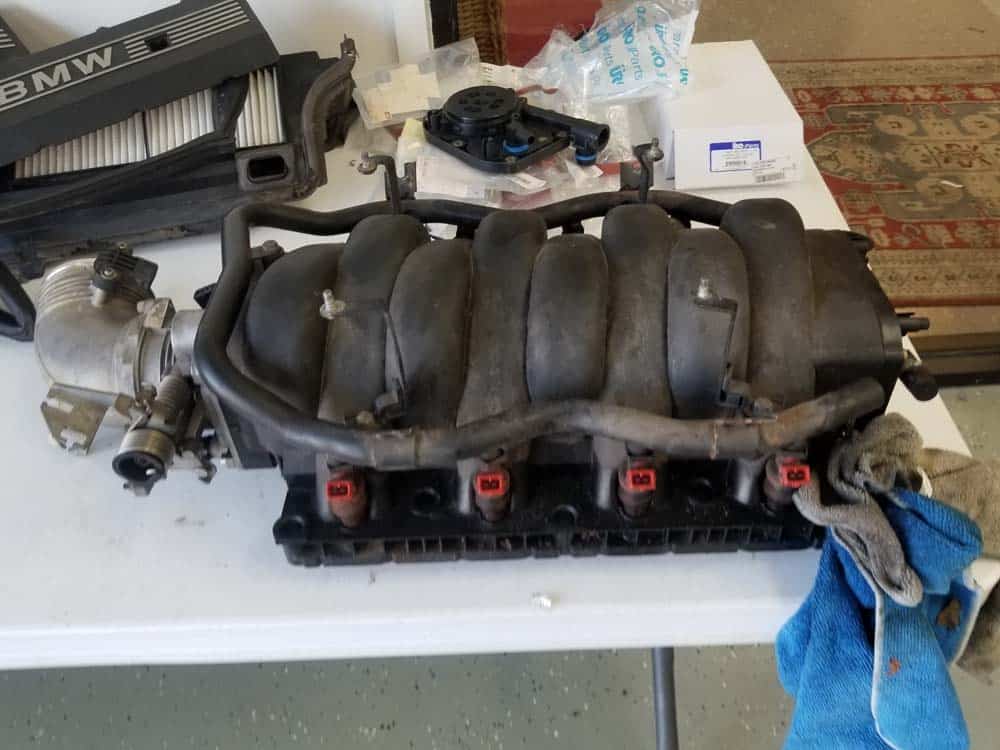
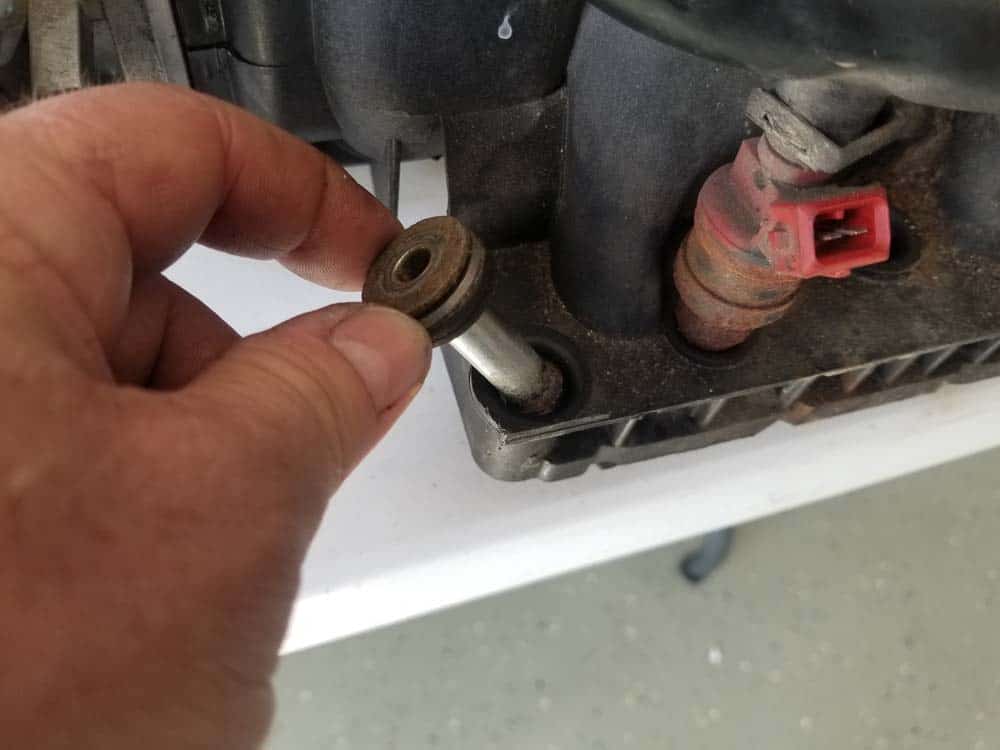
- Remove the old spacer bushings from the manifold...these should be replaced with new ones.
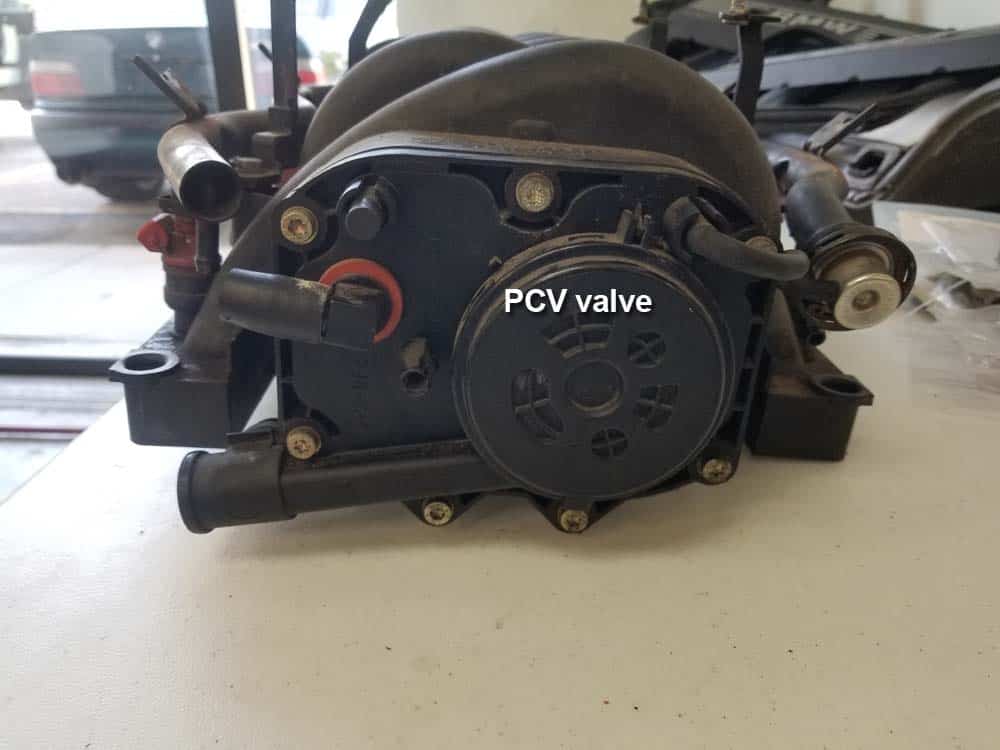
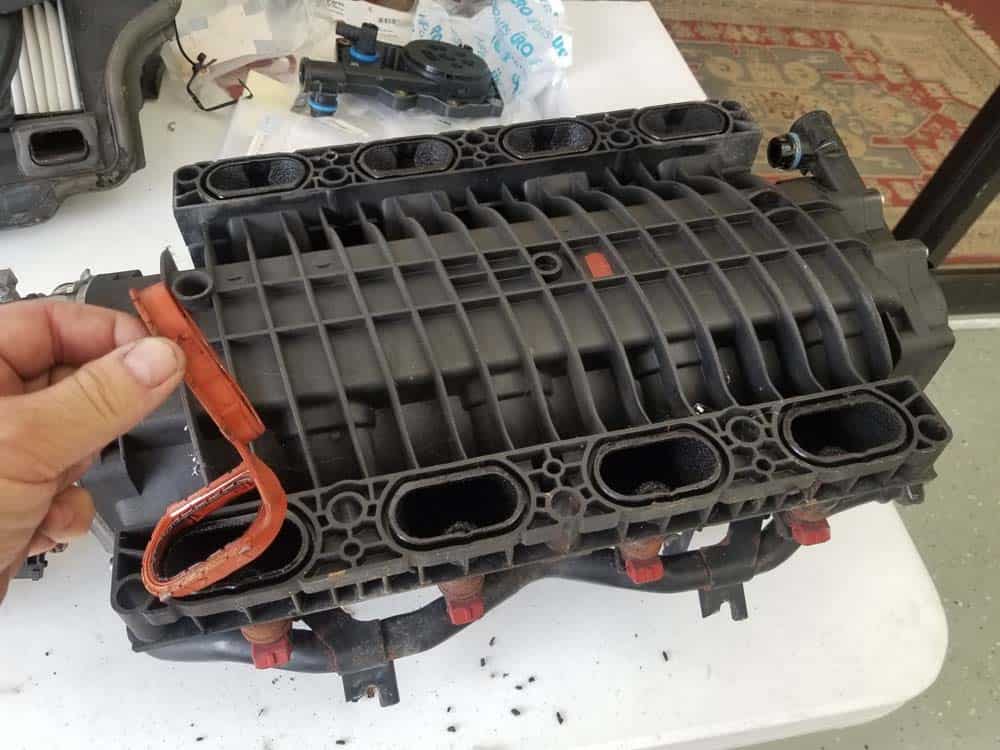
- Inspect the rear of the intake manifold - this is where your PCV valve is mounted. Now is an excellent time to replace the PCV valve on your vehicle. The PCV valve is very difficult to replace with the intake manifold installed. Pay particlular attention to the rubber vacuum caps. These are notorious from cracking causing a rough idling engine. All of the required parts necessary for replacing your PCV valve and caps are in our parts section above. For more information on replacing your PCV valve, please see our article BMW M60 PCV Valve Replacement – 5,7,8 and X5 Series 8 Cylinder.
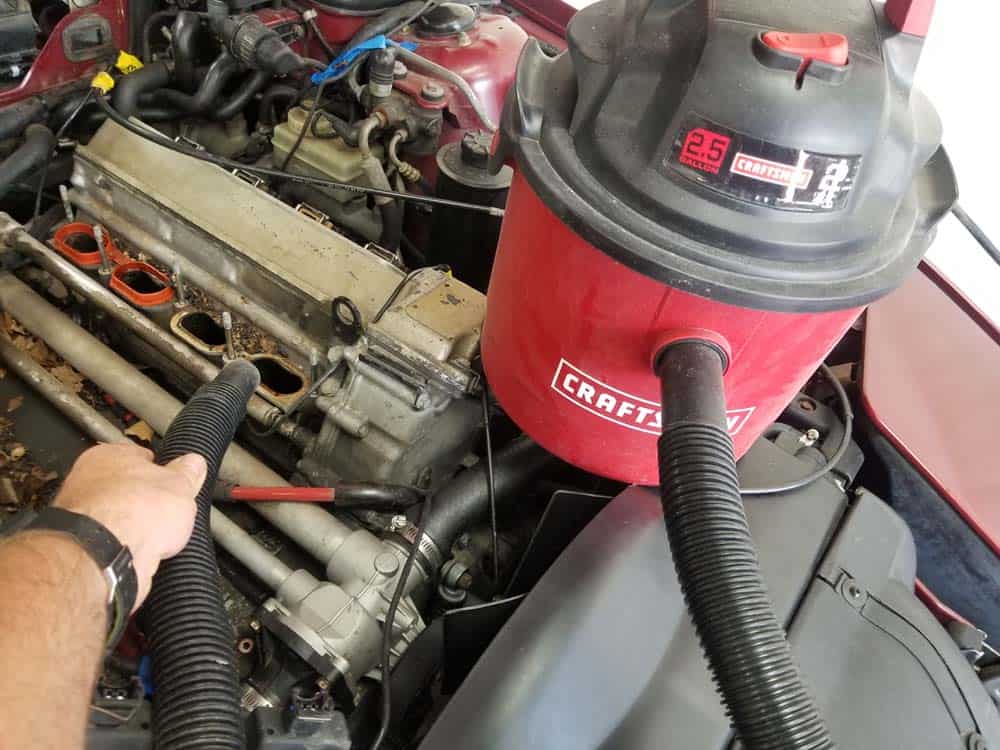
- Use a vacuum to thoroughly clean out any dirt, leaves and debris that was caught underneath the intake manifold. Use an attachment to suck out any debris that may have fallen in the cylinder head ports.
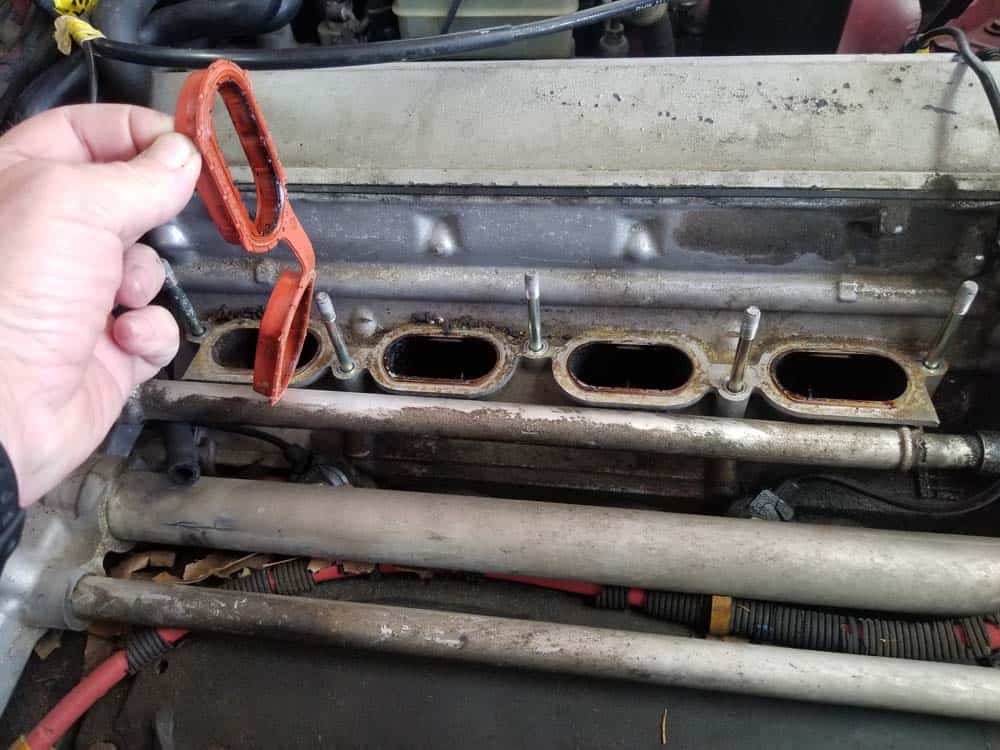
- Remove any of the old manifold gaskets that stuck to the cylinder head.
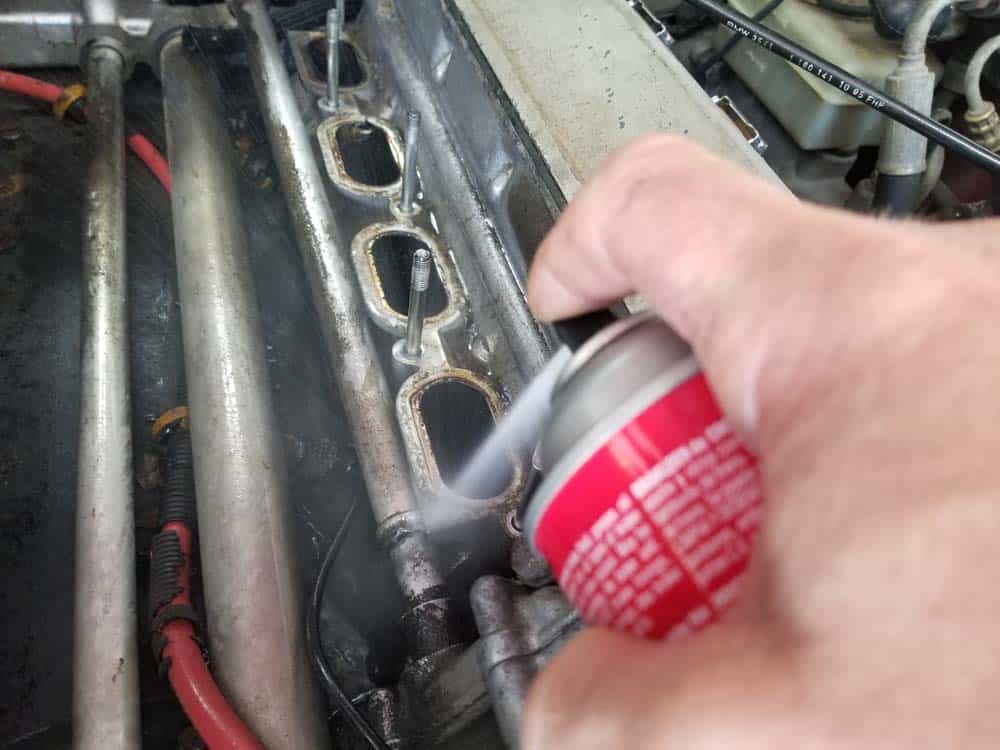
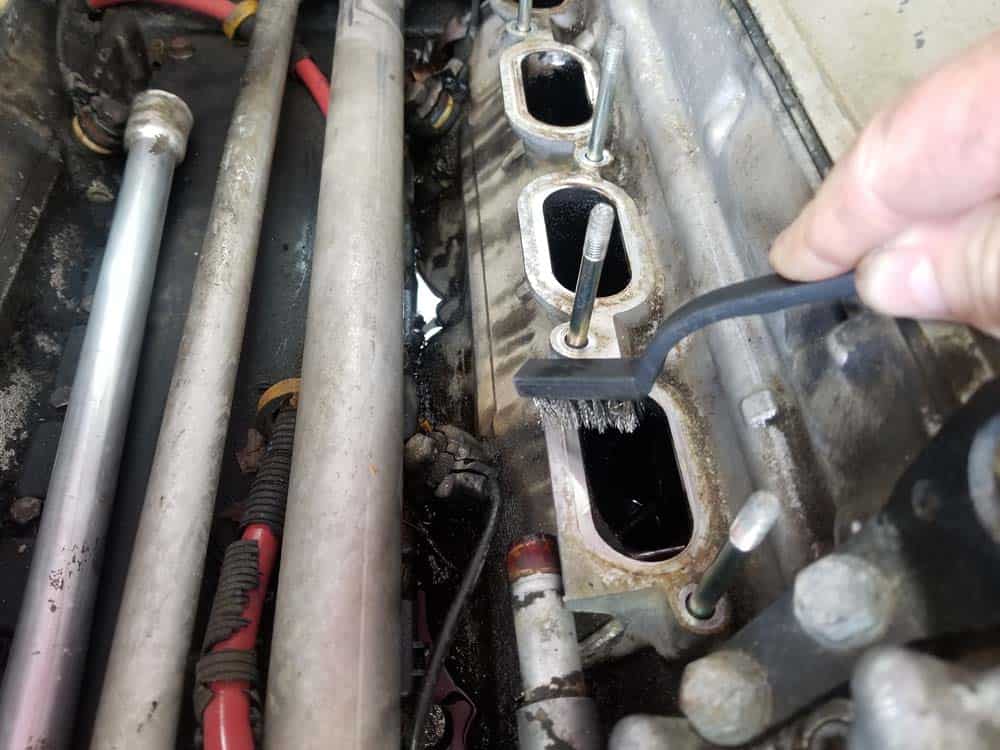
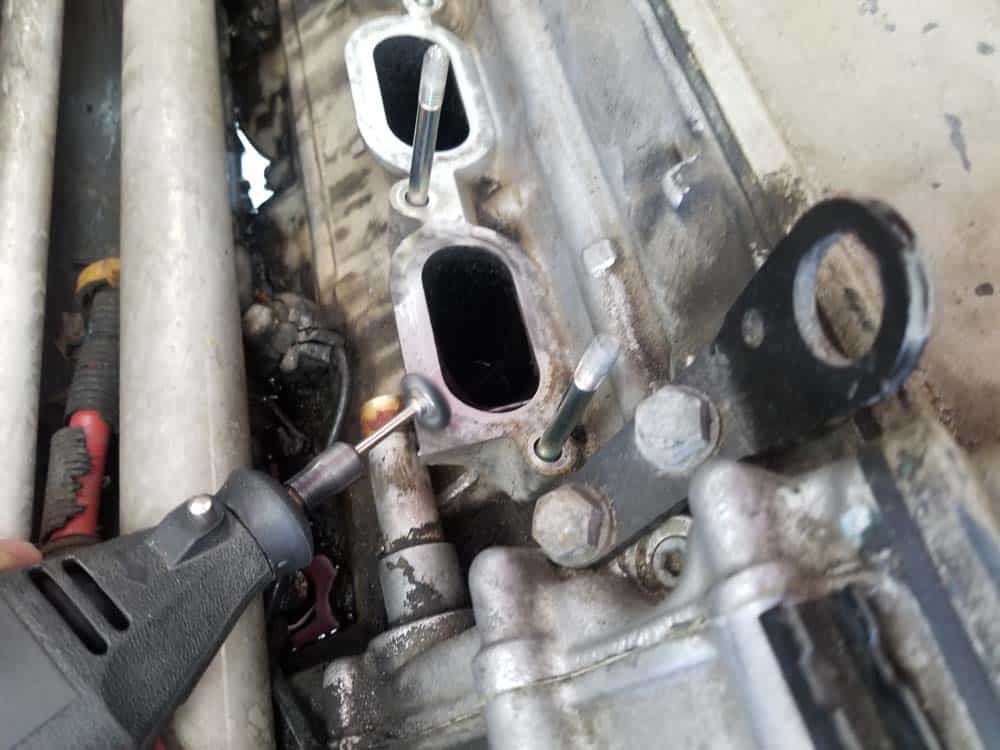
- The cylinder head surfaces must be thoroughly cleaned before reinstalling the intake manifold. As you can see...ours are in pretty bad condition. Start by spraying liberally with CRC Brakleen and scrubbing with a soft wire brush and a clean cloth. If the corrosion is particularly stubborn, you may have to use a Dremel tool with a wire brush wheel like we did.
- This cylinder head has been properly cleaned and is ready for reassembly.
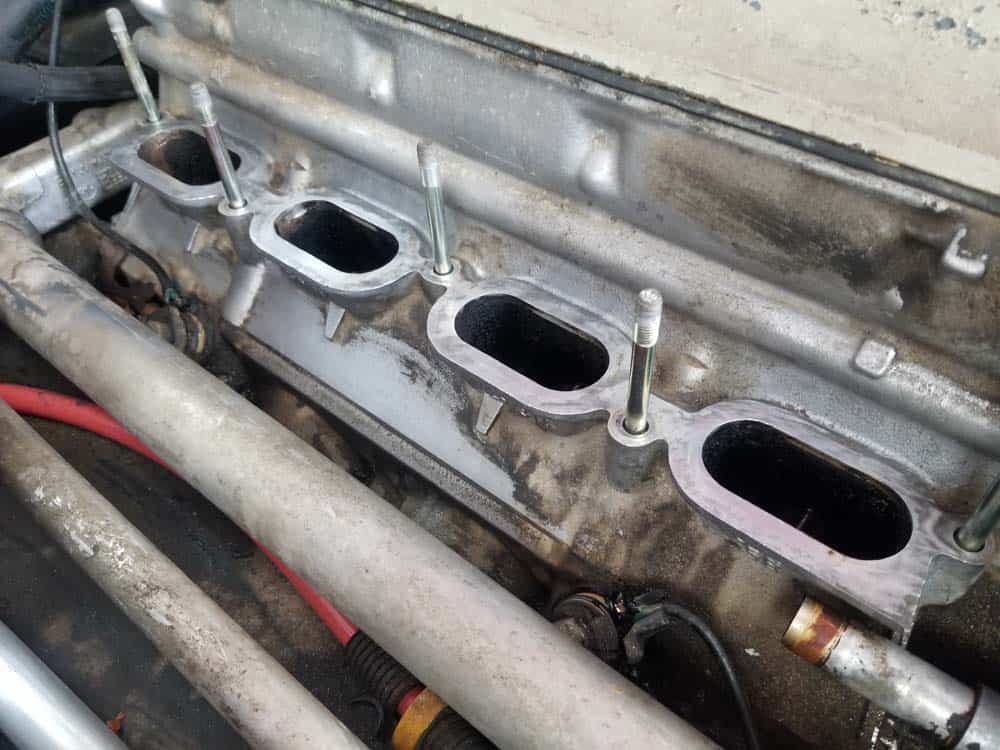
A properly cleaned cylinder head on our 1995 840i. This engine is ready for reassembly. - Moving to the intake manifold, remove all of the old rubber gaskets.
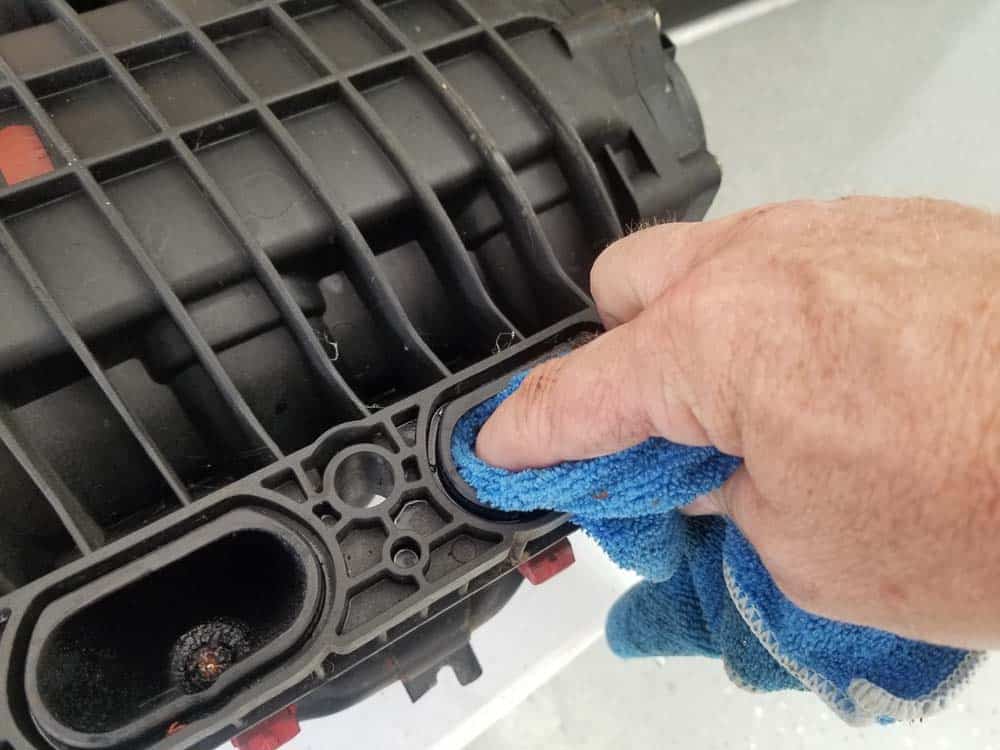
- Using CRC Clean-R-Carb, liberally spray the gasket mounting grooves and the intake ports and clean with a soft cloth. You may have to spend extra time on the ports if you have carbon build up like we did.

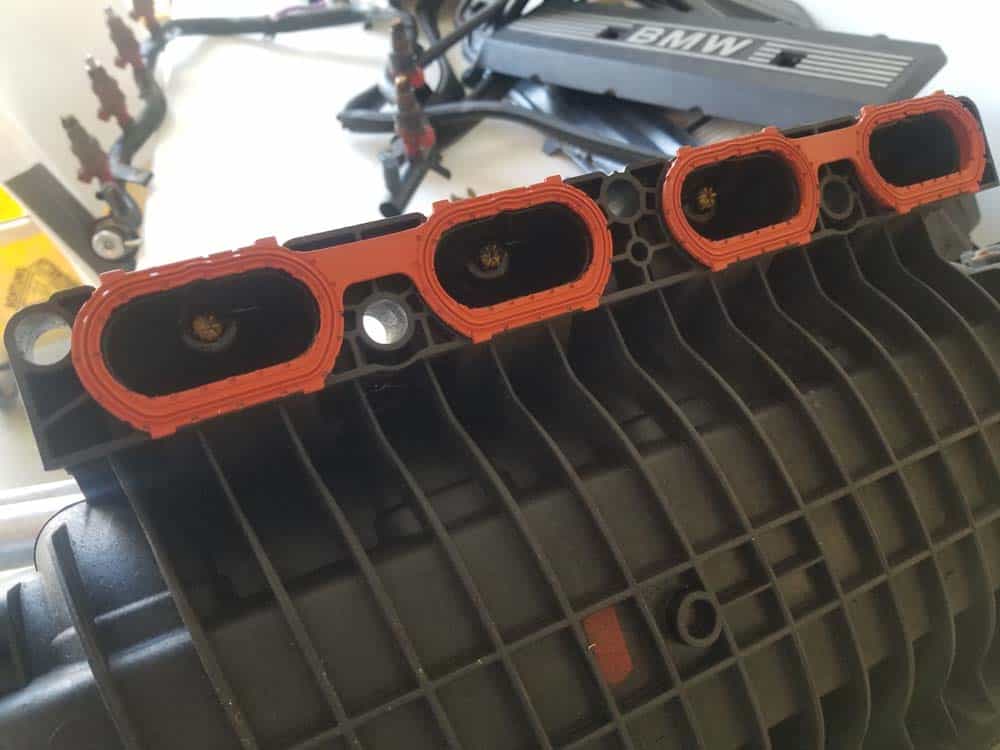
- When the intake manifold is clean, install the new intake manifold gaskets. The intake manifold is now ready for reassembly.
Section 3 - Reassembling the Vehicle
Reassembling the vehicle is very straightforward with no special procedures. It is very important that new spacer bushings are installed in the intake manifold to replace the ones removed in Section-9 above. Using the old spacer bushings may keep the intake manifold from creating the proper tight seal necessary to prevent future vacuum leaks. Take your time during reassembly making sure not to miss any vacuum or electrical connections. We have provided a comprehensive checklist with the exact steps for reassembly. It also includes all of the critical torque values for your convenience. BMW M60 Intake Manifold Gasket Replacement - Reassembly Checklist
***The following steps were performed on a 1995 840i...other models may vary.- Install the new spacer bushings in the intake manifold.
- Place the intake manifold back in the engine on its left side and connect the vent pipe to the PCV valve. Install the fixing clamp back on the vent pipe connection.
- Position the intake manifold on its mounting studs and install the ten mounting nuts. Torque the nuts to 15 Nm (11 ft-lb).
- Reinstall the fuel return line at the right rear of the manifold and tighten the hose clamp.
- Reinstall the fuel supply line at the left rear of the intake manifold and tighten the hose clamp.
- Fold the left wiring harness back over into position. If you had to temporarily reroute any wires like the alternator sensor, put them back into their proper position now.
- Snap the left and right wiring harnesses back onto the fuel injectors. Make sure all of the metal clips snap into place.
- Reinstall the four wiring harness mounting nuts an torque them to 10.5 Nm (8 ft-lb).
- Plug the intake air temperature sensor back in.
- Plug the ignition coils back in and replace the side engine covers.
- Plug the two round wiring harness connections back in at the rear of the manifold. Turn the locking rings clockwise until they are snug.
- Plug the six wiring harness connections back paying careful attention not to mix them up.
- Replace the sound insulation at the back of the manifold.
- Reinstall the heater closing panel and the microfilter cover.
- Reinstall the rubber engine gasket.
- Reconnect the fuel vent valve vacuum line and tighten its hose clamp.
- Reinstall the throttle cable bracket onto the throttle body. Torque the two mounting bolts to 10 Nm (7 ft-lb).
- Reinstall the accelerator and cruise control cables back onto the throttle body.
- Reconnect the Bowden cable to the secondary throttle housing.
- Reconnect the intake boot to the secondary throttle housing.
- Reinstall the throttle control valve and reconnect it to the intake boot.
- Reinstall the intake muffler lid to the intake boot. Clip the lid back onto the base of the intake muffler.
- Reconnect the mass air flow (MAF) sensor.
- Plug in the throttle valve switch.
- Plug in the throttle body.
- Plug in the idle control valve.
- Replace the engine cover.
BMW Intake Manifold Gasket Replacement Replacement Finished